


Bedford
-
Posts
1,261 -
Joined
-
Last visited
Content Type
Profiles
Forums
Gallery
Events
Posts posted by Bedford
-
-
E J I'm still here just not building.
Thanks for the appreciation, I'm putting a bit extra into this one because of my little girl.
Feel free to ask anything.
- Keith Black, EJ_L and Mark Pearse
-
 3
3
-
Thanks for the trip Druxey, it was an absolute pleasure to tag along
- mtaylor, druxey, Keith Black and 3 others
-
6
-
Mark, well done!
Cliff was obviously a pragmatic man who designed sensible boats. The bowsprit as a boarding plank is testament to that.
- druxey and Mark Pearse
-
2
-
-
She's coming along very nicely Mark
- mtaylor and Mark Pearse
-
2
-
Thanks Mark, I've been to the maritime museum, it's an interesting place. I'm looking for somewhere with something like that I can get involved in
-
I've been a bit quiet on this for a while because other things get in the way and now there's a major roadblock.
I've been given notice to vacate my home. It was only meant to be a temporary address but I kind of got settled.
Now I have to decide where to move to because I won't stay in Sydney, it's just too full, too hard to get anywhere and way too expensive. I'll be looking at somewhere hopefully down the south coast with a view to either renting or better still, buying a house where I might just build another 1:1 boat.
So at present the Royal Caroline is on indefinite hold and I feel that my involvement with the Sydney Heritage Fleet will have to end. Pity, I love the Waratah!
-
Just as a reference point, my row boat has a beam of 4'6" and the oar guide recommended the oars should be 8'6". Don't know if that helps but the wider the beam the longer the oars
- thibaultron, mtaylor and Keith Black
-
3
-
With that beam it would easily take two per thwart.
- mtaylor, druxey, Keith Black and 1 other
-
4
-
The bowsprit seems fine to my eye but you would be far more familiar with the type than I.
I've often wondered how epoxy would work with huon pine due to it's natural oilyness.
-
Nice progress Michael, aren't those mill clamp "risers" useful things.
I've had my first A-Z shot at my GP and the second was booked at the time so no ques for me. Sadly there's been a bit of a slow down by over 50's ( if you're over 50 here you get A-Z ) because the news loves making a big deal out of a few people getting blood clots. Doctors know who's susceptible now so it's pretty safe to get the jab, far safer than getting covid.
-
I gather from the pics that you are going to install the floors prior to planking. Much better than after, they were really fiddly on my 1:8 Miss Caroline
- michael mott, FriedClams, Jack12477 and 2 others
-
5
-
I would think the almost bluff bow on this boat will definitely have some "S" form going on and much more than my boat so yes, trust the lines.
As for the scarf joints, none of them line up exactly. They are fairly close but the scarfs run away in opposite directions to spread them out. In my case there are two pieces per strake. Having said that, mine is a glued lapstrake boat and the epoxy bonds are very strong. I'd imagine on a traditionally planked boat they would be scarfed in a much more staggered manner and cross a frame.
- mtaylor and FriedClams
-
2
-
Congrats Chris on a successful launch, well done.
As for the ring around the hull, that's just how you mark the waterline! You should see it on a white hull after heavy rain washes everything into the waterways.
- Edwardkenway, mtaylor, ccoyle and 7 others
-
10
-
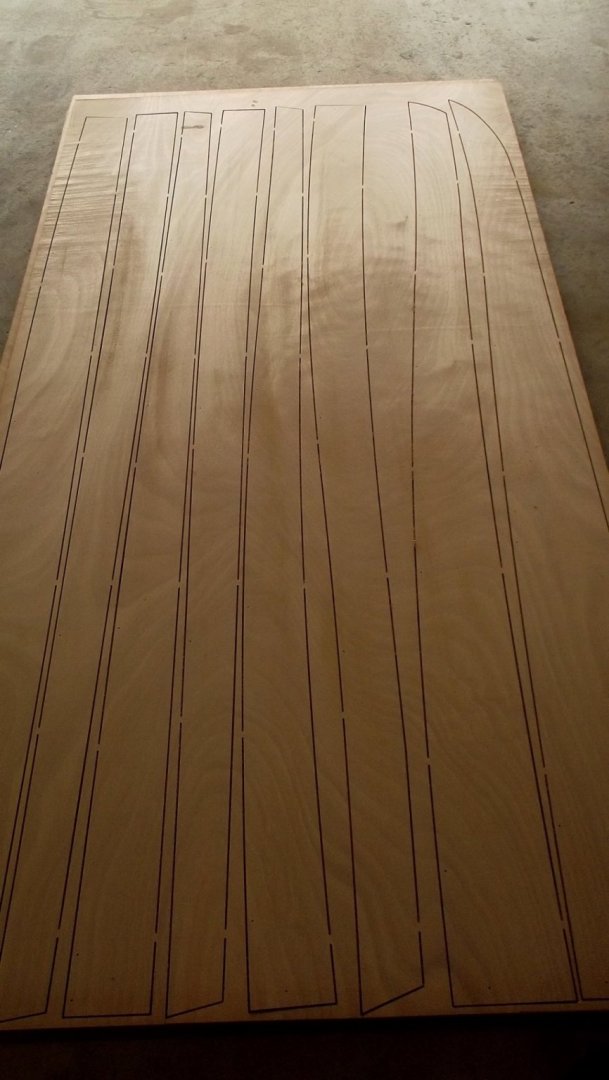
The following is intended only as food for thought.
Should all the planks (strakes) be the same width or should they appear to be the same width?
Granted my full size lapstrake boat is epoxied ply construction and the strakes appear to have similar width relevant to where you look along the hull but the strakes themselves are wildly different and some really strange shapes are used to achieve this.
This is demonstrated by the second photo in your post above, the midway batten looks "wrong" because of the curves but look at it from a level side view and it looks perfectly fair. The point is, you can look at the batten from any angle to ensure it is fair with the flow of the hull but the only angle you can view from to decide if it's following the correct line is a level side view.
I've included a pic of some of the strakes for my boat
- Wintergreen, mtaylor, GrandpaPhil and 1 other
-
4
-
I'll pull my chair up again. nice to see some progress on this little beauty
- Keith Black, mtaylor and FriedClams
-
3
-
Chris that blue looks great in the sun, sets the whole thing of very nicely!
As for your concluding thoughts, I couldn't agree more with the last two.
-
Yeah Chris, I'm not trying to correct the designer and I'm sure there will be plenty of quiet drifting/slow paddling where the seated position will be highly desirable. Just thought it reasonable to let you know the other option.
I wonder if this is designed to be paddled more like a kayak which, by the way is far more efficient than the single paddle and "J stroke". I had a 15 foot Old Town canoe and always preferred the kayak paddling style. Either way, you'll work it out and get a great deal of pleasure from it.
-
5 hours ago, Jack12477 said:
Hmmmm ! I always knelt in the bottom a canoe with my tush resting against a thwart. Never sat in the bottom of a canoe. Wonder what paddling from that position is like.
Yes I was thinking the same thing. Sitting in it kayak style will not allow proper power strokes or control whereas kneeling as above gives a great deal of control and power. Even if you aren't going for power it will give you better bang for your muscle buck so you will not fatigue anywhere near as quickly. There is also the benefit that when kneeling it is easy to tip the canoe to one side which will help it turn.
A comfort tip for kneeling:- take two car washing sponges to kneel on, they also double as bailers to remove excess water.
-
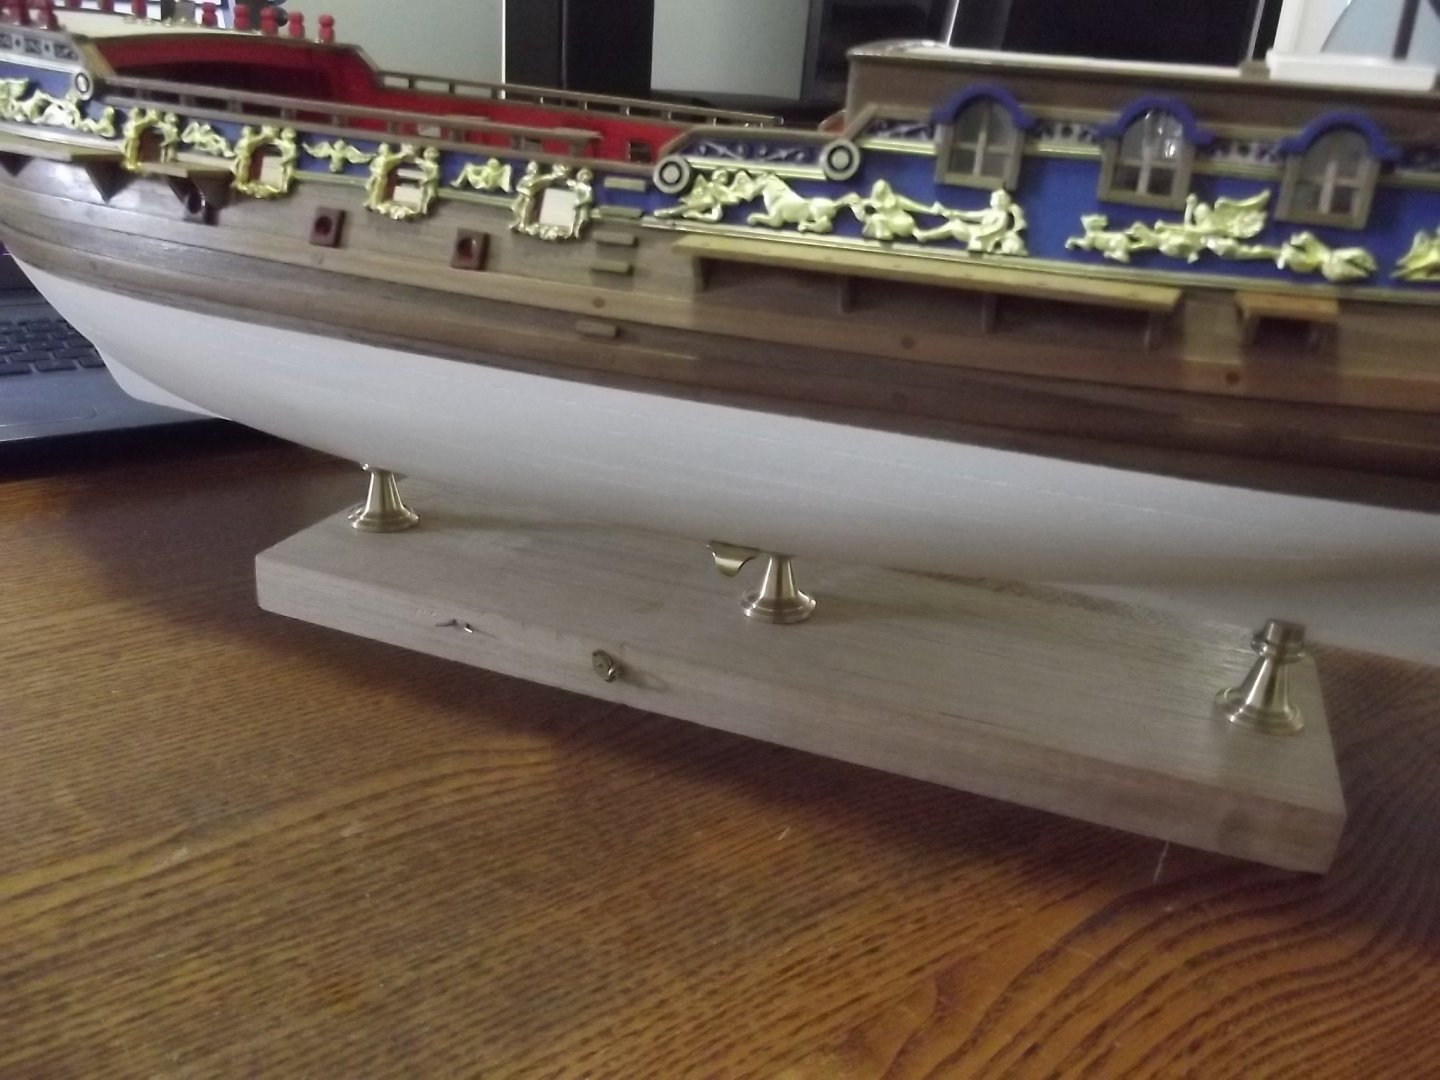
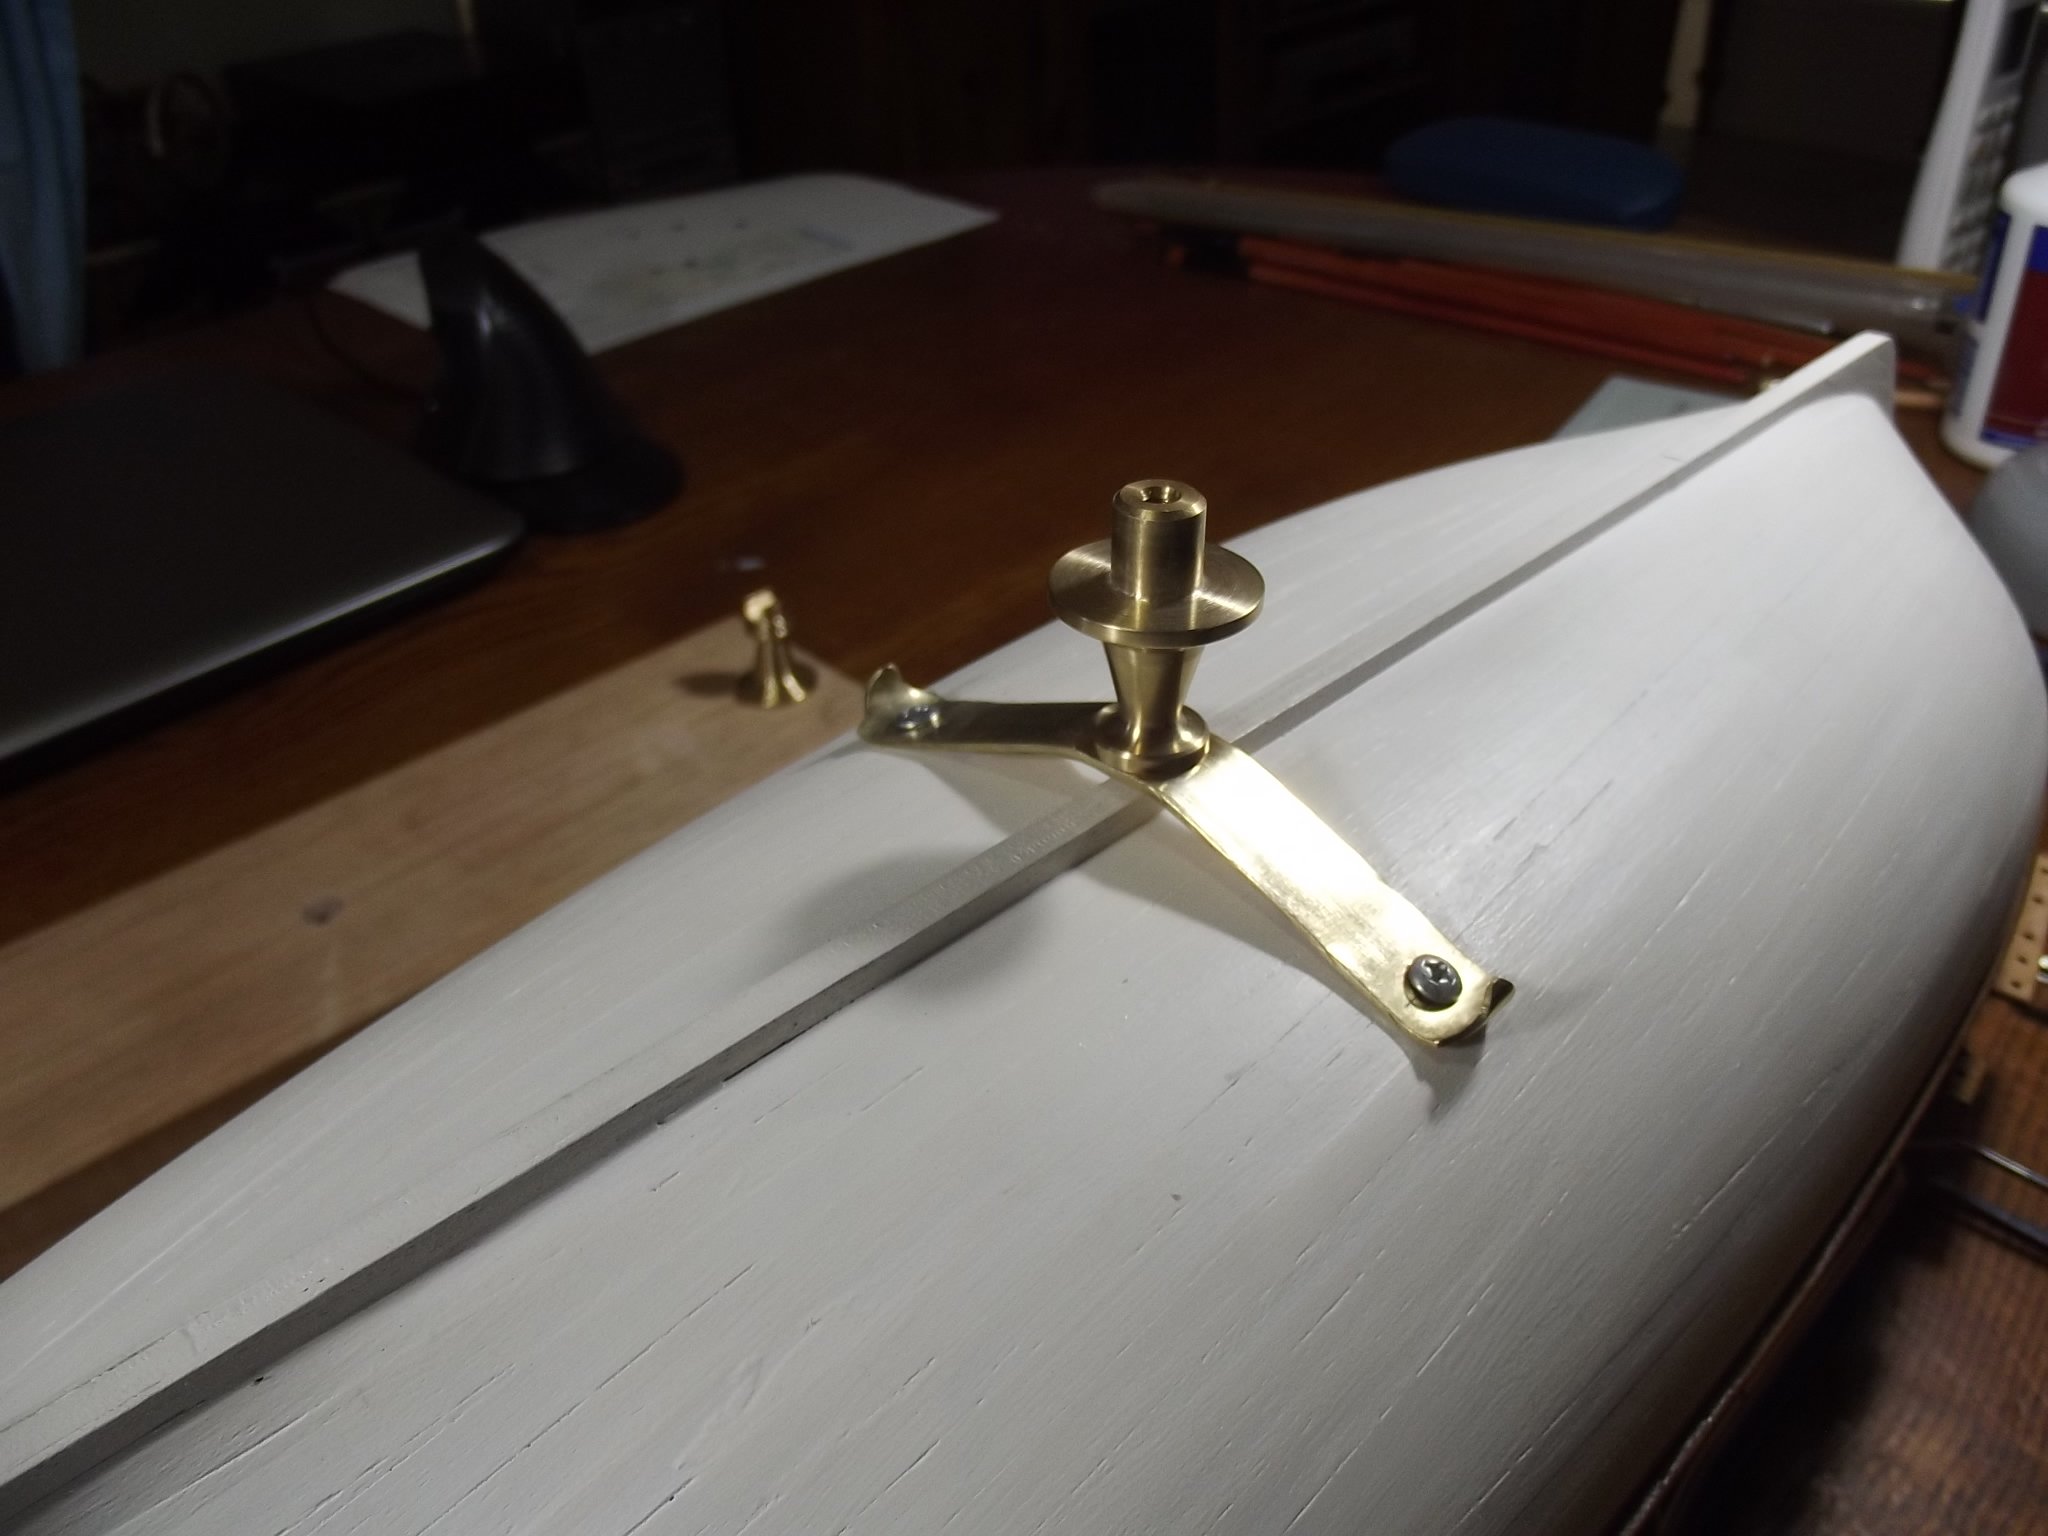
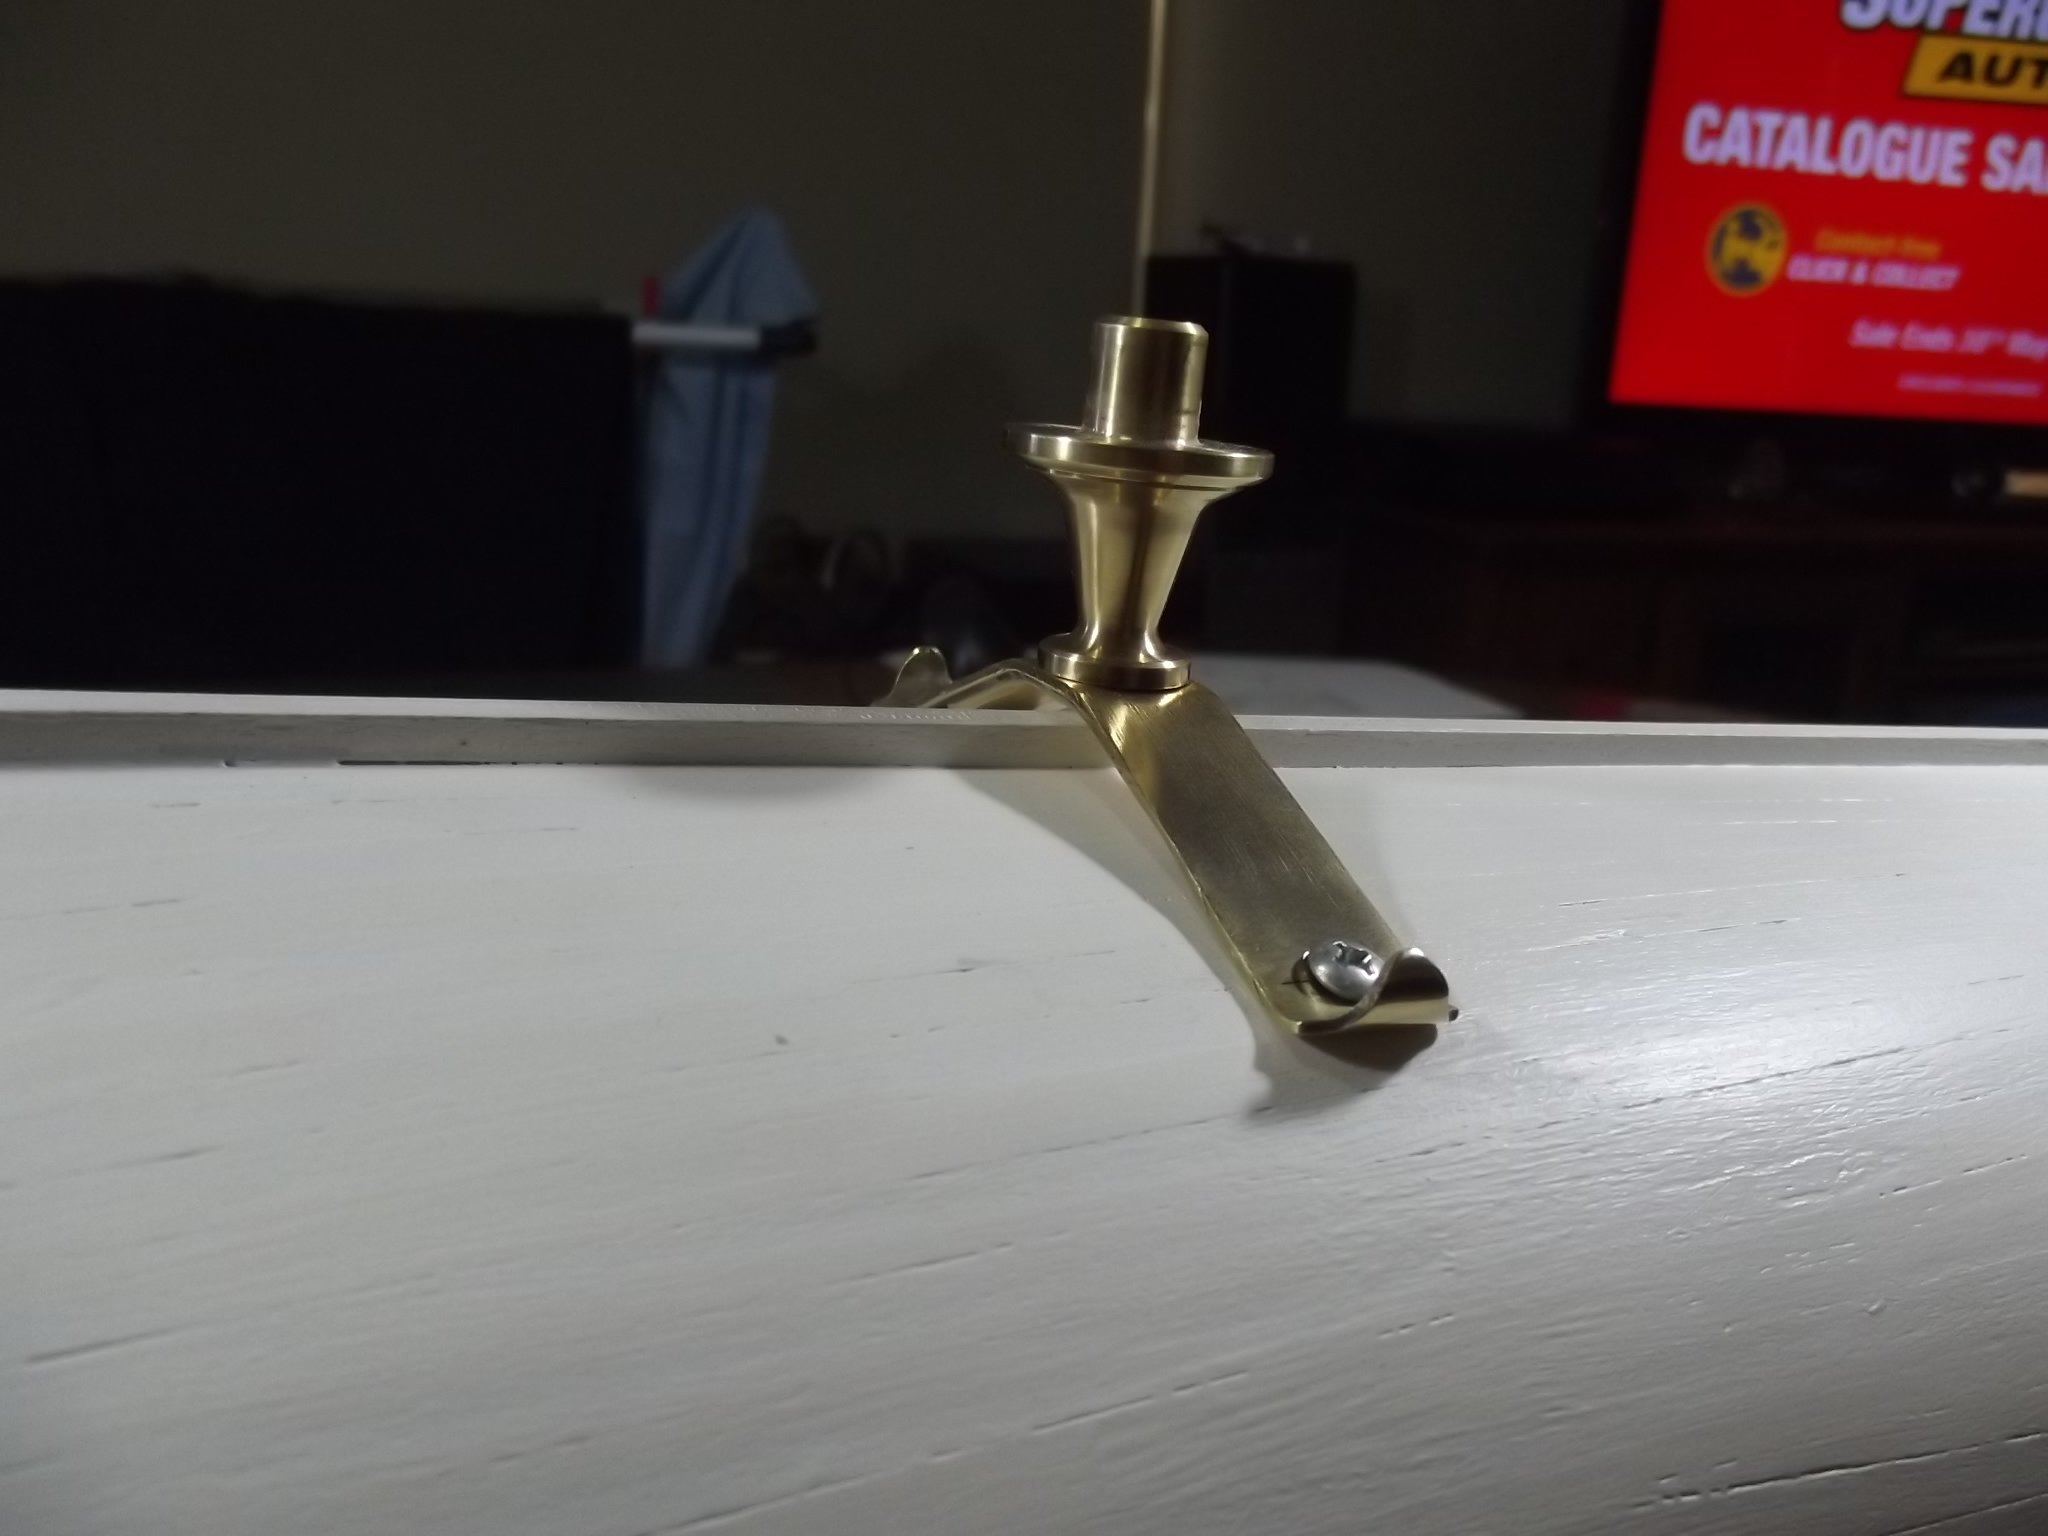
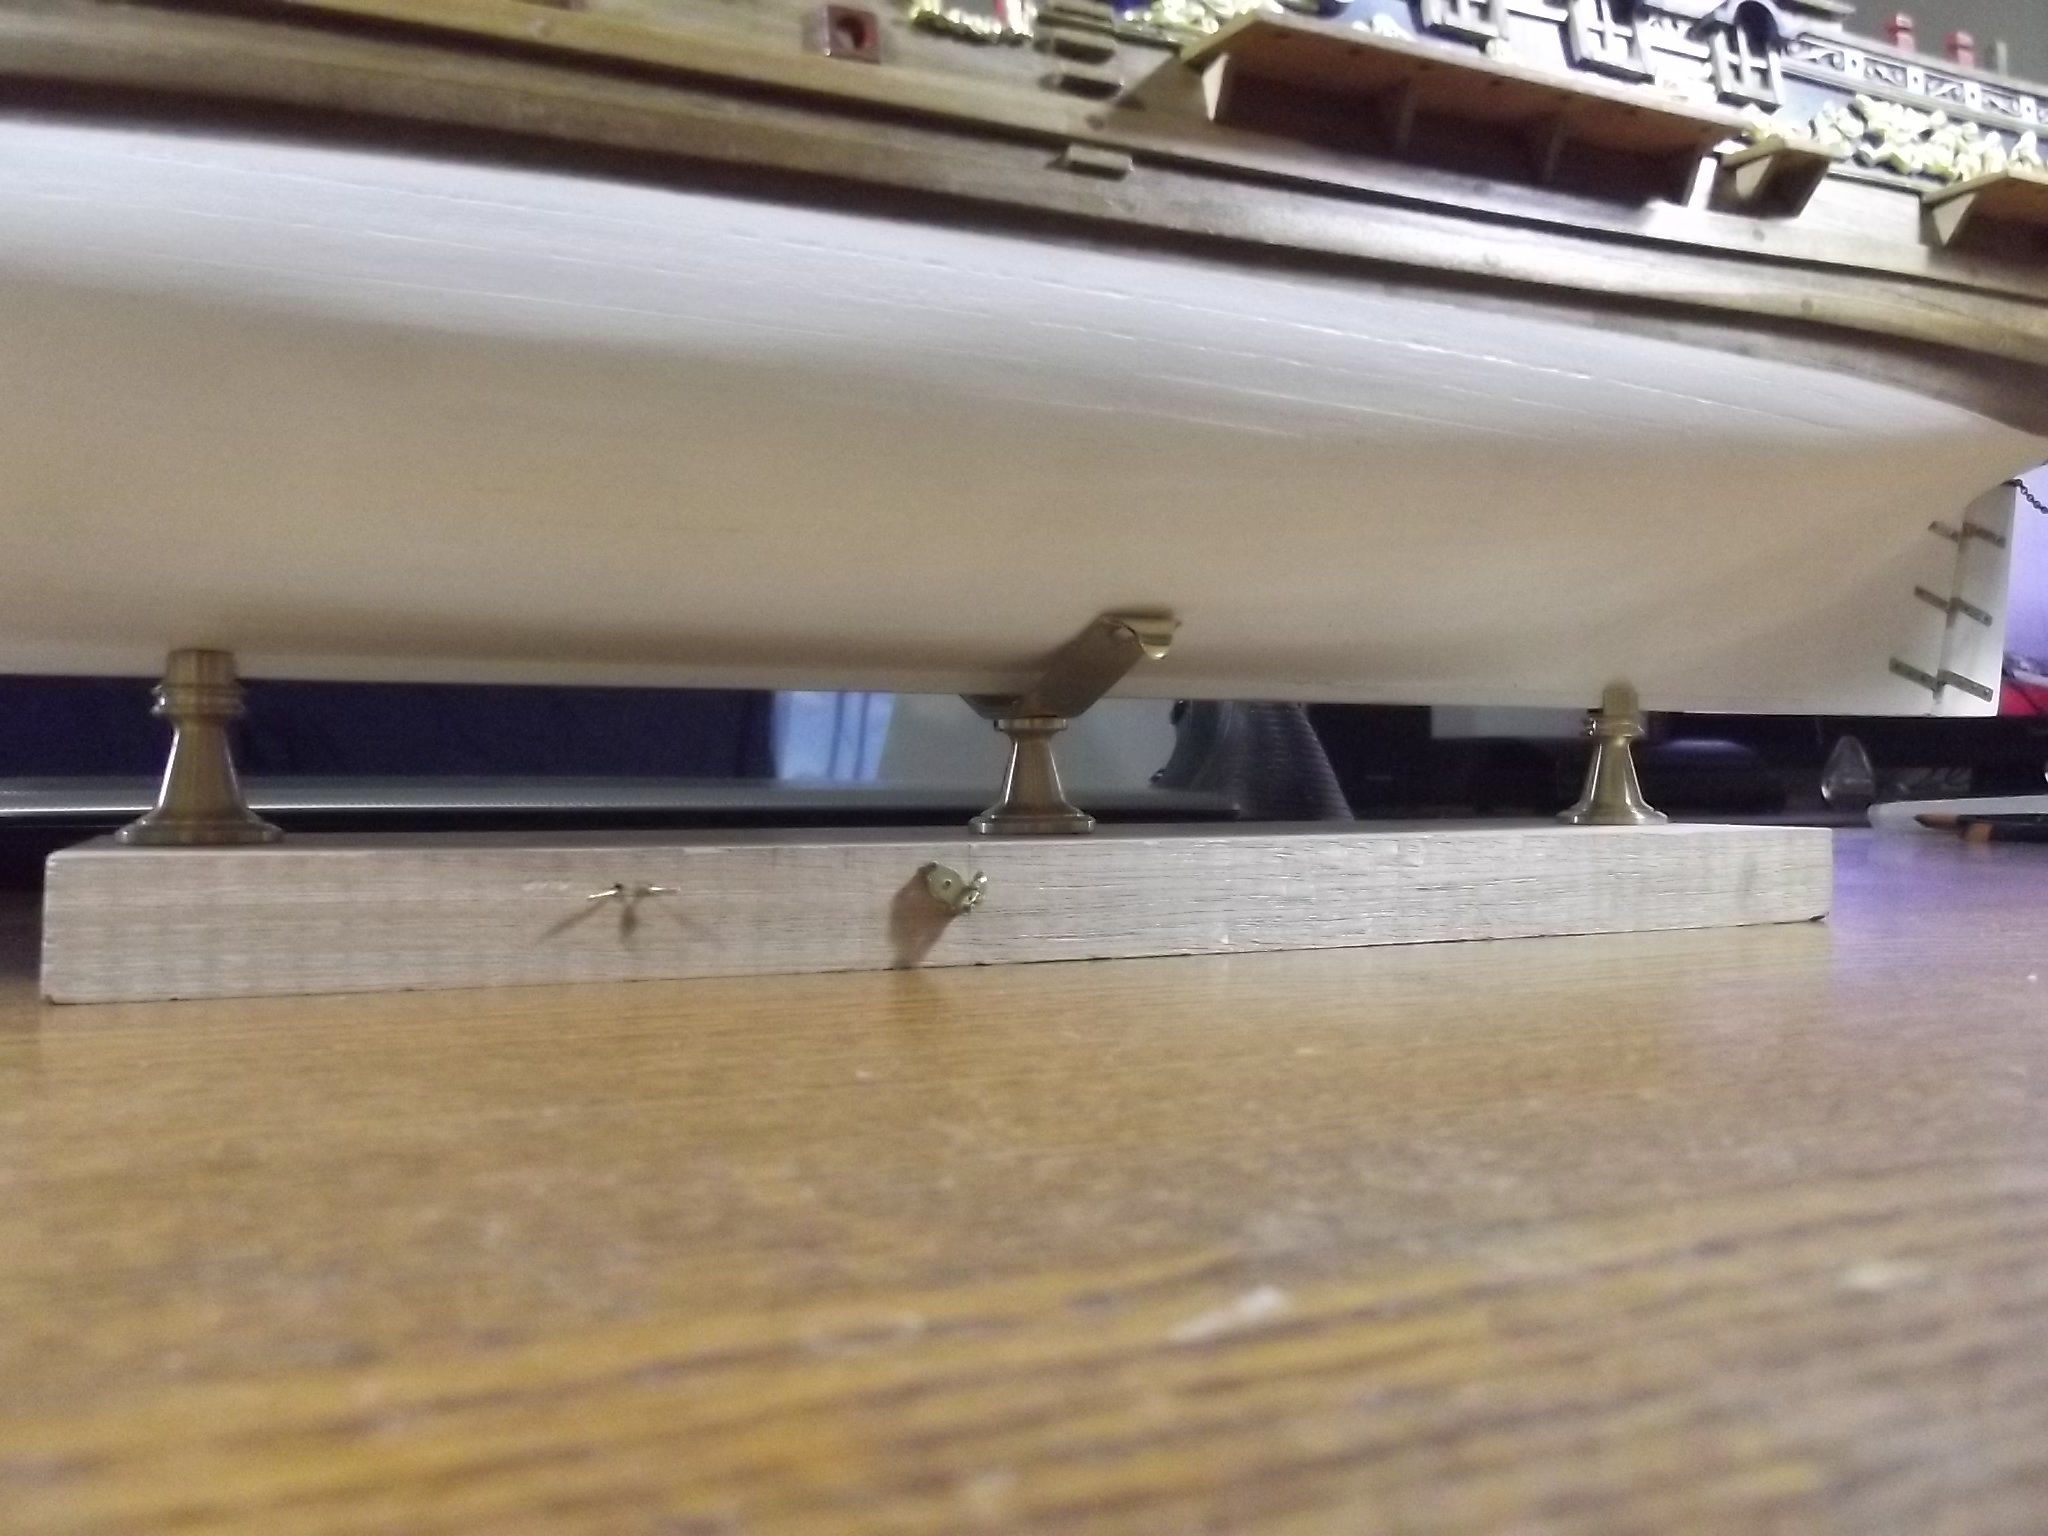
Thanks Mark, I've been stewing this over for weeks trying to come up with an elegant solution. Most involved very complex milling of the centre pedestal head from larger diameter brass which I wasn't keen on. I saw one model with the two pedestals as usual and a vertical strut from the display base to the far side of the hull which I even considered for a bit but thought a bit too rudimentary. This solution presented itself the other day and I'm very happy with it. Viewed from a normal angle there is very little to see which is what I wanted.

- EJ_L, Keith Black, GrandpaPhil and 1 other
-
4
-
2 hours ago, mtaylor said:
Well that rules out Supercalifragilisticexpialidocious
Well that depends entirely on the font size
- FriedClams, mtaylor, Keith Black and 4 others
-
5
-
 2
2
-
I've been concerned for some time that the weight of this hull would be too great for the tiny keel ( 4x4.5mm ) to sustain any lateral movement so I've come up with a 3 pedestal system whereby the centre pedestal is parted off below the keel and a cross arm fashioned from two layers of 1.2mm brass plate soldered together after shaping them to fit the hull. The cross arm is screwed to the hull and will hopefully provide the anti roll protection I think it needs. The wooden base it is currently on is for setting up and continued building, when done the pedestals will fit straight into the display base.
I had to get this sorted now while I can still tip the thing upside down.


- Keith Black and GrandpaPhil
-
2
-
Yeah Chris, don't beat yourself up about a less than glass like finish. My boat looks great to everyone that sees it but the fish and I know that it ain't perfect
- Edwardkenway, ccoyle, Canute and 7 others
-
10
-


SMS WESPE 1876 by wefalck – FINISHED - 1/160 scale - Armored Gunboat of the Imperial German Navy - as first commissioned
in - Build logs for subjects built 1851 - 1900
Posted
It's the small details that take the most effort, just remember to look at them from a few feet away. The fact that they are that good at that scale is very impressive.
I think we all know the feeling of a tiny piece we've labored over disappearing into the abyss just as it's finished.