


Bedford
-
Posts
1,261 -
Joined
-
Last visited
Content Type
Profiles
Forums
Gallery
Events
Posts posted by Bedford
-
-
Thanks for the input kirill, I might have to do some investigating on that.
Mark I'm high and dry but there's a hell of a lot of water going down the Nepean through Camden and it's all joining the spill from Waragamda Dam and head for Penrith & Windsor.
I agree that there would be various tones in the finish, there are 3 distinct tones at work here but I'm hoping that with all the handling I've given them and their exposure to oxygen they will become less different over time.
- Mark Pearse and Keith Black
-
 2
2
-
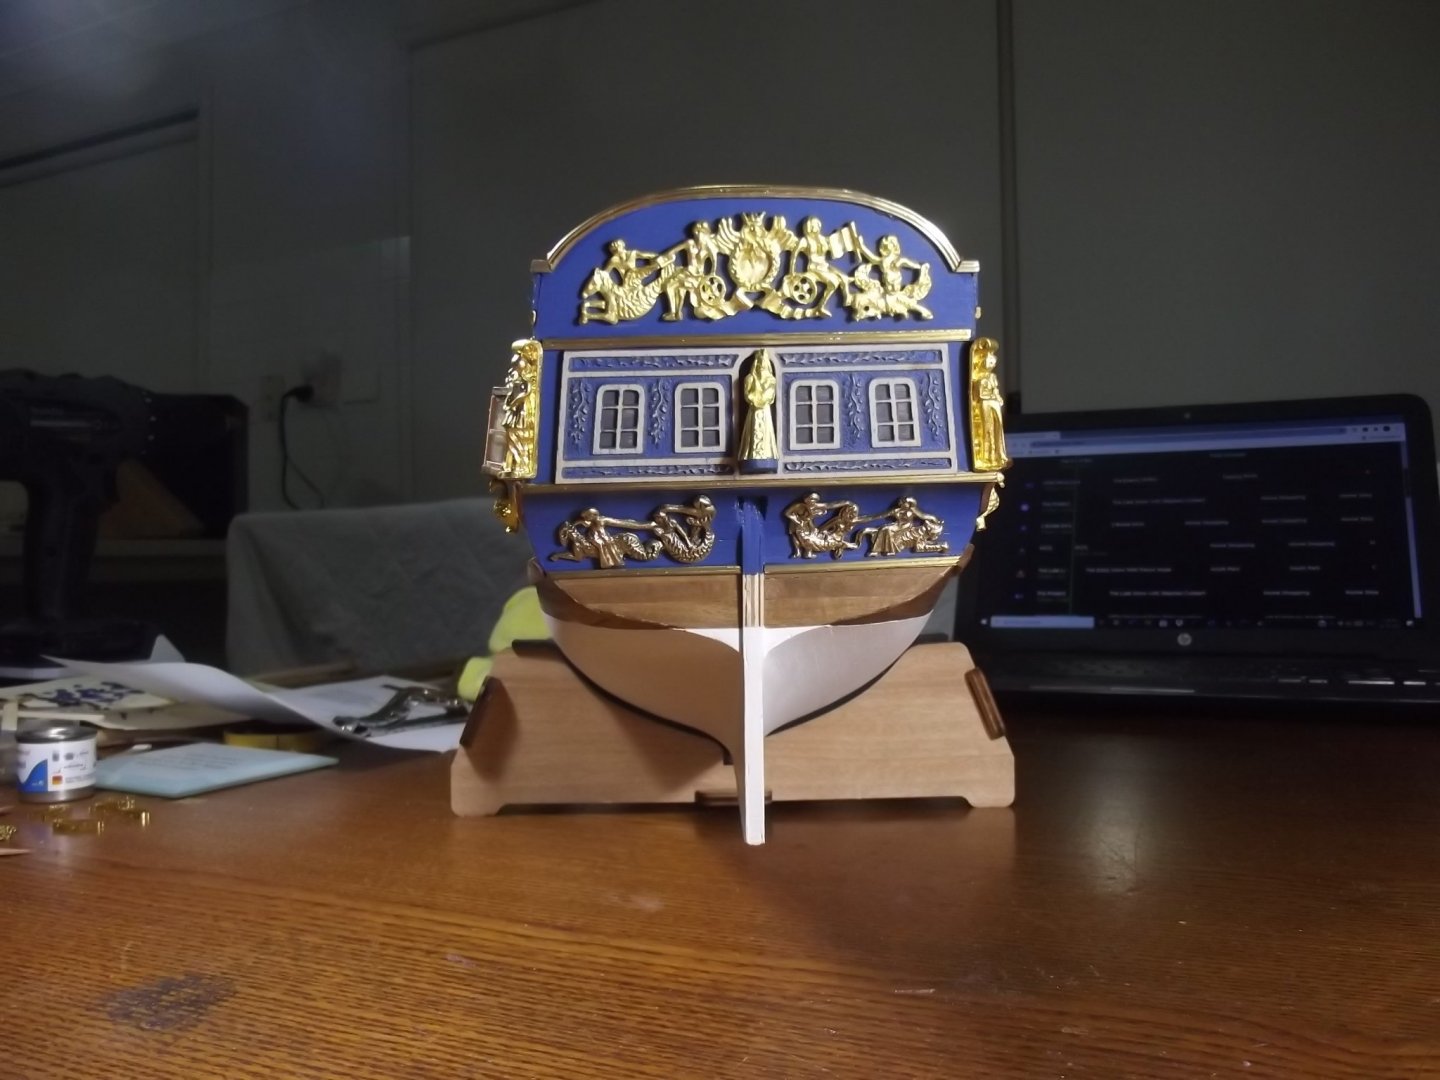
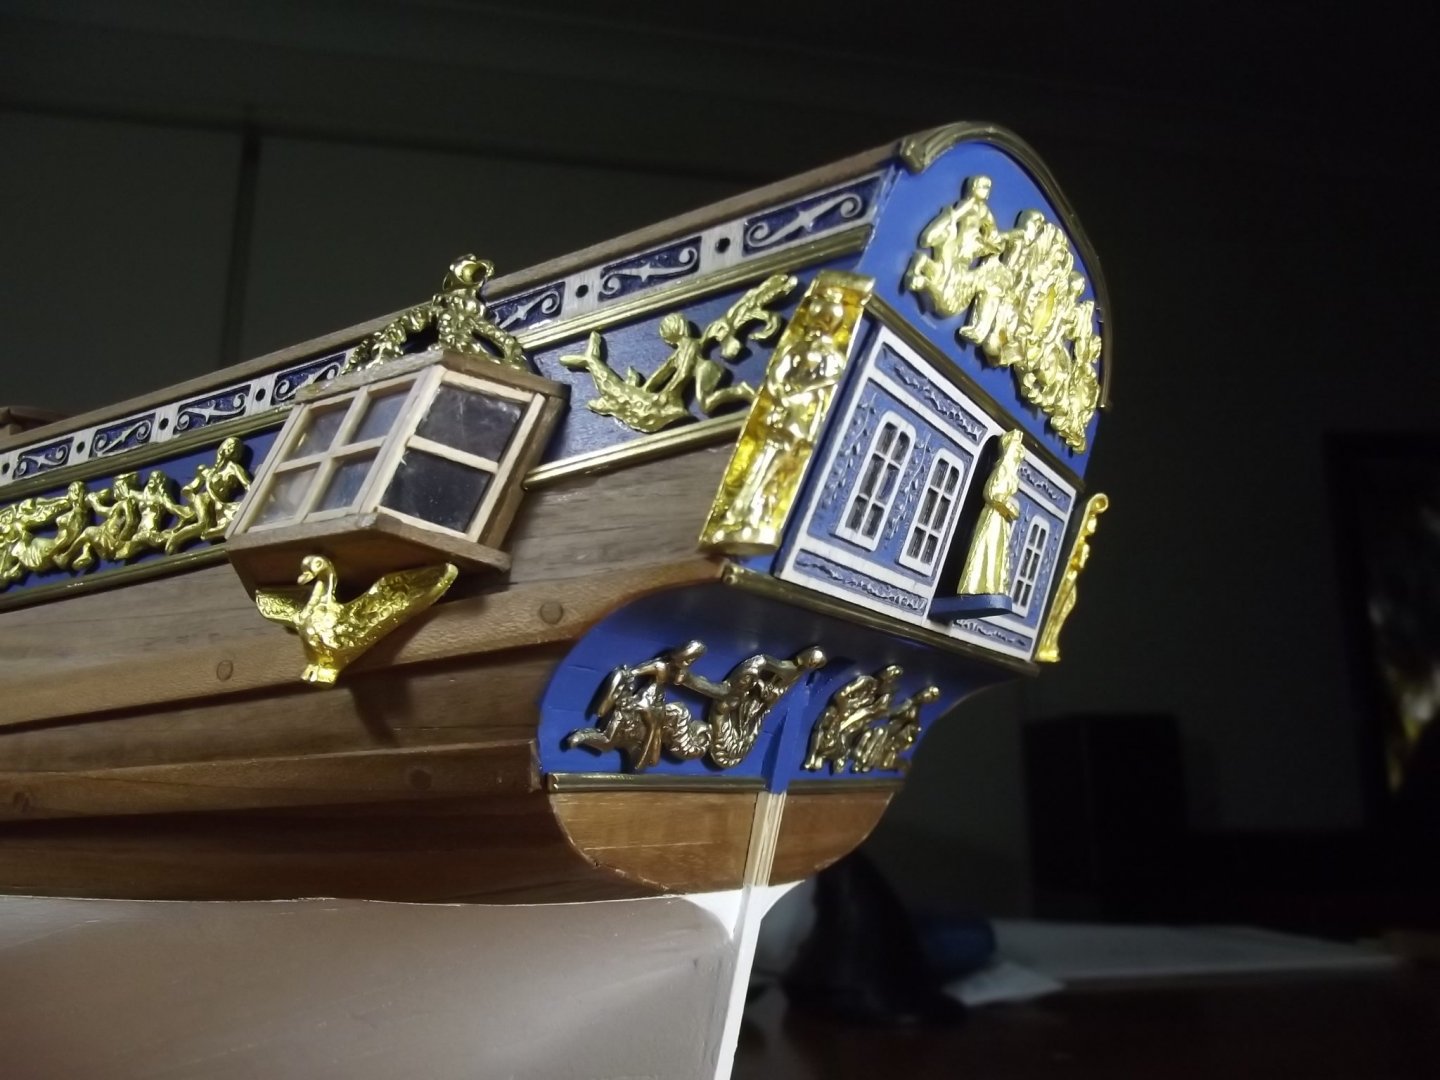
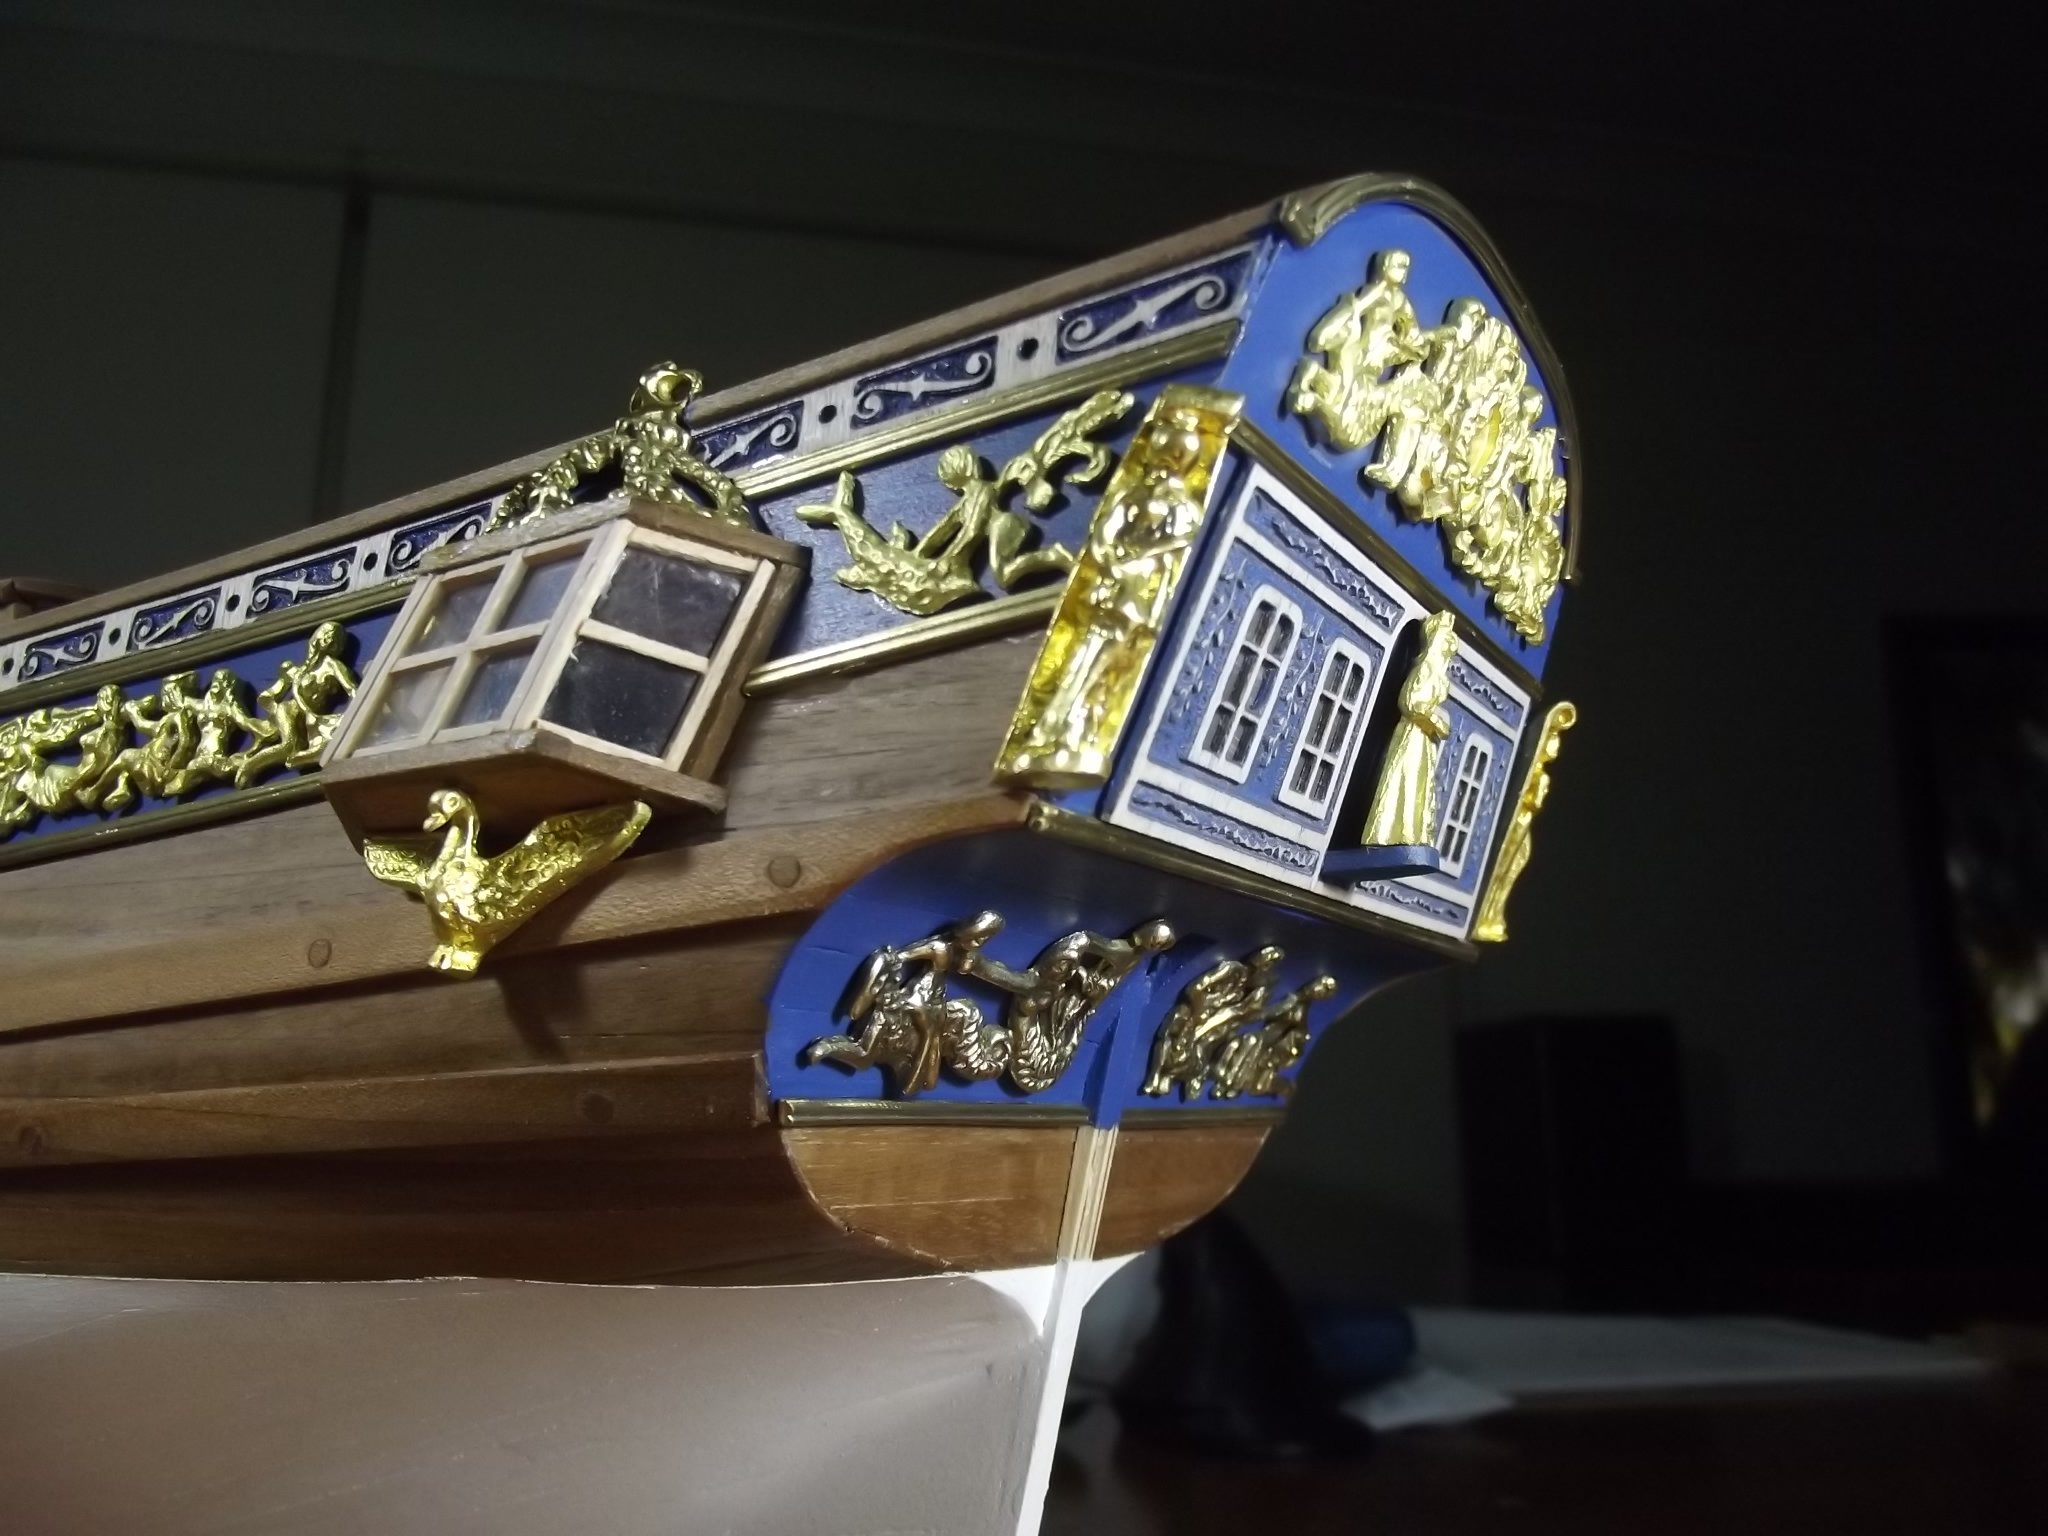
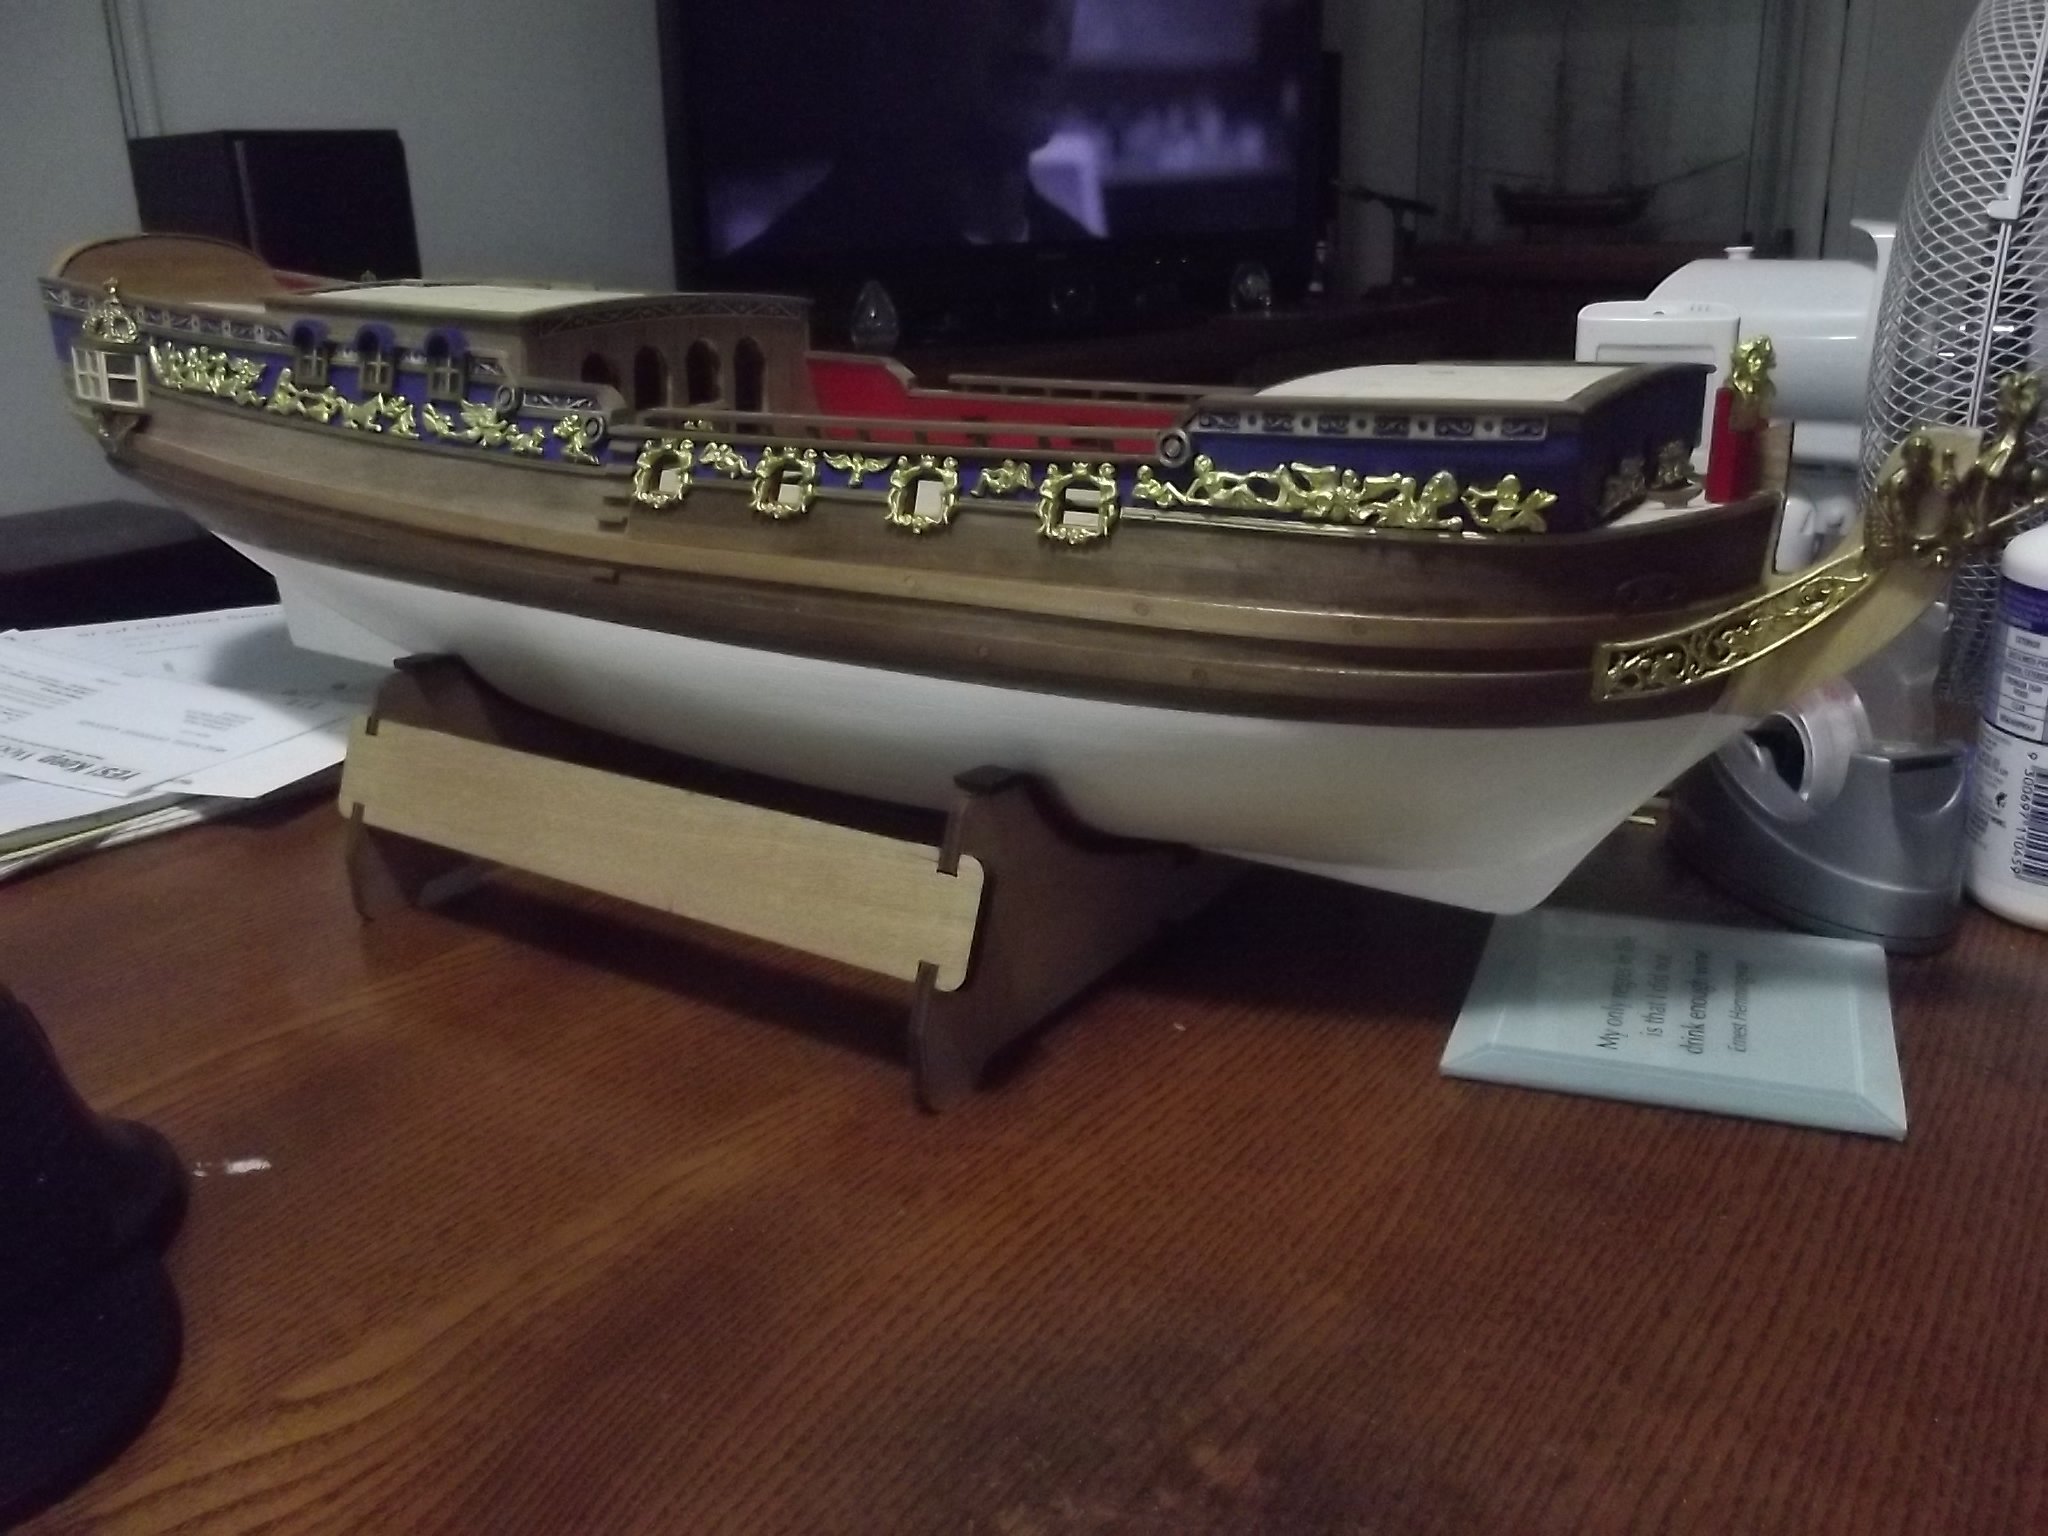
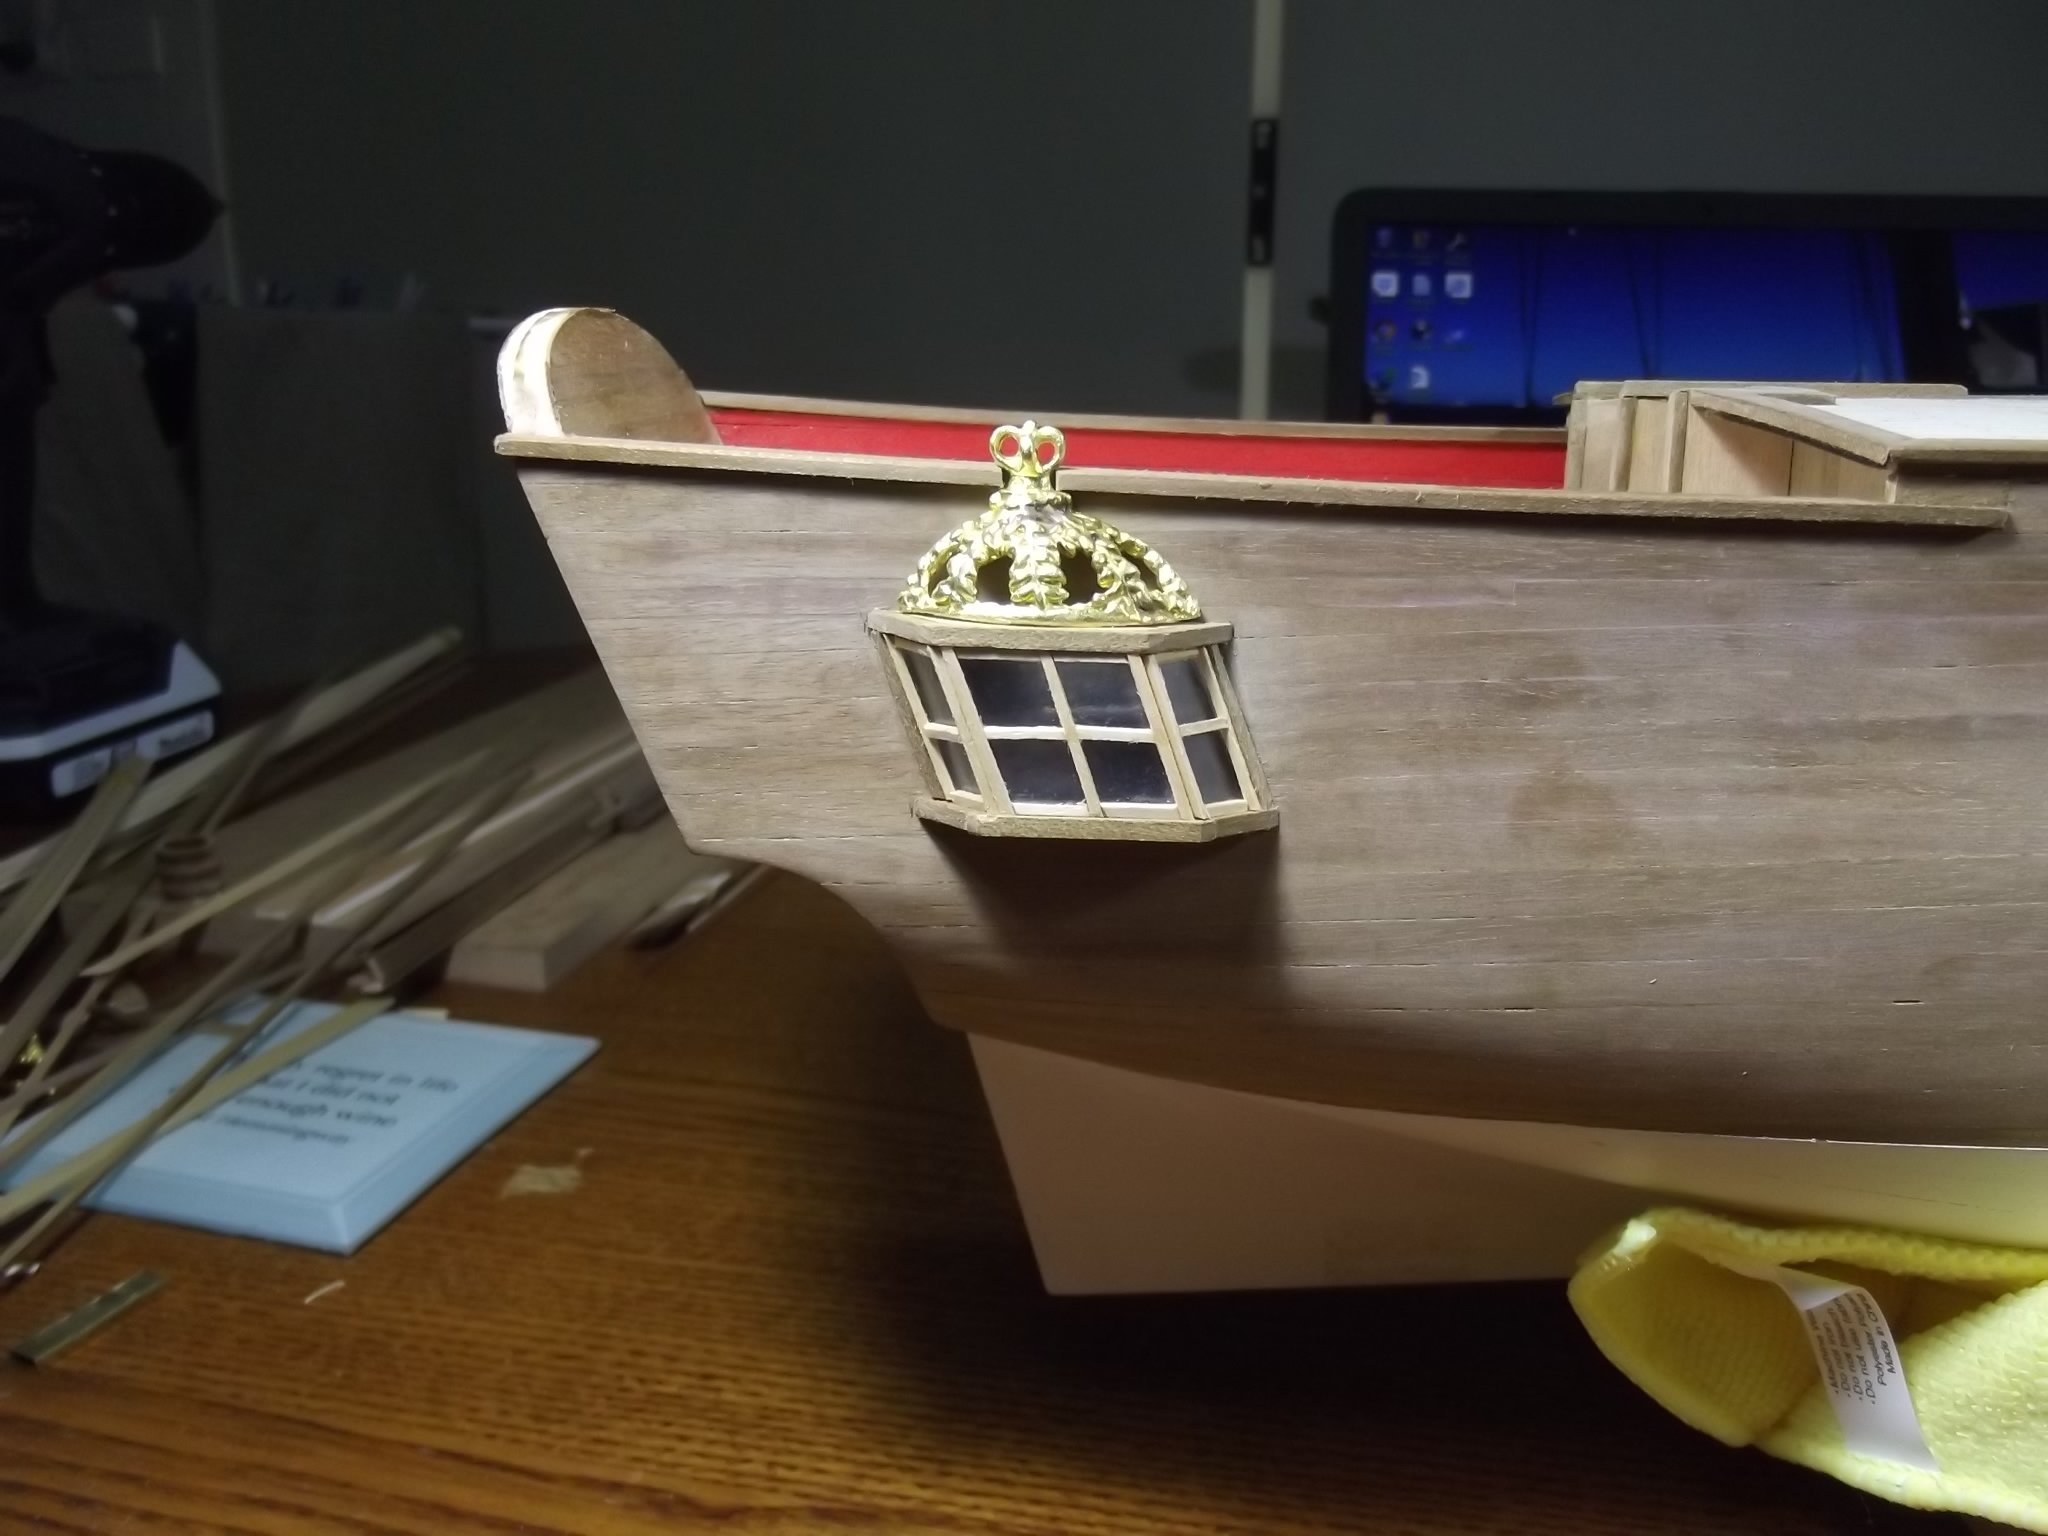
I've got the decorations done on both sides now, more frustration because the opposite castings were different lengths and sizes so it made fitting them a bit of a puzzle and I had to re-arrange them a bit on the starboard side to make them fit but they're on. I've also finished the stern decoration, the hardest part there was fitting the lower two either side of the rudder. I found the radius of the curved section of the transom and drilled a hole through some hard wood with a 32mm speed bore which was the closest to the correct size then cut the wood through the hole to give me a mold to hold in the vice. Then I annealed the castings, laid them in the curved mold and tapped them into the curve of the mold using another piece of wood as a drift so as not to mark them. A little bit of adjusting and they fit beautifully. Unfortunately they are now a slightly different colour but I can't do anything about that, I tried gold paint but couldn't find one worth spit!
-
A little bit more progress

-
Thanks Mark, she was built in 1749 for King George II.
That puts her 15 years ahead of Endeavour and while the replica Endeavour is clearly not the original it is regarded as one of the most accurate replicas around so I'm using my knowledge of her to guide my thinking on this build, same country, same era, same navy and basically the same size so there are bound to be many similarities and that thinking has helped me understand and in many cases change what the drawings and instructions say to do

- puckotred, Mark Pearse, GrandpaPhil and 3 others
-
6
-
I've got a bit ahead of the instructions because, one - I needed a break from woodwork, two - I'm finding more and more that the castings, plans and dimensions rarely match so I'm laying out all the exterior decoration now so I can make sure everything will fit properly before putting woodwork in the way.

-
-
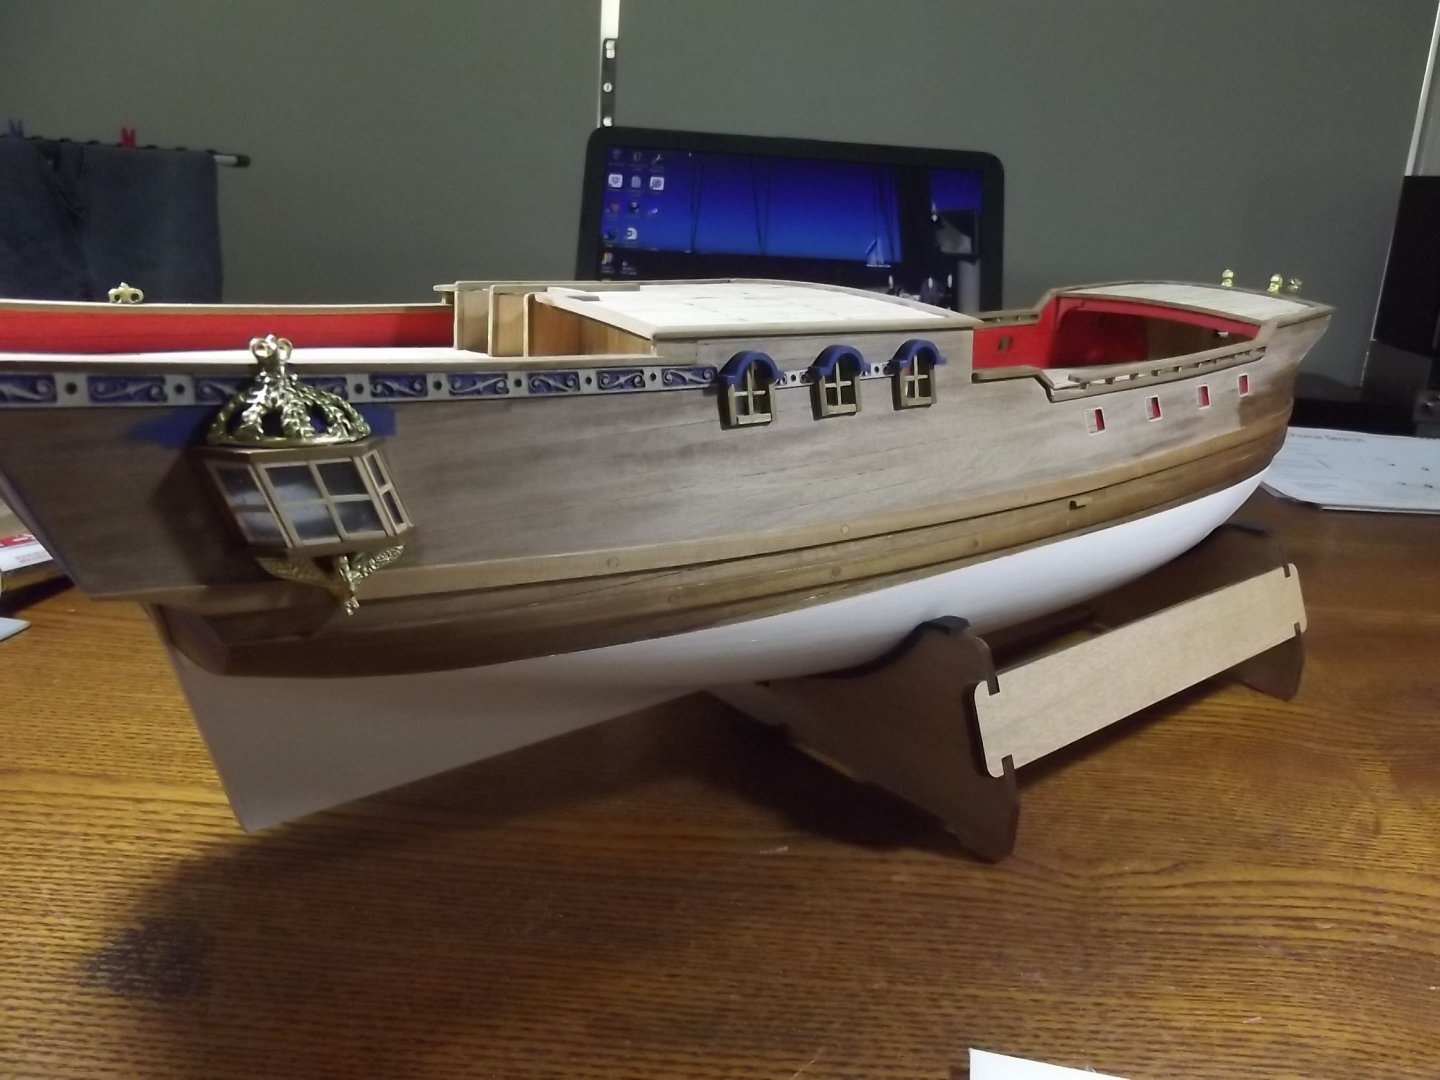
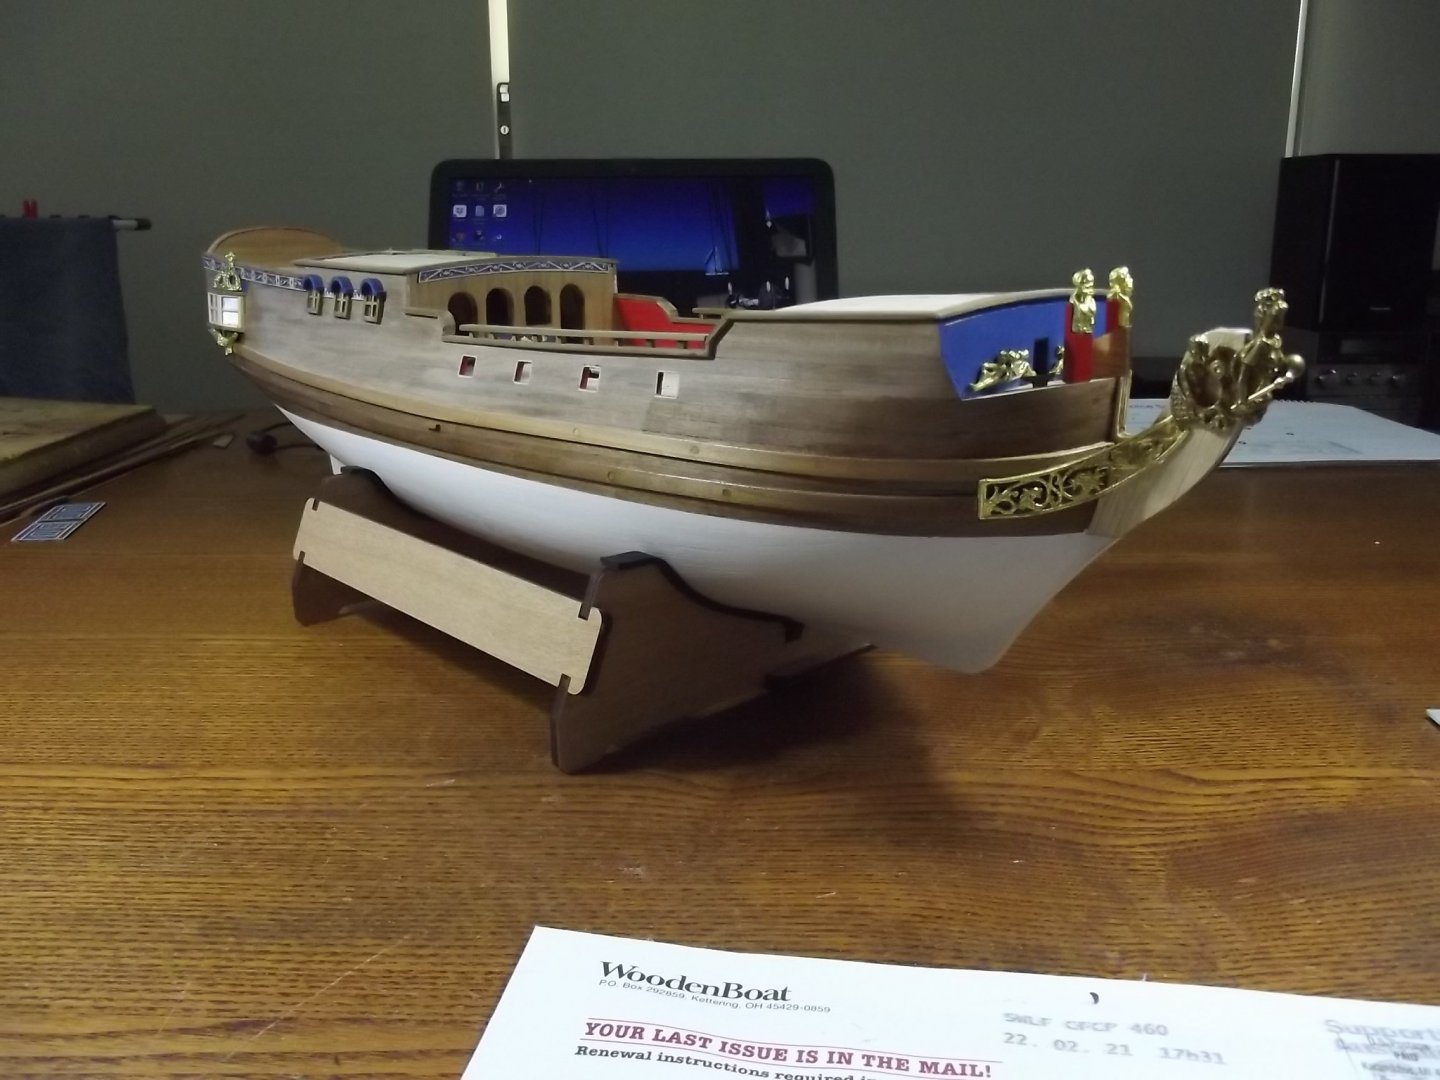
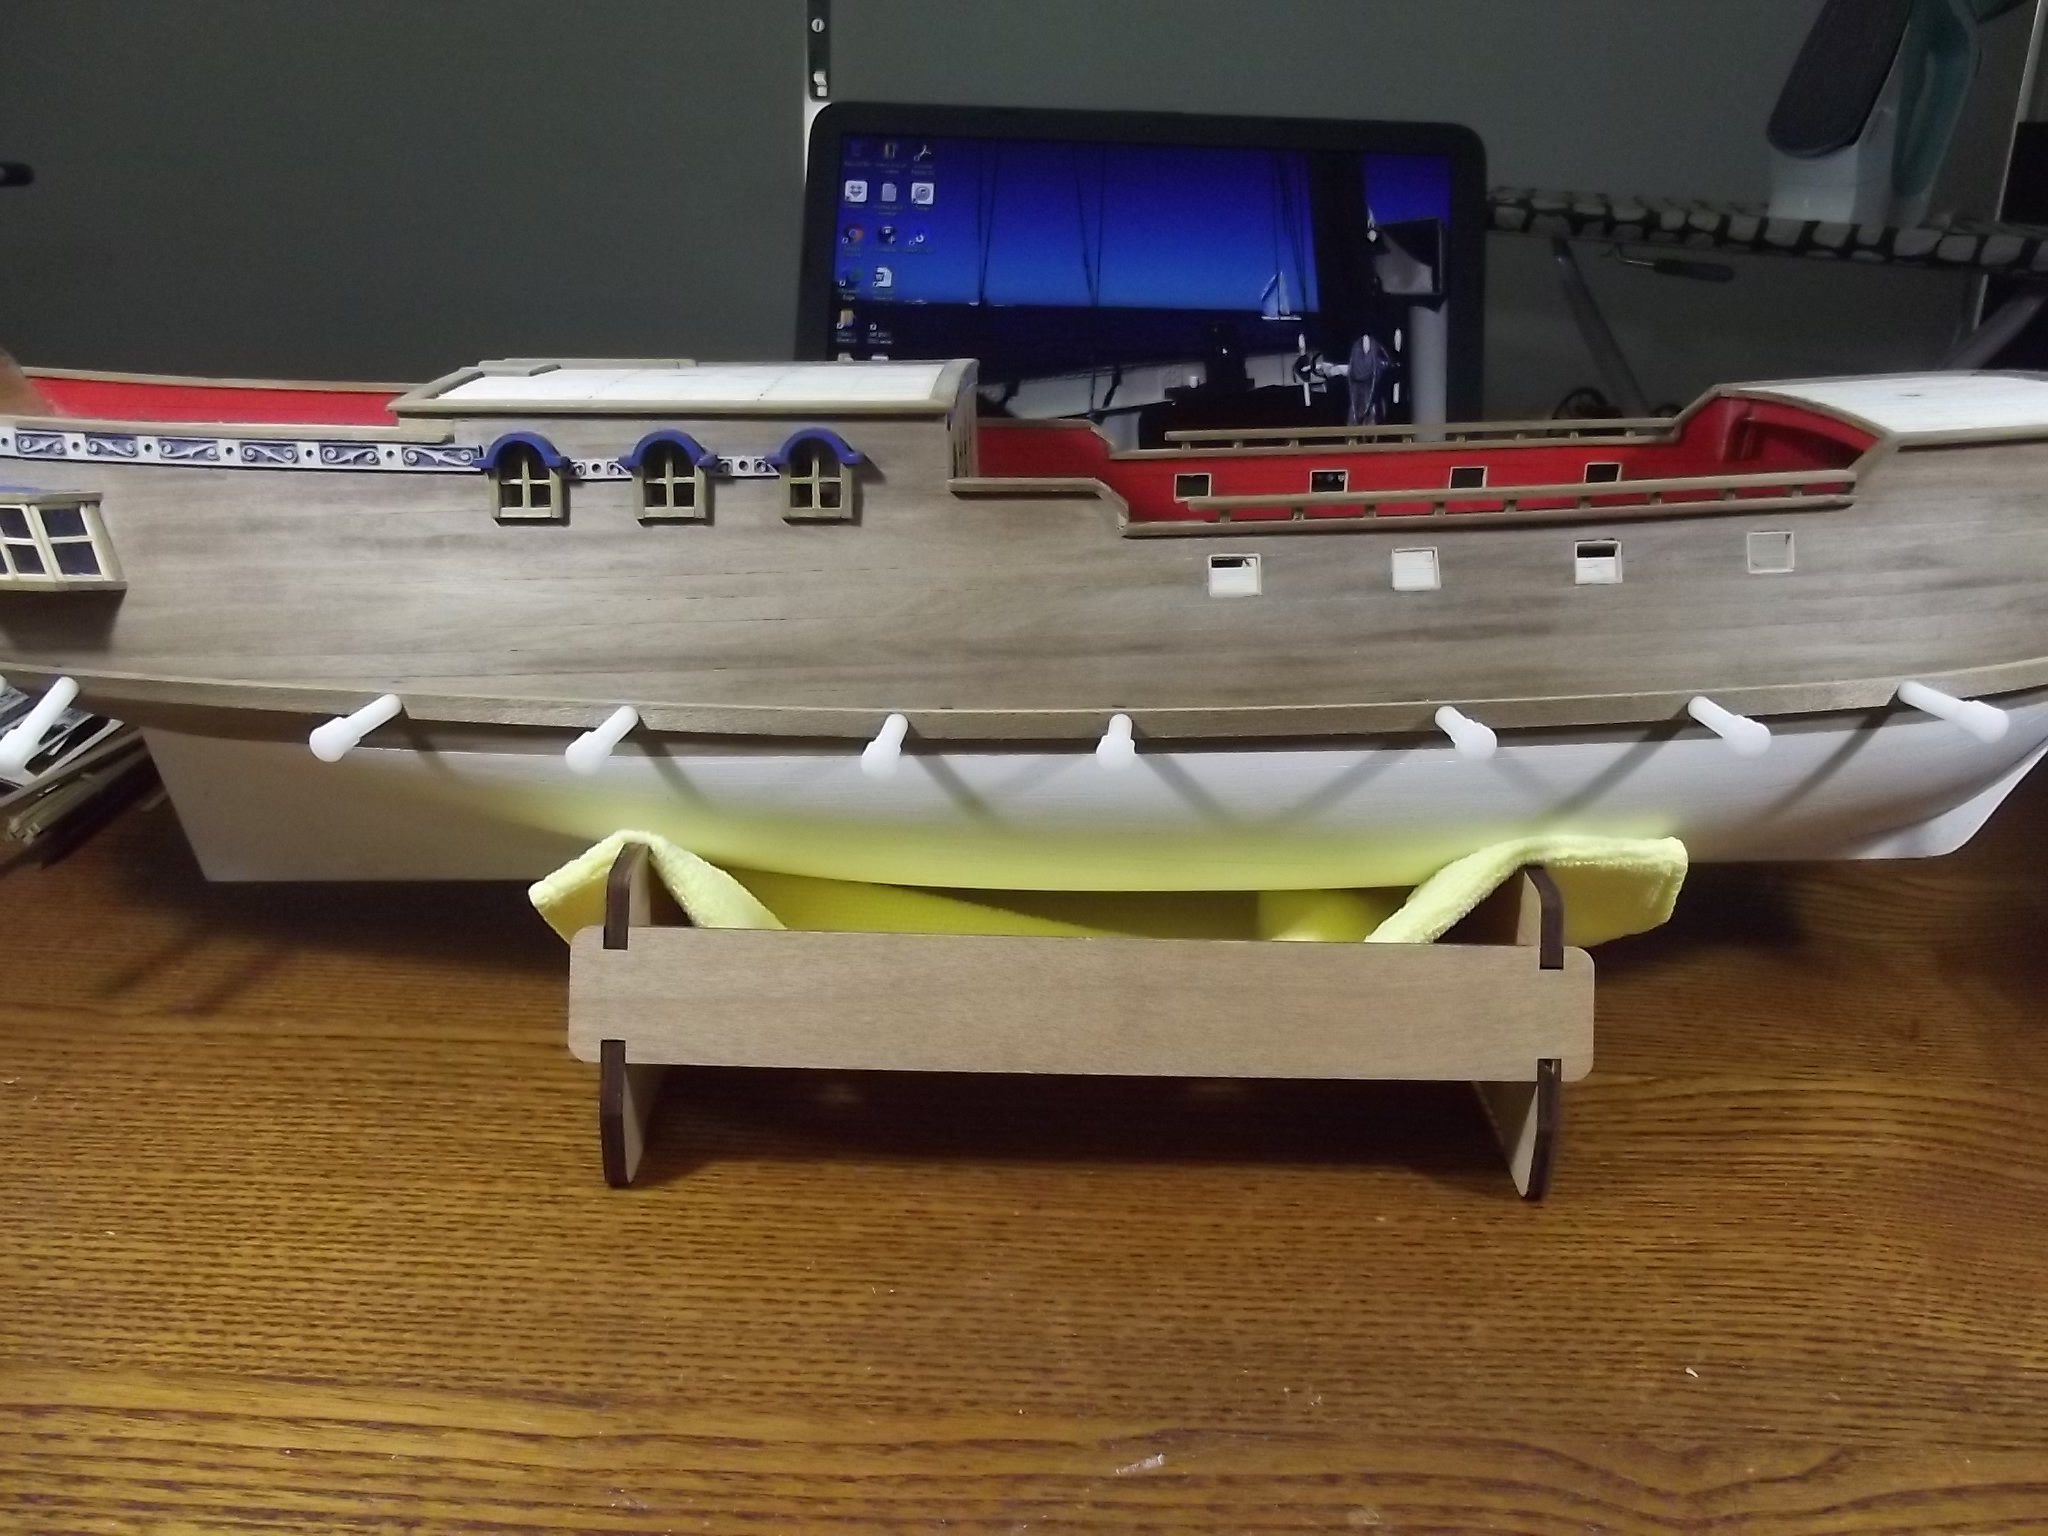
I've made a bit more progress with the side windows done, and wasn't that a fiddly job!
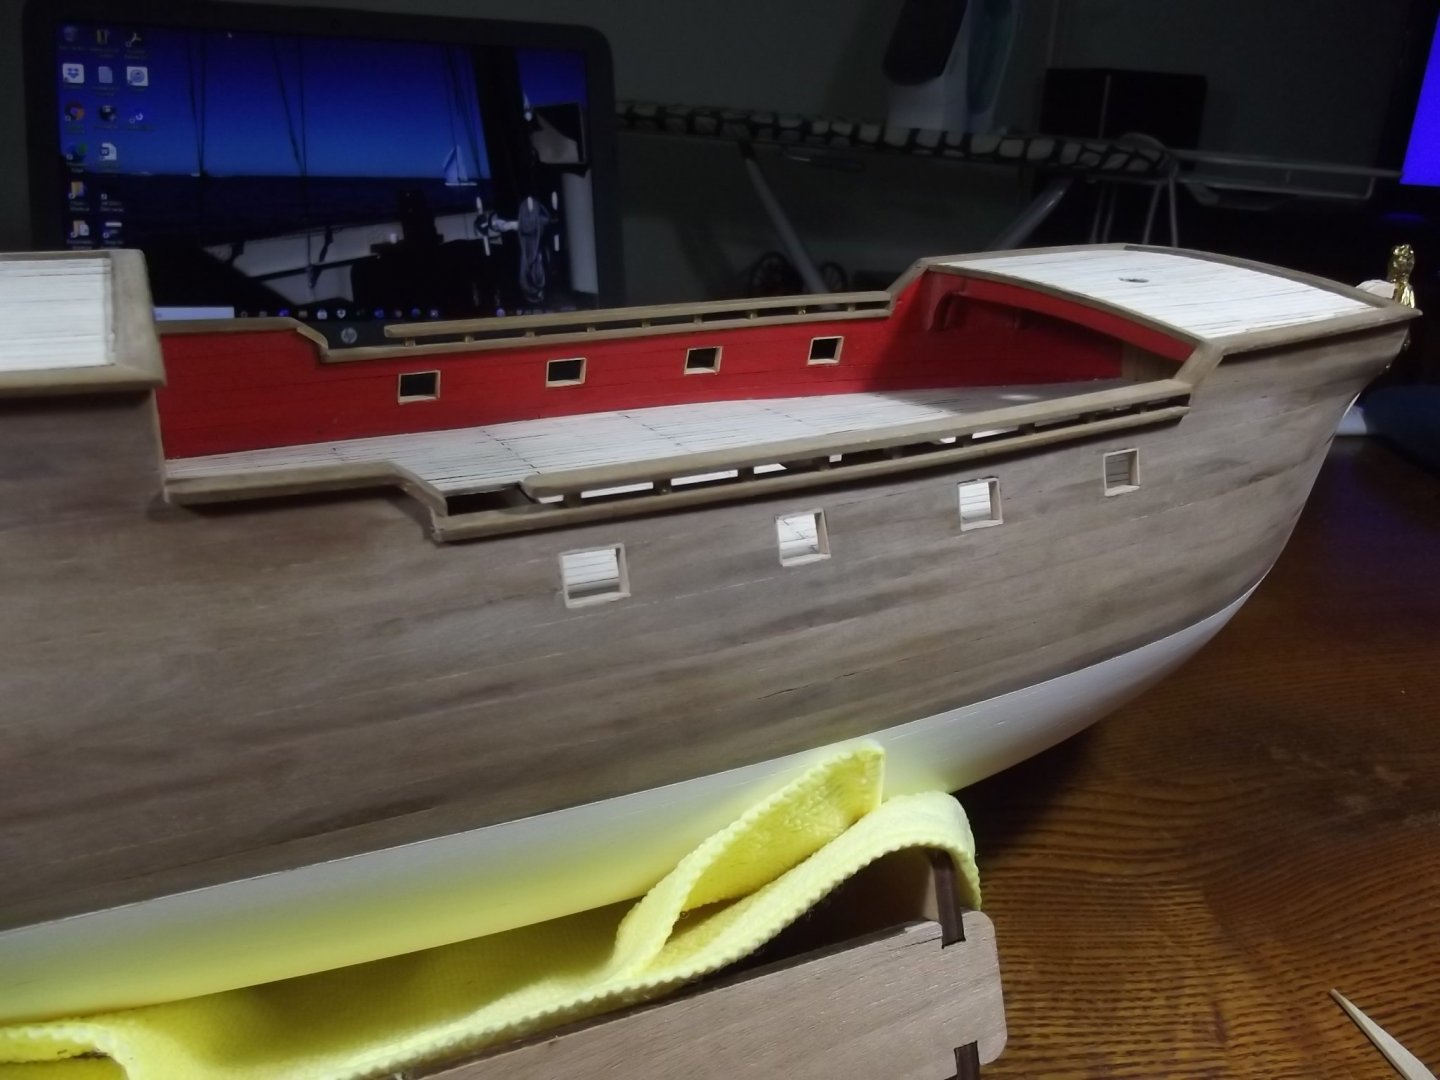
I've also fitted the side rubbing strakes, I was originally going to paint them black but decided against it reasoning that black would be somewhat overpowering and the hull will be pretty heavily decorated so too much detail I think.
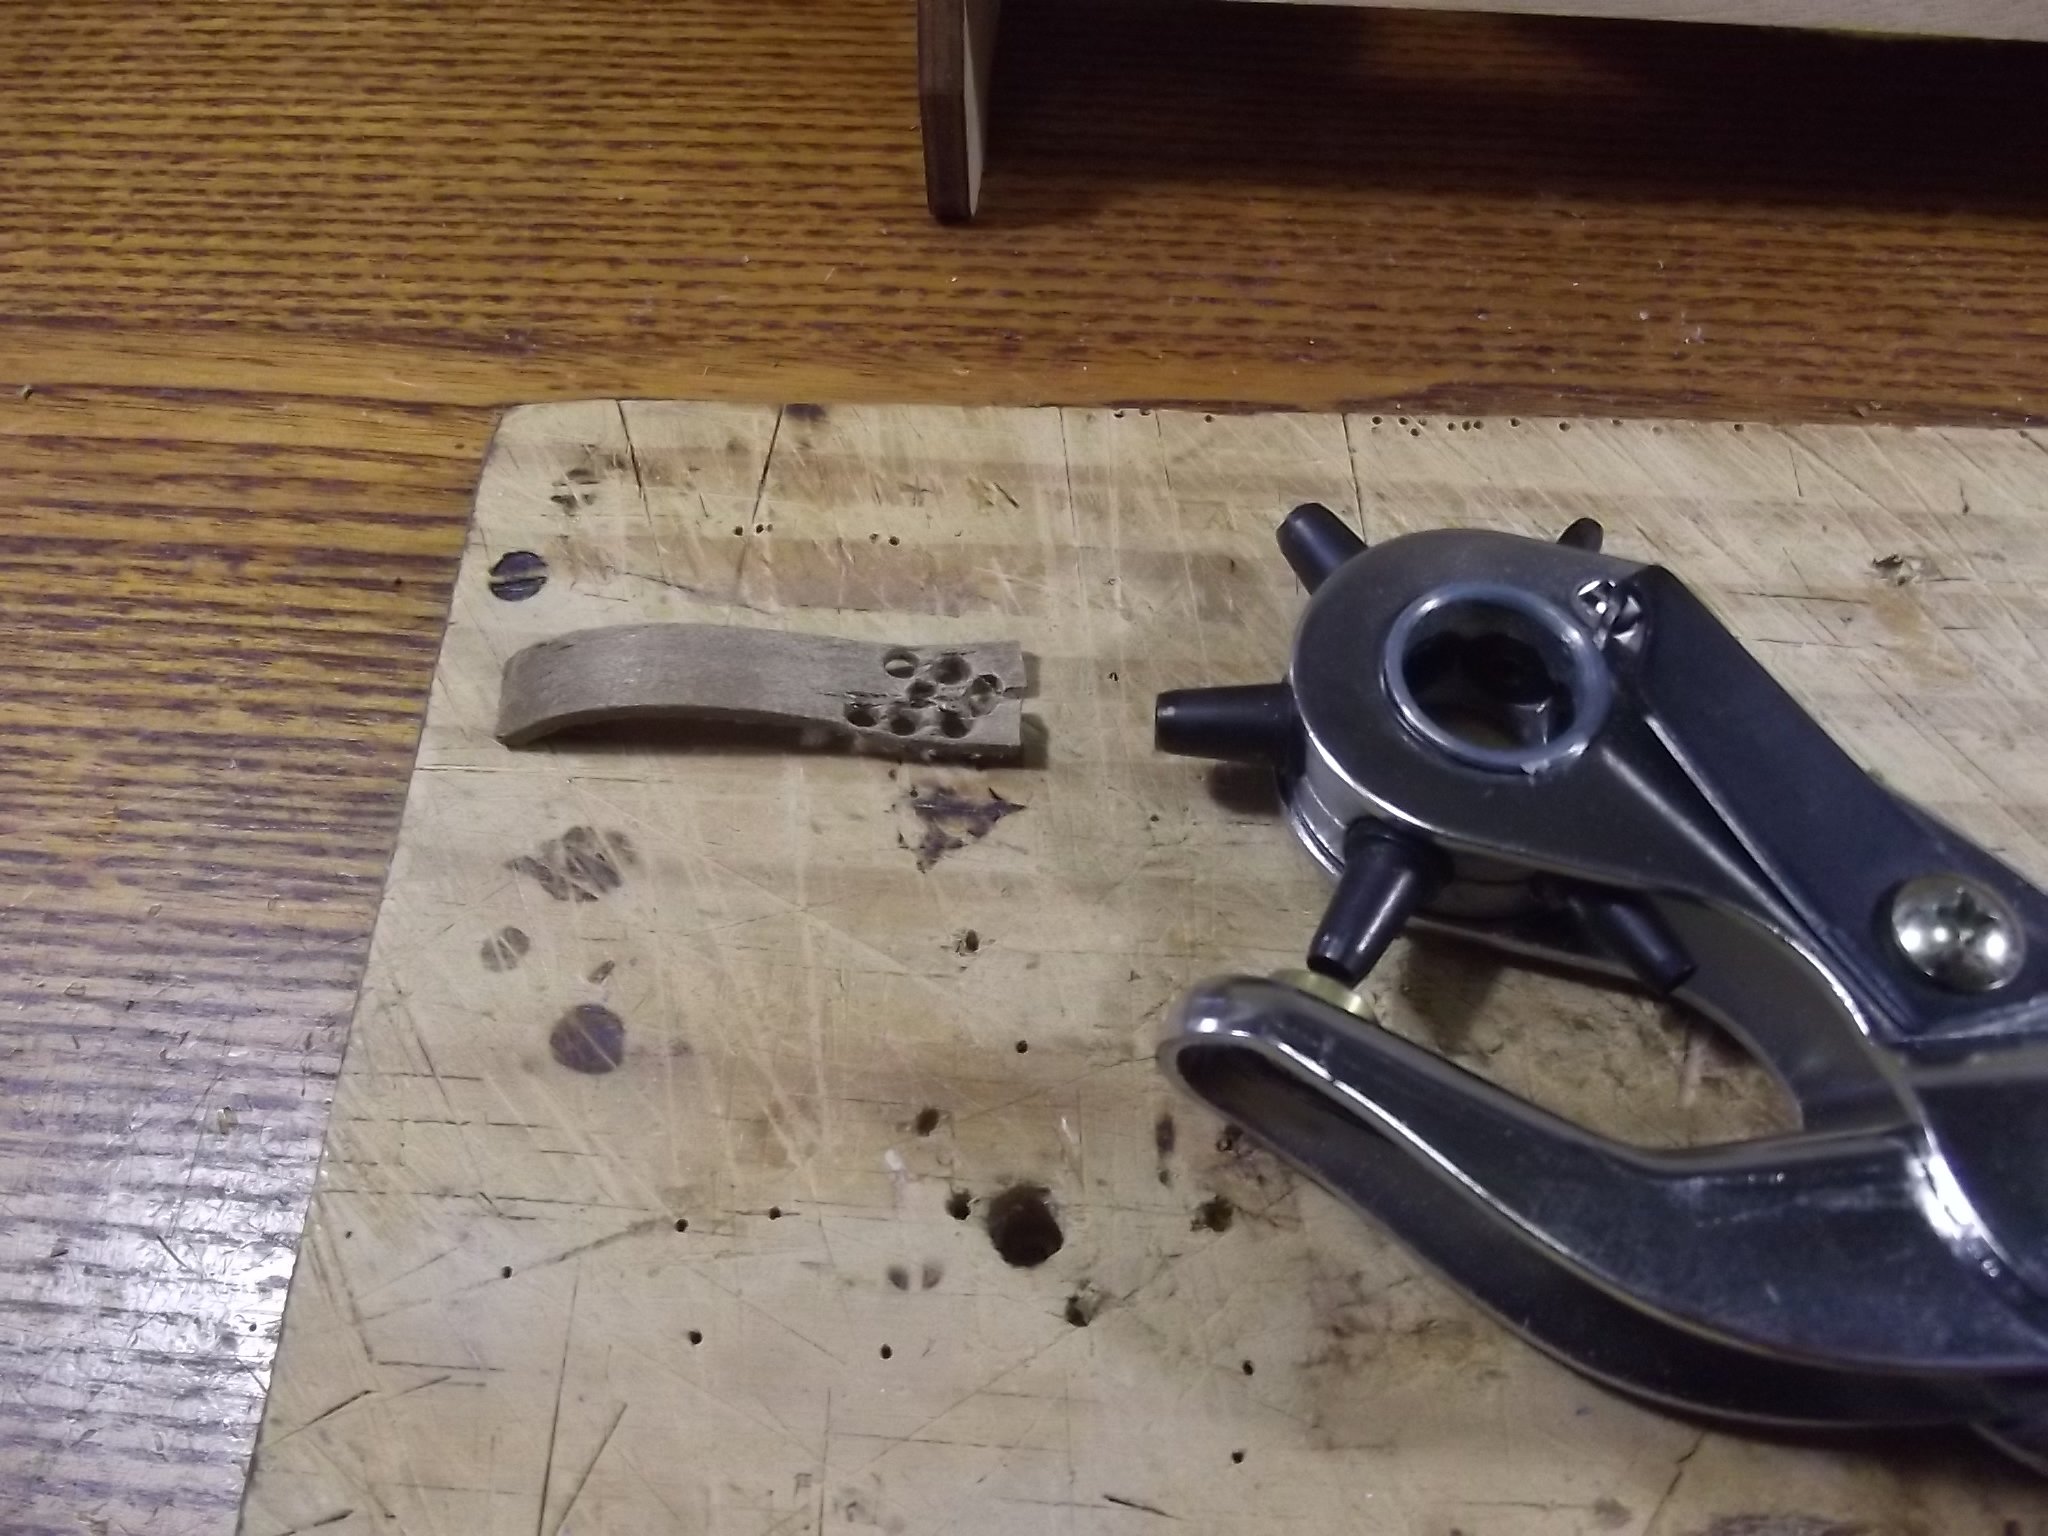
The downside of not painting the strakes is I had screw clamp holes to fill and try and hide. I used a hole punch to cut bungs from scrap walnut which I have glued into the holes and after a good sand they don't look bad. We'll see once I get some varnish on.


-
Yeah, I give up now. I'll just go and crawl into a hole.
")
- FriedClams, Tony Hunt, Wintergreen and 6 others
-
6
-
 3
3
-
A master class as usual Michael but you're making me glad I don't have CAD
- TBlack, Keith Black, mtaylor and 2 others
-
5
-
-
I tend to forget how big this build is and then you post a pic with a clutch pencil on the deck!
- mtaylor, michael mott, Keith Black and 1 other
-
4
-
12 hours ago, ccoyle said:
Just noticed this in your signature. HMV beat you to it. 😉
That's really interesting, it has the life jacket boxes and the square plastic drinking water tank under the original cylindrical tank on the boat deck, the side awnings on the wheelhouse and even the carley floats, all of which are modifications made by Sydney Heritage Fleet. I know the boat extremely well because I crew her and the model has most of it pretty right.
- ccoyle and Keith Black
-
2
-
I've added the hand rails to the waste deck bulwarks and again drawing on my knowledge of Endeavour which is very much a contemporary of this ship in size, era and navy I opted to use squared posts for the handrails rather than round ones. If they were round they would have had turned details which can't be done at this scale but if it was Endeavour I can almost guarantee they would be squared timbers. Also in using square posts I didn't have to drill through the top rail and then add the cover strip which I didn't like the look of. Also based on Endeavour I have left the hand rails on both sides short to allow boarding because there is generally access from both sides of the ship.
I've also done the stbd aft window which was a challenge too. the plastic window molding was not great and again the timbers included weren't up to the job so again I used wood left over from other models. It's a fiddly job and now I have the port window to do.
A question Has anyone had experience removing the wax from castings? How did you do it?

- Keith Black, Blackreed, ccoyle and 3 others
-
6
-
So your dear wife is more supportive and has more faith in you than your daughter eh?
-
I haven't decided if I will got that far with my RC because I find too much detail on deck can detract from the overall model and it's hard to get lines to "sit" right.
-
You never cease to impress Michael
- Keith Black, WalrusGuy, Jack12477 and 4 others
-
7
-
Mate, you'll be splashing it in no time!
- mtaylor, Canute, FriedClams and 5 others
-
8
-
Thanks Michael. I retired a few years ago, partially because I can't handle the stress and pressure of modern business anymore, I'm sure you can appreciate that I've had a huge overload in that area. Thankfully I was able to afford throwing in the towel.
Unlike your hemisphere where people are too cold to go into their workshops it's too hot and humid here to go out doing anything else so I'm utilising the air con and building the boat and it's a labour of love which is at the same time cathartic.
- Keith Black, austristan and Blackreed
-
3
-
The final deck is done and it was the easiest of all. However the ply false deck seems to be 3mm short because the stairway walls don't line up like the diagrams. I have to say I'm not impressed with the quality of the kit so far!
The plans show a sliding hatch above the gangway down into the cabin but there should also be doors, I'm not sure how I'd do them so I'll leave it for now and see what, if anything develops.

-
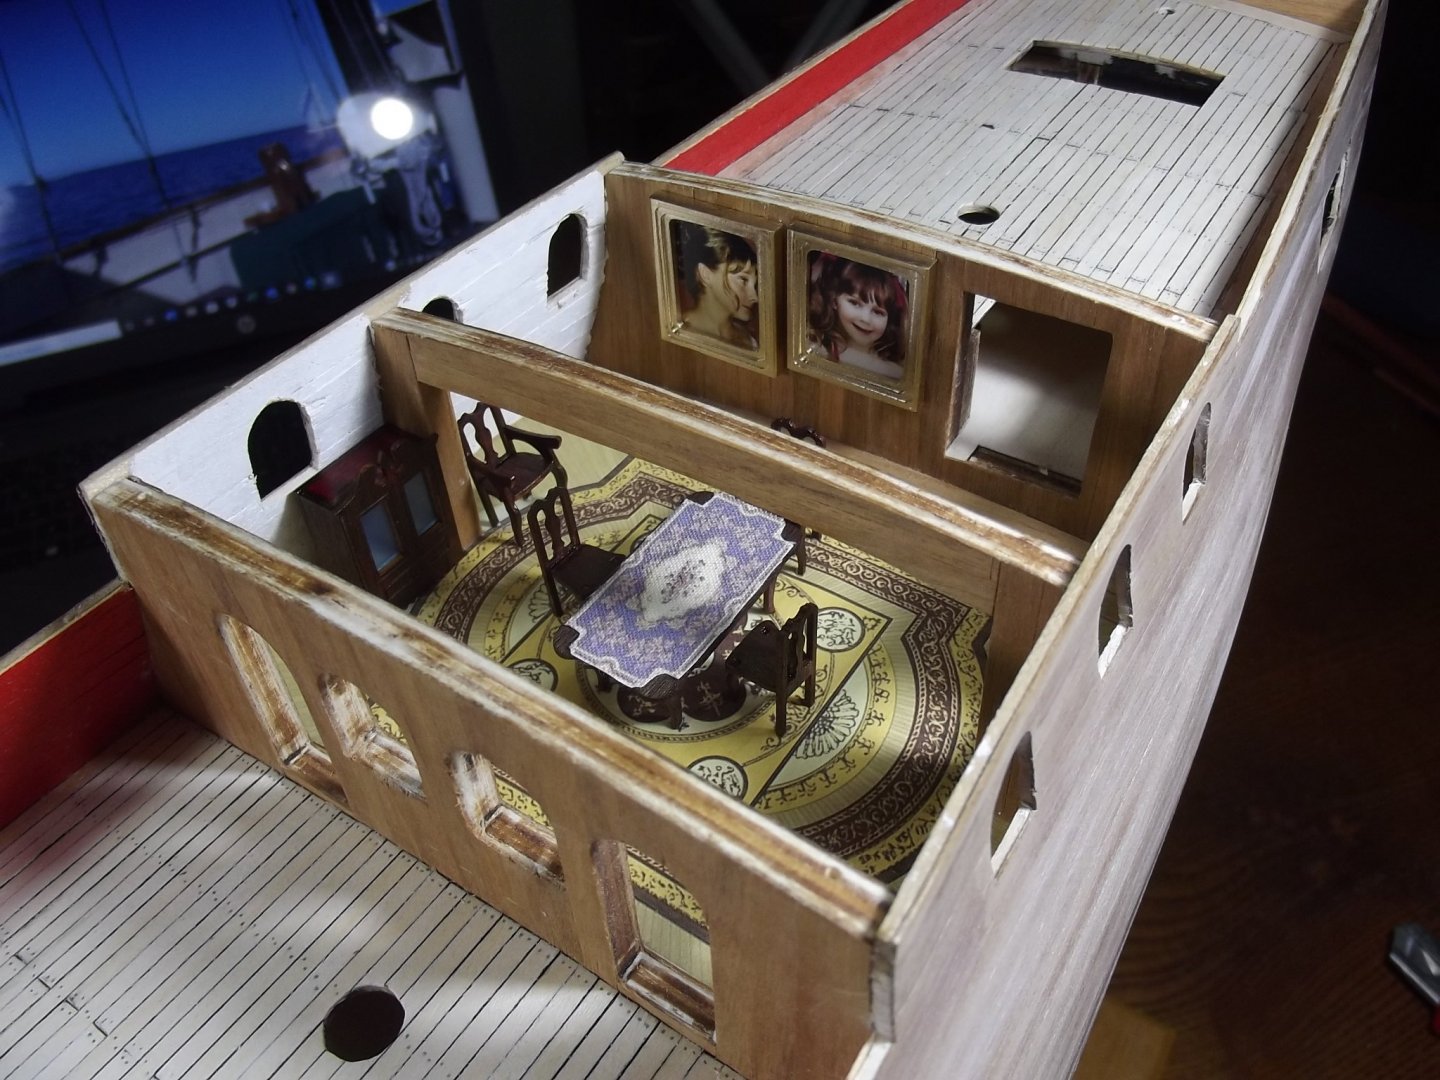
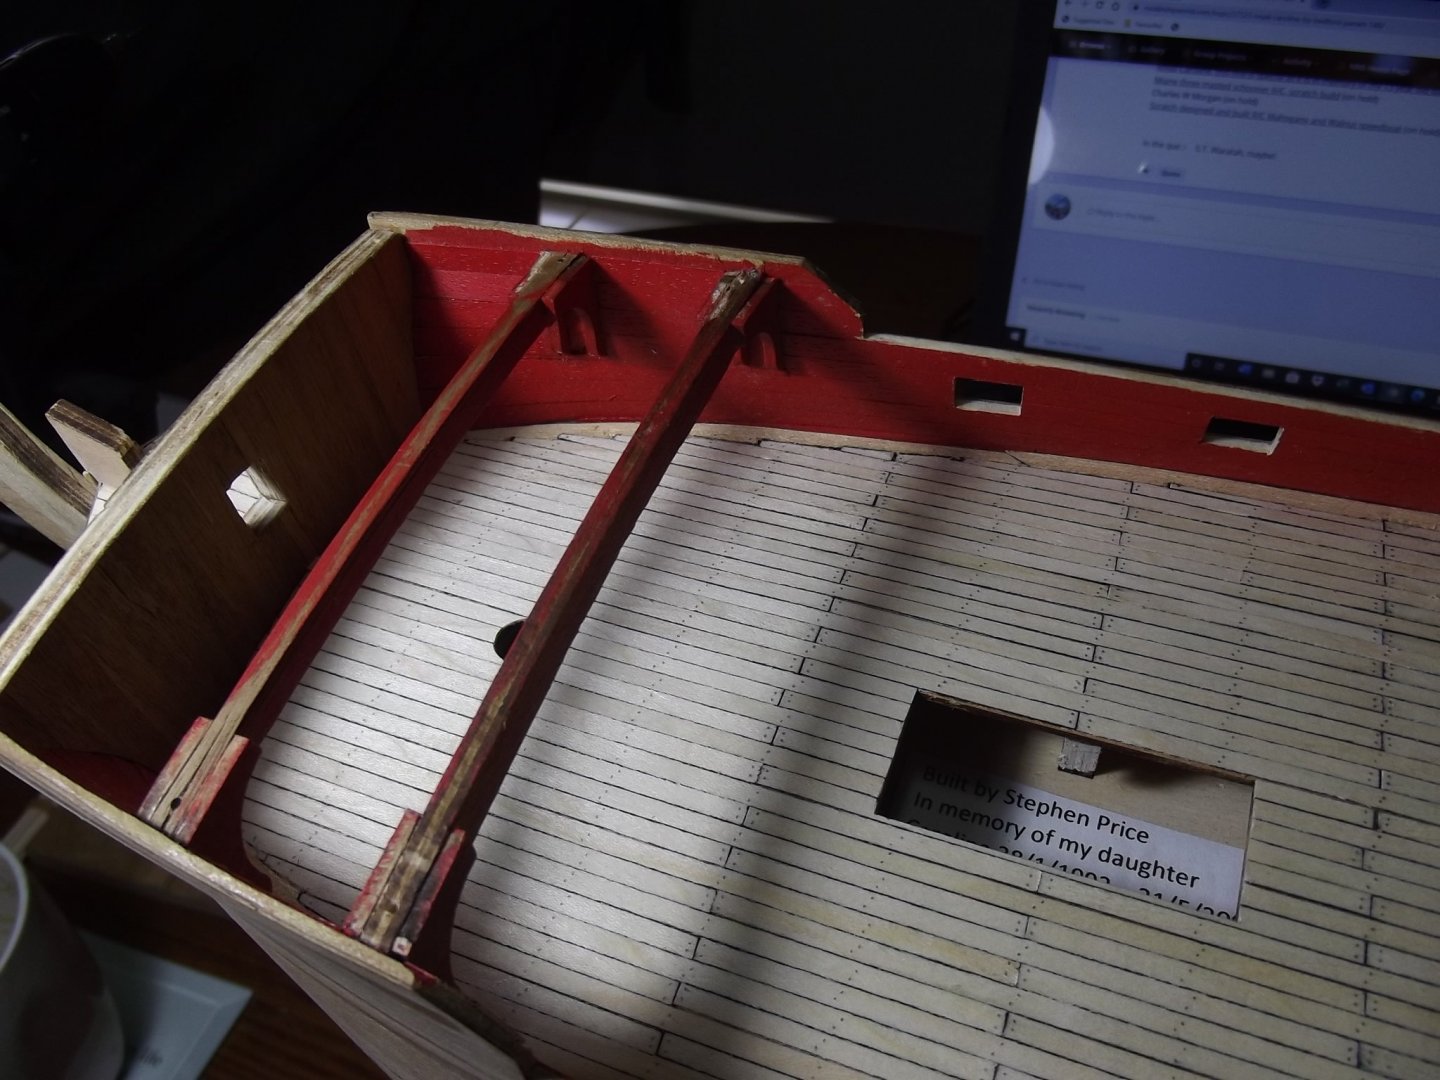
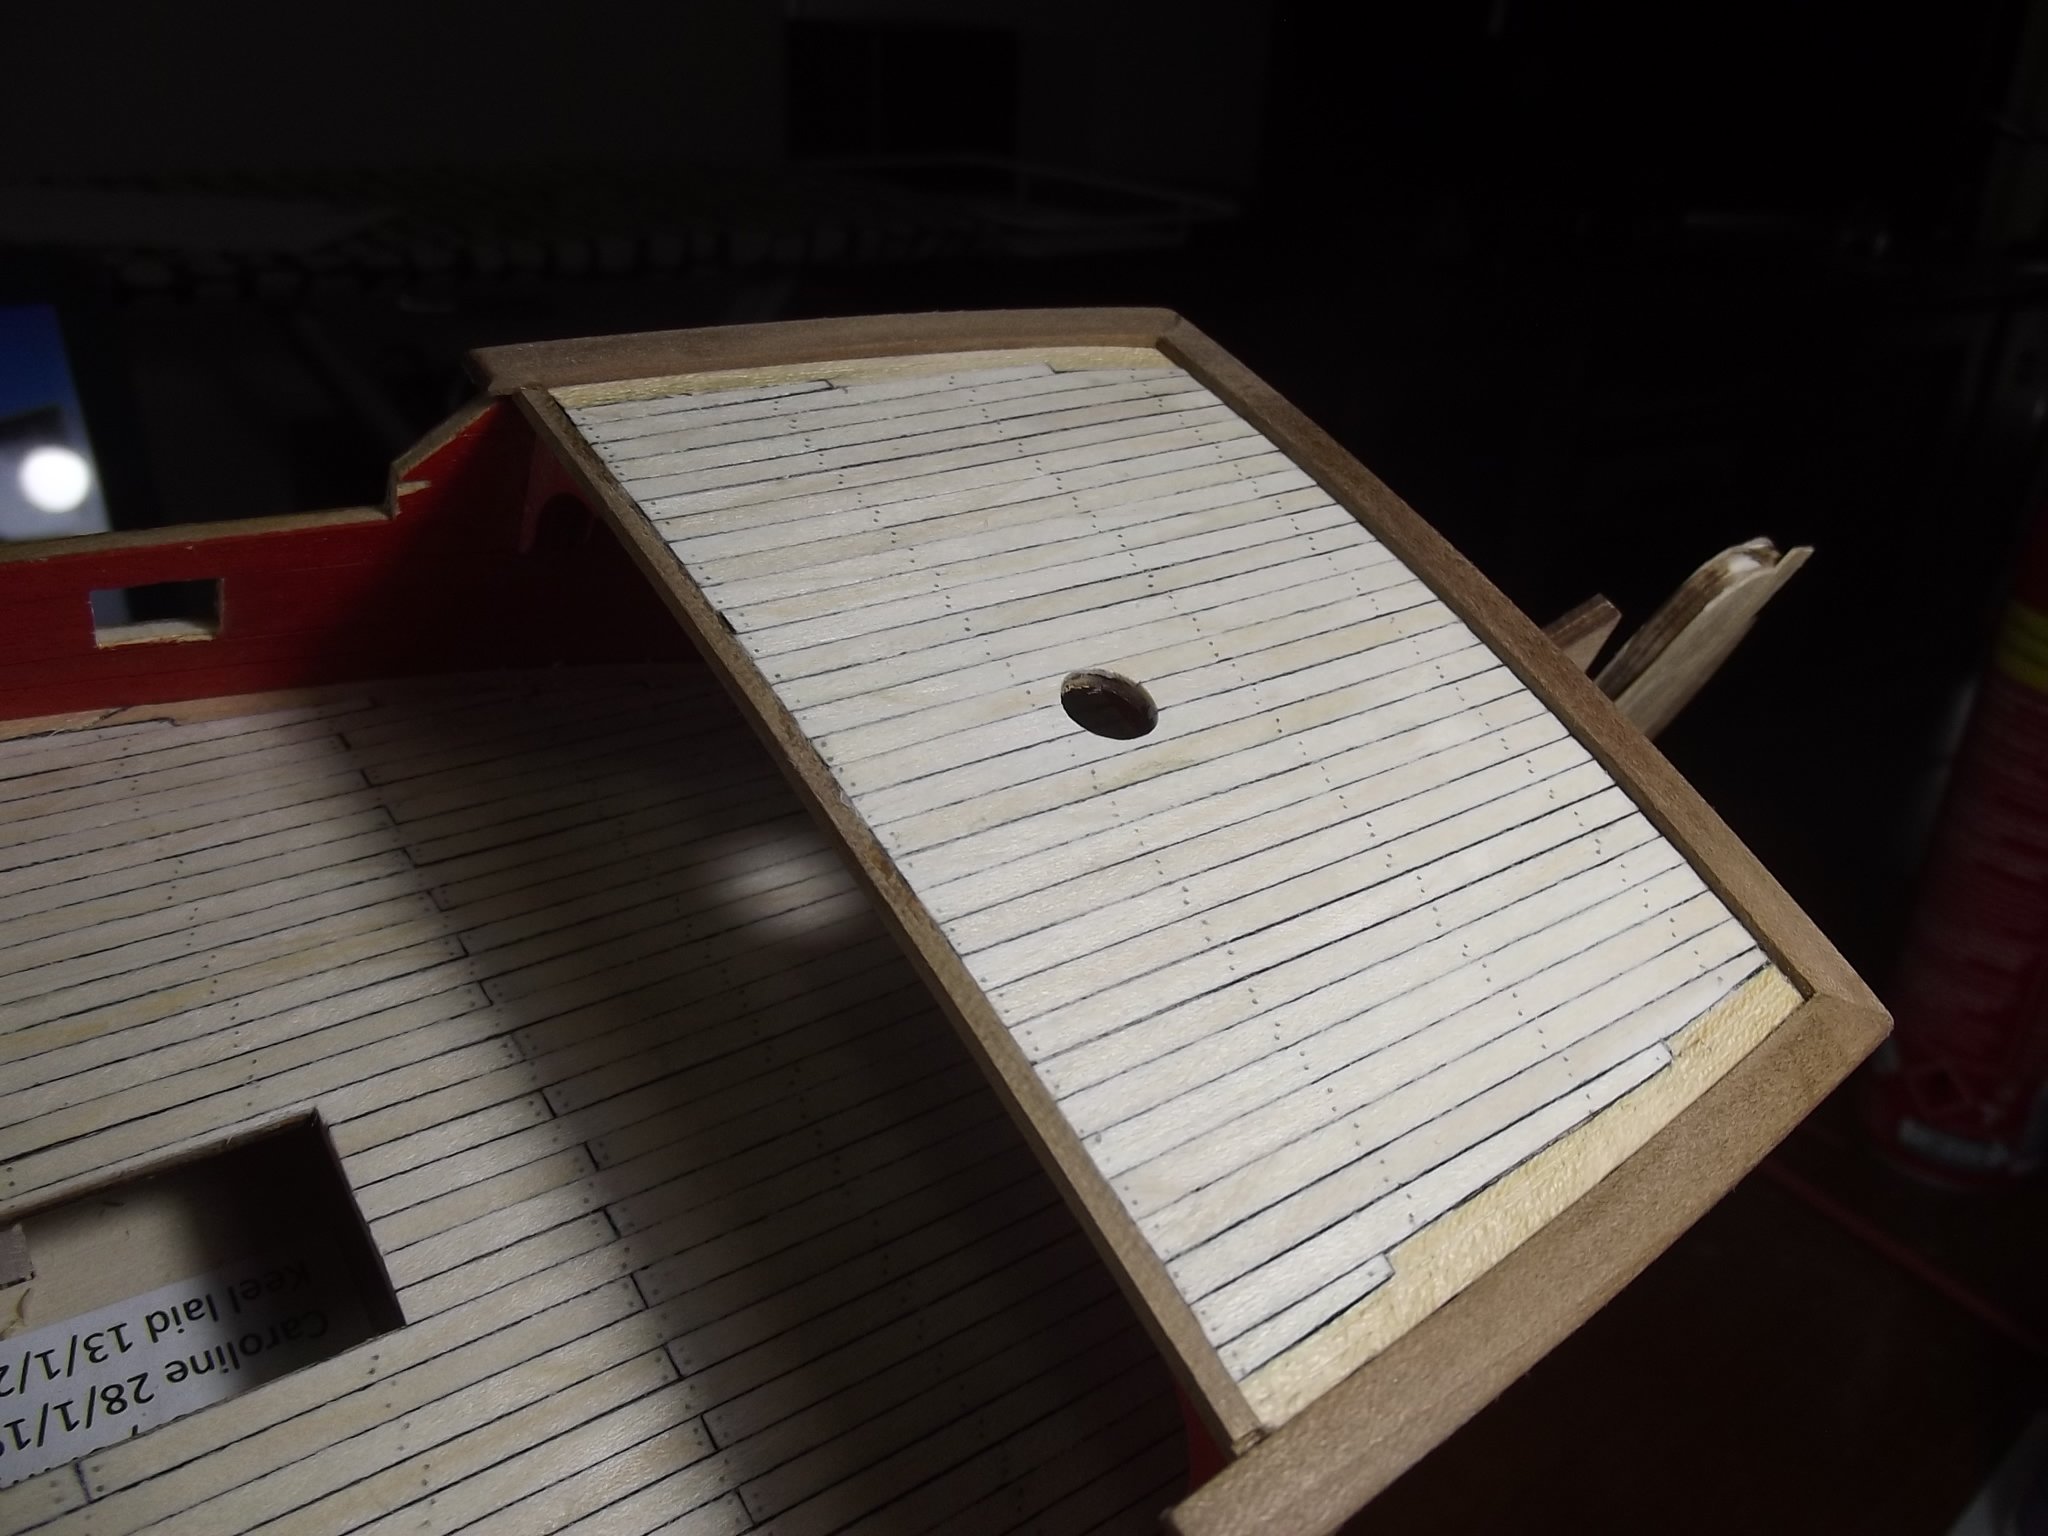
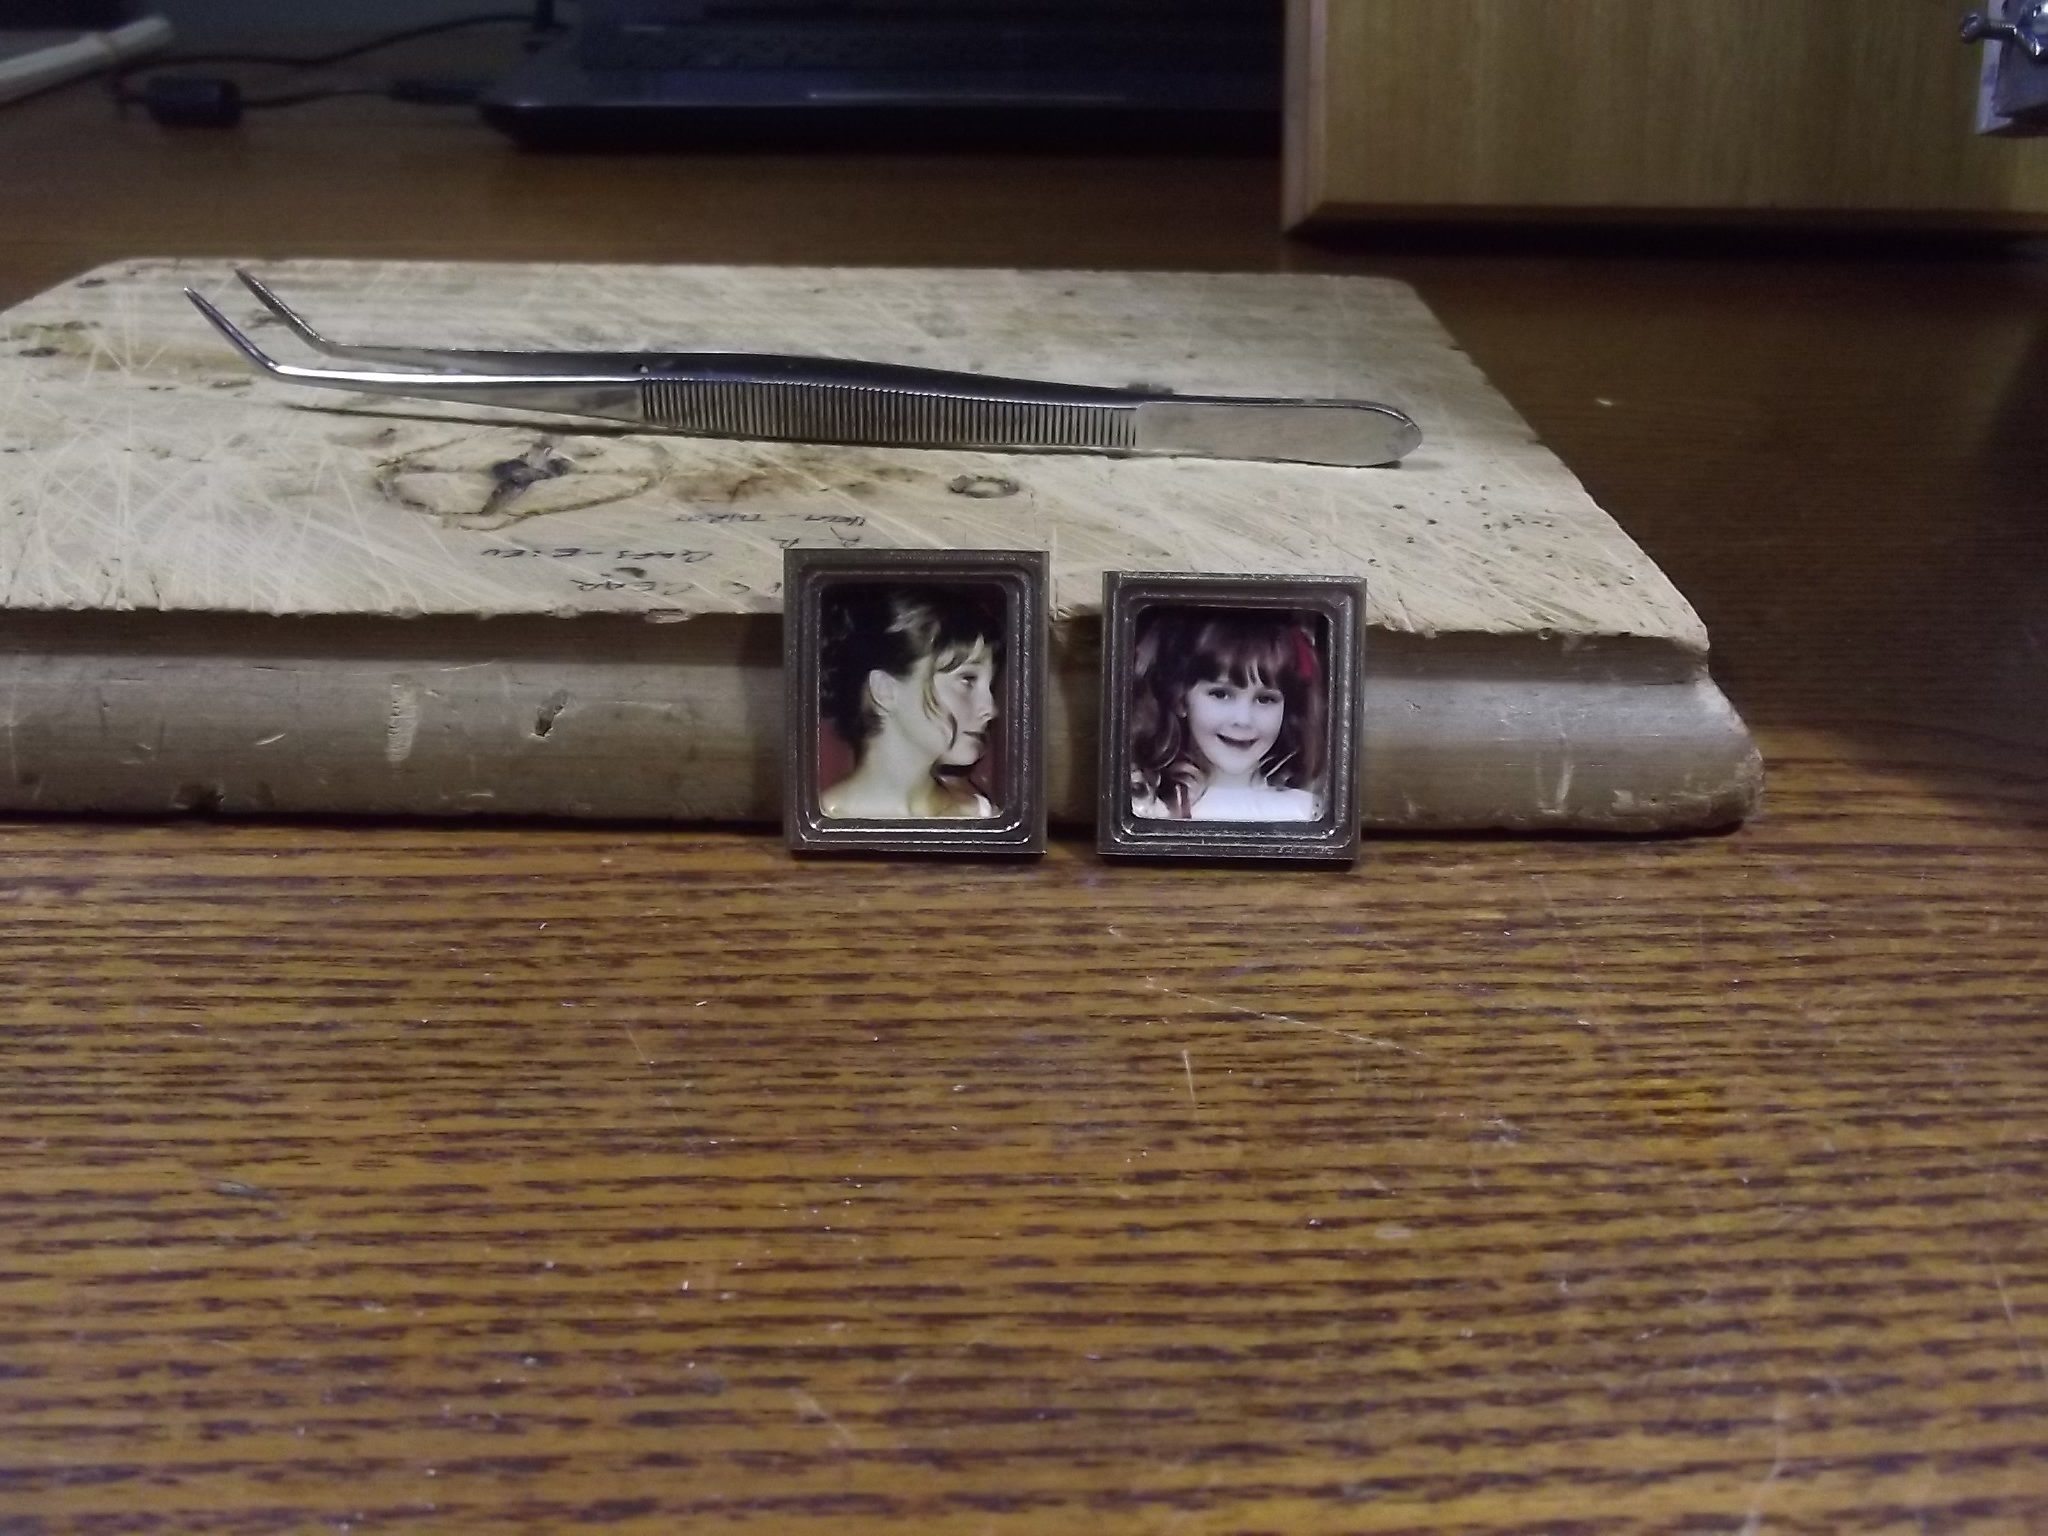
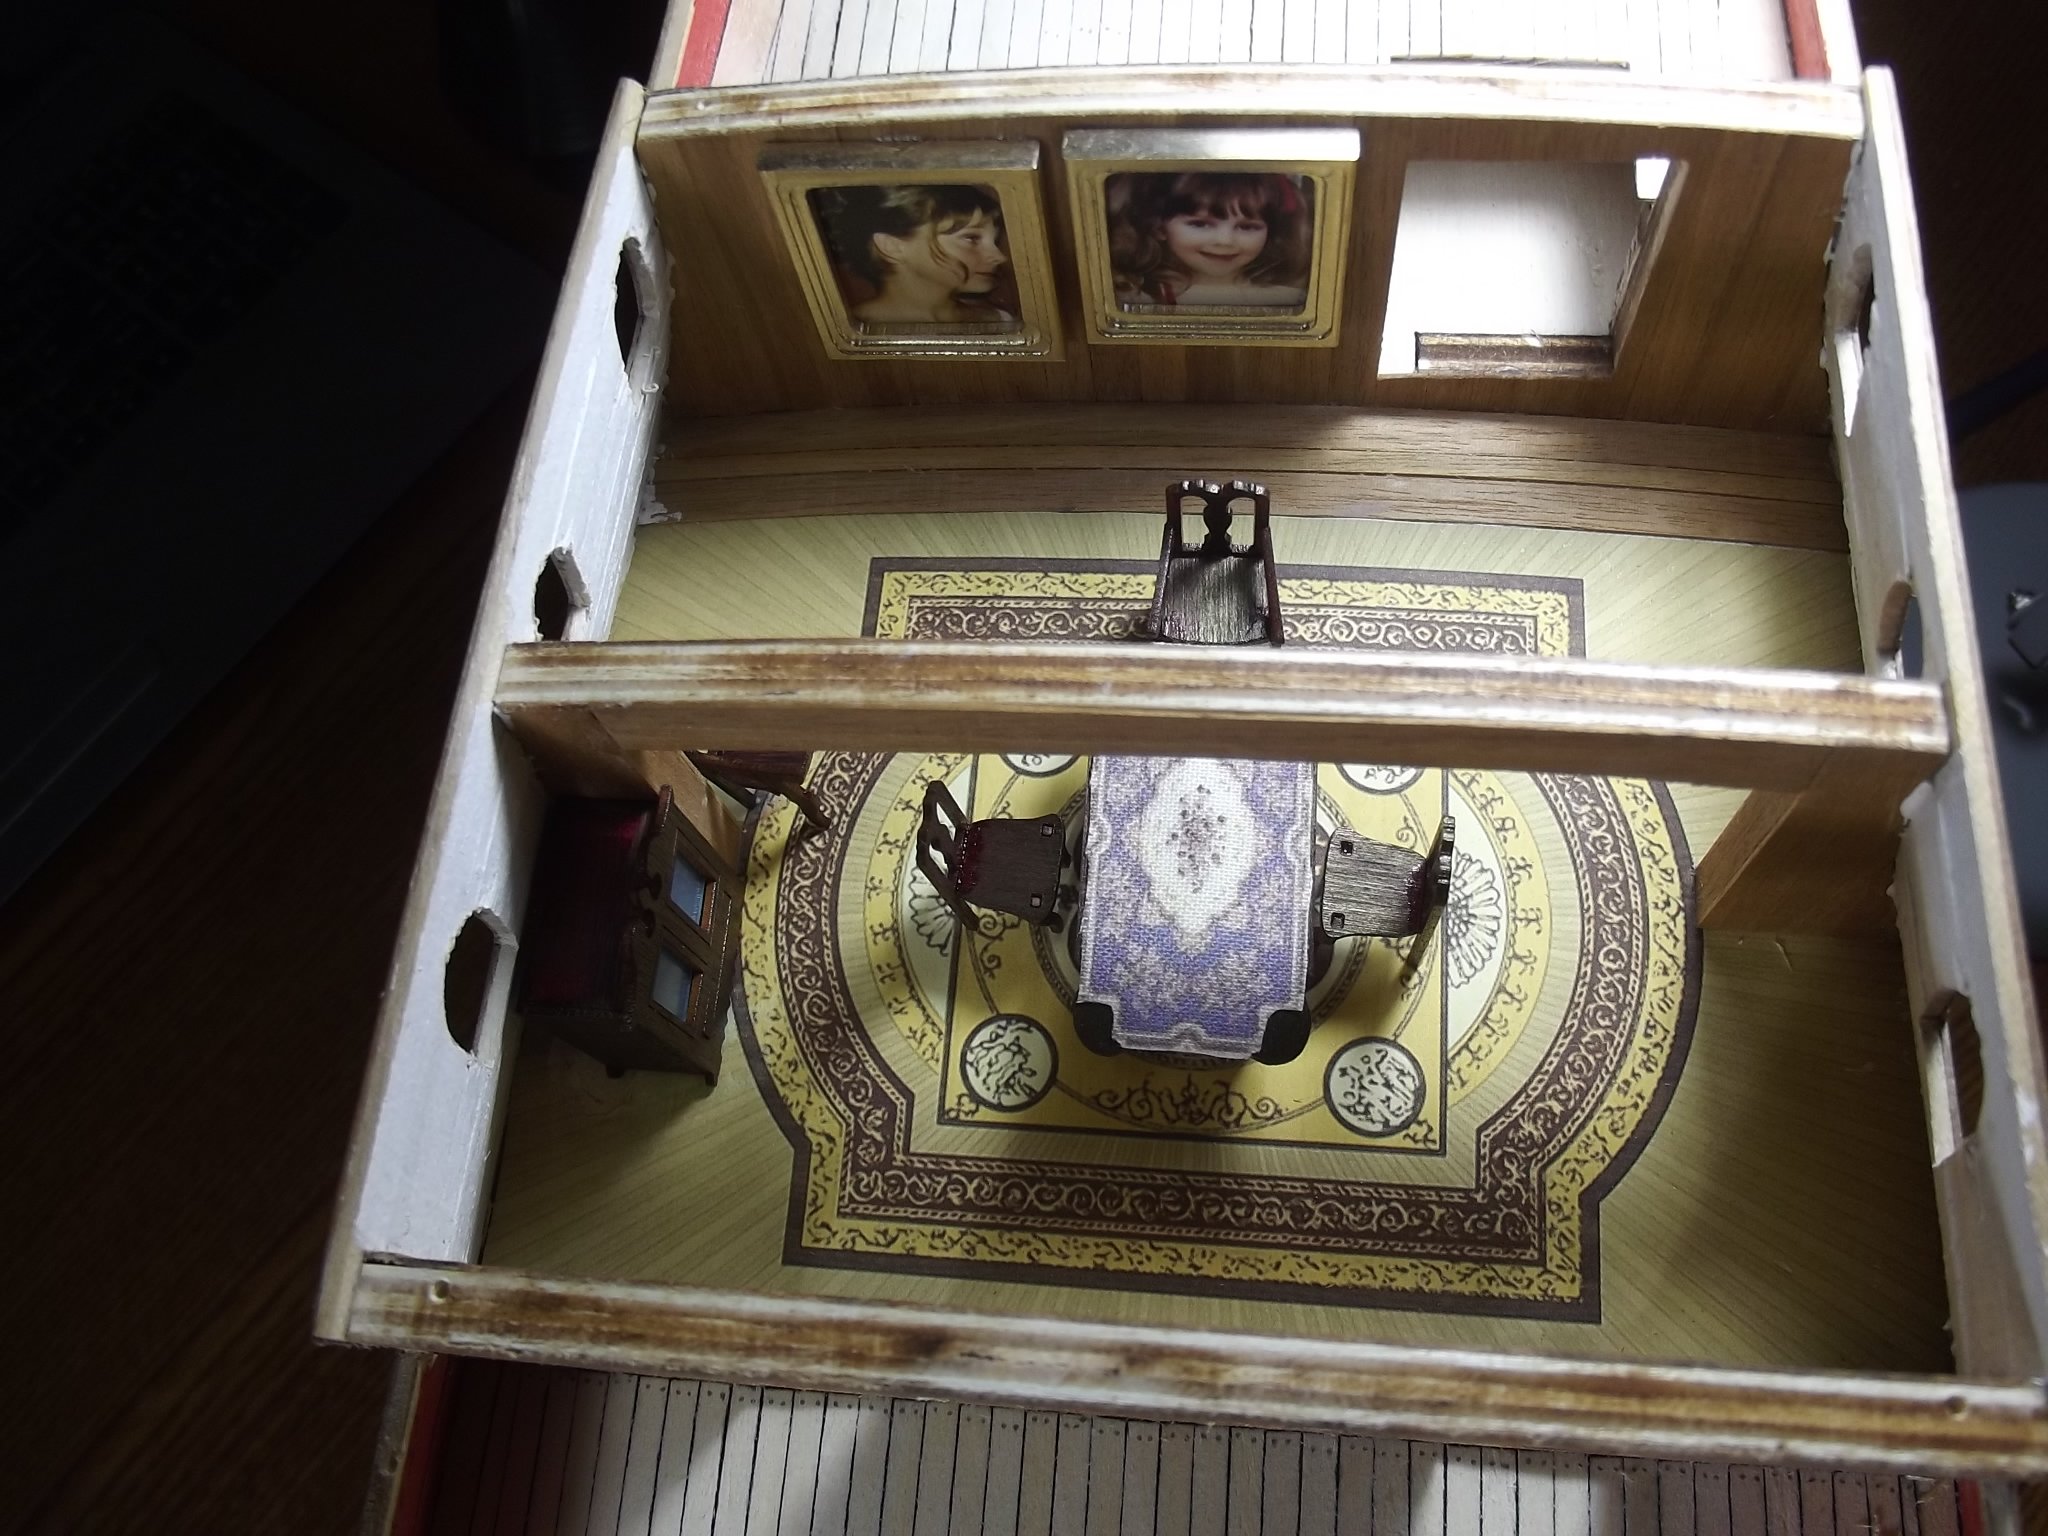
The fore deck is planked, it was much easier to joggle the planks on this deck due to ease of access. I've also done the kings cabin with two of my favorite pics of my little girl. I milled some flat brass bar into the picture frames and added a little furniture just for the heck of it. Now with the cabin top on you can't really see much in there but I know it's there.


-
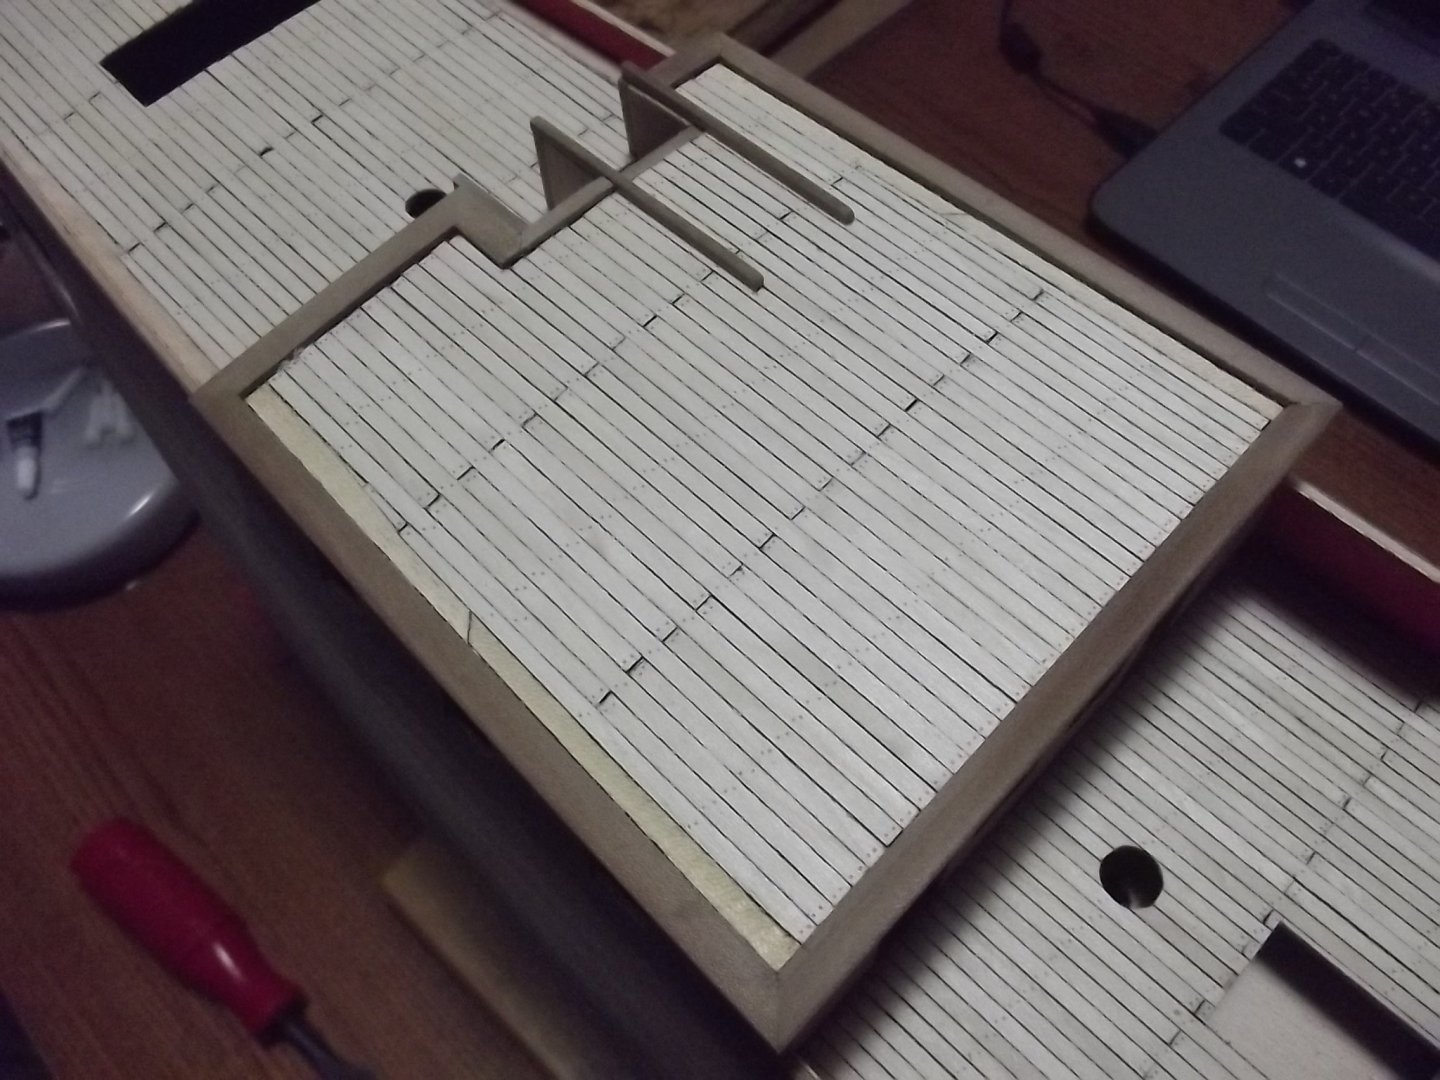
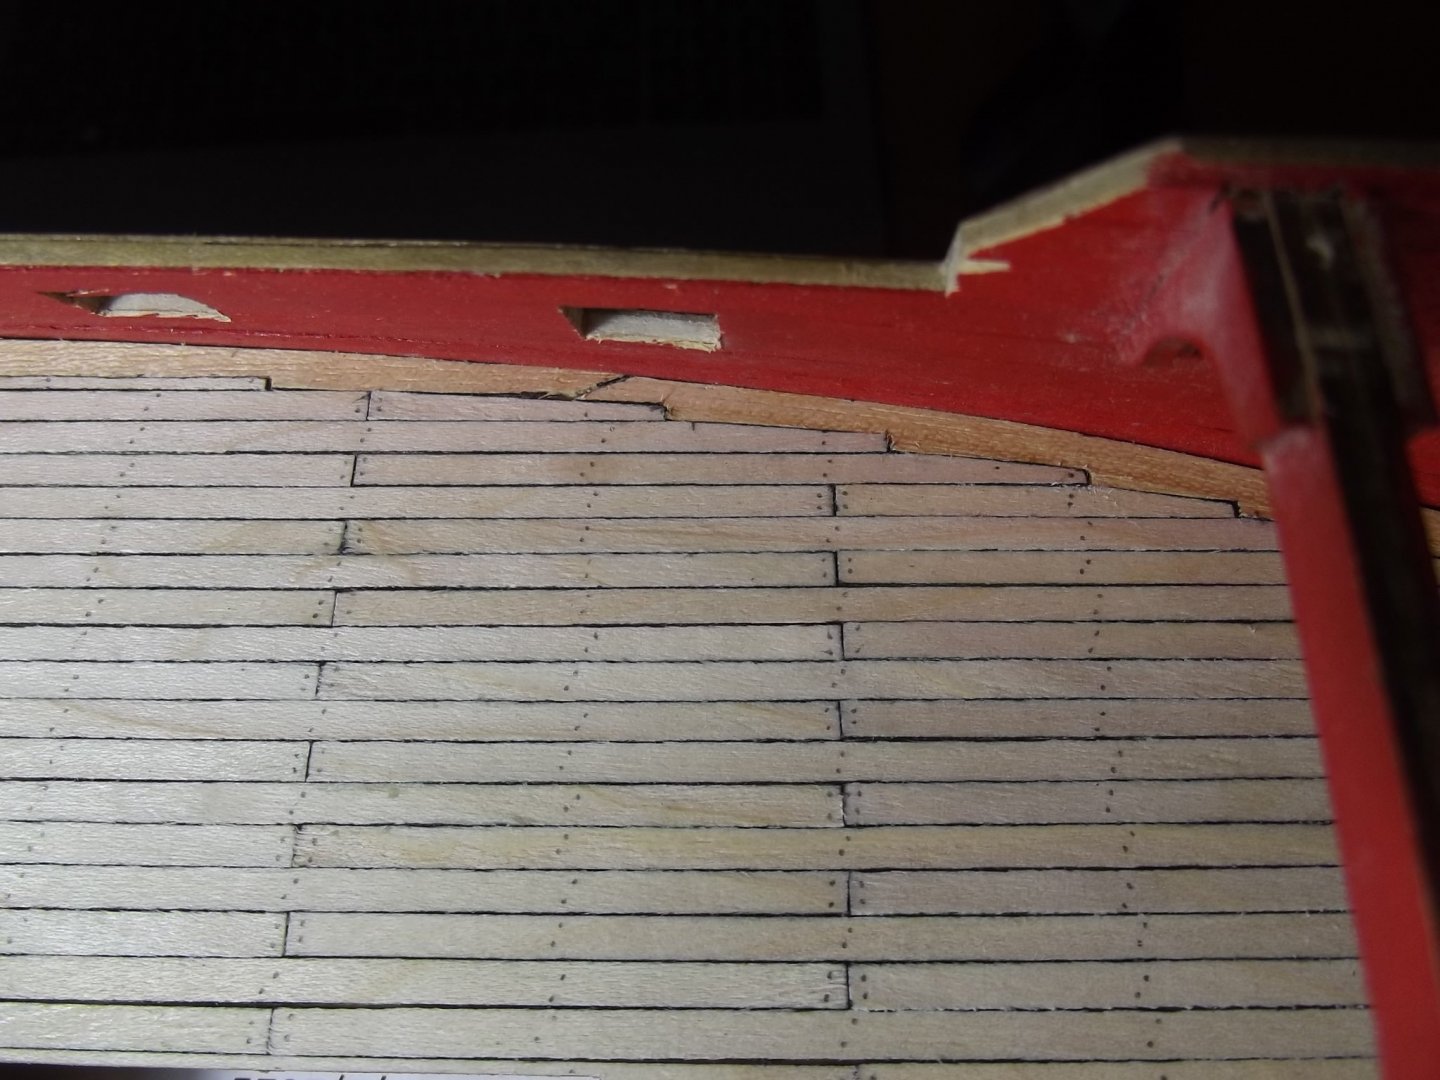
The waist deck has been planked. I'm happy to get that behind me because joggling the planks into the margin boards is always fiddly.
All that's left to do there is to scrape it with a sharp chisel.
- Keith Black, Blackreed, GrandpaPhil and 3 others
-
6
-
Keith, wives can be very helpful can't they, my ex used to do a lot of quilting and although she didn't make the sails for Bluenose II, the only static model I've put sails on, I knew the tricks needed like cutting on the bias from watching and learning and her machine had all the right attachments to make it easy right down to a foot that let me stitch the bolt ropes on easily.
The Australian govt has taken it slow and steady with the vaccine because we haven't been in dire need so it has been thoroughly tested and the Pfizer and Astrazeneca have both now received full approval and the shots will be starting soon. I believe we are making the Astra here as well.
-
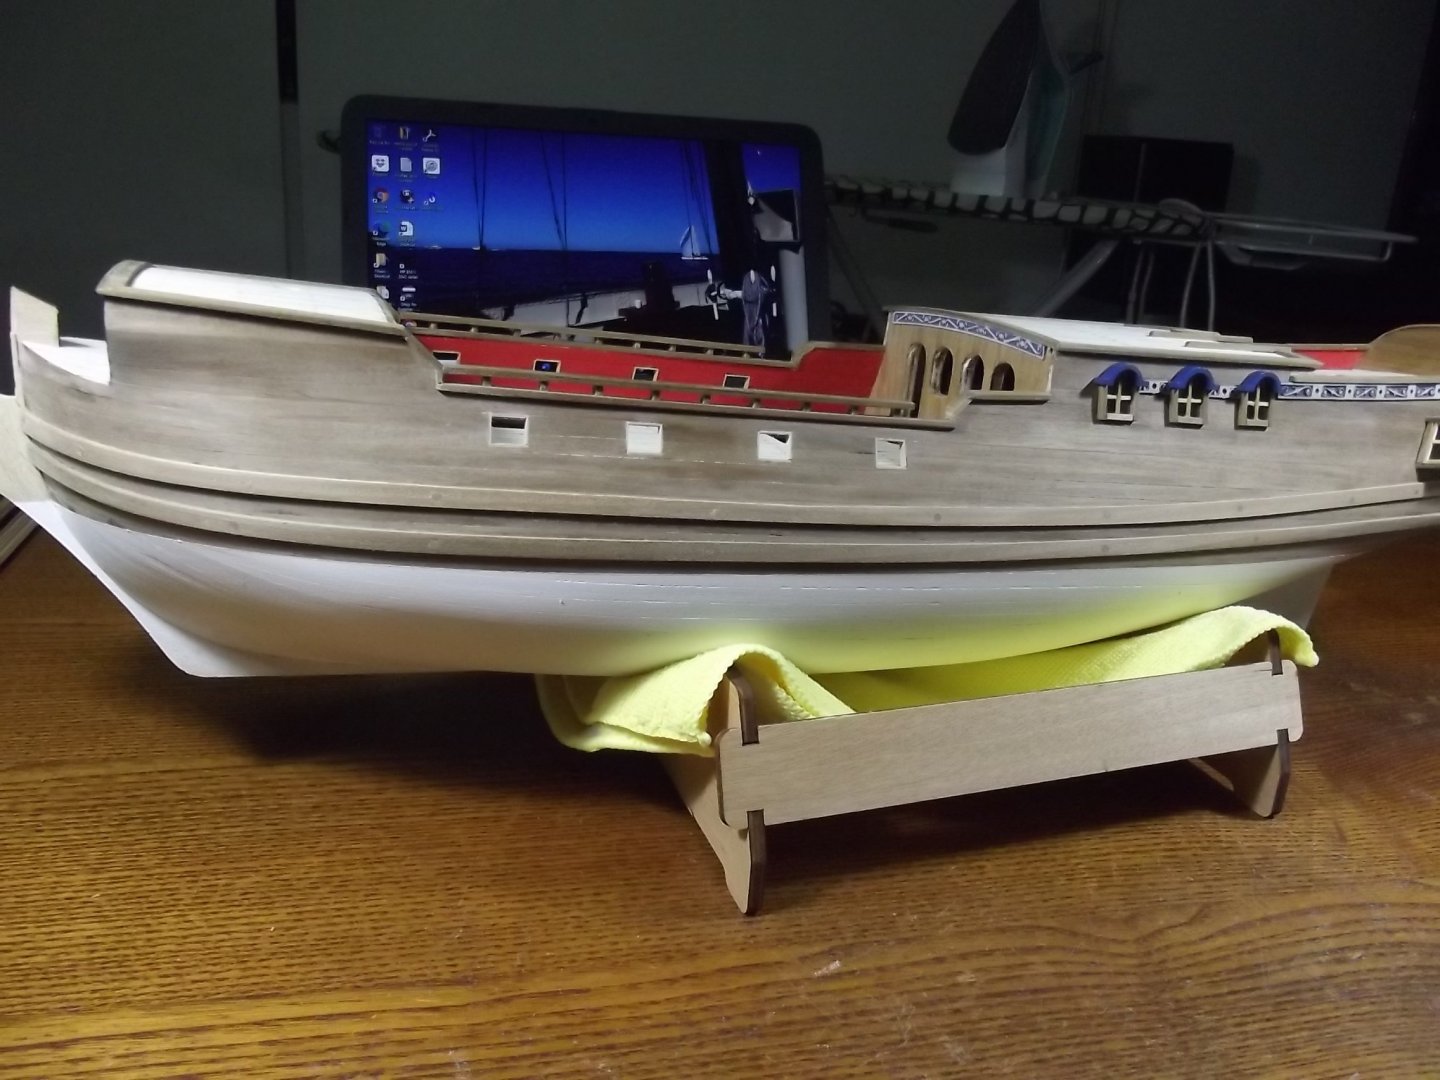
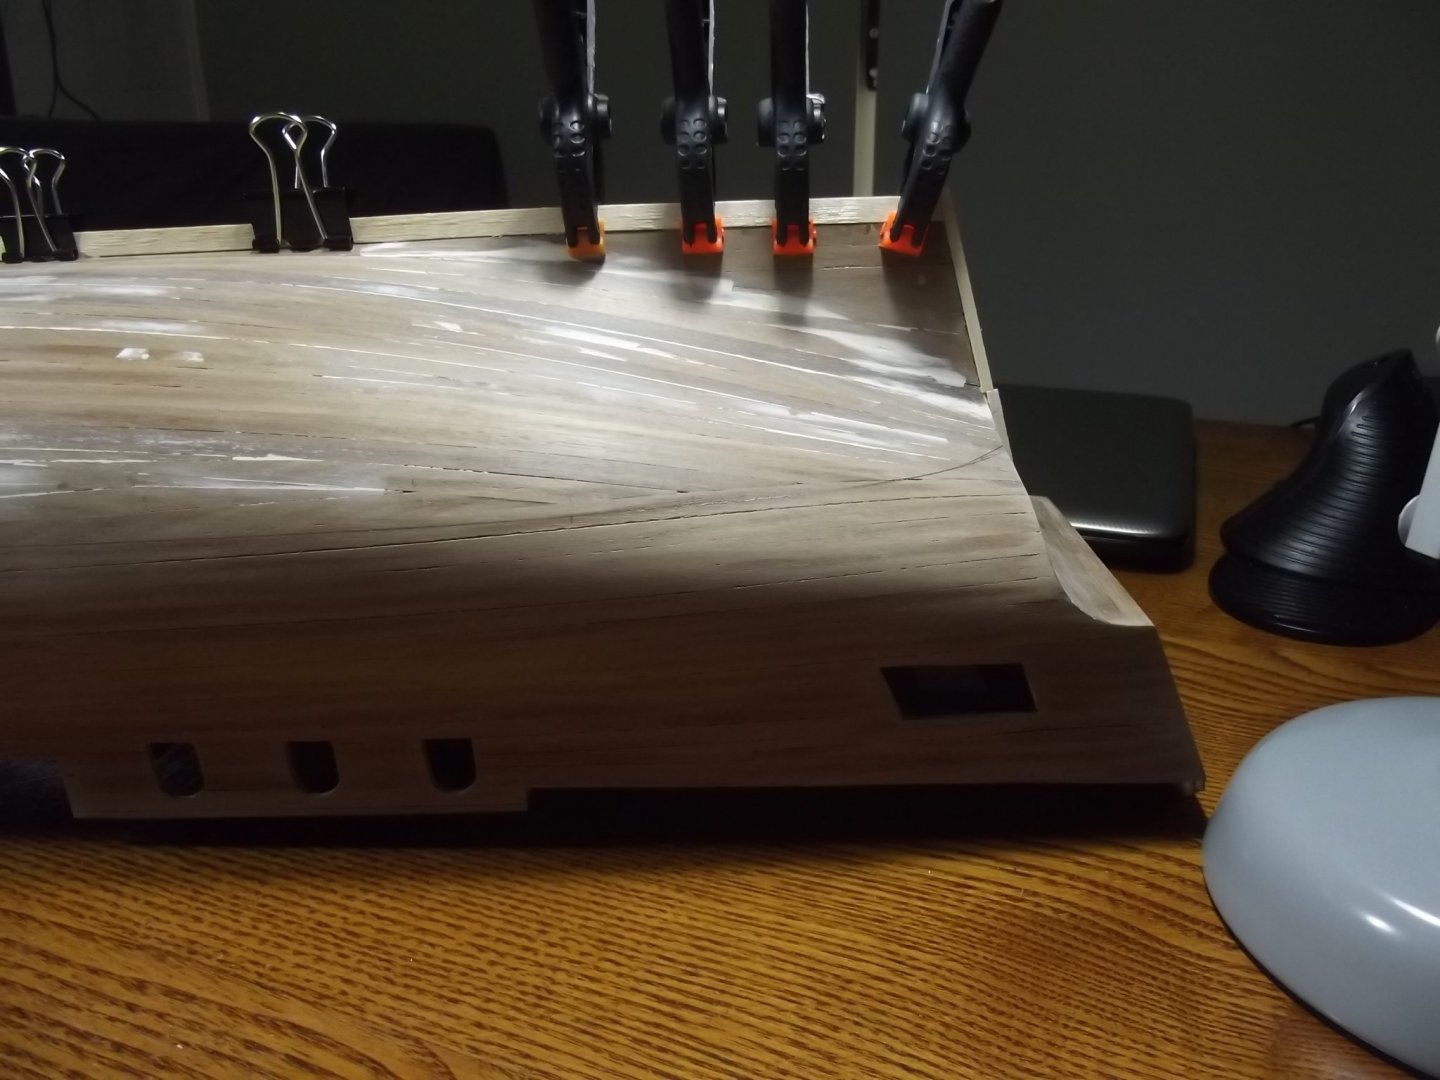
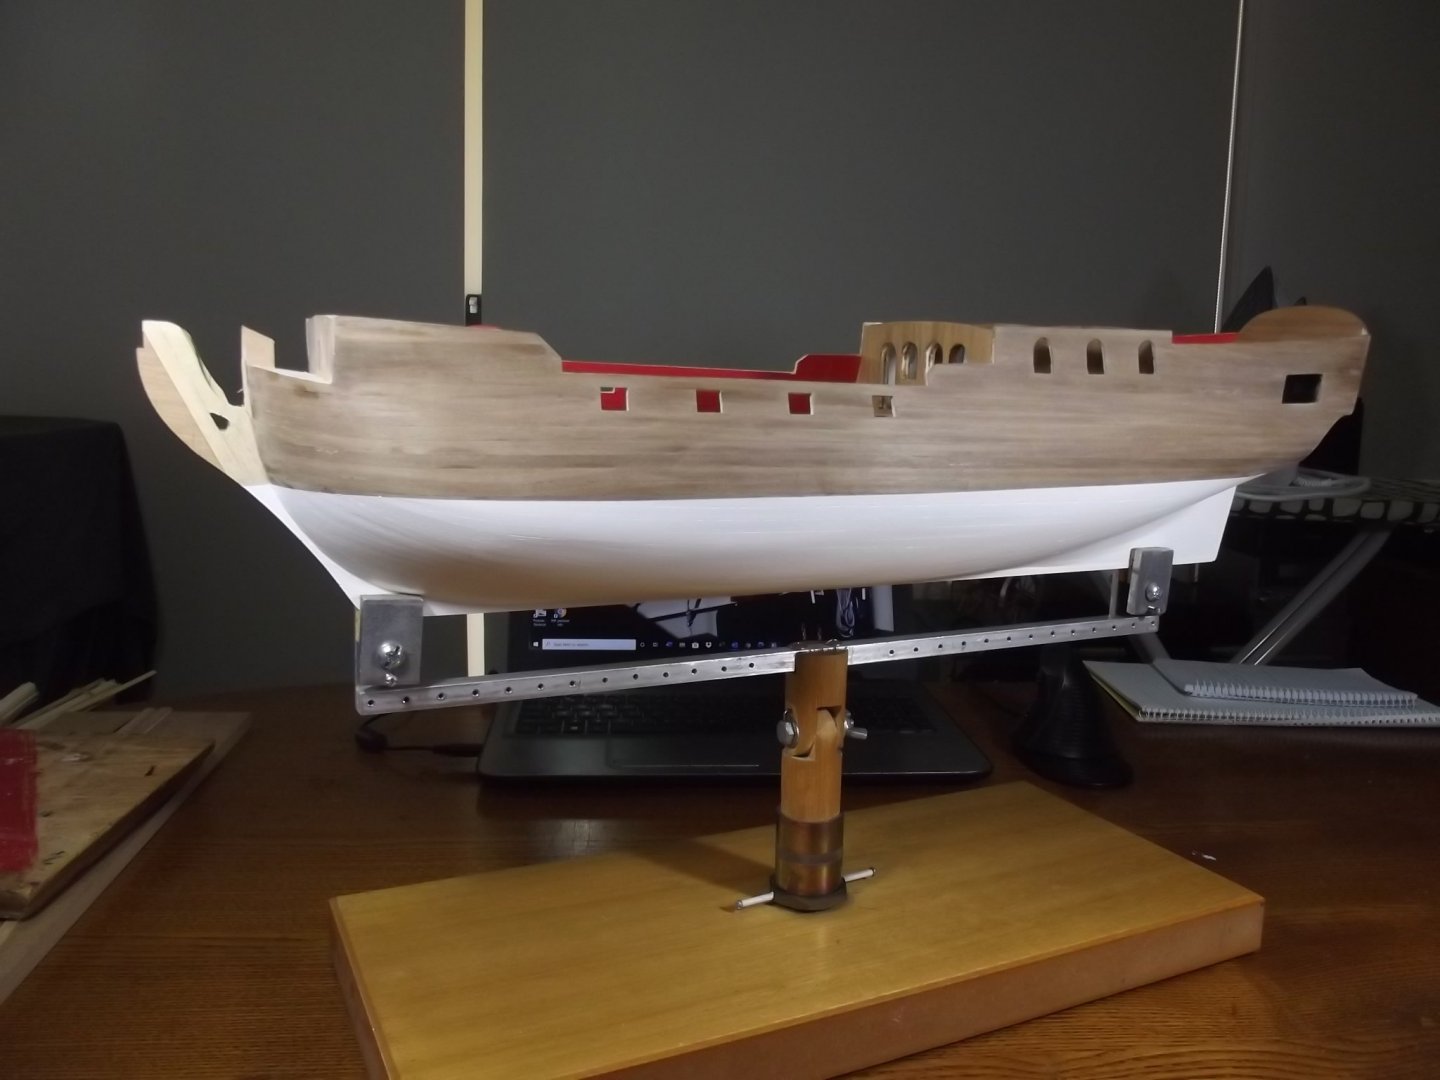
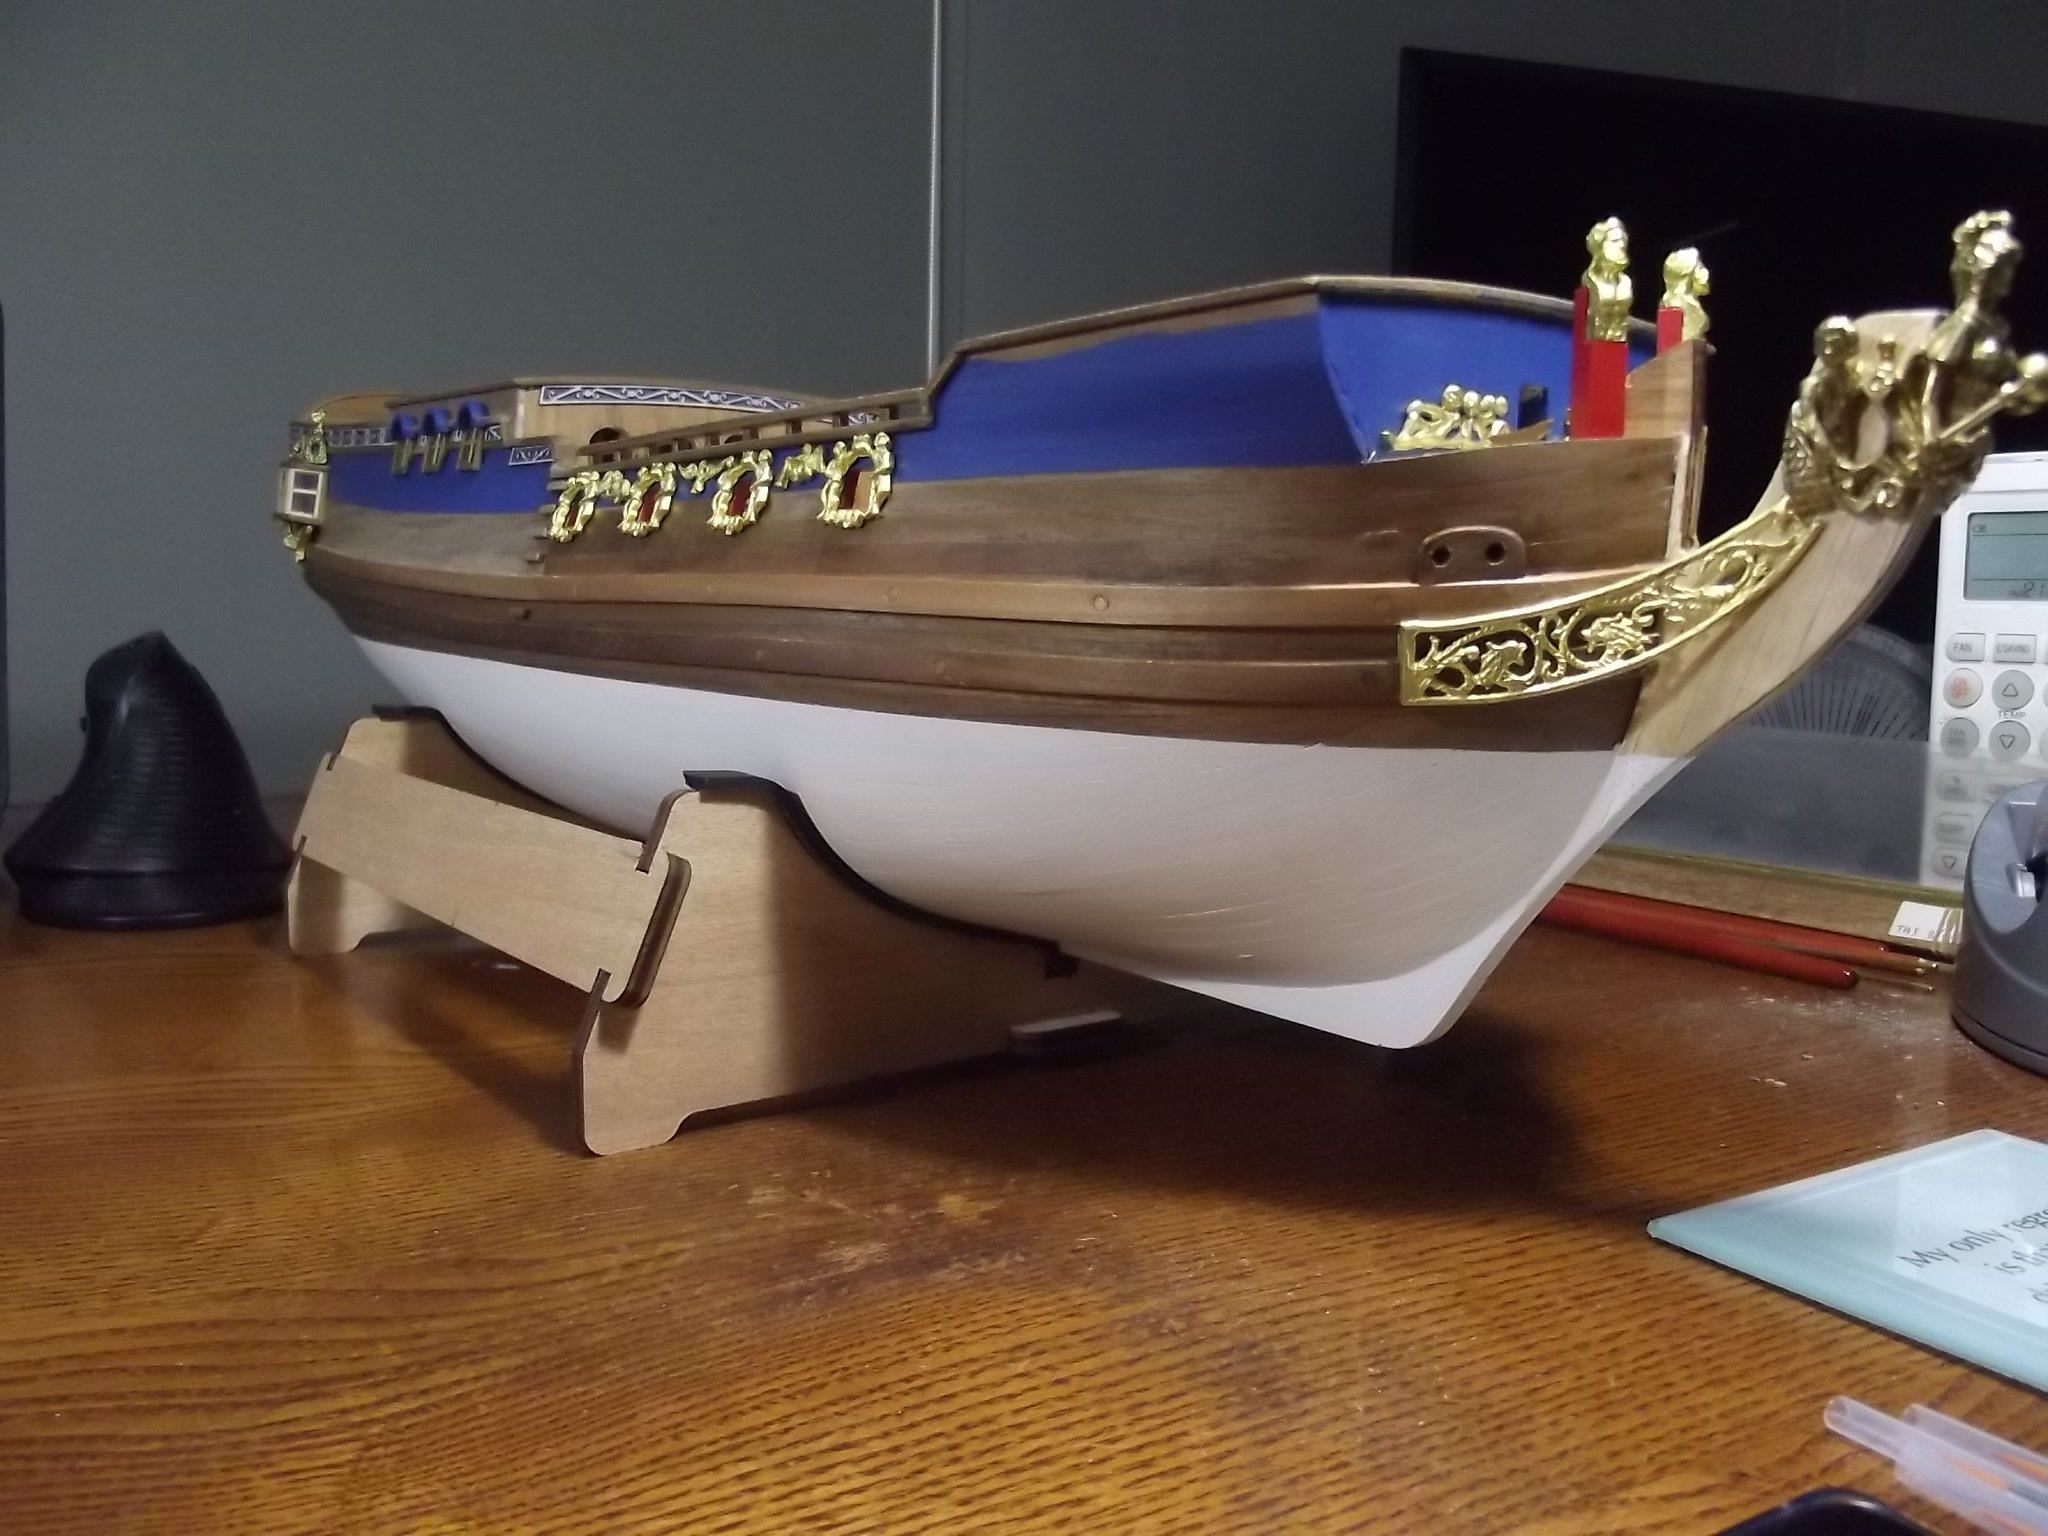
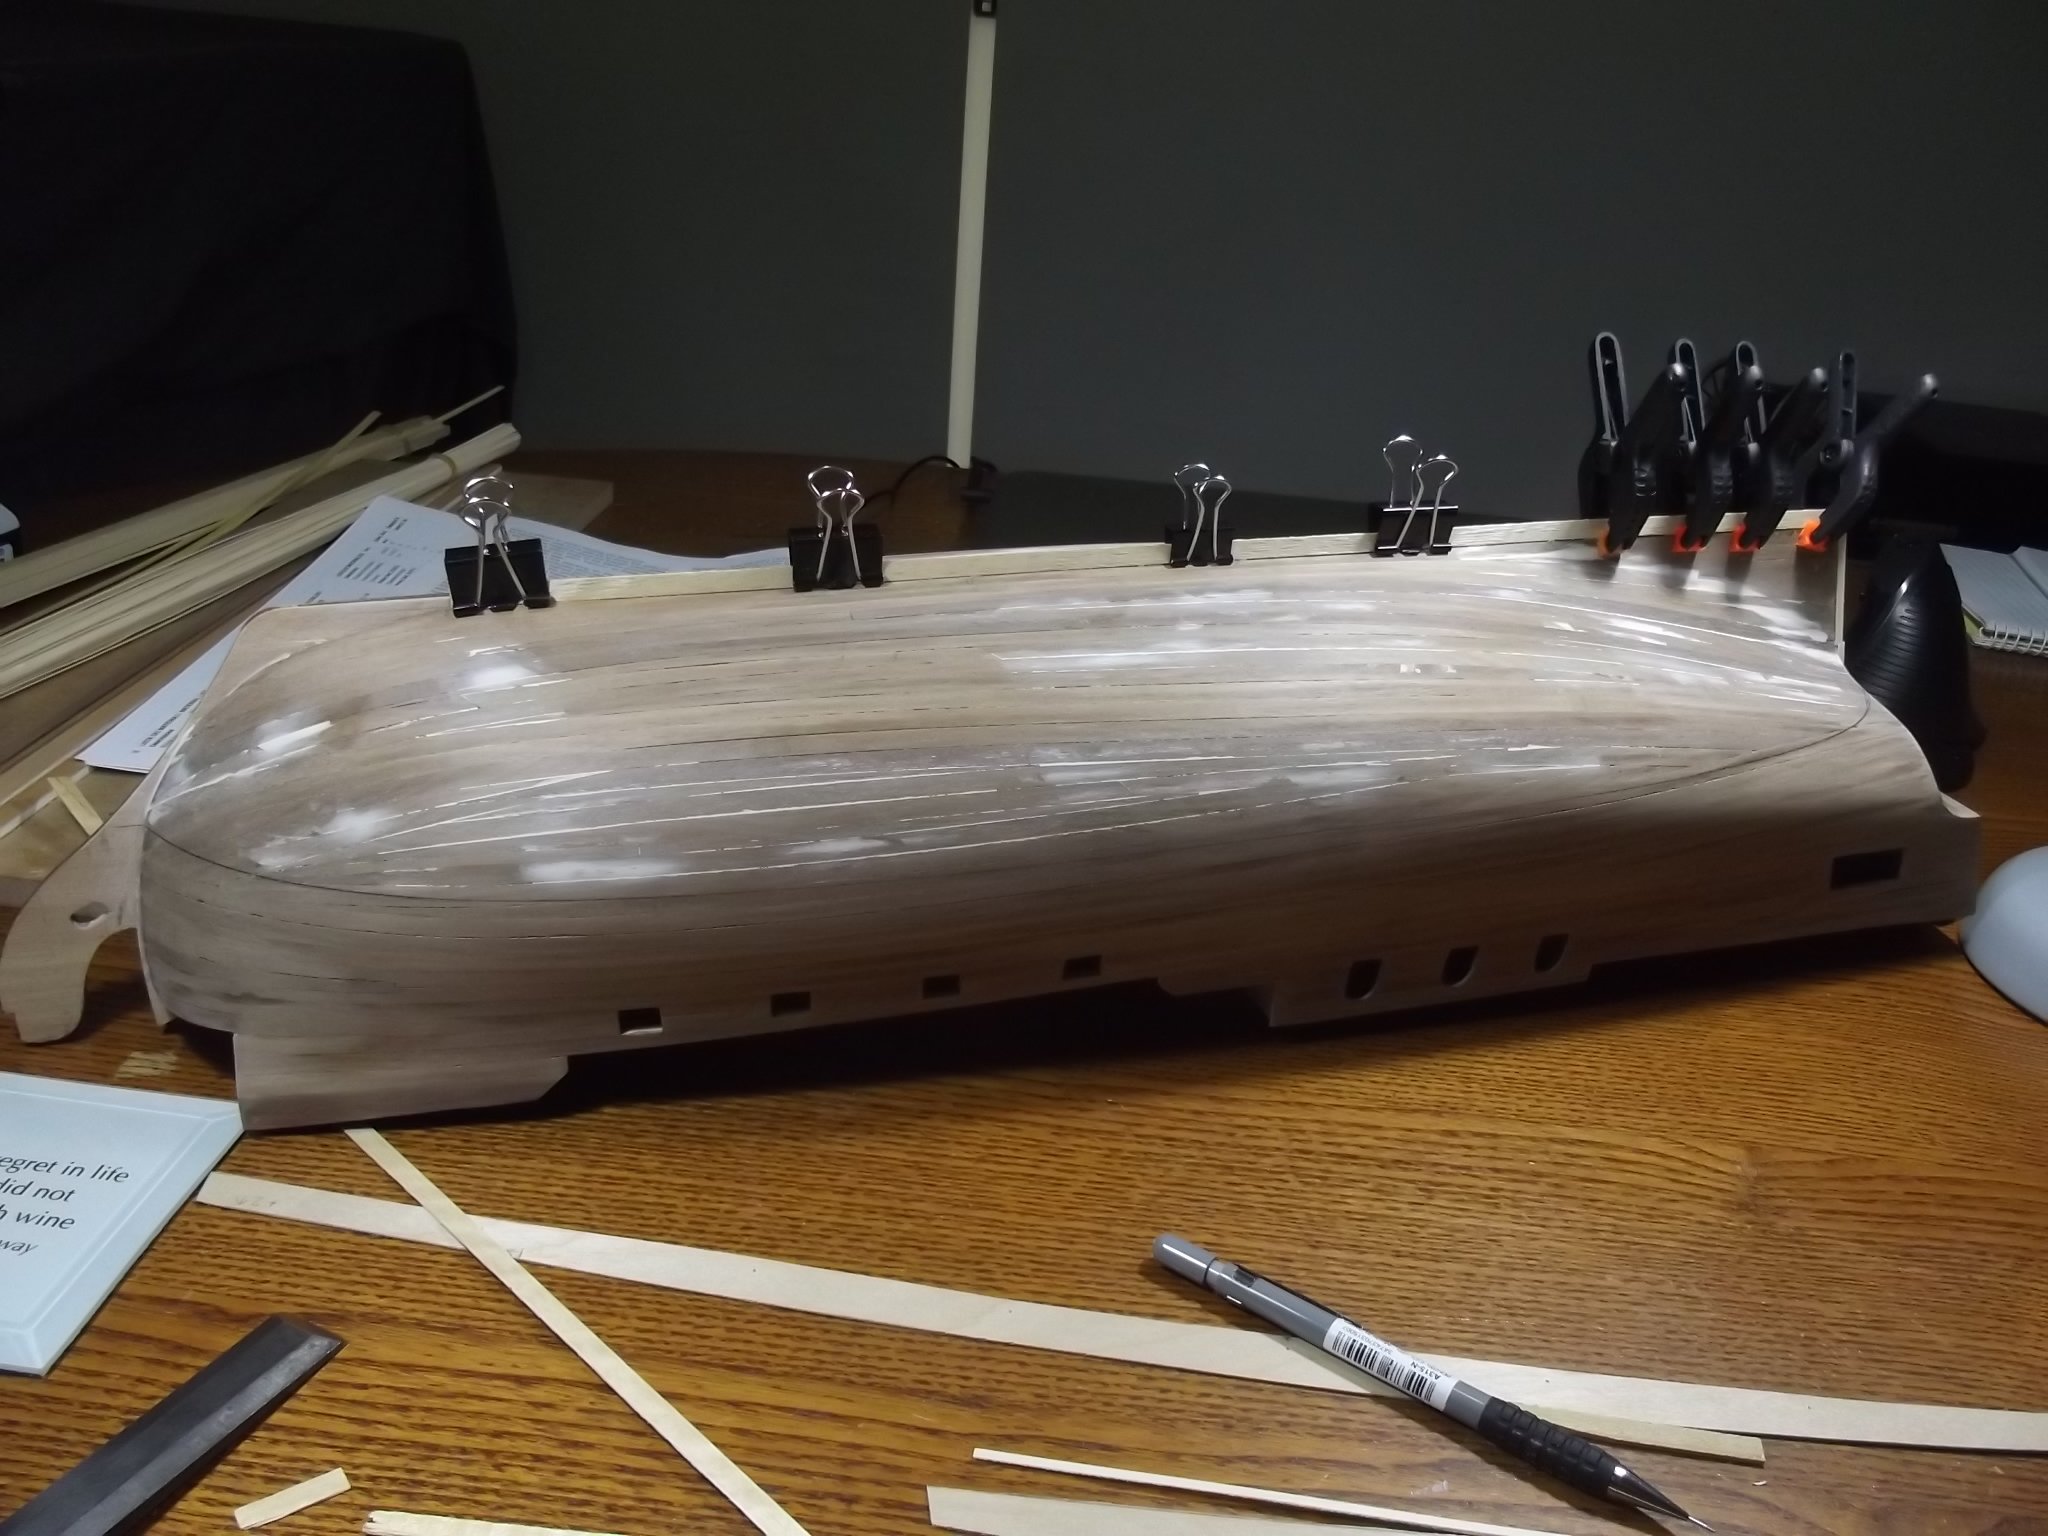
I've finished the second planking layer and it's looking really nice.
The kit didn't have anything to line the ply keel with which is disappointing because it would leave the edges of the planking proud which is just wrong so I lined it with left over deck planking wood from a larger scale model. It will be more accurate scale wise because at 1:48 scale the 4mm keel only comes out to 192mm which is way too thin for a keel on a ship this size, it's now scaled to 240mm which is still too thin but will have to do.

- Keith Black, michael mott, DelF and 4 others
-
7
-
Beautiful workmanship Valeriy
- FriedClams, mtaylor, lmagna and 3 others
-
6


Royal Caroline by Bedford - Panart - 1/48
in - Kit build logs for subjects built from 1501 - 1750
Posted
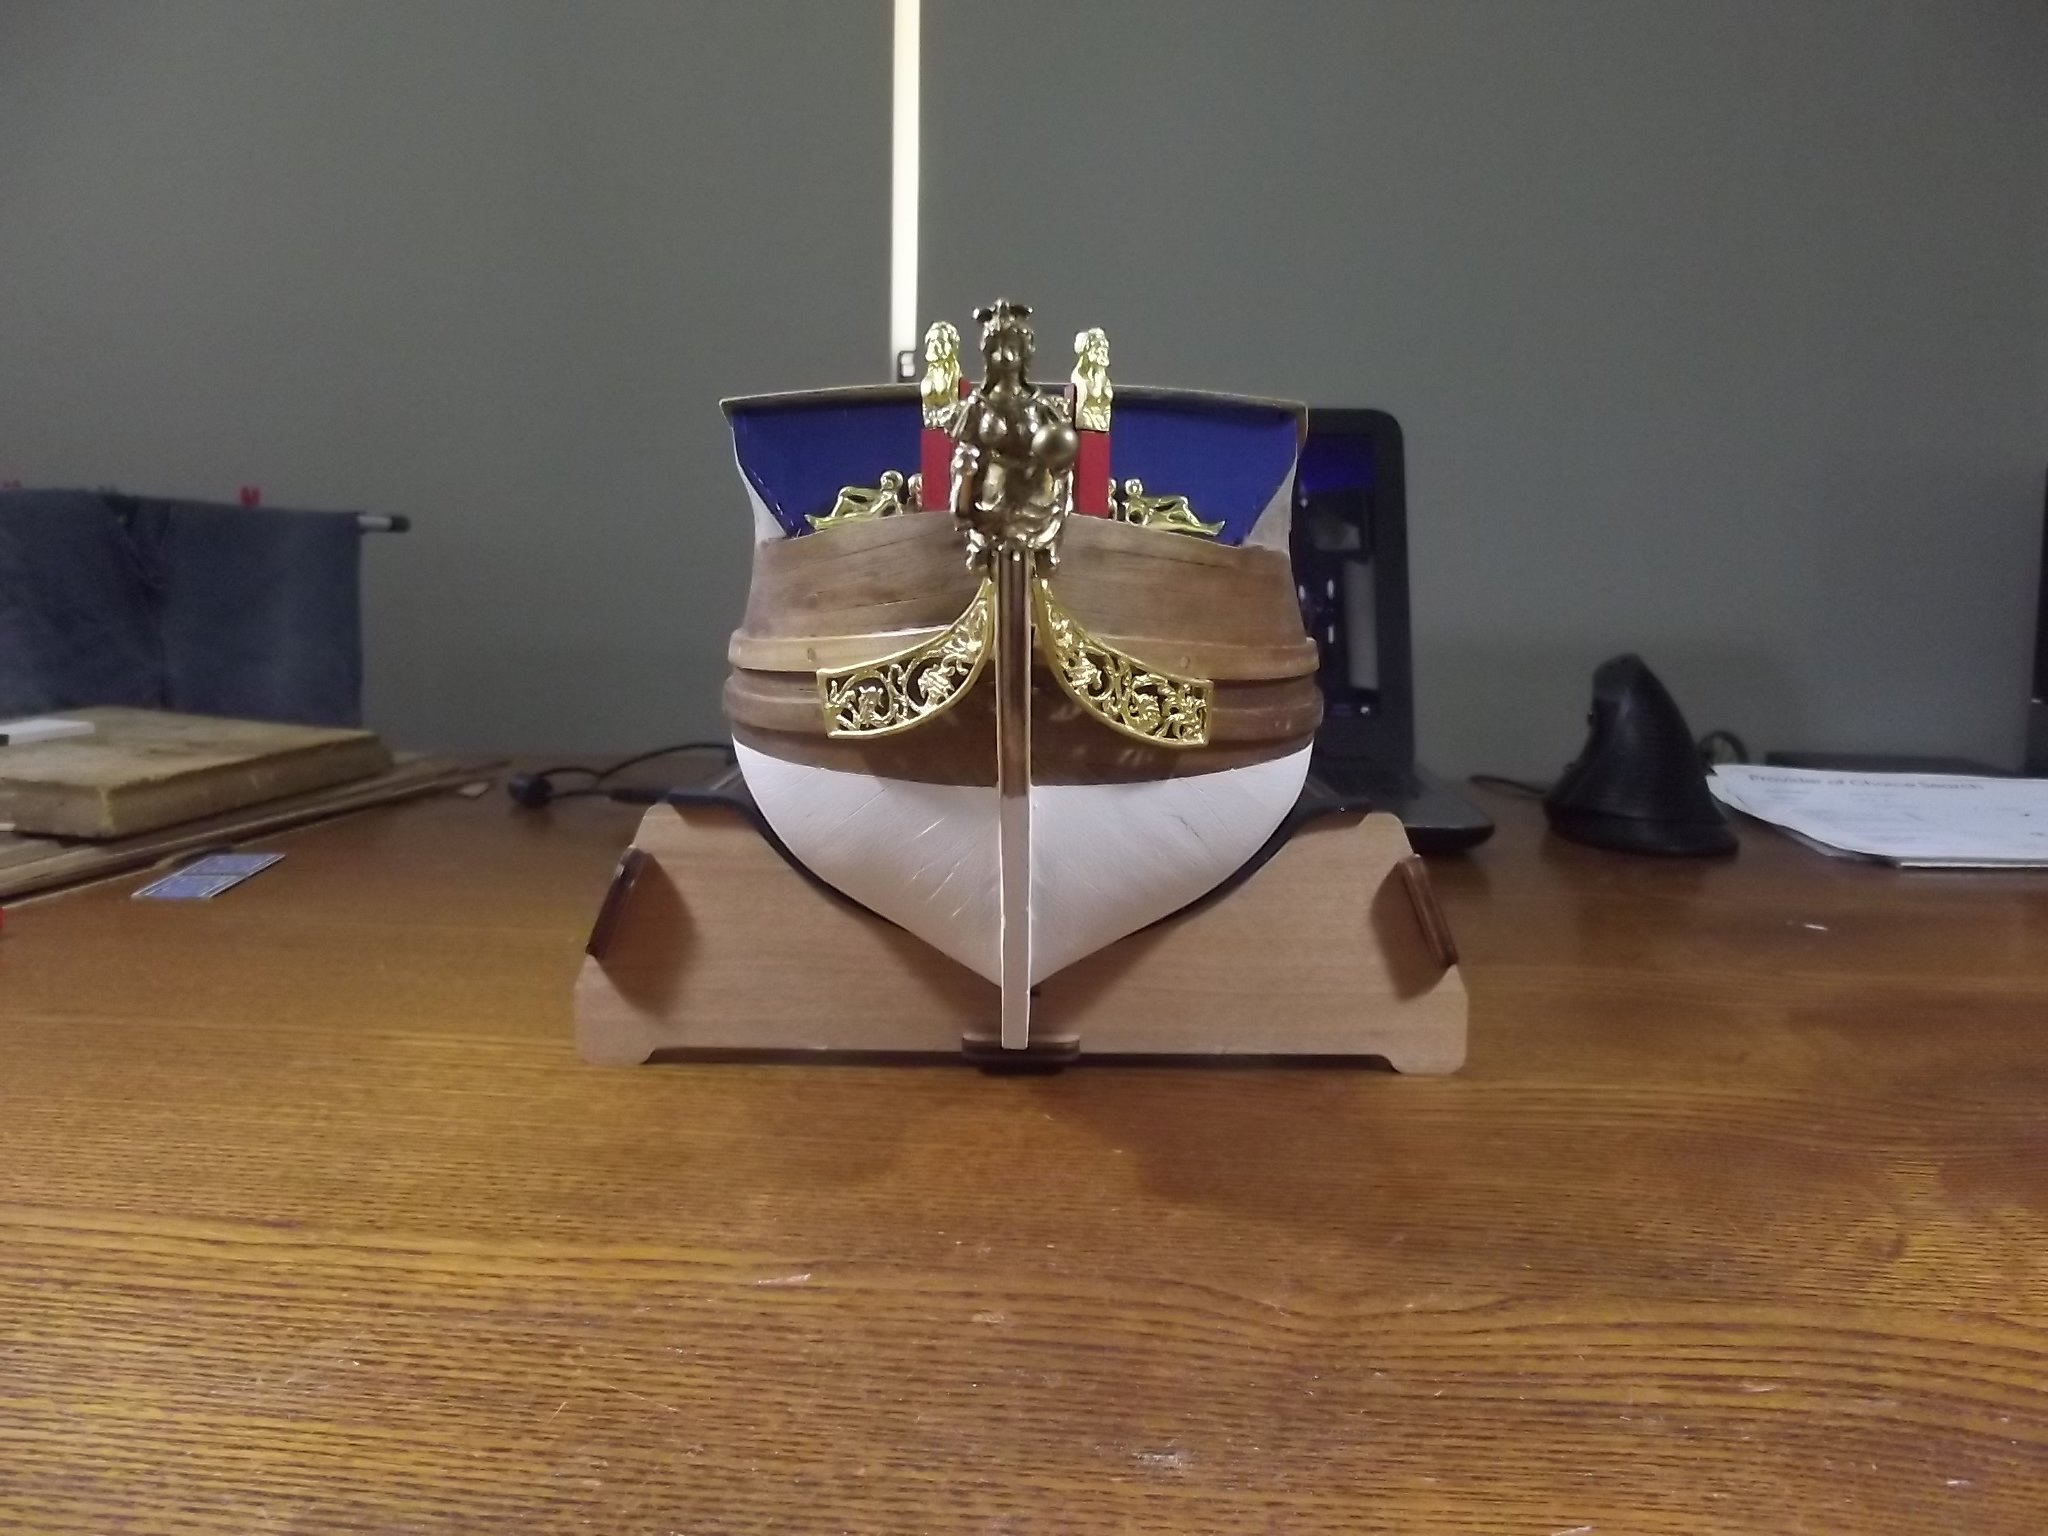
I've got the rudder hung now, not real happy with the chains hanging below waterline but that's where the plans put it.