

knightyo
-
Posts
531 -
Joined
-
Last visited
Content Type
Profiles
Forums
Gallery
Events
Everything posted by knightyo
-
 14k!?!? Well.... If anyone would still like one of these, I'll go ahead and build one with this level of detail for only 10k. Alan
 -
It looks like the decal is already on, thus too late for Mark to apply gloss coat to the model before application. Should he remove the decal and redo? Alan
-
This log was so much fun to watch, I didn't want it to end! Another outstanding model. Alan
-
I did the same thing with my Syren. The coppering allows us to practice planking, with all our errors being forgiven by the coppering! Alan
-
I wish we could have a little microphone in front of Greg right when he reads about this. lol.
-
Do you wear hearing aids by any chance or need to get them? I've needed them for years, and am finally going to get them (invisible, in-ear canal). Apparently, they can also be configured to receive input from the TV... Alan
-
HMS FLY by cafmodel - 1/48
knightyo replied to cafmodel's topic in - Build logs for subjects built 1751 - 1800
Wow! That is beautiful work. Alan -
Me too. That looked horrifying. Beautiful model, aviaamator! Alan
-
Grumman A-6 Intruder by Papa - Fujimi - PLASTIC
knightyo replied to Papa's topic in Non-ship/categorised builds
Should still be salvageable? Paint thinner? -
I live "close" to Mountain Home and love watching the flights come in. I'm also able to see a lot of A-10's since the National Guard base is also close by. Alan
-
Bell UH-1H Huey By lmagna - Dragon - 1/35 - PLASTIC
knightyo replied to lmagna's topic in Non-ship/categorised builds
Voila! That would be perfect for decal paper, once you did test prints on "normal" paper. If memory serves, I purchased a couple of sheets from my local hobby store (the sheets came in white or clear), and I was able to print them with my inkjet printer. It seems like a follow-up protective coating just needed to be applied afterwards so the ink didn't run. Alan -
Bell UH-1H Huey By lmagna - Dragon - 1/35 - PLASTIC
knightyo replied to lmagna's topic in Non-ship/categorised builds
Lou, maybe try your hand at printing your own decals? I remember doing this years ago, and it was pretty easy. Alan -
Beautiful metalwork! Alan
-
The vids work for me, and are a lot of fun to watch! Popeye, maybe use a different movie player? Alan
-
I'm in the same "boat". I'm not fond of this aging thing. Glass lenses then? Sigh... ok... Alan
-
I think natural looks best. Maybe with a wash applied? That would be an interesting experiment. Alan
- 1,784 replies
-
- 1
-

-
- winchelsea
- Syren Ship Model Company
- (and 1 more)
-
I've noticed a lot of art prints at exhibitions now have clear acrylic coatings "painted" on, so the piece looks like it was painted rather than printed. Would that add another layer of authenticity to the friezes, if the clear acrylic was painted over the shapes with a very small, fine brush? Alan
- 1,784 replies
-
- 2
-
-
- winchelsea
- Syren Ship Model Company
- (and 1 more)
-
Superb instructions, Chuck. That last post was a lot of fun to read/watch. Alan
- 1,784 replies
-
- 2
-
-
- winchelsea
- Syren Ship Model Company
- (and 1 more)
-
US Brig Syren by knightyo
knightyo replied to knightyo's topic in - Build logs for subjects built 1801 - 1850
Thanks! I'm eager to restart progress on this one. Now that it's been a few years, I can copy the techniques of the higher skilled builders who went before me. Alan -
It will really be fun to watch how you create them; I think I can visualize the method you described. Not having to solder anything is also definitely appealing. It's really going help a lot of builders to see both of these methods! Alan
- 1,784 replies
-
- 1
-
-
- winchelsea
- Syren Ship Model Company
- (and 1 more)
-
Oh my. That's exactly what I'm going to do. Beautiful. Thanks Dubz. Alan
- 1,784 replies
-
- 1
-
-
- winchelsea
- Syren Ship Model Company
- (and 1 more)
-
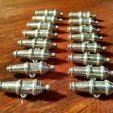
Gorgeous work as usual Chuck. Have you decided how you are going to approach the gunport hinges? "Real" blackened metal hinges and straps would really look nice. (I basically want to see how an expert does it, so I can copy the same method on my Syren) 😁 Alan
- 1,784 replies
-
- 1
-
-
- winchelsea
- Syren Ship Model Company
- (and 1 more)
-
This is really an excellent point, and I think is probably why most people don't even try to take on a project of this nature. I think I have the same amount of free time that you do, Beckmann. Chuck, those templates look great! Alan
- 1,784 replies
-
- 4
-
-
- winchelsea
- Syren Ship Model Company
- (and 1 more)