mtaylor
-
Posts
26,273 -
Joined
-
Last visited
Content Type
Profiles
Forums
Gallery
Events
Everything posted by mtaylor
-
Sweet work, JCT. Looks super nice. I hope you will put her in a case. BTW, I love that jig for the ratlines when you're tying near the top.
-
Have you gone back to the topic that you posted on this before? There's answers to your question there. https://modelshipworld.com/topic/21147-blue-jacket-revenue-cutter/
-
The catch is, we moderators don't know if they've been abandoned. We've had builders who have had to stop due to family things and then one, two, three years later come back. No gold stars. We're pretty much non-judgement here as we have builders from super expert to beginners. As for searching... the downloadable indexes work well and will tell you which builds are "completed".
-
-
Proxxon jigsaw or a scroll saw
mtaylor replied to Edwardkenway's topic in Modeling tools and Workshop Equipment
I'll add one... There's more than couple excellent scratch builds on MSW where only hand tools were used. Could be money or perhaps they like the feel and ambience of working wood by hand. And some of us have power tools for the heavy work and then hand tools for the precision work. -
kit review 1:35 Viking Longship – 11th Century - Dusek Ship Kits
mtaylor replied to James H's topic in REVIEWS: Model kits
Looks like an interesting model. 60 to 100 warriors on it and with several, one see why the Celts would have this prayer: "“From the fury of the Northmen, O Lord deliver us.” -
Don't feel bad about the scroll saw, Denis. I use one also for when I don't want to use laser or for work that is too big for the laser.
-
Thanks for the likes. Pat, ribands are on the menu of "must do". Luckily, I had ordered more plywood last week as I suspected that if I didn't, Murphy would run amok and he did. Somehow, I had two sets of CAD drawings instead of one original and one copy to be transferred to the laptop running the cutter. <double facepalm time). Which means that many of frames were cut with the wrong CAD drawings. Steps have been taken to ensure this doesn't happen again: a good self flogging and a temporary reduction in the rum ration. Any way, when the wood gets here, I'll recut the frames that need cutting, make extra ribs (especially for the bow) and also sort out adding new ones to replace the 6-7 I have to remove for the gunports. I'm probably going to use a mixture if filler woods below the deck line such as balsa and basswood and possibly some much of scrap plywood to align the bulkheads and also strengthen and straighten the false keel. Now to be patient waiting for the plywood to arrive from Maine.
-
-
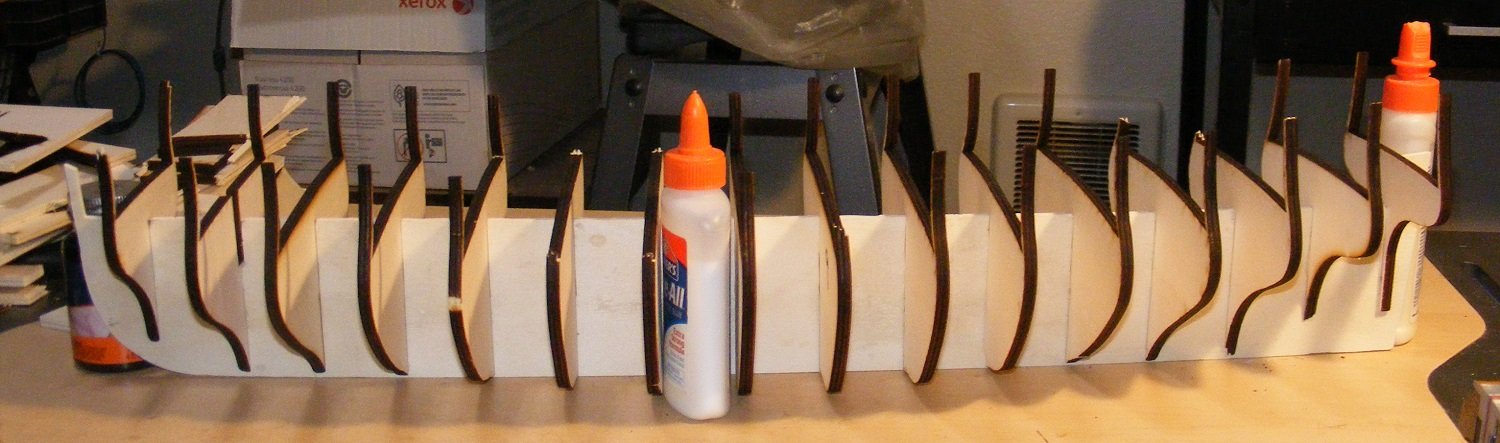
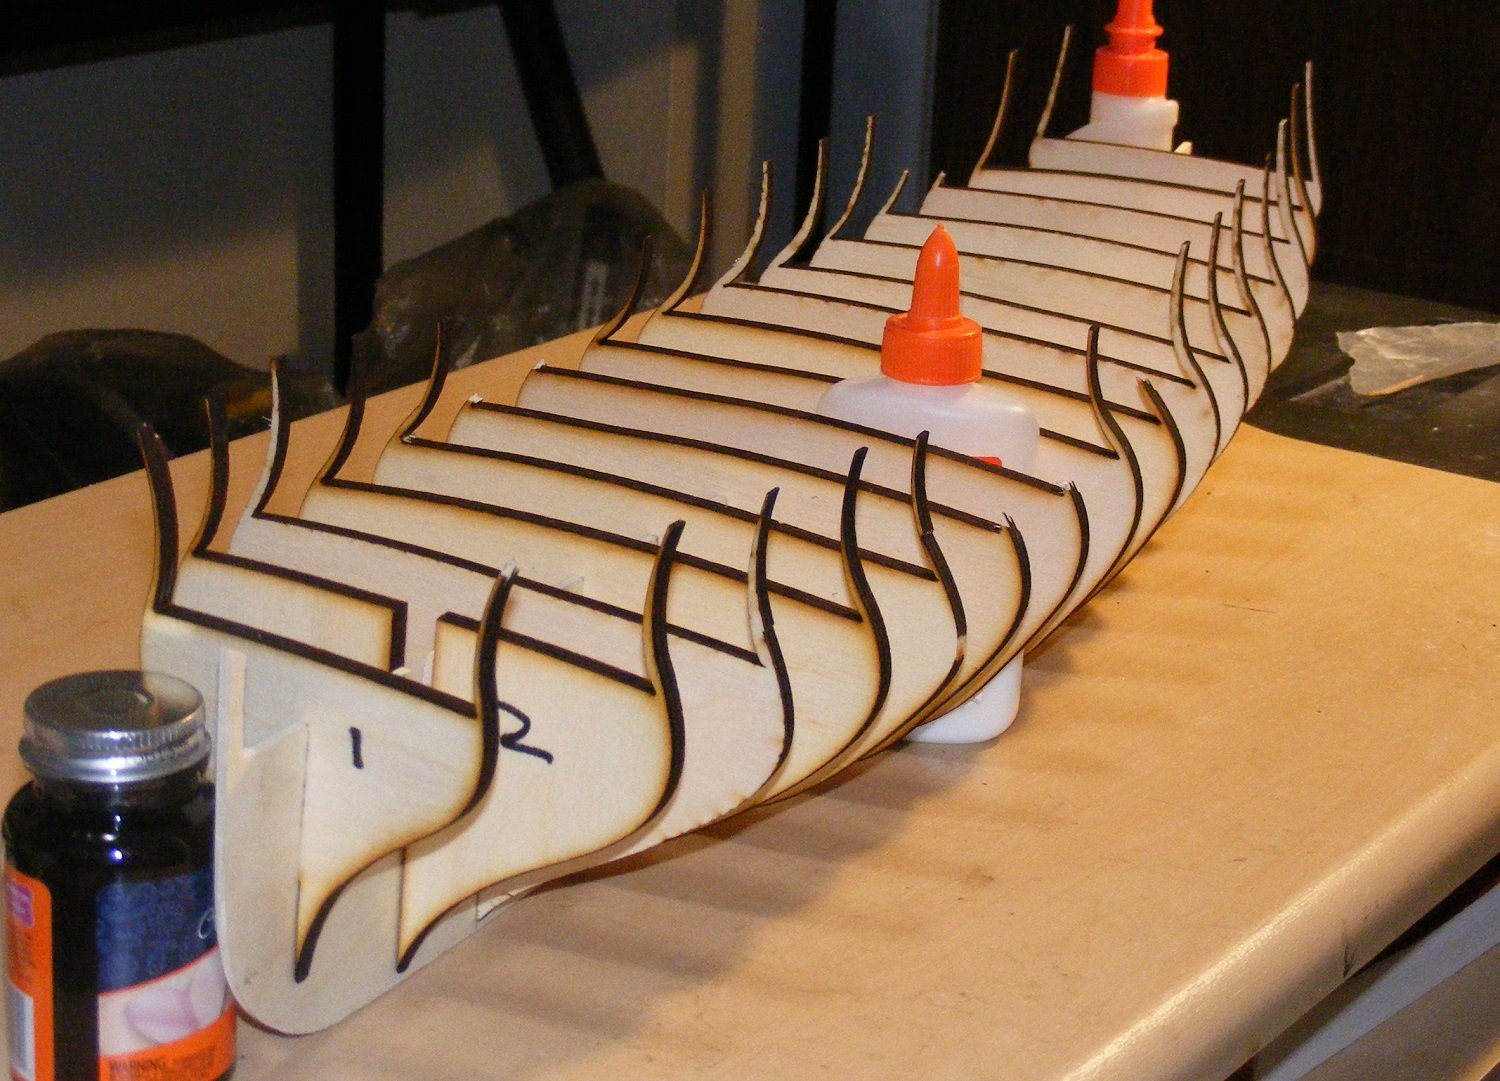
Update, finally. I've managed to do the false keel in one piece. Thank heavens for small favors on that one. I've also cut out the all bulkheads, managed to make the keel, stem, and sternpost. In the photos, are the false keel with the bulkheads simply fitted. I'm having a few "minor" issues with the framing bits breaking off but I'm working on a solution. As it is, 6 maybe 7 need to come off anyway due to being in the way of the gunports. I will say that I'm glad I'm doing her in 1:48 but 1:64. She's still a big girl. As for the framing bits breaking, I think I had too much "heat" with the laser and I've have some ideas which is the next couple of days project. I do need to cut "false" frame ends because like pointed out, many will get off for the ports especially the forward 6 bulkheads. I'll either cut new bulkheads (after modifying the framing bits or fix what I have. I'm hoping fixing works better rather than having to order more wood. Anyway, here's photos. So until next time...


-
Yves, If you can take the shafts apart, maybe sliding some shrink tube over them and couplers will work She's looking very good and very real.
-
-
Hi Michael, Pontiachedmark had some really good advice. Definitely a build log will help with your ships.
-
Don't feel bad. This project was my first scratch build also. Well.. actually I did a 1:24 cannon first, but I digress. I remember redoing the frames. As I recall, I did the first one about 3 times... then started the next one. I think by the time I was happy with all frames I could have built several models from the throw aways.
- 94 replies
-
- 2
-

-
- Triton
- first attempt
- (and 1 more)
-
gun ports
mtaylor replied to Anthony Hearne's topic in Building, Framing, Planking and plating a ships hull and deck
Being a Corel kit and based on the instructions that Anthony has.... best bet without a lot work is just build it as the kit shows. But then again, I like bashing kits. -
Wonderful workshop and that view is great!
-
Thanks for all the recommendations. I like Allan's idea and if I have cut anything bigger than I can laser, I'll give that try. I ended up with a small can of "Spray Mount" from Scotch brand after speaking with the sale person at the local office supply house. It's holding fine and when I'm done, a bit acetone should clean the wood up nicely for gluing bulkheads, etc. I think this is the only time I'll have to use it as I can laser the bulkheads (whew!) as I'm not the best scroll saw operator.
-
While it is a good reference, one must check for dates and nationality as things changed and varied by country (including the duties and numbers of the gun crew) over time. But overall, it's a good document and can help understand how the guns were manned and served. Thanks for posting this Phil. I'll bookmark for future reference.
-
Thanks for that Daniel. The ANCRE monographs all show the dual training tackles and eyebolts on the rear. I'll have to note the change on my Belle Poule plans.
-
-
Thanks Kurt. I'll give myself a facepalm for not searching first. And maybe a 10 minute out time in the corner.
-
Does the glue stick leave a residue? I think that last time I used glue for the plans, I used acetone as wipe to remove it.
-
Dave, How heavy will the booth be? I'd be worried about it being top heavy and easily knocked over.
-
I'd say not nylon. Find the smallest (thinnest) cotten thread you can. Try a sewing shop.