mtaylor
-
Posts
26,273 -
Joined
-
Last visited
Content Type
Profiles
Forums
Gallery
Events
Everything posted by mtaylor
-
Hobbyzone building slip for wooden ship models
mtaylor replied to aydingocer's topic in Modeling tools and Workshop Equipment
Varnish won't hurt. But give some thought to a good waxing, perhaps car wax or a paste wax for wood. -
Bending Trim planks.
mtaylor replied to Ed Meyer's topic in Building, Framing, Planking and plating a ships hull and deck
Ed, Either of those two methods should have worked although the thickness is probably an issue. They may need more soaking time as you didn't specify soaking time or the wood type. -
I'm not sure anything acidic is good to use unless the wood is washed or the acid neutralized. I've heard of sails colored in tea/coffee being eaten in a few years so I'd think the same would apply to wood but over a longer time frame. This would apply to vinegar also. I might be wrong and if I someone knows different, let me know and I'll delete this post.
-
I don't know if the Brits changed the ship name on the ship or only for "paperwork" purposes. But.. both sides were known to carry "extra" flags of other nation's navies. Sort of an early stealth attempt that was often quite successful. All sides many times did not have a flag flying at sea and then raised one as appropriate.
-
Thanks for the comments and the "likes"... I'm using 400 grit at the lowest speed (2000 rpm) plus, if I put too much pressure on the tool, it stops spinning. Speed wasn't my issue, it's getting to the darn things and this seems to be working. Thanks Dan. I'll look into them although I've never used them. Might be useful for the next project as a bit late for this one. Hmmm just looked.. .9" wide. A bit too wide for the space I have to work in.
-
Derek, I think it looks pretty good from here. If you have some scrap wood, mock up a deck section with a gunport and put into position. BTW, if you do the mock up, it makes a great jig for working on the gun rigging.
-
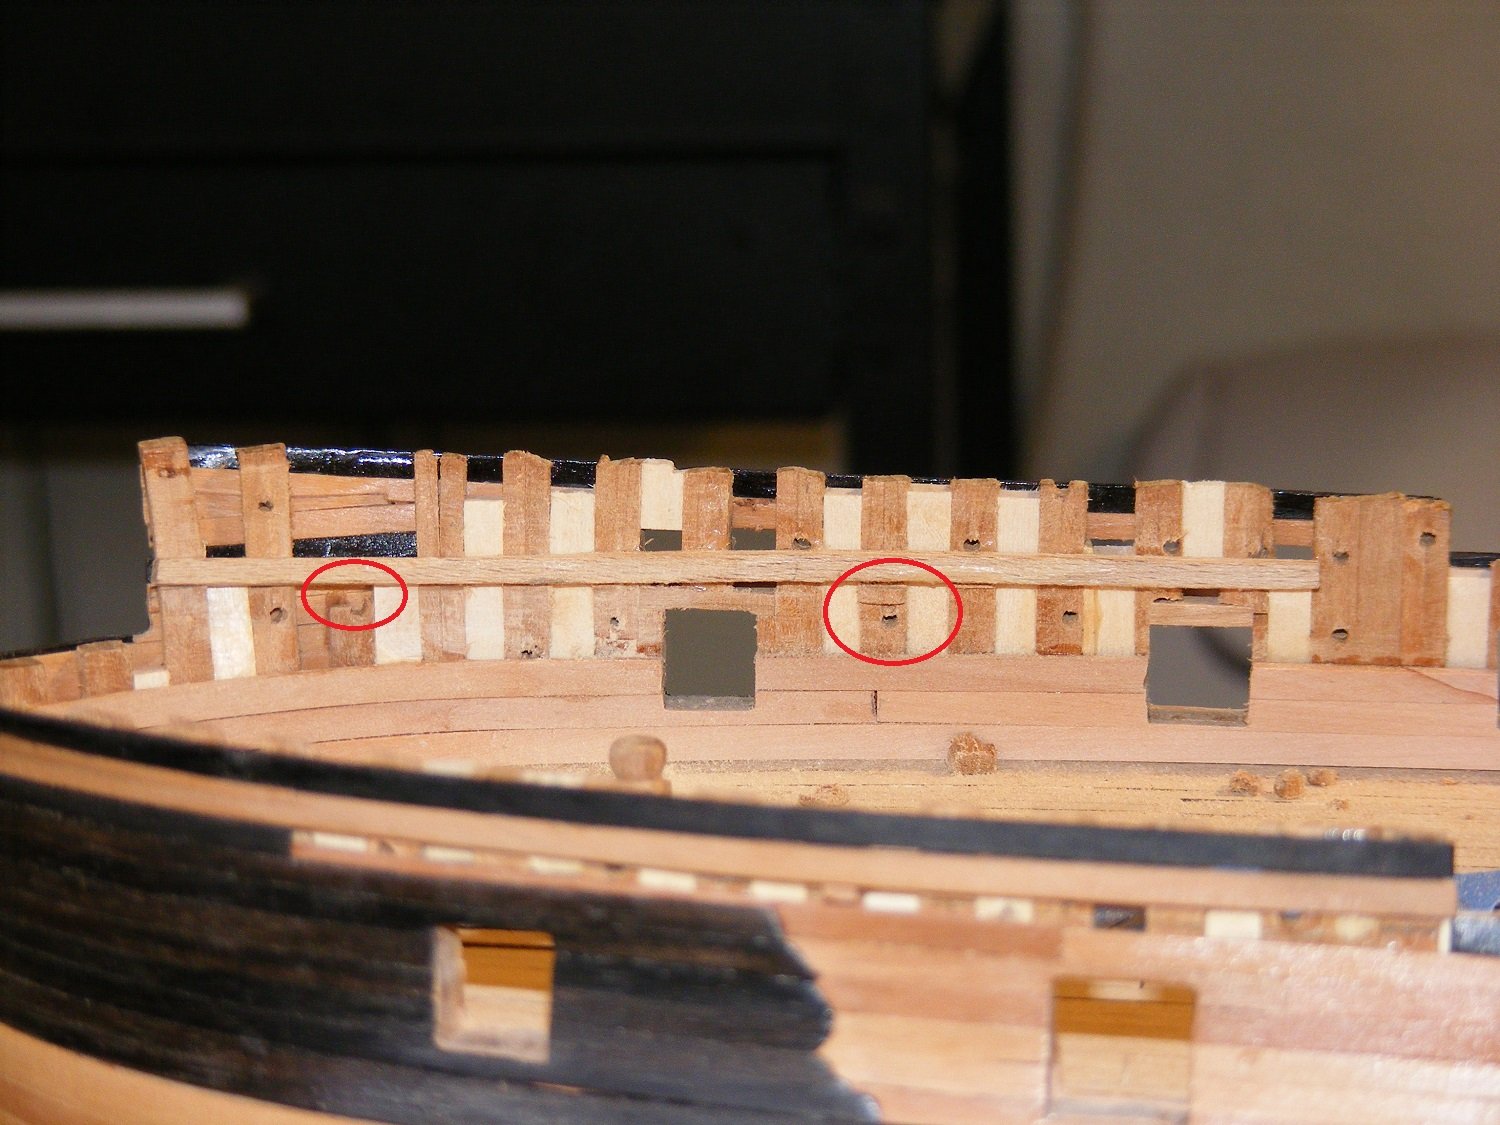
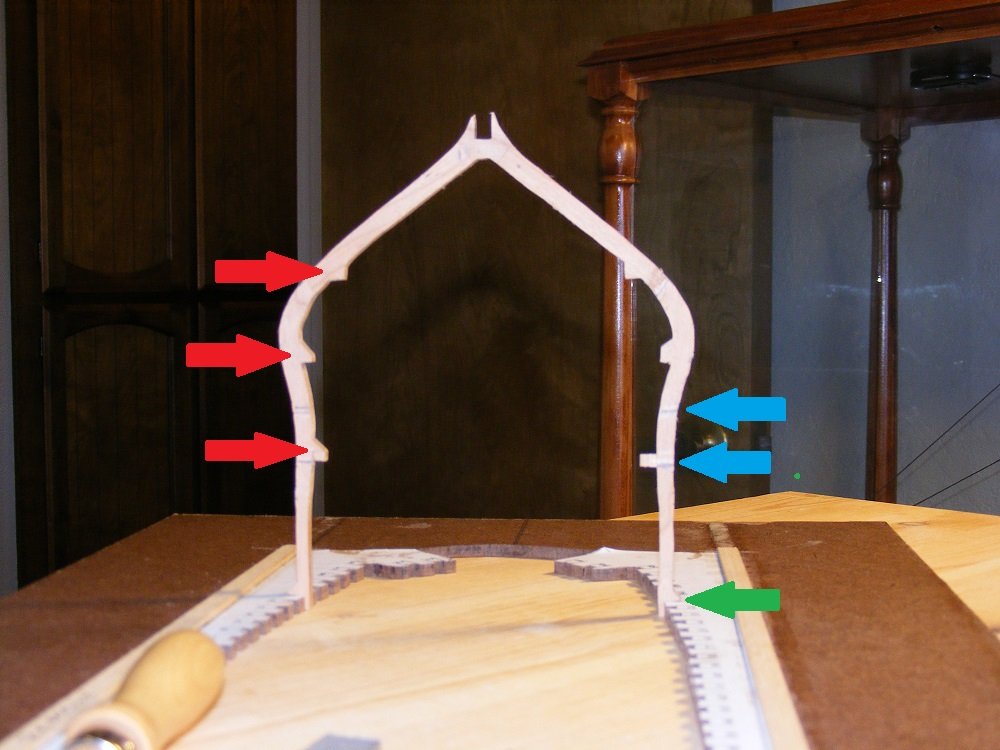
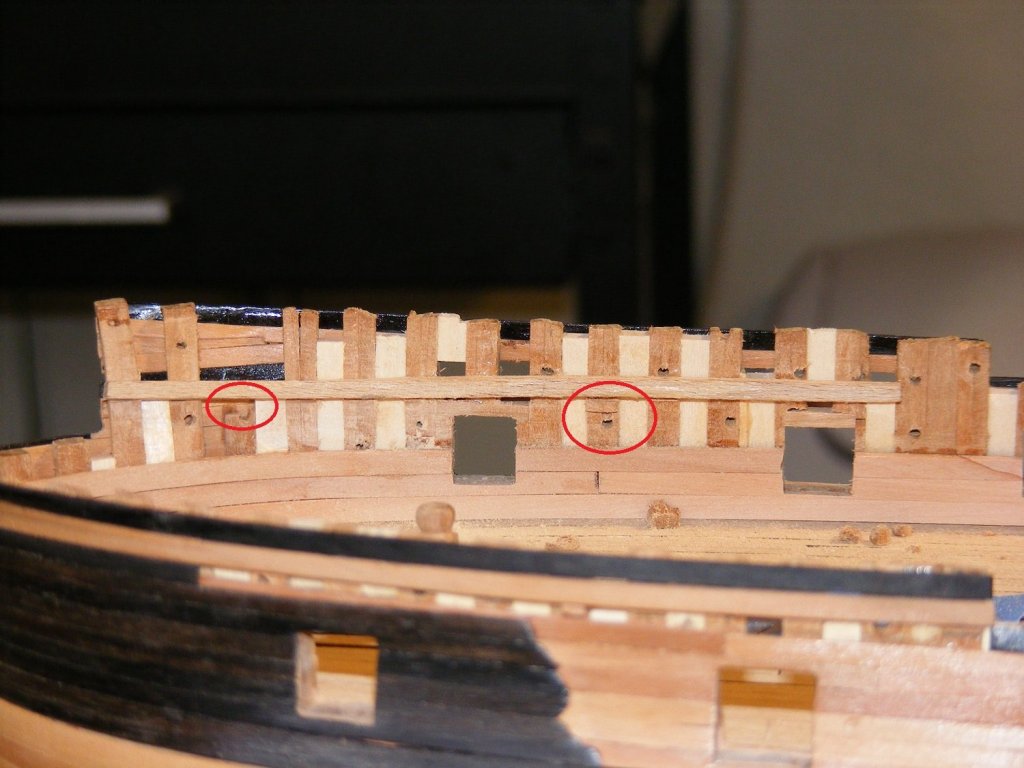
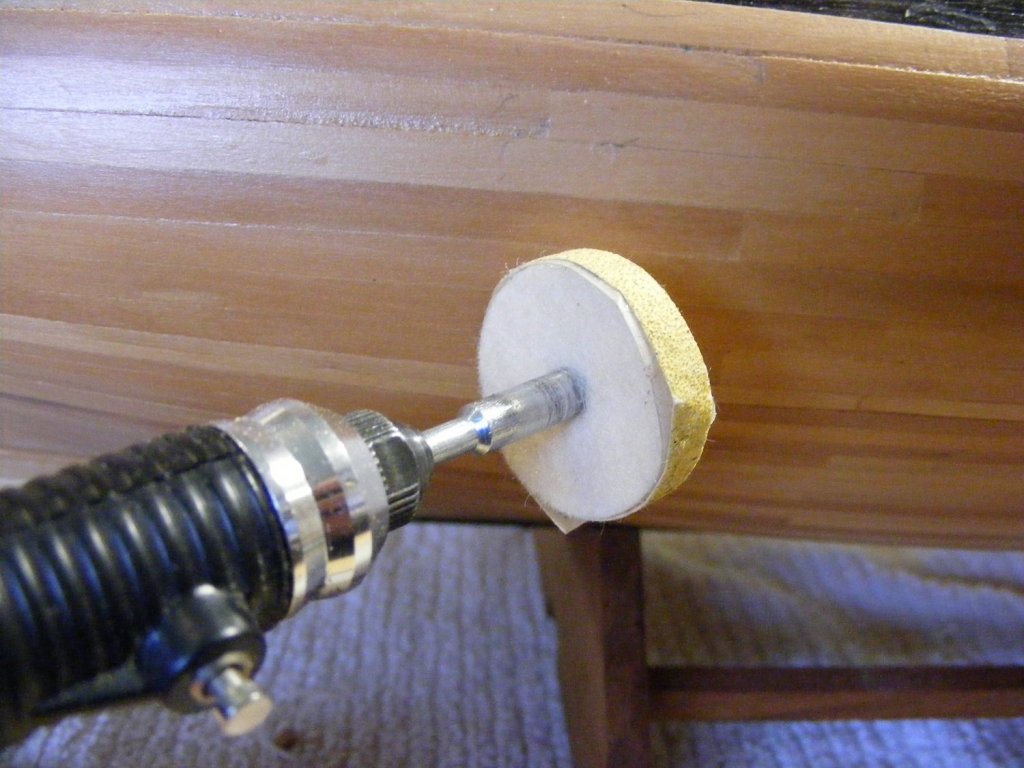
Thanks for the likes and comments... It's been too long since this was updated... so this is a short update about a pesky, self-induced problem. Between doing things around the house and yard, numerous medical visits for both Janet and myself and trying to sort my brain out and what's what, I've been pounding my head over a problem. If we go way back to cutting out the frames, I put some "tits" on the frames to allow for positive placement of the deck clamps (I think that's right... brain fart). But.. I've forgot how I was going to deal with them when I did the inner hull planking. My bad... and my notes are no help. Here's one frame.. those "tits" are highlighted by the red arrows. After much angst, occasionally thinking of just burning her in the stocks, I started to hand sand them with a thin piece of scrap sanding stick, I punted. The sanding stick was taking forever and I wasn't pleased with the lack of control and also damage from my fat fingers. Here's the area I was dealing with... you can see a couple of the offending pieces highlighted in red. What I finally came up with is the below tool.. a felt buffing piece with some sticky-back sandpaper attached. I'm using my mini engraving tool as it's small, lightweight, and the lowest speed is a good 3000 RPM less than a Dremel. It seems to be doing the job. Once I've got the sanding done, I'll finish the planking. Anyway, I'm still at this and hope to have another update as soon as time permits.
-
Scottish Maid rigging pt2 - spanker sheets.
mtaylor replied to gthursby's topic in Masting, rigging and sails
I'm looking at my build of the Scottish Maid from about 15 years ago which was the first ship model I did. It's possible the kit has been changed but I'm not sure. Based upon what I see, there's ample room for the spanker boom tackle as it's secured to the top of the aft bulwark. -
Friskit Low Tack Masking Film
mtaylor replied to grsjax's topic in Painting, finishing and weathering products and techniques
Were you using it with solvent or water based paint? I'm not sure how it work with a solvent based paint. Good stuff as I recall but I haven't used Friskit in decades and back then it was for fixing masters for printing tech manuals. -
Art, For blackening brass, Birchwood Casey Brass Black (they also make other blackening solutions). Also JAX makes blackening solutions. Many gunshops also carry blackening.
- 82 replies
-
- 2
-

-
- naval smoothbore
- model shipways
- (and 1 more)
-
Walt, My deepest condolences at this news. I'm sad that this happened but I know that with your family and faith, you'll make it. Do the things that are important and need to be done as MSW can wait. Take care of you, my friend.
-
Basswood isn't an ideal wood for bending, etc. as it's rather stiff and I found it'll break easily. I find pear works well. One of the big keys is use wood with the grain as straight as possible. And soak the wood well. I also use an old curling iron to apply heat for bending. Enough steam and heat and some woods can be tied into knots. What the others have said applies.
-
Been there, done that about 20 years ago, Andy, as far as career change. It's scary as hell but I hope it works out. And I hope it something you'll love doing.
- 382 replies
-
- 3
-
-
- stadacona
- sylvan scale models
- (and 1 more)
-
Eric, Have you been able to find any photos of a steamboat ouf of the water. Off the top of my head, I don't recall seeing any. You might contact the folks at the Arch in St. Louis. They have a great museum and might be able to shed some insight. Or possibly the museums you've already visited.
- 599 replies
-
- 4
-
-
- sidewheeler
- arabia
- (and 4 more)
-
I looks like a good plan, Dereck. And the cannon carriages look spot on.
-
Count me in also, Chris.
-
That's a real bummer about the job, Andy. I'm guessing there's nothing open in the office for you where you were for awhile? I hope you get things sorted out jobwise and find something you'll love doing. Nice to see this model again and the progress you're making.
- 382 replies
-
- 3
-
-
- stadacona
- sylvan scale models
- (and 1 more)
-
Please help! What to buy.
mtaylor replied to semorebutts's topic in Metal Work, Soldering and Metal Fittings
My only recommendation is do NOT use acid core solder as it will eat away any thing the flux touches. As for everything else... it comes down to personal preference. I use a small mini-torch that's propane fired as soldering irons historically have driven me nuts. -
Patrick, Both Dutch definitions work for English as well. So there's 3 definitions that are correct at least in English.
- 756 replies
-
- 2
-
-
- galleon
- golden hind
- (and 2 more)
-
Hi Dave, Welcome to MSW.
-
jb, A mill can be use for drilling while a drill press can only drill. Yes, there is a higher cost, but if you can find a used mill in good condition at a good price, go for it and skip the drill press. Just my 2 cents.
-
-