Old Collingwood
-
Posts
12,104 -
Joined
-
Last visited
Content Type
Profiles
Forums
Gallery
Events
Everything posted by Old Collingwood
-
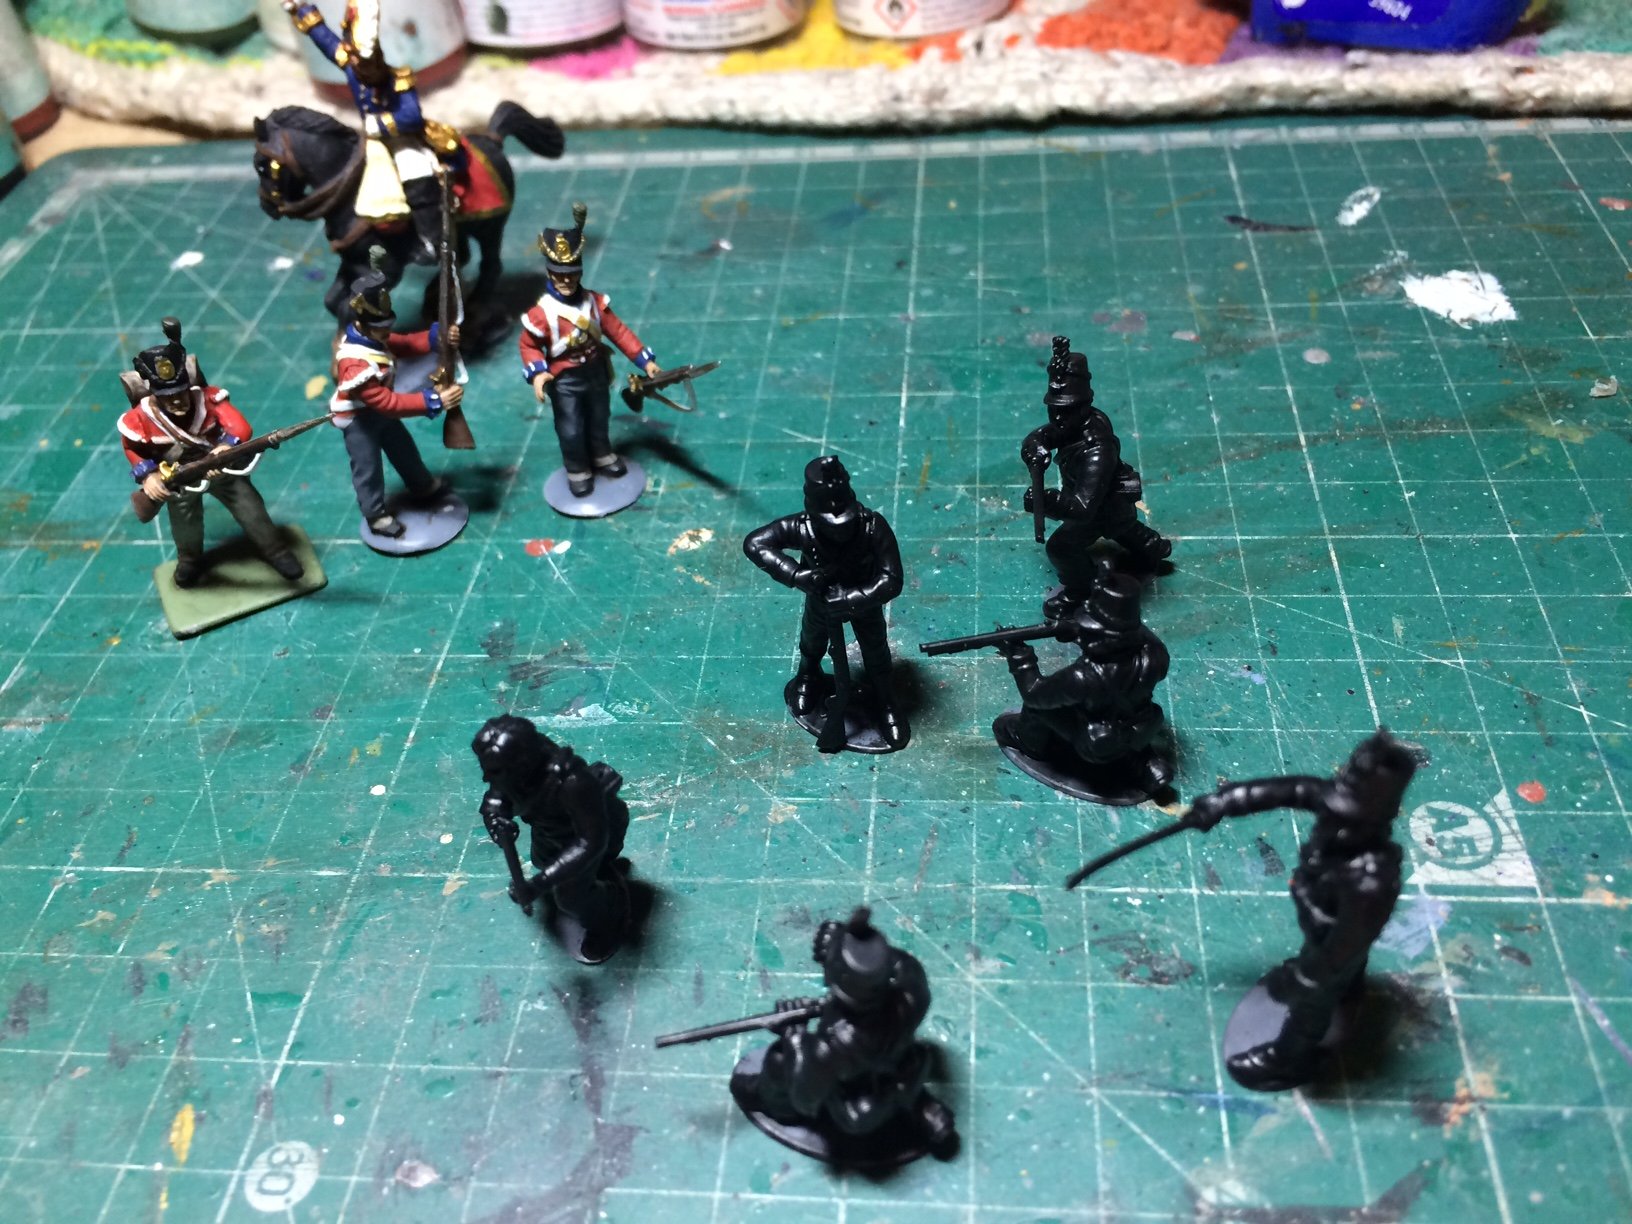
 Evening all, I have been busy again this evening - I managed another Three hours at the benchy thing, I decided to carry on making more 2nd KGL, I have been working form the box of nearly 30 figures working on the different torso's adding different arm positions and creating some different poses, I am doing one doing a handstand up the wall as he was bored and another doing a jump over a piece of gym equipment (only joking - I'm not that mad - yet), the difficult thing is matting up the correct arm positions to the torso's as there is no number sequence or construction guide - only some box artwork of the completed/painted figures, so to an extent I have to use some heat and glue to get the arm socket positions as they need to be. OC.
 -
You have toys in the attic ............Action Man, GI Joe, Dinky/Corgi tanks - thats it I'm coming over to pley😃 OC.
- 1,090 replies
-
- 4
-

-
- showcase models
- vendetta
- (and 2 more)
-
So wish I had been there that day 2015 at Waterloo - Amazing. OC.
-
Just down Lou and Marks field ........."where are youuuuuuuuuu........." OC.
-
You would have to supply the food and beverages Alan😁 OC.
- 1,090 replies
-
- 4
-

-
-
- showcase models
- vendetta
- (and 2 more)
-
Really nice work Denis, all the additions and your work ethics are really showing. OC.
-
Its good seeing you back. OC.
-
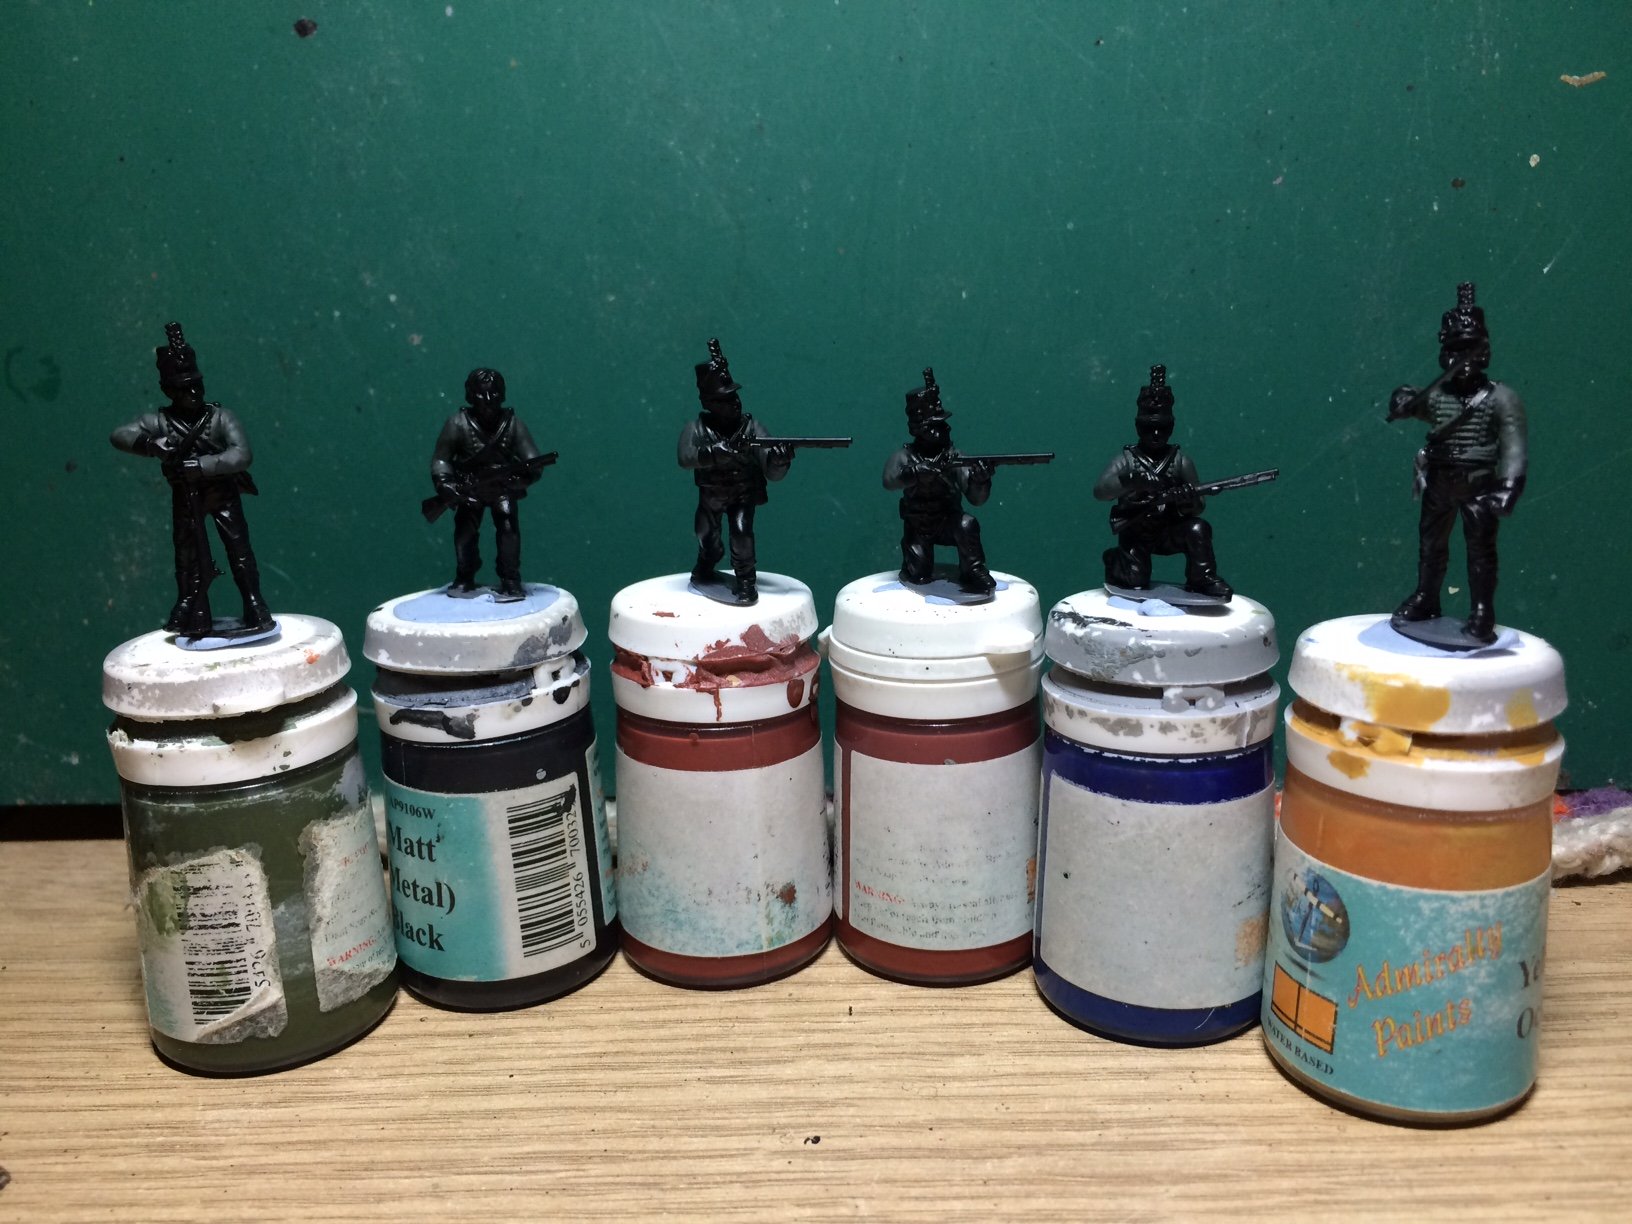
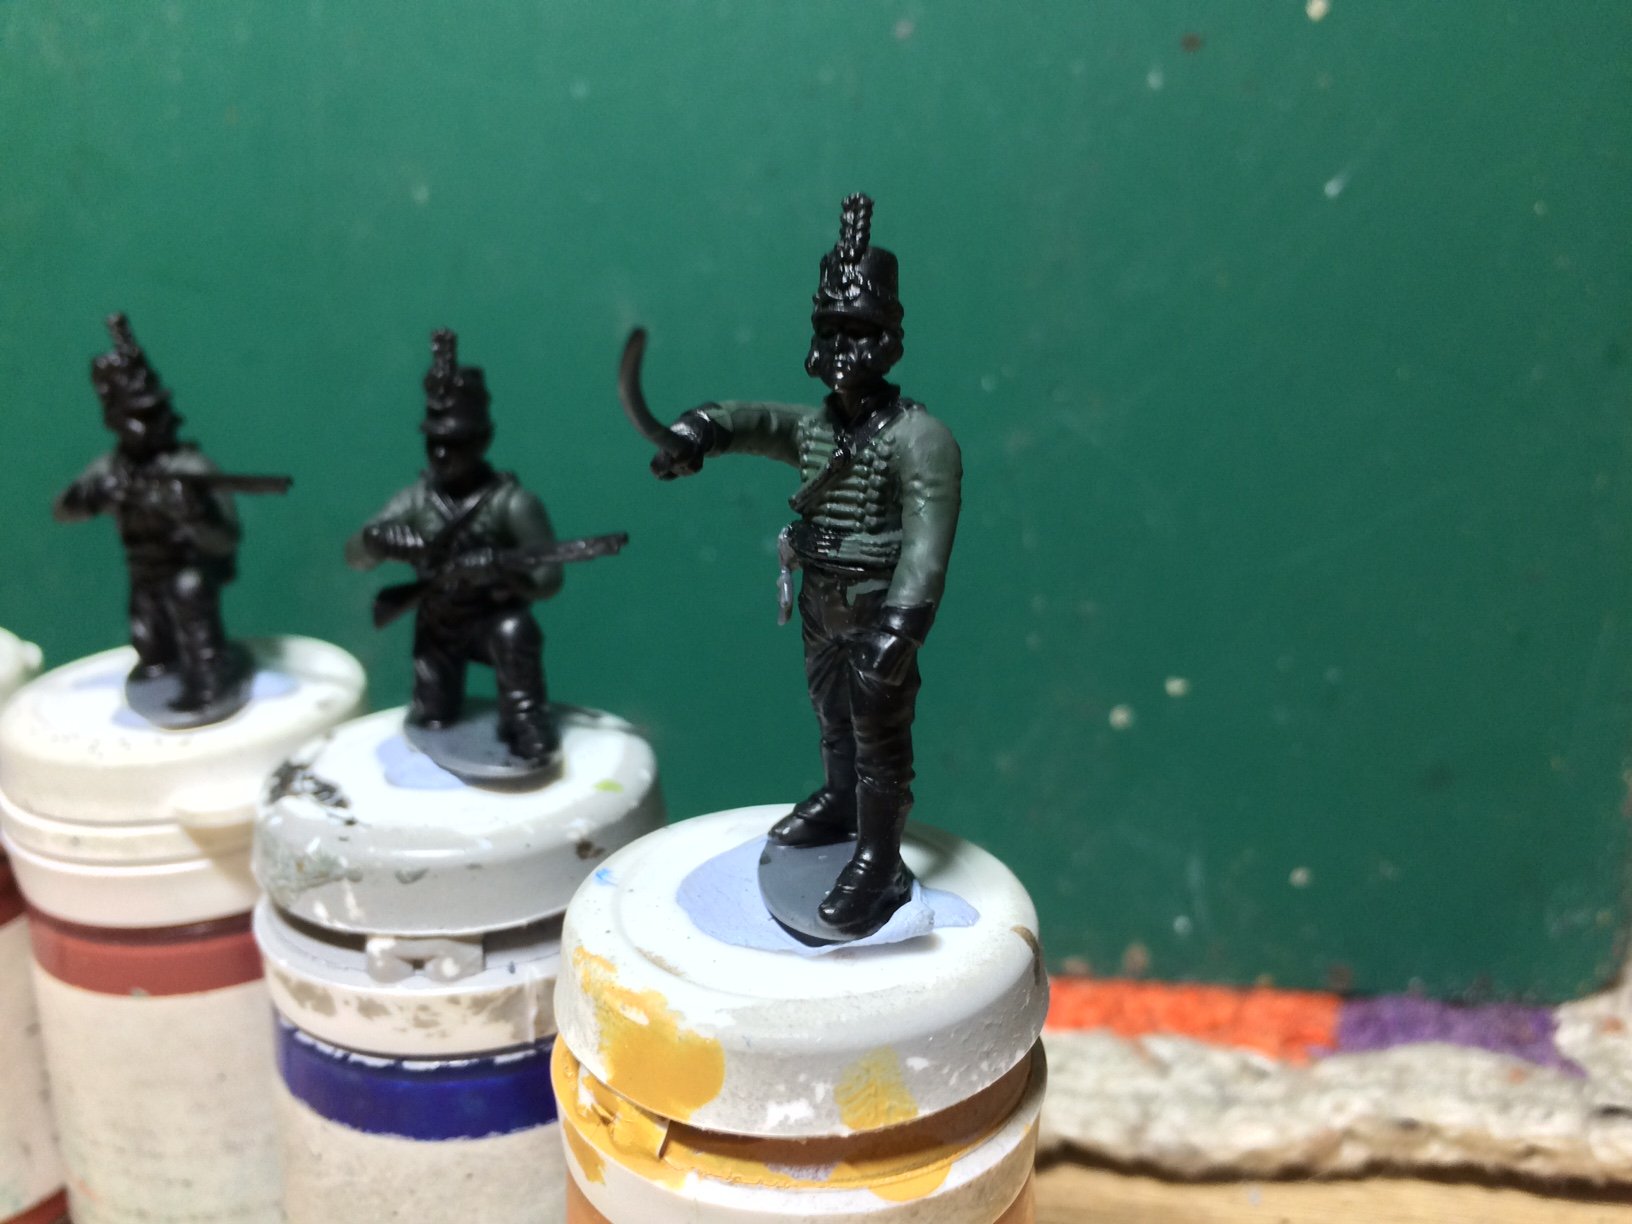
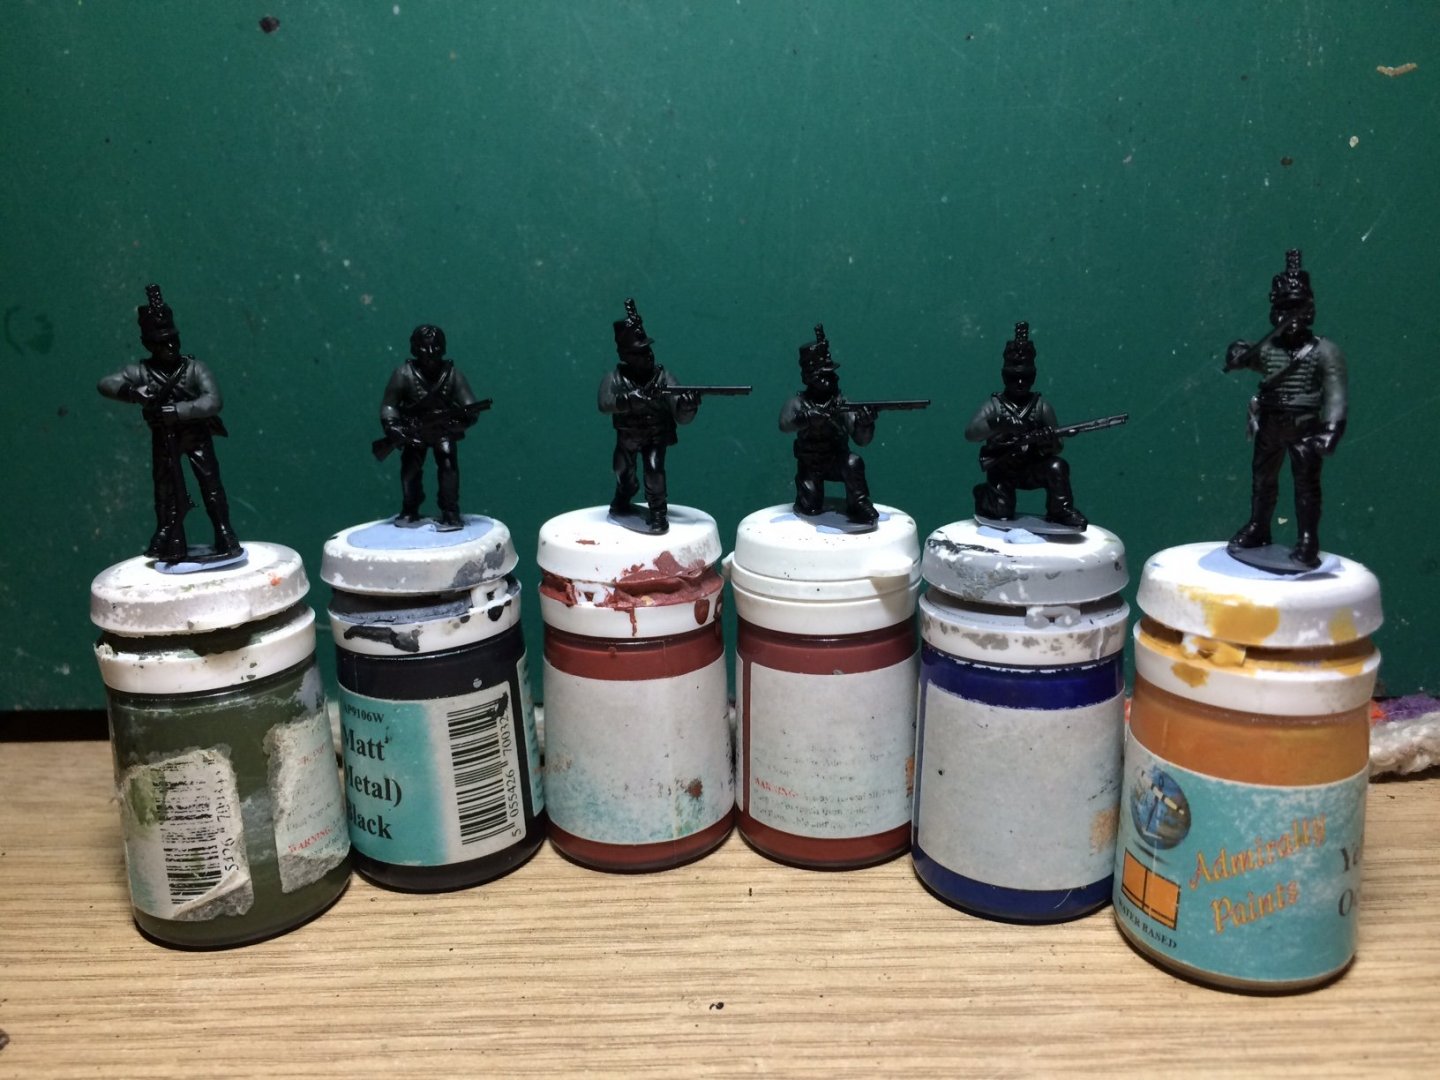
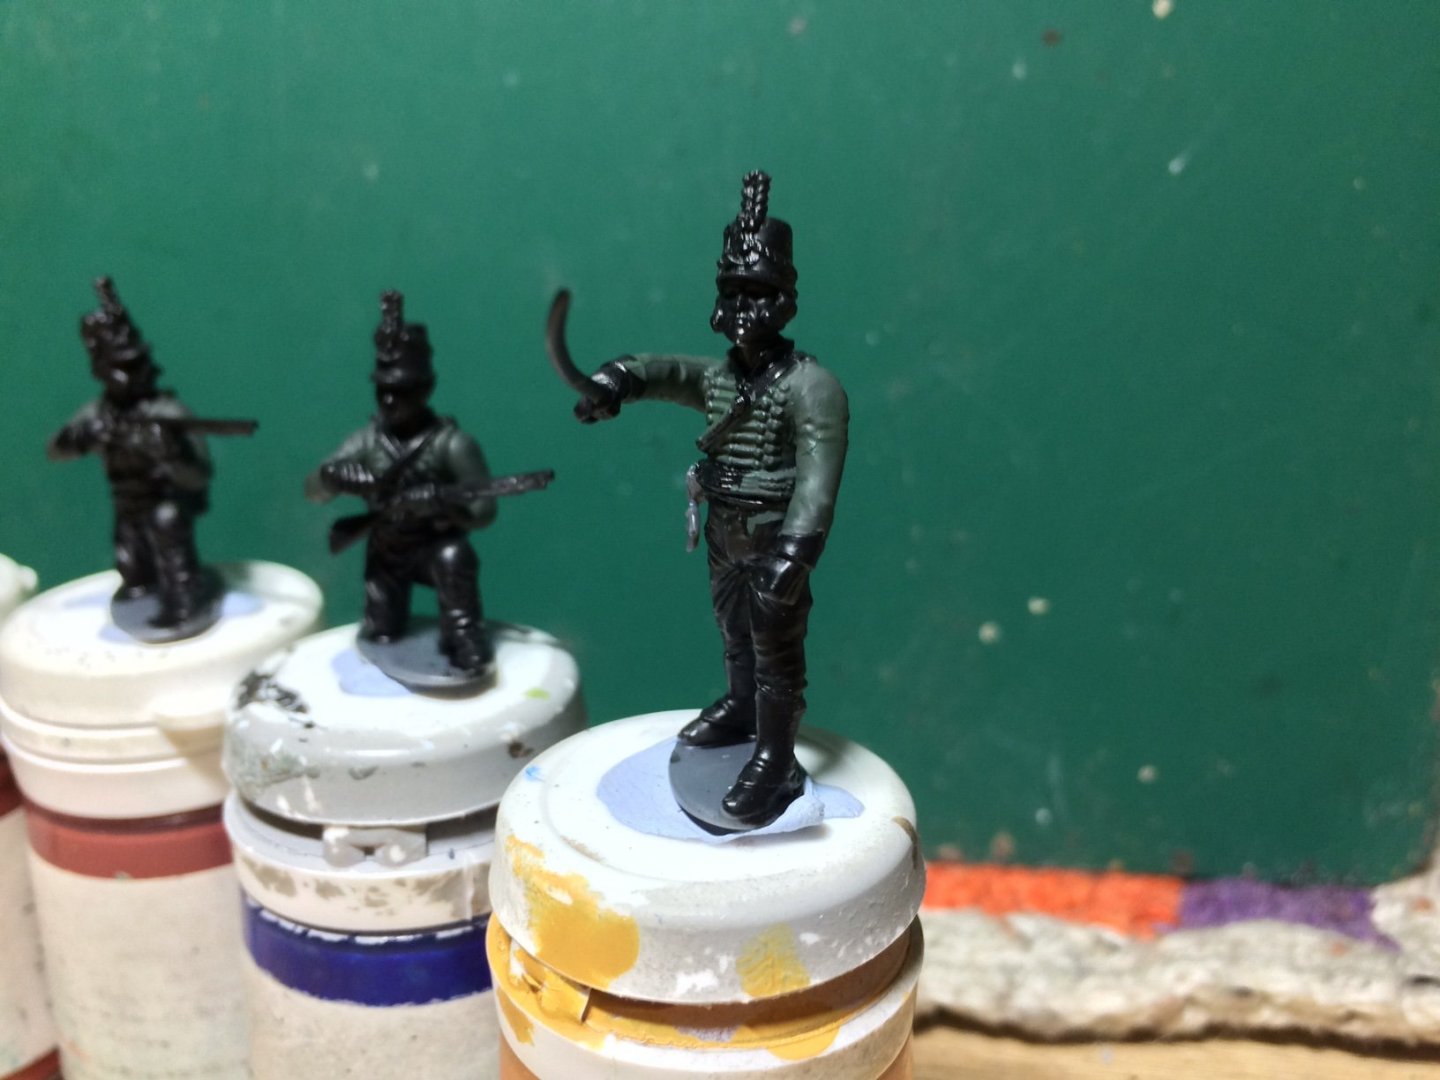
Evening all, paintwork has started on the new 2nd KGL figures - I started with their Green jackets first, just Two brushed on coats. OC.
-
Im here - brought my normal picnic reuirements and a notebook to take notes. OC.
-
Any one used "Fed - Wrecks" OC.
-
Looking forward to your build - I remember being a keen lad getting my dad to help me build my first model ships - sometimes he got a bit to excited and stuck into it - especially with the bigger builds. OC.
-
Typical - why do companies mess us around - does nothing for their ratings. OC.
-
Airplanes and Tanks in plastic by Jörgen
Old Collingwood replied to Jörgen's topic in Completed non-ship models
Superb work - makes me want to see far more of your fine work. OC. -
Thanks Ken, gives a bit more room that way. OC.
-
AmaZing work with all those tiny little parts bet your admiral will be looking at you strange when you glance across cockeyed. OC.
- 168 replies
-
- 6
-
-
- Scharnhorst
- Flyhawk
- (and 1 more)
-
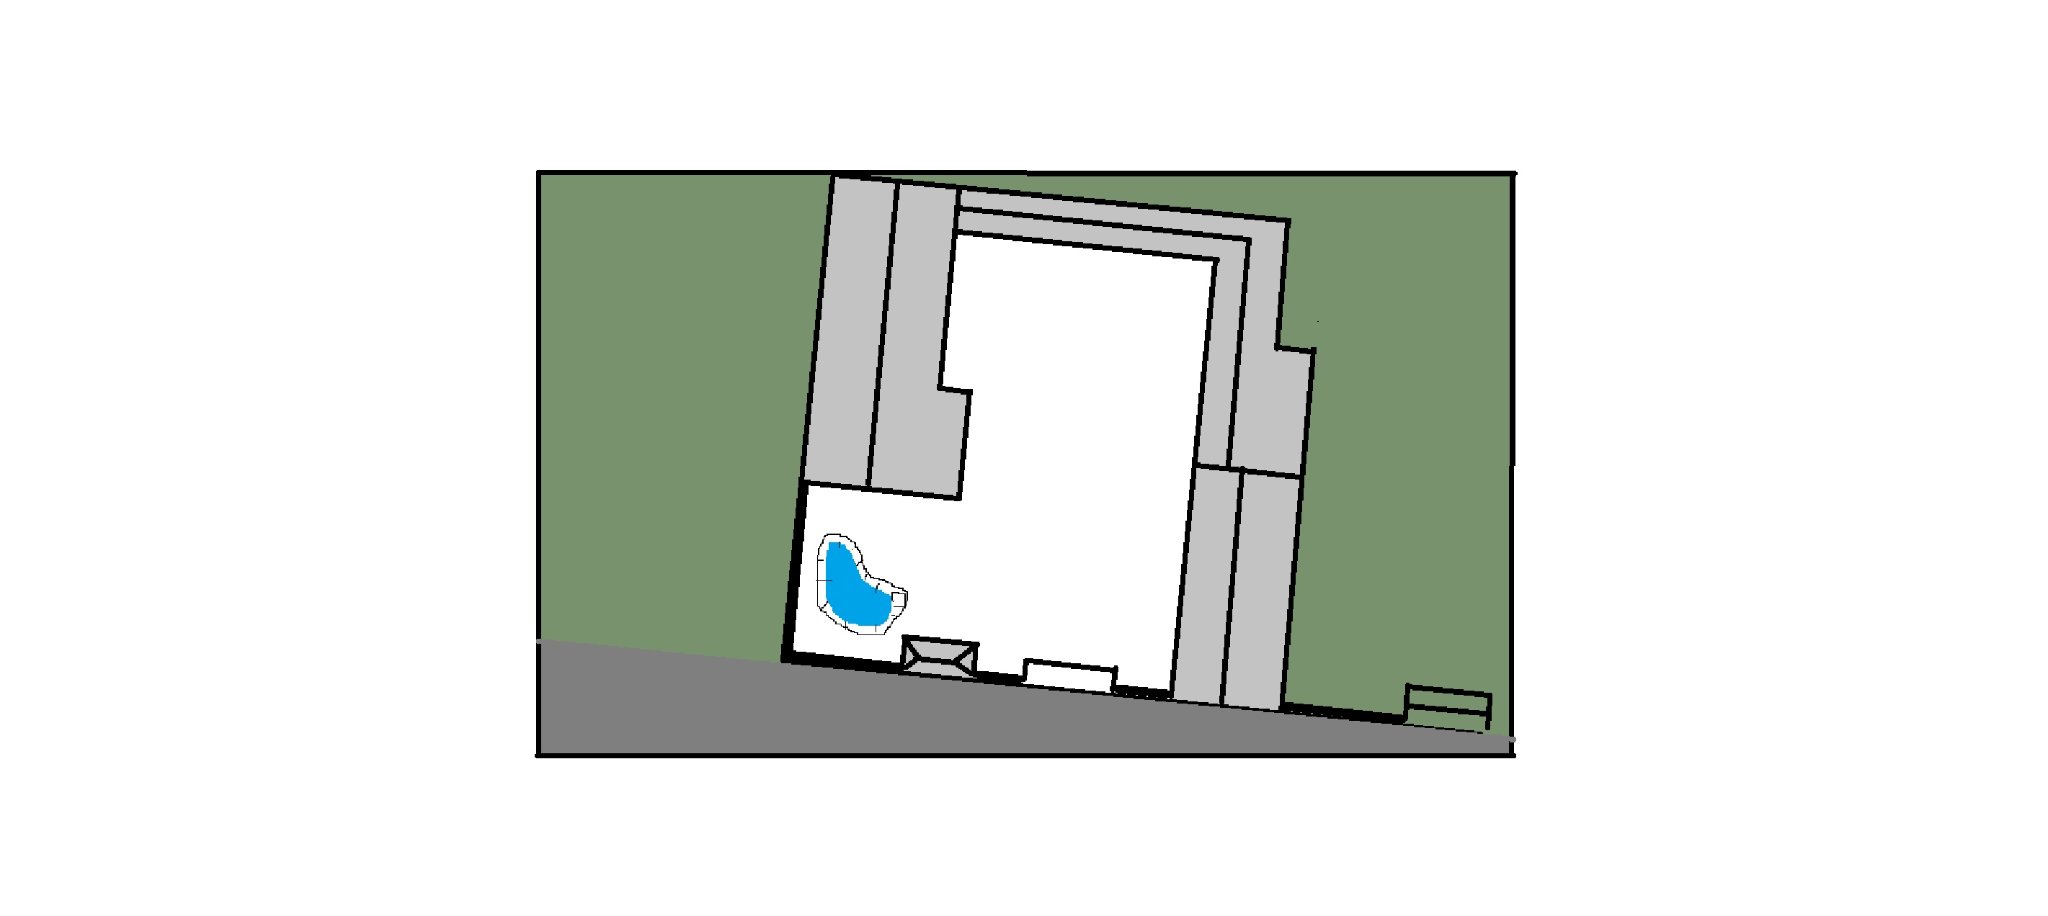
I have done more scribbling in Paint to show an overhead how I could lay out LHS on the base dimensions I have to play with, OC.
-
Excellent work - so realistic - loving this. OC.
-
Those are looking Superb Edward - they so compliment each other, You have nailed that camo - not easy to do. OC.
-
Thank you Edward - much appreciated. OC.
-
Evening all, after spending another afternoon in the yard (camera in hand scanner on) I decided to prime the happy little KGL group, stariaght forward (does as it says on the tin) just a couple of brushed on coats with my "go to" Vallejo Acrylic Black then dried off with the HD (hairdryer) then I thought it would be an idea to drag out some of the first made figures and brush over a couple of coats of my new falt coat - its Migs Ultra Flat Acrylic Varnish, this stuff really works its the best I have used so far that has to be brushed on, trick is to only put a small amount on in coats dried between coats. So here is a pic showing the primed KGL along with the now very flat varnished KGL line. Oh and a pic of the varnish. OC.


-
Goeing to be an interesting build brother. OC.
-
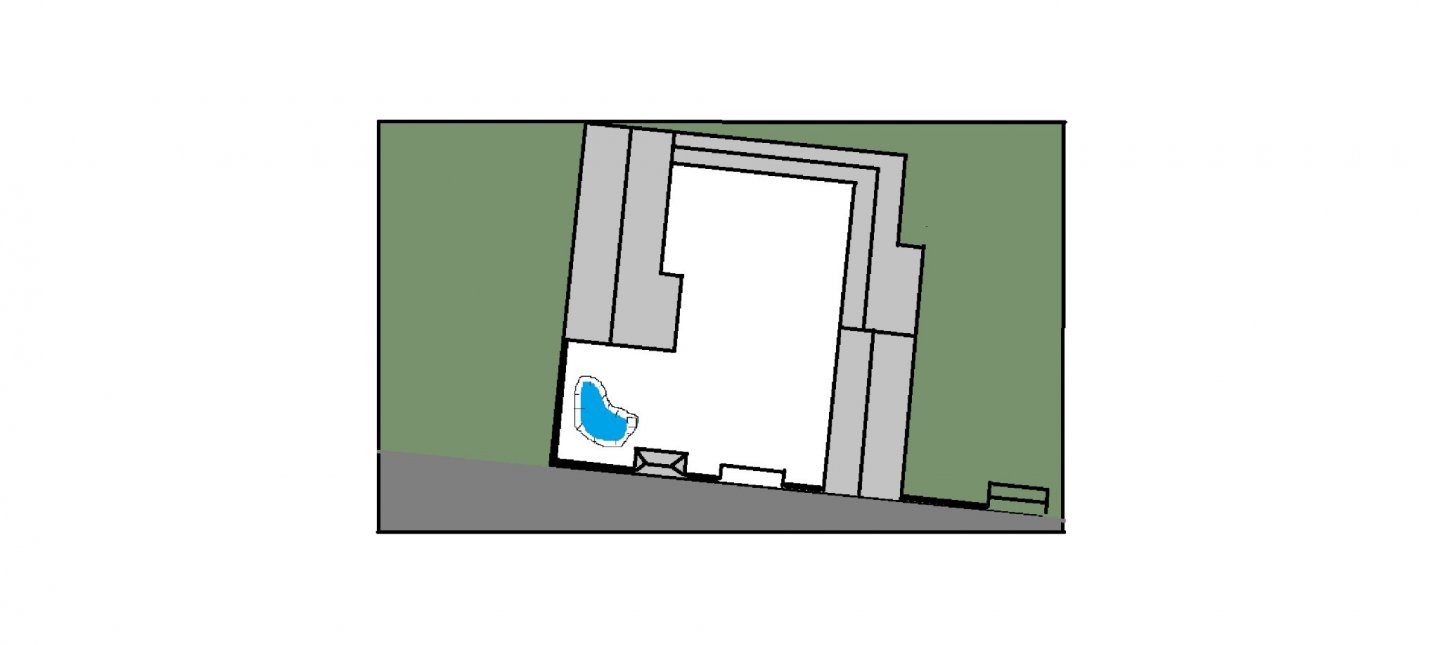
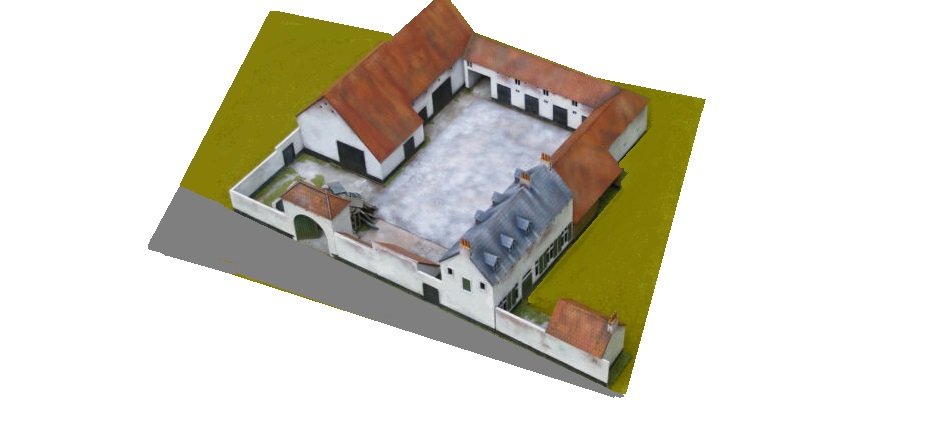
I have had a look at another way I could place the farm on my board when it comes with the case - instead of placing it flat against the back with the roadway along the front, I could place it at a slight angle - that way I could place some of the figures around the farm not just the front and left sort of like this - what do you think - OC.
-
Thanks Mark. OC.
-
Evening all, I have done a lot of thinking and researching today to work out my display case strategy, after talking to the admiral we both decided it would be better (safer) if I went for a plastic display case instead of glass, Two things biased this decision firstly I will be taking the case of the base quite a lot while building the dio, and secondly the weight and fragile risk of the case getting smashed and tiny fragments going into the carpet and cutting our dogs paws. I did a lot of looking around and I found a few companies who specialize in Acrylic cases with a base, I found the cheapest (ish) one and dialled in my size requirements go the size I wanted (I went a wee bit wider to allow me to build the whole farm complex without cutting the back row of buildings off) the price surprised me a bit but guess I am getting a good bit of kit that will be lighter and less risk of getting smashed/damaged - just need to wait for it to arrive in a few weeks. OC.