


KenW
-
Posts
1,228 -
Joined
-
Last visited
Content Type
Profiles
Forums
Gallery
Events
Posts posted by KenW
-
-
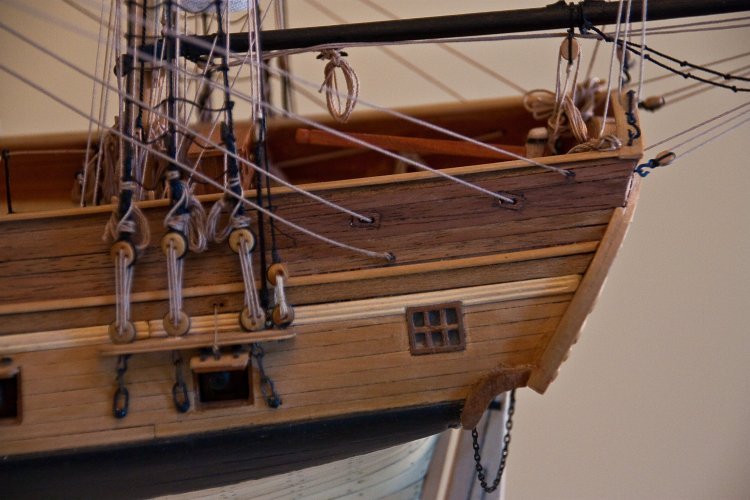
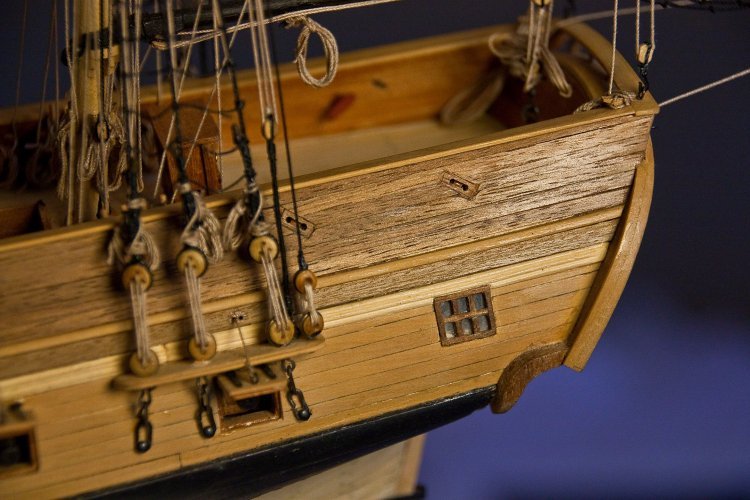
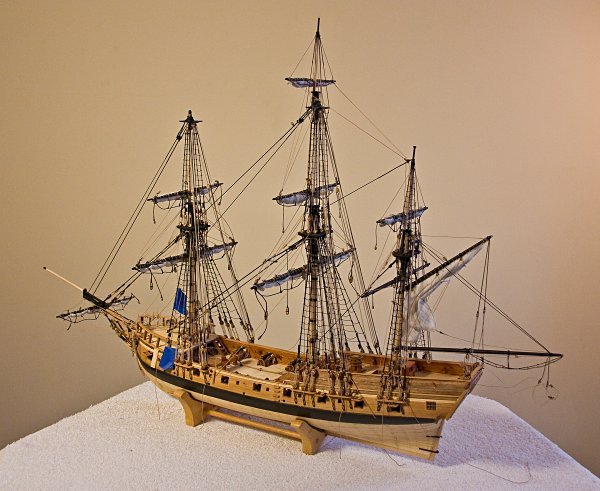
I’ve corrected the location of the sheaves in the side of the hull which are used for the main lower sheets and braces. I think the repairs came out pretty well. You can see where the new walnut planks join the old, but the join is behind the mizzen shrouds and not very noticeable. As for the bulwarks, I mixed paint to match the faded color of the redheart planks and I’m satisfied with the results. I just hope that the unpainted planks don’t fade too much further.
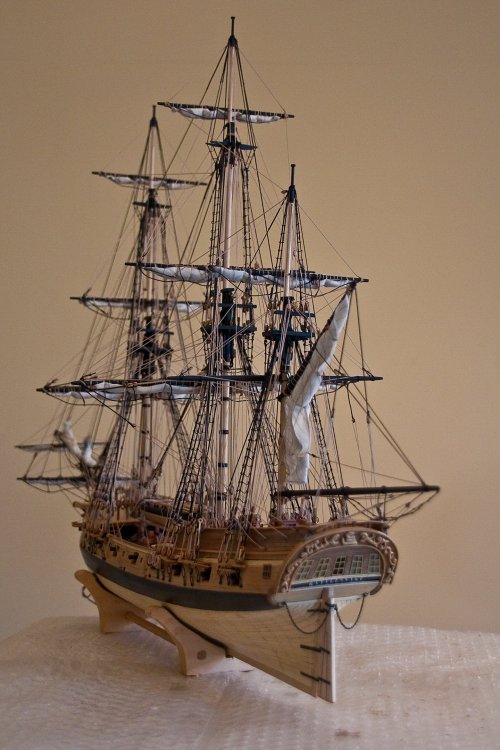
The rigging is complete. So all that is left to do is make and mount the anchors and the ensign. So, the completion date is not far off.
- captgino, Tigersteve, MEDDO and 15 others
-
 18
18
-
Your workmanship is unbelievable. Excellent!
- Canute, Tigersteve, mtaylor and 1 other
-
4
-
Steve: I just read through your build log and I think it is a great description of your work as well as a informative tutorial to supplement Chuck's manual.
Just one question - what is that unusual clamp in the last photo? I saw it in an earlier post and there it is again.
Thanks.
- Elijah, Tigersteve and Stuntflyer
-
3
-
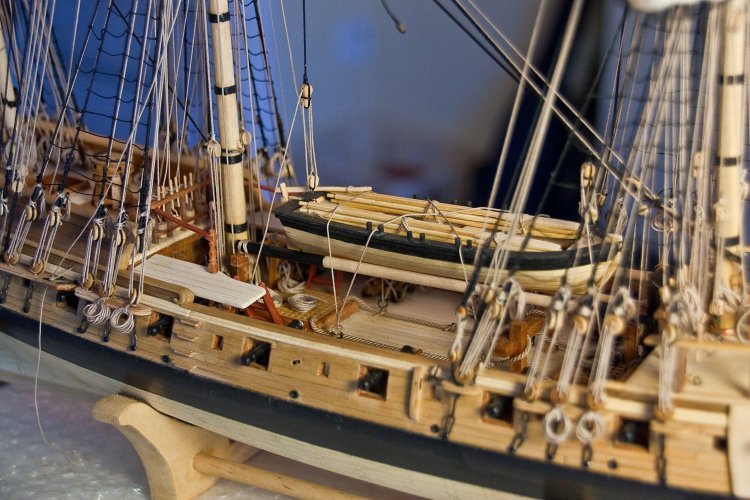
I have good news and bad news. I’ve finally done enough rigging so I’m ready to lash the spare mast and yard to the gallows and tie down the ship’s boat to the spares. My wife says it looks like the boat has had a baby.
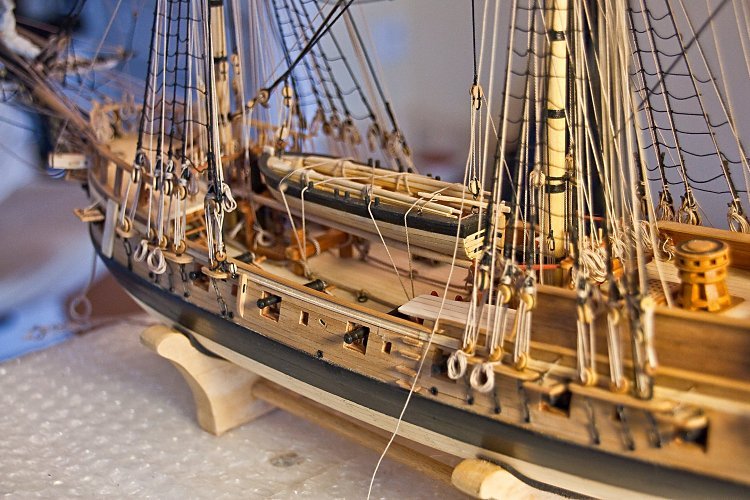
I also added extended fixed gangways. I made brackets to support the end of each gangway out of wood which can’t be seen. I also added ladders up to each gangway. I based my design on a drawing in a book by Howard Chapelle entitled, “The History of American Sailing Ships", published in 1935. The drawing is on page 136. I’m pleased the way it turned out.
The Chapelle drawing:
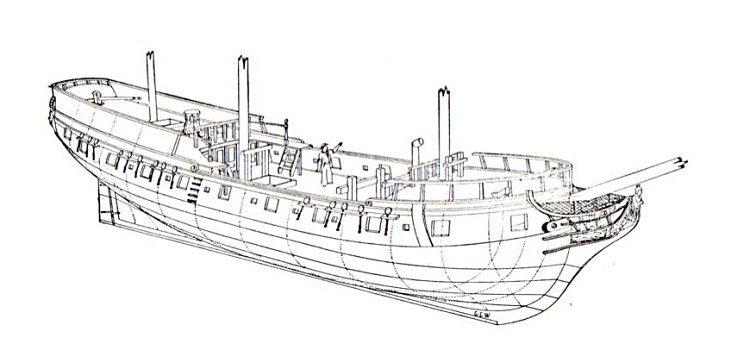
And now for the bad news. Way back last year, while planking the aft bulwarks, I added sheaves for the main sheets and braces. However, I placed them wrong. As can be seen in the photo, the sheet will foul the mizzen back stays and shrouds. The only way I can think of fixing the problem is to remove three planks from each side of the hull and replace them with the sheaves in their proper place. Fortunately, I still have walnut planks he same width and thickness. But it will take some very careful work.
- Jack12477, Tigersteve, coxswain and 10 others
-
13
-
-
-
-
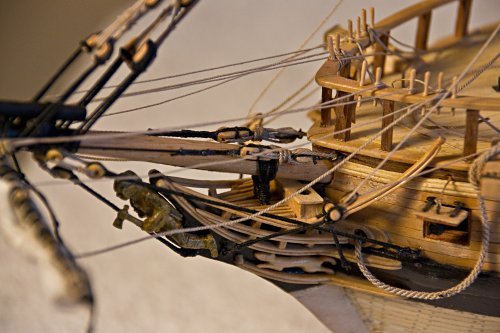
All lines on the forecastle are in place, tied off and coils are added. Attached is a better photo taken from the same angle as the shot with all the spaghetti. The photo was taken at sundown.
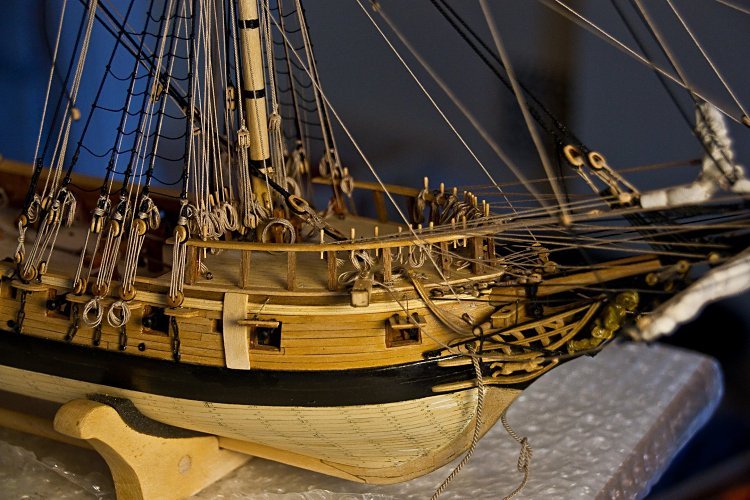
The lines on the quarter deck are also tied off and coiled. I like to think that I’m a ‘good’ captain considerate of his crew. So I added various railings to protect the sailors from unnecessary injuries. For example, I added a rope railing to prevent officers on the quarter deck from falling down the stairs going below.
I also added railings to the aft of the tops.
And, finally, a railing so a crew member has something to hold onto while using the head. (That one is kind of hard to see.)

-
-
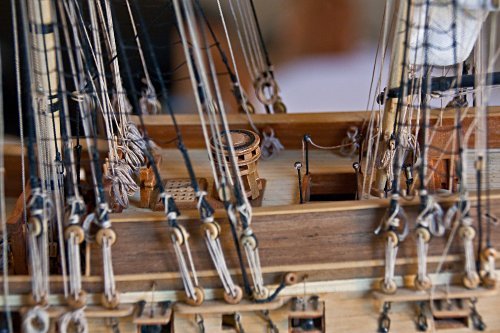
The spaghetti is gone from the forecastle. All the lines have been tied up, glued and coils were added. I still have to finalize the jib and staysail sheets. But I’m ready to move on to the shrouds, starting with the fore mast and moving aft.

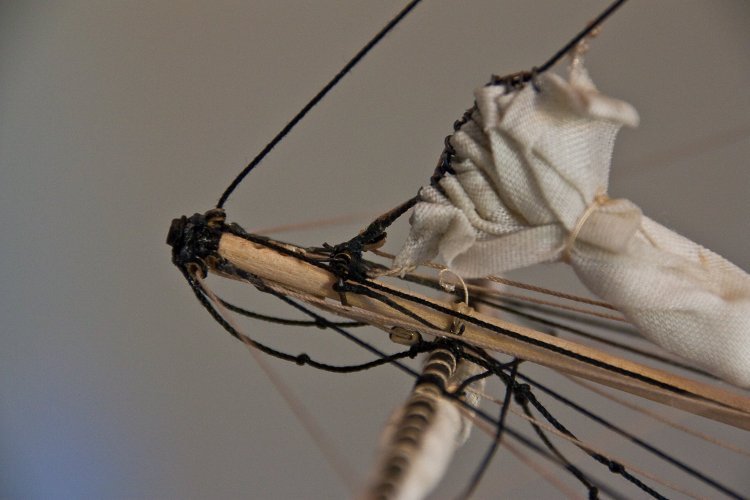
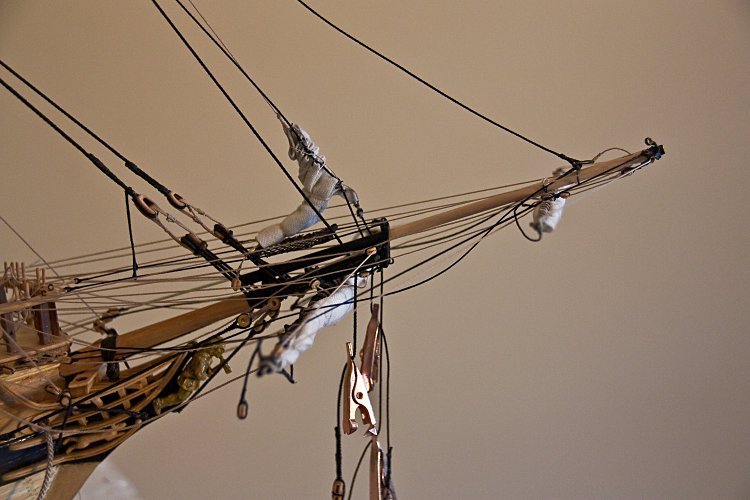
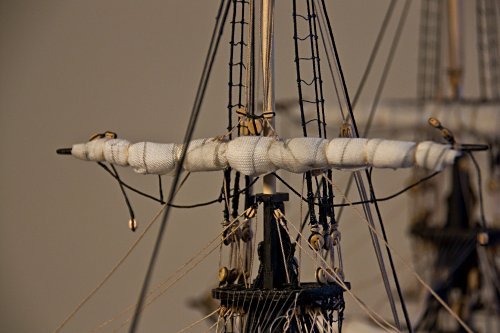
The tip of the jibboom doesn’t look to bad. I was finally able to make some decent thimbles from 1 mm thin brass tubing. I see in the photo that I left a loose thread from the topsail spritsail lashing. That was soon taken care of.
- EJ_L, russ, Ryland Craze and 7 others
-
10
-
I've always been impressed with your workmanship, or should I say craftmanship. Your design abilities are excellent as well.
It's a pleasure watching your progress.
Cheers.
- Canute, Stuntflyer, Martin W and 3 others
-
6
-
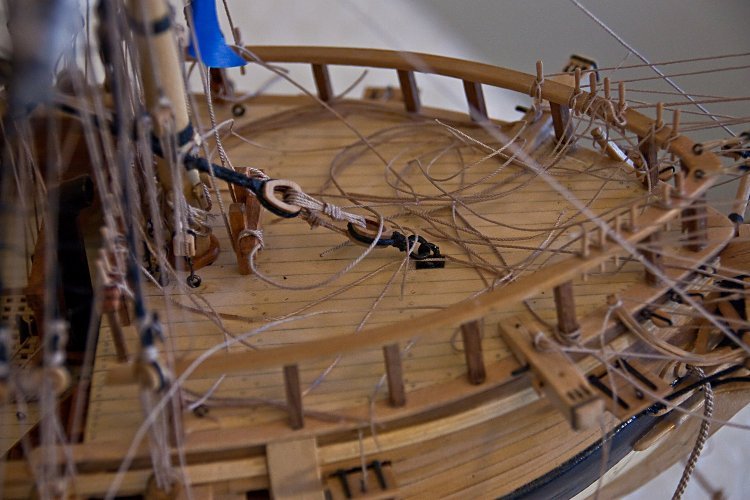
I’m still in the process of cleaning up the rigging at the bow. So far, I re-did the lines from the spritsail and topmast spritsail, but none of the lines are permanently tied off and glued. It is a good thing that I’m able to re-tie lines because every time I add a new line it seems I have to change the overall rigging positions. Right now the forecastle deck really looks like a plate of spaghetti.
I also made the fore topmast staysail and attempted to furl it into a ‘bundle’ as shown in the Hegland book. After a few tries I settled on this interpretation and will probably stick with it.
I’ve started on the jib sail, but will not furl it into a ‘bundle’. Part of the whole process of these sails (the staysail and jib) also requires that I decide where to place the belaying pins for the halliards, downhauls and sheets.
-
Very impressive. And, excellent workmanship.
Congratulations.
- EJ_L and BLACK VIKING
-
2
-
-
-
The fore top gallant mast and yard are installed. I spend a lot of time insuring that various lines don’t cross other lines or ‘foul’. Some compromises must be made. So far, compromises only involve a switch between David Antscherl and the kit. Since an American privateer is not obliged to follow British Admiralty directives, I don’t have problems using the kit rigging plans where necessary. Now, on to the bow.

- shipmodel, coxswain, usedtosail and 12 others
-
15
-
Good luck Bob.
We've all been there.
Cheers.
- Stuntflyer, Ryland Craze, Canute and 2 others
-
5
-
-
-
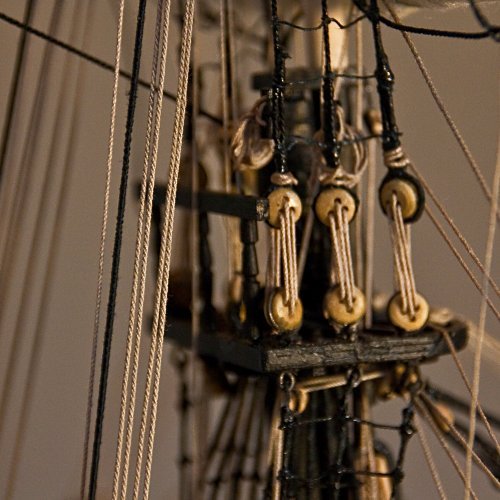
The main top gallant mast and yard is installed. The amount of rigging is getting crazy. I spent hours trying to insure that no lines were touching or otherwise fouling. A small flashlight was very helpful. Anscherl says that top gallant bunt lines were only used on larger ships so I left them off. Most of the lines are still not tied off yet.

-
Looking really good, Mike. I love your rope coils. Excellent!
- Canute, Stuntflyer and mtaylor
-
3
-
Great work Chuck. Can't wait to see it on Tuesday.
- Canute, Ryland Craze and mtaylor
-
3
-
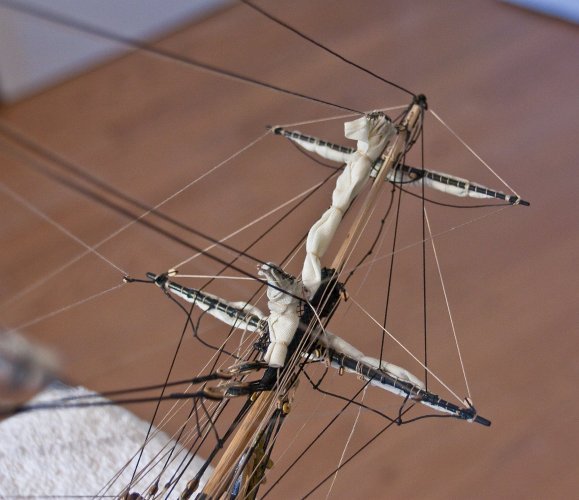
I finally added the fore topmast and its topsail yard and sail. Everything is the same as the main topsail mast, yard and sail. I also rigged the fore topsail stay and preventer stay. I have not rigged the jib stay at this time. There are a lot of lines to be added to the bow area, and I’m worried that lines will have to be added in a set order, and I’m not sure yet what that order is. I’ll be doing the main top gallant next and, hopefully, tying of some of those lines that have been left dangling.
- Stuntflyer, russ, MEDDO and 7 others
-
10
-
That is one big boat! Hope you have a big shelf.
Great work.
- EJ_L, Eddie, popeye the sailor and 1 other
-
4
Rattlesnake by KenW - FINISHED - Model Shipways - Scale 1:64 - American Privateer
in - Kit build logs for subjects built from 1751 - 1800
Posted
Thanks for all the comments; and the 'likes'. I will not be pointing out the repairs from now on, although I may tell my club guys.
The end is near.
Cheers.