


KenW
-
Posts
1,228 -
Joined
-
Last visited
Content Type
Profiles
Forums
Gallery
Events
Posts posted by KenW
-
-
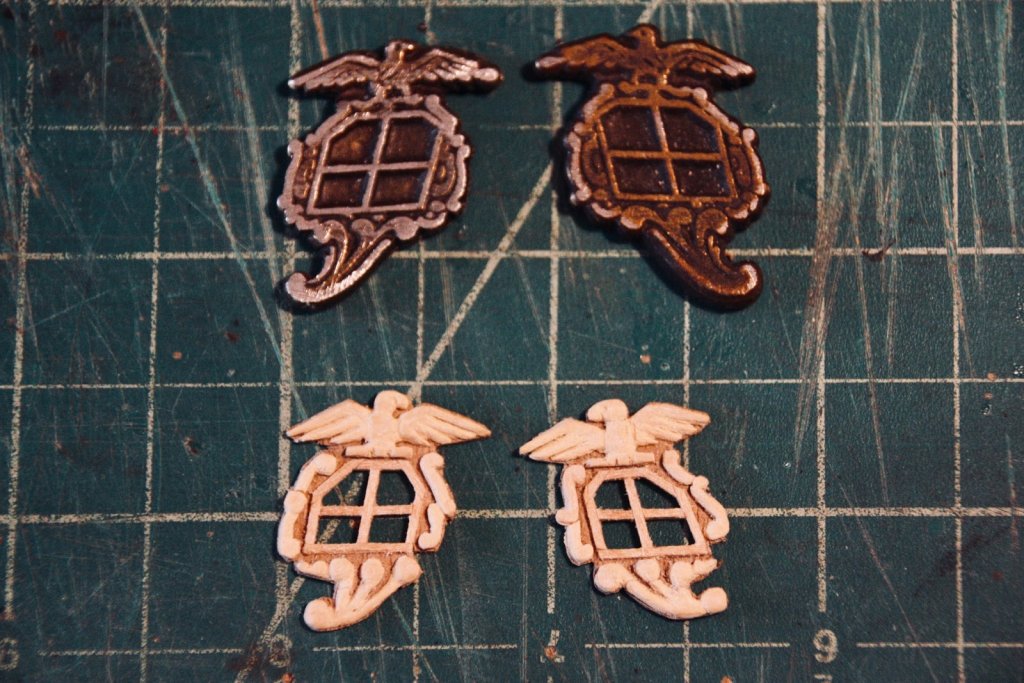
I carved and assembled the Quarter Badges. If anybody is interested, I used the same technique as I used to carve the stern transom decorations. First, study the plan’s carvings and divide it into several components. Then make a copy of, in this case, the quarter badges from the plans and print several copies. Next make cut outs each component. Glue these small cut outs to the wood you want to carve, and then glue that to a large piece of wood.
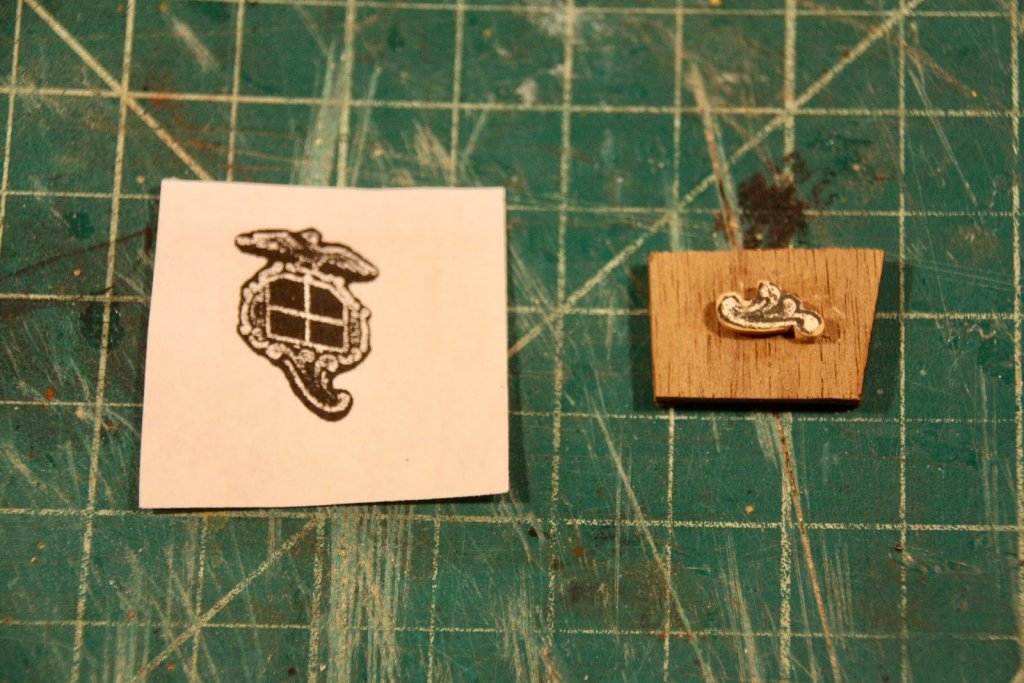
Carve the component and when you are satisfied, place the piece of wood into Isopropyl Alcohol (91%). After about an hour or so, carefully use your Xacto knife to remove the carving from the piece of wood. Let the carving dry overnight. For my quarter badge I’m making my window on a 1/32 sheet of walnut and glueing the carvings once the window frame is finished. The walnut is a good contrast to the box wood.
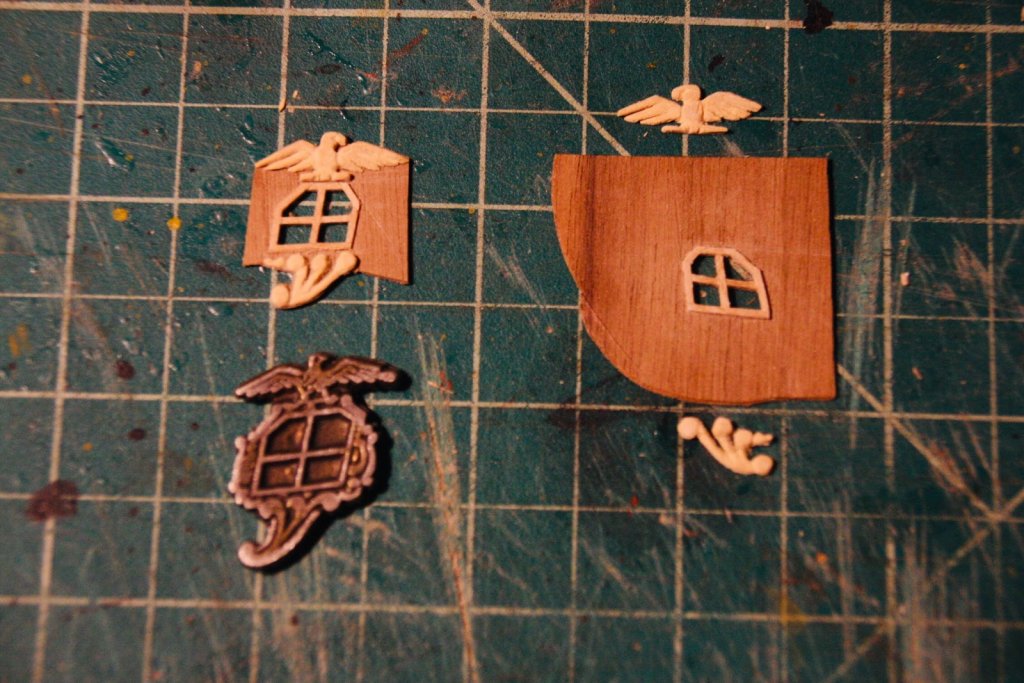
Once all the pieces are finished and glued, I trimmed the excess walnut and produced a quarter badge. Now, I just have to stain, urethane, and mount the carvings on the boat.
- Ryland Craze, dvm27, GrandpaPhil and 9 others
-
 12
12
-
-
-
-
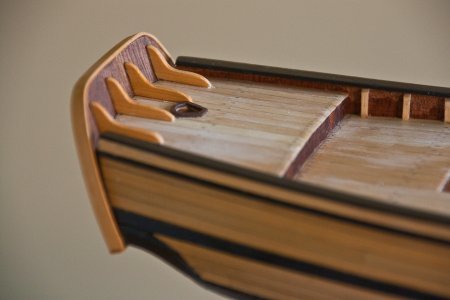
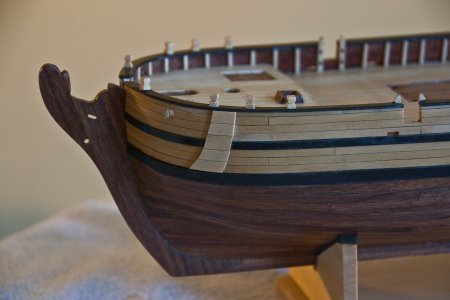
I added the various carvings on the stem. I have two cheek knees and a head rail. I left off the middle rail because I felt it made the area look too crowded. The fancy carvings are similar to the kits, but I borrowed the design used by Clair Hess on his model. I like the result.
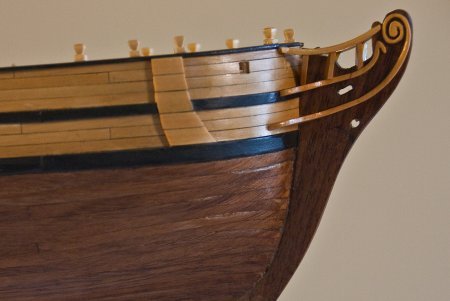
My next task is to explore the possibility of making the quarter badge windows.
- jwvolz, CharlieZardoz, Jim Rogers and 10 others
-
13
-
Thanks Dave. Thanks to the 'likes' as well.
-
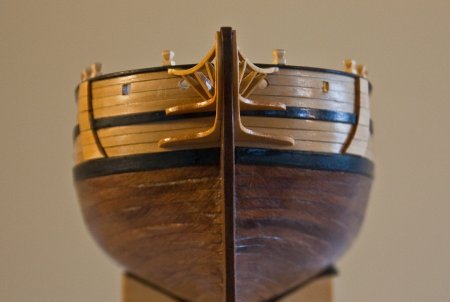
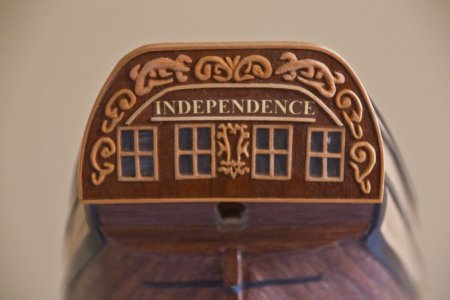
Finally, I finished the transom. I knew that I wasn’t going to be able to use the dye-cast metal transom supplied in the AL kit as it was now out of scale. I had to set about making my own. I ran into a problem, however, because I made the windows just a little bit too big. One of the carvings wouldn’t fit. So I left it off and made a variation of the smaller carving to fill in the space. I’m satisfied with the result.
A view of the other side with the knees added.
The carvings on the stem will be next.
- GrandpaPhil, EJ_L, Ryland Craze and 7 others
-
10
-
Your work looks greag.
What is a - "flex shaft with the small pen-sized head" on a Dremel?
I saw Mike make belaying pins, I'm never able to get a proper round boxwood strip unless the original piece is square.
Cheers.
- EJ_L, thibaultron, Canute and 1 other
-
4
-
-
Richmond is correct. That Red Ensign doesn't have the 'red X' for Ireland. You want this one.

- jml1083, mtaylor, paulsutcliffe and 4 others
-
7
-
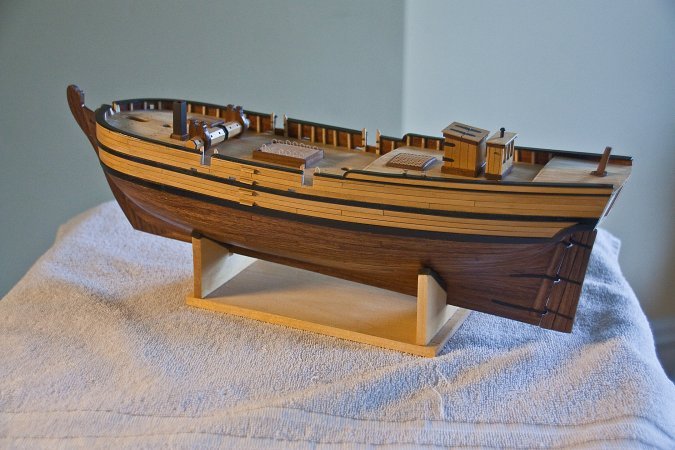
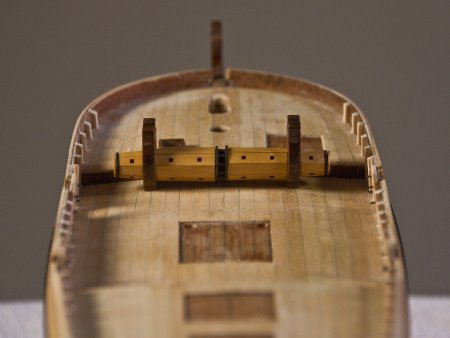
I made more deck ‘furniture’. First is the bilge pumps. I used the pump kit from Syren’s Cheerful. I made the pumps shorter because I felt the resultant pump looked better on this boat.
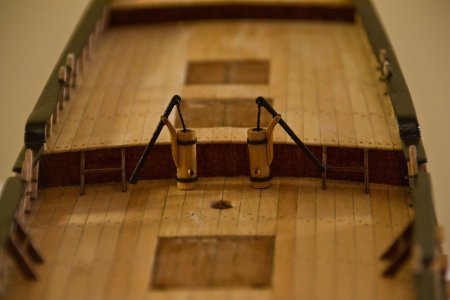
I added the other stairs for personnel coming aboard over the side. Also, I made the bits, including the main bit with the ship’s bell. The bell is the only item from the original kit that I’ve used. Neither the pumps nor the bits are glued on yet; so they may look akilter. I like the way the bow looks with its ‘side burns’.
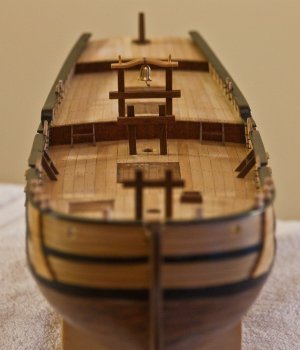
The transom will be next.
- rafine, kees de mol, DocBlake and 5 others
-
8
-
-
-
I’ve resolved to add entries to this log more often. So, I made two changes to my Independence. I added the gunwale posts in the bow area and the anchor bumpers. (I don’t know if ‘anchor bumpers’ is the correct name, but it is descriptive.) This reminds me that I need to drill the holes for the anchor cables.
- russ, GrandpaPhil, rafine and 7 others
-
10
-
I’m surprised at how long it’s been since my last entry. A death in the family, another surgical procedure and a great family reunion have happened, but I have been working on my model during a along these two months. I have to make entries more often. Anyway, this is where I am at present.
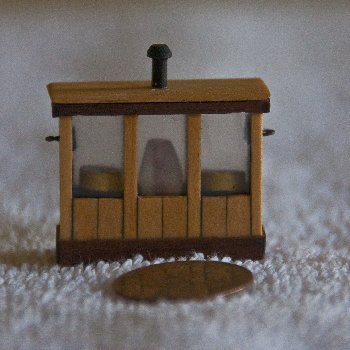
I made the binnacle. I based my design on some models being built in my club and a few photos I found on the web. As my friend at the club said, “All binnacles were the same. Two compasses with a lantern in the middle.”
I made the cap rails from a1/32 inch sheet and some strips. I finished planking the side and completed the cap rail all the way to the stern. Also, I made the rudder and attached it to the hull. And I added stairs from the water line up the hull and a ladder from the main deck to the quarter deck
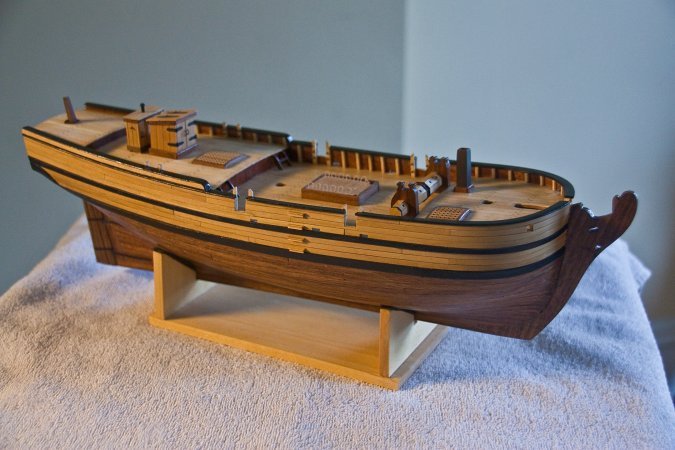
So I have some more deck furniture to make, and the transom and stem carvings, as well as the quarter badges to create.
-
-
-
Really like the wreath. Great carving; it would look good even without the pencil.
Cheers
- EJ_L, mtaylor, CaptainSteve and 1 other
-
4
-
-
Great looking work, Mike.
- mtaylor, FrankWouts, Stuntflyer and 1 other
-
4
-
-
-
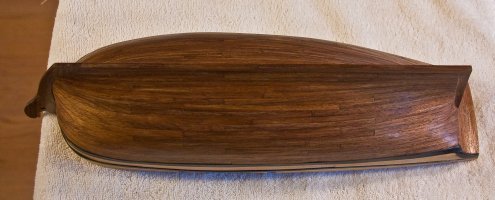
I haven’t made an entry in quite awhile due to a family issue. But I’m back in the shipyard and can report on some progress. First, I noticed that even though I used satin polyurethane, there is quite a shine on the lower planking. So I sanded it with 400 grade sandpaper and wiped it down with a tack cloth. I did not add another coat of urethane. It looks much better.
Next I added vertical supports along the bulwarks which I assume were added during the conversion from a merchant/fishing boat to an armed privateer. I used wider supports where the gun ports are. I will probably replace the supports on the quarterdeck where those guns will be mounted. I stopped in the bow area so I can coordinate the supports with the location of the catheads and anchor hawse holes.
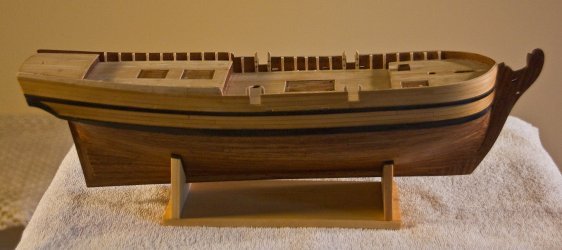
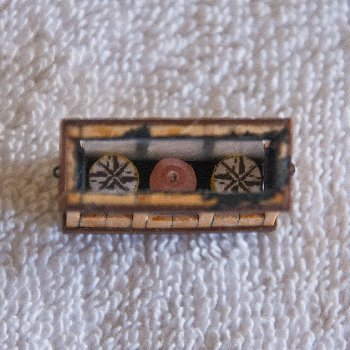
I also made the windlass. I ‘bastardized’ the windlass from Syren’s Cheerful model kit. I had to make changes since this model is narrower that the Cheerful model. I reduced the section with three holes down to two and got Chuck to let me have another section so both sides of the windlass are the same. I think it came out rather well. Of course, I changed the ‘supports’ from boxwood to walnut. Note: It isn’t glued yet.
- DocBlake, Mirabell61, mtaylor and 10 others
-
13
-
Right Chuck! I forgot that the scale of this model is bigger.
On my model, I was planning to use 1/16 for the cap rail and now I realize I need to use thinner wood.
But your comments about being aware of scale and how that would translate to real life size is really valid and important.
Cheers.
- Canute, Elijah, thibaultron and 4 others
-
7
Independence 1775 by KenW - FINISHED - Scale 1:48 - American Privateer
in - Build logs for subjects built 1751 - 1800
Posted
Thanks Dave. I’m not really that good. As long as you stay about 3-6 feet away it’s OK.
Cheers.