


KenW
-
Posts
1,228 -
Joined
-
Last visited
Content Type
Profiles
Forums
Gallery
Events
Posts posted by KenW
-
-
Excellent Mike. Your workmanship is stunning to behold.
Cheers.
- Stuntflyer, Canute, mtaylor and 1 other
-
 4
4
-
I haven’t posted in awhile because I’ve been working on my club’s group build of the Medway Longboat. But I’ve managed to finish rigging the guns. Not much to discuss. Everything went straight forward.

I added eye bolts for the in-haul tackles which are stowed away.
-
Your model looks excellent! Very fine workmanship.
And you log is a pleasure to read.
Cheers.
-
Your model looks really good Ryland.
I also used Doug McKenzie's spacing jig (and forgot to give him credit in my log).
Cheers.
-
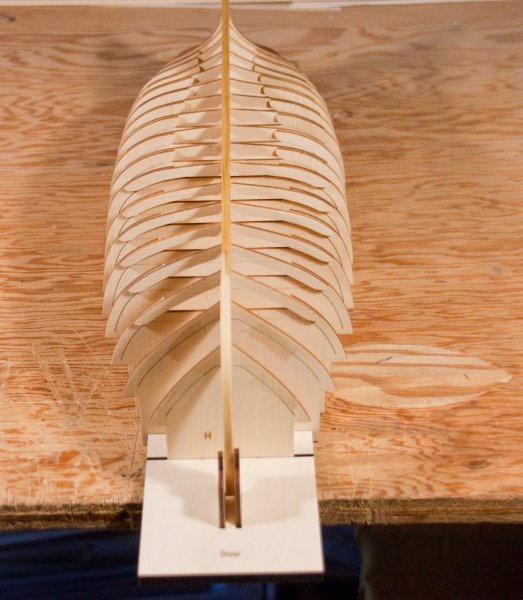
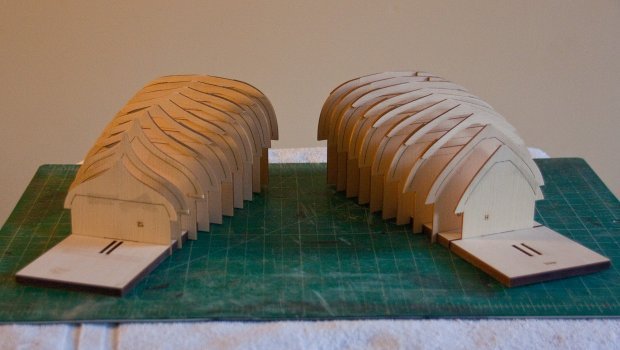
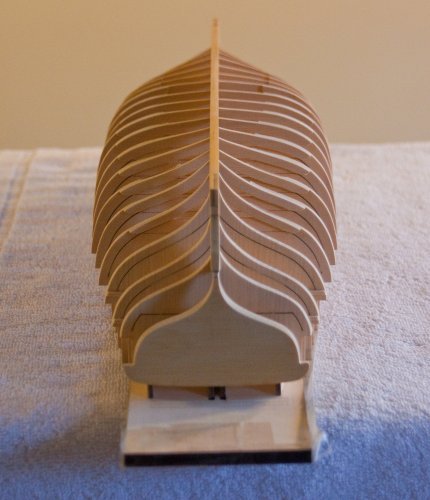
After fairing the hull, I lined off the hull using the paper strips and tape as per the instructions. However, today I went to a workshop at Chuck’s house for members of the my club that are participating in the group build. Chuck pointed out that my fairing of the hull was insufficient. Where the upper and lower pieces of the frames were glued together, one of the pieces still has char on it. This means that that piece with the char is actually ever so slightly ‘shorter’ than to other. This means that the piece with the char will not be glued to the planking - it’s to short. The problem is that if both pieces aren’t glued to the planks, there will be real problems when the center of each frame is removed. Either the upper or lower piece could split. So fairing must continue.

So I removed the tapes and continued fairing both sides of the hull. The method I was using was OK, I had just stopped too soon. After a awhile, I could see that the fairing looked better. Of course, I must re-do marking each frame with the ticks from the paper strips, etc. and adding the tapes. But that is a small price to pay; a possible disaster was averted.
- Tigersteve, Richvee, Rustyj and 7 others
-
10
-
-
Hey Steve. Which photos are distorted? They look fine to me.
Cheers.
-
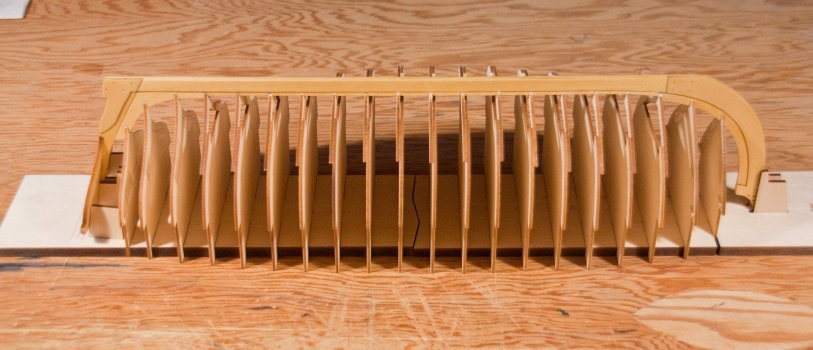
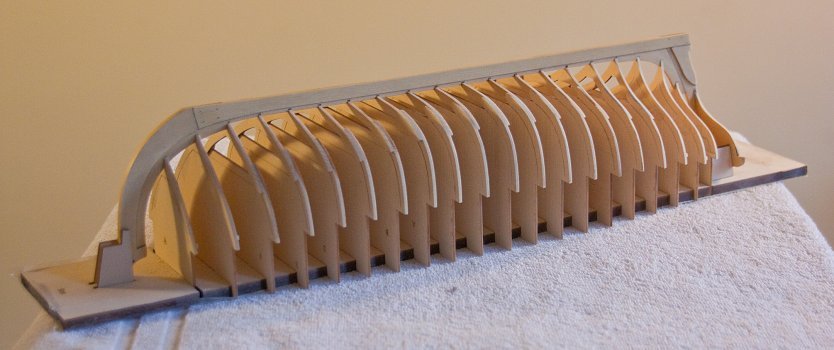
The keel has been glued to the frames on the building board. It worked just as the directions said with no problems. At our club meeting last Tuesday, Chuck said that care must be taken to insure that the keel is straight with no bend. He said he just eyeballs it. I’m sure my eyes aren’t as good as his, but it looks good to me.
-
Thanks Frank. I didn't notice this post until just now. Sorry I missed it.
-
I made the all the frames and fit them into the baseboards. No real problems except for a initial confusion with my reading of the #6 and #9 numbers on the frames. But after a quick fix, no damage was done.
-
The stand looks great. What are the dimensions of the base, and what kind of wood?
Thanks
- EJ_L, Ryland Craze, mtaylor and 1 other
-
4
-
Thanks Jeff, Dave and Chuck, as well as the 'likes'.
Jim: Thanks as well - The instructions say it isn't necessary as the holes are only for a small piece of filiment.
The size of my holes (a #78 drill) made for a tight fit. I don't think I could get the filiment all the way through and I didn't want a bigger hole.
Cheers.
-
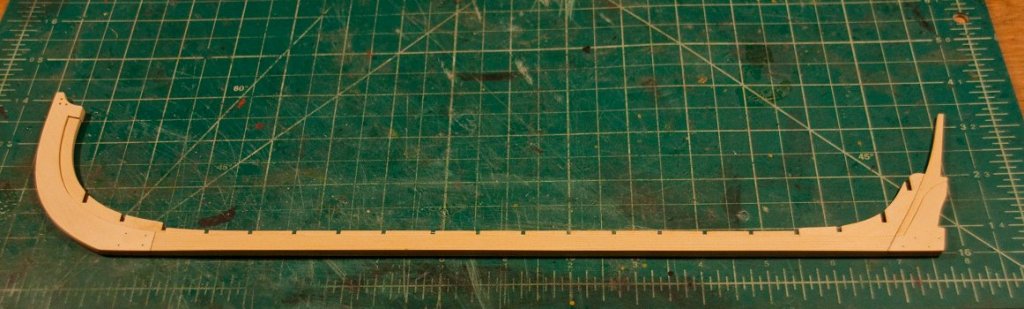
I’m taking part in the group build of Chuck Passaro’s kit of the HMS Medway Longboat. The kit looks to be well made in a way that most experienced modelers will be able to successfully build the model. The directions provided by Chuck are explicit and easy to understand.
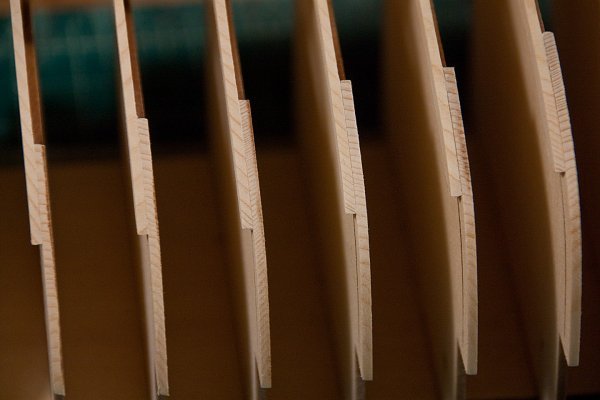
I’ve started the kit and have completed the keel. I followed Chuck’s instructions and everything went according to plan. I followed the ‘more advanced’ instructions for making the keel. One thing I did that was sort of unusual was the way I determined where to place the bolts at the bow and stern. I made a photocopy of the two areas of the keel with the bolts. I cut out the two places on the photocopy where the bolts were so the cutout fit the thicker keel part. I drilled the holes (using a #78 drill) on the port side since the plans show the port side of the boat. Then I just turned the small photocopy over and used the small holes in the paper to drill the starboard side. I hope I’m being clear in my descriptions.
I don’t think my rabbits were 1/32 inches because the 4 thinner pieces were a little thicker that 3/32 inches. But the difference is so small I don't think it will be a problem.
The kit is really well designed and I think it will turn into a great build.
- rafine, Ryland Craze, Chuck and 6 others
-
9
-
Hey Jim! Hope to see you at our meeting next week.
You are inspiring me to start a build log even though I won’t have much to offer compared to you.
Keep up the great work.
Cheers.
- Ryland Craze and jml1083
-
2
-
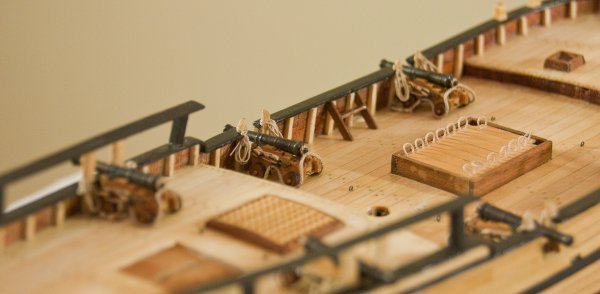
The guns have been mounted on the boat. They look good; the only problem was attaching those hooks on the breaching line onto the little eye bolts. I also glued some deck furniture to the boat. I don't think these pieces will interfere with the task of rigging.
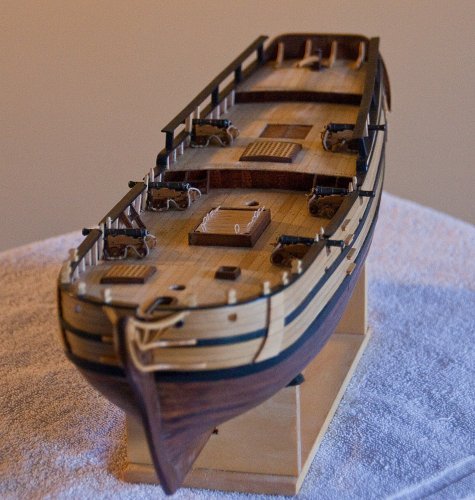
I cheated and used diluted glue to keep the lines where I wanted them.
- rafine, mtaylor, GrandpaPhil and 3 others
-
6
-
-
-
-
Great to see another of your builds of huge ships. You will be making lots of gun ports and carriages, etc.
And, I love to watch your carving skills. Very inspirational.
Cheers.
-
Great build Bob. It’s really coming along nicely.
Cheers.
-
The gun carriages were already assembled and stained. Today I blackened the gun themselves. I used the process described by Dave (DocBlake) in his blog. The first step is to soak the barrels in Acetone for 15 minutes. Then soak for another 15 minutes in Muriatic Acid. Finally, soak each barrel for about 1 minute in JAX Black for Brass, Bronze and Copper Darkener. The result is a very metal looking gun barrel.

The photo doesn’t due the color of the guns justice. It’s much blacker in tone and all the details can easily be seen.
- Ryland Craze, EJ_L, rafine and 5 others
-
8
-
-
Hey Dave - My intention is to rigg her including furled sails.
We’ll see.
- mtaylor, EJ_L, Ryland Craze and 1 other
-
4
-
The carvings are installed on the hull; as well as the aft cap rail. I also made a tiller.
I like the way the boat is shaping up and I think the quarter badges look good.
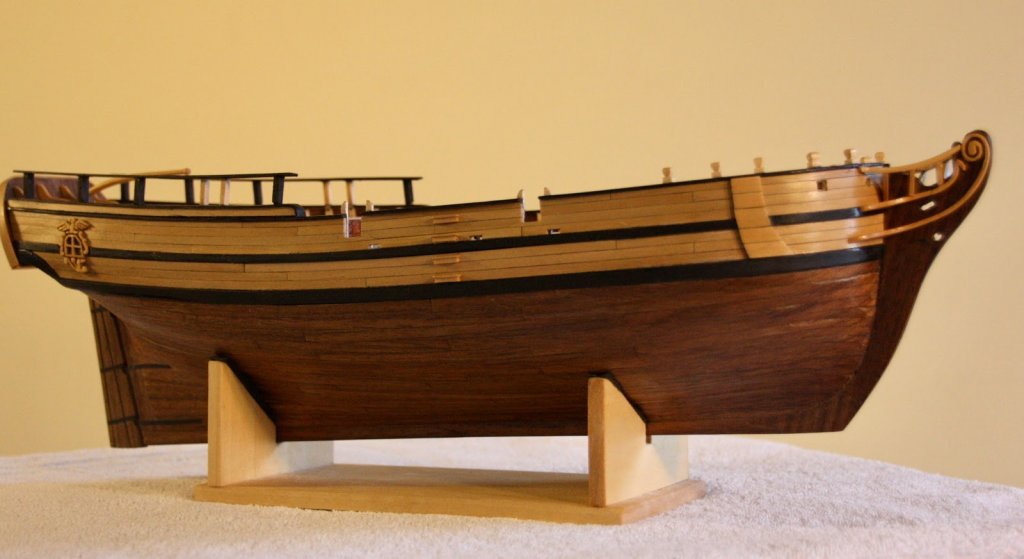
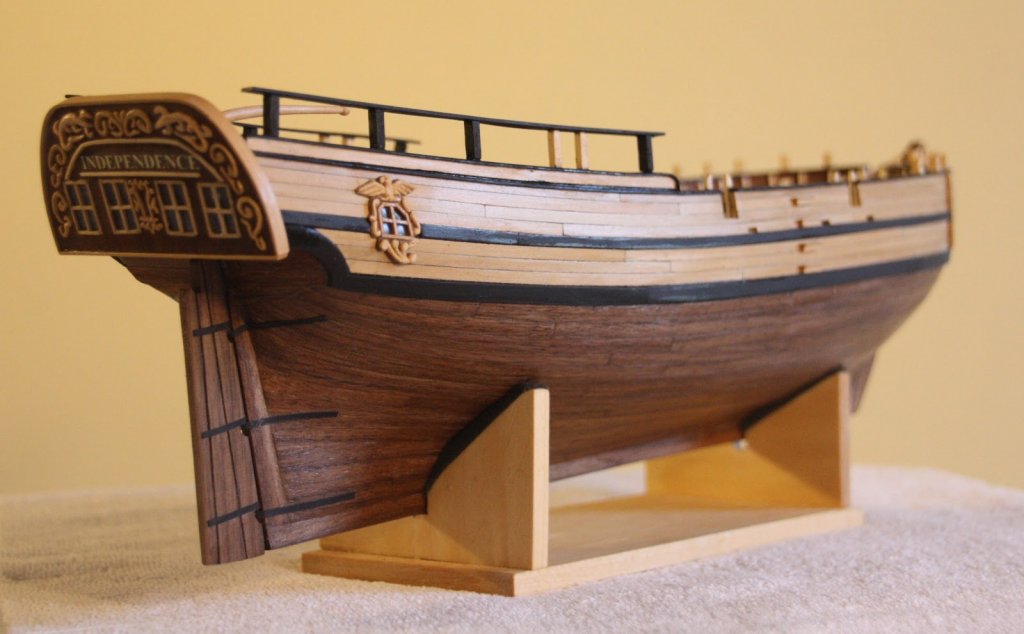
I’m almost ready for the boat to be launched. I need the swivel gun posts and I have to blacken the guns and mount them. The gun carriages are already put together.
- EJ_L, Jim Rogers, Valeriy V and 8 others
-
11
Medway Longboat 1742 by Chuck - FINISHED - 1/2" scale
in Medway Long Boat - 1742 - Public group project.
Posted
What is the title of May's book?
Your model is outstanding as usual.