


KenW
-
Posts
1,228 -
Joined
-
Last visited
Content Type
Profiles
Forums
Gallery
Events
Posts posted by KenW
-
-
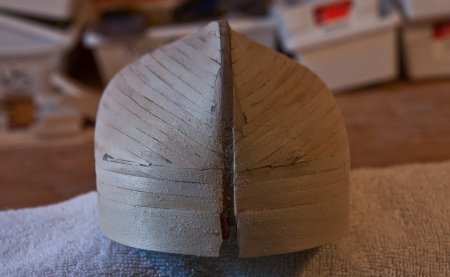
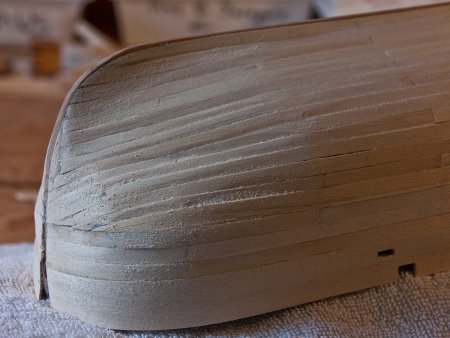
After applying lots of Wood Filler, the hull looks much better. Of course, you can’t see much original wood but the shape of the hull looks alright to me.
And, at this point I think more sanding would be counterproductive.
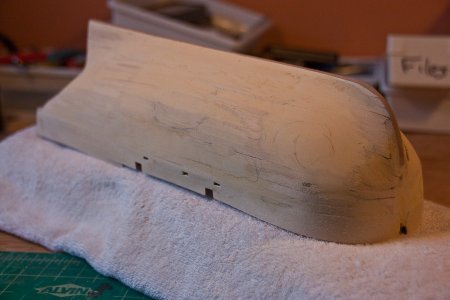
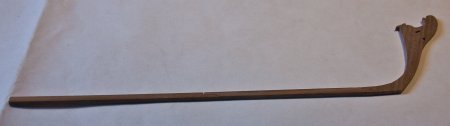
I also made the stem and keel pieces using my trusty coping saw and some sandpaper and files. The stem and keel fit together pretty well so I’m glad that’s over with.
Finally, a photo of the boat with stem and keel attached, sitting on its new cradle. The cradle is simple and basic so I may decide to make something more fancy in future.
- Jim Rogers, mtaylor, Martin W and 5 others
-
 8
8
-
Every time you make another addition, the boat becomes more impressive.
How do you do it?
-
The model gets more and more impressive with each addition.
Great job!
-
Hey Dave: I know how hard it is to edge bend planks that are 1/32" thick because my first layer is 1/32 basswood. I've started with the wood filler and I'm using it to give strength in several places just because the strips are so thin. The problem is that my second layer will also be 1/32 inches; except it will be walnut. I hope that wood has a little more substance to it.
As for the transom, I have some ideas I plan to try out. We'll see. (The metal piece is definitely out.)
Cheers.
-
-
I had surgery back in April so modeling has been on hold. I had hoped to be able to get back into the shipyard sooner, but my recovery has taken longer than I planned.
The planking on this boat is extremely challenging. Fortunately I'm double planking so I will have a chance to fix all my mistakes. The first layer is now complete; and I really made a royal mess of it. My planking plan was poor and skill at edge bending seriously lacking. The only thing I can say is that my bow does not look too much worse that the pictures on the photos of the AL kit’s bow. My goal is to make the final layer look as good as DocBlake’s bow. I will need a new and better plan and more patience when edge bending. But first, more sanding and then some Elmer’s Wood Filler.
Some photos:
-
-
You're pretty handy with a needle and thread.
- cog, popeye the sailor, Piet and 1 other
-
4
-
WOW! I never considered this a scratch build. I'm copying the kit with the only difference being that I reduced the plans.
I always thought of a scratch build as involving creativity. I don't feel like I'm creating anything. Anyway, I changed the title - how do I "ping a moderator"?
Also a scratch build for me is POF, not POB.
-
Hey Dave. Good to hear from you.
I had surgery a couple of weeks ago so modeling has been on hold. I hope to be able to get back into the shipyard soon.
The planking on this boat is definitely challenging. Fortunately I'm double planking so I have a chance to fix my bad planking plan.
I'll add another entry as soon as the first planking layer is done.
Cheers.
-
Hey Dave. This is certainly a project like no other that I've seen.
I'll be following along with interest. Your workmanship looks outstanding.
Cheers.
- thibaultron and mtaylor
-
2
-
What a beautiful boat! And it is the scale you wanted.
You were able to meet every challenge with impressive results.
Cheers.
- Piet, Mirabell61, mtaylor and 3 others
-
6
-
Mike: You're doing a great job. I think the problem Dave sees is that in the photo the vertical is not straight up-and-down.
And the bow, because it is farther away, seems less vertical than the stern.
I hope I'm right.
-
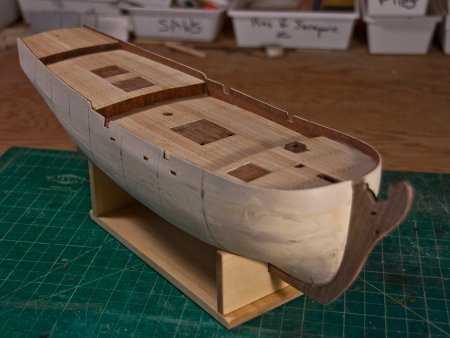
Planking the deck is complete. I used basswood and liked using the wood but each plank seems to have a different color tint. I guess I should have paid more attention when I selected the wood at my local art supply store.
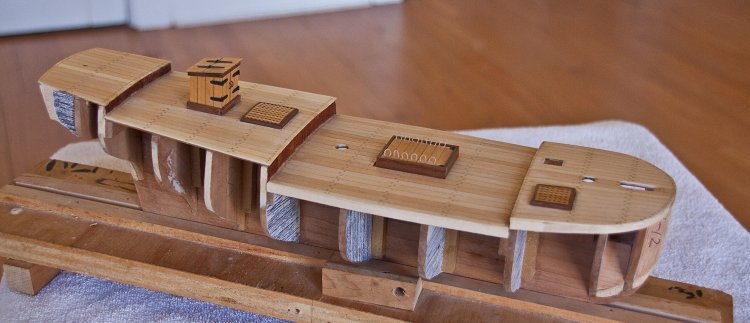
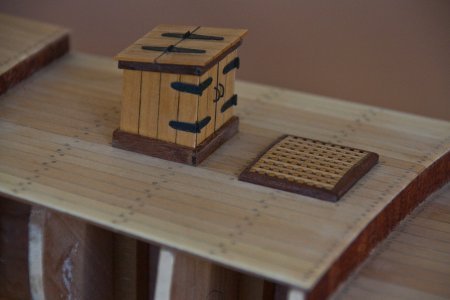
I also made some of the deck furniture. I made whatever was to be placed into the deck planks. The smoke stack and its coaming is not shown here. (It keeps falling over.) The main hatch has two holes drilled into the forward covering plank. The holes are for the anchor cable. The kit has the cable coiled on the deck and the amount of line in each coil is obviously not accurate. An anchor cable can be several leagues long and is much better stored below; thus the holes. I’m not sure if I need rope handles on that plank.
Next up is more fairing of the hull in preparation of the first layer of hull planking. There is always more sanding to be done.
-
Can't wait for the tape to come off.
- popeye the sailor, mtaylor and russ
-
3
-
In addition to your skills as a wood worker, you have come up with some great 'tricks'. Supporting the bulkhead extensions would have saved me a lot of grief on my last model. And, clamping a temporary batten for the gun port alignment is another great idea.
Keep the ideas coming; and keep showing your results. And - keep bringing the model to our club meetings.
Cheers.
- Martin W, mtaylor, Old Collingwood and 8 others
-
11
-
Your work is progressing with your usual high quality.
And nothing like getting a new toy (i.e. a camera).
Keep up the good work.
-
Another great model! I have admired your skill ever since I discovered your build logs.
In fact, I find myself referring to this build as I progress on my latest build attempt. You are giving me much appreciated help.
Great work and I can't wait to see your next project.
Cheers.
- popeye the sailor, mtaylor and Canute
-
3
-
Those sails look great anyway.
Cheers.
-
-
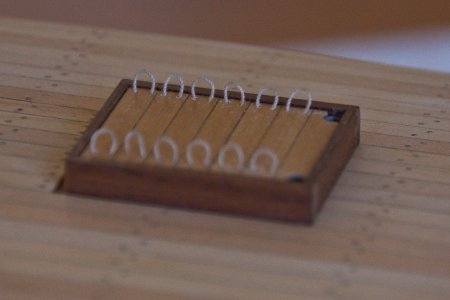
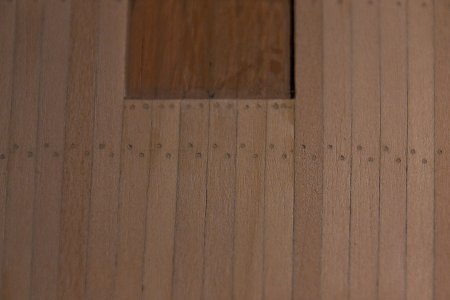
I’ve cut the false decks and glued them into place. I then measured to determine if I had them cut/centered properly. I also planked the main deck and drilled that deck’s tree nails. For the tree nails, I used the method described in Chuck Passaro’s Cheerful log (page 10). That log is full of good modeling ideas and techniques.
A brief description of his method, taken from his log after some small holes are drilled (he uses a #78 drill):
- sand the area smooth
- use a sharp awl and GENTLY insert into each. Don’t push it too hard or you will distort the hole shape.
- Take a very , very , very sharp #2 pencil. Insert point into each hole and twist lightly. You must keep a sharp point and sharpen the pencil every ten or so holes. Use one of those cheap kids pencil sharpeners.
- Then fill each hole with Elmer's wood filler. Scrape off excess with a piece of wood.
- Sand it smooth to get a nice surface.
- Then apply some wipe-on-poly.
For me, I used a #72 drill and didn’t use an awl. The pencil must be sharp. I could hear/feel when the point broke and sharpened the pencil again. Also, the hole had to be re-drilled to get the lead out.
The deck planking was also done based on another method from Chuck’s Cheerful log. It’s described on the 17th page.
Basically, the outer planks are curved and, where needed, hooked scarf joints are used when the curve of the bow or stern gets too steep. For the best description, check out Chuck’s Cheerful log on page 17. My planking will not have a water way. I don’t know if that’s authentic, but the kit’s plans doesn’t have one. I’m worried about that curve at the bow which forms a unique stubb-nose on the forecastle. I figure that if one deck has a water way, they all should.
A closer look at the tree nails:
A better log on the Independence is the one by DocBlake here on MSW.
Also Clare Hess’s log is excellent and can be found here: https://shipmodeler.wordpress.com/category/ship-model-build-logs/als-independence-build/
Clare’s log is odd since his first entry is at the end rather than the beginning of the narrative.
- Mirabell61, russ, EJ_L and 6 others
-
9
-
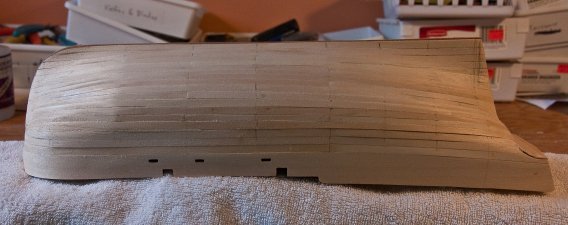
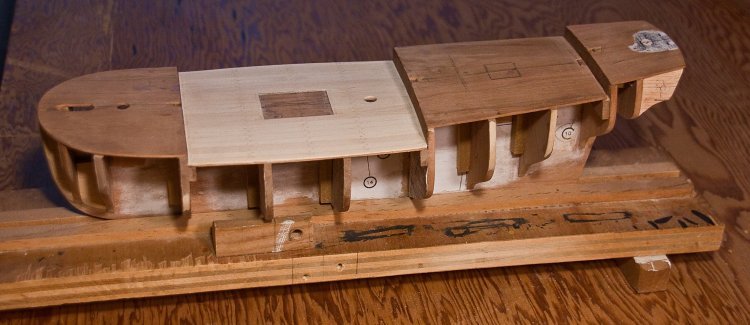
I glued the bulkheads on to the keel former. I was surprised that after I was so careful when I cut out these parts, they still were not ‘square’ and centered properly. So I had to do a lot of scraping, filing and adding shims; and I still have fairing to go. Oh well, there is a reason I, among others, prefer to start with a kit and laser cut pieces.
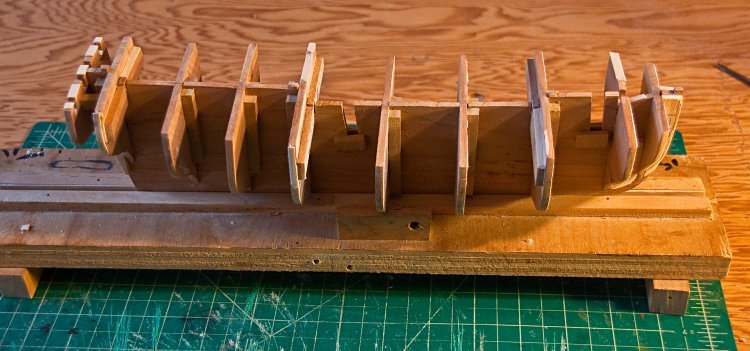
Well, I plan to install the false decks and then fair the bulkheads. I think I will need more sand paper.
-
Hey B.E. I'm enjoying your Cheerful build log and have already learned a few things.
The Admiralty model of the Cheerful/Surly is here in the US at the museum of the US Naval Academy at Annapolis, Maryland. I took these photos on a recent visit there. Thought you would enjoy them.
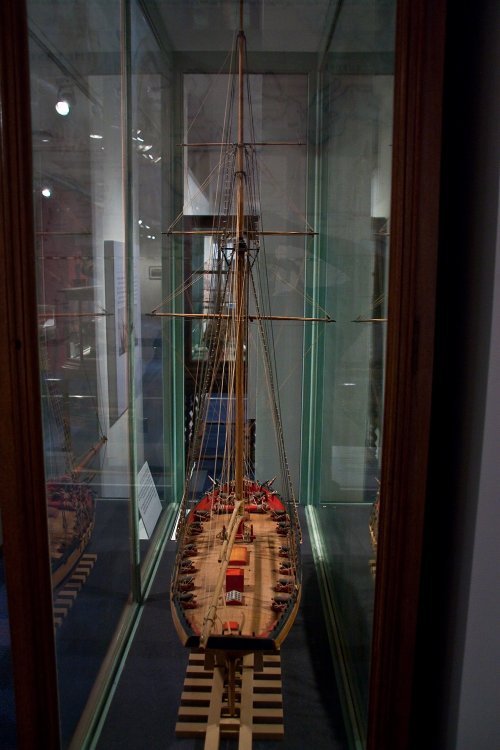
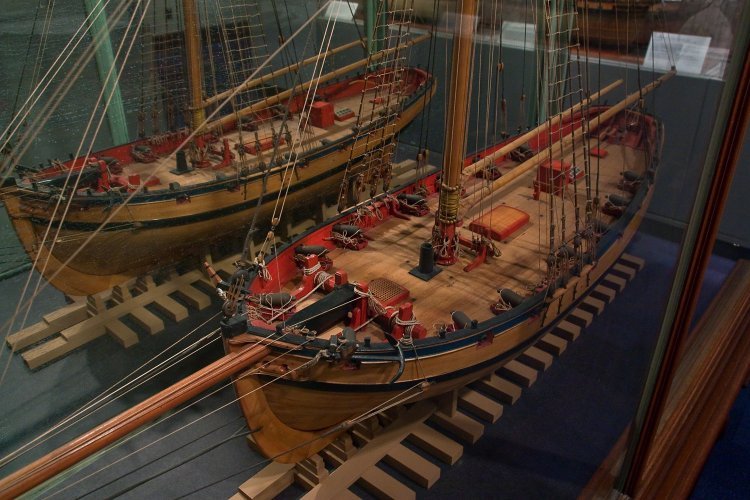
The back of the case is a mirror - there aren't two models in the photo.
Cheers.
-
Thanks for your reply. And, yes, I've seen them now that I see them.
I'll check them out.
Cheers.
Independence 1775 by KenW - FINISHED - Scale 1:48 - American Privateer
in - Build logs for subjects built 1751 - 1800
Posted
Thanks Lou. DocBlake showed me that it can be planked, but, at least on my first layer, I was not able to get planking that I found acceptable.
Check out his blog; I can only hope that my second layer will be as good.