MORE HANDBOOKS ARE ON THEIR WAY! We will let you know when they get here.
×


vossiewulf
-
Posts
1,477 -
Joined
-
Last visited
Content Type
Profiles
Forums
Gallery
Events
Everything posted by vossiewulf
-
 I wish I'd considered that option before attaching the 10 boxwood pintle mounts
- 714 replies
-
- 2
-

-
- lady nelson
- victory models
- (and 1 more)
-
Is there anything NOT being built from the Heller 1:100 Soleil Royale right now?
- 244 replies
-
- 3
-
-
- heller
- soleil royal
- (and 1 more)
-
Cedric, considering that basically nothing matches- hull lines, head shape and position, mast position, gunports... is it really an advantage to start from the kit? I'm wondering if you're going to spend more time trying to change one into the other than you might spend just drawing bulkhead lines and scratching it from styrene (if that's your preferred medium).
-
Popeye, the chop-it thing uses a regular double-bevel razorblade so it puts a slight bevel on the end of anything it cuts, you'll still need to hit the ends with sandpaper to get a good fit. I suggest you look at the disc-sander mandrels for rotary tools from my build log, you don't need a micromotor with a 90 degree attachment, that just makes it a bit more convenient- the mandrels will work in any rotary tool, and you just need to touch a plank end square to the disc sander and you have a perfectly square plank end. And the disc sander is even more useful when fitting planks at the bow where you need to set two angles at once for a good fit. I sincerely doubt my planking would have turned out as well as it did without the use of the disc sander mandrels.
-
Anyone have recommendations for falconets? The copper ones in the kit are unusable, cast in badly misaligned halves. I've found a series of falconets offered from various manufacturers at Cornwall, does anyone know which ones I should order? Or are all of them terrible and I should make them myself?
- 714 replies
-
- 1
-
-
- lady nelson
- victory models
- (and 1 more)
-
Thanks Chuck for the starting a thread and posting the info above. I am thinking of getting a ropewalk so even if I can't talk you into carrying polyester maybe I can give it a spin myself. But I think you should support polyester, maybe make it a premium special order or something where you'll only make what people order and they'll have to wait a bit for delivery. As for colors, one is pretty green and the other is a more saturated yellow, I prefer that one from an aesthetic standpoint but the green one may be more realistic.
-
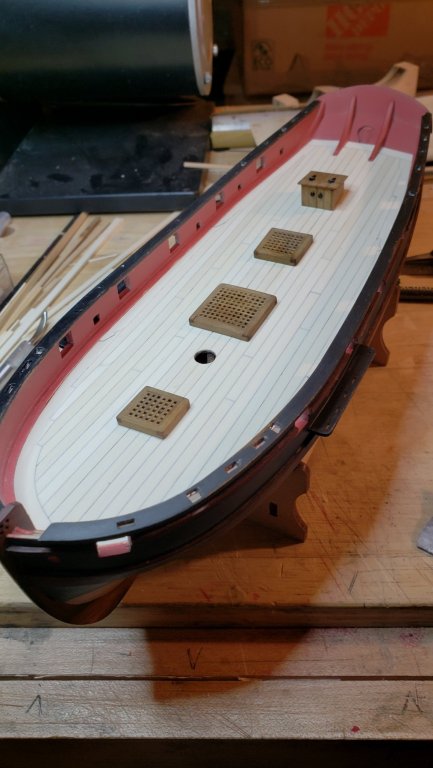
Thanks Rick and Grant Well I should have known the windlass was required for the anchors, but the image I posted above confused me- the lines coming off it and running through the grate down below doesn't look heavy enough to be an anchor cable.
- 714 replies
-
- 1
-
-
- lady nelson
- victory models
- (and 1 more)
-
Thanks Rick. I am now confused about the windlass- after looking at Tony's period model pics and Chuck's builds the only thing I can say is a cutter had a windlass to control the bow yard. What they looked like seems to be highly variable. From Tony's pics, this is the one closest to the kit version, but it has a pin rail which seems odd, and I really can't see what is going on there. It seems they were square section passing through a mount that had a square pin that would pass through the yard, so the positions you could put the yard in where fixed and the yard couldn't be moved in and out dynamically. I also assume that was something of a reefing mechanism where the bow yard is hauled progressively inward as wind force climbs. And there was a flap-style ratchet mechanism but it had to work differently than shown in the kit drawings, which is just a strip of wood glue in place. I can't really see how that should look.
- 714 replies
-
- 1
-
-
- lady nelson
- victory models
- (and 1 more)
-
Thanks Rick. I haven't decided on finish yet for the windlass and other bits, natural and black and red all are choices. Yes, was looking at the pumps and they will have to go. BTW do you know if brass blackener works on copper? I'd assume it does, but the kit's provided eyebolts are copper.
- 714 replies
-
- 1
-
-
- lady nelson
- victory models
- (and 1 more)
-
Thanks folks. So... I know I have to finish the deck furniture, but any suggestions on order from this point? There is probably a rational order in which to do everything, but I have no idea what it is.
- 714 replies
-
- 1
-
-
- lady nelson
- victory models
- (and 1 more)
-
Very difficult part executed perfectly. Really excellent work. The impression I get is among this community of builders, wood bending is the standard by which skill is measured, so he who can do more bends and more difficult bends than the other guy, wins. So we have parts like the cabin roof bent into multiple smooth curves for no functional reason, and a hull shape that is closing in on being a circle
-
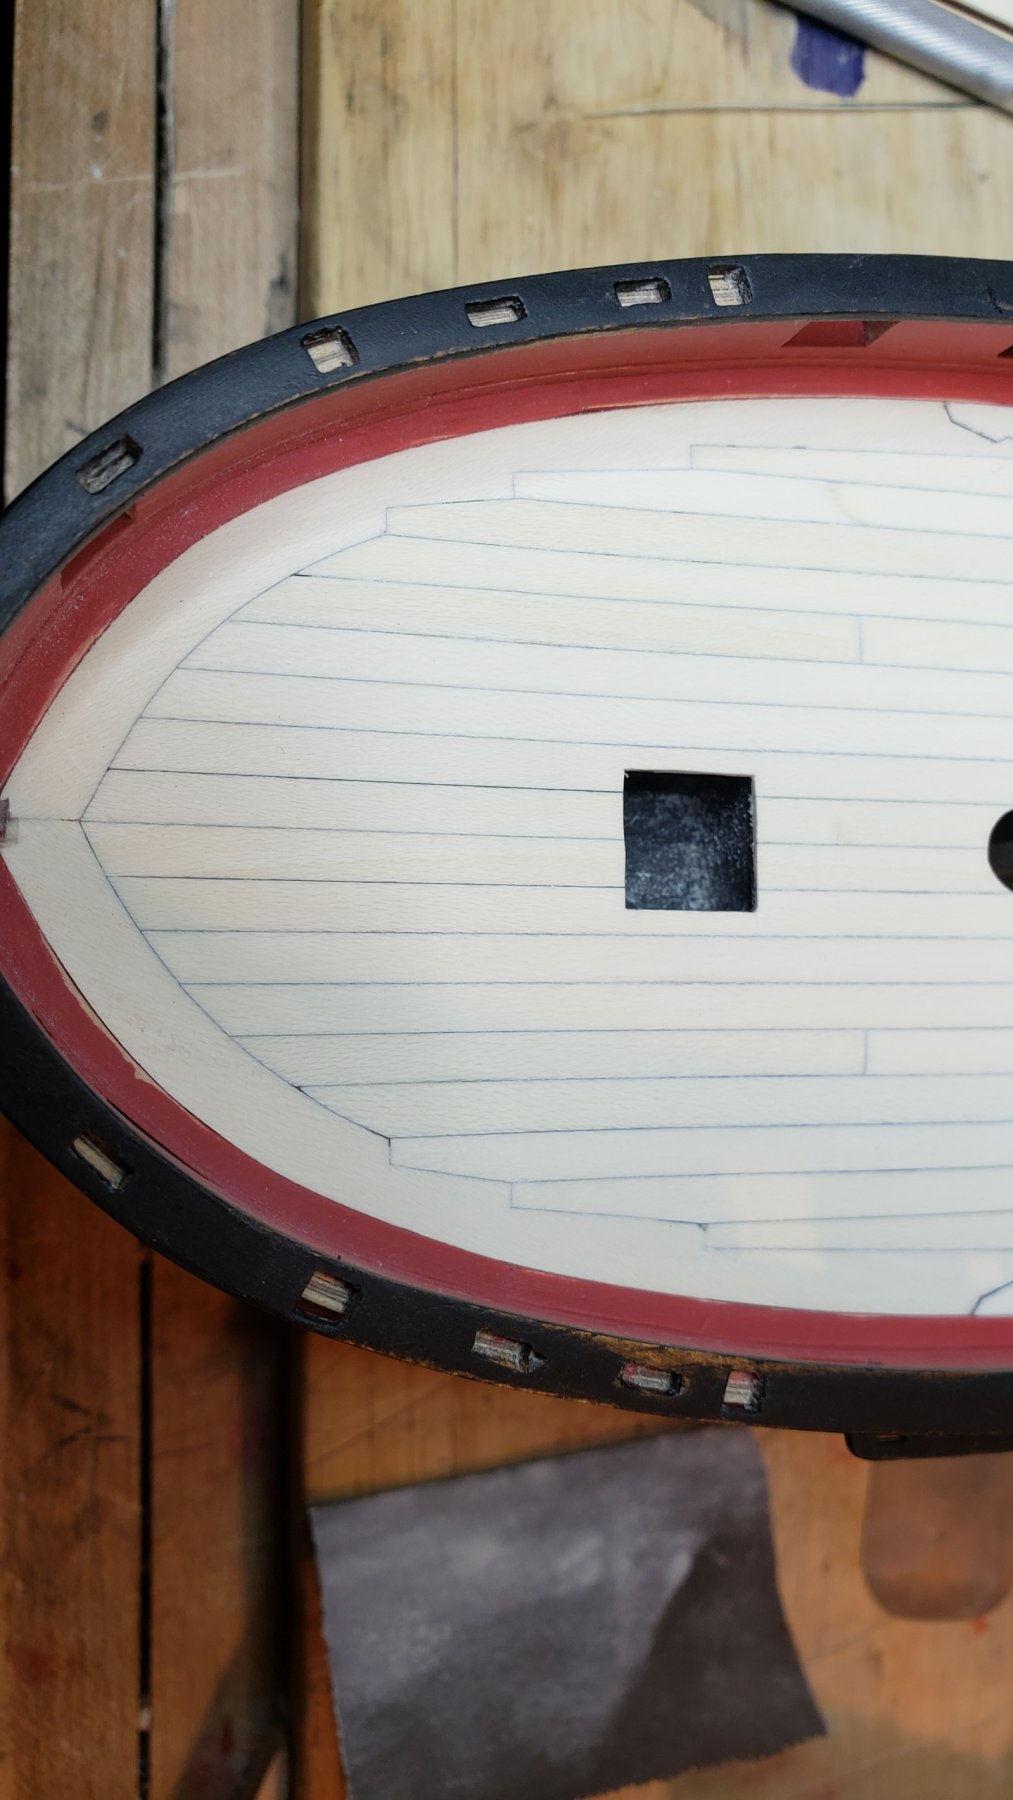
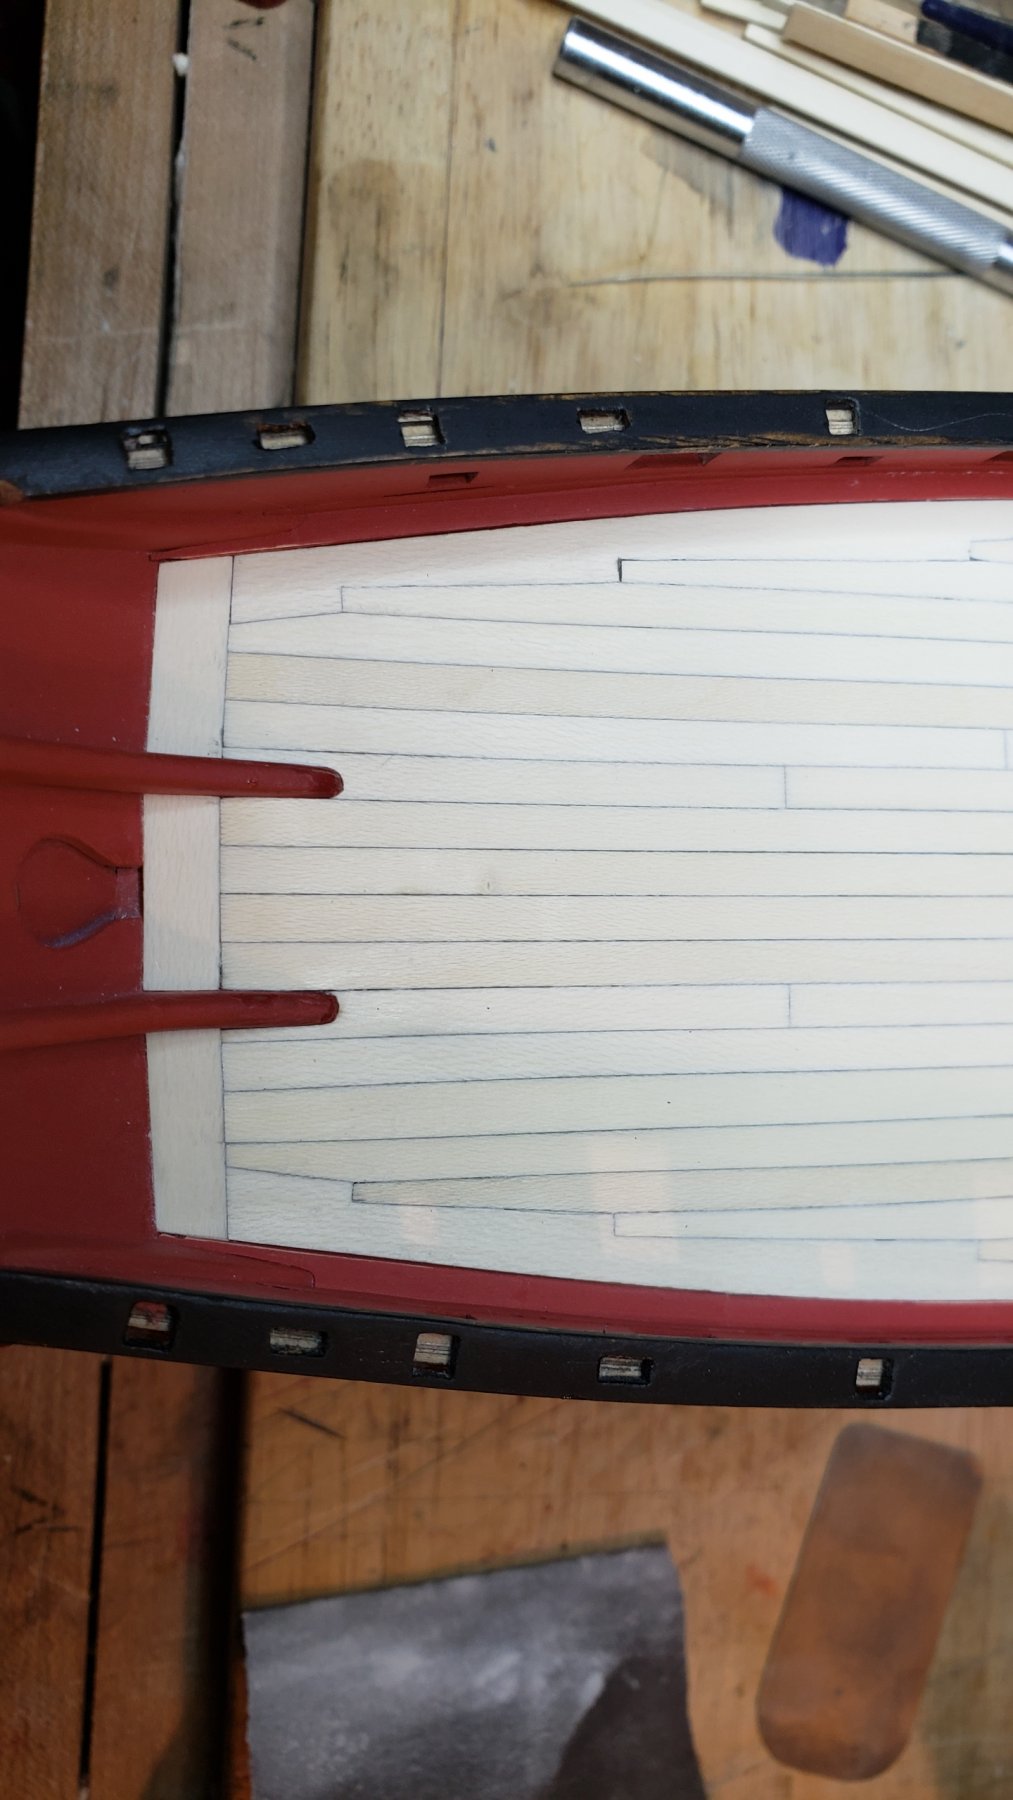
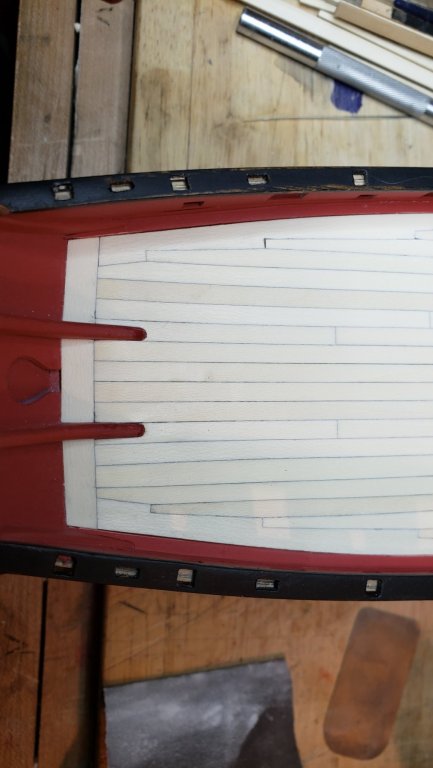
Done with deck except for clear coat. Starboard side fought tooth and nail to go off the rails, starting when I managed to put a big belly sweep into the first nibbed plank that's supposed to be all nice and straight. I had to make wider planks and then taper the rest of them on the starboard side to slowly remove that bend over four planks, lots and lots of fitting and sanding. But it looks reasonable now.

- 714 replies
-
- 15
-
-
- lady nelson
- victory models
- (and 1 more)
-
You don't think you will offer the polyester as an option Chuck? Switching over completely does sound a little extreme but it's very pretty rope and the explanations and instructions could make it clear that it's caveat emptor, make sure you're prepared to handle it. And I'm thinking a flexible CA glue would probably work well to control the fraying. Or at least I'd be willing to give it a try
-
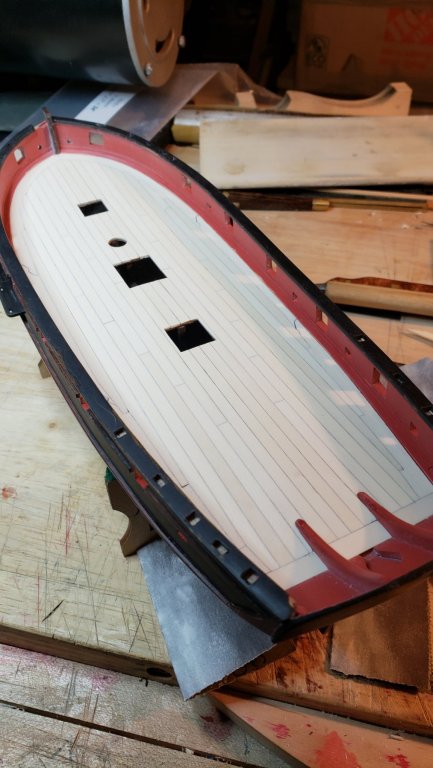
Nice job with a pretty hull shape. It's going to be an eye-catcher.
-
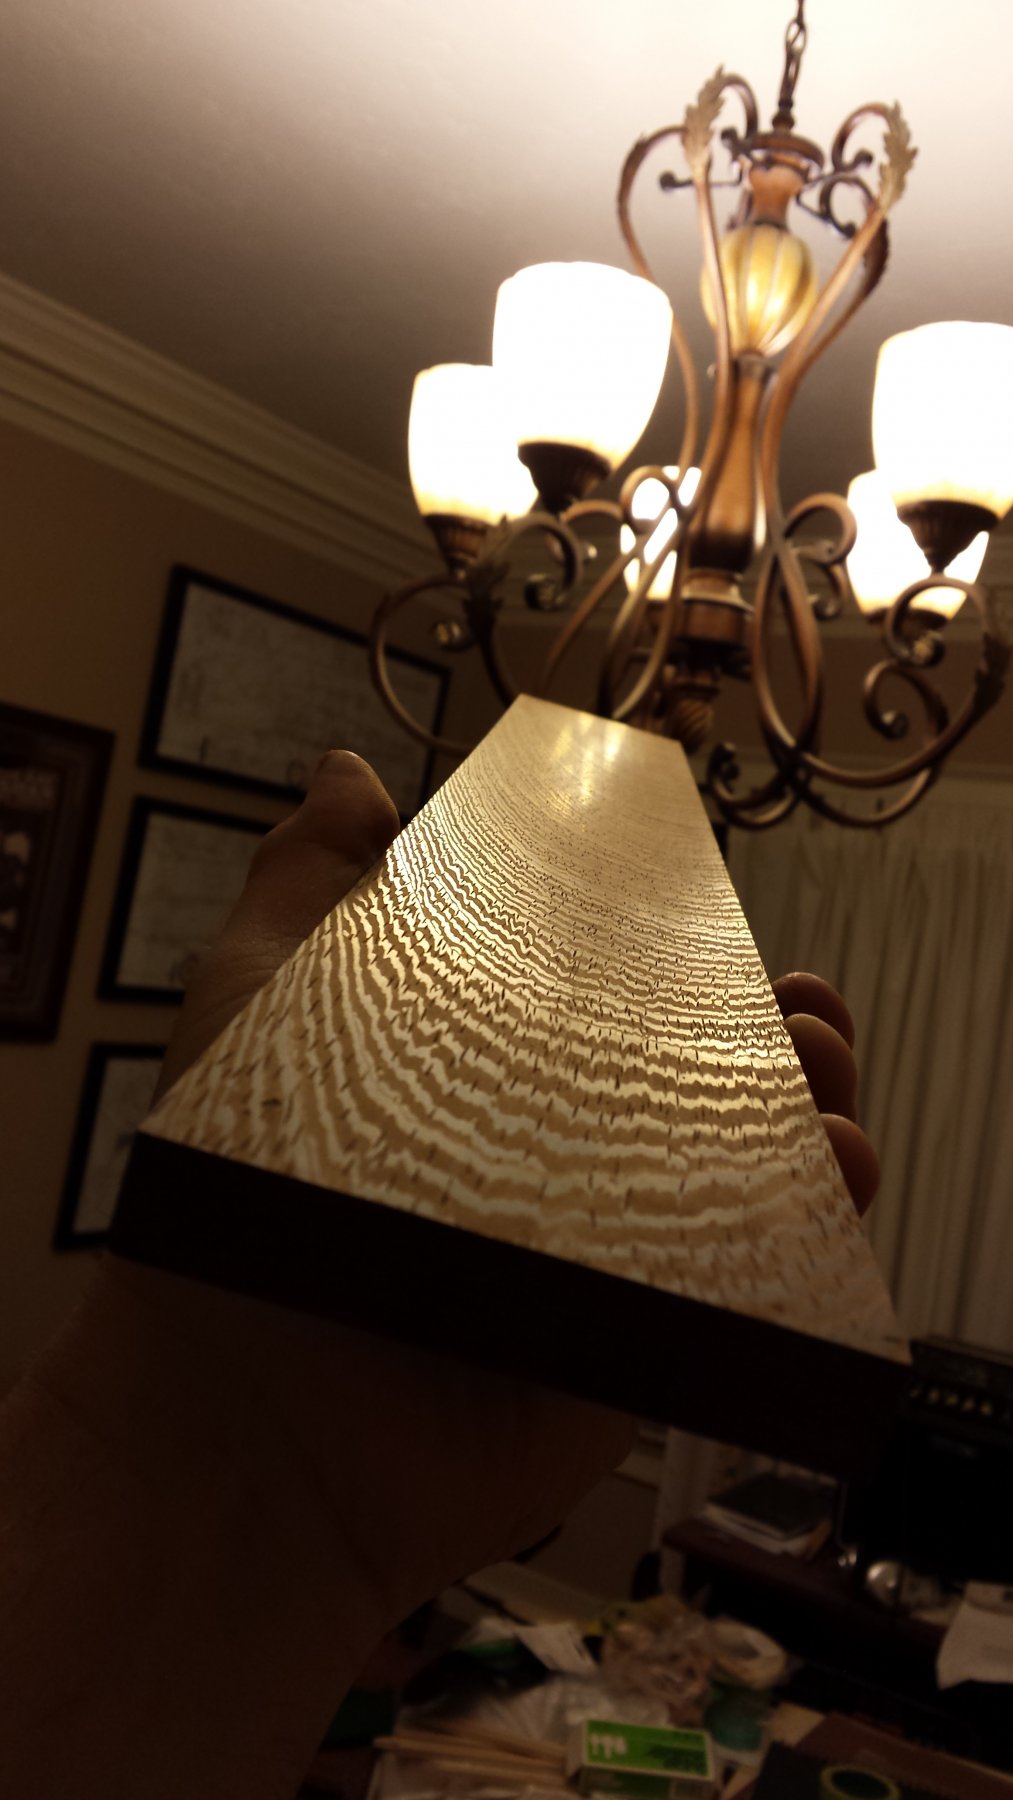
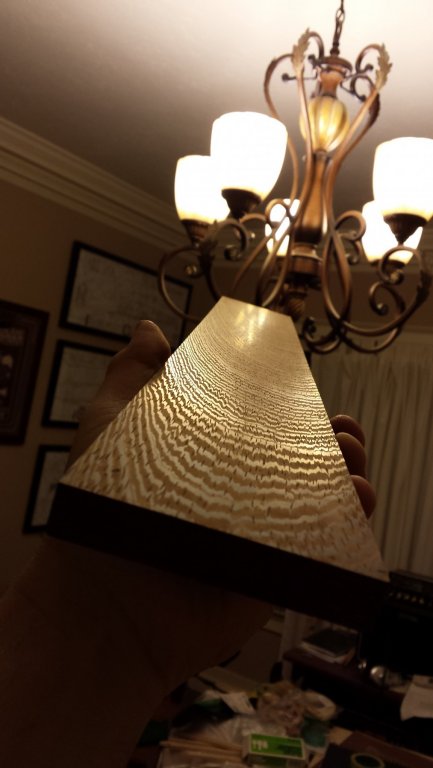
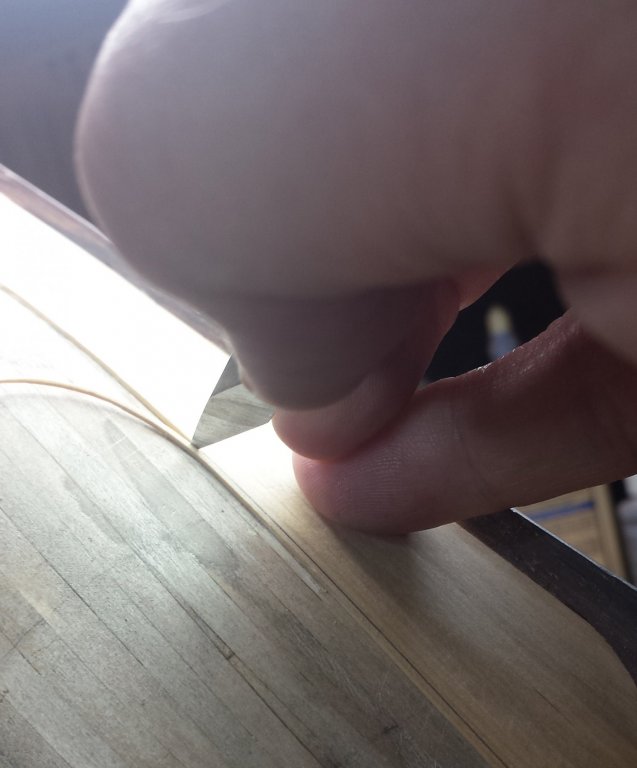
That will work if Ron won't help, but will be a fair amount of work to process it into what you want. On the up side, PM-V11 steel and you'd definitely feel like it was your personal knife. Below is a piece of wenge wood planed down with my Lee Valley low-angle smoothing plane with a PM-V11 iron. I don't anticipate having a need to do better than this.
-
My reaction to Flexcut tools is "meh". They're not horrible but neither are they (IMO) very good. I have one Flexcut knife and wasn't happy with how sharp I could get it, so I mostly use it for opening boxes. For micro tools available from retailers, I'd recommend the ones carried by Lee Valley over Flexcut any day, but the Lee Valley versions are considerably more expensive and that's usually a big factor also. If the Lee Valley tools are out of budget, try Ebay, if you know how to recognize them there are sellers of less expensive Japanese sets that really aren't bad at all. And here's a used Robert Sorby set for $185 that's quite good. Here's a Narex set that is reasonably good for $200, they're from the Czech Republic.
-
Wow, that's disappointing, never had him say that before. Did he say why? Maybe a fairly minor change to the design would make it possible for him to make it for you? If he didn't explain, I would ask, I don't know of anyone good who is willing to do custom work like he does, and certainly not with the same quality of steel. You can also work around his limitations by being willing to grind it down and shape it if needed yourself. That can be done reasonably safely to the temper of the steel by constantly dipping the blade in ice water and never letting it get more than warm under grinding. In one case I changed my mind about what I wanted, and took a blade he made and ground it quite a bit to change it to the new shape. Let's figure out how to change your design so Ron can make it, and then you might need to invest a bit more time before you can put a handle on it. And yes, I agree there is sharp and there is super sharp. When chip carving with the Hock knife, I can maintain super sharp for about 15 -30 minutes, after which I use the strop. I only do that a few times before returning to the 1000 grit stone to resharpen because strops, being soft, always start to round over the edge, and even the most subtle change in the bevel of the knife is noticeable to me when I'm carving.
-
Did you perhaps install planking that had just been delivered? Somehow that wood was bone dry when it was installed with nice tight joints and then it was exposed to humidity and expanded much more than I would have guessed possible- that's comparatively considerable change in plank width. That looks like normal boxwood, I didn't think it was that dimensionally unstable. That's the kind of wood movement you expect out of plain sawn oak. No you say it was delivered in March and a couple months would be enough for basic acclimatization. I think maybe it has to be the hot air gun then? If you're getting them more dry than they would be acclimatized and installing right then with a tight fit, it will have nowhere to go when moisture gets back into those planks. If it was in your garage hot and covered, that could also have acted like a sauna, semi-steaming the very dry wood. But even then I wouldn't have guessed it would go that far.
-
Yeah that's not shrinkage, that's expansion causing those lines and ripples. They must have been put on under exceptionally dry conditions and then been exposed to 90% humidity. If you have that much humidity range in your shipyard and can't control it otherwise, best bet is planking in springtime or fall, in between the extremes. I'm sorry for that, must not have been a good day when you saw that had happened.
-
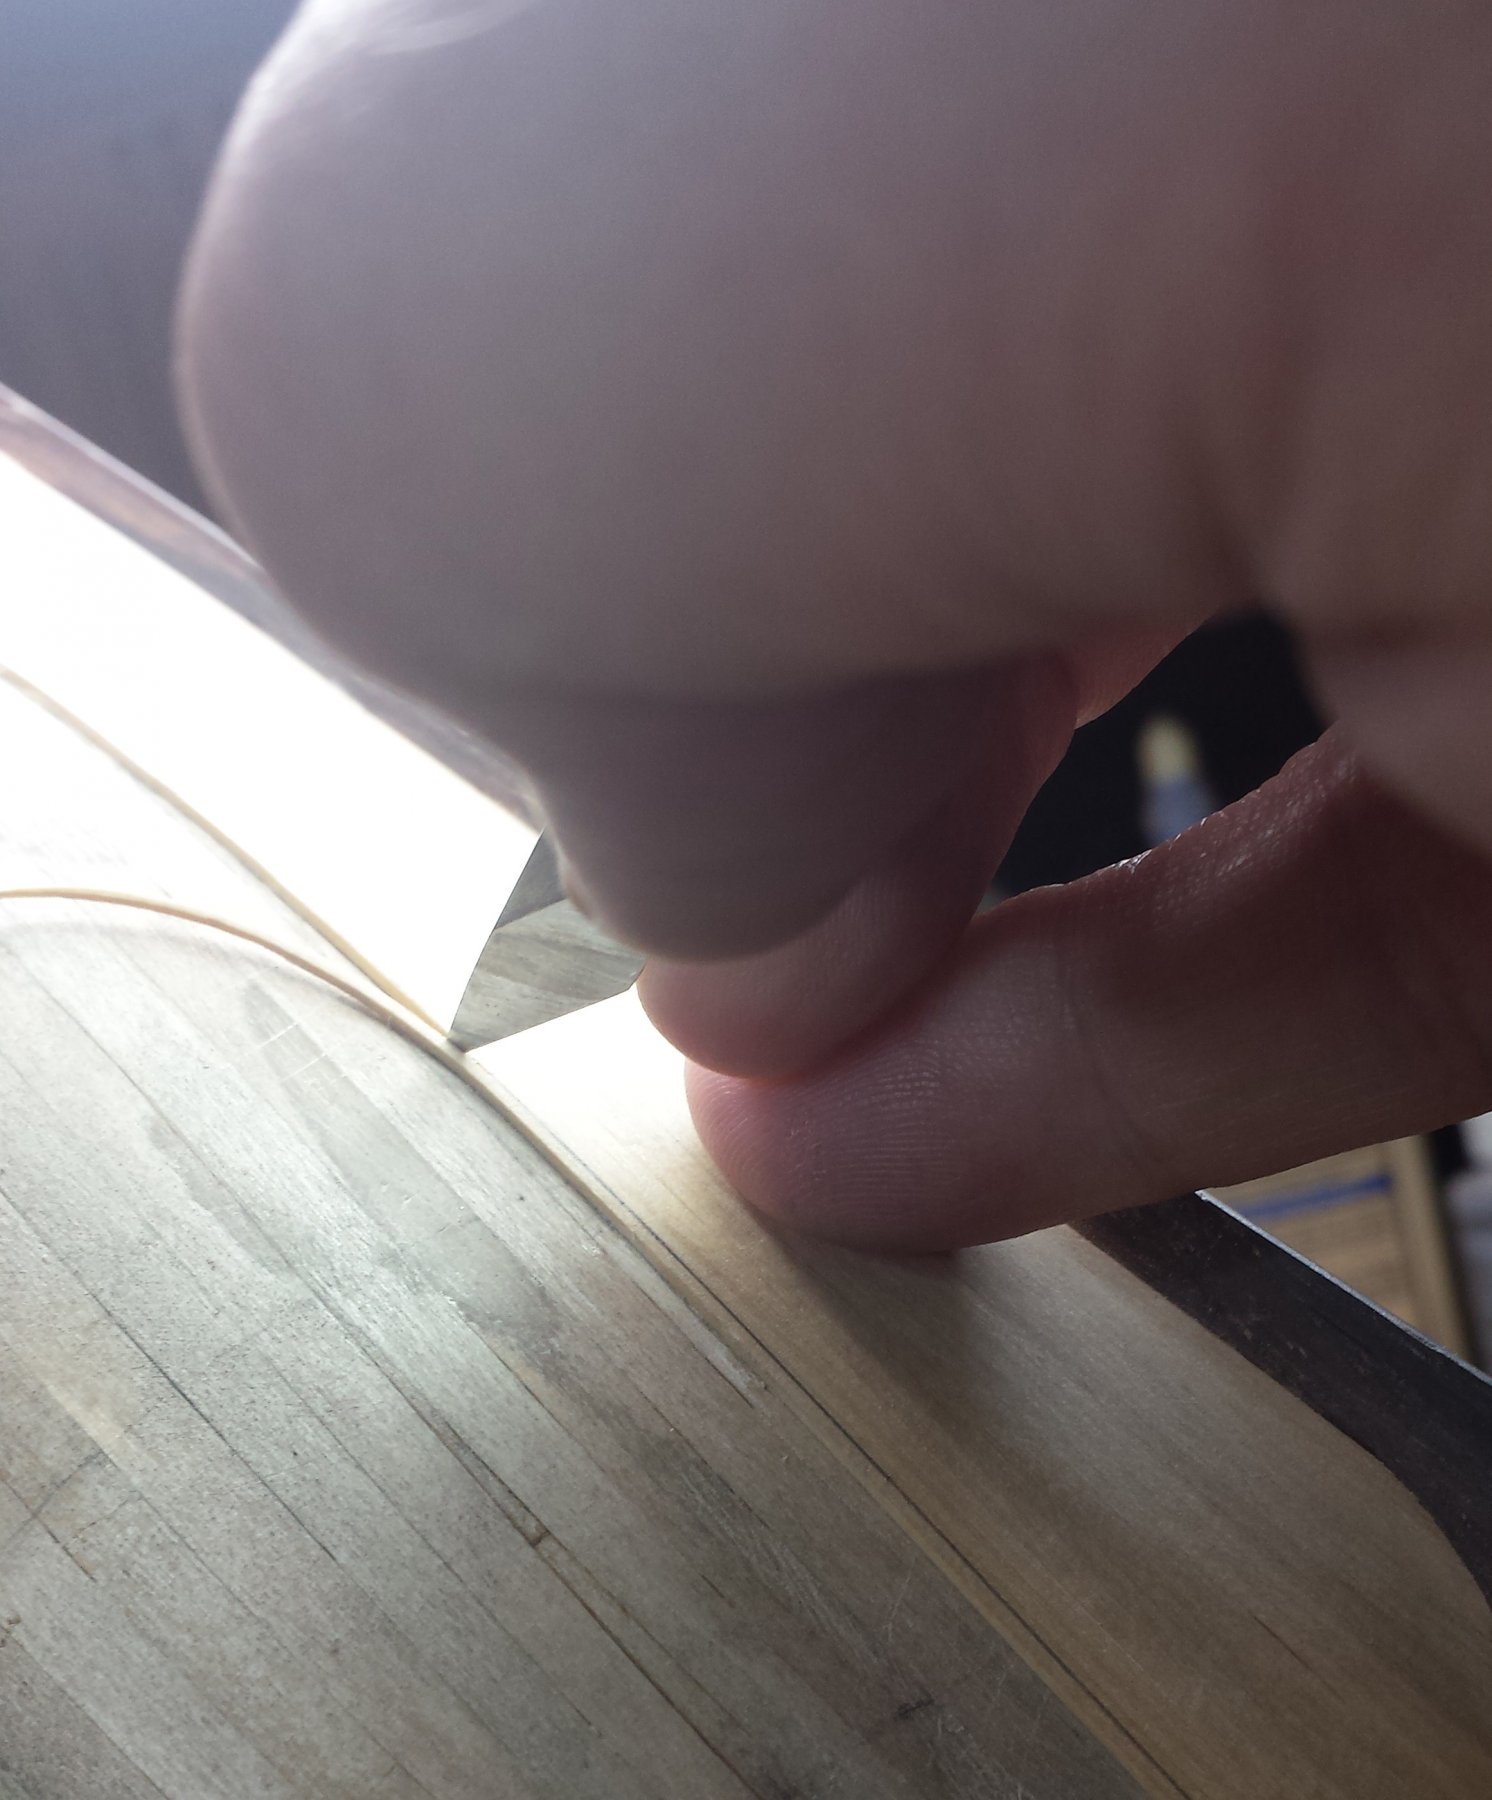
In simplest terms, I get the knife insanely sharp and then for each triangular chip I first cut lines from each triangle point to the center of the triangle so the chips for each side of the triangle can fall away independently, and then I remove most of the waste before making the final cuts. Removing the waste means much less force is needed for the final cuts and the less force used, the greater the accuracy. With chip carving everything has to be dead perfect, one triangle out of shape and it disturbs a pattern and is therefore easy to notice by anyone. However letter carving isn't usually done with knives, primarily it's done with v-gouges of various sizes. Are you talking about scale lettering for a ship, or full sized for some other purpose? If it's small for a ship I might switch what I just said and recommend a knife. Also let me see if I can find the photos I took of how I hold a pencil-style knife for precision work. Found it, as you see only my pinky and the knife edge touch the wood, and my ring finger is against the side of the blade and is pressing down into my pinky- the point is to have each finger pressing down on the next one, it makes for a strong and steady support. If you keep your index finger and thumb quiet, you can cut very straight lines using this grip. Or you can carve and do curves by manipulating the blade just with the index finger and thumb- the fewer moving parts and the more constrained their movement, the more accuracy you get. Not sure if any of that helped, but we need to get back to Gaetan's beautiful ship build If you want to discuss it further, please start a thread over in the modeling tools/techniques forum.
-
You're welcome Gaetan, glad to help. Let us know how your new perfect knife works out
-
To return to another point of yours, how thin the blade is definitely matters, but it also matters in how often it needs to be sharpened and how strong that edge is. If you're making straight cuts and don't mind sharpening often, I long since had reached the same conclusion as you where the sharpest blade is achieved when each side of the blade is a whole bevel. I've been sharpening my detail/chip carving knives that way for a long time now, and I carved 90% of the chip carving below with a Hock detail knife sharpened that way. The disadvantages are weakness under any twisting load, they have to be sharpened often, and sharpening takes much longer because you're hitting so much metal. Most of the knives I use for ship work aren't sharpened that way, they still have a big bevel but not the whole side of the blade. For me the only time the performance vs. drawbacks is positive is when I'm chip carving where you need well more than scalpel sharpness.

-
Doris, I wasn't joking about the book part. You've developed a whole series of techniques in combination with material sources to produce a totally unique type of ship modeling that promises to make outstanding results much more accessible to people- as you say, you only need simple tools, card stock, and your foils whereas we're working with table saws and thickness sanders and have to come up with all sorts of clamping arrangements whereas you're attaching your planks with a hair dryer. I sincerely hope you take the time to create a book and teach a whole new generation of shipwrights a new, easier to approach ship modeling method.
- 1,035 replies
-
- 10
-
-
- royal katherine
- ship of the line
- (and 1 more)
-
Speaking of the color of holly, after seeing it in situ I tend to agree that it's too white for realism purposes, but at the same time using plain fir or maple isn't the right color either since holystoning a deck plus the normal bleaching of the sun would lead to a lighter color of those woods than is natural. So for pure realism's sake, you should deck with holly but stain it lightly to bring it down from the bone-white color of natural holly to that of bleached and holystoned maple or fir or whatever wood they used for your ship. But at the same time one of the nice things about ship modeling is there is a long tradition of using plain unpainted woods and colors other than purely realistic with finishes- everyone agrees the structure should be accurate, but the colors are up to interpretation by the builder and as such the white holly is perfectly valid and definitely creates a dramatic look.
- 714 replies
-
- 2
-
-
- lady nelson
- victory models
- (and 1 more)