Nirvana
-
Posts
5,465 -
Joined
-
Last visited
Content Type
Profiles
Forums
Gallery
Events
Everything posted by Nirvana
-
 Did a try with soft plastic and CA with wood. I am surprised! It sticks! I did my trial with the type of soft plastic covering containers from the bakery of your store. Now here is the question: What type of blue to use? I am using Vallejo paint, and have several blues. Guess a sample plate with all the blue has to be done. The blue appears different on clear plastic versus wood.
 -
What primer?
Nirvana replied to Brewerpaul's topic in Painting, finishing and weathering products and techniques
There are great acrylic primers as well. However, I used Rustoleum white primer on my Bluenose before airbrushing with Vallejo paint. No problem for me. Yes, the primer gave the surface the feeling of a fine sandy beach, but after using a 400 grit sandpaper the surface was good for painting. -
I have the answer for you, according to page one of the instructions those number are related to deck frame numbers.
-
This is looking so good, makes me miss Sweden and the archipelago. Following with sincere interest.
-
Back in the 80's a friend of mine had an R4. After one evening and early morning on our way from the "dancing the night away", he suddenly had the "umbrella handle" in his hand. Even with four people it did fine. Wasn't the rocket after a red-light stop. I think all Renaults and Citroen had their quirks and special electronical issues. Mike, now back to your 2CV. Oh btw, here is a sketch of the motor-bay.
-
Mike, That Tamiya box says "functional suspension" - I am intrigued how that system works. Build log will tell.
-
From one Per to another Per, Bedste Velkommen to MSW. You certainly have some ship modelling skills. Scratch building Dannebrog shouldn't give you any problems. I have BB's Danmark which is not started - will wait with it until my ship yard has space for it.
-
Brad, I just want to concur with others and start with a warm , Using the towel technique, worked out for you. That's great. Make sure that all bulkheads are squared to the false keel. Once that is done, make blocks to fill in-between the bulkheads this will help to straighten the false keel and help you along the way when it comes to planking.
-
Salem, Warm , Do you use a PC? Well, in that in that case it's just to transfer the information from the DVD to USB and take it to a print shop. They will provide you with all needed prints and you will have the video instructions on DVD. The kit itself is very nice what I have heard. A quick search gave me this: Swift Maybe to some help.
-
Bob, thank you for the constructive comment. You certainly have a good point there. I am going to to try that idea.
-
Bonus for you tonight - the progressing full moon.

-
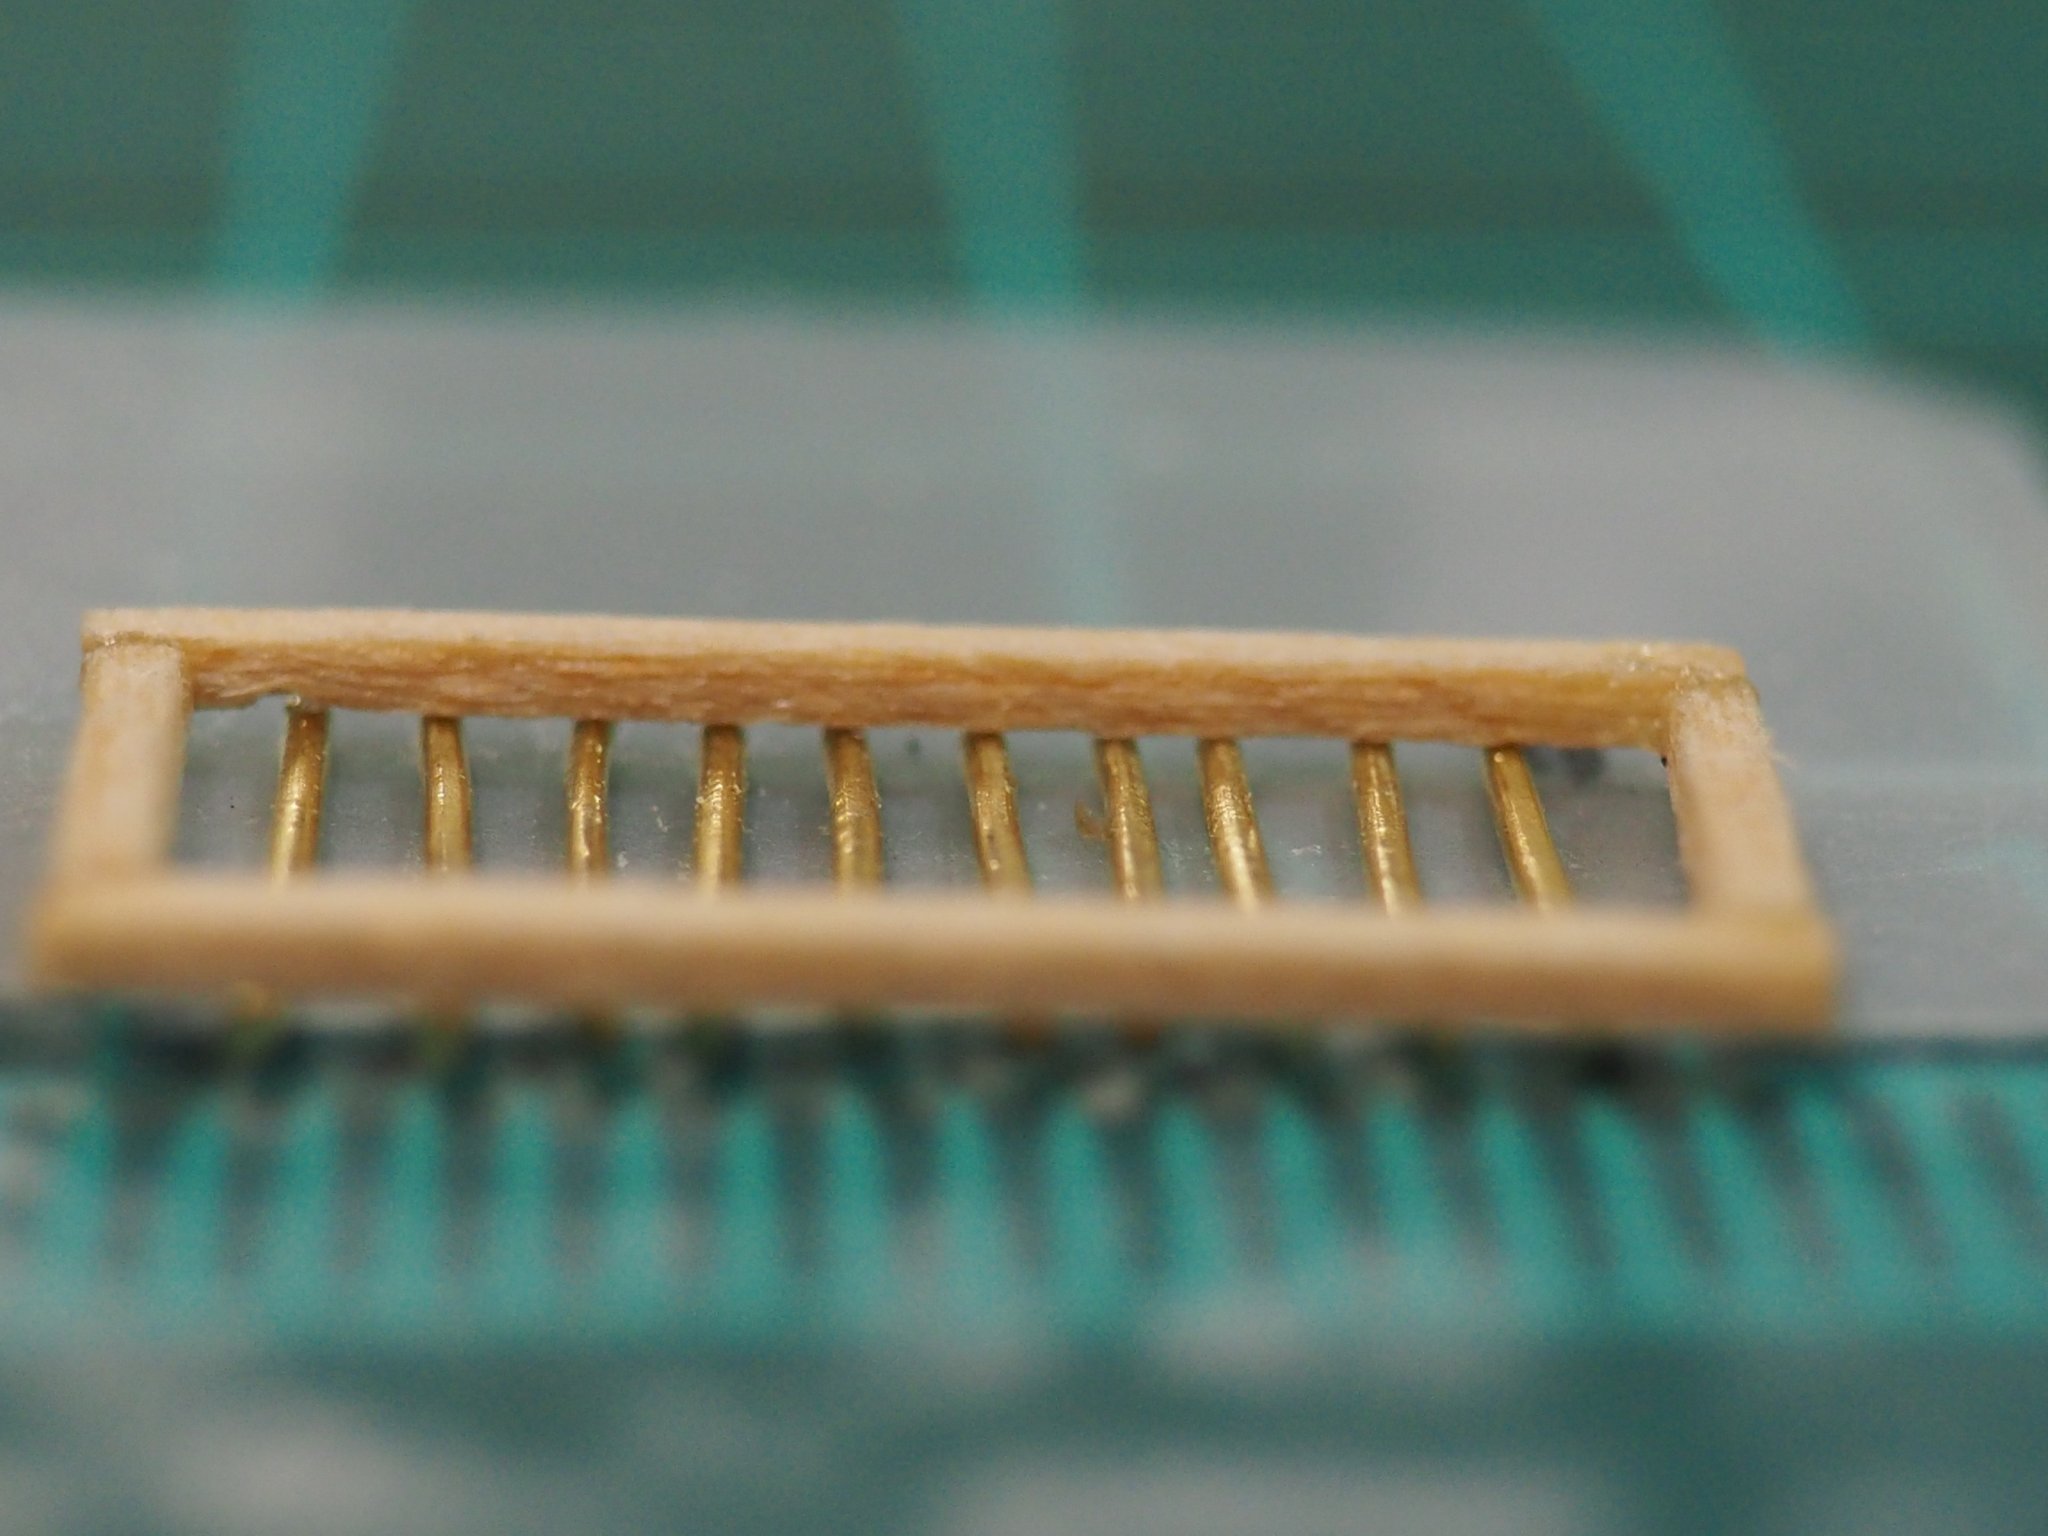
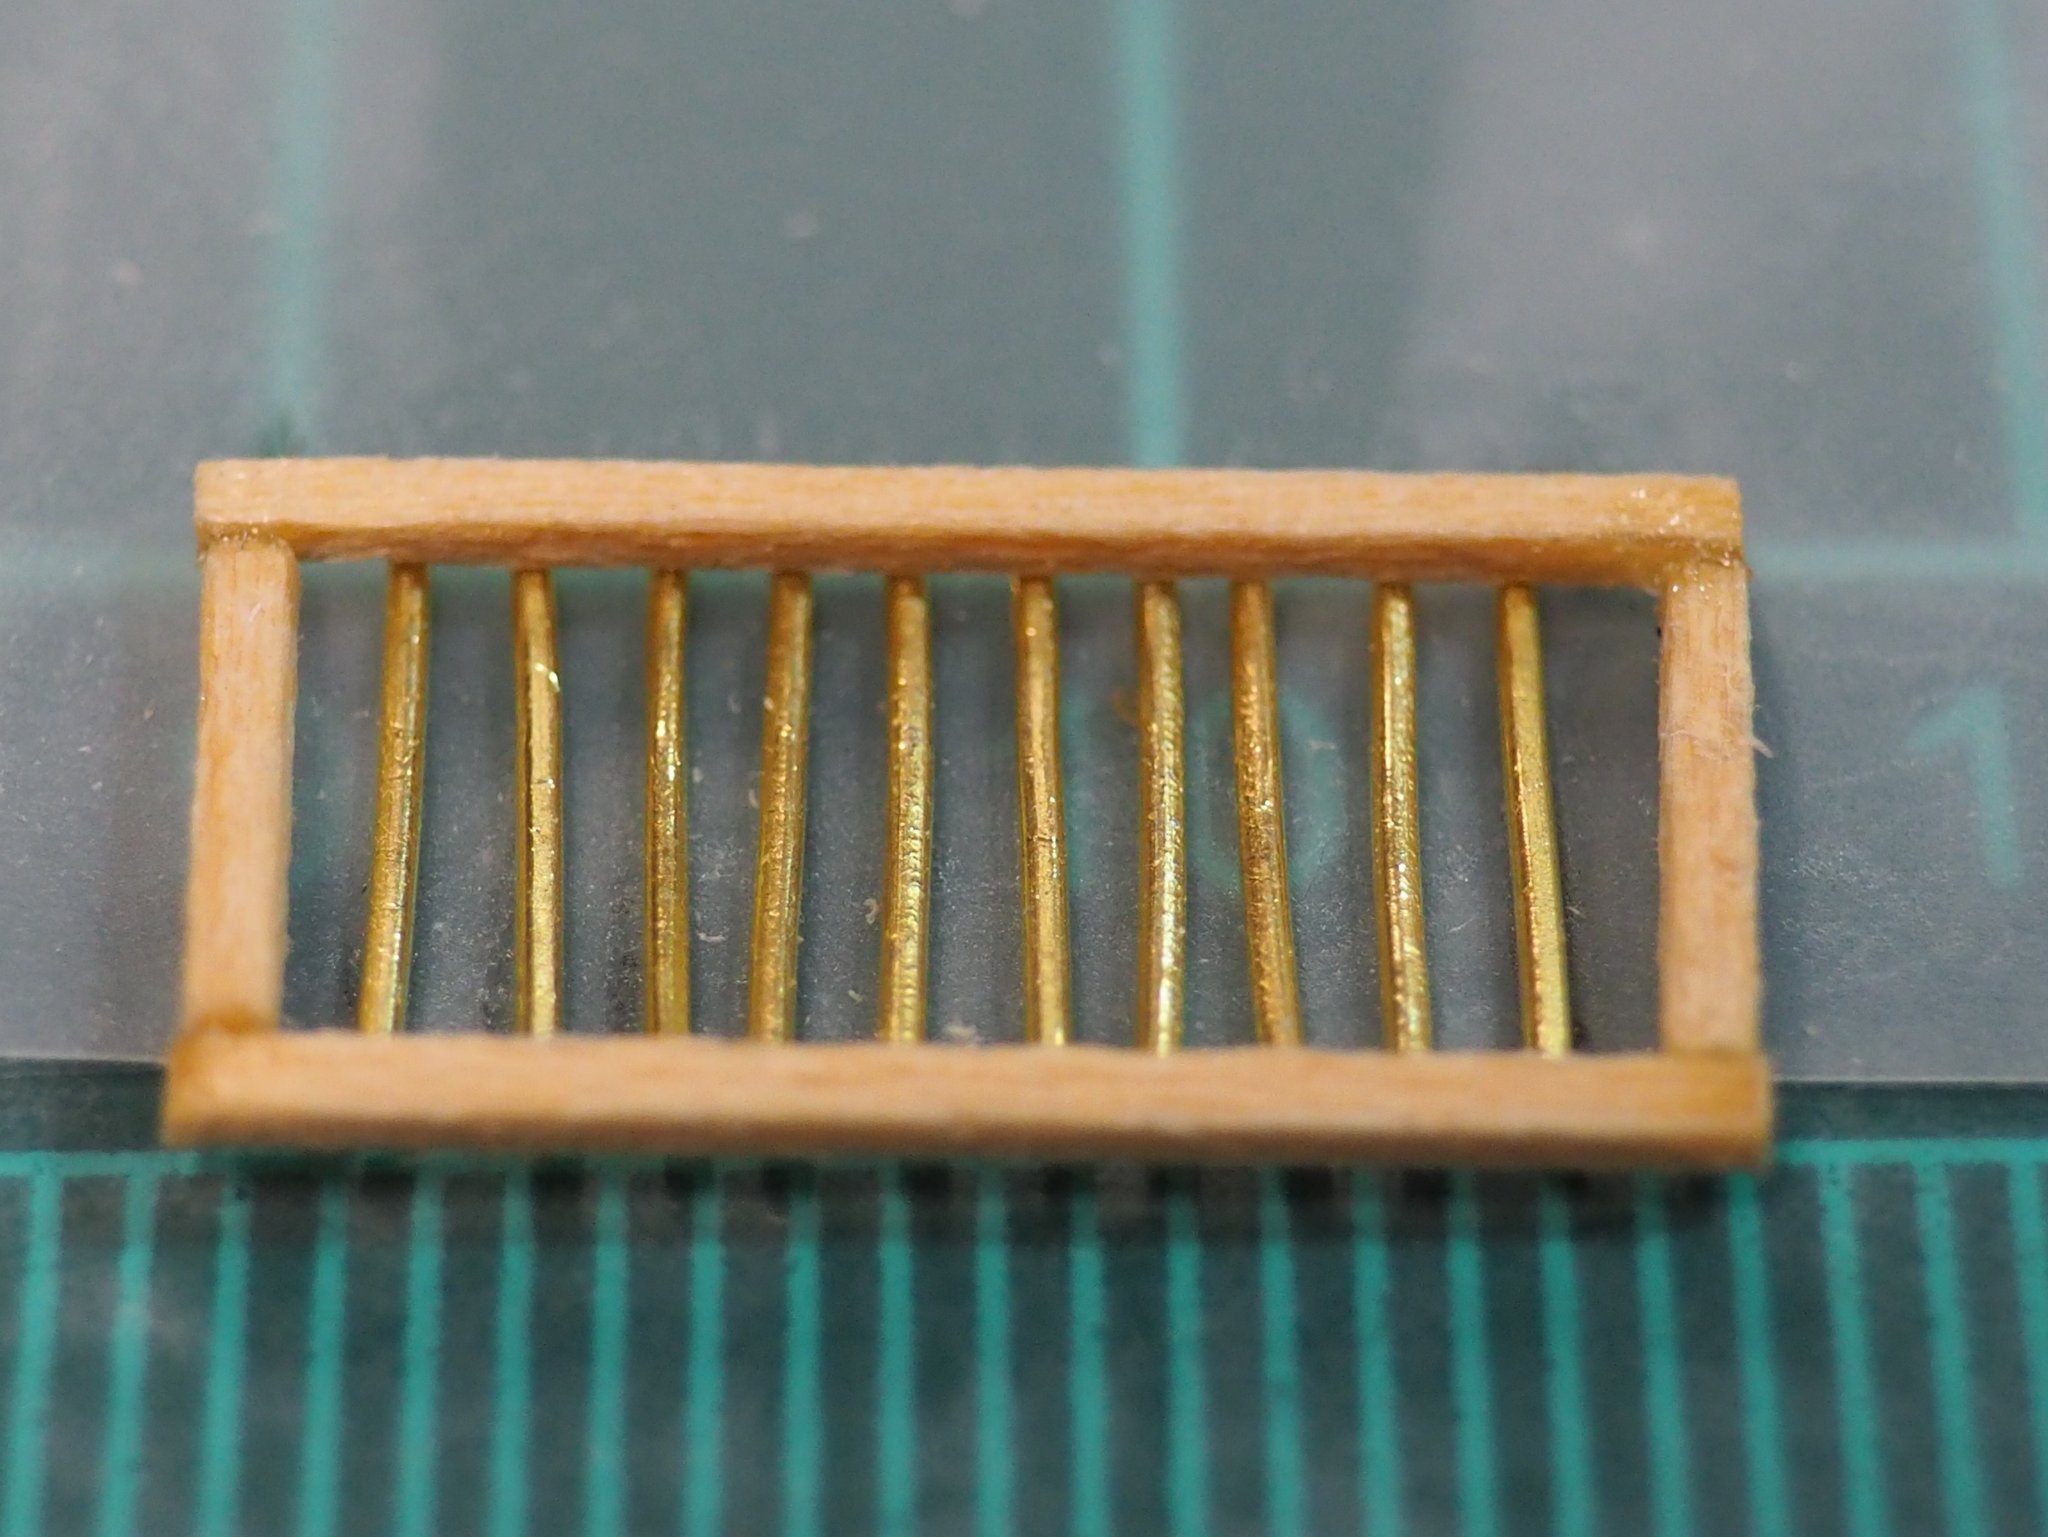
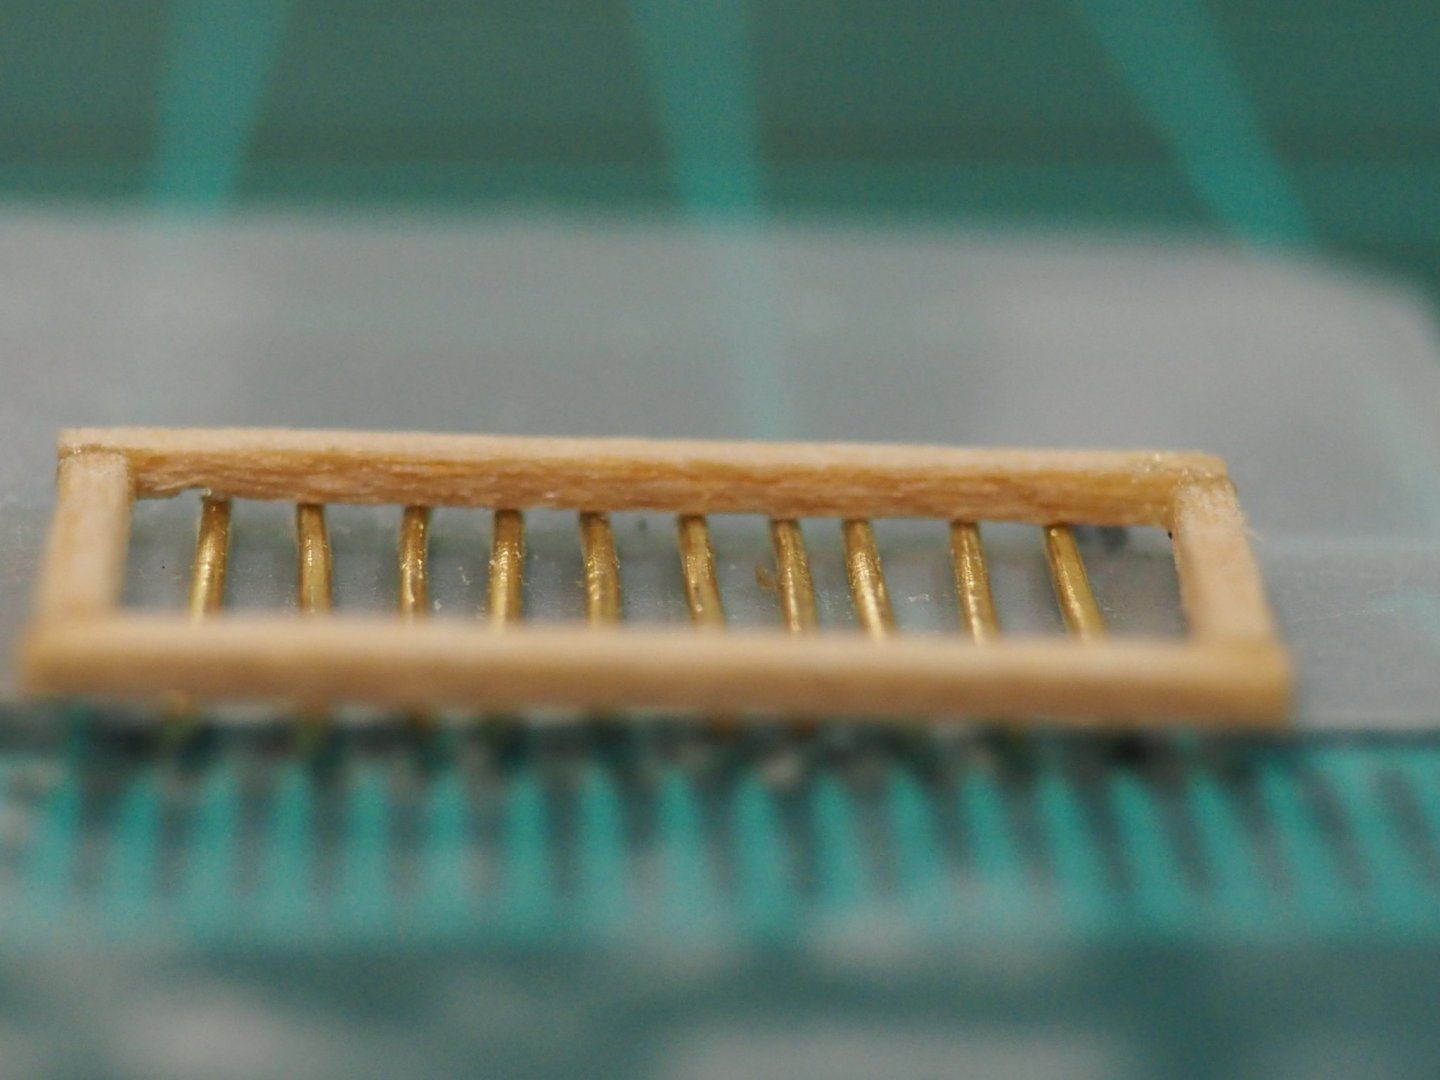
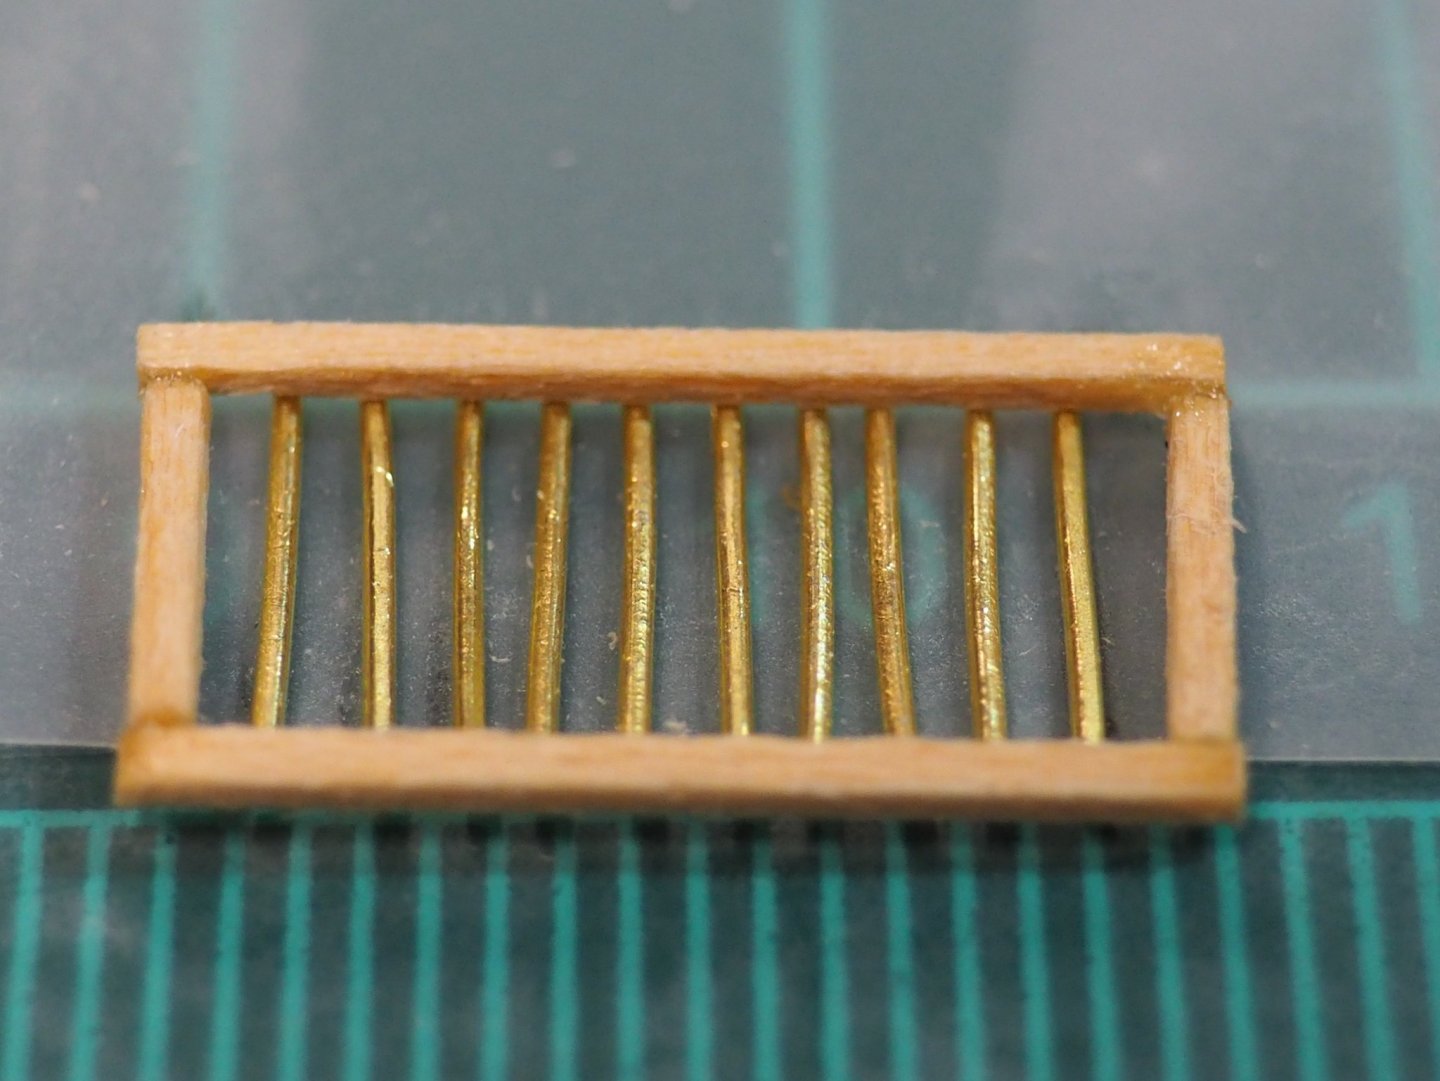
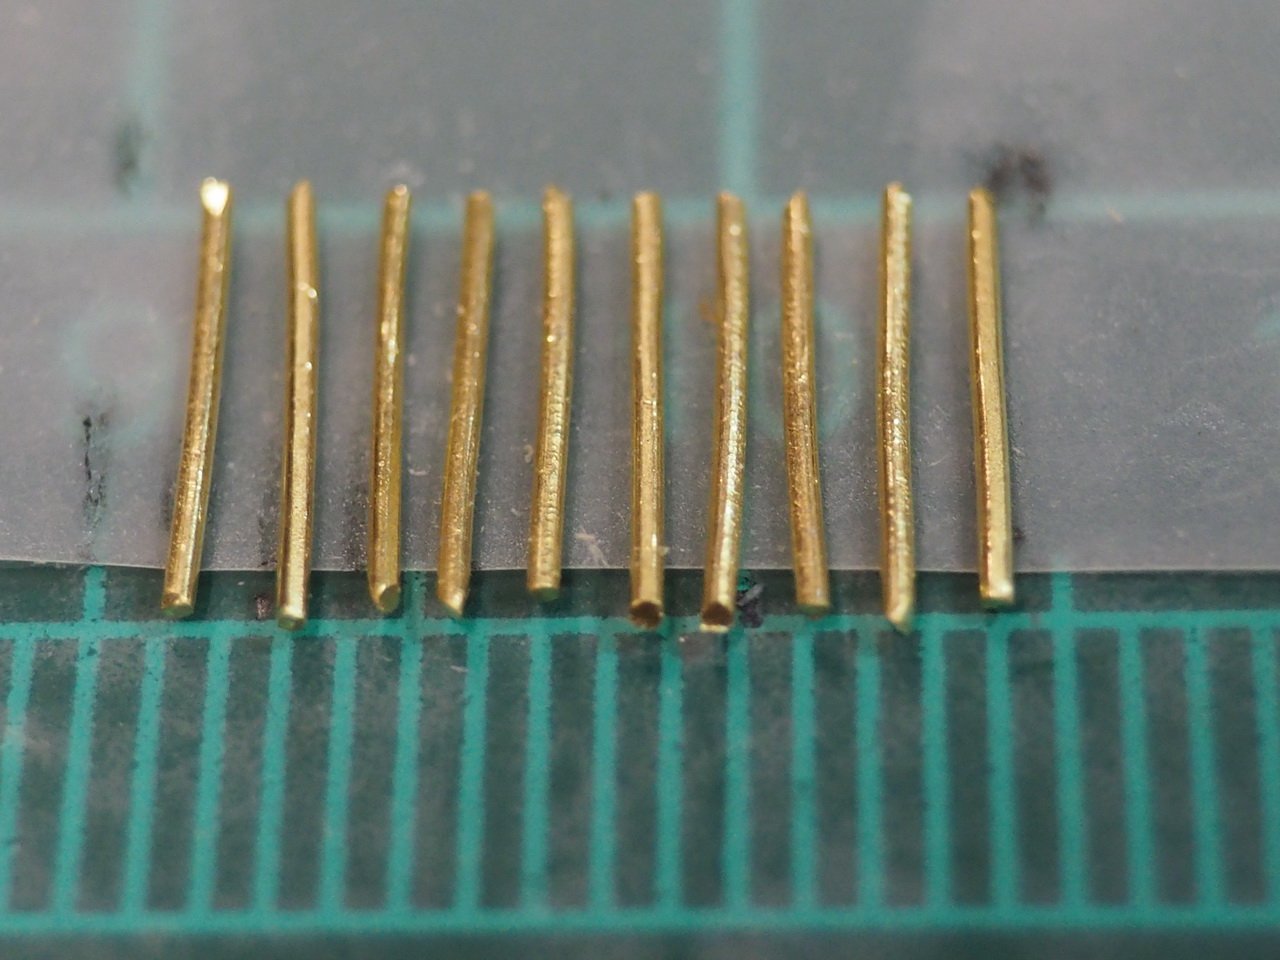
Regarding the bars on the skylight window, I tried this out using thin thin brass wire. The inner opening is 14 mm, so I added 10 wires. With the macro photo none of the strings are straight, but from 2ft / 36cm I have a hard time to tell. I will try to straighten them out a little more. My idea of this setup is: double sided tape - lay the strings down - matching about 1.5mm on center. place the frame down on top add glue - press all the pieces into place, using a cover plate and lots of weight Will this turn out okay? Once it's done - I will know
-
Genny, from Pacific North West with a greeting. I am also looking forward to follow your build log.
-
, I would suggest to read through the link provided by Mark. There are several easier kit that doesn't have complicated planking. Patience and more patience is what you need.
-
ancre Coureur by cafmodel - 1/48
Nirvana replied to cafmodel's topic in - Build logs for subjects built 1751 - 1800
That is just beautiful, giving that material some patina for aging and would be able to fool me saying it's and old mark. -
Converting a Backyard Shed into a Model Workshop
Nirvana replied to Hank's topic in Modeling tools and Workshop Equipment
Hank, what a great job you have done. Will you have a fridge with refreshment too? Btw, your display case - that stand it is placed on seems to be kind of instable. I would recommend to do something about it, unless you have done that without us seeing it. -
You guys are to kind, it sure can had been done in another and better fashion. It was tricky to get the height correct for the platform. The support block on the samson post got a fraction to high and made it all look weird. Had to sand it down and then the support block between the bits I just took the distance from top of the bits down to lower part of platform and glued them together. Support block for windlass brake beam hasn't been installed yet.
-
More work has progressed during the last couple of days, this was tricky to work out. But I got it finally.

-
Jim, from PNW a warm welcome to MSW. I certainly look forward to your build log of "different ship name" of Jerimiah O'Brian. We are certainly glad you have been inspired by other members in here.
-
Ed, Now before continuing of the start of planking. Do yourself a favour, take a look at my build page post #11 and add the extra support for waterways to be installed between stanchions. Saved me a lot of foul language.
-
I was thinking of gluing the "glass" to the skylight frame. And work upwards, this way the bars has something to rest on.
-
Greetings from Chicago and winter is coming
Nirvana replied to ThirdCoast's topic in New member Introductions
ThirdCoast, a big The choice of yours are perfect to start with, this as the kit doesn't have any complex rigging which can be very intimidating for a beginner. Hope you took a look at the video presented by Nick @ Bluenose. I have included two videos of building the dory, this from Todd Wardwell. I haven't watch the videos myself, but they may have some valuable information. With this kit you will get all needed skills to move forward to your next ship. That being said, a build log along with pictures will help you in the progress of the build but also use when getting stuck to ask questions. If you like to provide a first name, please do but it's not needed. Dory Part One Dory Part Two -
Wayne, Shouldn't you have cut out the area in between R22 and L22 where you have tabs to be folded? This before folding the hull. To me it looks like you will have an issue, unless JSC's manual says something else.