Jump to content

Recommended Posts

Posted

I'm a long-time member but has hardly been active here during the past few years. I recently completed my first scratch build, the USS Syren (plans provided by Chuck Passaro back when it was a group build) and was looking for my next scratch build. I wanted to try a fully framed build so was looking for something easy and decided on the Santa Caterina from Ancre, mainly because I like Mediterranean lateen-rigged vessels. 

The monograph is in 1:12 scale but I felt that was too large, so I scaled all the plans to 1:18 which results in a boat that is around 30 cm long. 

I'm using from swiss pear with black hornbeam for all the black parts (mainly antennas and blocks); I do not intend to paint any part of the model. I don't have many power tools, just a mini lathe and a power drill, both from Proxxon. I may get more power tools in the future, but at this point I don't think I need them. 


I started building around 3 weeks ago and have just completed the keel assembly and started on the frames. There are some inconsistencies in the plans but so far nothing that can't be solved by checking ahead (I hope!). 


Keel, stem and stern posts:PXL_20230205_185301073_2.thumb.jpg.d65e47380f2ae6647b9aad3e727c865b.jpg

Starting on the frames. At this point I'm just checking that they all fit well; I have created the drydock to make sure everything is squared when I install them. 

PXL_20230213_184156895.thumb.jpg.dfafa9efef805825a4ae146e8c8a8cf7.jpg

I post a lot of pictures on my Instagram too, but wanted to write a build log especially in case I need to ask for advice at any point, and also to document any issues I may find. 

Any criticism is more than welcome, don't be afraid to point out my mistakes! That's the only was I can learn and become a better builder. 

Posted

Thanks for the kind words @Chuck!


I'm continuing work on the frames and dry-fitting them and sanding them to a rough shape. What's the best way to sand the inside of the frames once they're all attached? I can sand a bit before I install them but I'll still have to leave 0,5 - 1mm inside to remove later, especially at the bow and stern. I've been searching for attachments for my Proxxon drill but nothing really seems to be able to do the job. 

PXL_20230223_202359306_1.thumb.jpg.ee334c6ccaa268532d64c1c84fe0db96.jpg

The monograph briefly mentions that the frames would have been nailed together but the plans don't show where the nails should be. I've bought some 0,8mm copper wire that I'll use for that, I think it'll give some extra needed strength and also look more authentic, and should be pretty easy to do. 

Posted

No easy way I suspect.  Just go slow and try not to catch the edge of the sandpaper on any frames.  There are far better pof builders out there who could prob give you a better answer.


Its looking ver good.

Posted

I've had to modify the dock a few times; for some reason I expected the plan showing the boat from above to show it at its maximum width, but instead it's the width at some lower point. Also it's not a horizontal line, resulting in the upper deck of the dock to be curved. This seems very weird to me, but I can work with it. 

The frames are correct according to the line drawings, so I'm not too concerned. 

PXL_20230303_191011006.thumb.jpg.1d55126d0407000b8ab109624d52dc8b.jpg

However, I suspect frame 8Ar is wrong on the plans. I've made it exactly as per the frames plan, but it seems a bit too narrow compared to the frames next to it. You can just notice it on the photo above, it's frame 8 in the foreground. I'll probably remake it just to be safe. 


Nonewithstanding these issues, I think I'm progressing nicely and I'm enjoying building this boat a lot! So much so that I've already decided that my next project will also be a monograph from Ancre, which I've just ordered. 😄

Posted

For anyone else building this boat and reading my build log, I've noticed a rather important error on plan no. 1: 

PXL_20230305_201047926.thumb.jpg.f45c8ba90097c55b16593caa5c4b26fc.jpg

The lines I have highlighted in red (the parallel lines from the centerline) are NOT equidistant from the keel line, one of them is 20 mm from the centerline, the other one 22 mm at scale 1/12. 

How this hasn't been caught by Ancre I have no idea, I'll write them an email tomorrow so they can hopefully fix future prints. 

I almost got a heart attack today when I thought I'd completely screwed up while creating the frames, as I noticed they didn't appear symmetrical according to that line. 😅 

  • 3 weeks later...
Posted

I've now glued all the frames in and sanded the hull almost to the final shape. 

Again there were inconsistencies in the plans regarding the stem frames, on one plan they were installed at an angle, on the other they were perpendicular to the keel. I ended up installing them at an angle by basically eyeballing the position. It turned out perfect though, but maybe I was just lucky. 

image.thumb.jpeg.0b84bb1b0d545f02ce618fc8a93921b9.jpegPXL_20230323_181212695.thumb.jpg.f5c55e33a93807d4af6ab32b178ac0a0.jpgPXL_20230326_164805349.thumb.jpg.7b768f4af588bba966926e94cfc8b4a3.jpg

The tape is there to protect the keel and posts from scratch marks when sanding. 


I'll spend a few more days sanding down the last 0,1mm to get a perfect fit for the frames, and then it's on to planking the hull. 

Posted

I'm enjoying following your build log. I think this is a very beautiful model and I've always thought it might be a good model for a first scratch build. I'm sorry to see that you are finding errors in the plans though but it looks like you are doing a great job at overcoming them as you go along. Good luck on your build! 

Bob Garcia

"Measure once, cuss twice!"


Current Builds: 

Hms Brig-Sloop Flirt 1782 - Vanguard Models

Pen Duick - Artesania Latina 1:28


Completed: Medway Longboat 1742 - Syren Ship Model Co. 

Member of the Nautical Research Guild


Posted

Thanks @BobG

The errors in the plans are not huge, but if you don't think ahead and trust the plans completely they could possibly ruin your build. 

I think if one were to create the model in 3D first it would help, but although I work in IT this is sadly not a skill I have. 

Anyway I'm doing my best to point out the errors in this build log for future builders. 

Posted

I was lucky with one plan for another Ancre monograph: when I reported it to Ancre they quickly sent a corrected pdf. So you may be lucky. These boats do make lovely models.


I'll be following your build with much interest.


Tony

  • 4 weeks later...
Posted

I'm slowly progressing with the planking. It's more difficult than I thought it would be, either because I'm out of practice (last boat I planked was around 10 years ago), or because of the steep curves at the bow and stern. Anyway, I think the result is fine, if not perfect. image.thumb.jpeg.316f0ae96e96b0e63768cf26bb75ca0b.jpegimage.thumb.jpeg.3eab92648544fd3be90b3a60f5ca01ff.jpeg

Posted

I'm glad to see you are making progress on this interesting build and I think your planking looks great.


Do you ever receive a response from Ancre about the errors that you have found in their plans?


Bob Garcia

"Measure once, cuss twice!"


Current Builds: 

Hms Brig-Sloop Flirt 1782 - Vanguard Models

Pen Duick - Artesania Latina 1:28


Completed: Medway Longboat 1742 - Syren Ship Model Co. 

Member of the Nautical Research Guild


  • 3 weeks later...
Posted

I'm basically done with the planking (except for one strake on the port side) and have started with the treenailing. I looked into buying a draw plate, but apparently in Europe it's impossible to get one for wood and buying the one from Byrne is prohibitively expensive because of shipping and taxes. So in the end I made my own from a scrap piece of metal, it's very far from perfect but does the job admirably well. 

I "only" need to make some 1600 treenails and made almost 100 today, so that should take me the best part of the month 😂

But I kind of enjoy it, I put on some music and just meditate while working on them. 


I initially wanted to make them from tooth picks but I didn't like how they looked, the wood tooth picks are made from is too light. So in the end I'm just making them from pear, they are hardly visible on the model but I think that's how it should be; you don't see them until you look for them. 

image.thumb.jpeg.75d04967b51bdaa3f7e515ff897a3096.jpeg

I should name the boat Saint Porcupine instead of Saint Caterina! 

PXL_20230512_170905455.thumb.jpg.f6dff480d80050b0d46260b05fb65ac1.jpg

Posted

Treenailing went a lot quicker than I expected, and after a bit of sanding the hull is starting to look very nice. The planking is not perfect, but I'm very happy with the result. If you shine a lamp from inside the hull the light seeps through here and there along the seams; I tried filling the seams with blackened glue but wasn't able to completely fill them. It's a minor thing though, and without the light you rally can't see it at all. So as long as somebody doesn't try to float the boat it should be fine 😄PXL_20230517_174401981.thumb.jpg.311fd4e5c38c295ef53a1fda848f9414.jpgThere's still some sanding to do at the stem and stern, but first I need to finish planking the port side and treenail it. PXL_20230517_174204697.thumb.jpg.b0ae2131f4c3590392eeb39ca2e12664.jpgPXL_20230517_174220285.thumb.jpg.05c9763bf9a39afadd4b38aeff30ad8c.jpg

  • 4 weeks later...
Posted

I have mostly finished the outside of the hull and can now work on the inboard details. I just installed the inboard strake (not sure what the technical name is) which is joined with a z-joint. Next will be the floor boards. 

I've decided not to seal the wood since I really like the look of swiss pear. I was initially considering using linseed oil but it darkens the wood considerably. What I will do instead is sand the wood with fine sandpaper and scrape it with a razor blade, which gives a very smooth finish and somehow seals the wood. 
PXL_20230611_163744886.thumb.jpg.3d5cdeb7738e759709b326b09123a917.jpgPXL_20230615_080608144.thumb.jpg.2dd06d8d4832757e0fc61ec978ea464c.jpgPXL_20230615_080628147.thumb.jpg.95d0a2c88fb8a81b5d5bdadc849a5e4f.jpg

Posted

I have a question regarding planking: I learned a long time ago that planks should never be tapered to a point since they'd quickly rot. However, the deck planks on the Caterina are supposed to be tapered like that according to the plans. I suppose that since these are planks that could quickly be changed if they rotted tapering them like that wouldn't matter much? Or are the plans wrong and I should not taper them that much? image.thumb.jpeg.23d0c541c27ef23bb833e82880babb14.jpeg

Posted

You raise a good point.  However, it seems on most ships that the garboard was tapered to a point.   

Mark
"The shipwright is slow, but the wood is patient." - me

Current Build:                                                                                             
Past Builds:
 La Belle Poule 1765 - French Frigate from ANCRE plans - ON HOLD           Triton Cross-Section   

 NRG Hallf Hull Planking Kit                                                                            HMS Sphinx 1775 - Vanguard Models - 1:64               


Non-Ship Model:                                                                                         On hold, maybe forever:           

CH-53 Sikorsky - 1:48 - Revell - Completed                                                   Licorne - 1755 from Hahn Plans (Scratch) Version 2.0 (Abandoned)         


  • 3 weeks later...
Posted

Oar banks, hooks and beams. Nothing much to comment here regarding the plans, they're pretty good. However, I feel the prototype model in the monograph has too much curvature for the oar banks (or whatever the long perpendicular beams are called), so I reduced it quite a bit. On the other hand, the plans hardly show any curvature at all here. PXL_20230708_170838692.thumb.jpg.6b48cd4dd51132c3d9914d9c6aad957e.jpgPXL_20230708_171051803.thumb.jpg.636274b868dbf0349599135345897f98.jpg

  • 4 weeks later...
Posted (edited)

Progress is rather slow lately due to the summer heat and travelling. Still, I've finished the two small decks and most of the oar benches. PXL_20230719_144957393.thumb.jpg.8f711d201c266401eb2aa2885e05976e.jpgPXL_20230804_174417217.thumb.jpg.626bb70ec2d94338d7f3e0fddbd1c1d5.jpg

Looking ahead, I've found several issues with the way the rigging is represented in this monograph, and I frankly don't understand the author's basis for rigging the boat this way. The two biggest issues are: 

  1. The antenna and sail are too small. According to the research I've done the antenna should be at least 1,2x times the length of the boat for a winter sail, which is the smallest. On the plans, it's less than 1,1x. 
  2. The rigging and blocks are very heavy duty, much more than required for a 5-6m long boat. I suspect this has been directly copied from the monograph of Le Requin, a xebec which is a much larger ship with heavier antennae. The tackle for the antenna has 4 pullies, other latin-rigged boats of this size has 2. 

While I'm anything but an expert of latin rigs I intend to completely rework the rigging of this boat, deviating a lot from the monograph. I'll keep the mast almost as it is but will make a longer antenna and rig it differently (and simpler). 


Edited by KLarsen
  • 5 weeks later...
Posted

Cap rail finished, but not yet treenailed. I deviated a bit from the plans here; the scarf joint was supposed to be midships, but that would have resulted in the wood grain running perpendicular to the rail at the ends, as there was no way I could bend it 90 degrees. Instead I made a joint at each end of the boat which seems more natural to me. 

Now I can start on all the details and then it's on to the rigging, which I've completely reworked. I'm now certain that the monograph has copied the rigging from a much larger ship, at one point it mentions that the antenna and sail would have weighed 4 tons and that the sail has an area of 45m² - the boat itself is less than 6 meters long! PXL_20230904_164045015.thumb.jpg.7ad30fdbcc22cc3417f8bf48f5d787a5.jpg

  • 1 month later...
Posted (edited)

My progress has been pretty slow lately as I've been travelling and studying, but I'm finishing up the hull with all the small details. I'm using black hornbeam for the items that are supposed to be tarred black. I've never worked with this wood before but I like it, it doesn't hold an edge as well as swiss pear but the finish is really nice. Also, it's a bit like carving chocolate... 😋 (I haven't tried tasting it!). 
PXL_20231014_165610295.thumb.jpg.70a622939db8090014f6c1a17055610d.jpg

PXL_20231013_174049268.thumb.jpg.822b8405888451709bb2b52f55d89f05.jpg

PXL_20231015_165554206.thumb.jpg.3286d44ff5ee4282a3eb772c8c95417c.jpg

Edited by KLarsen
  • 3 weeks later...
Posted

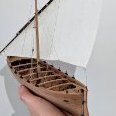
At this point the boat is almost complete, just missing some iron work and the rudder. Then I can start on the mast and antenna, which as I mentioned before will be different from the monograph. PXL_20231030_204932252.thumb.jpg.01a1be01c22a7db973c644bc5f8dc957.jpg

I should be finished with this project in a few months, then I can start on my next project which will also be an Ancre monograph. 

Posted

Hi Cnemo,

The hull with the rudder is 29 cm long and 9,5 cm wide at the beam. This is 2/3 the size of the monograph. 

When I finish this project I'll make a stern cross section of the Spanish frigate La Mahonesa in 1/48 scale. The wood is already on the way so I'll probably start on it in a few months. I'll be sure to make a build log here! 

Posted

Speaking of the rudder, this afternoon I finished and attached it. The hinges were difficult to make but I think they turned out fine. I would have wished the rudder to sit a little closer to the stern post, but I'm happy with the result. 


Since I intend to put a longer antenna and sail on the boat, the rudder needed to be longer (at least according to my research). As you can see, it extends below the keel. It should have been even longer (twice the draught), but I settled for a little less. 

PXL_20231107_181058348_MP.thumb.jpg.1a99e86cc36fa8958d0a56e37f5447f3.jpgPXL_20231107_181052224.thumb.jpg.a3da644437dceba7a2298ce91045cf14.jpgin the photo above you can also see the side keels which are necessary for a lateen rig, and the hooks to haul the boat onto the beach. PXL_20231107_180926446.thumb.jpg.226b7b9c0124dcc5bd5a2c938fb785b7.jpg

The rudder turns freely on the hinges and can be detached. I've yet to make the tiller. 


Now I can get started on the mast and rigging! 

Create an account or sign in to comment

You need to be a member in order to leave a comment

Create an account

Sign up for a new account in our community. It's easy!

Register a new account

Sign in

Already have an account? Sign in here.

Sign In Now
  • Recently Browsing   0 members

    • No registered users viewing this page.
×
×
  • Create New...