Search the Community
Showing results for tags 'amati'.
-
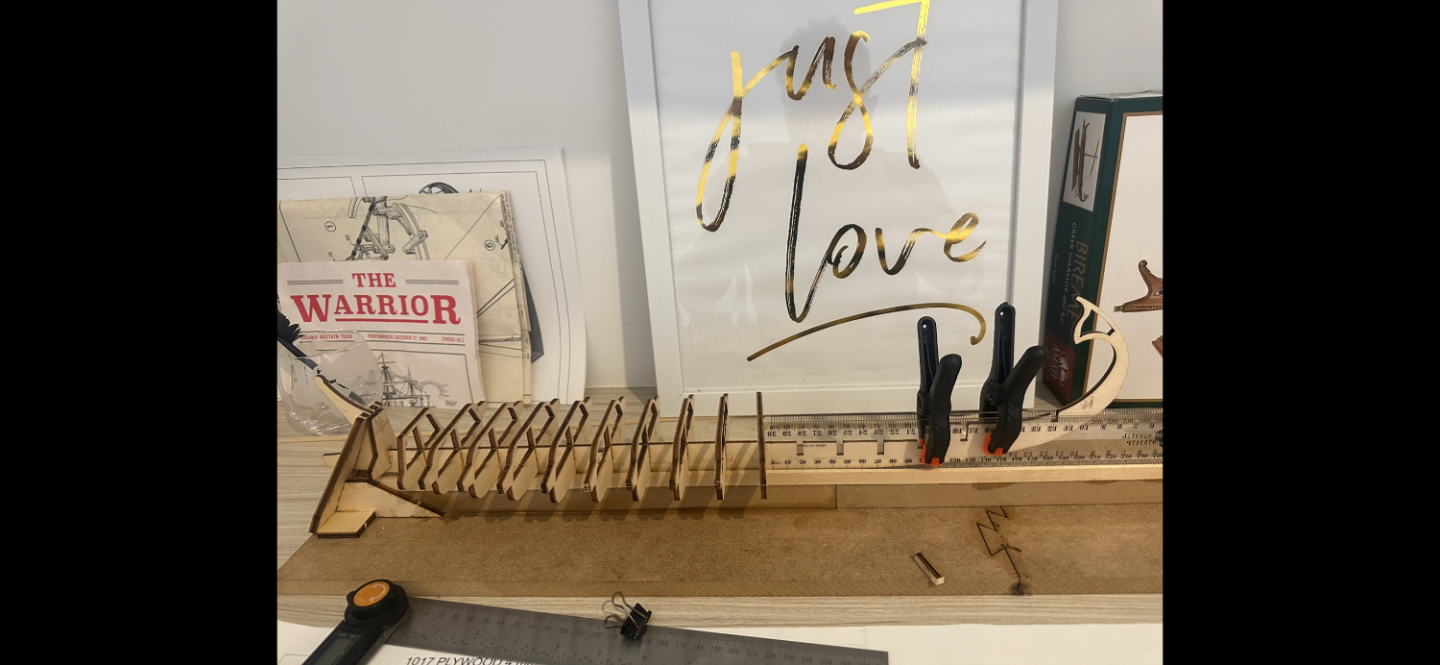
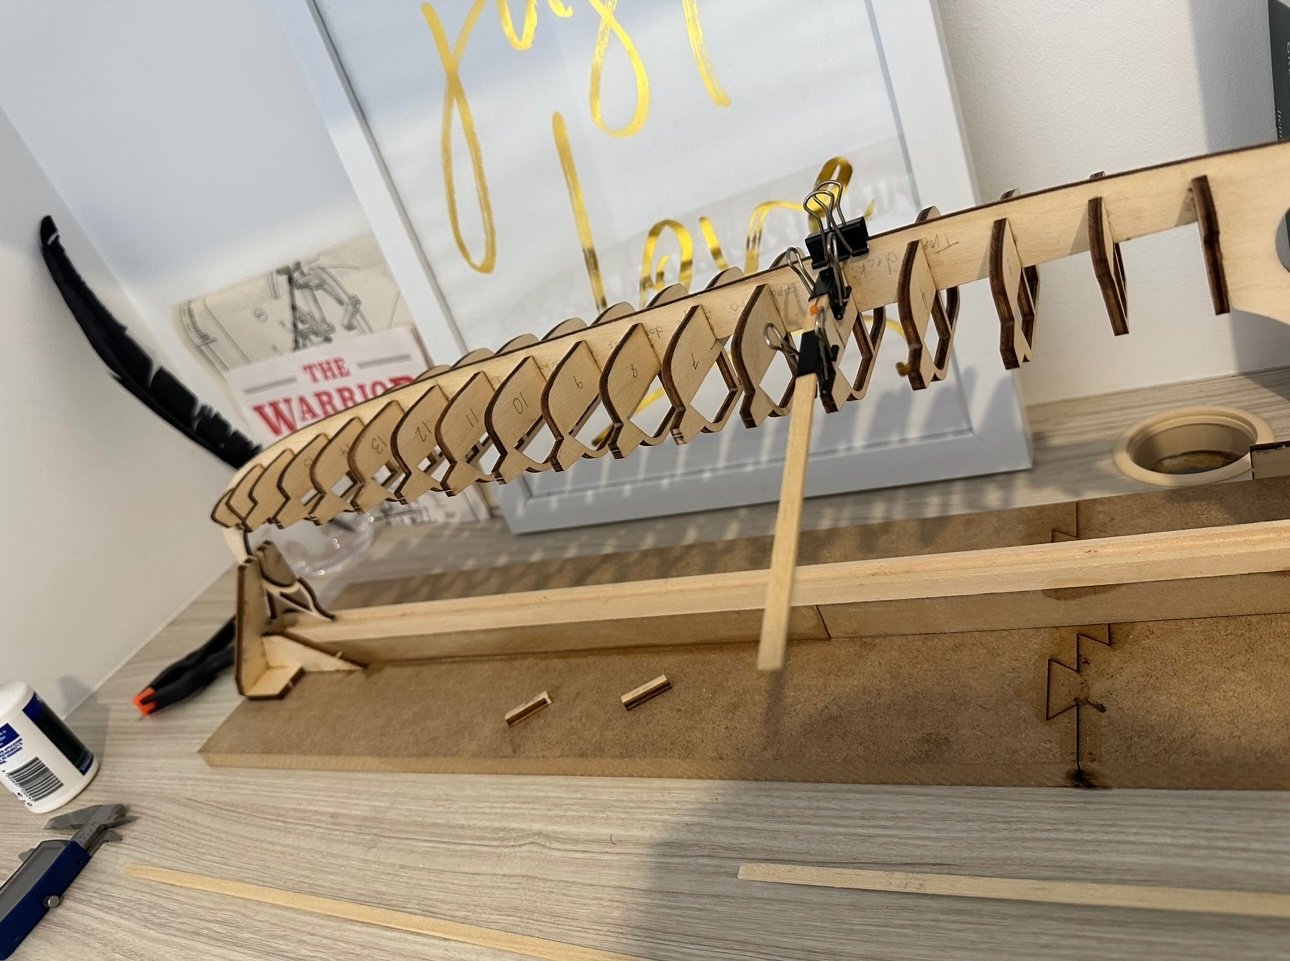
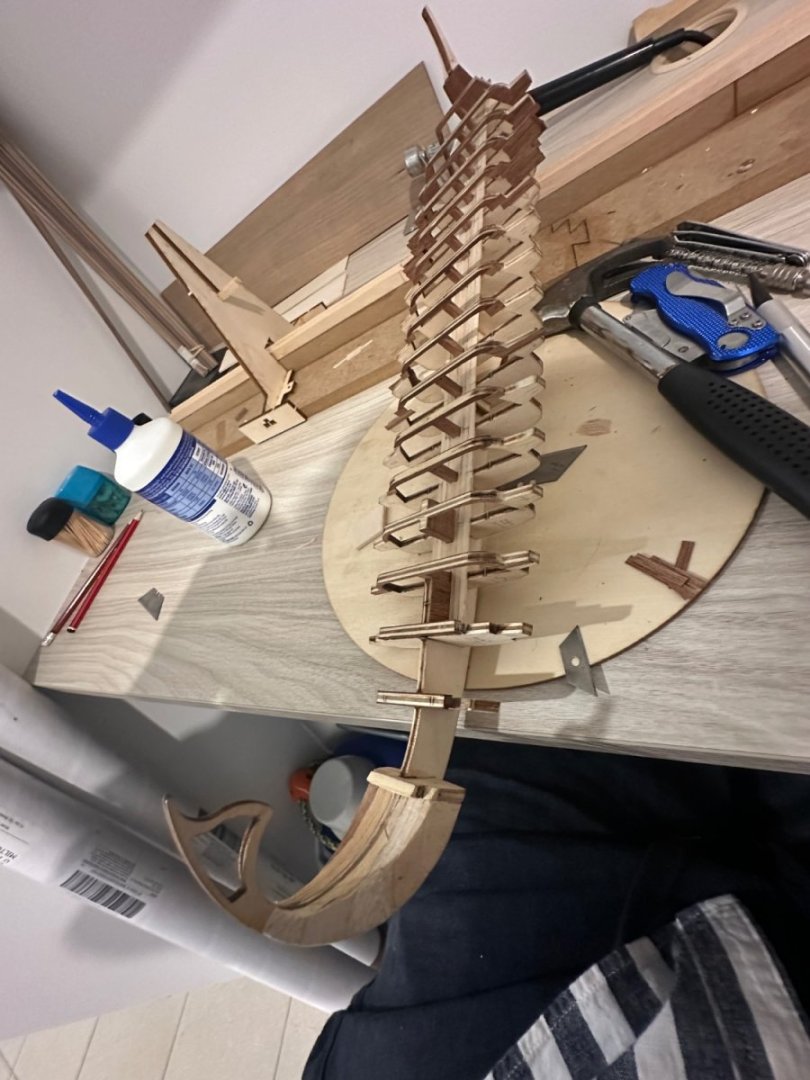
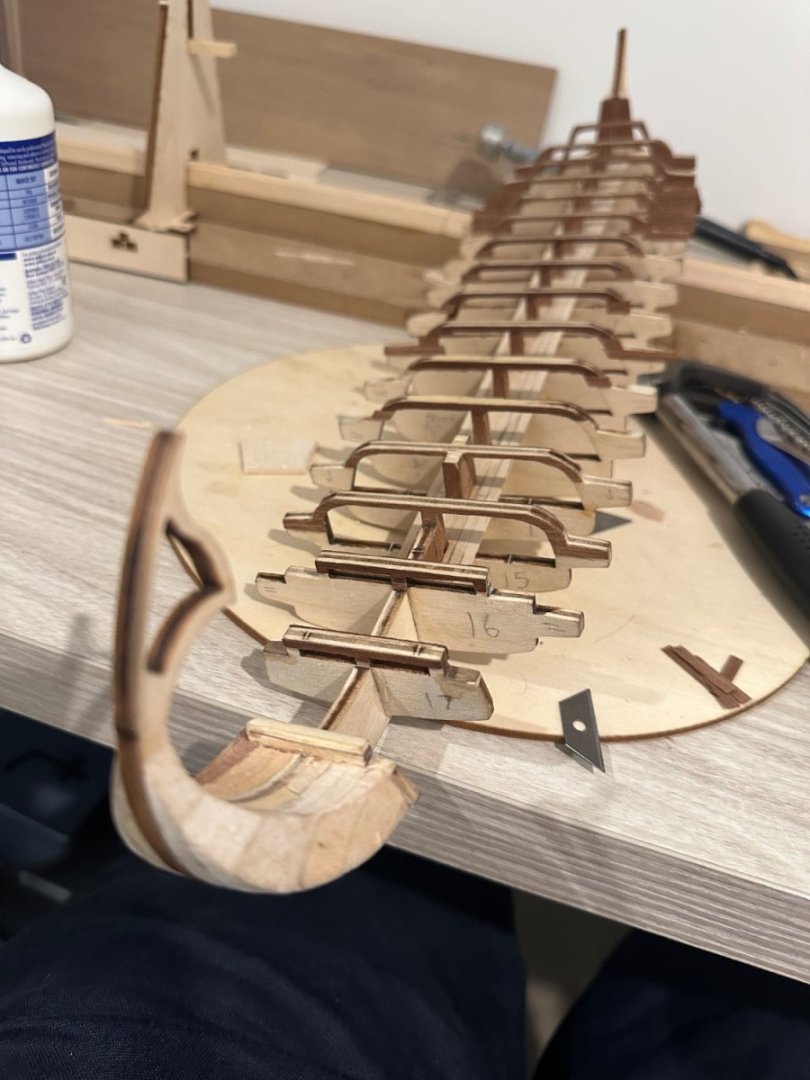
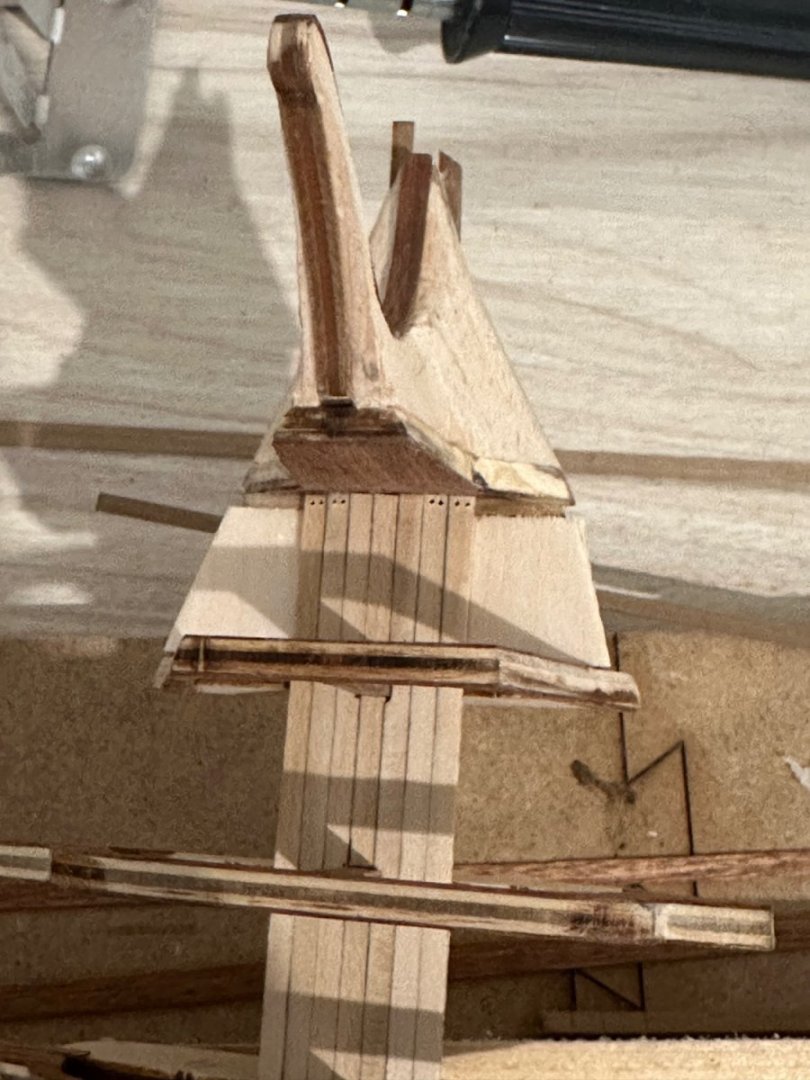
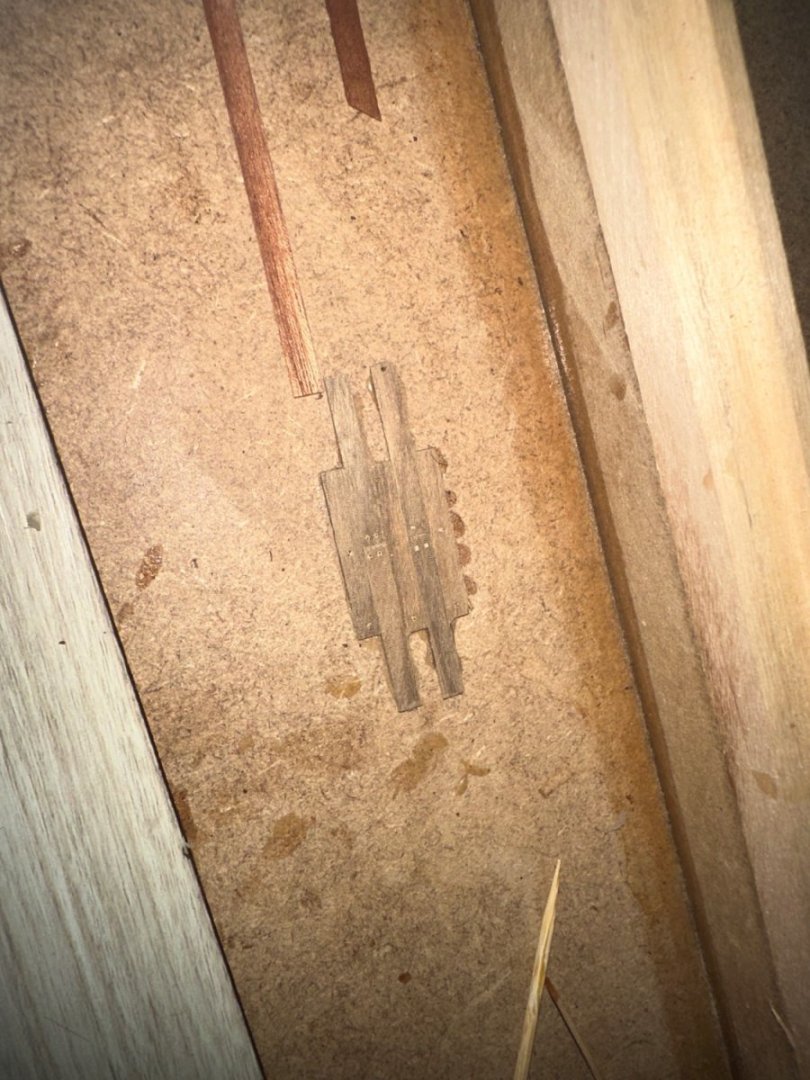
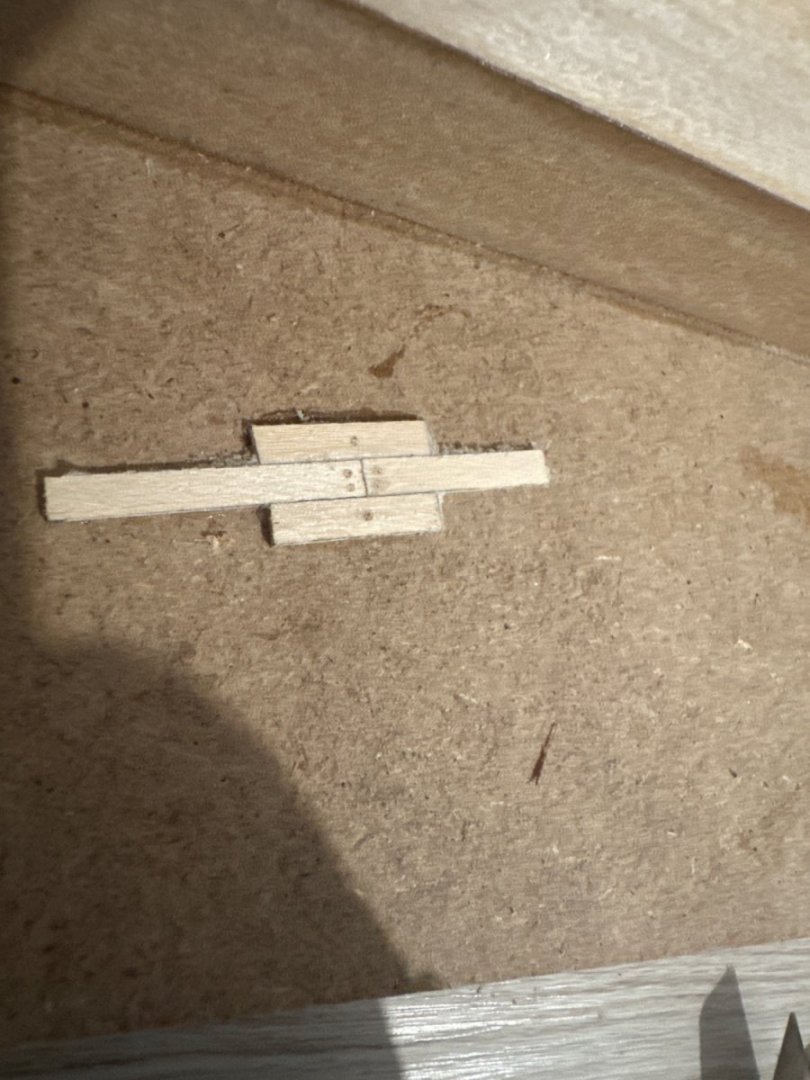
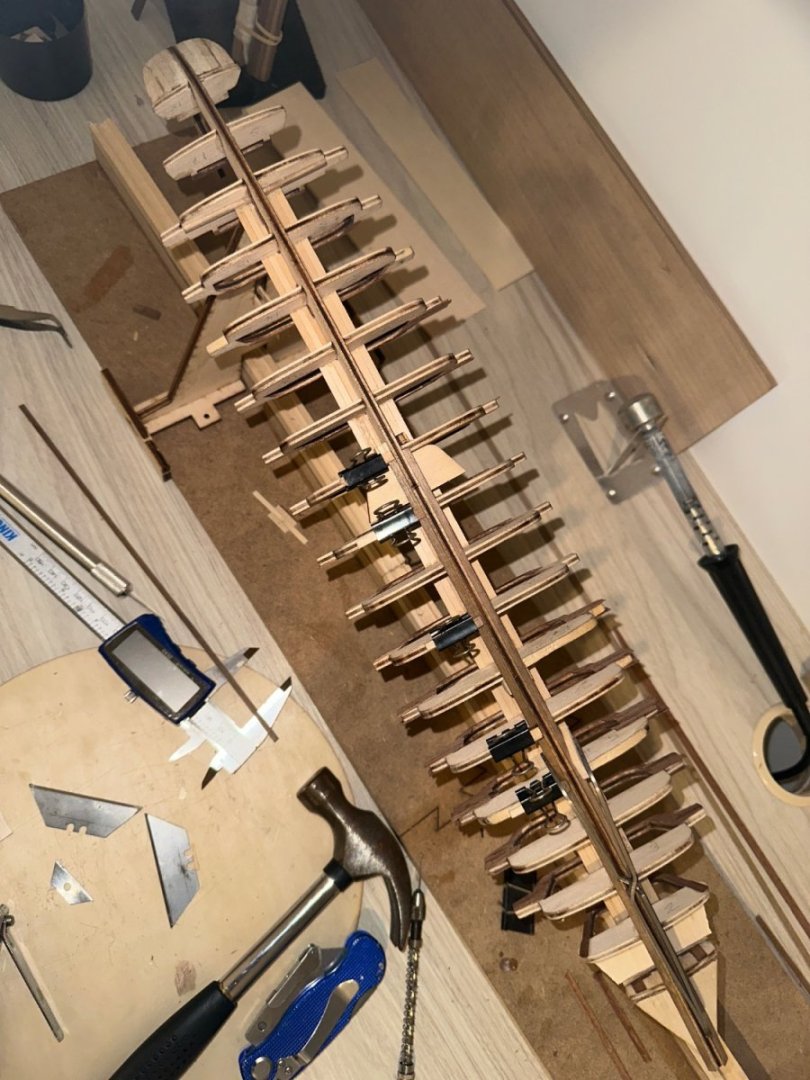
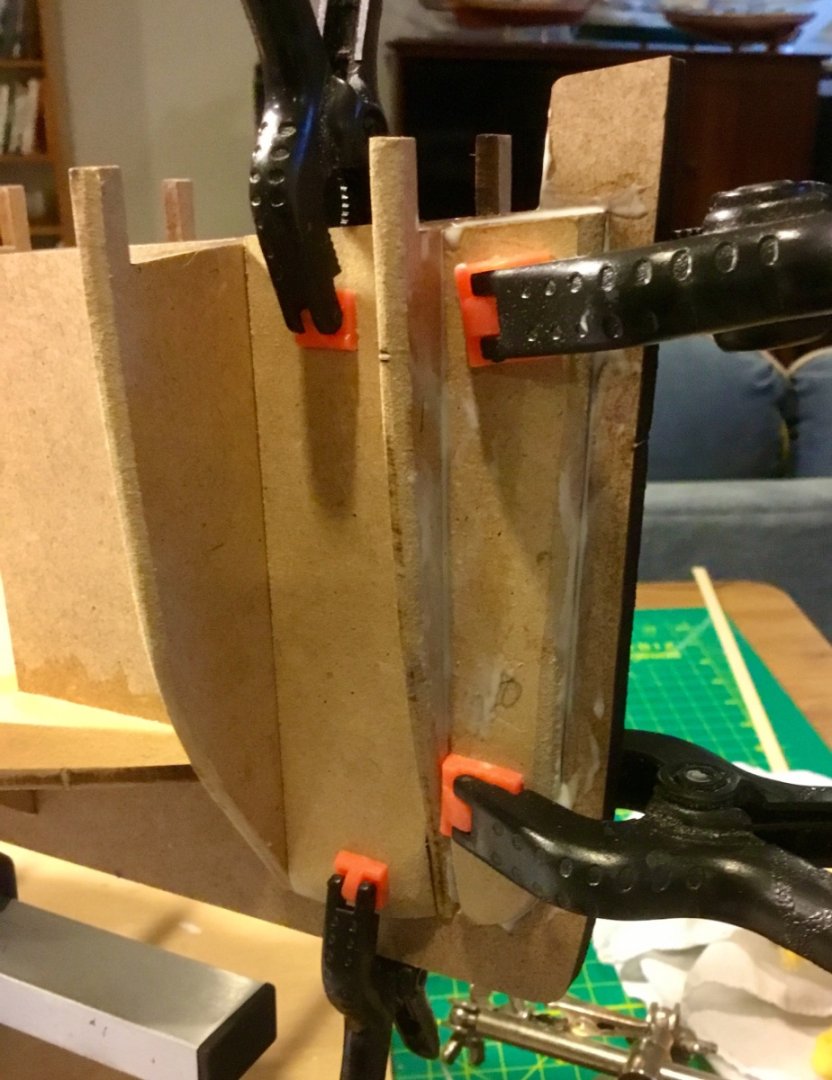
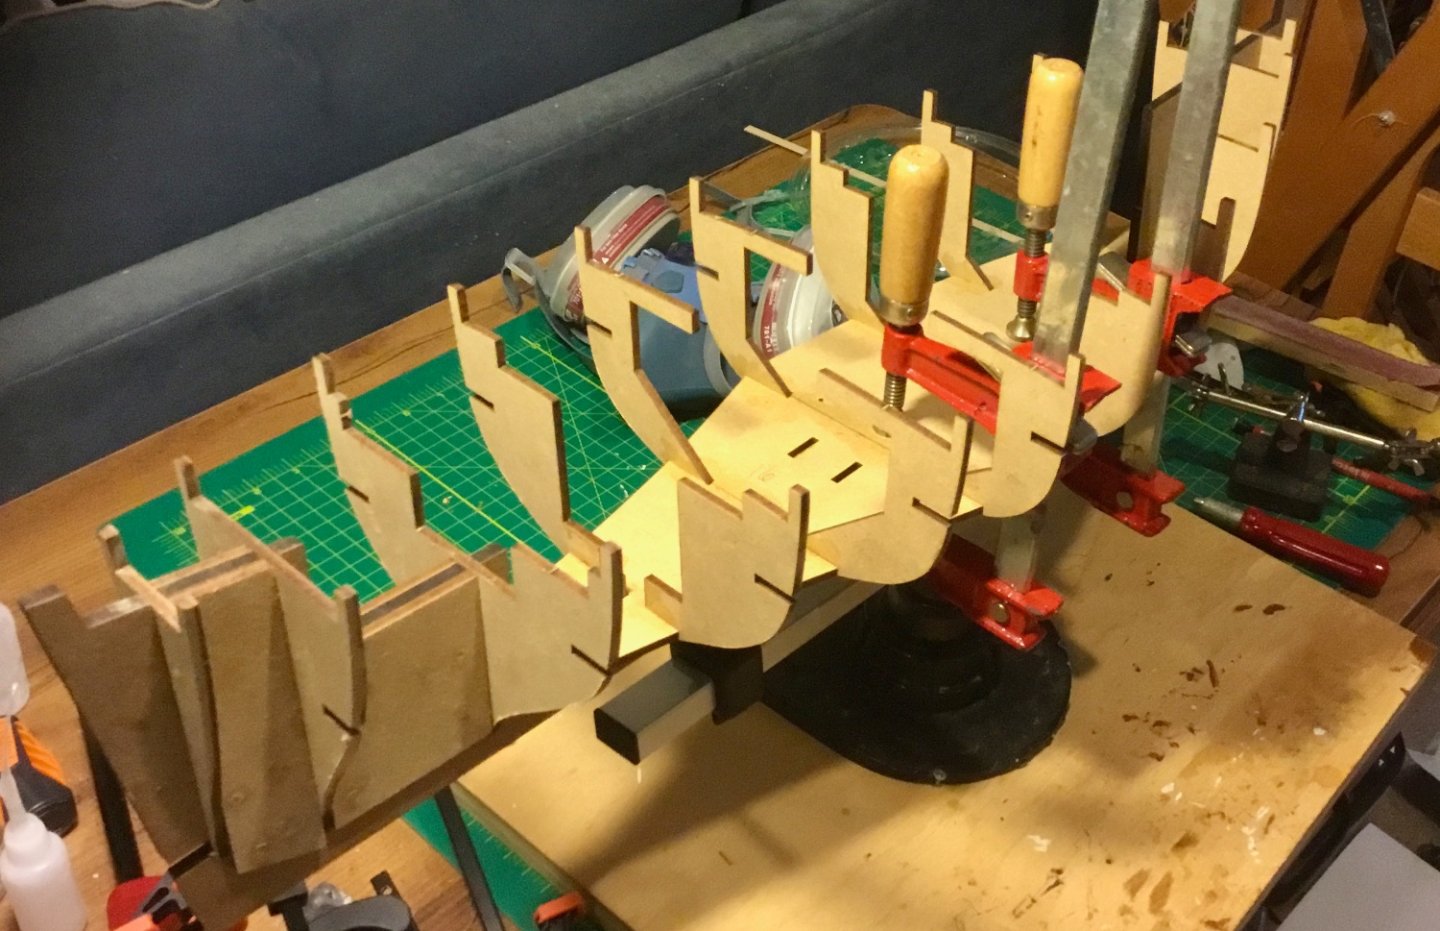
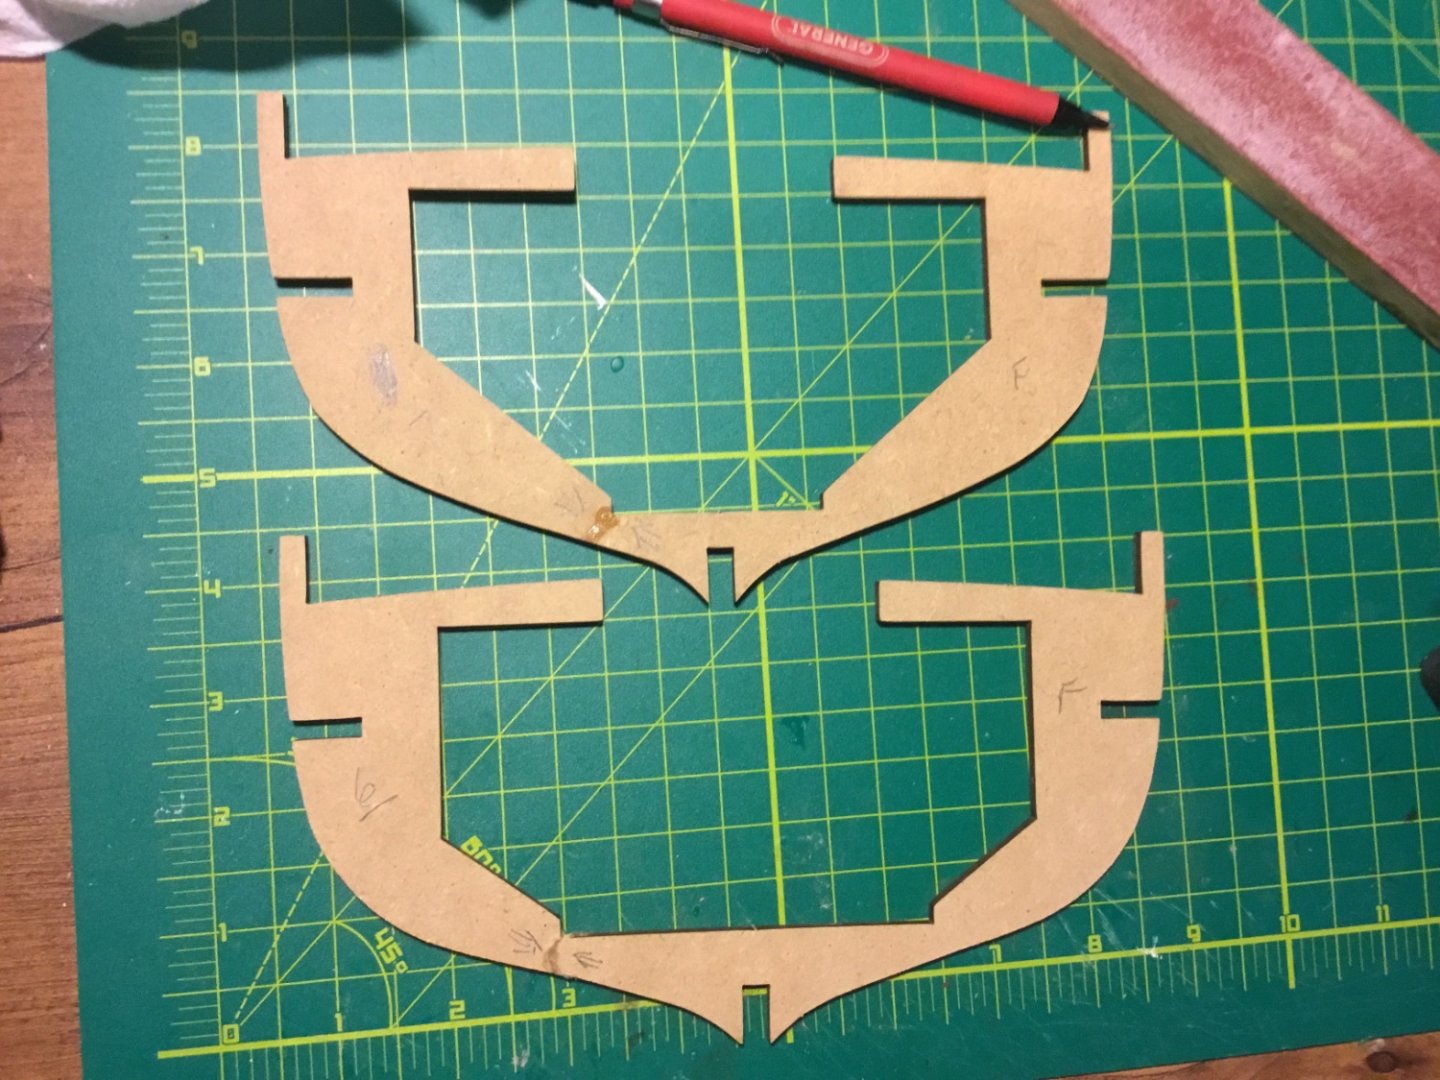
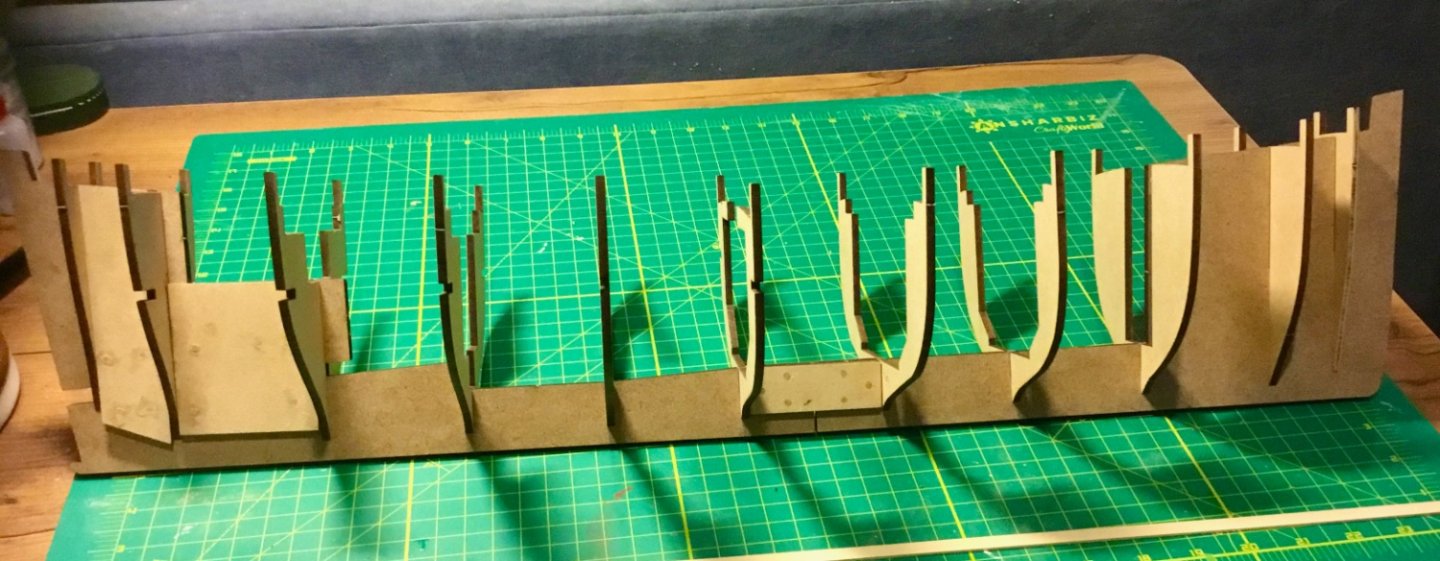
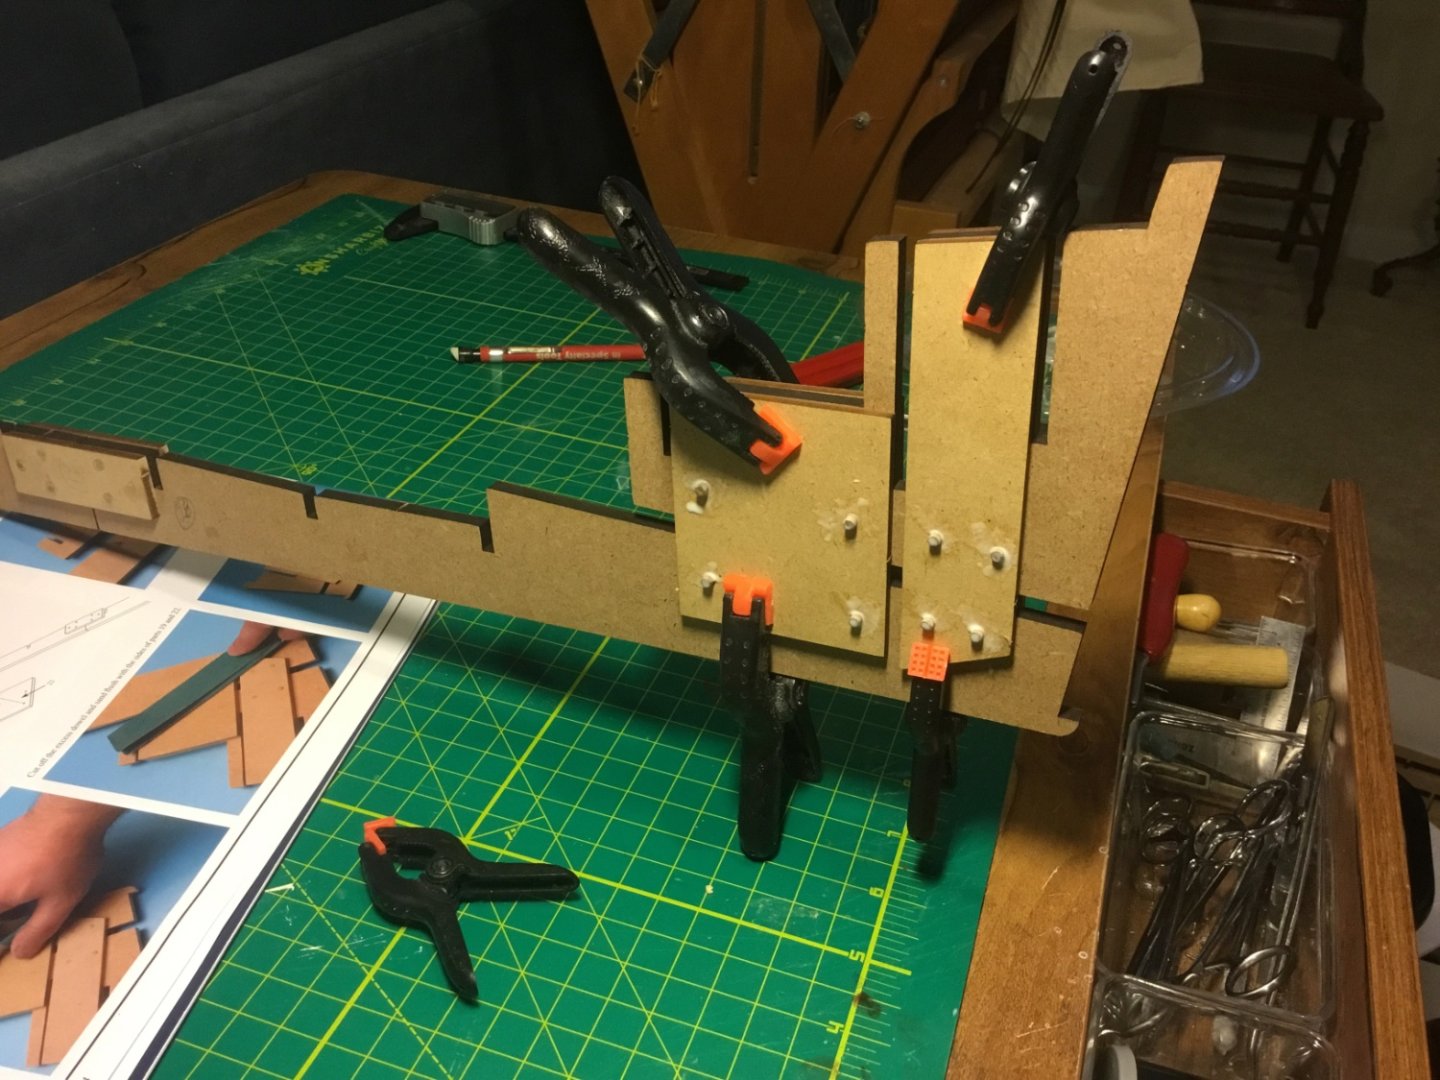
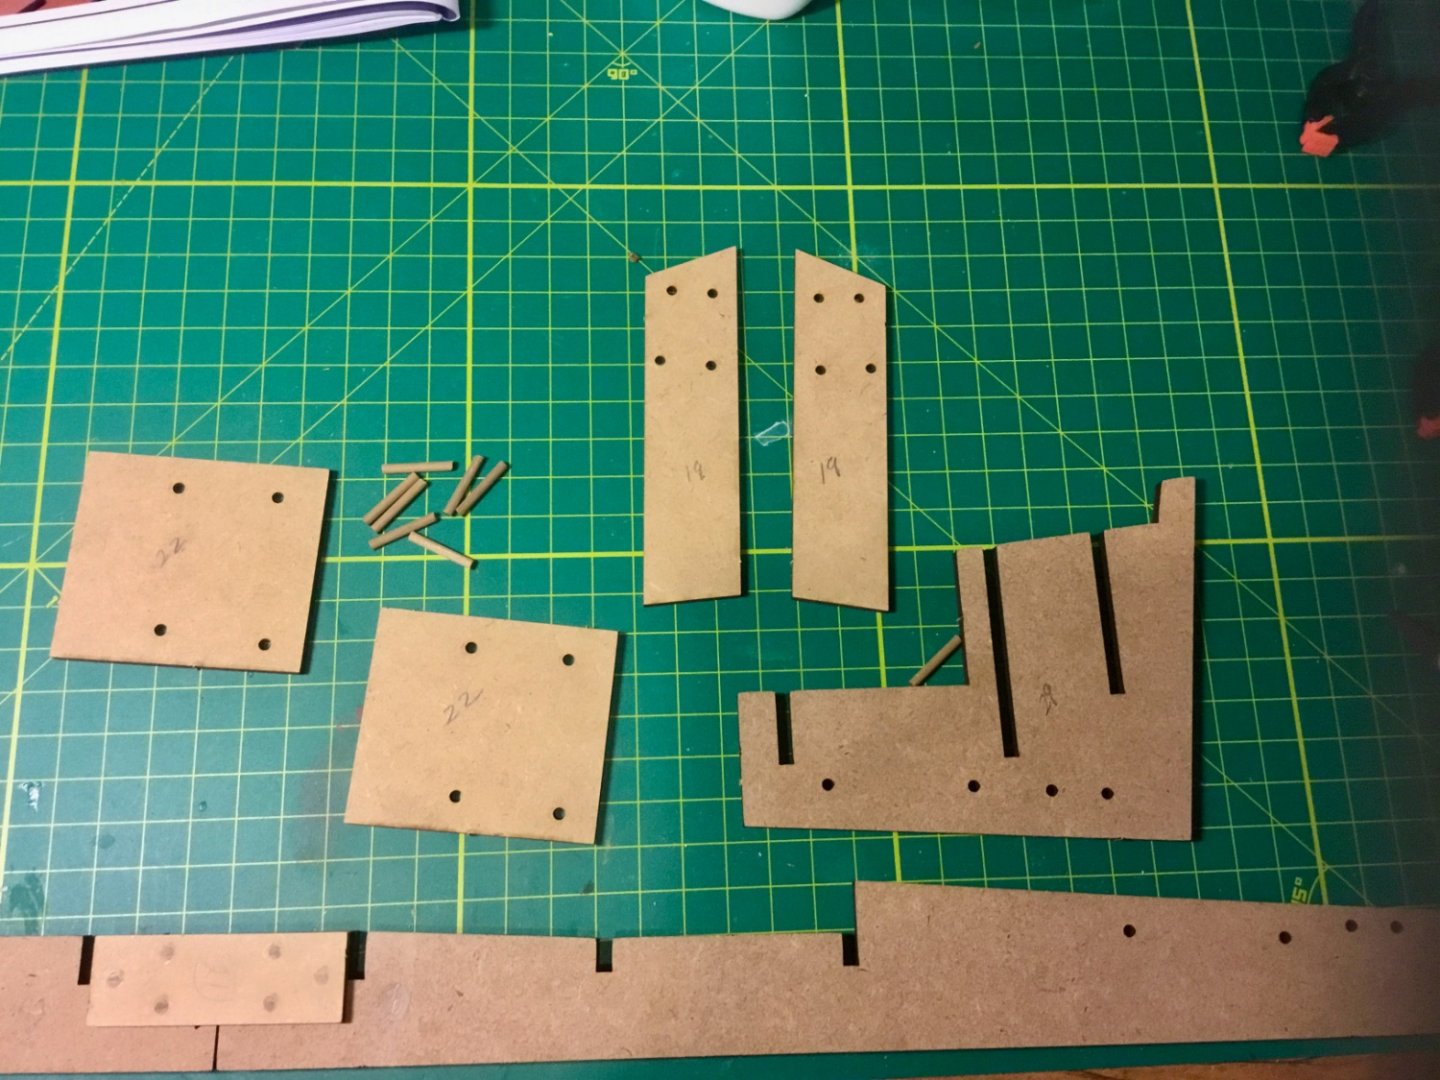
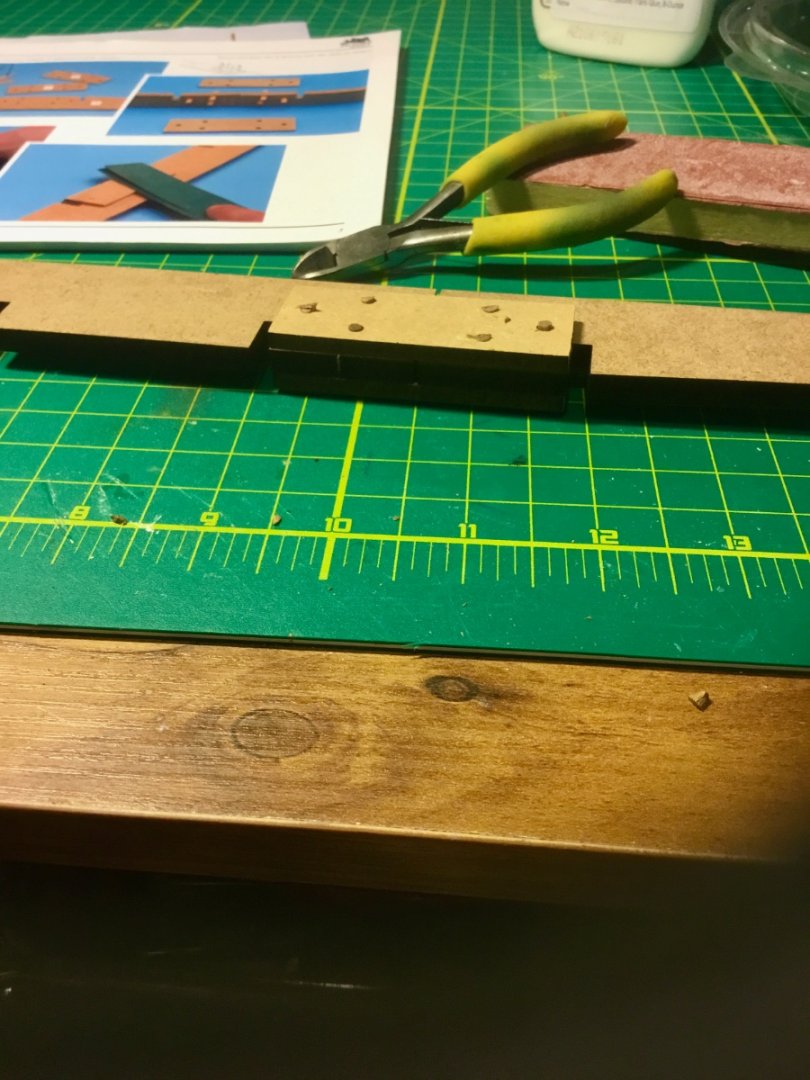
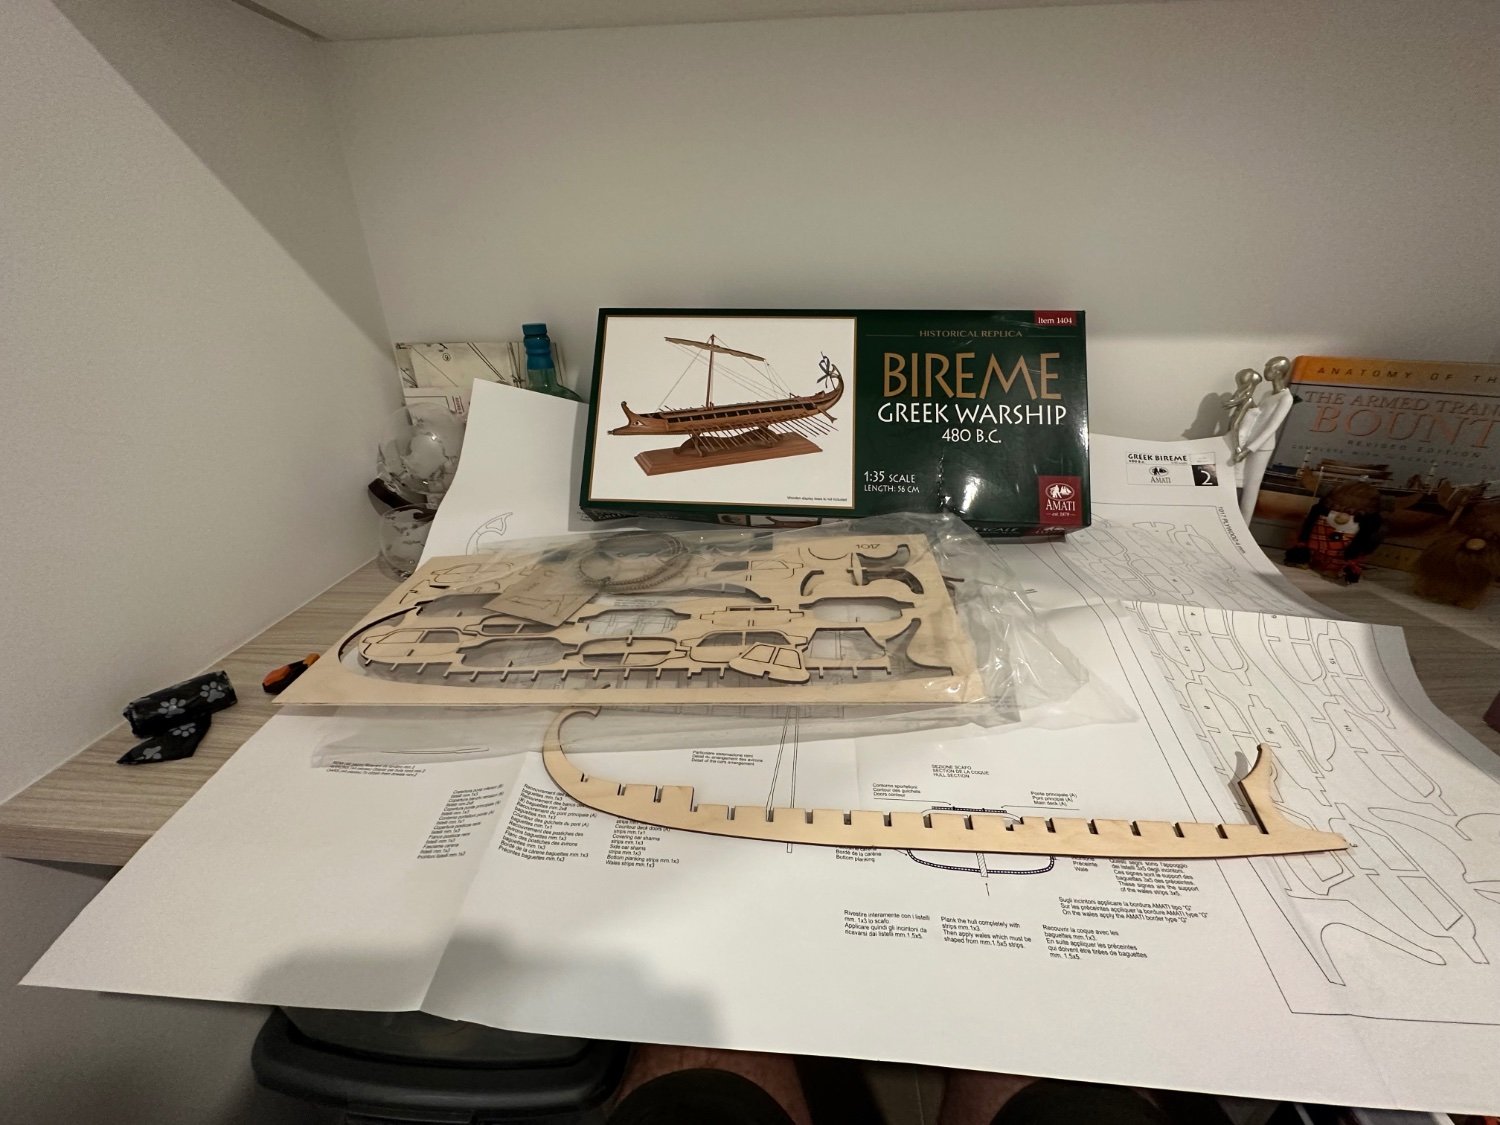
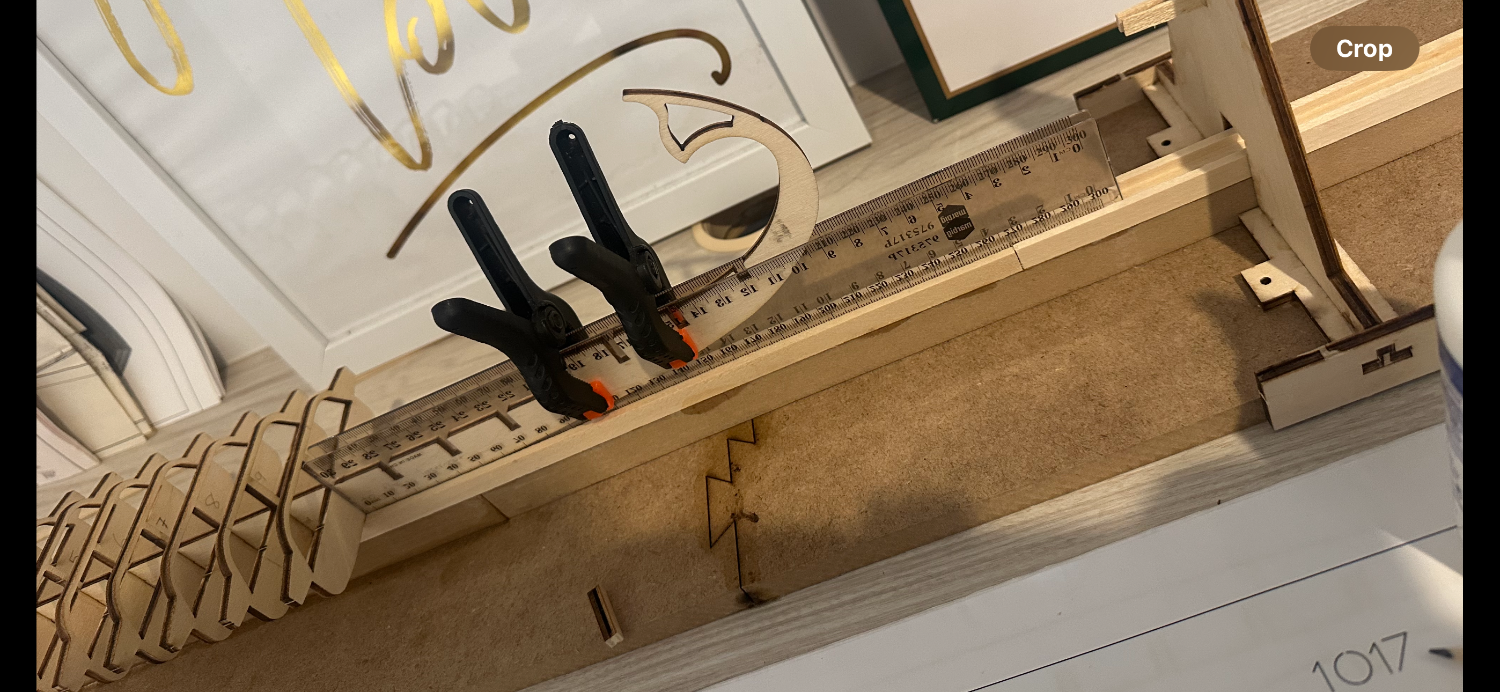
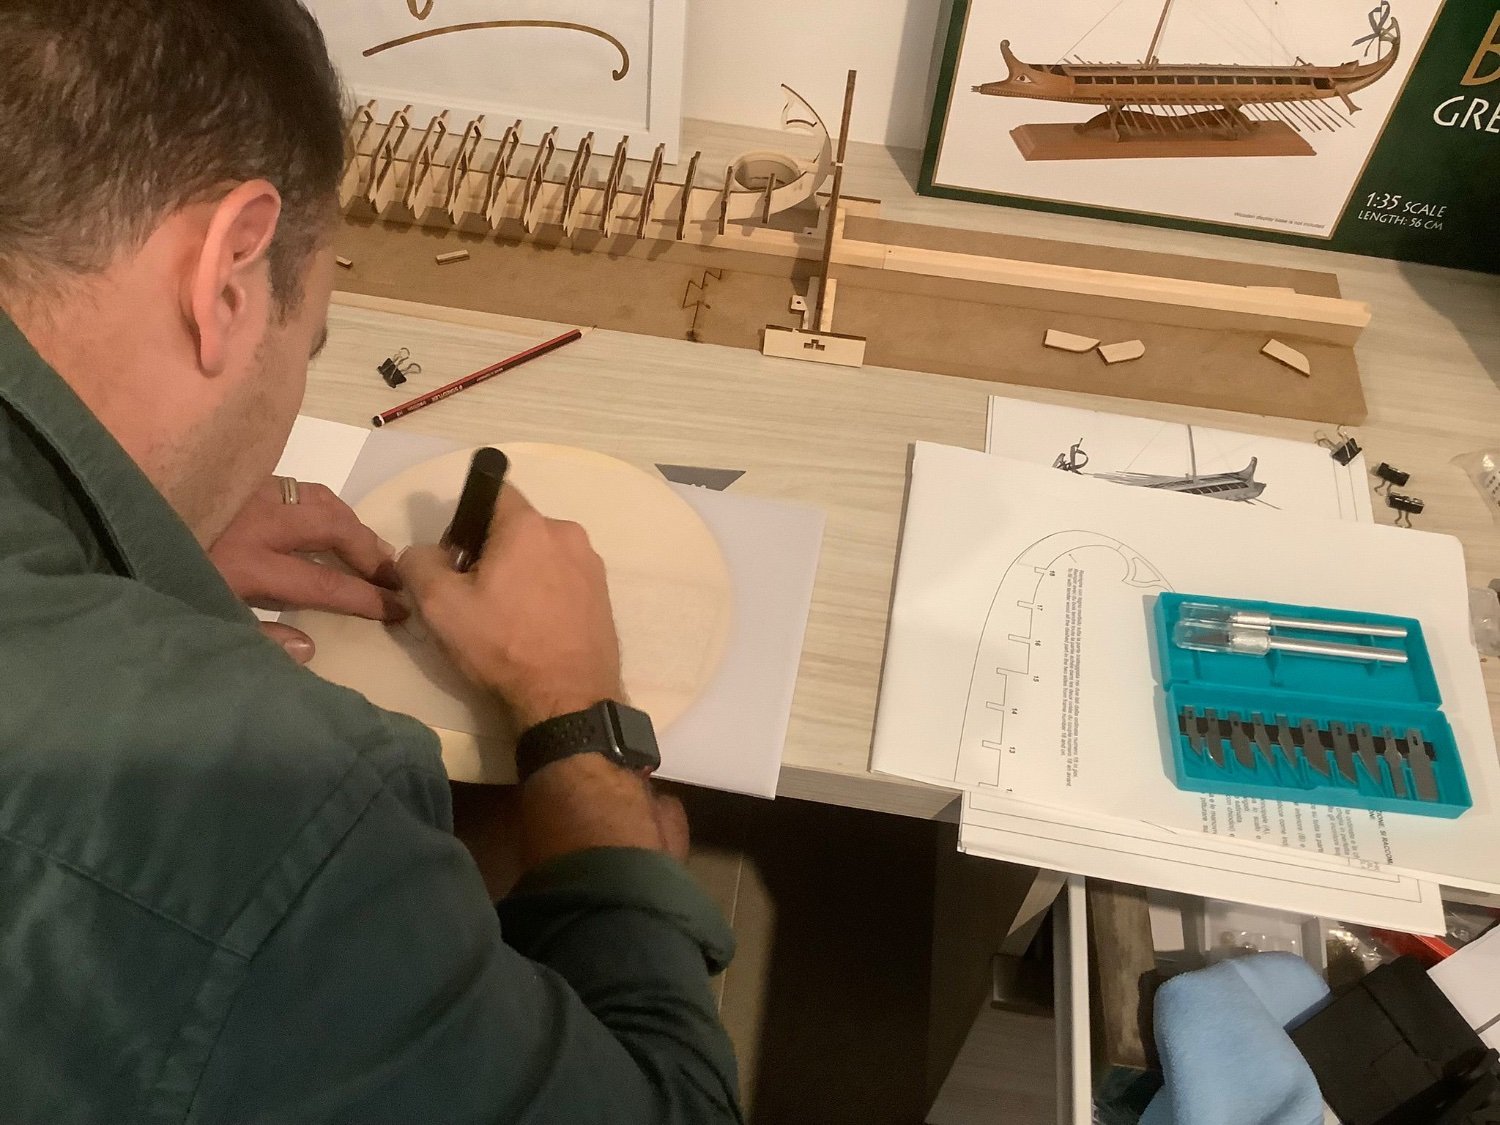
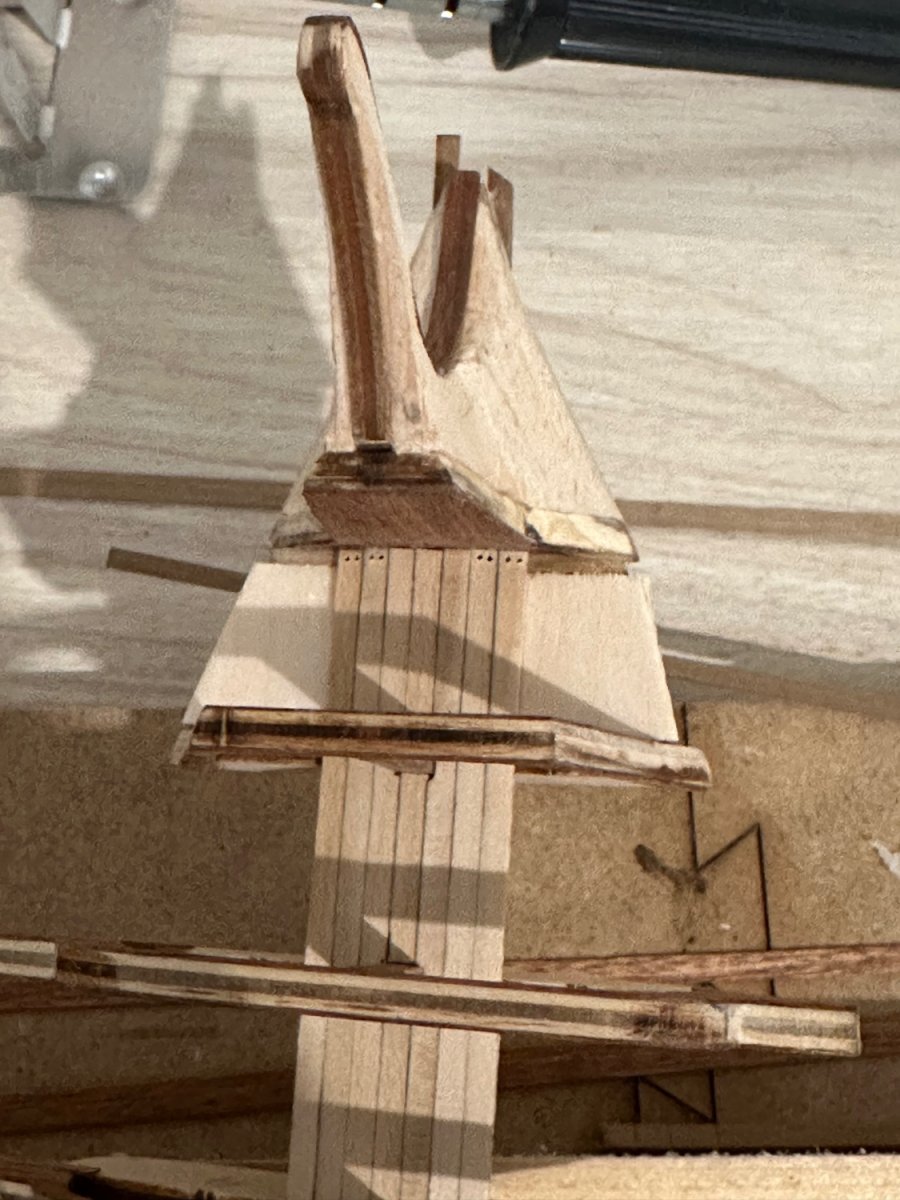
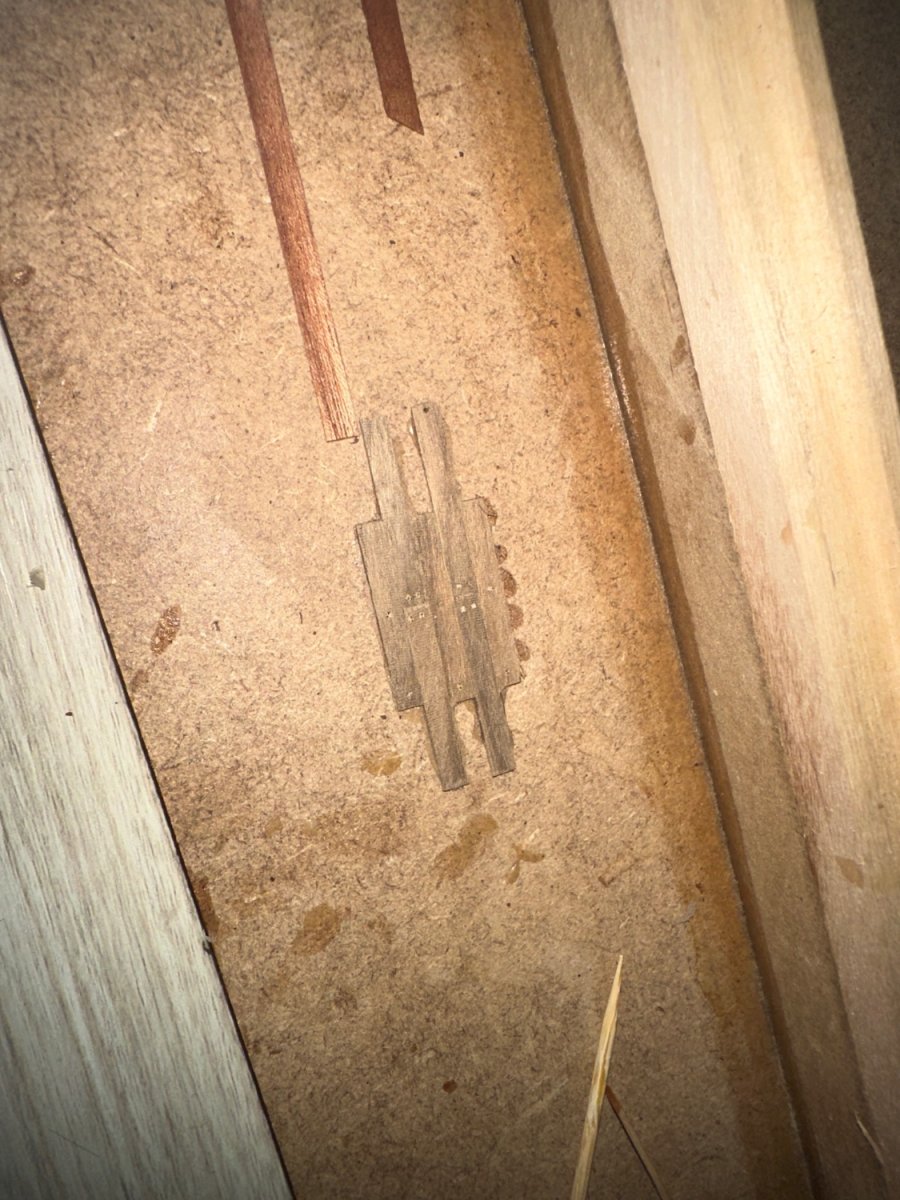
 Well it’s been too long… hello all who are interested …this will technically be my second build…however my last build (Hms Bounty) very sadly 😢…suffered a catastrophic accident and now no longer exists…no matter…I will build another better one…I learned a lot on my last build and intend to reach for higher levels of craftsmanship in the future on another bounty, but in the meantime while I considered which one to buy. I started work on this little Bireme. I’ve been at it for about 2 months now, but from this point hopefully I’ll post smaller more regular posts… so, like several other past logs I’ve read, I’ve noticed the usual disappointments. The instructions are very vague, and some of the laser cutout pieces are inaccurate. However, the fun of model ship building is sometimes, problem-solving…so let’s do this. at a snails pace, I added one bulkhead each day, obsessing over, trying to make it as square as possible. I end up being mostly satisfied with results, but I think next time, I could probably find tool that would do a better and easier job. trying to fix some of the inaccurate frames… ended up being quite happy with my efforts… The admiral took a photo of me using some tracing paper to trace off the plans for the stern cut out section… the balsa that is essential to complete this kit is not included. This is another criticism I have of this kit many parts that you need to finish simply aren’t inside the kit. Anyway…went out and have got a nice stash for my future balsa needs a lot of the frames will still be quite visible when the model is finished…so I ordered some mahogany strips to cover up exposed areas…stern section all smooth and shaped. Planked and sanded the inferior deck. Thought long and hard about whether or not to simulate tree nails. Did research on whether they where historically accurate…apparently a resounding yes…did a few test samples…I used toothpicks as the tree nails… they seem less visible than what I imagined…however I still think they will add some nice details…so I’m going to go ahead with tree nails… Will probably do tree nails on the walnut hull planking also… in the process of doing the garboard plank… and that is where I’m up to…please let me know if there are any suggestions or pieces of advice
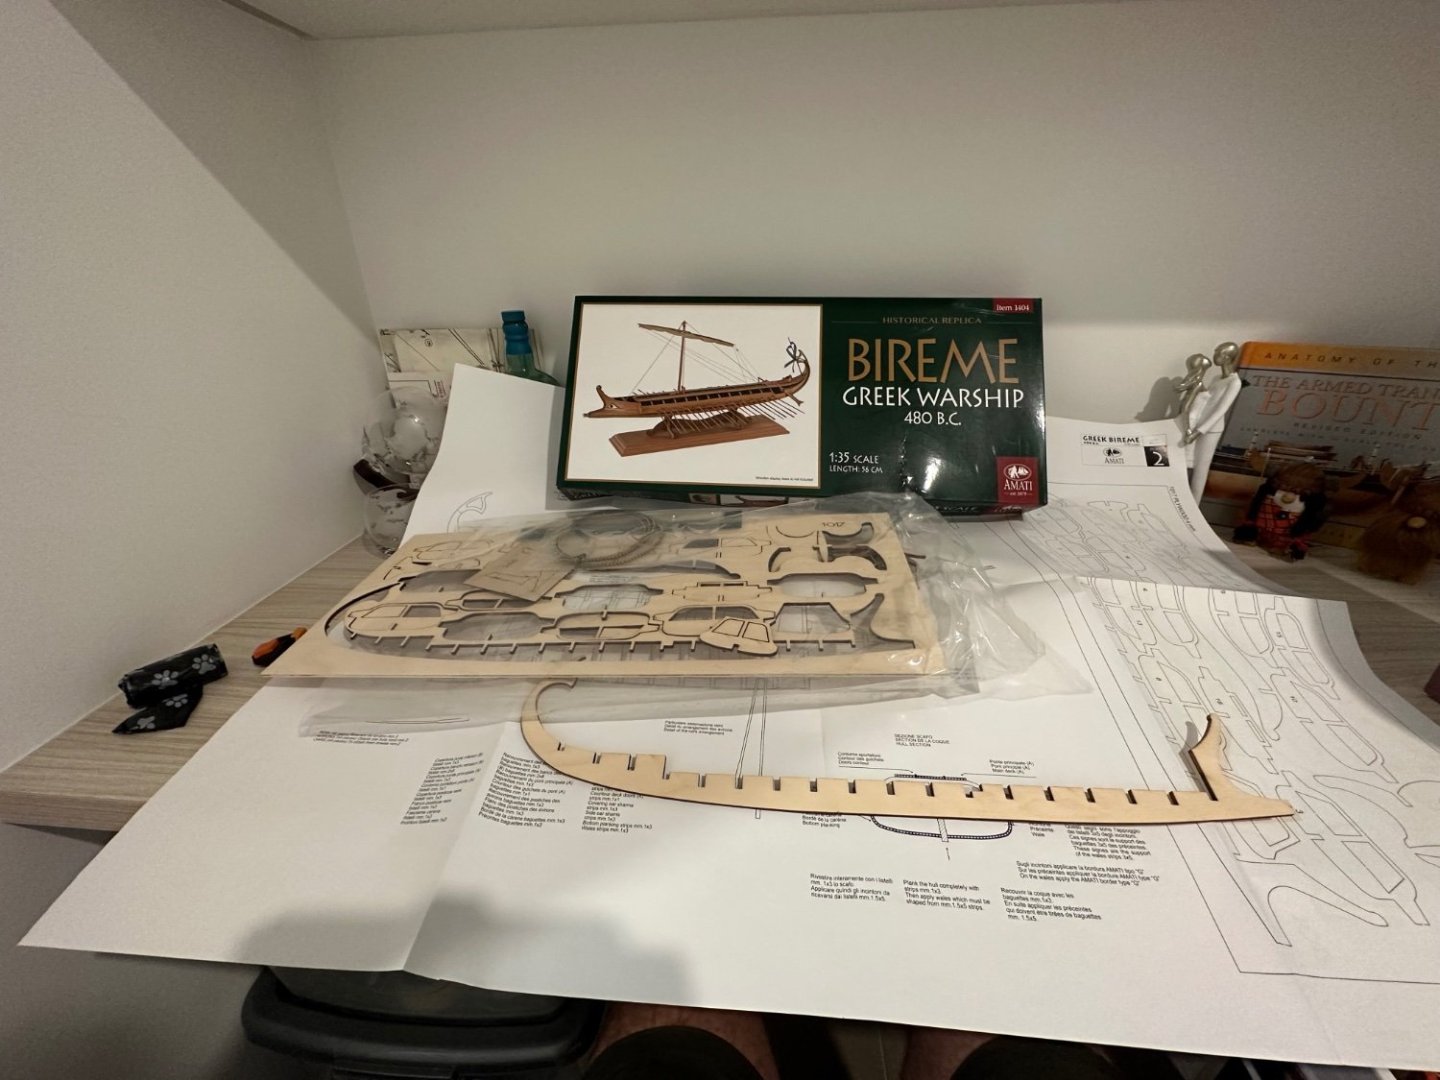


-
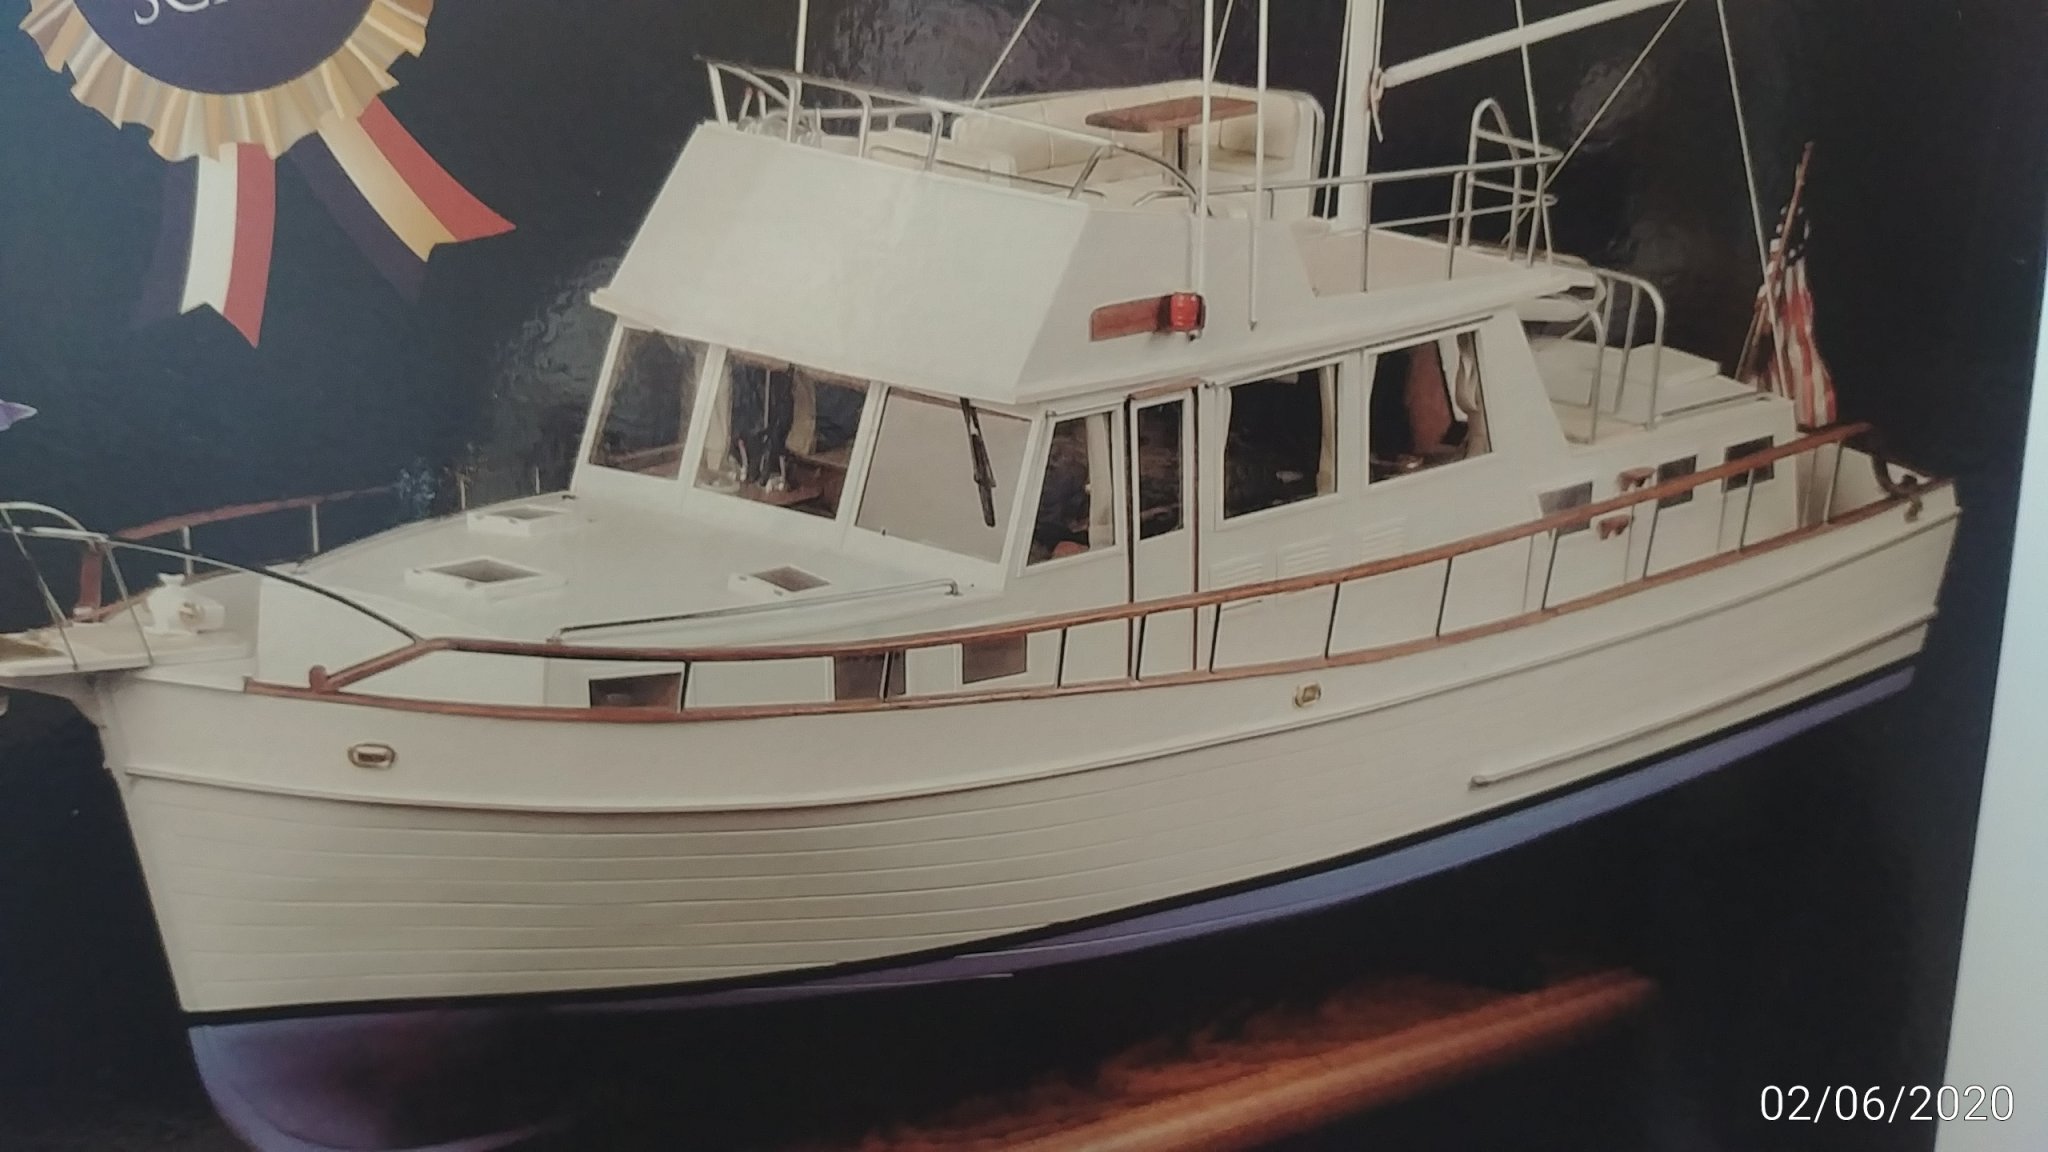
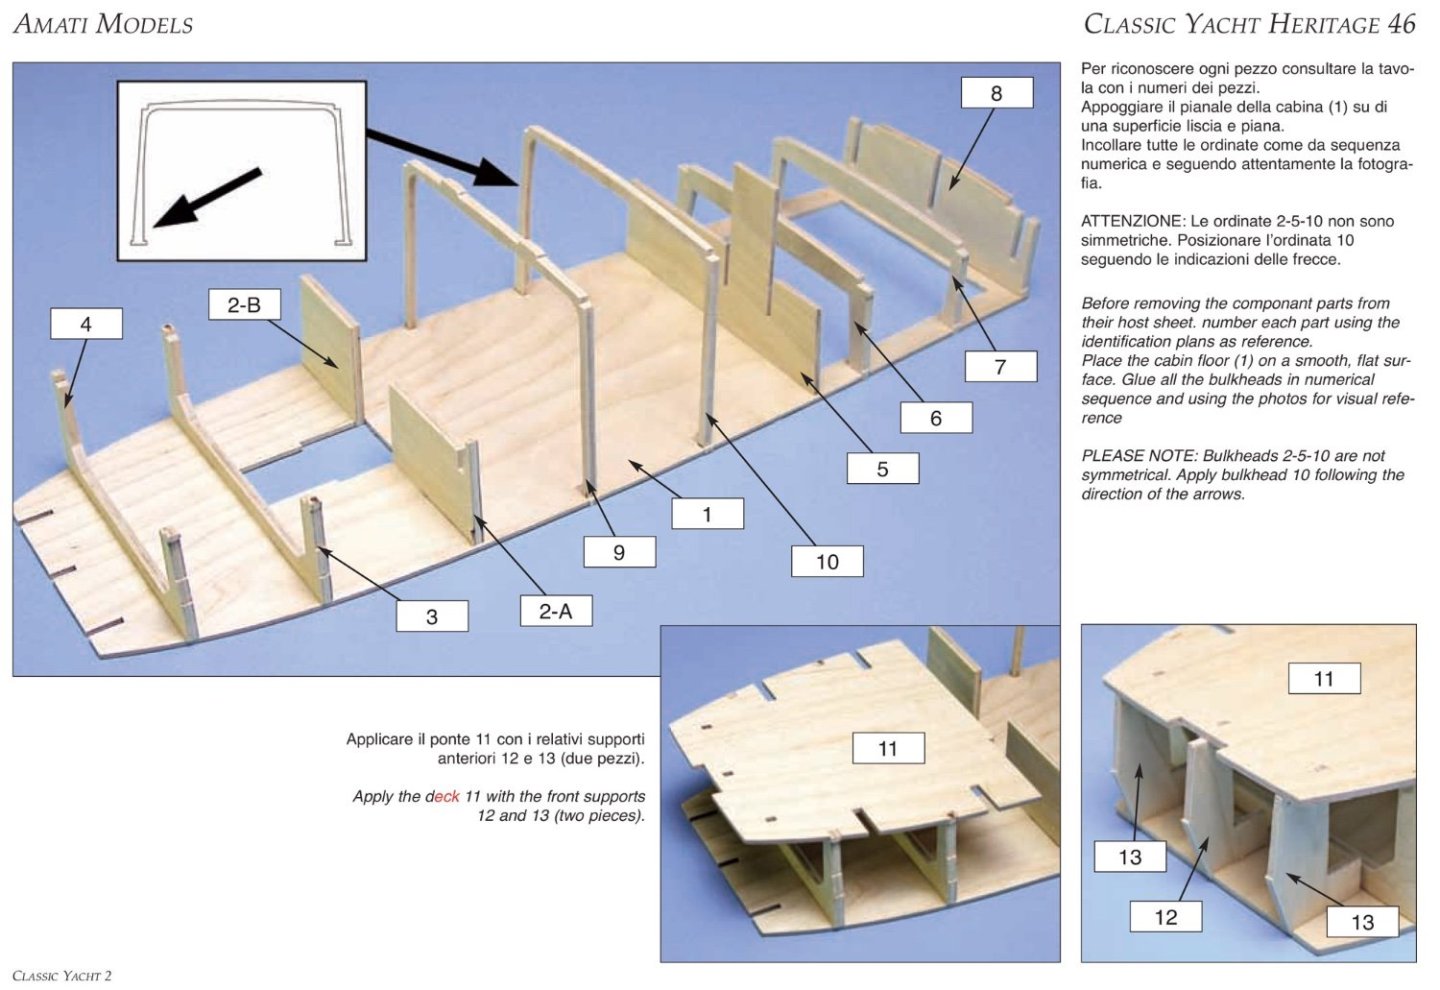
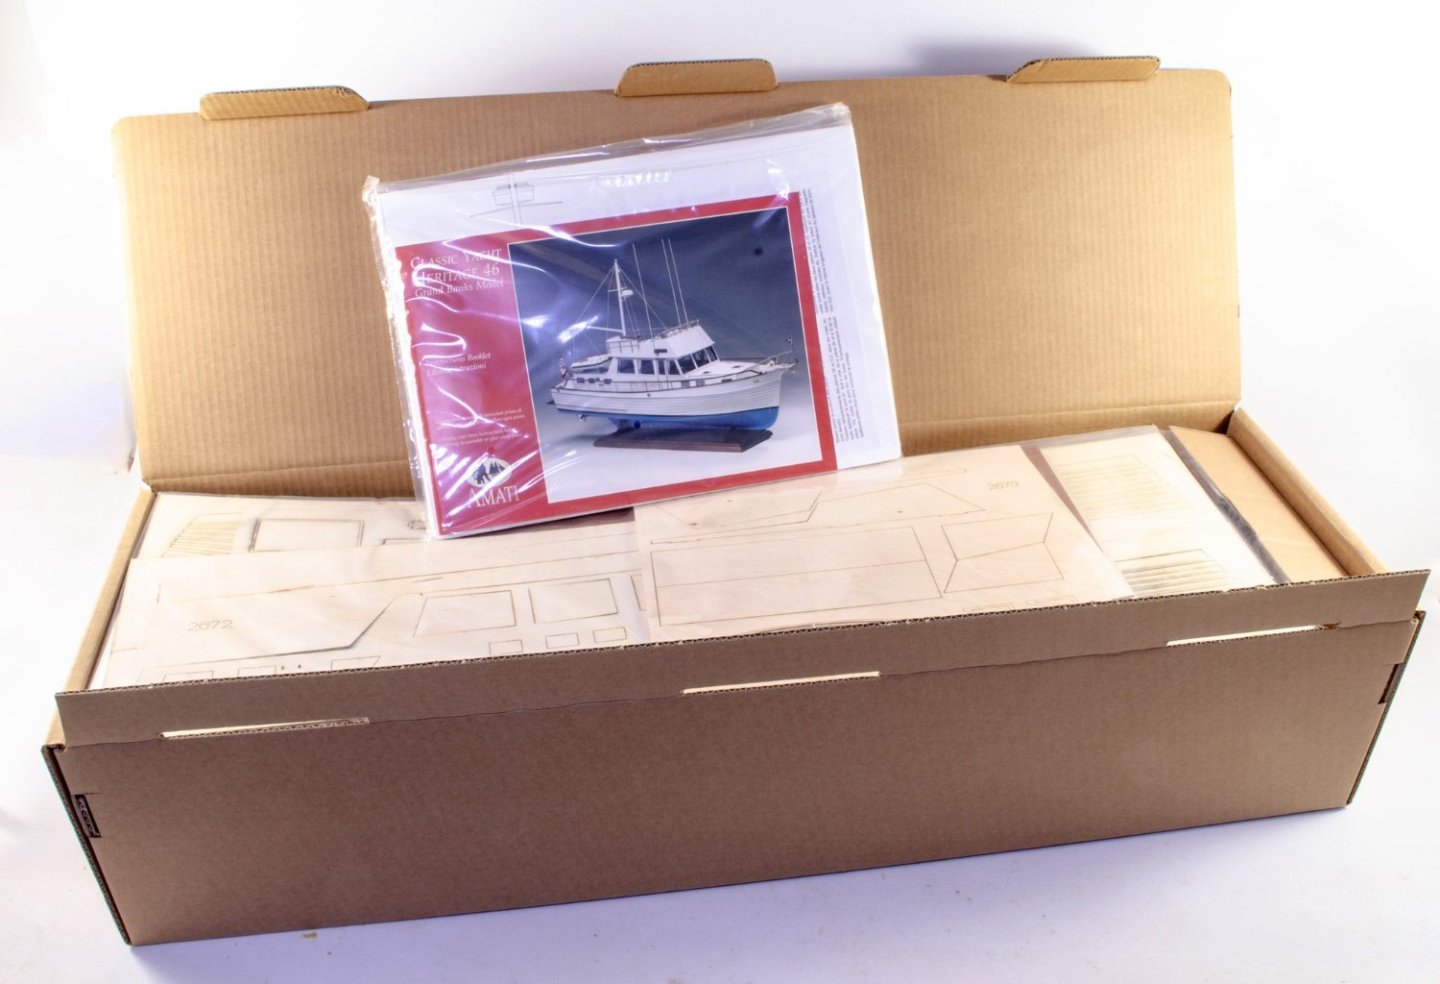
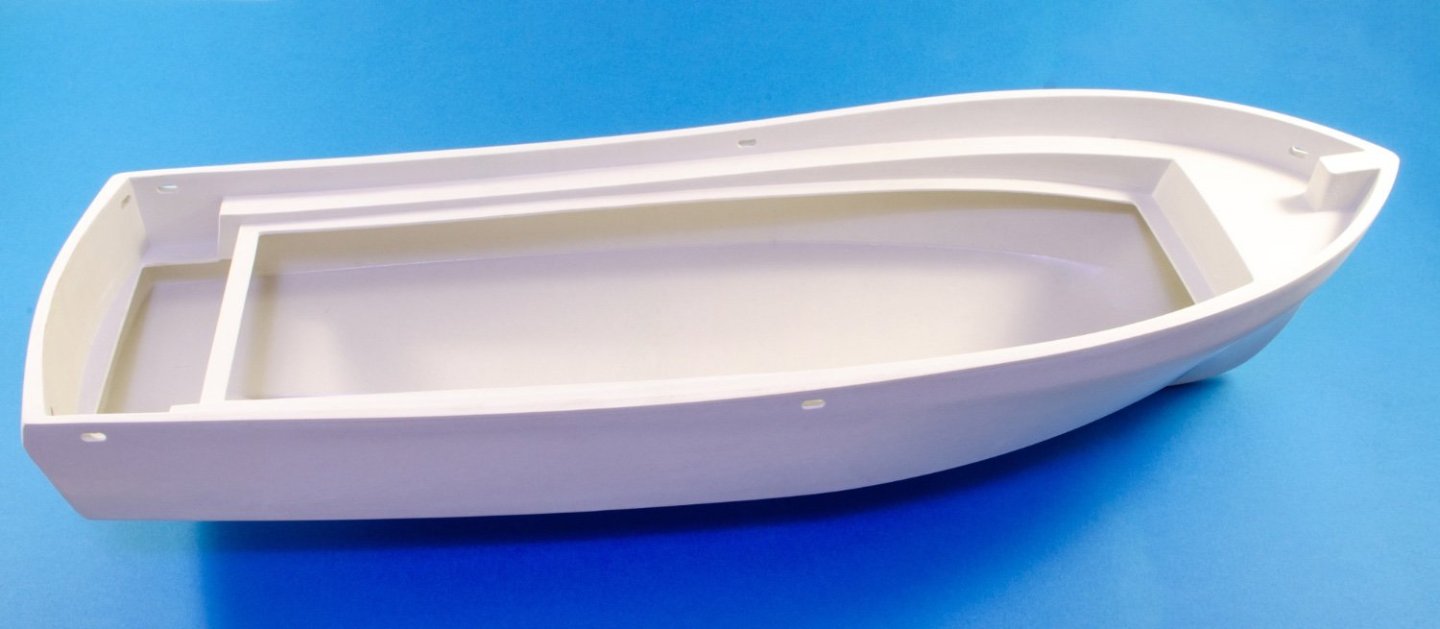
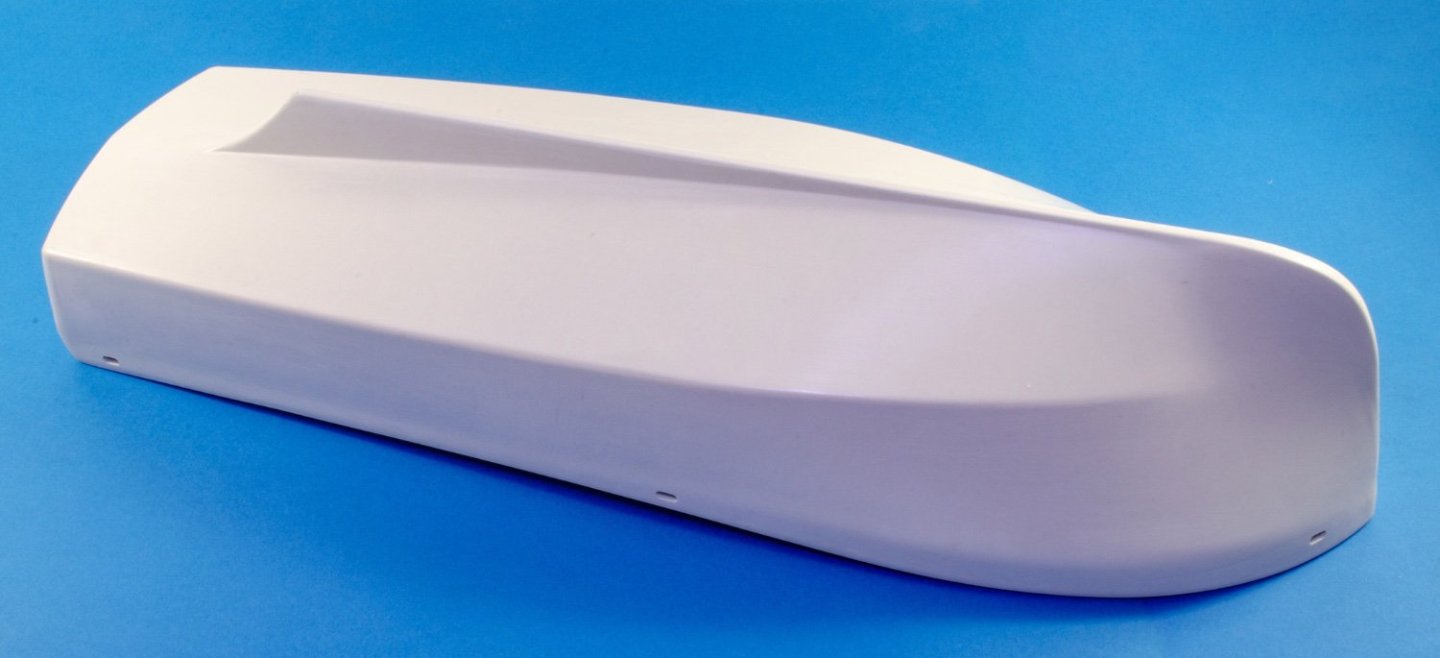
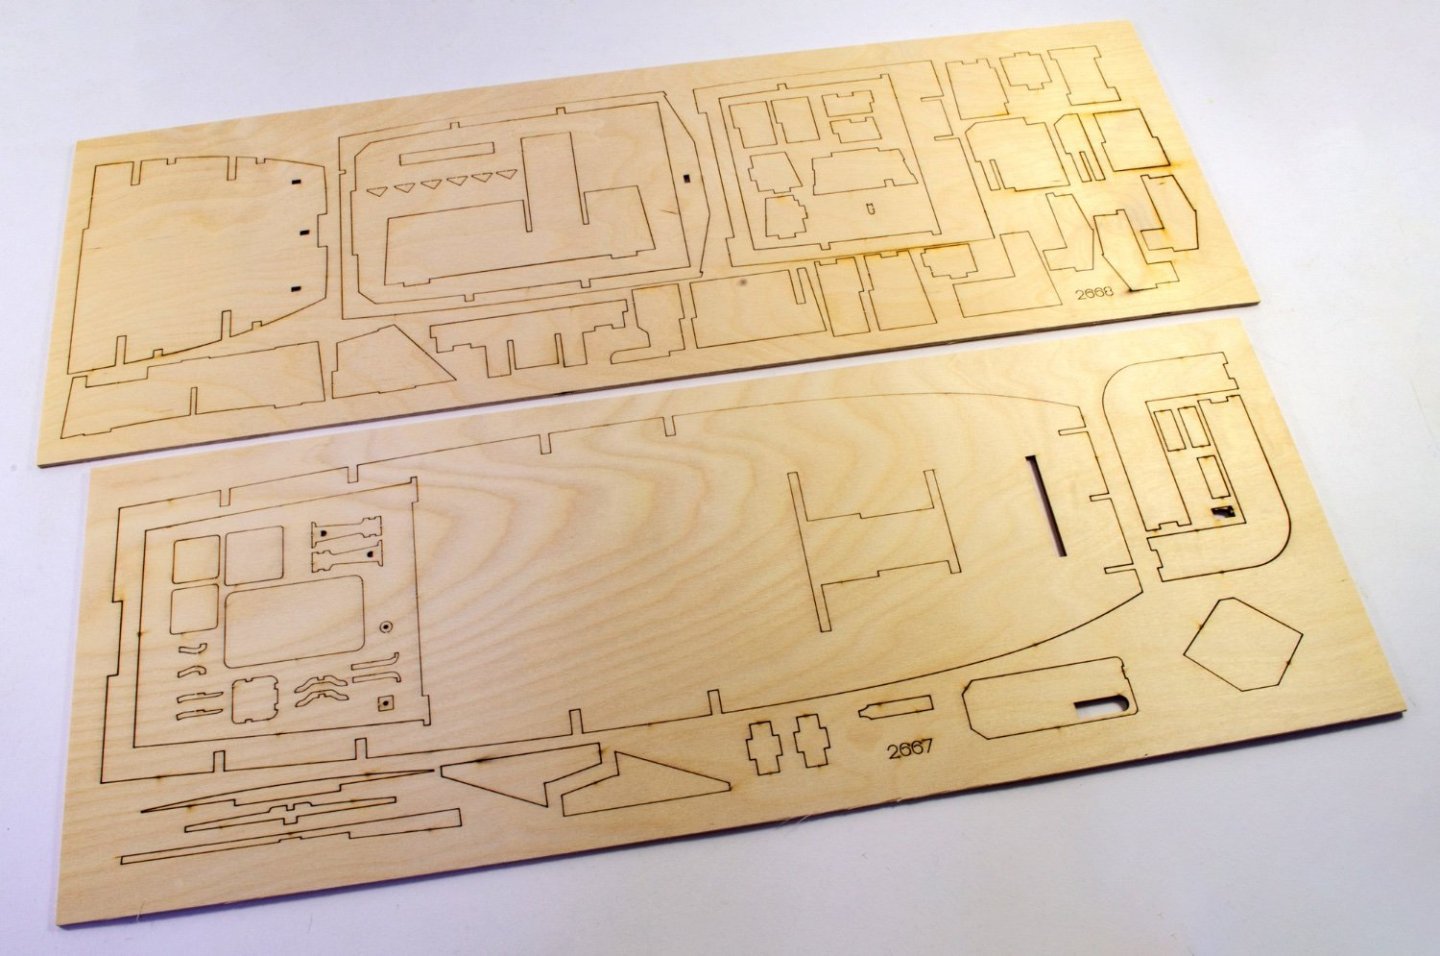
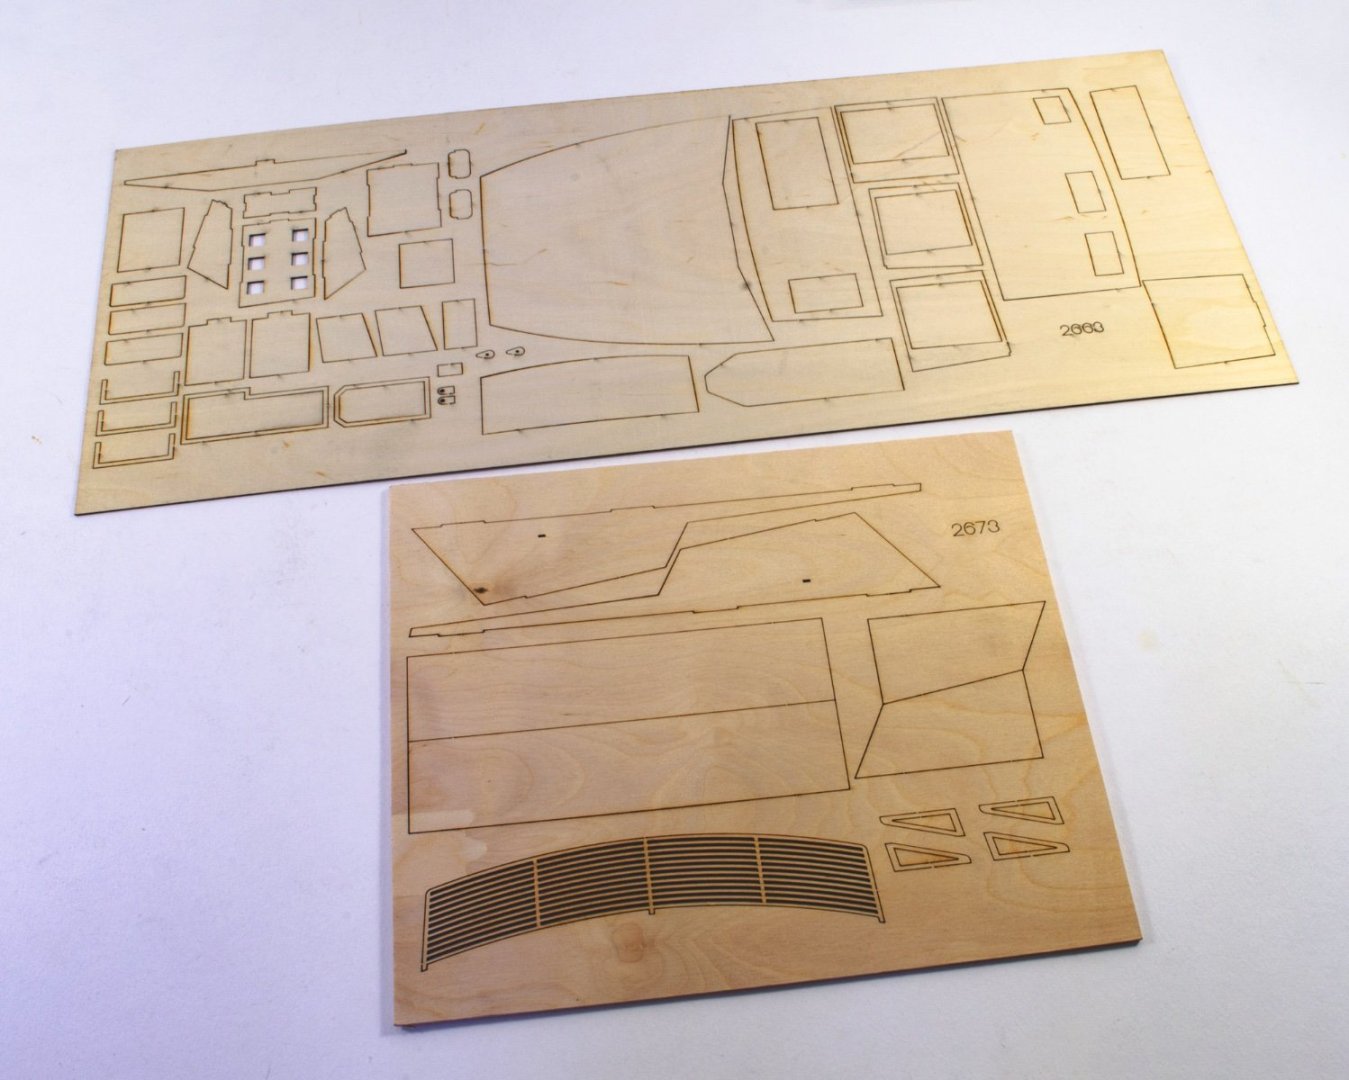
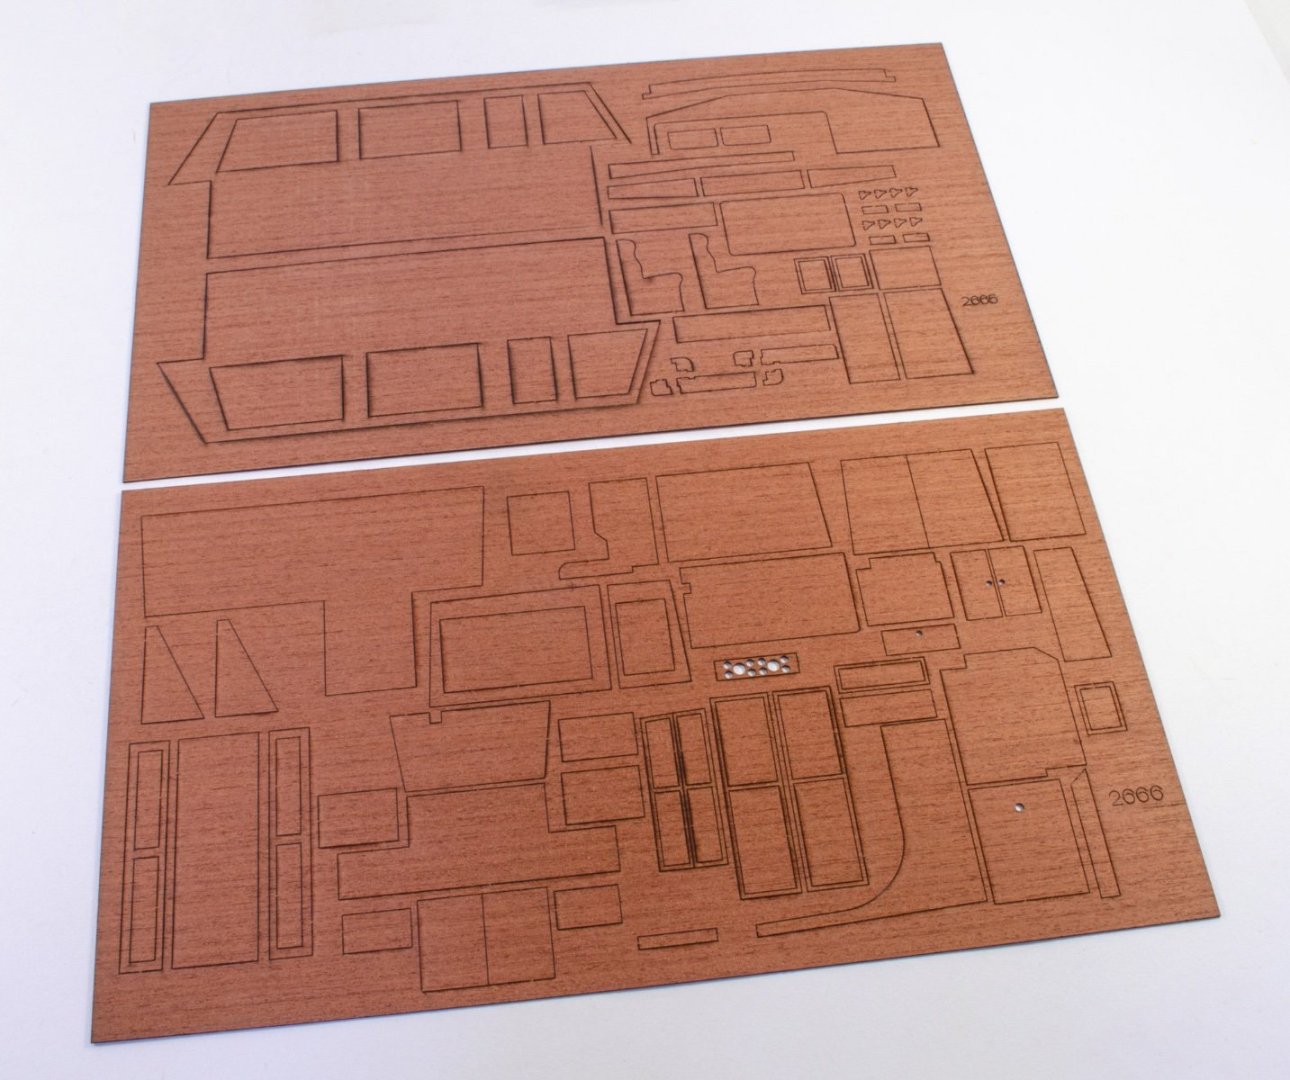
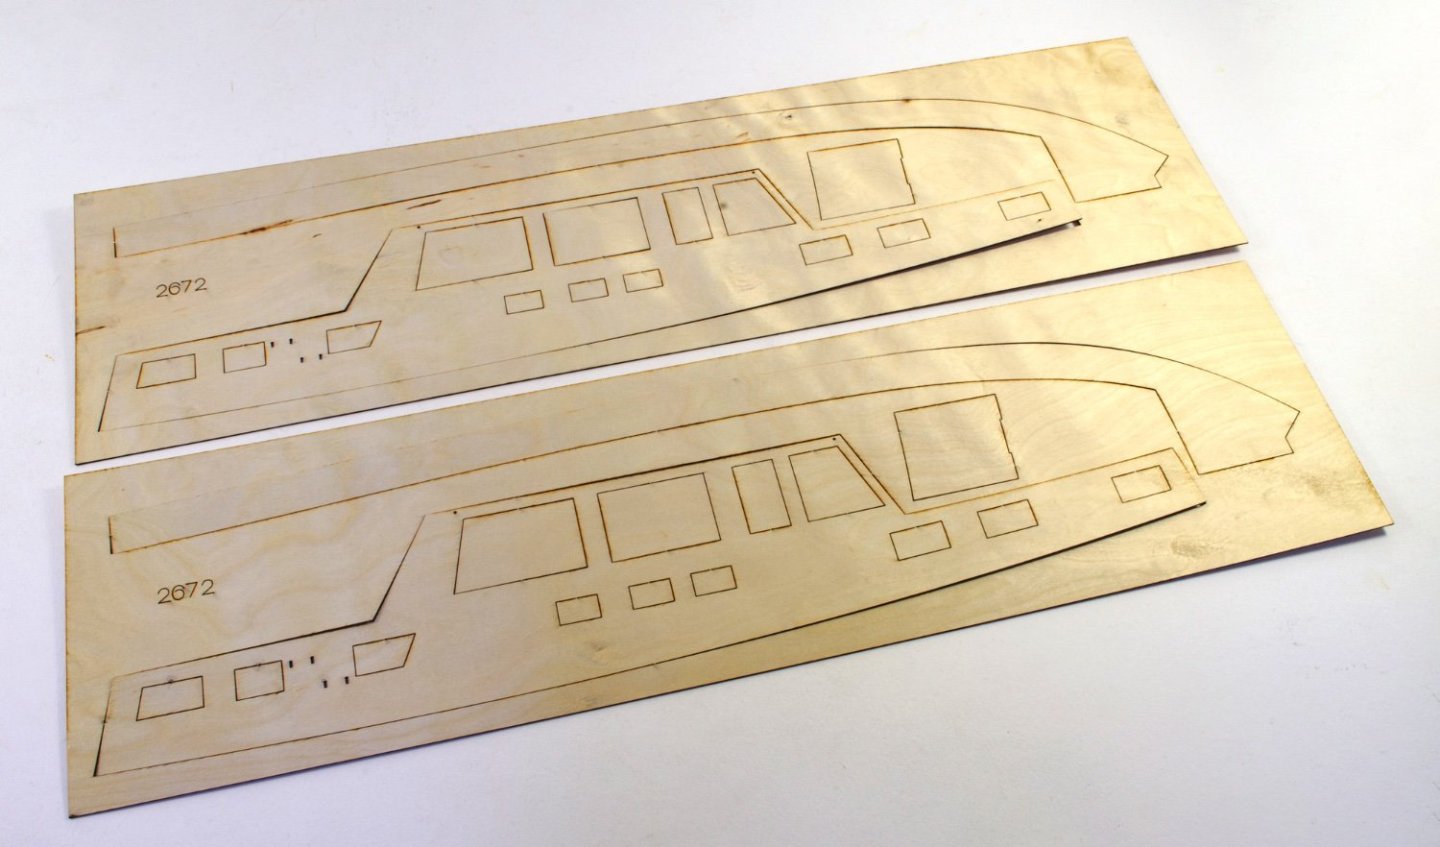
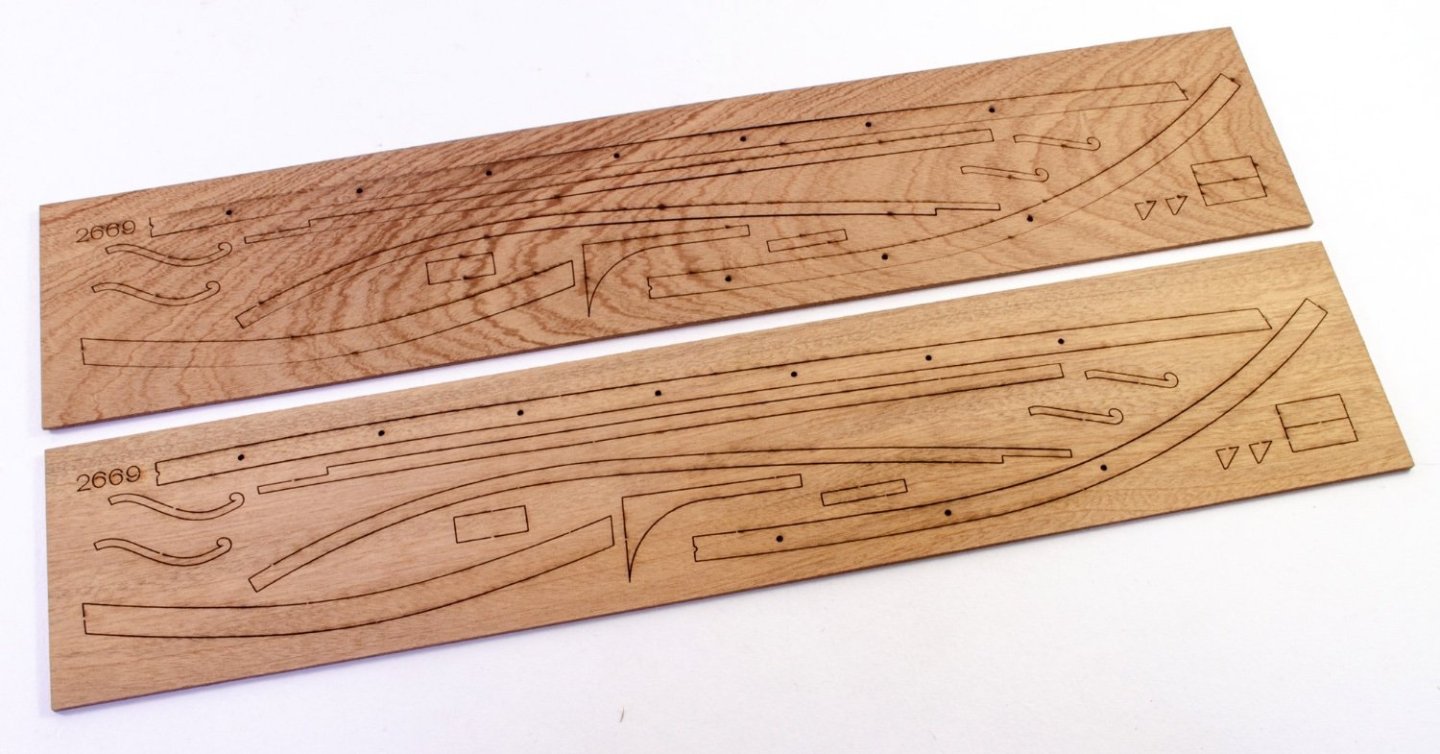
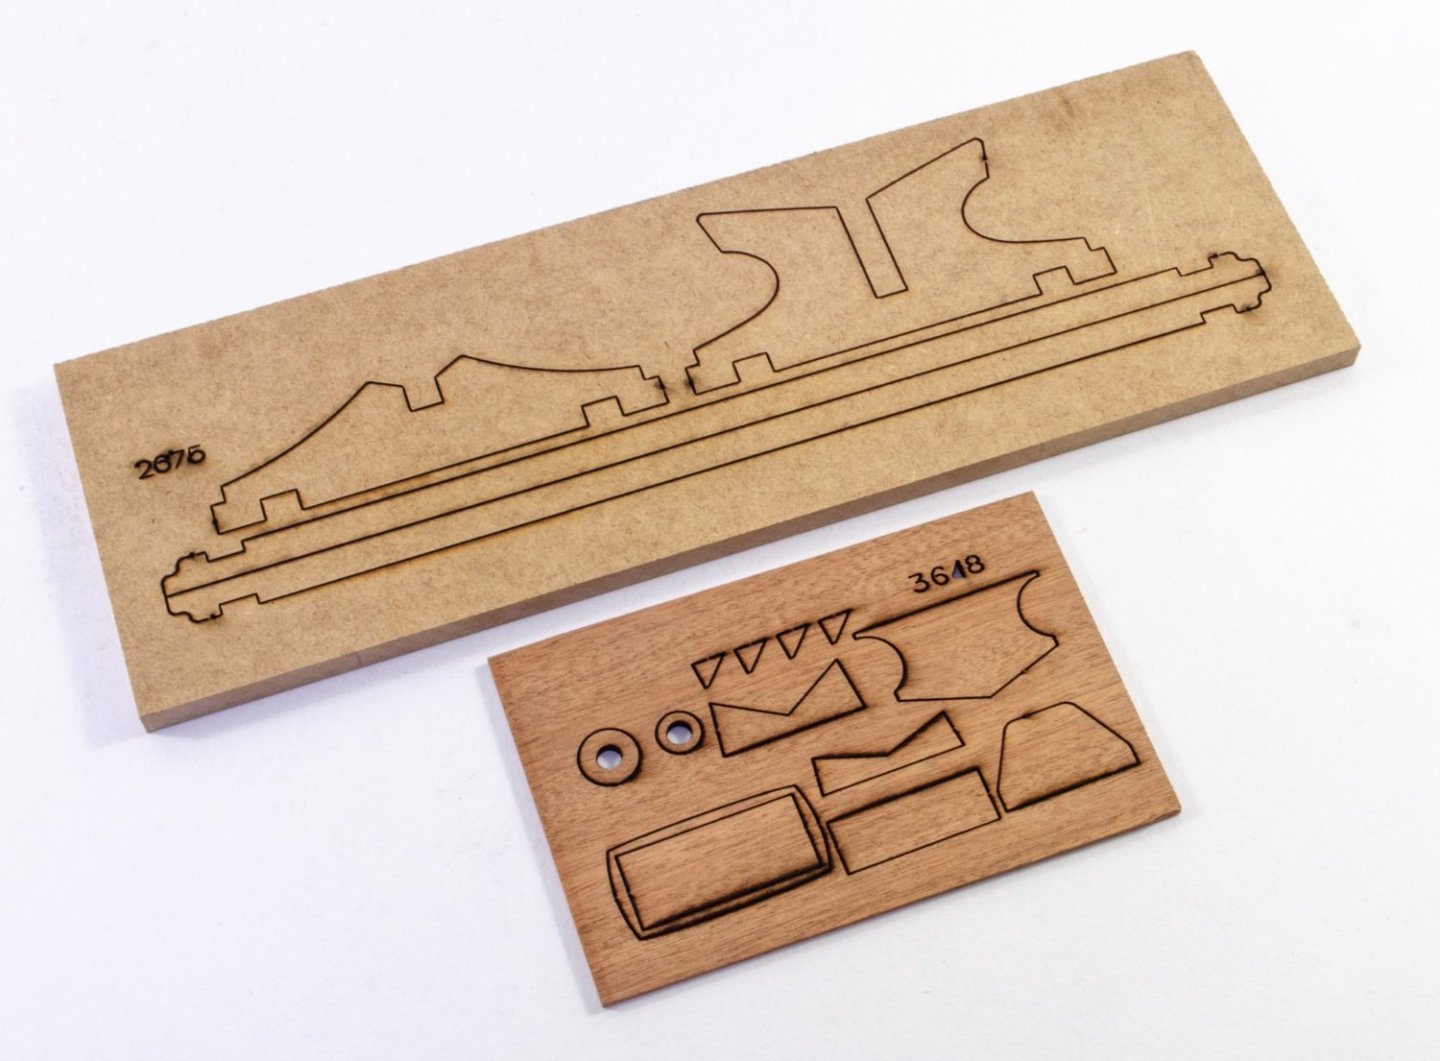
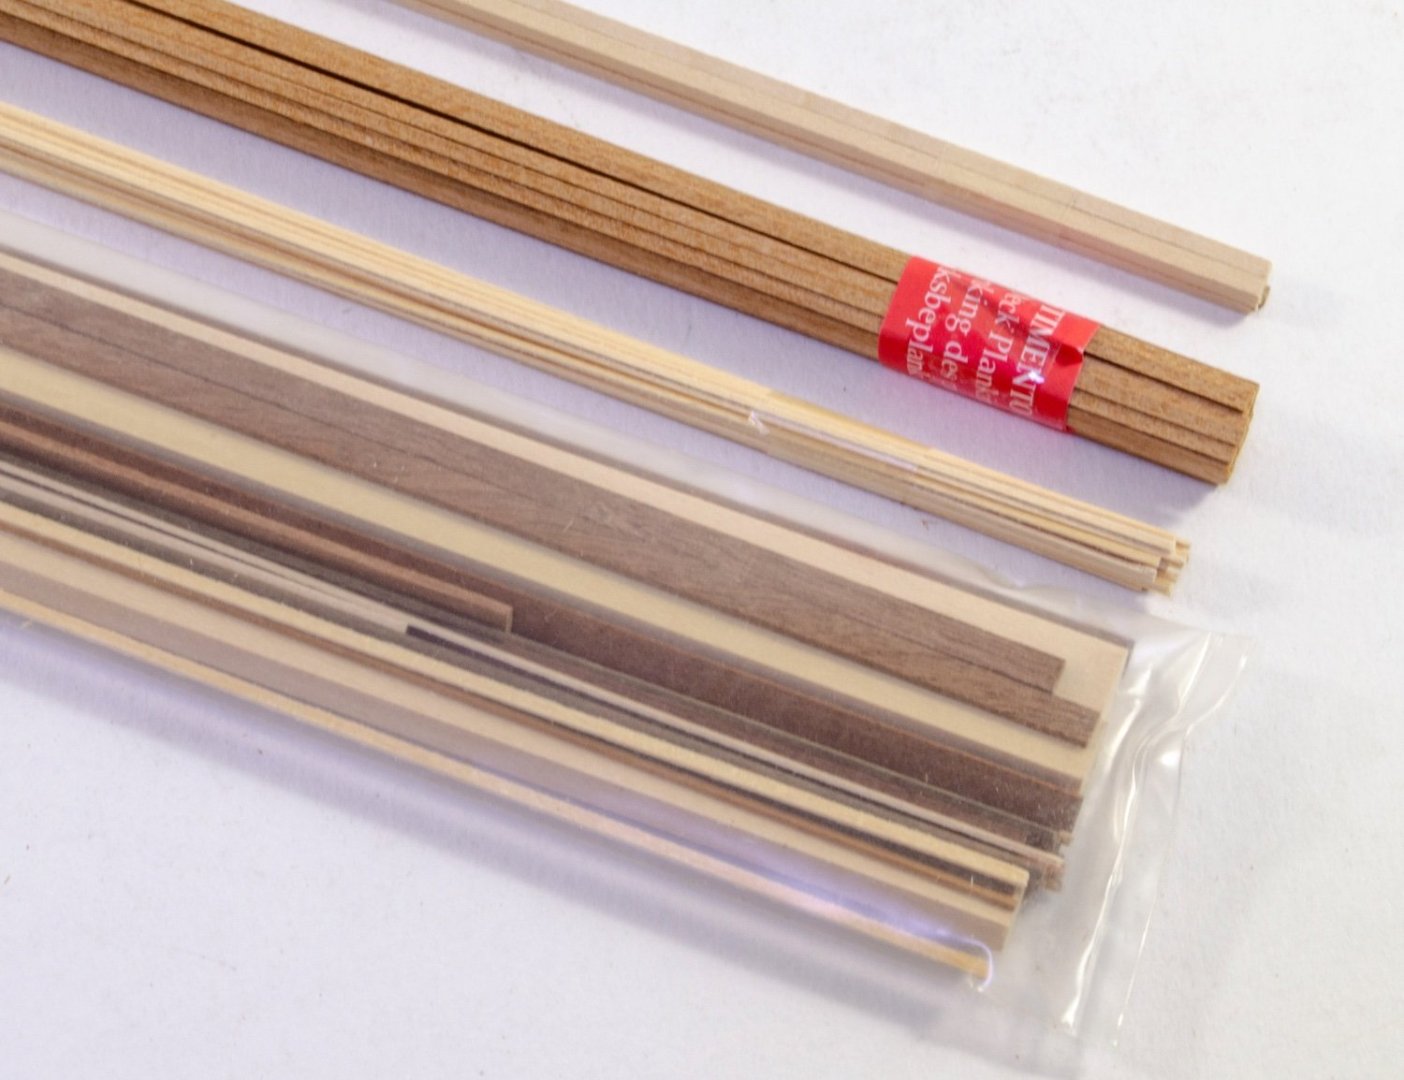
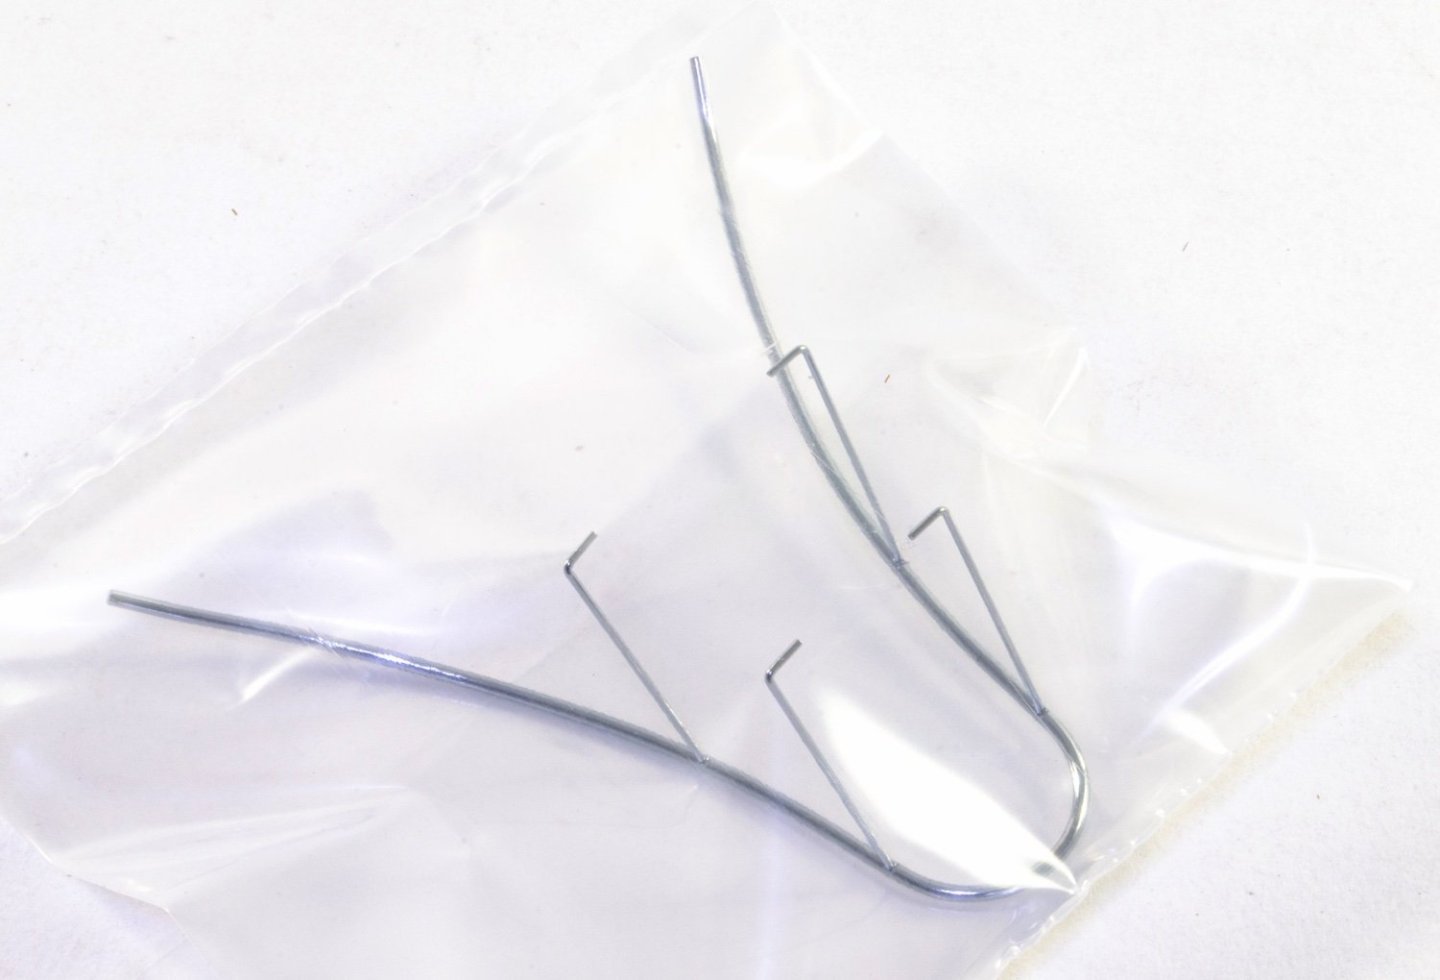
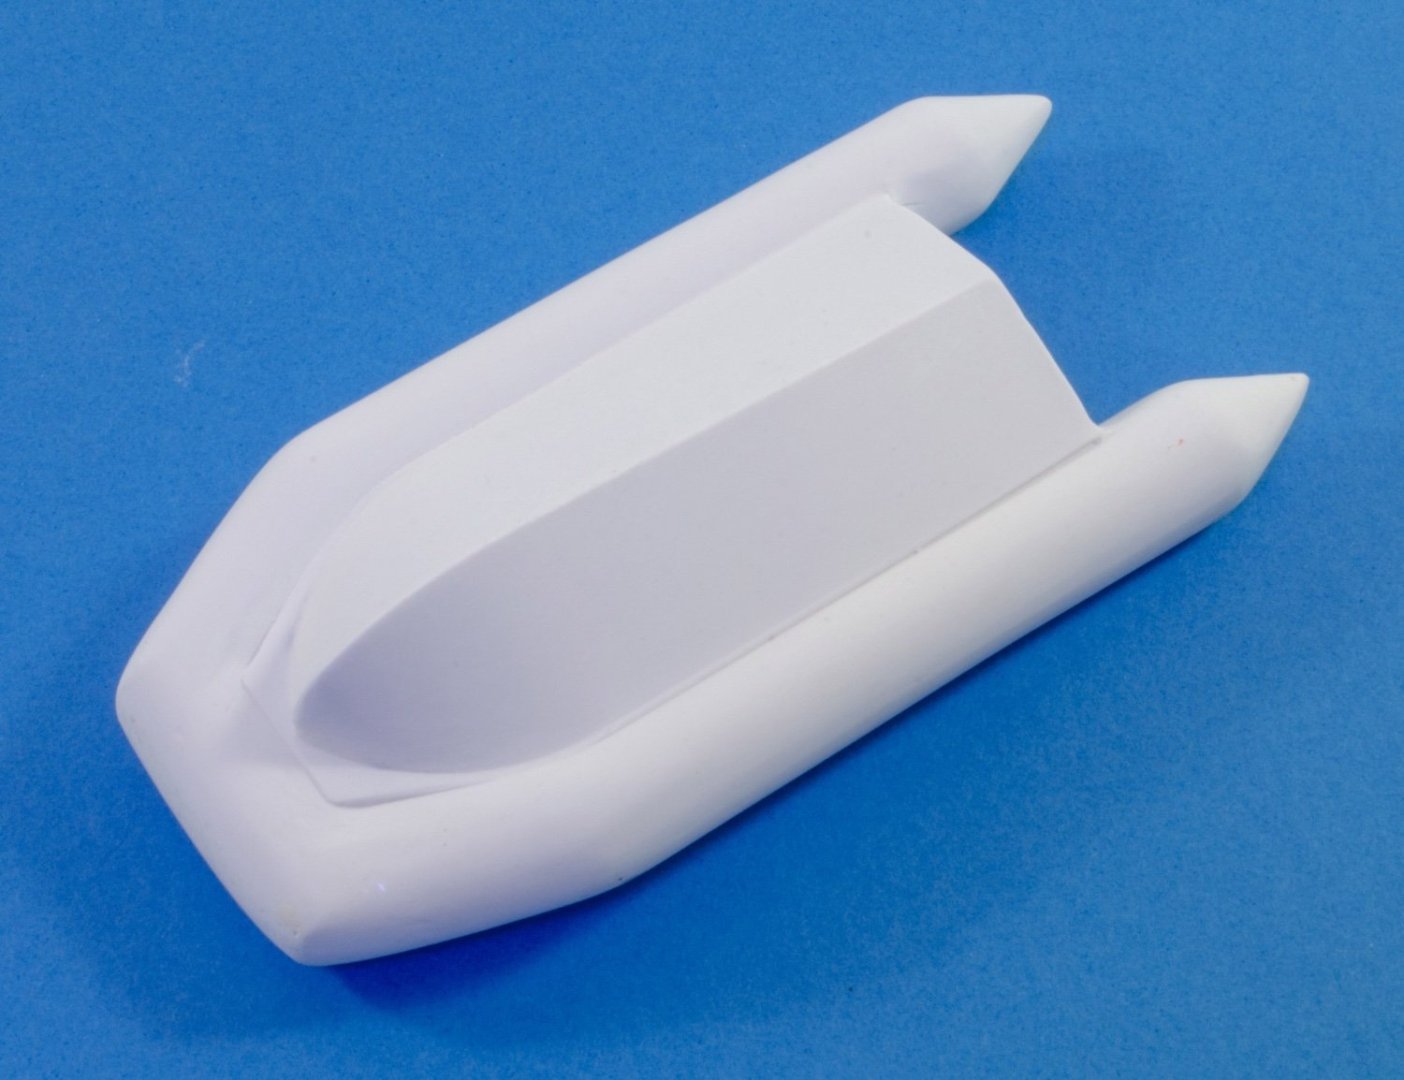
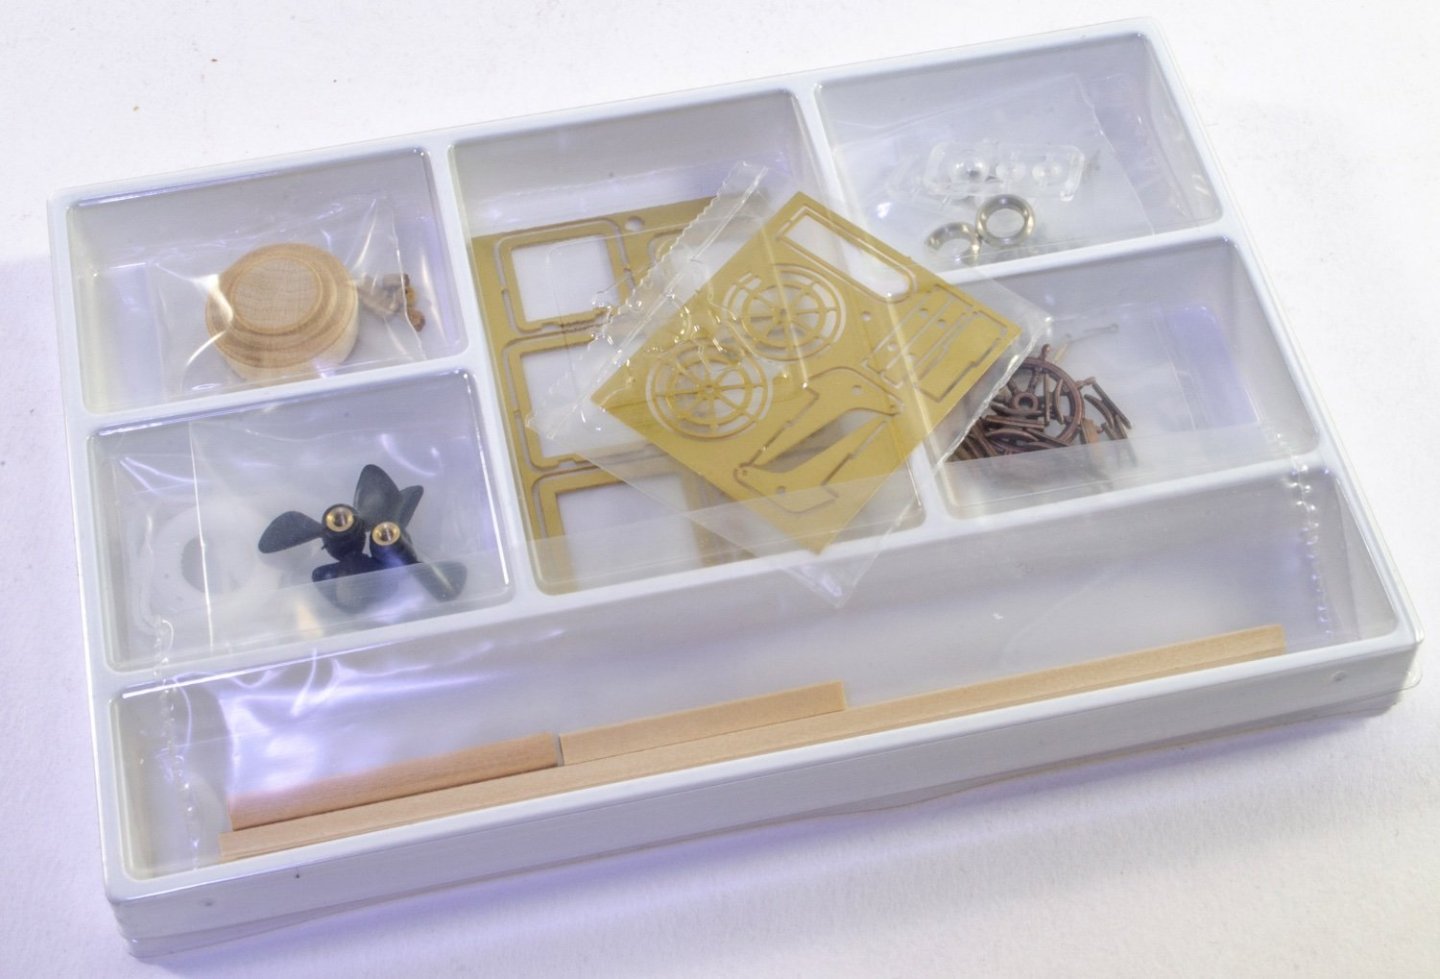
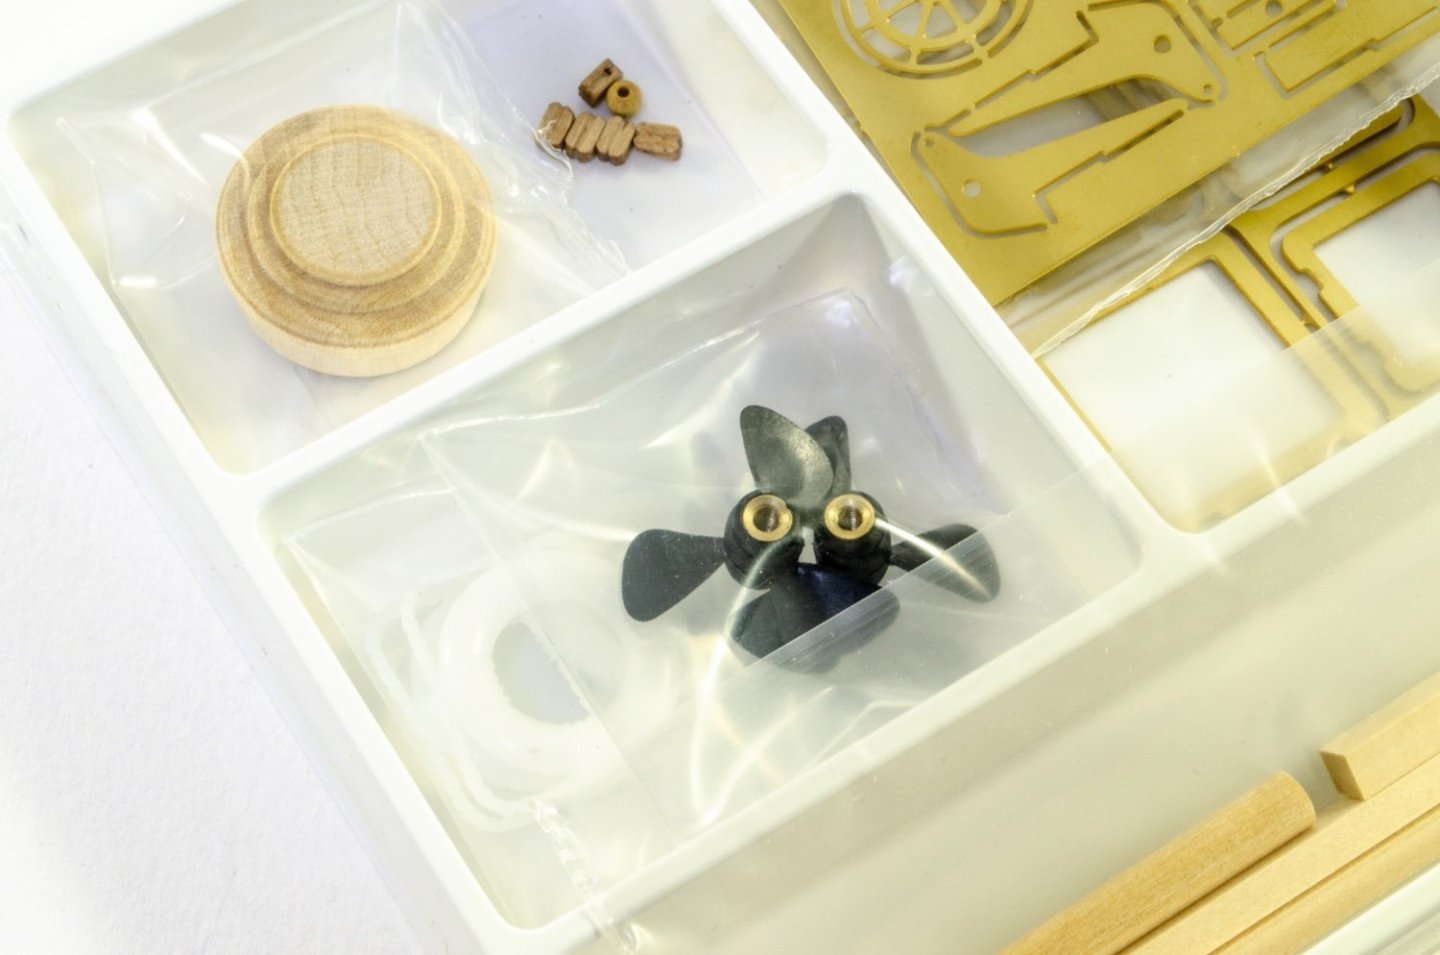
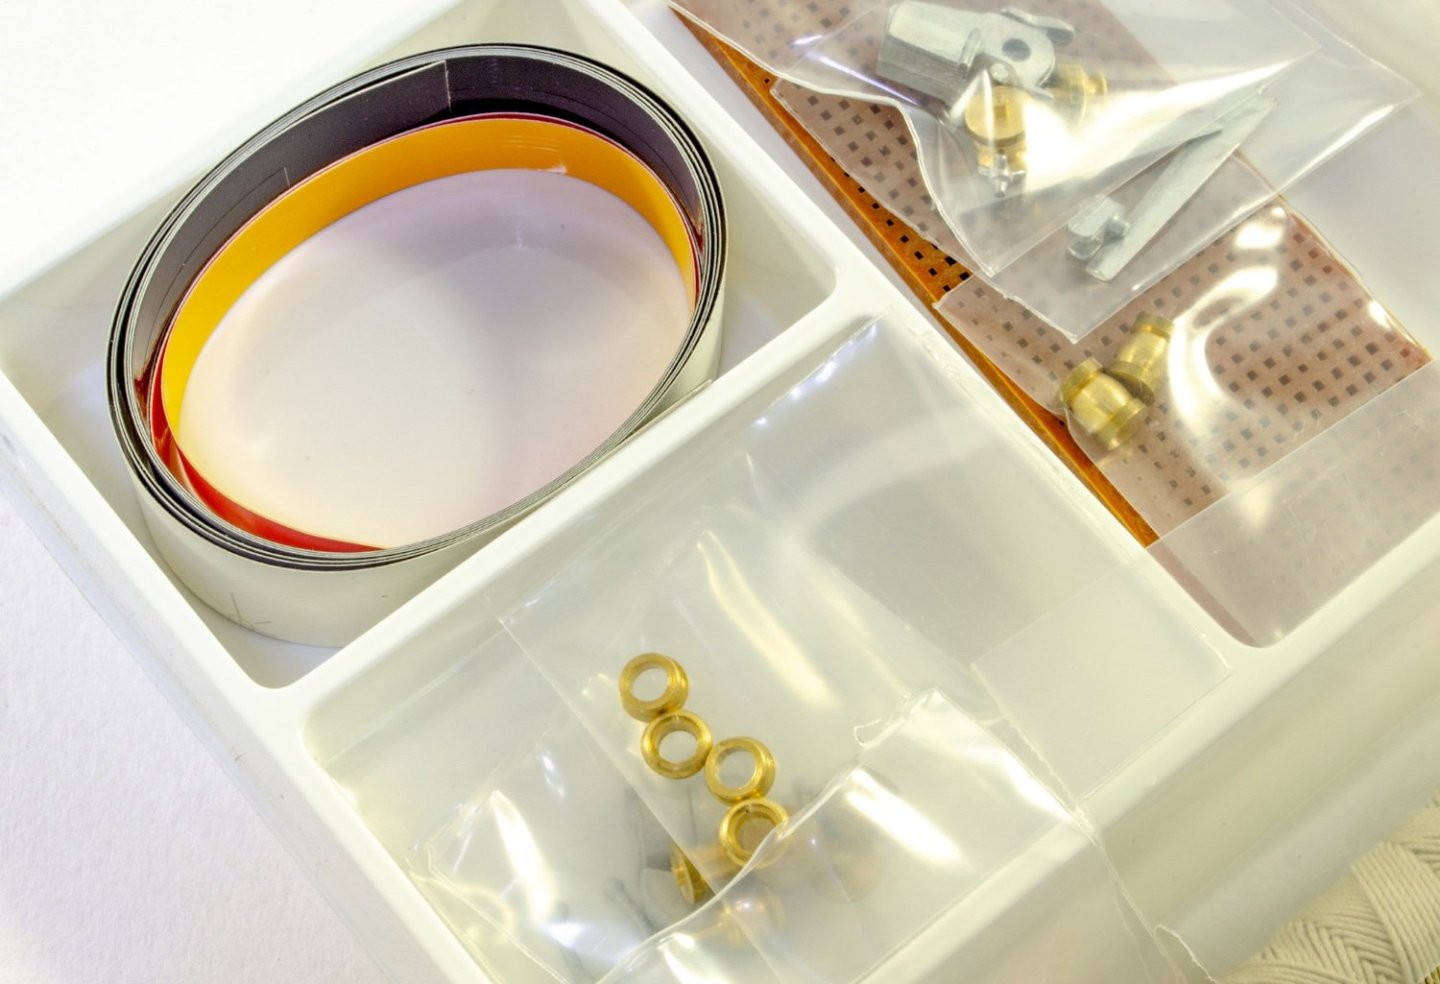
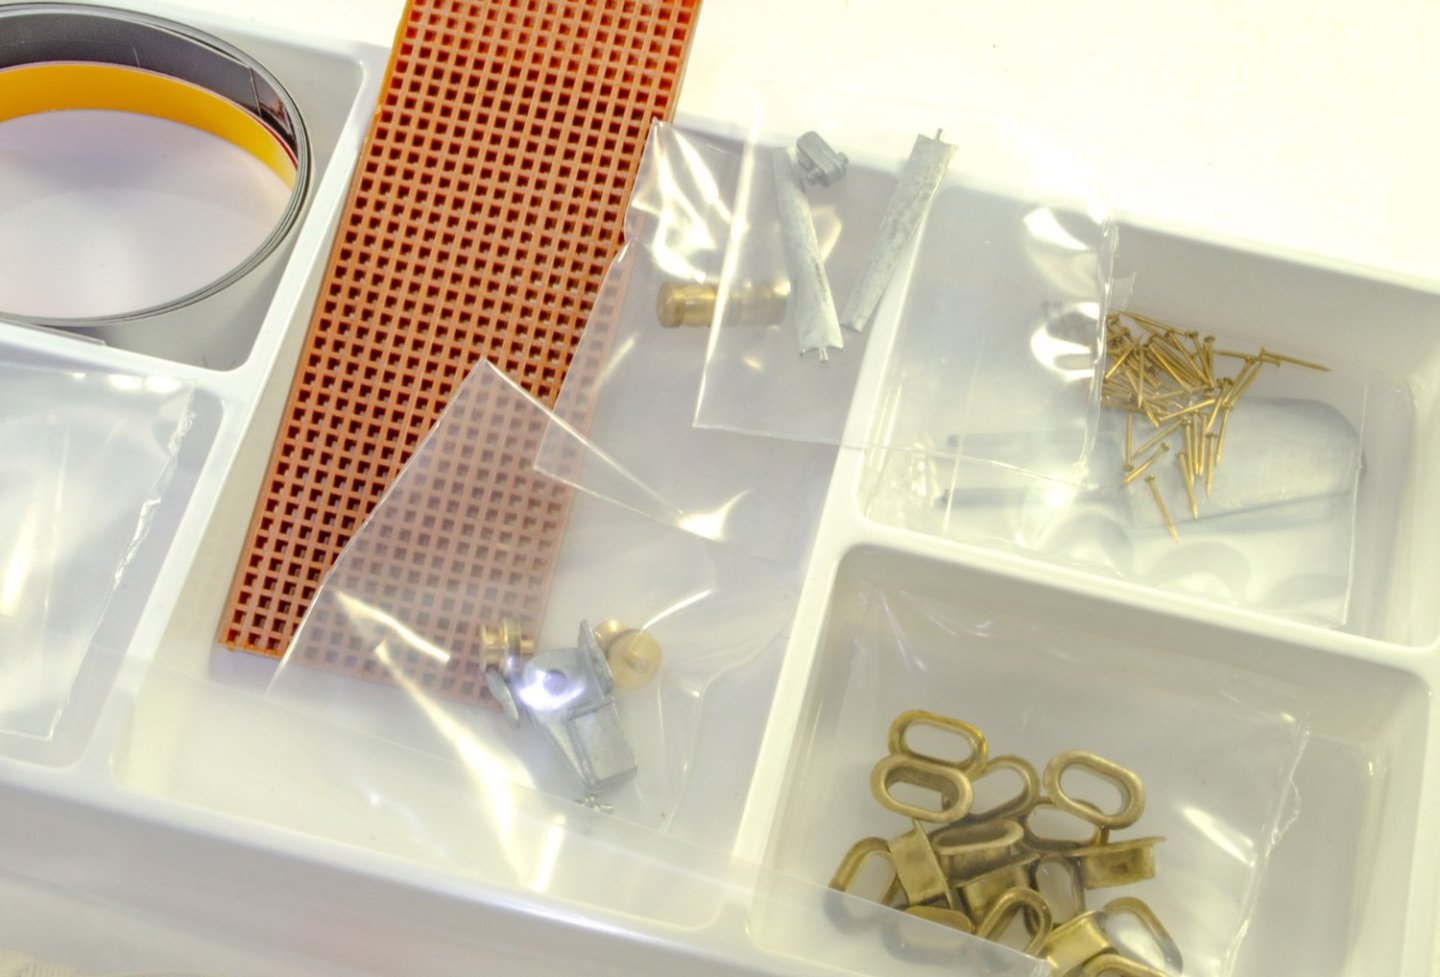
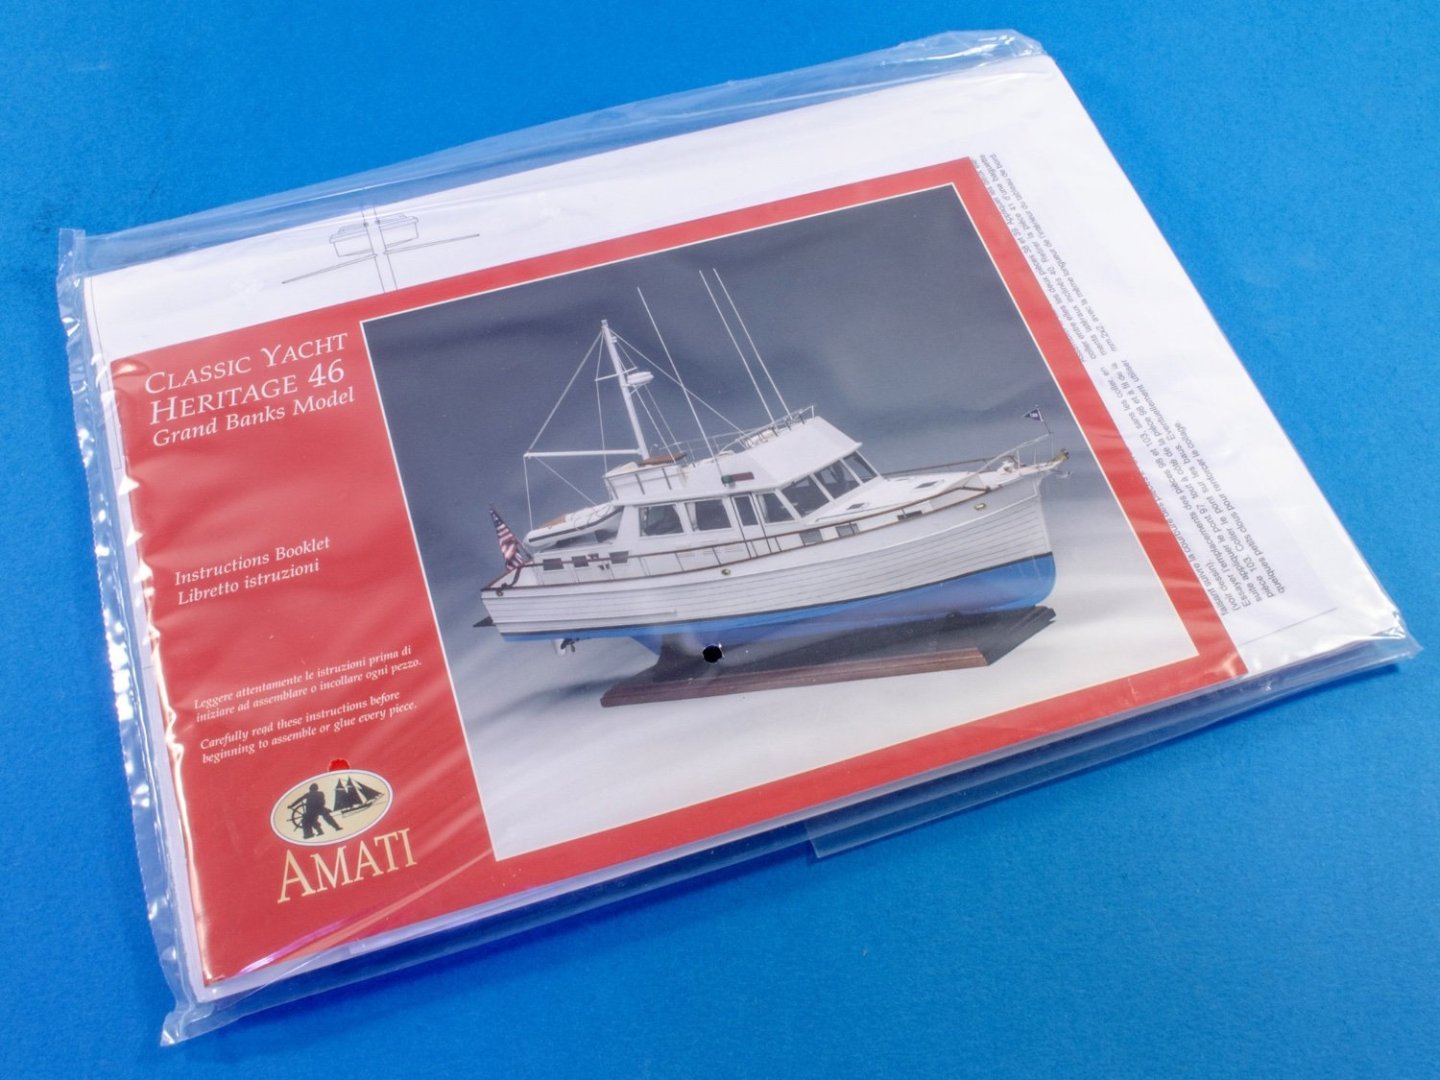
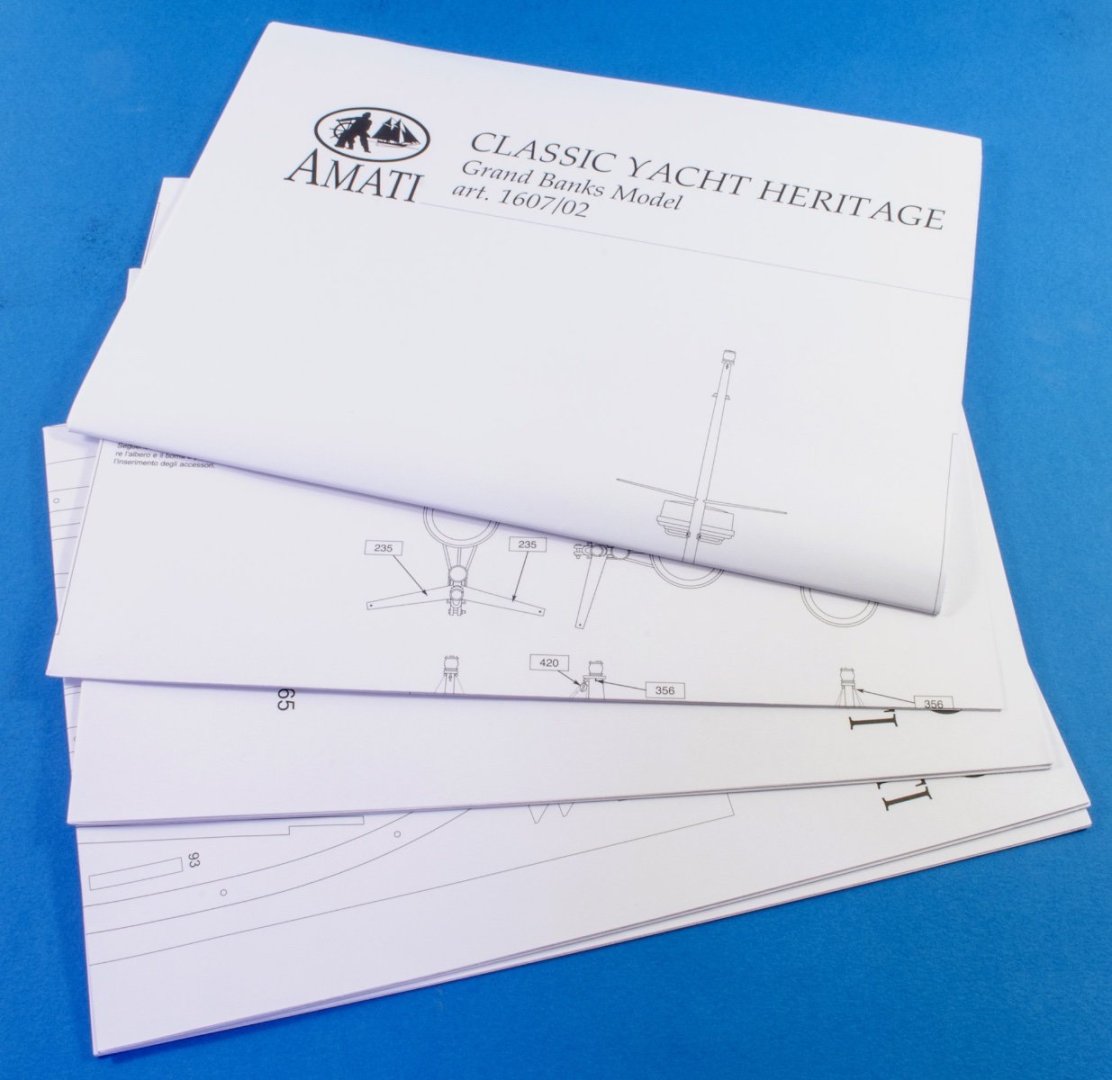
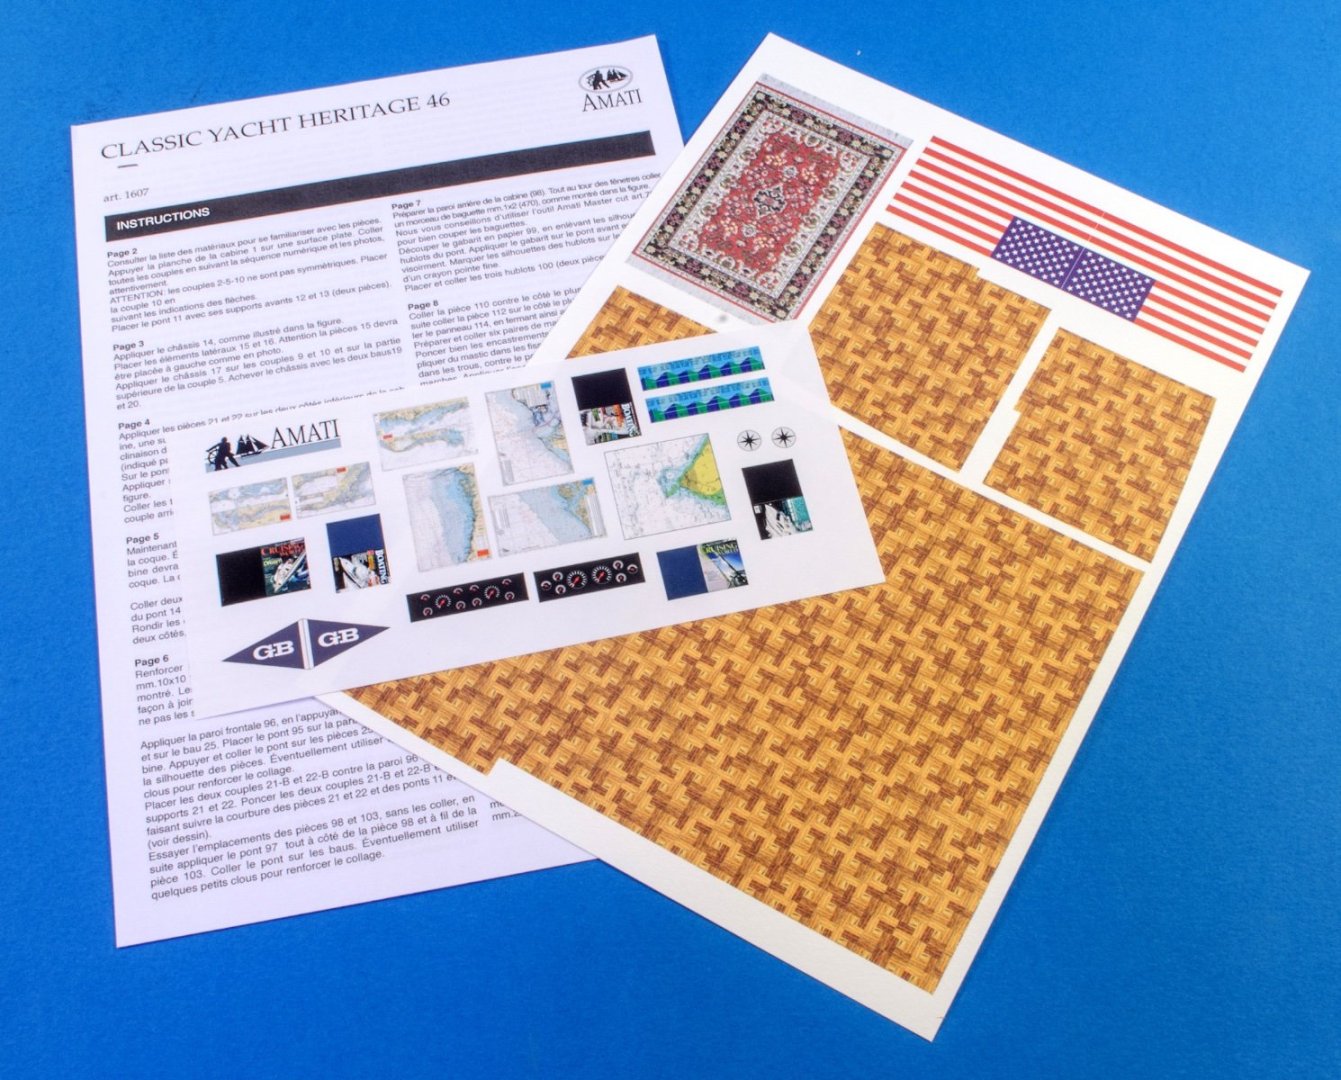
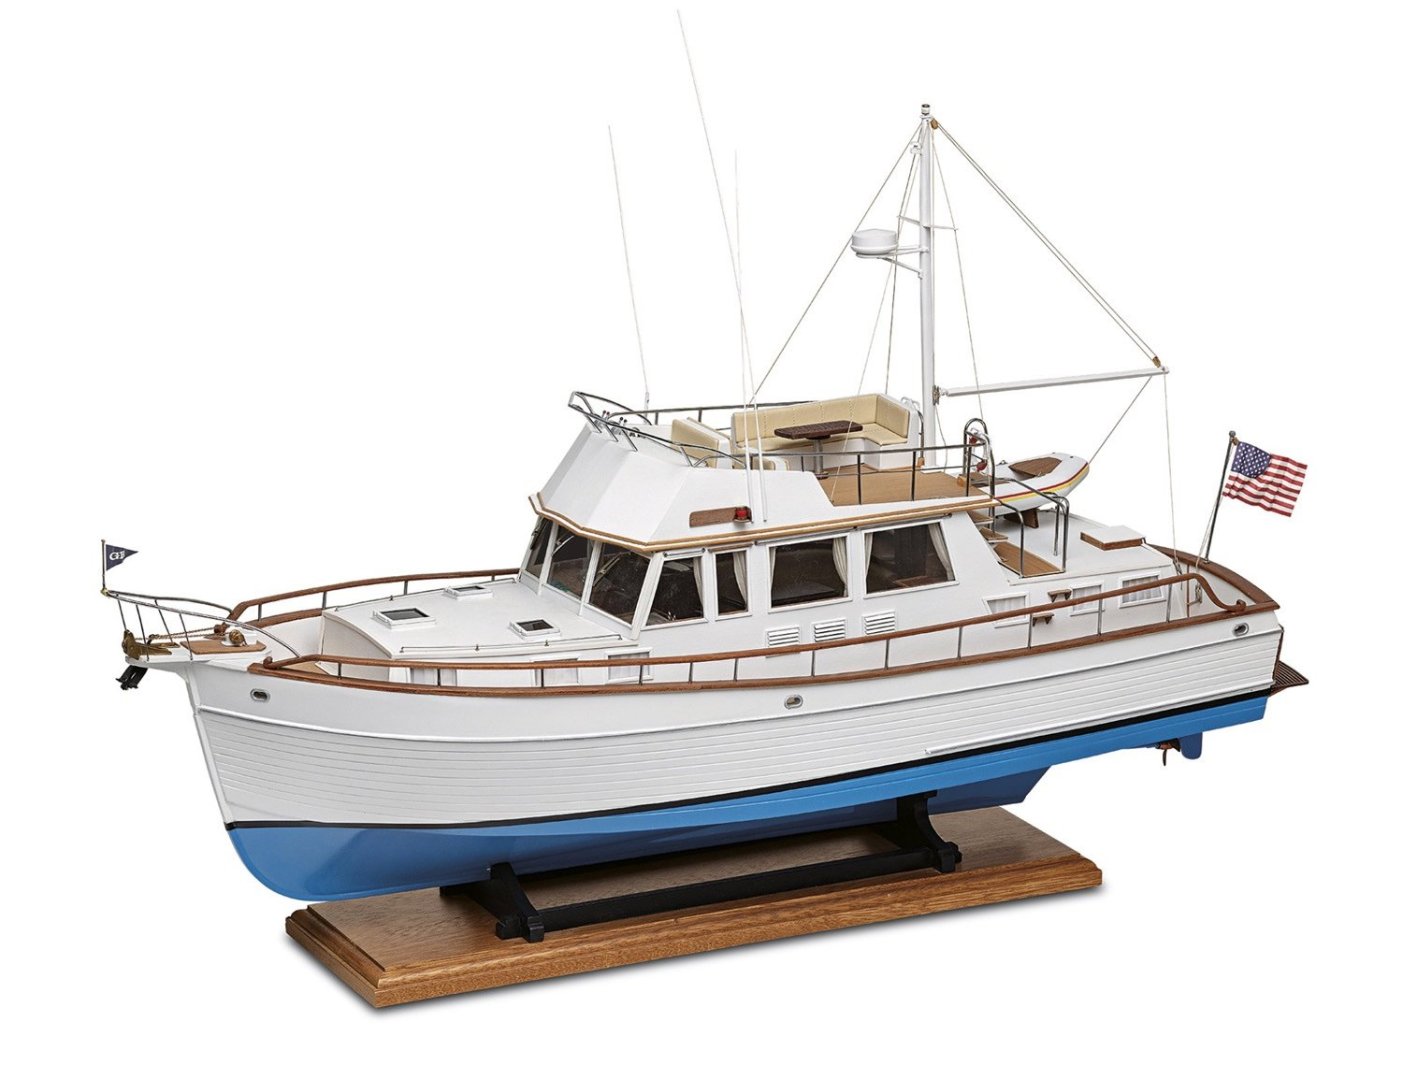
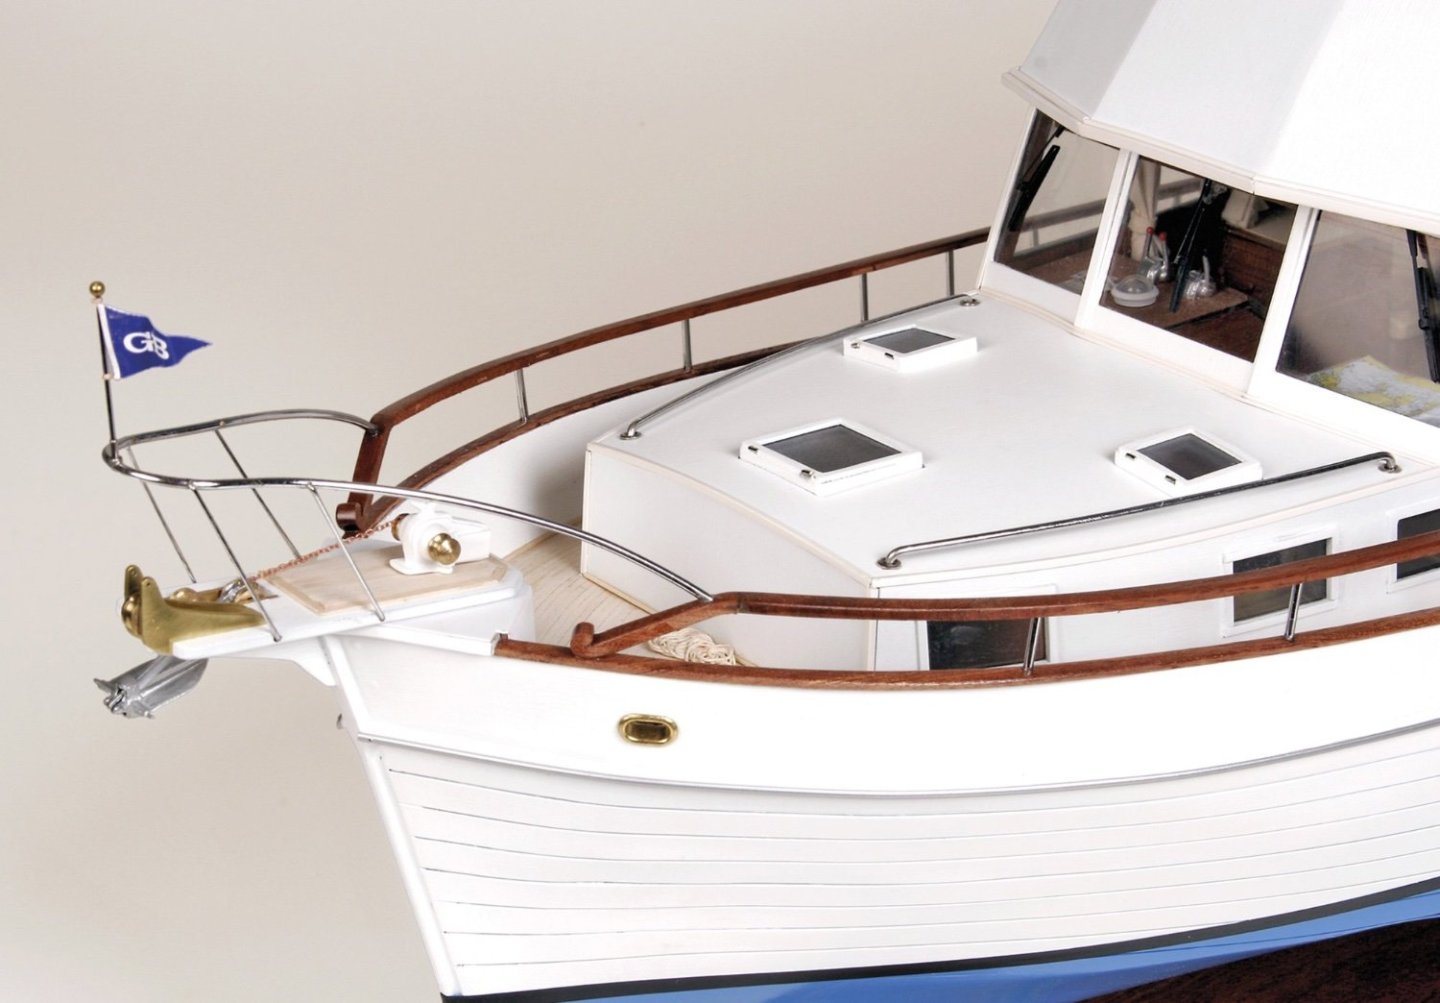
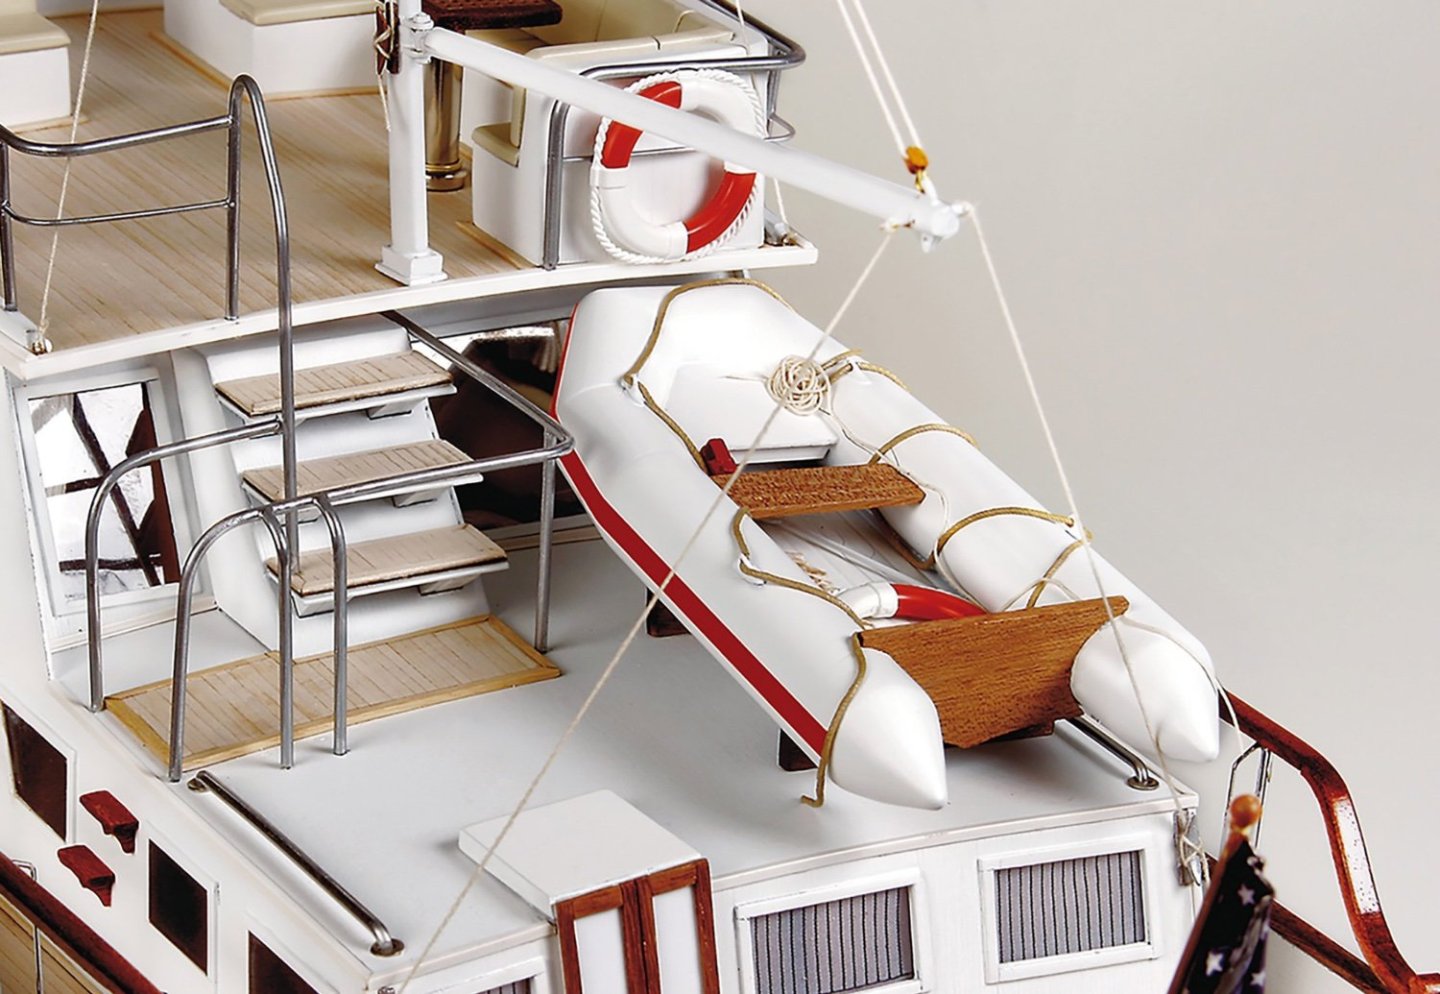
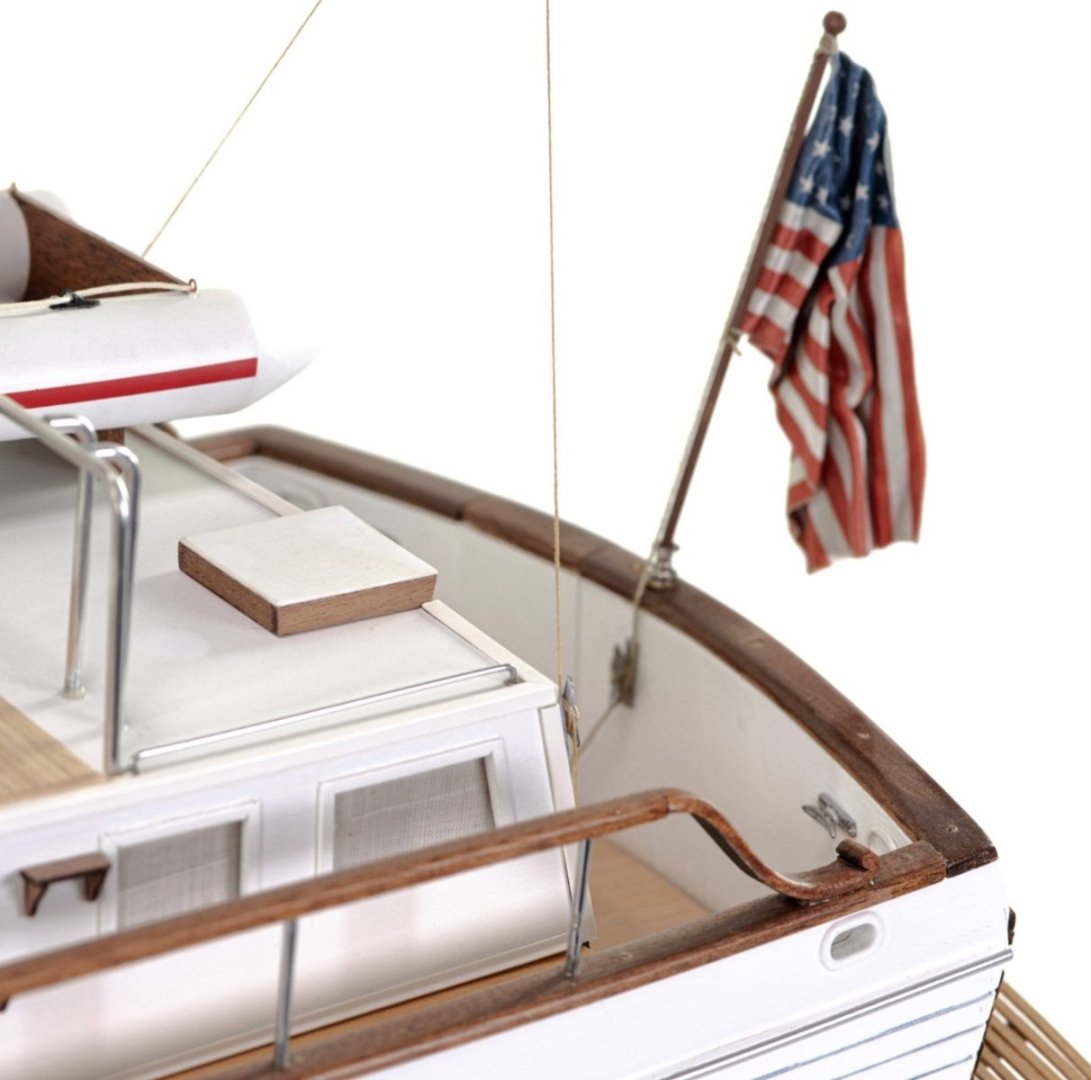
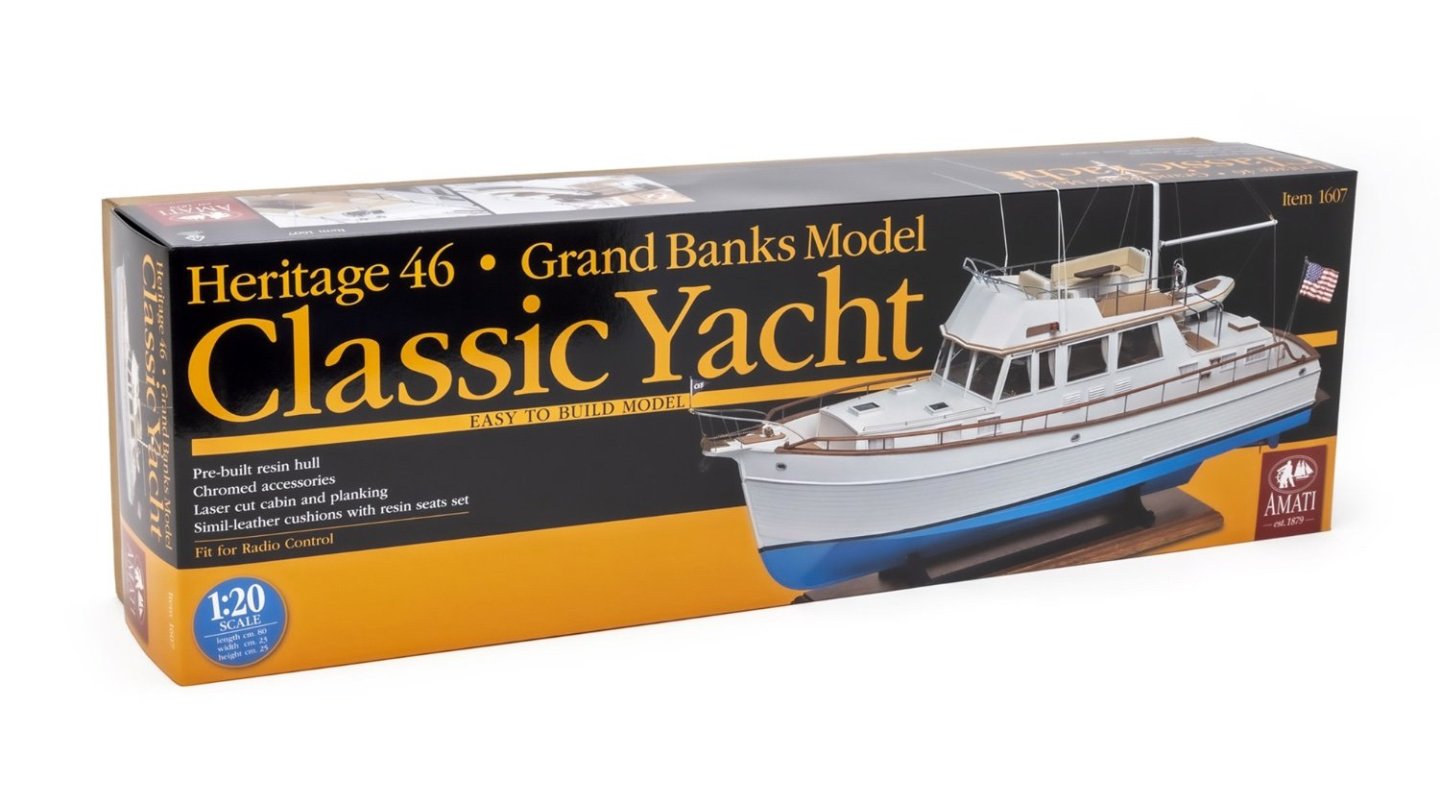
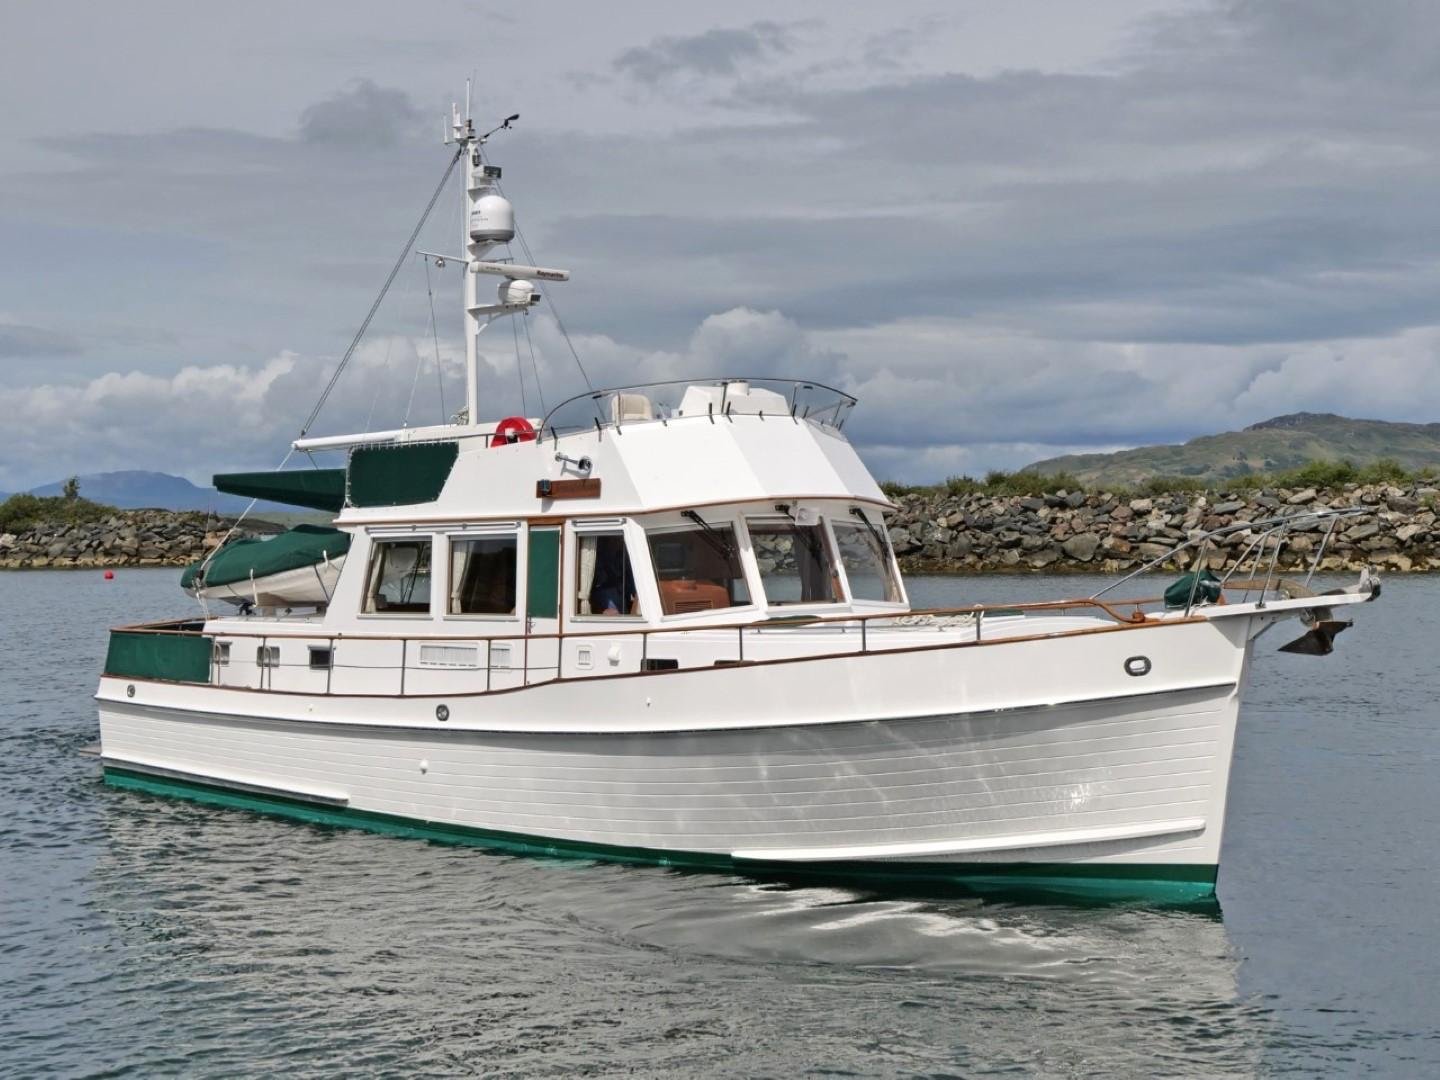
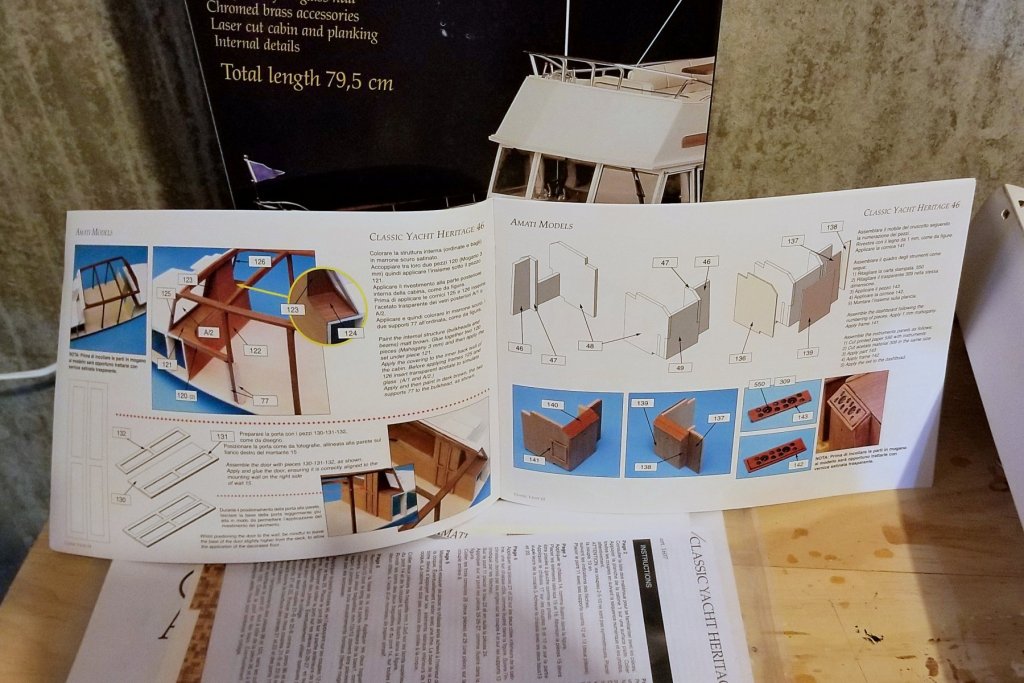
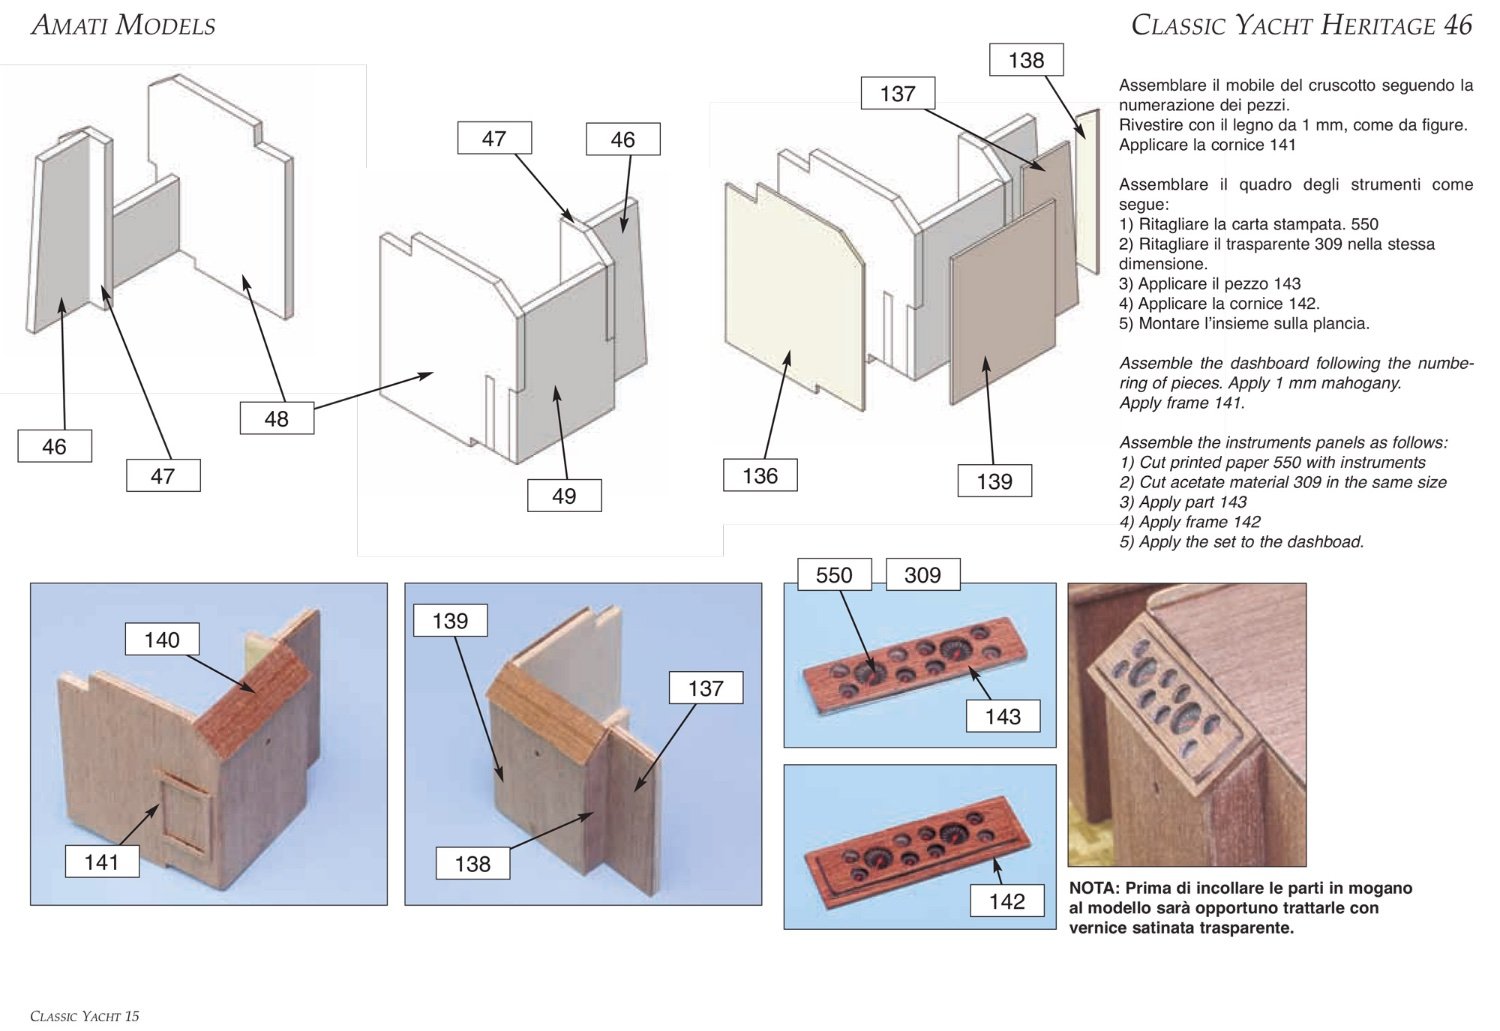
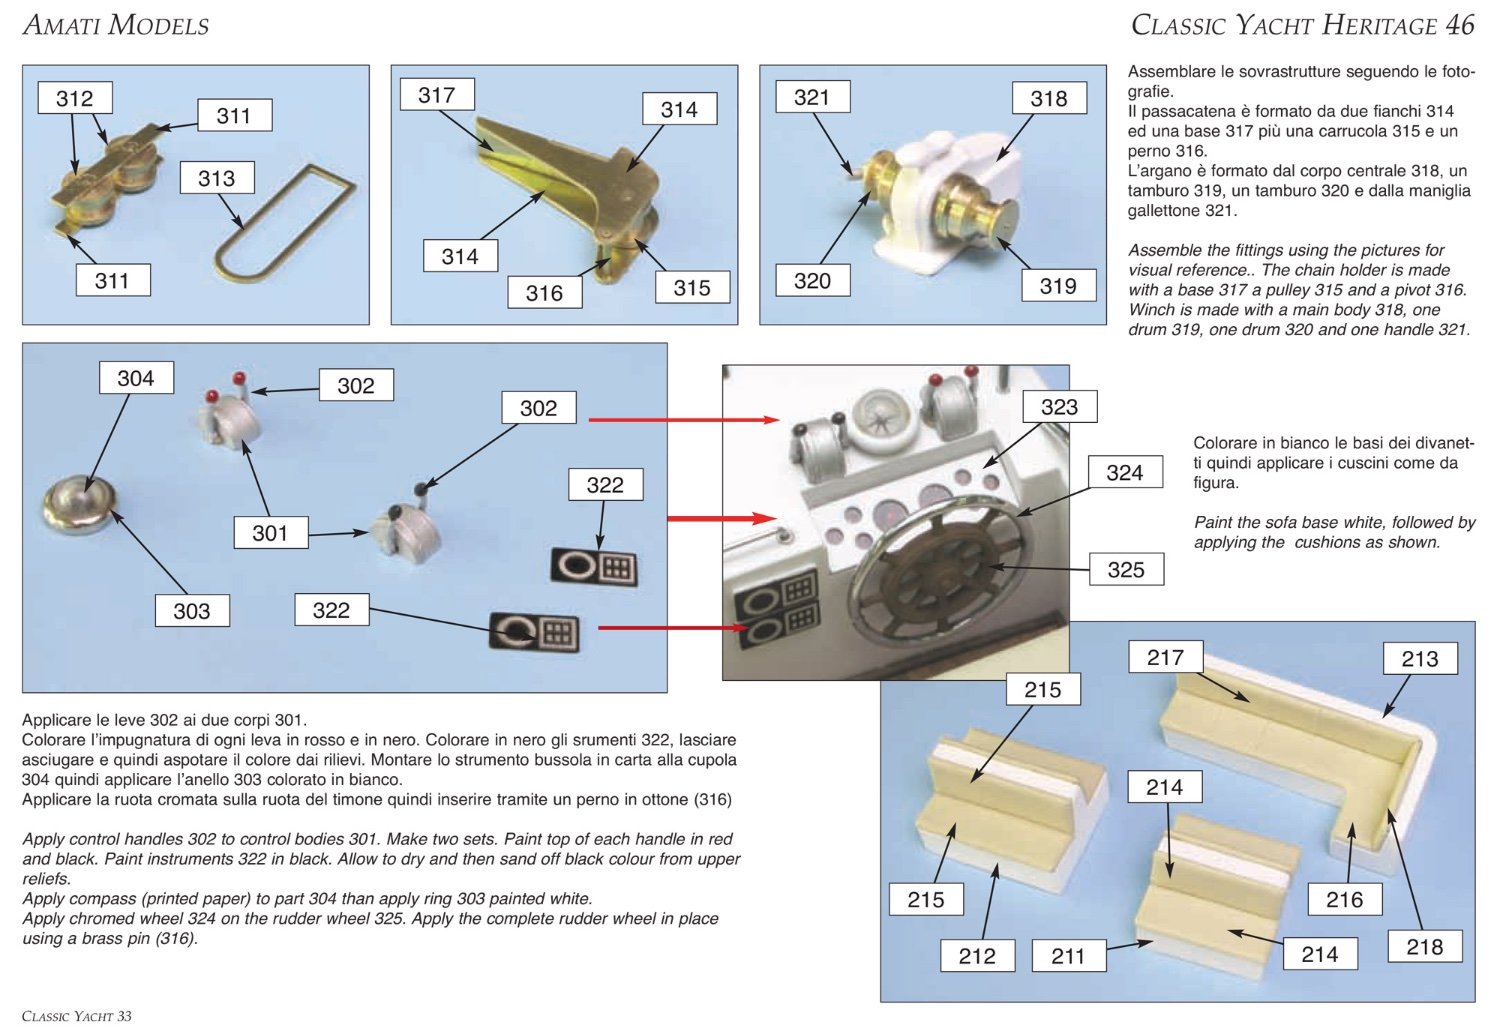
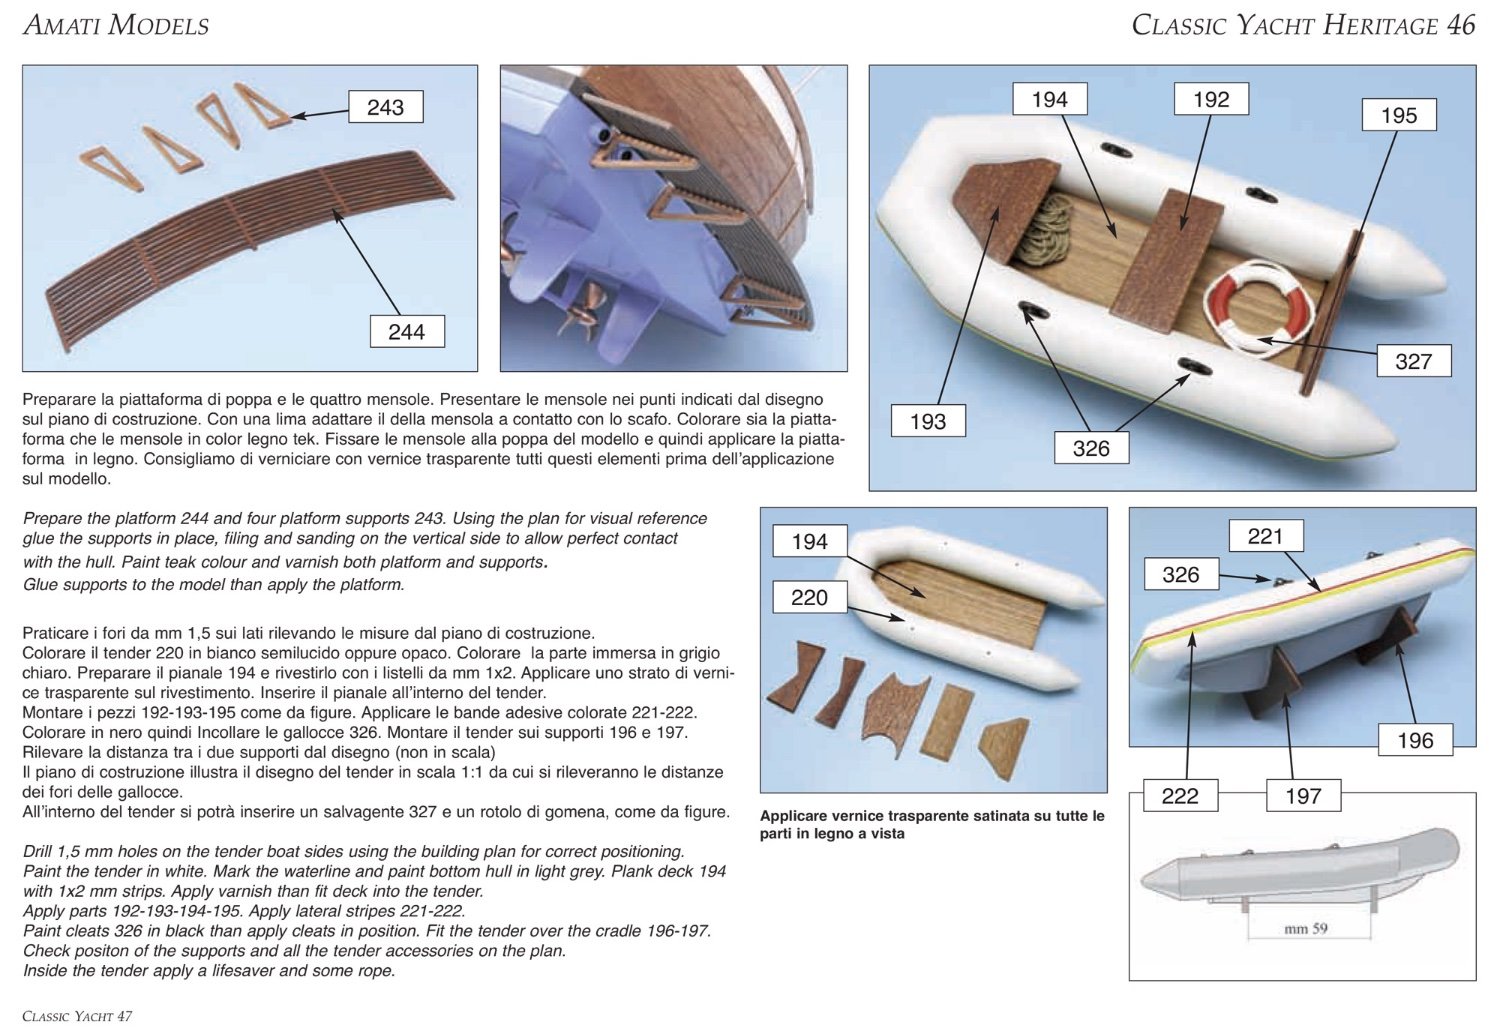
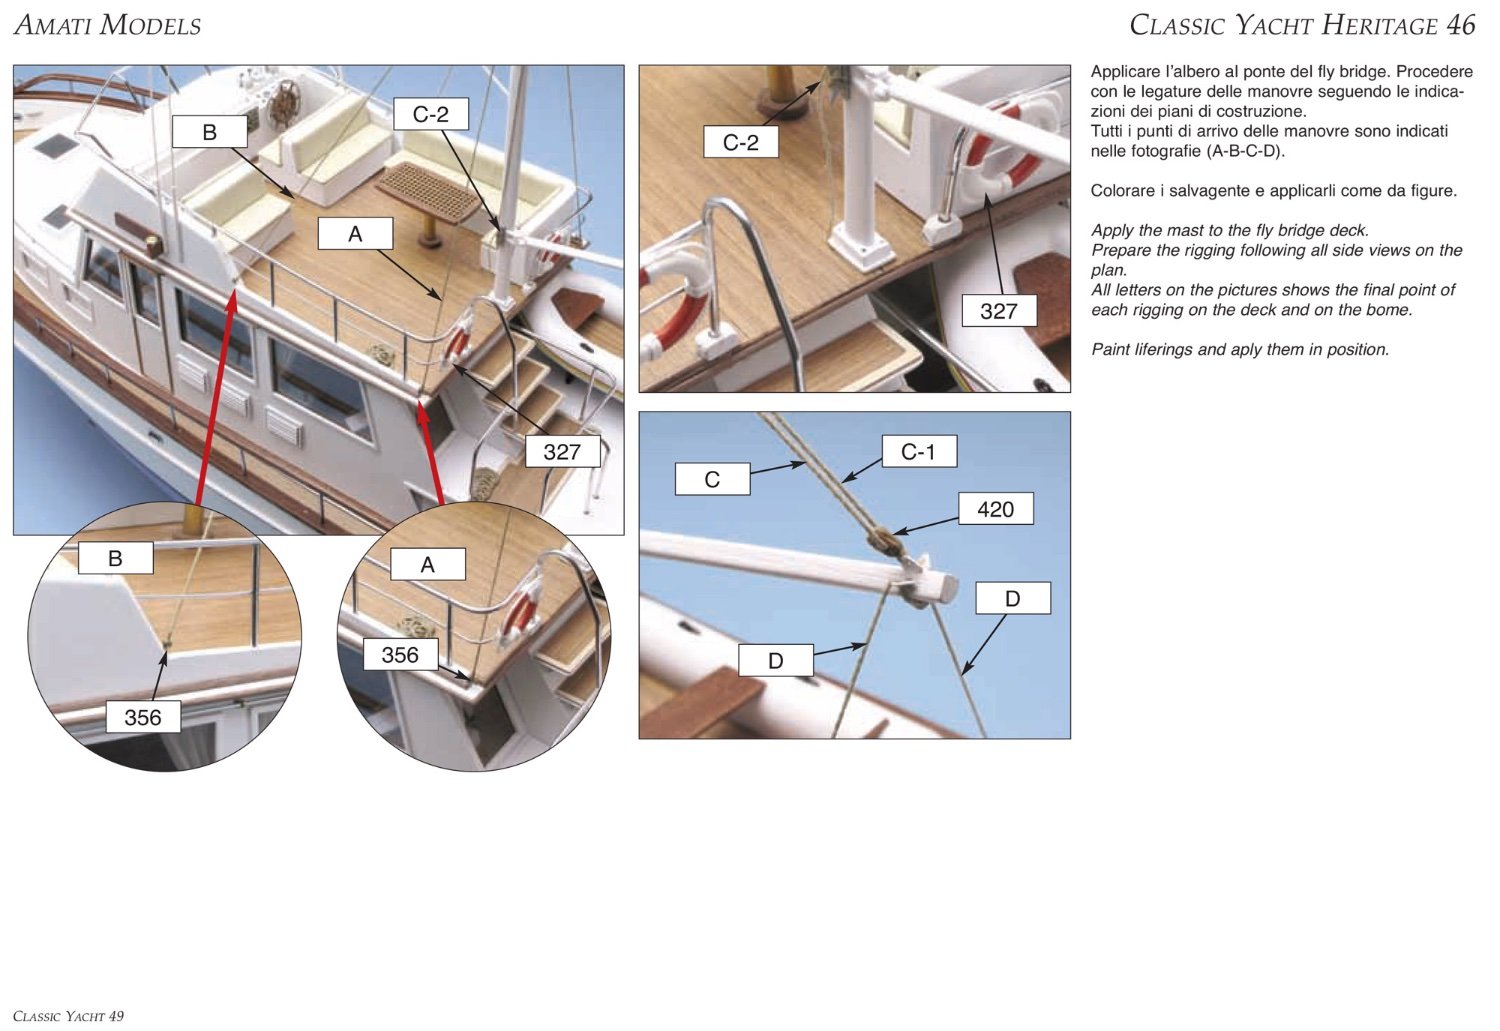
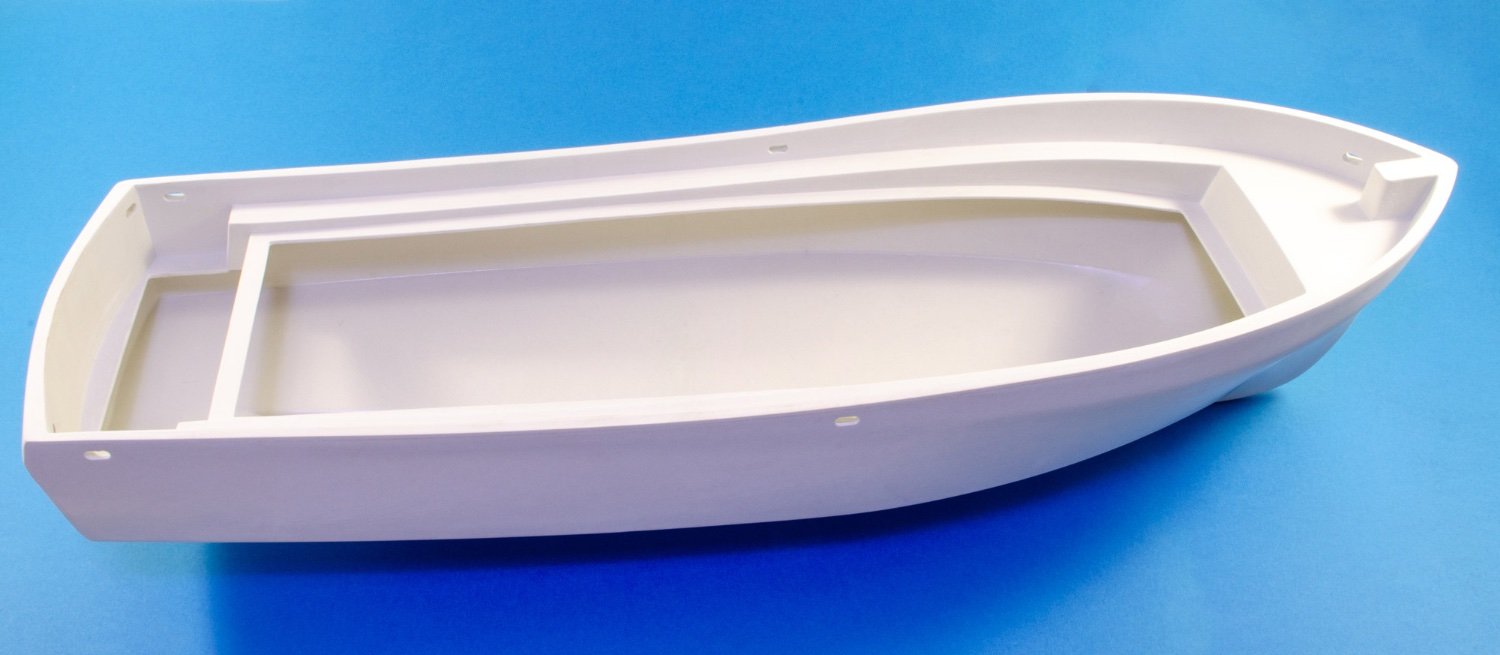
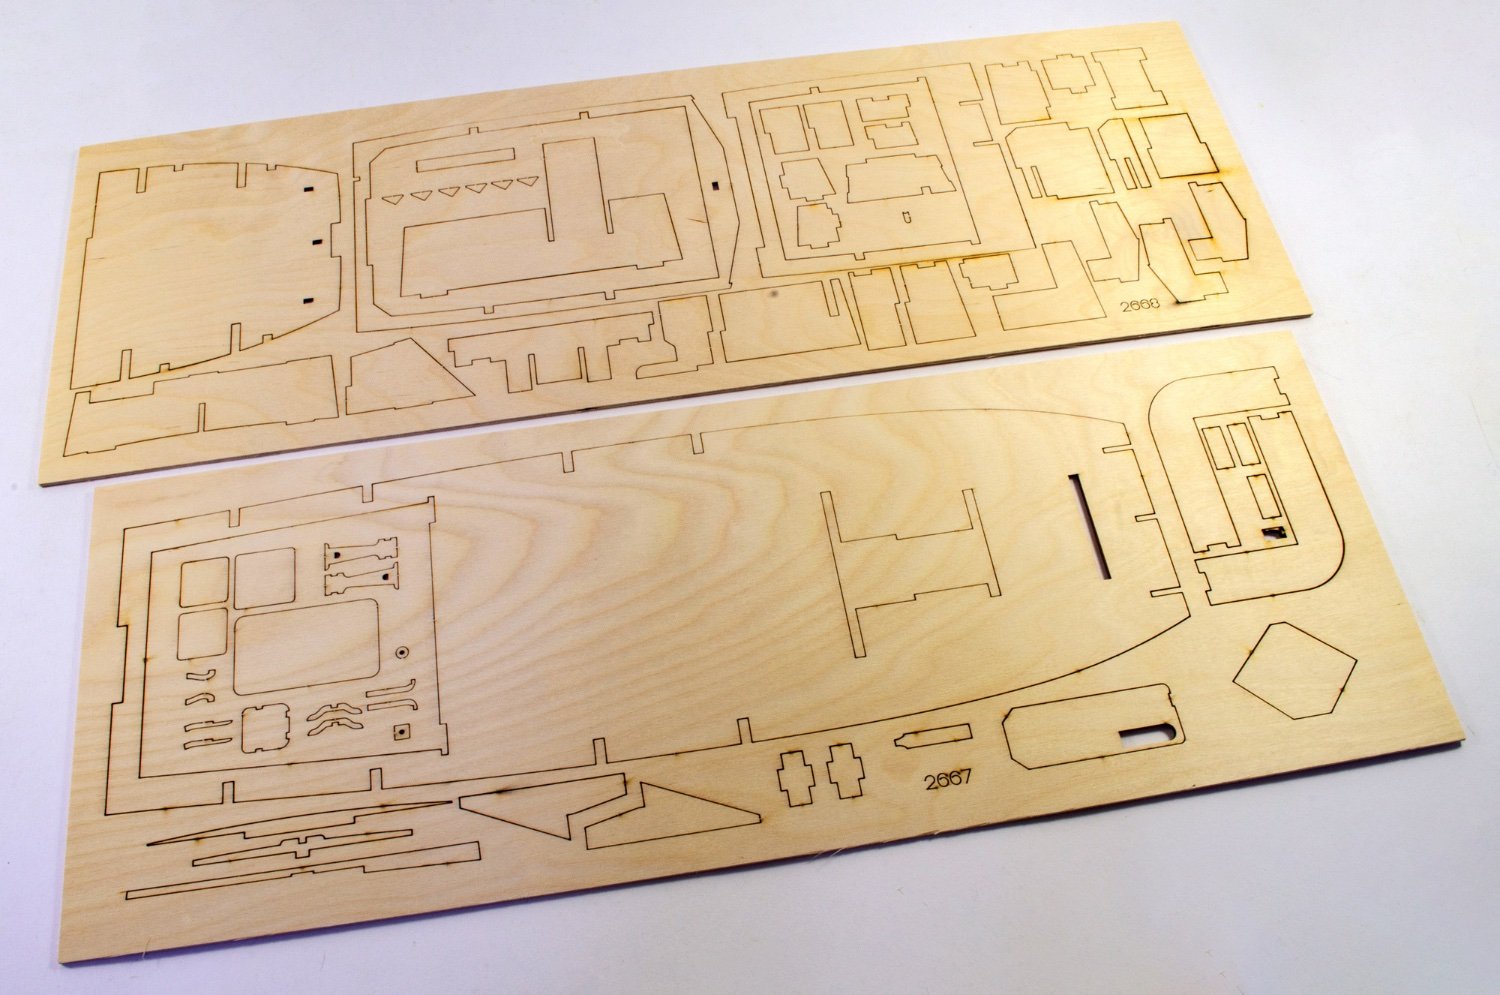
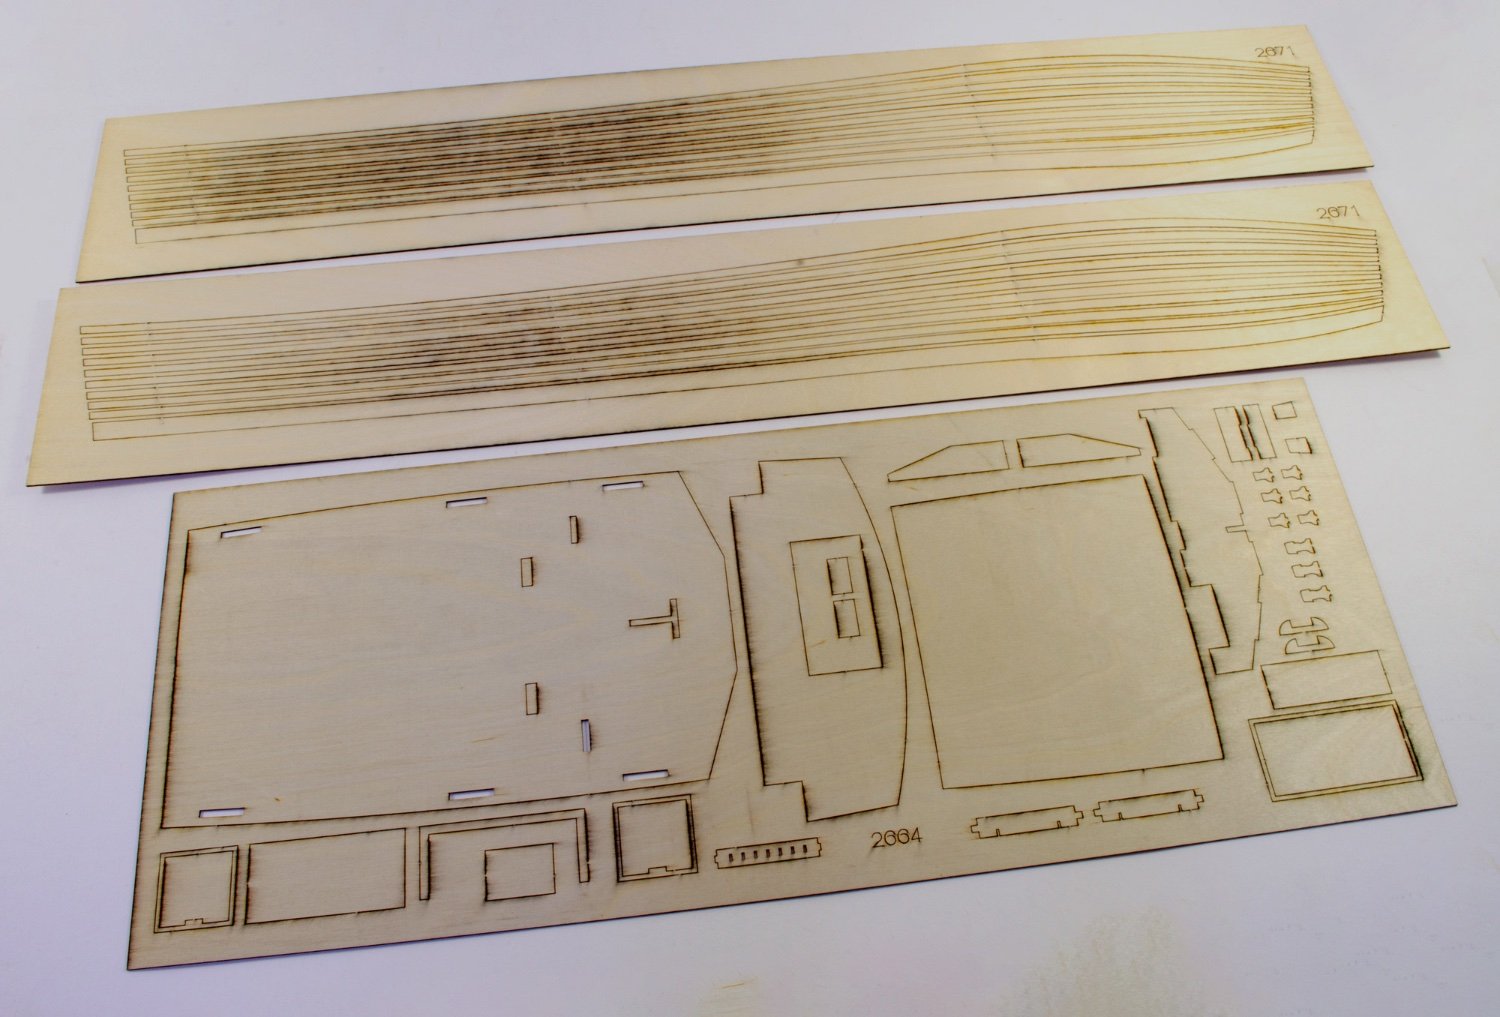
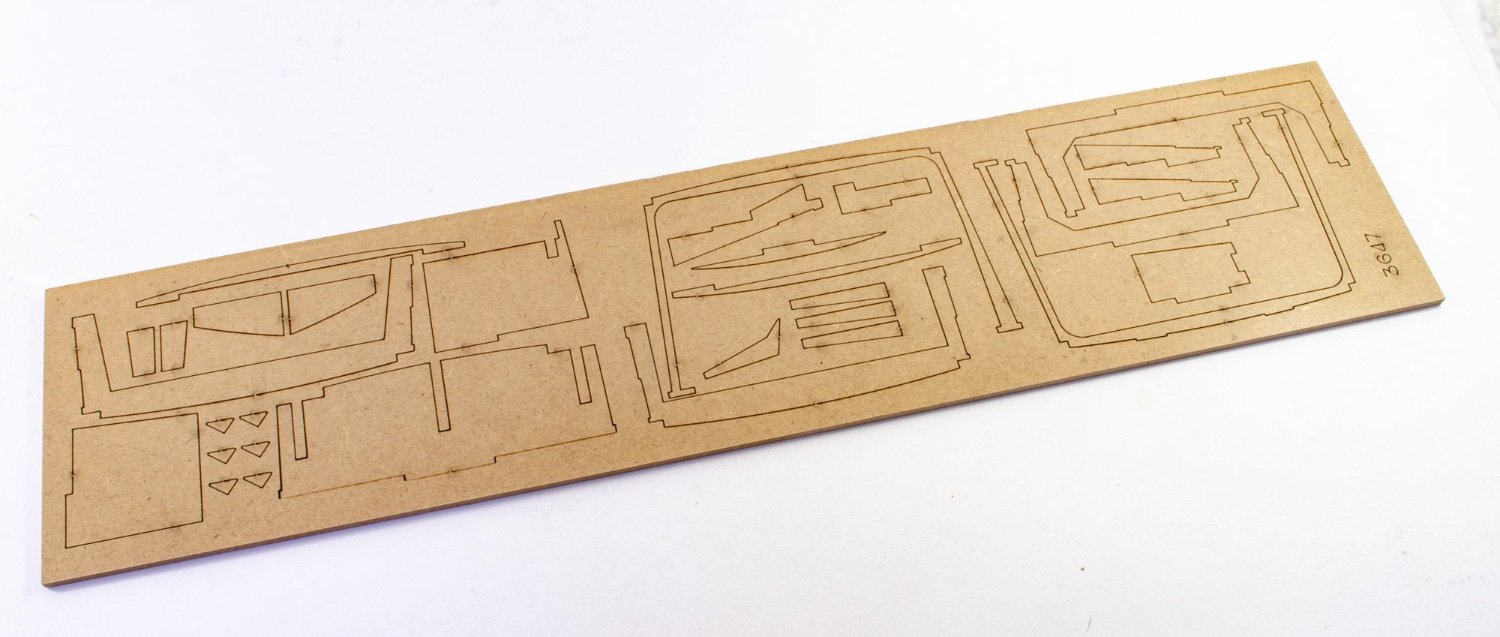
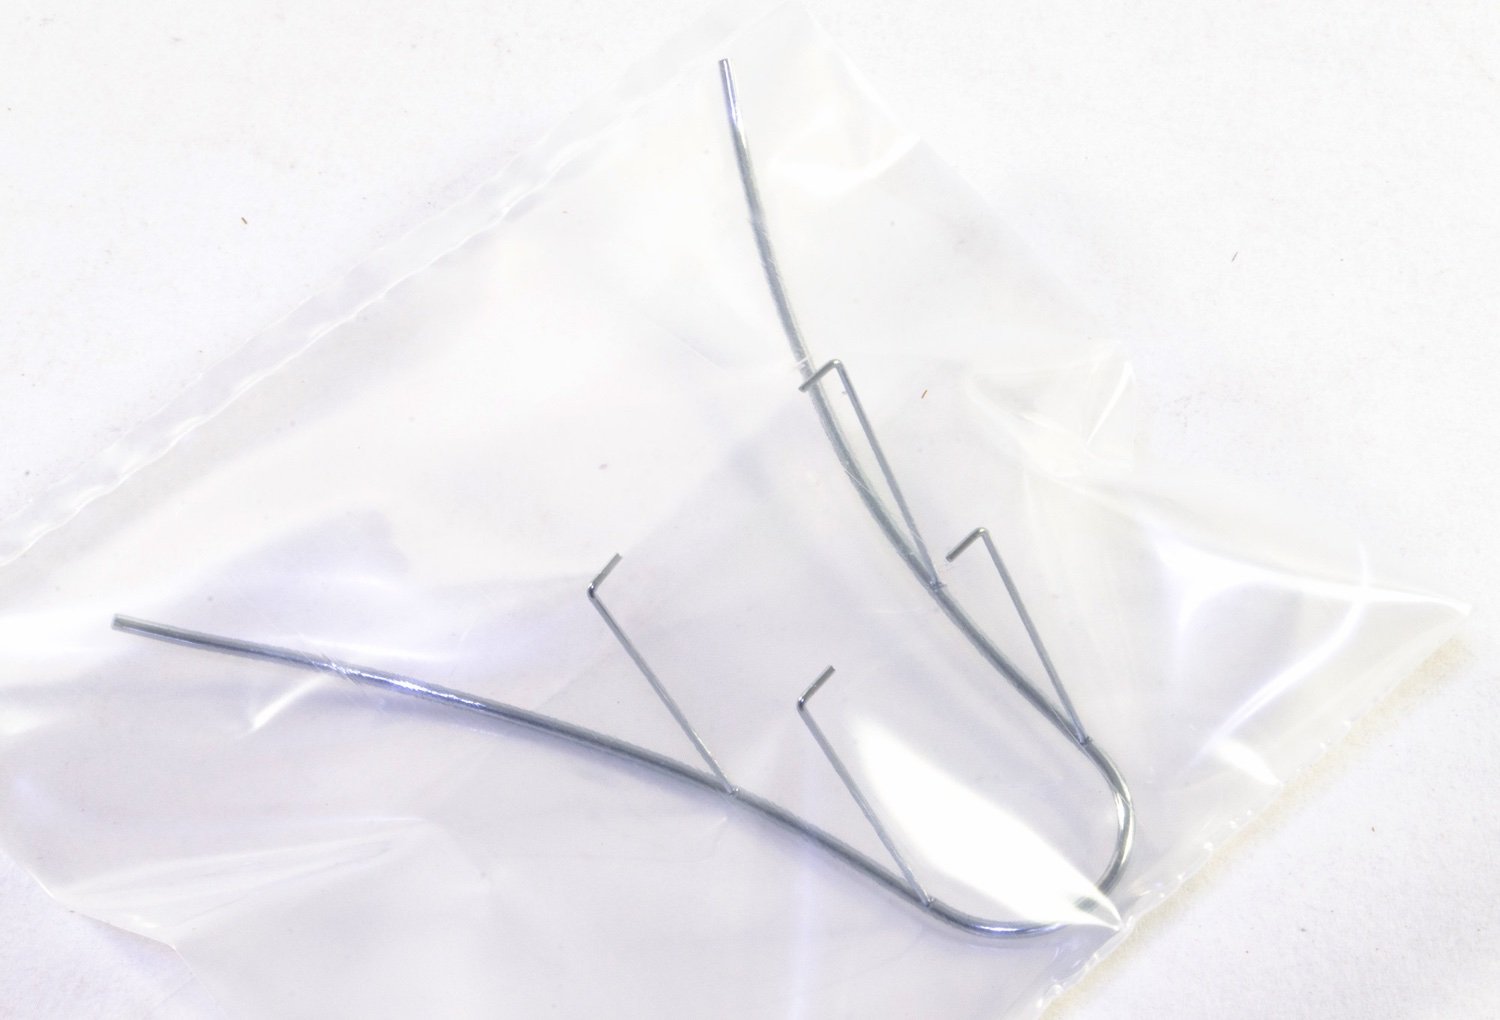
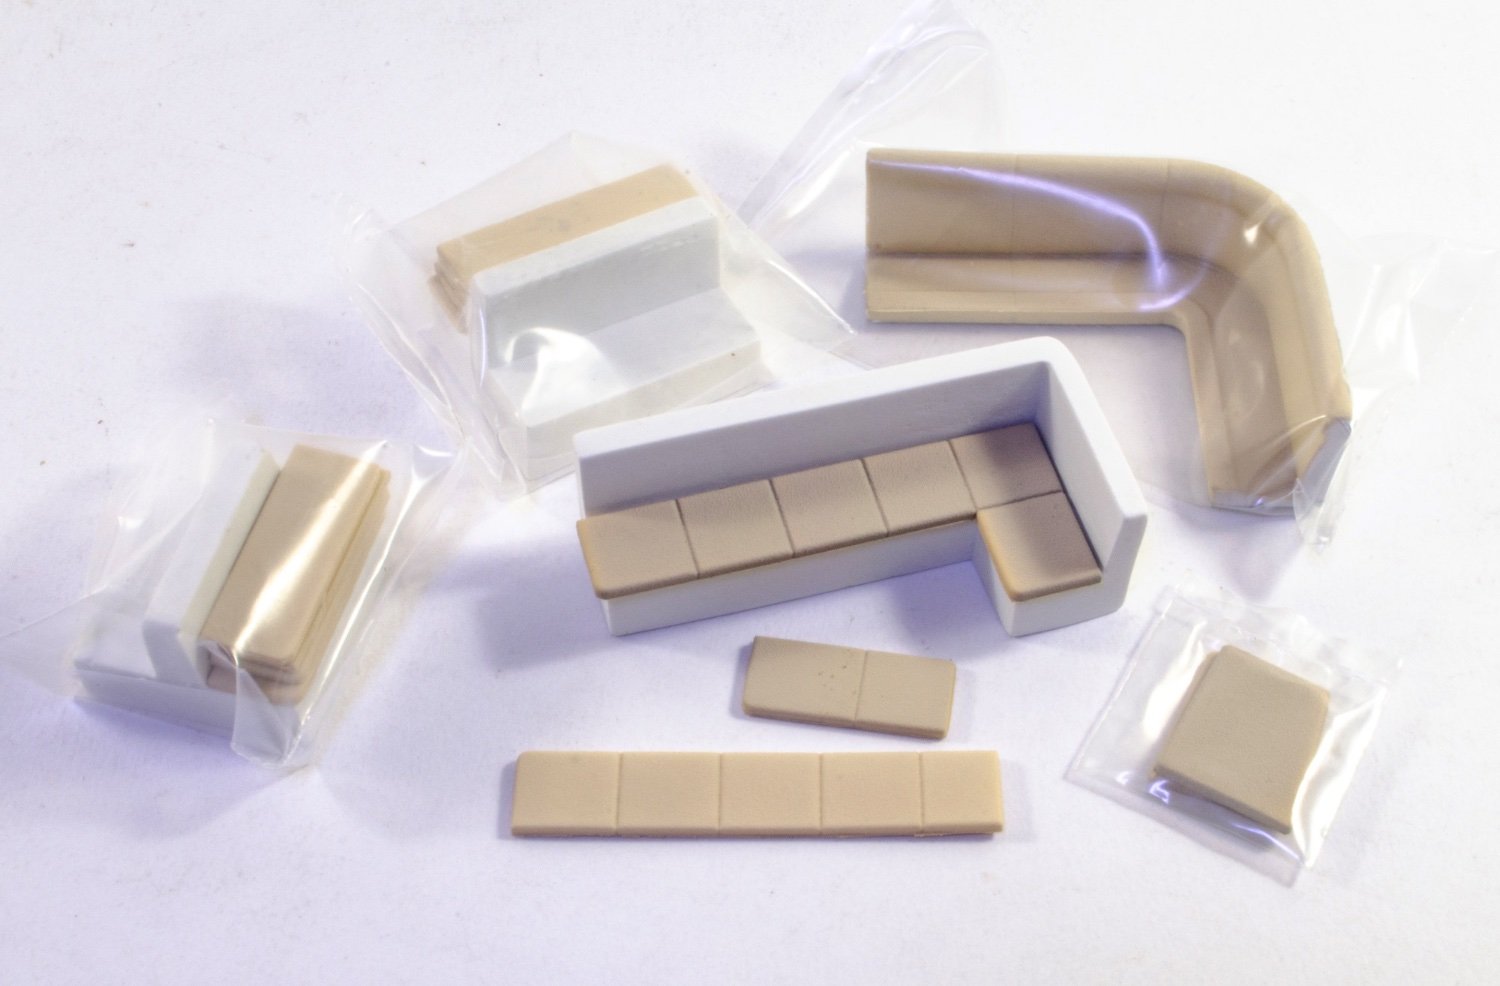
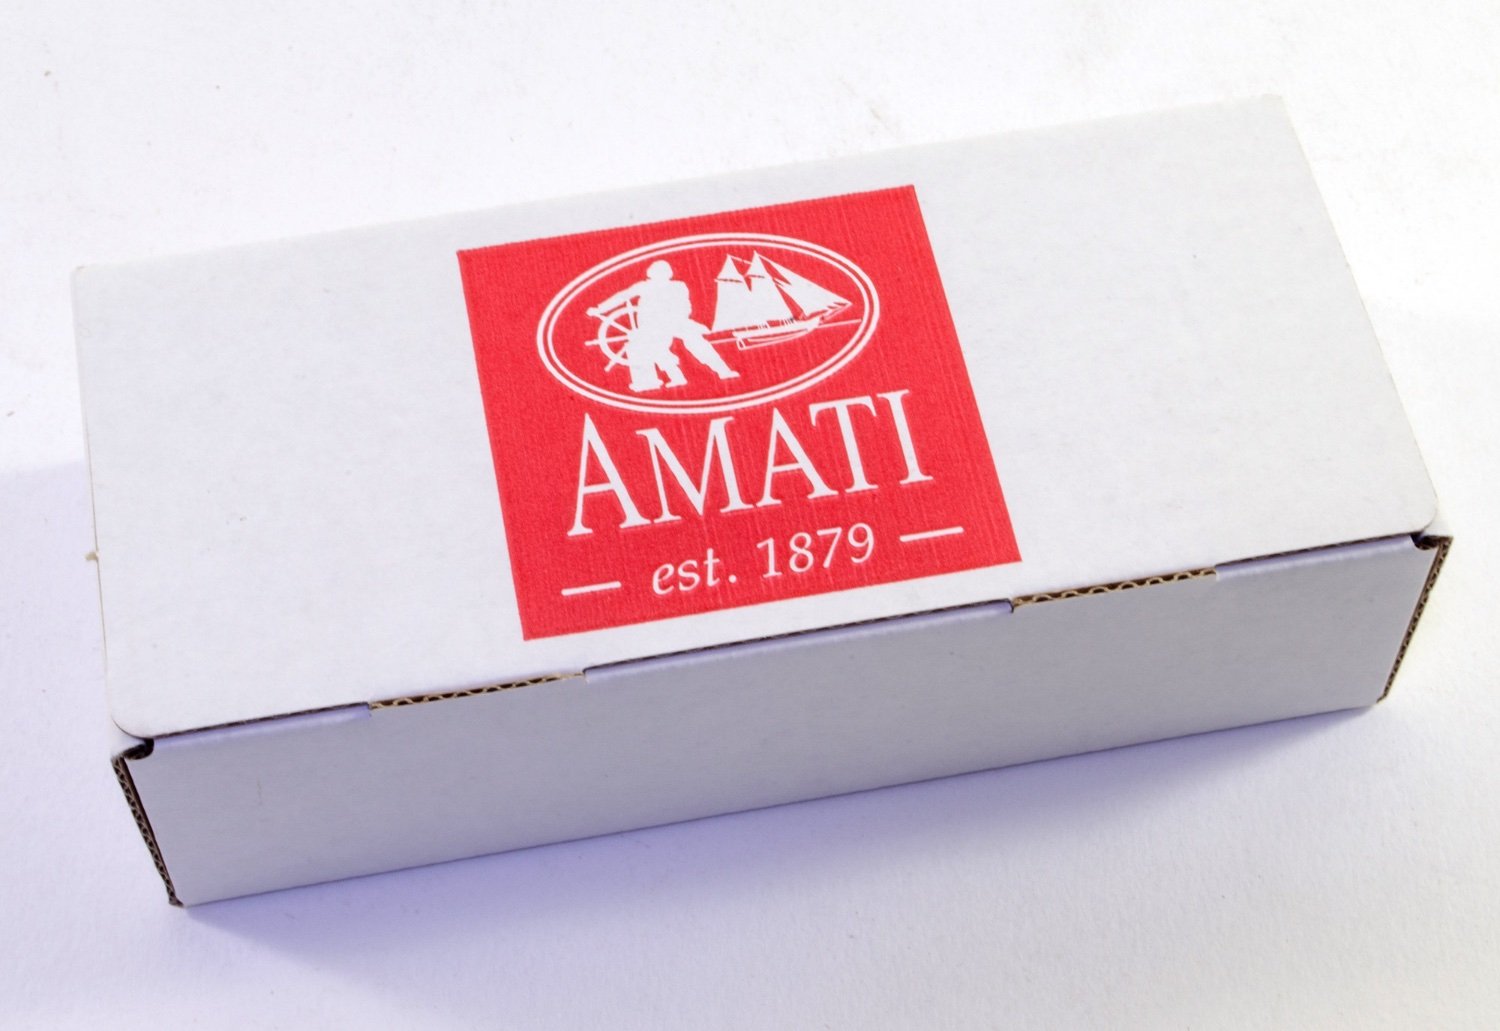
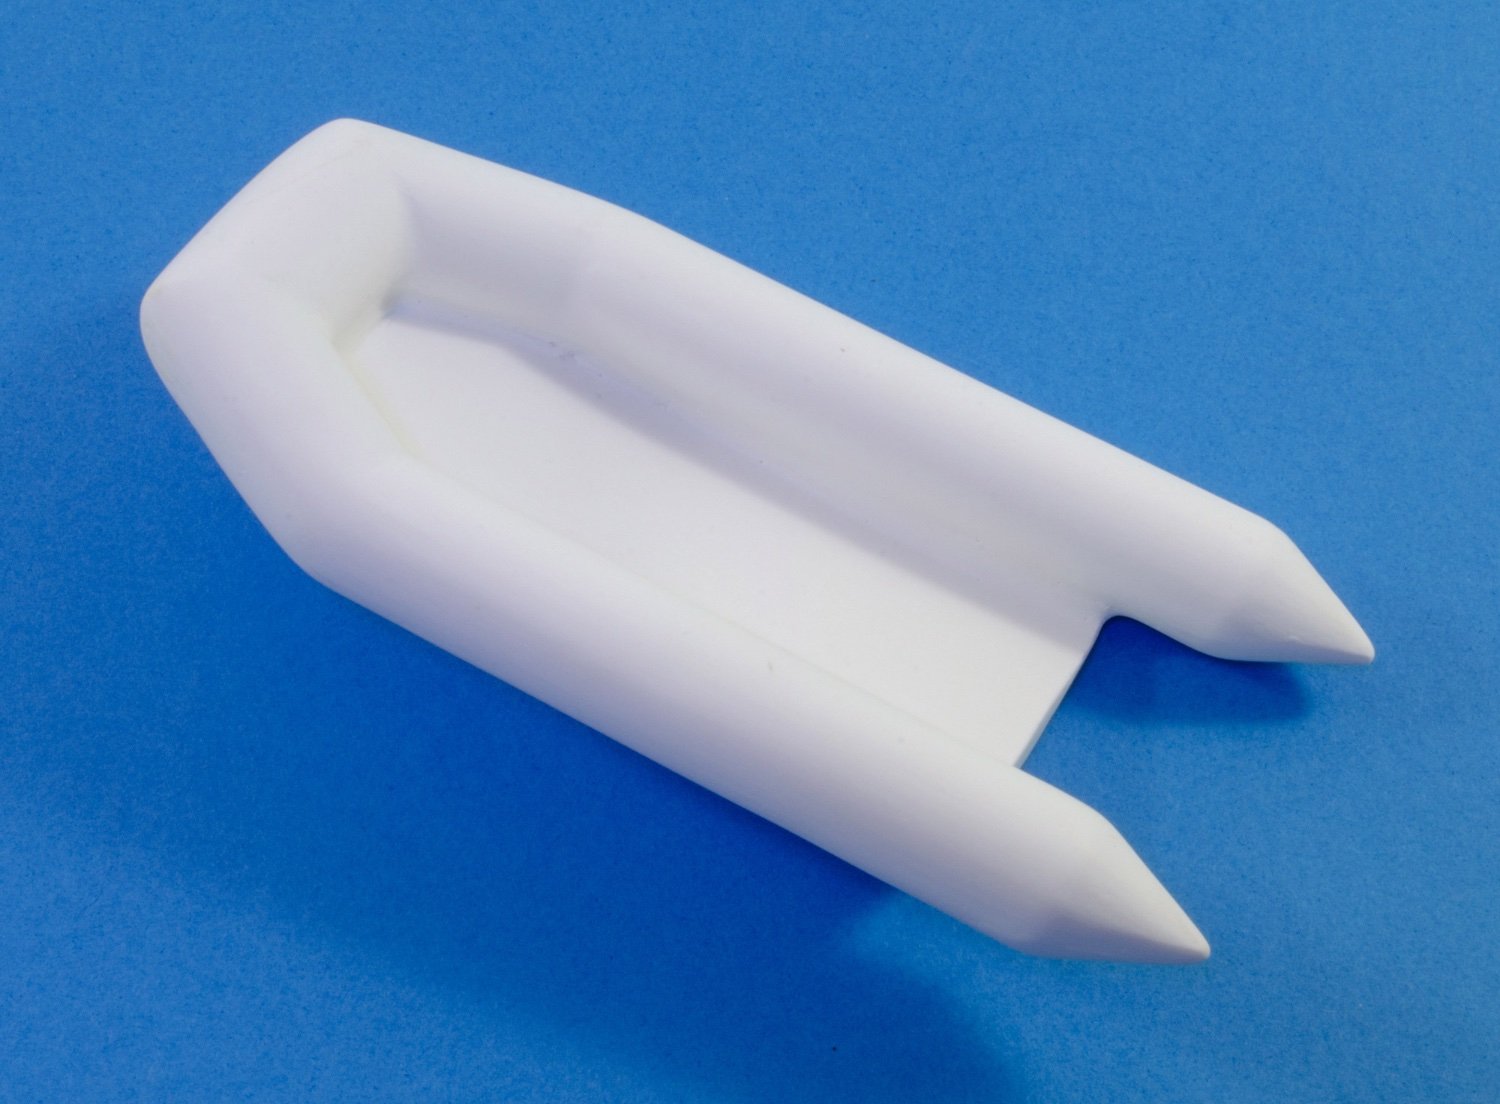
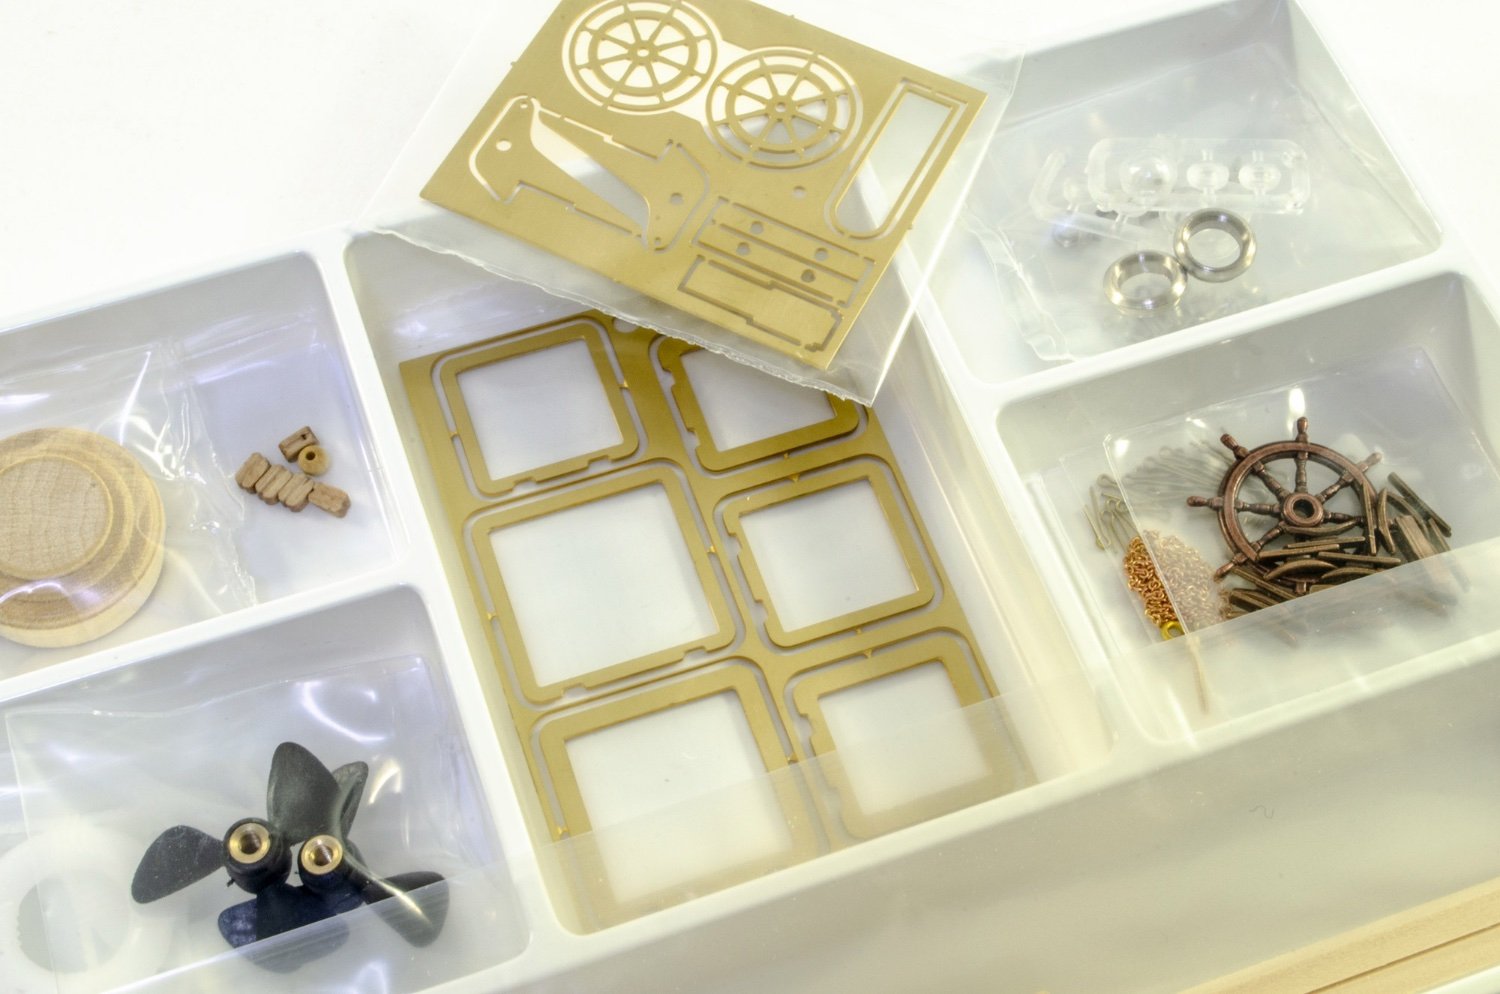
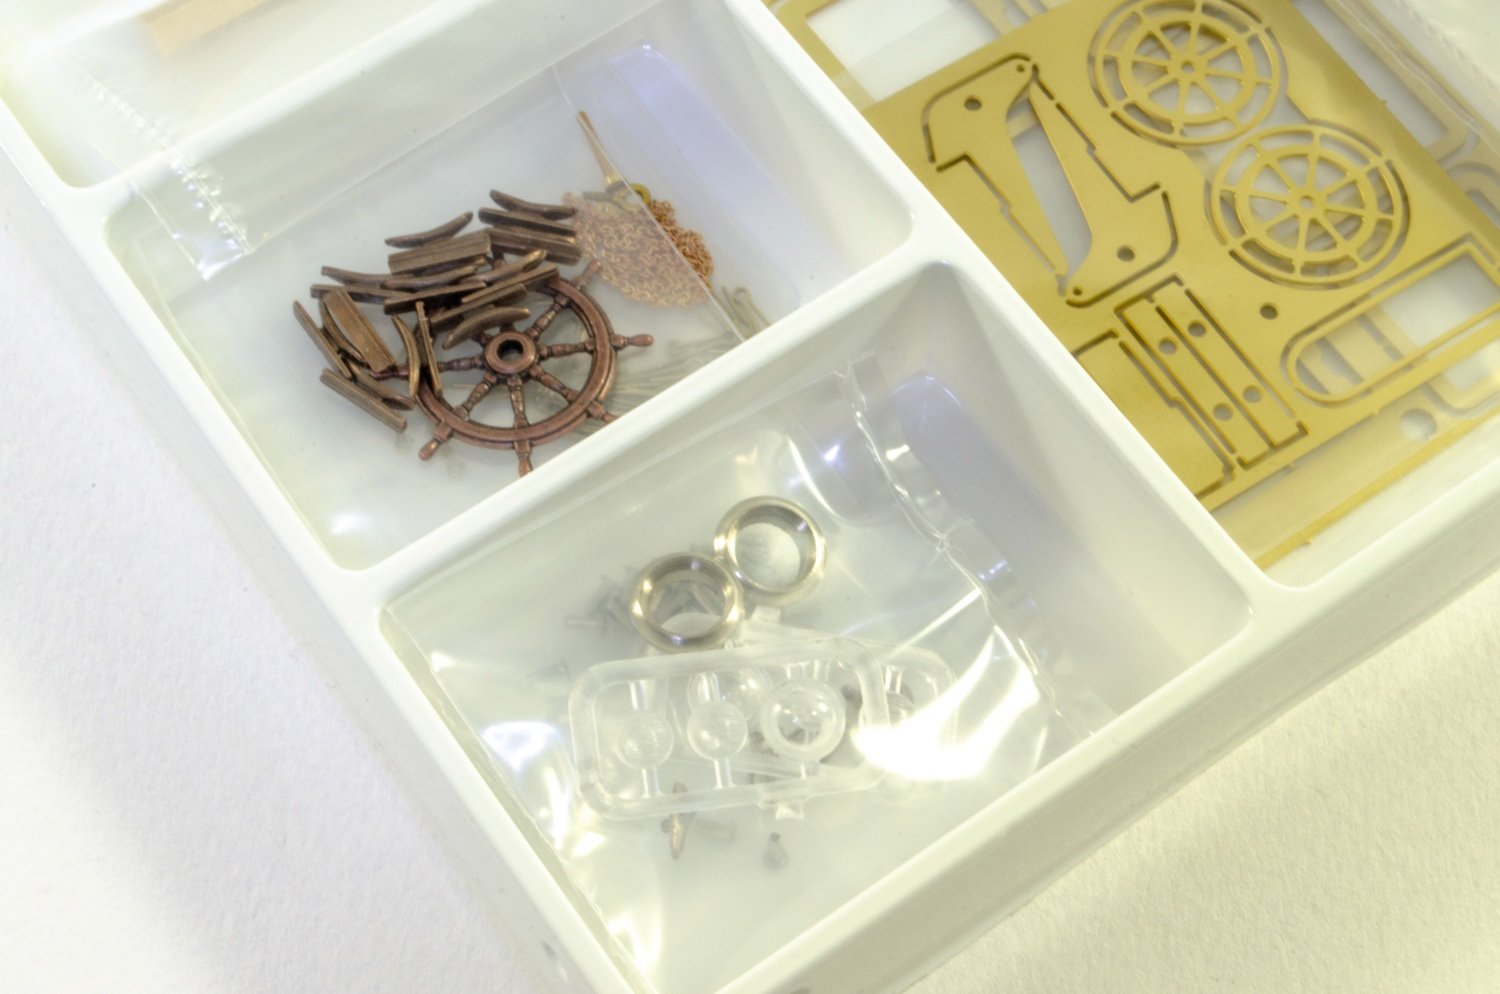
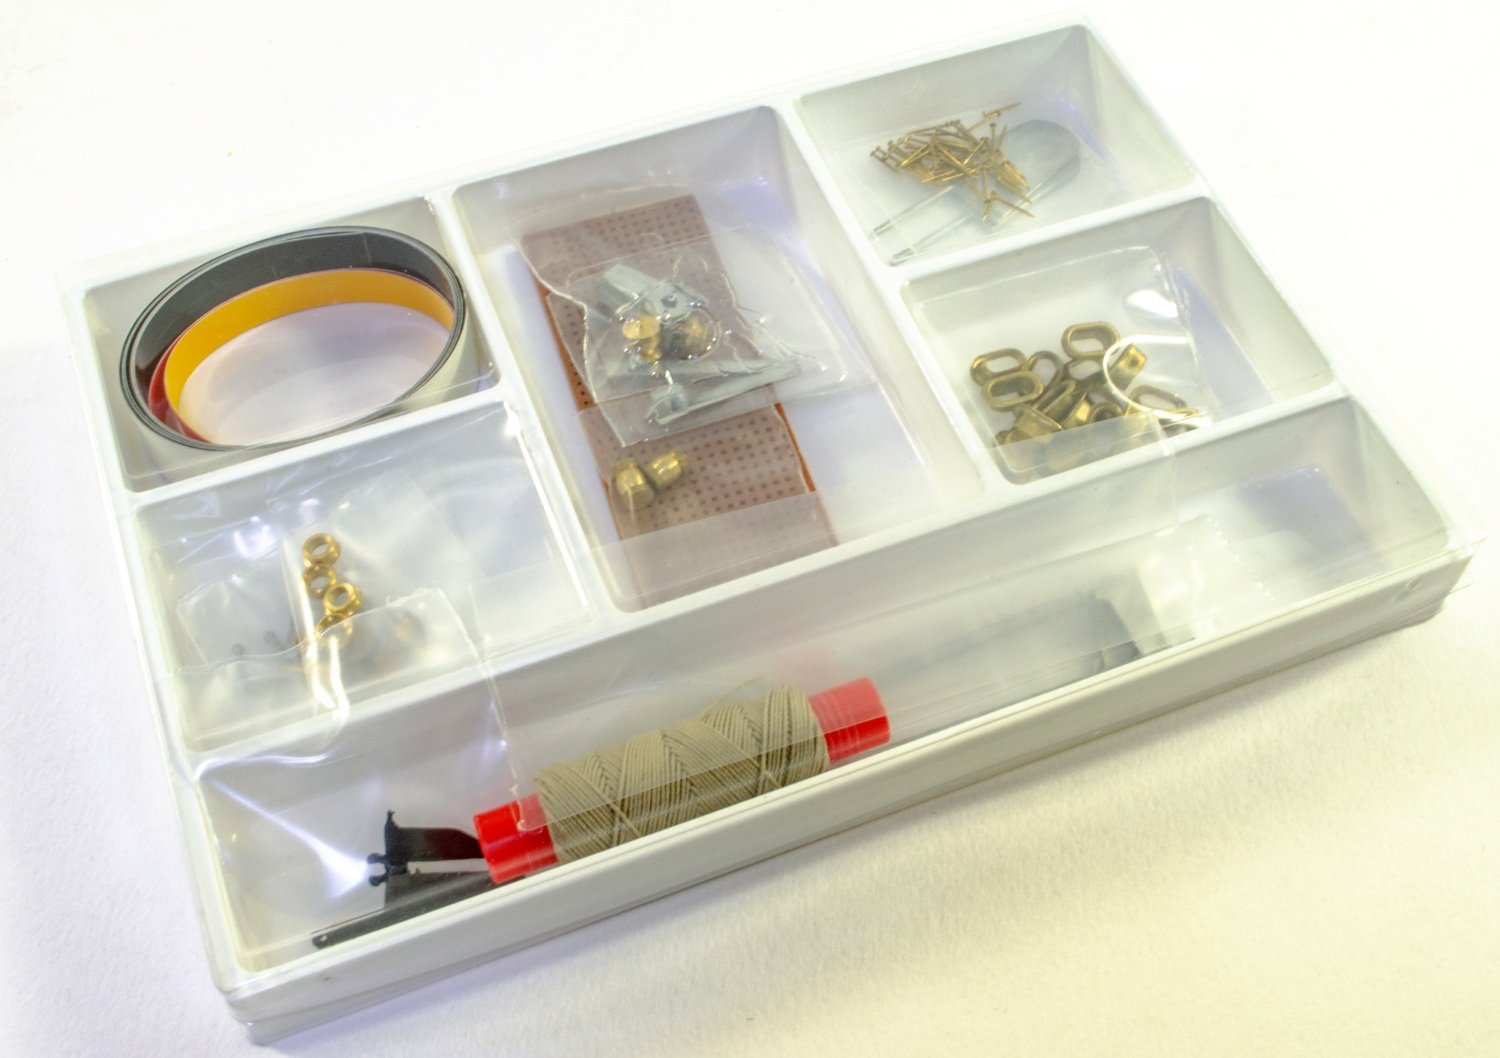
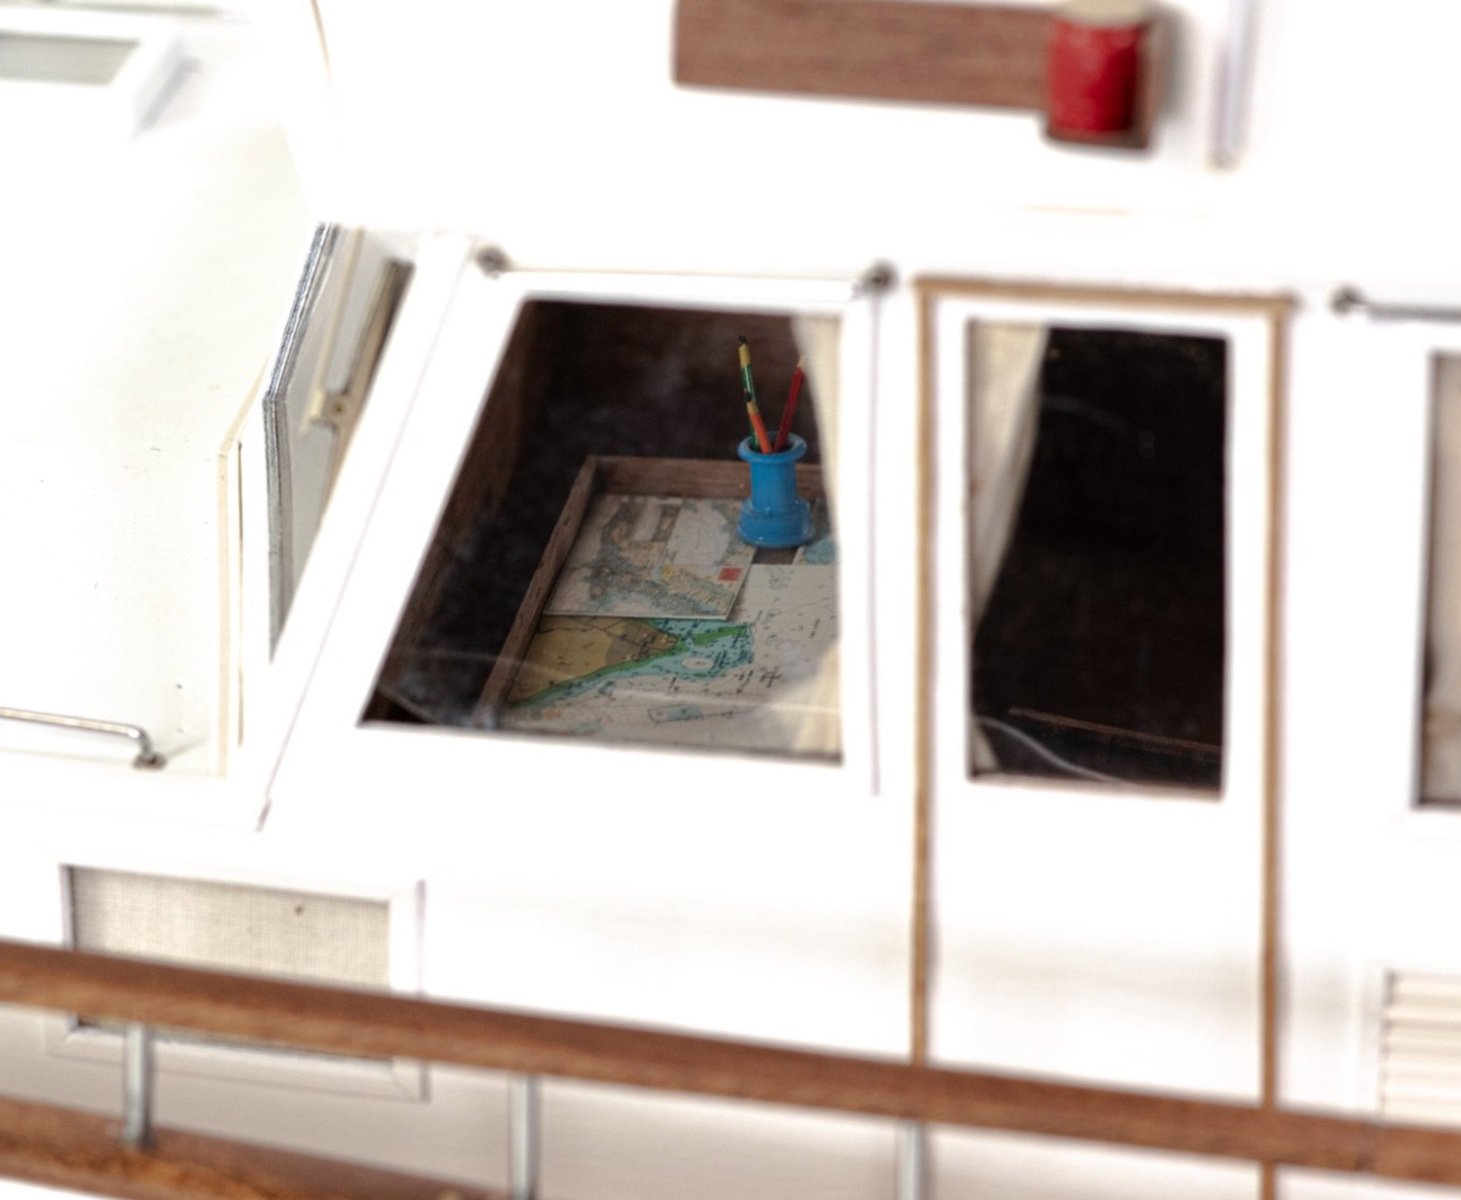
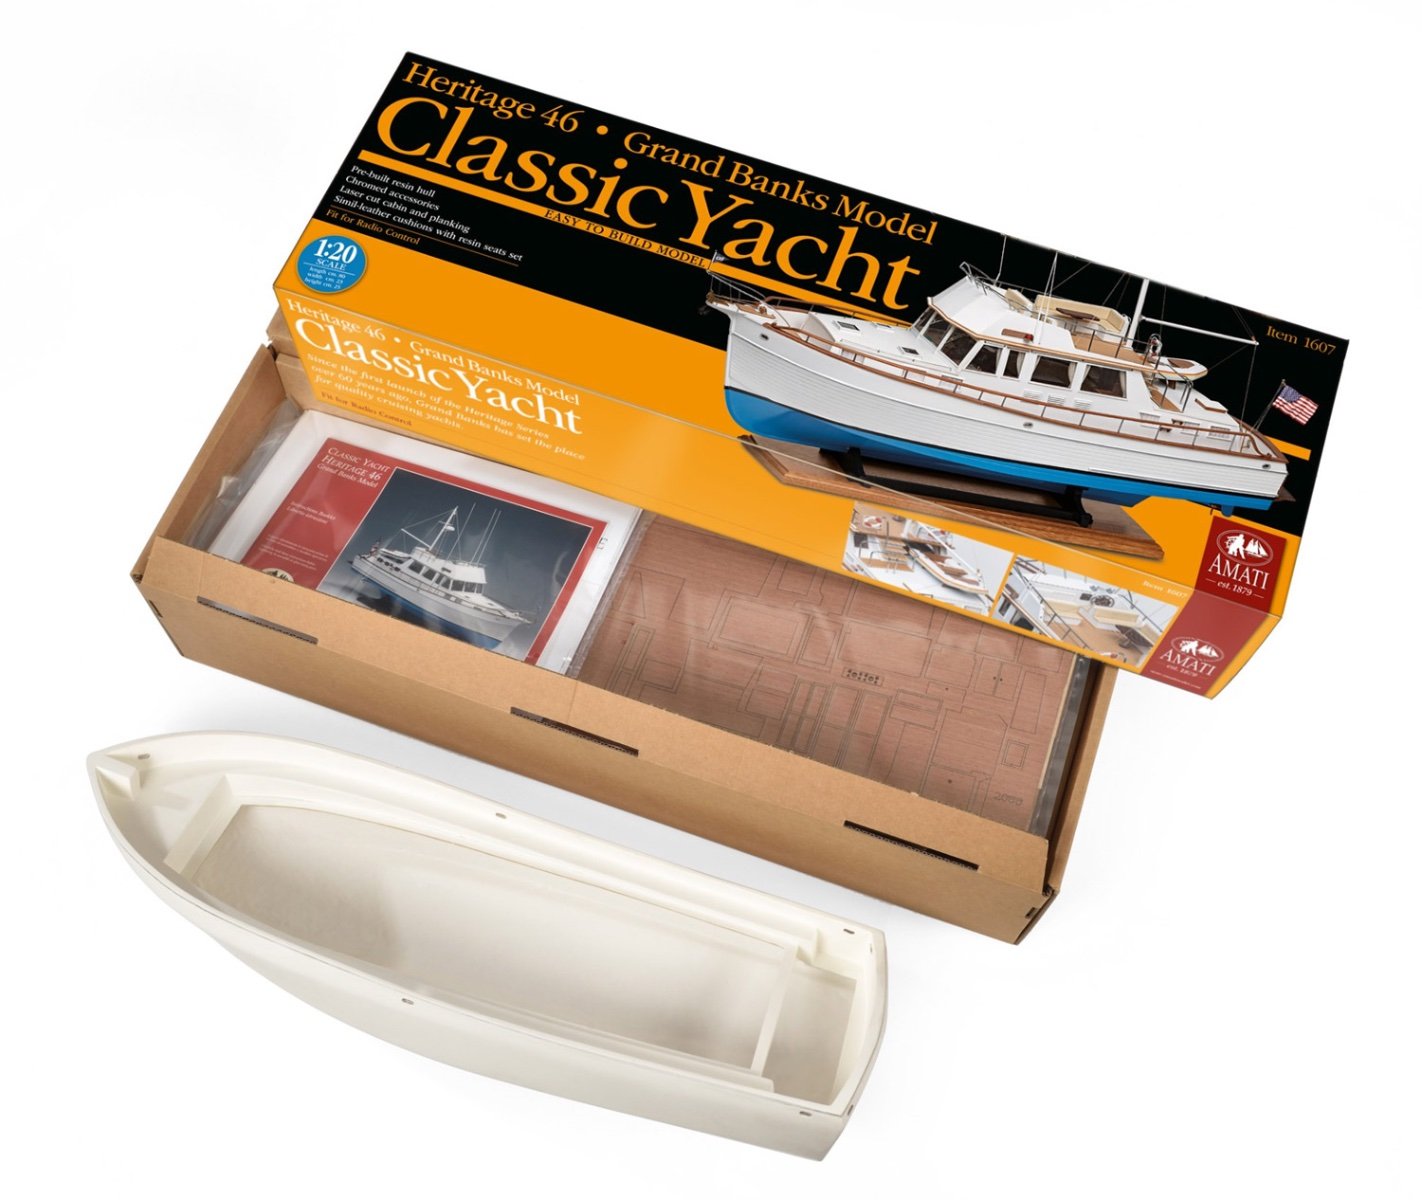
1:20 Grand Banks Model – Heritage 46 Amati Catalogue # 1607 Available from Amati for around €513 Grand Banks History The boatyard has its origins in Hong Kong, where it began building custom wooden sailing and motorboats in 1956, as American Marine. The Spray, a 36- foot -long displacement vessel, was designed and built in 1963 as a prototype trawler yacht. This new, robust, and visually pleasing type of boat was so successful that the company founders decided to put the vessel into production. Series production began in 1965, for the first time under the name Grand Banks, and the different models were each designated according to their length in feet. In 1968 the company moved to Singapore and since 1973, trawler yachts have been made of glass fibre reinforced plastic. The success of Grand Banks led to competing shipyards also beginning to mass-produce trawler yachts in the 1970s. Photo from boats.com The spacious living quarters aboard the Grand Banks 46 Classic provide ample room for comfortable long-range cruising. With top speed exceeding 20 knots, the 46CL is an ideal yacht to get you quickly to your favourite cruising destination. Safety and reliability are, of course, a built-in Grand Banks tradition. Wide walk-around decks, aft cockpit, and well-equipped steering and navigation stations both on the flybridge and in the salon are all part of the package. There are countless attributes of a Grand Banks that contribute to its reputation as one of the most reliable, high-quality yachts designed and built for cruising. The kit This Amati Grand Banks kit release is packaged into a highly attractive box with a glossy lid that depicts the completed model, including some scrap detail views. The scale of this one is a crumping 1:20! In real terms, that equates to a finished model which will be around This box appears to be the same size, or thereabouts, as the HS Vanguard and Orient Express kits, but possibly a little deeper. In fact, the kid itself doesn’t extend to the bottom of the box! One thing you’ll notice on the lid of this very heavy box is that the hull in this release is made from ‘resin’, or to be more accurate, glass-fibre resin. The large, single-piece hull is made from white resin and has a satin, slightly chalky but very smooth appearance. One thing I need to say here is that this model CAN be fitted out for RC and Amati sell an additional kit that can be used with this model. Ok, back to the contents. This is another of those kits where I don’t seem to be able to get everything back into the box once I’m done. Frustrating! The inner box has an integral lid which gives the box a load of rigidity as well as stopping anything easily piercing through the lid, into the contents. Lid off, and the first thing to be seen is an envelope with the manual and plans, with sheets of enveloped timber underneath. For the purpose of this article, I’ll tackle the contents in a different order. Many key constructional areas are laser-cut in a very nice quality birch ply. No parts numbers are shown on these sheets, and you need to cross match the sheet with the pictorial parts sheet that’s included. Of course, each sheet is numbered to identify it. Here you can see parts that will build up to create the entire superstructure. If you intend to make this RC, this whole area will lift out to provide access to the motor and servos/linkages below decks. Having looked through the instructions for quite a while, I do think that if you are capable, sheathing the entire superstructure in thin, white plasticard sheet, such as Evergreen, would produce a stunning finish. Anyway, that’s just me thinking out loud. Whilst the hull is glass-fibre, there are some thin ply strakes which fit below the gunwale. These can be seen in the two sheets at the top of this photo. There is some darker laser marking on some parts, but thankfully the parts aren’t degraded because of it, and some light sanding will remove it. Two sheets are cut from 1mm mahogany, and contain many cabin interior parts, plus window frames etc. The grain on these parts, in thinner areas, will be a little more fragile, so some kid gloves will be needed to handle them. It’s a case of not removing parts from sheets until they are needed. Of course, the exterior of the superstructure will need to be skinned, and these parts are for that purpose. Going back to possibly using styrene sheet to skin the model, you could in theory, use these as templates for doing just that. However, that’s not what’s intended here. Some parts are included on these two 3mm sheets, manufactured again in mahogany. These include more substantial parts, such as the multipart gunwales and ornamental scroll rails etc. The mahogany here is a little lighter and I think a staining varnish would be nice here to give the parts a deep, rich colour. A small cradle is supplied for the hull, and not the large stand shown on the box lid. This cradle is a simple MDF affair. Personally, if you are spending £500 on a kit like this, I’d look at buying/building a nicer mounting solution to this one. The smaller sheet contains parts for the dinghy/launch. There is a small amount of MDF in this kit. Here, the parts are for superstructure. A little area of familiarity is the inclusion of wood strip for various things, such as framing, deck planking etc. There is also a quantity of brass rod too. The two boxes supplied here are found at the bow and stern of the hull when packed. One of these supplies all the pre-shaped, chromed rails, and they are superb. These are quite complicated shapes and I don’t see any deformation etc. I really do suggest you remove this box to a safe place, right up until you need to fit them. Damaging these would be annoying. The other box contains a suite of various seating parts. The bases are cast in a matte white resin, and the seating is beige faux leather. All are very nicely made. A smaller box is included, containing the boat’s dinghy, cast in the same matte white resin. This of course will be fitted out with various mahogany parts etc. Residing in the boat’s hull are two packs of fittings. This first one contains two PE parts frets, some timber section, the boats props, wheel, rigging blocks, cleats etc. The second fittings box contains trim tape, brass ferrules, rigging cord, plastic grating, brass pins etc. An envelope contains a steel PE fret due to the nature of the parts on there, such as the grilles on the side of the superstructure. In this thickness, steel isn’t quite as flexible as brass, therefore not as easy to damage in key areas. There is also acetate in this package, for the various cabin windows. I think the cloth is perhaps for the cabin curtains. The last envelope contains a set of plans, full colour instruction manual, written notes and colour-printed sheets that have details for the parquet floor, flag, rugs, maps, charts, and even magazines for the cabin tables! Here a number of selected images from the manual. Conclusion On the box, Amati say that this is an ‘easy to build model’. Ok, everything is relative. Anything is as easy as you want to make it, but it’s the result which will define the effort you put in. This is by no means a beginner kit, but the construction of the kit, the beautiful fittings, chromed rails and small details, will make this an enormously enjoyable project to build, and if you’re like me, a very welcome change from regular masted, wooden ships. The plans and manual are also excellent and show all aspects of construction extremely well. It could be said that this isn’t a cheap kit, but I think it’s very reasonable for what you get, including that superb glass-fibre hull. There’s very little you can get wrong with this if you work objectively, and of course, it will make a really unique large shelf display model. If you’ve been thinking of taking the plunge with this, or in need of something a little different, I’d most definitely recommend Amati’s Grand Banks Heritage 46. My sincere thanks to Amati for sending out this kit for review on Model Ship World. To buy this kit direct, click the link at the top of the article, or head over to your local Amati distributor.


-
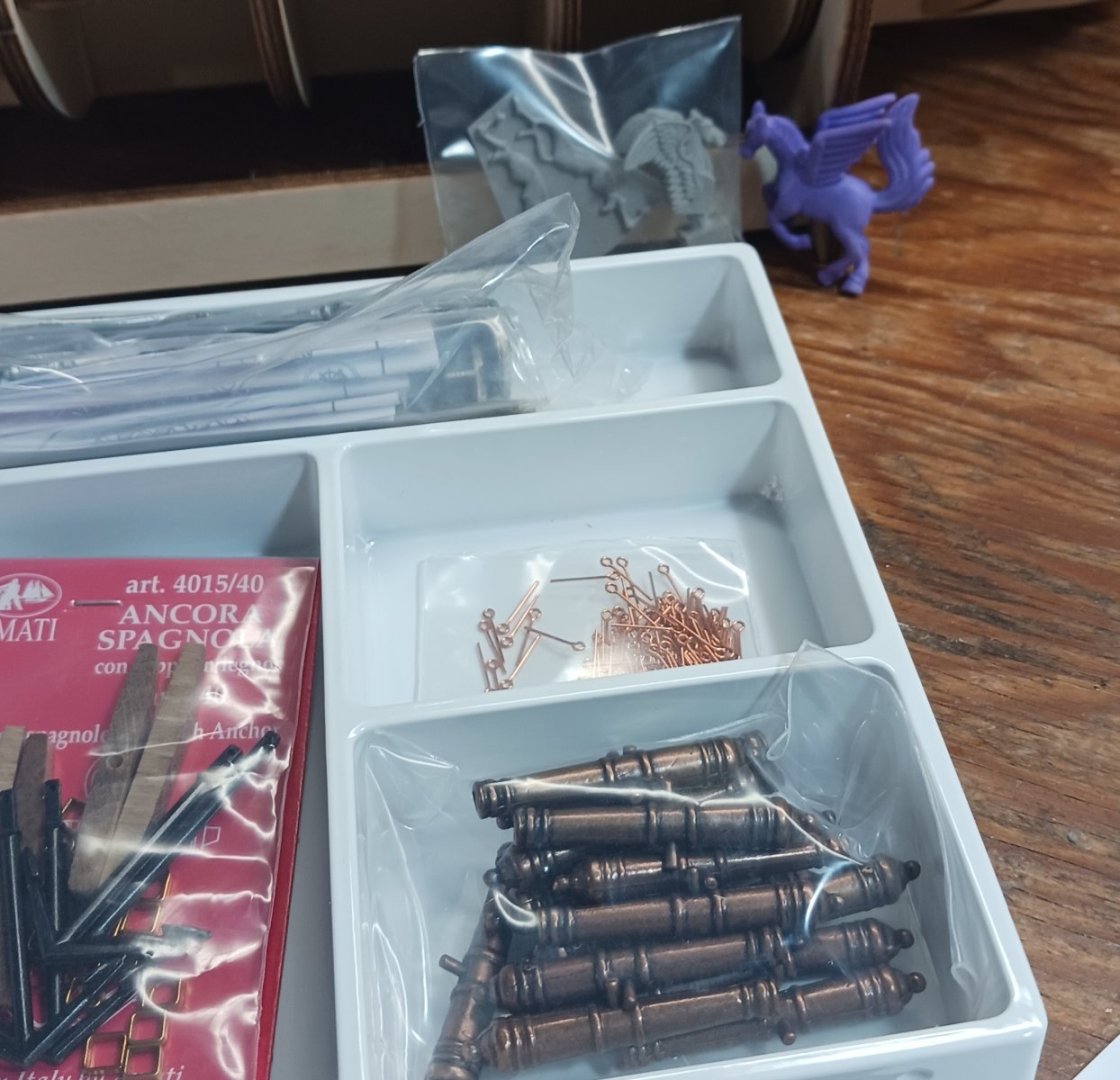
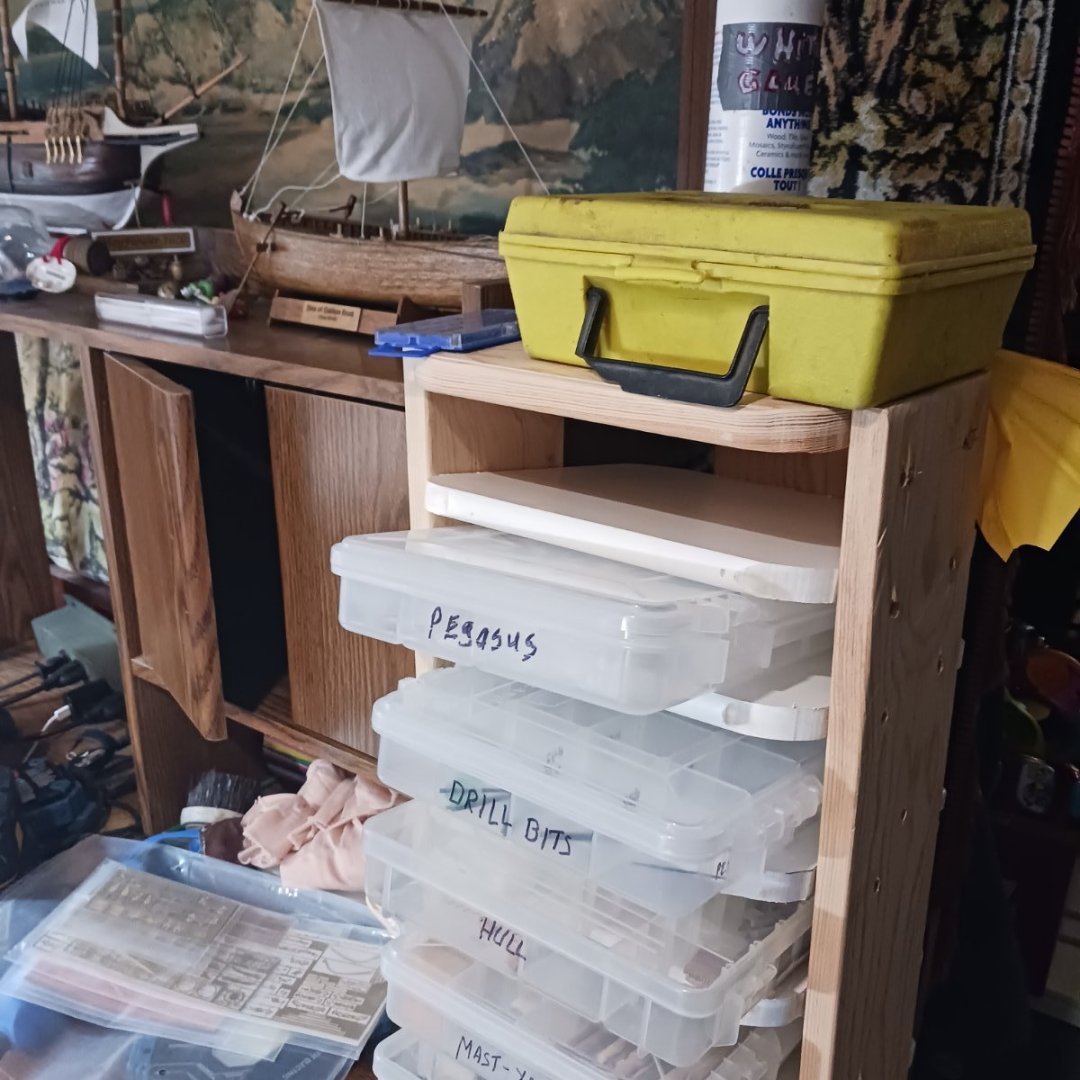
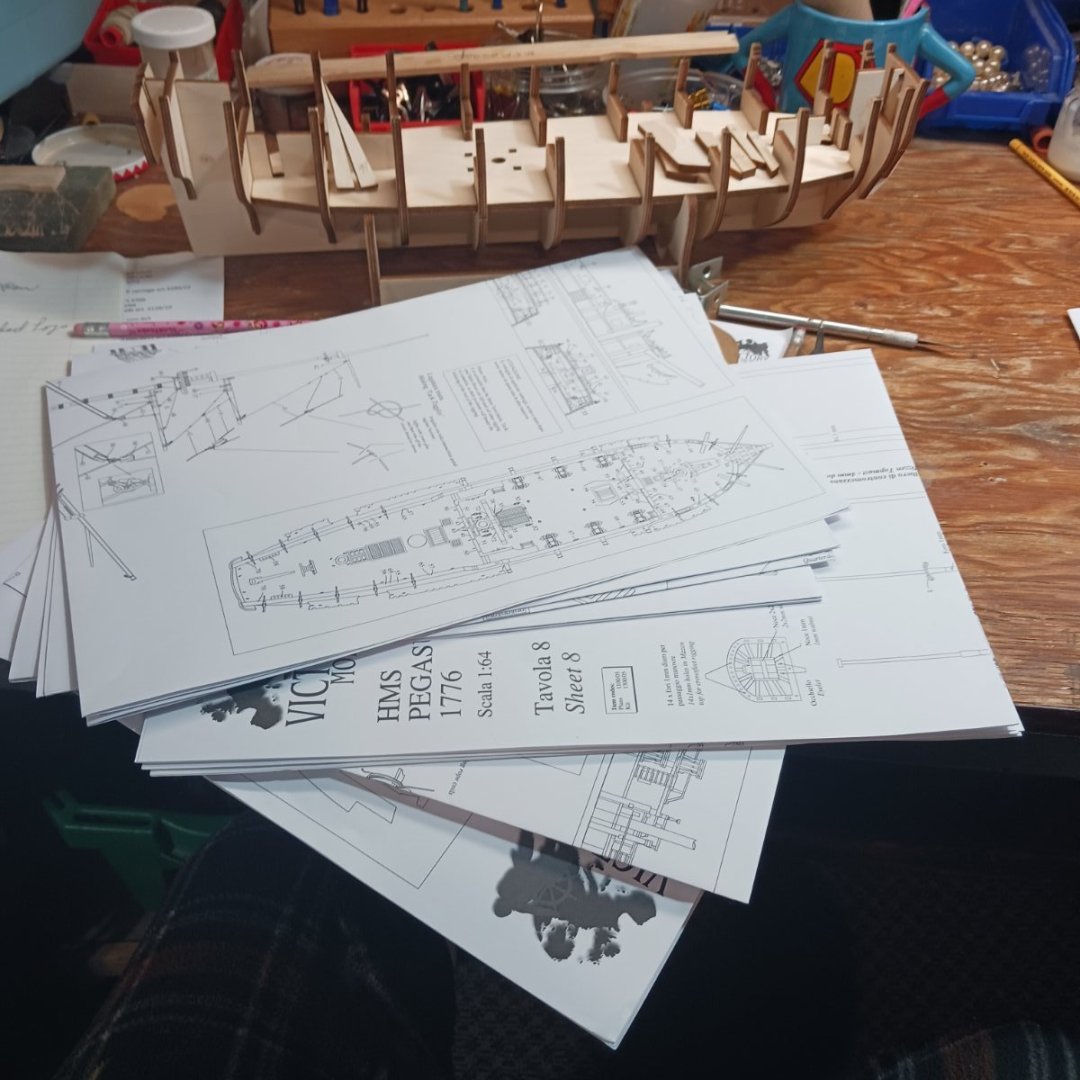
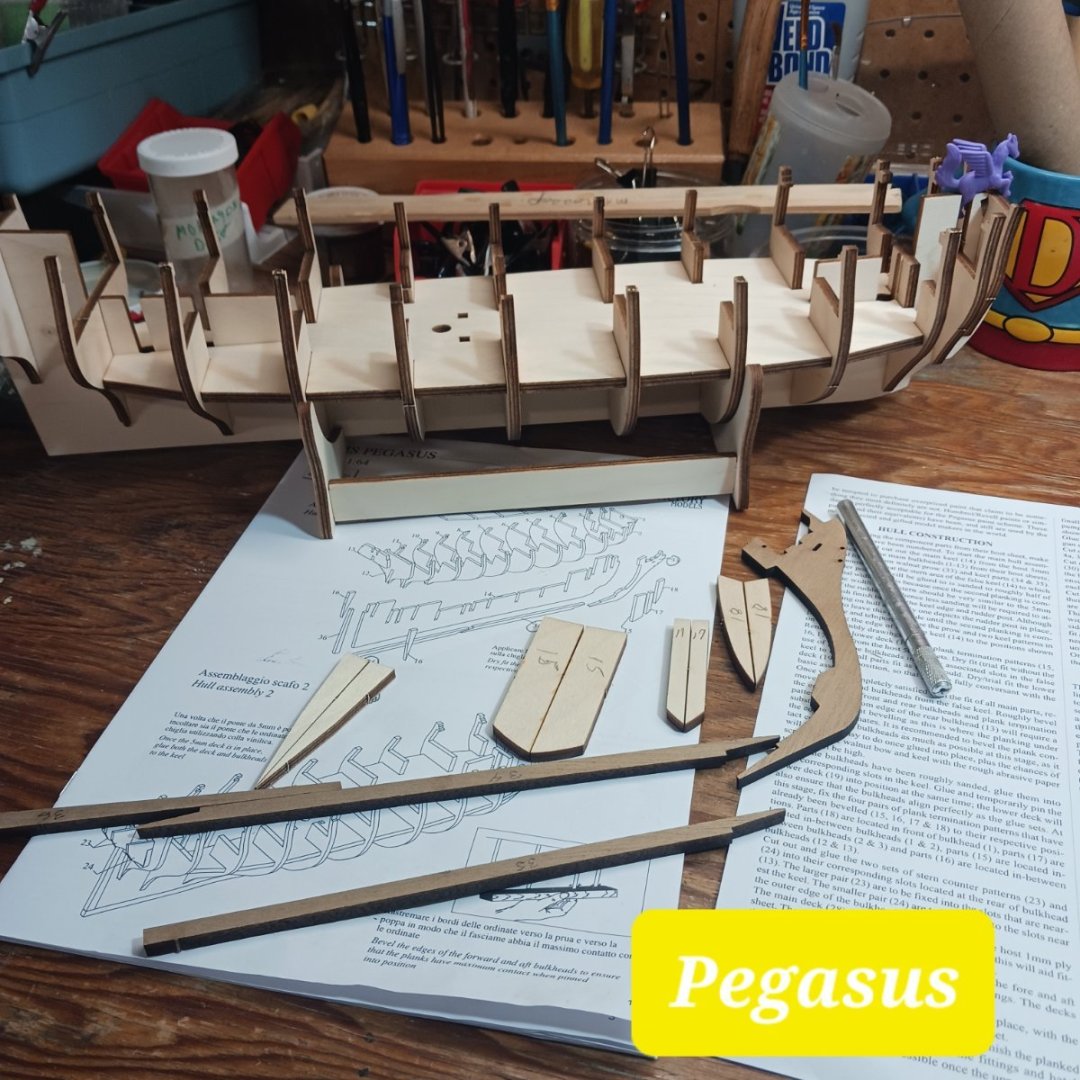
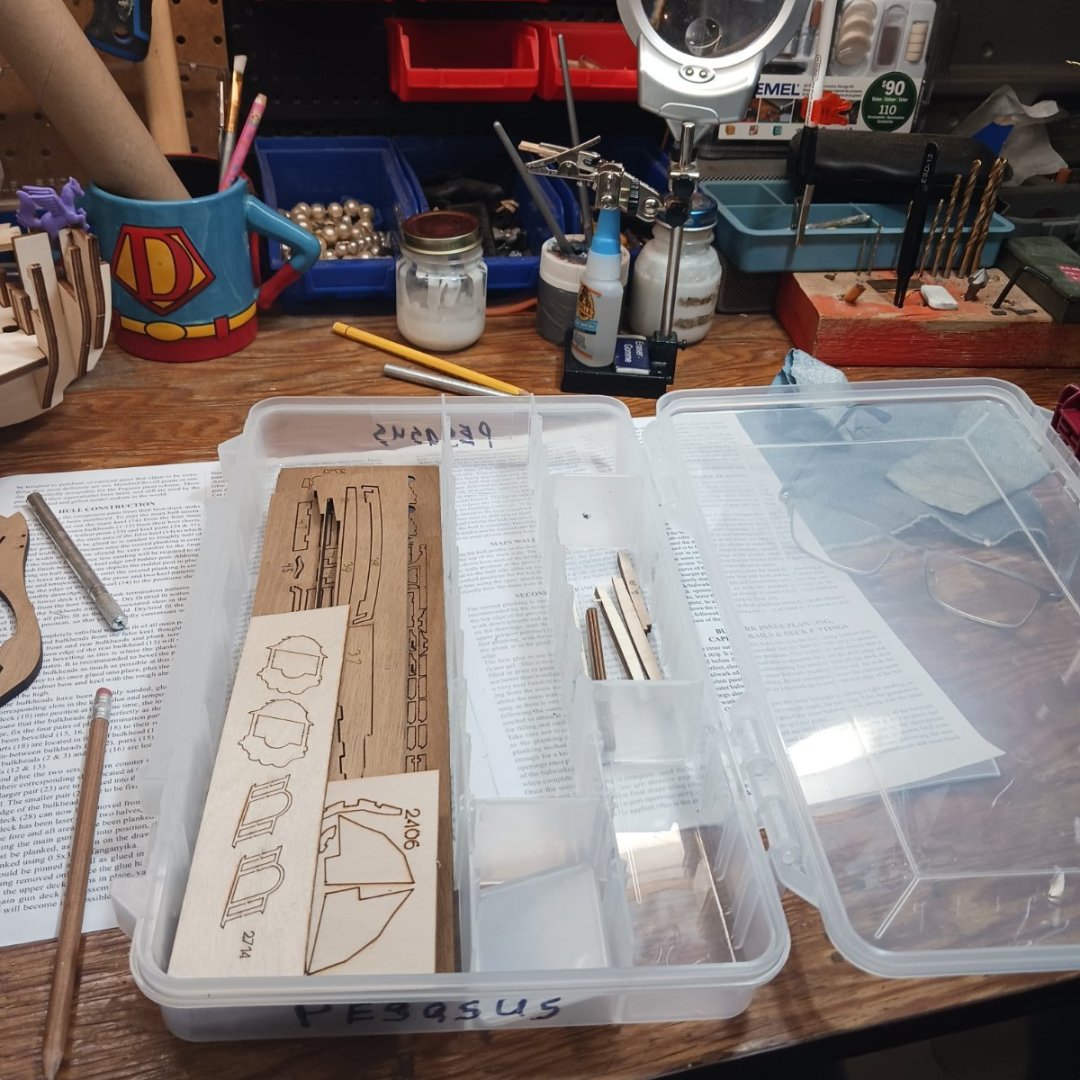
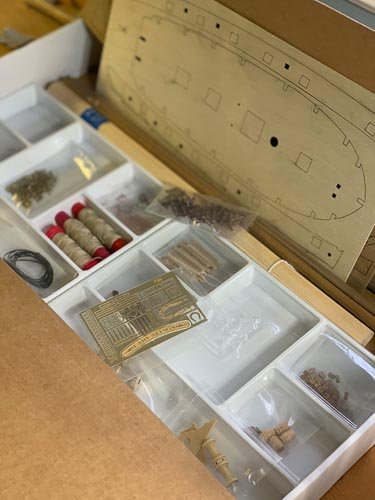
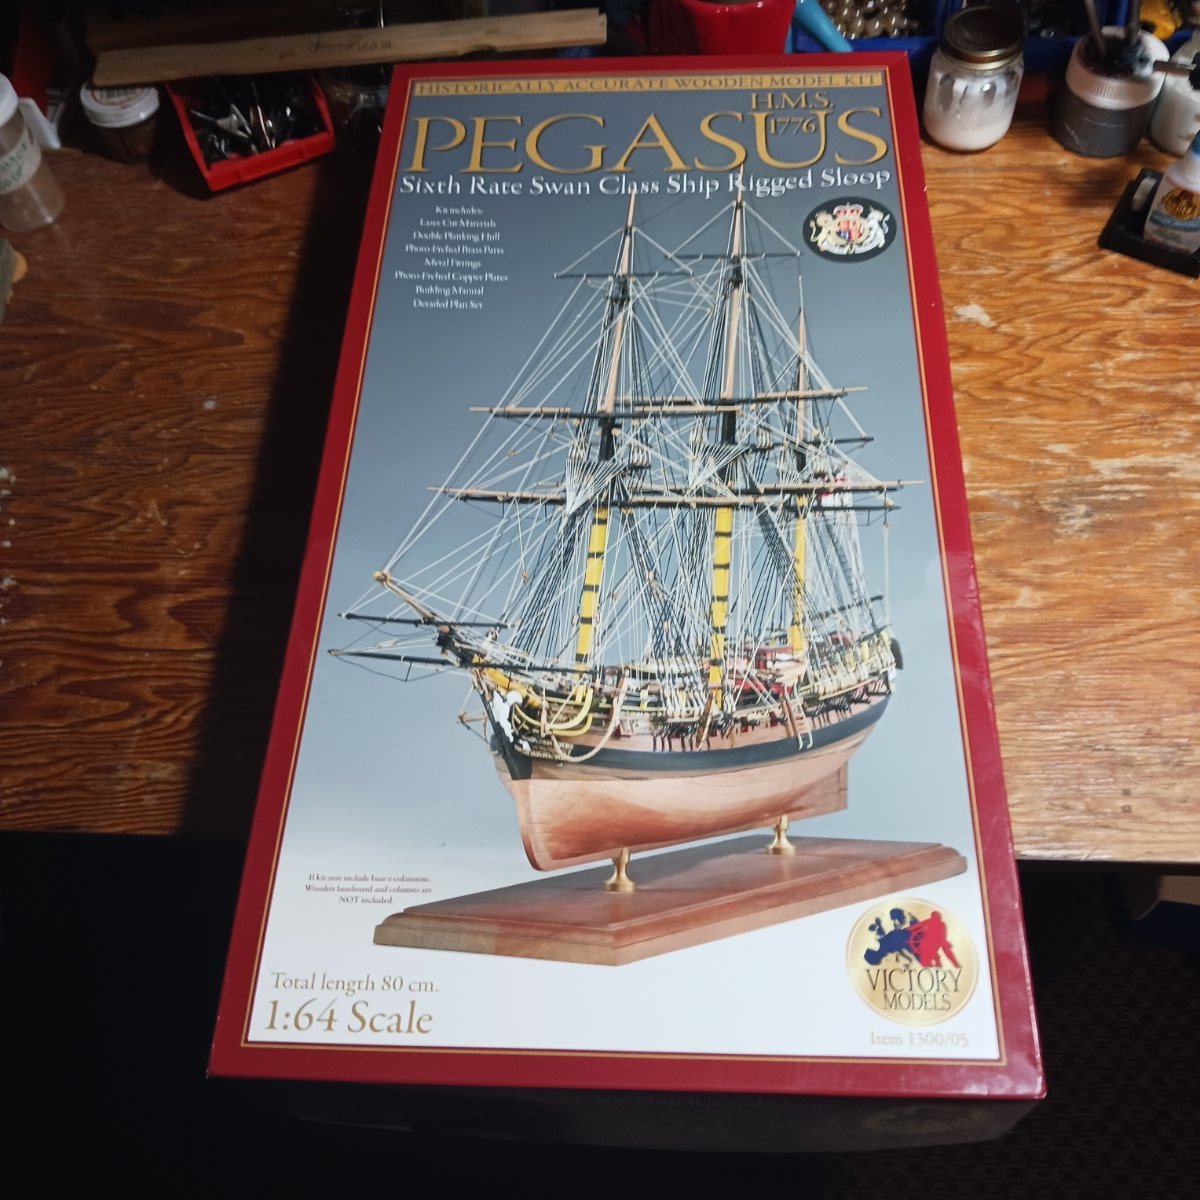
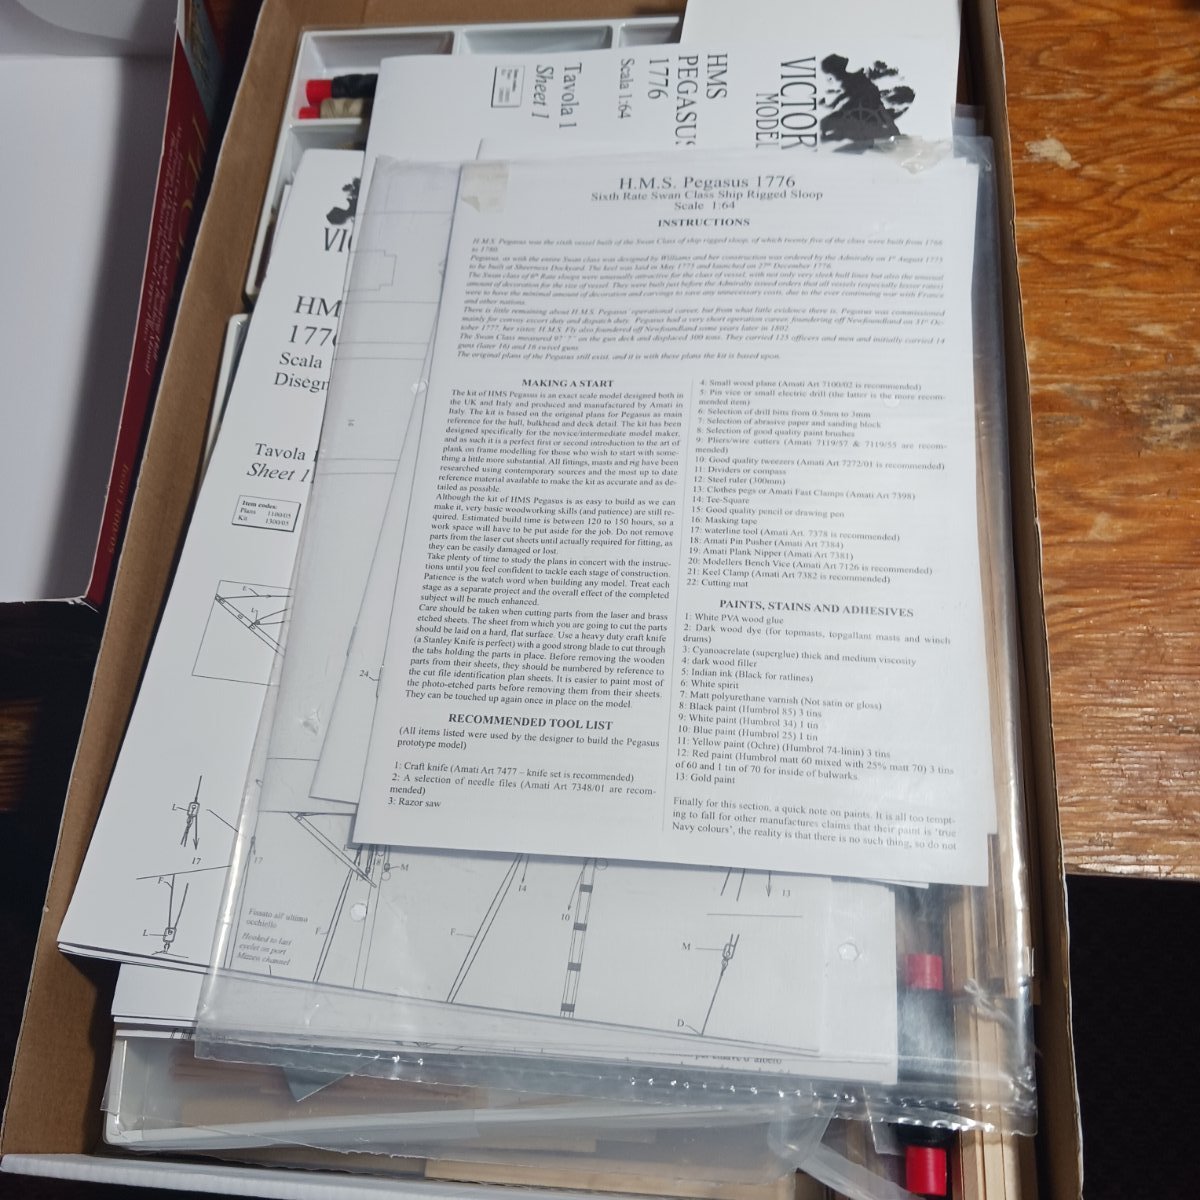
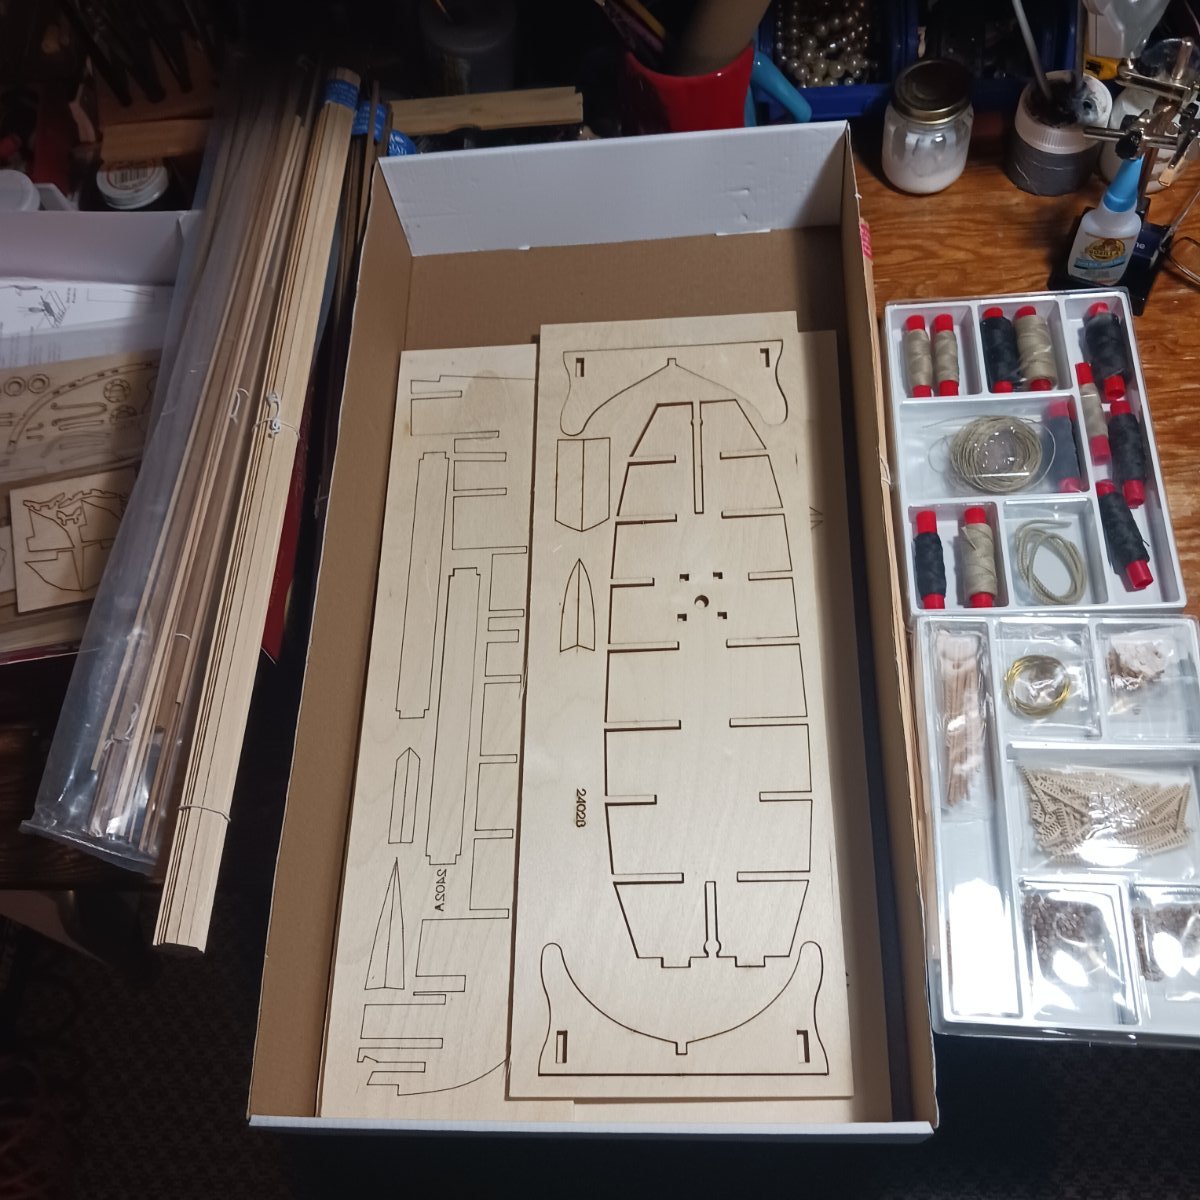
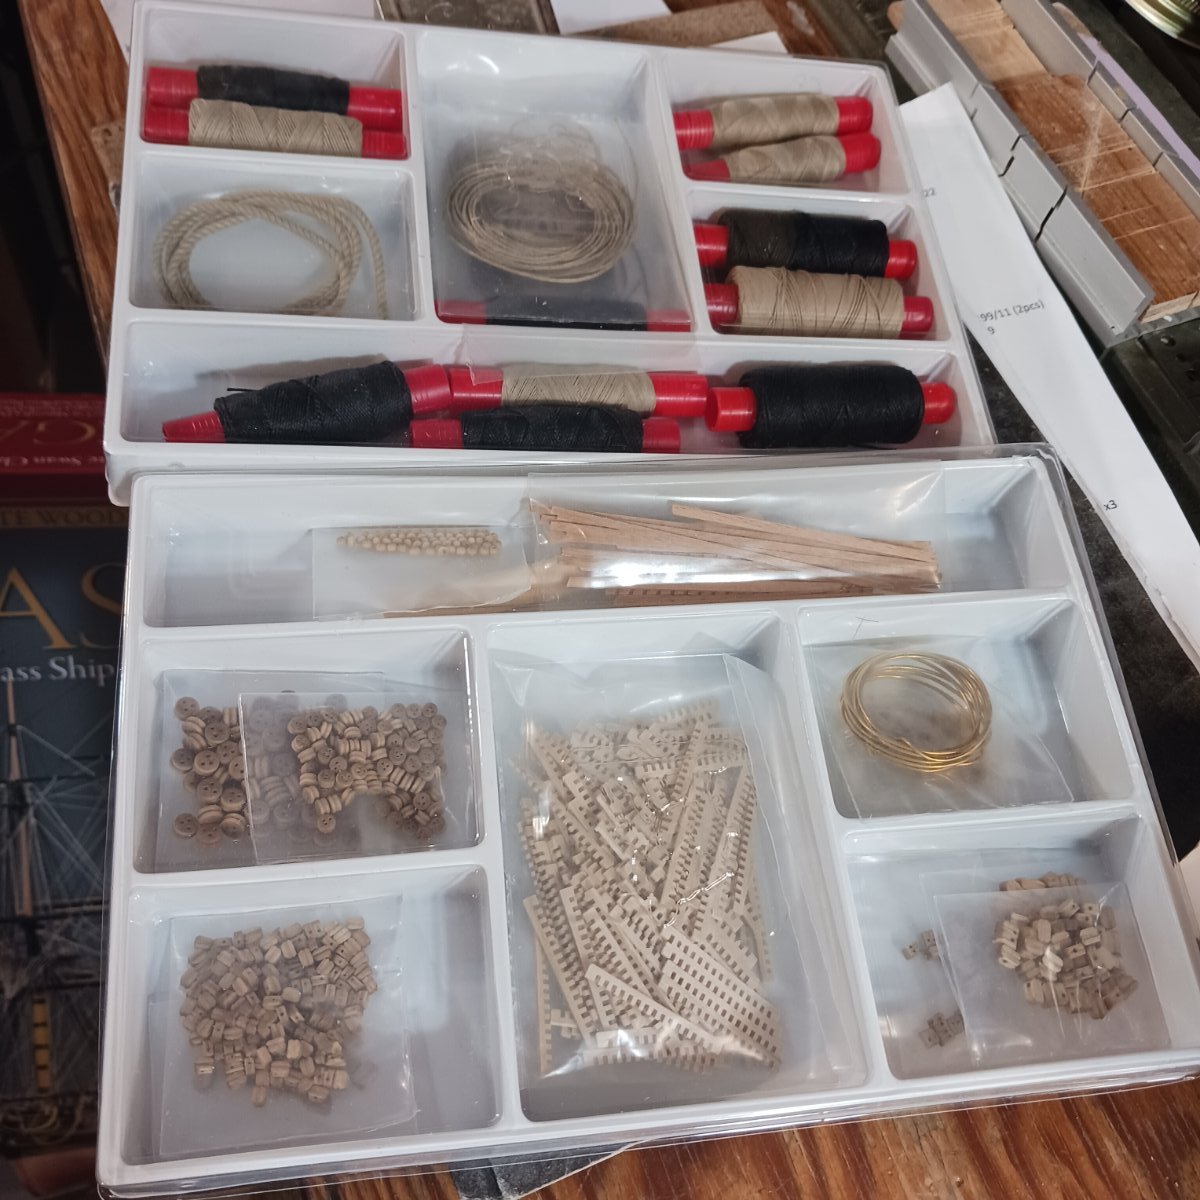
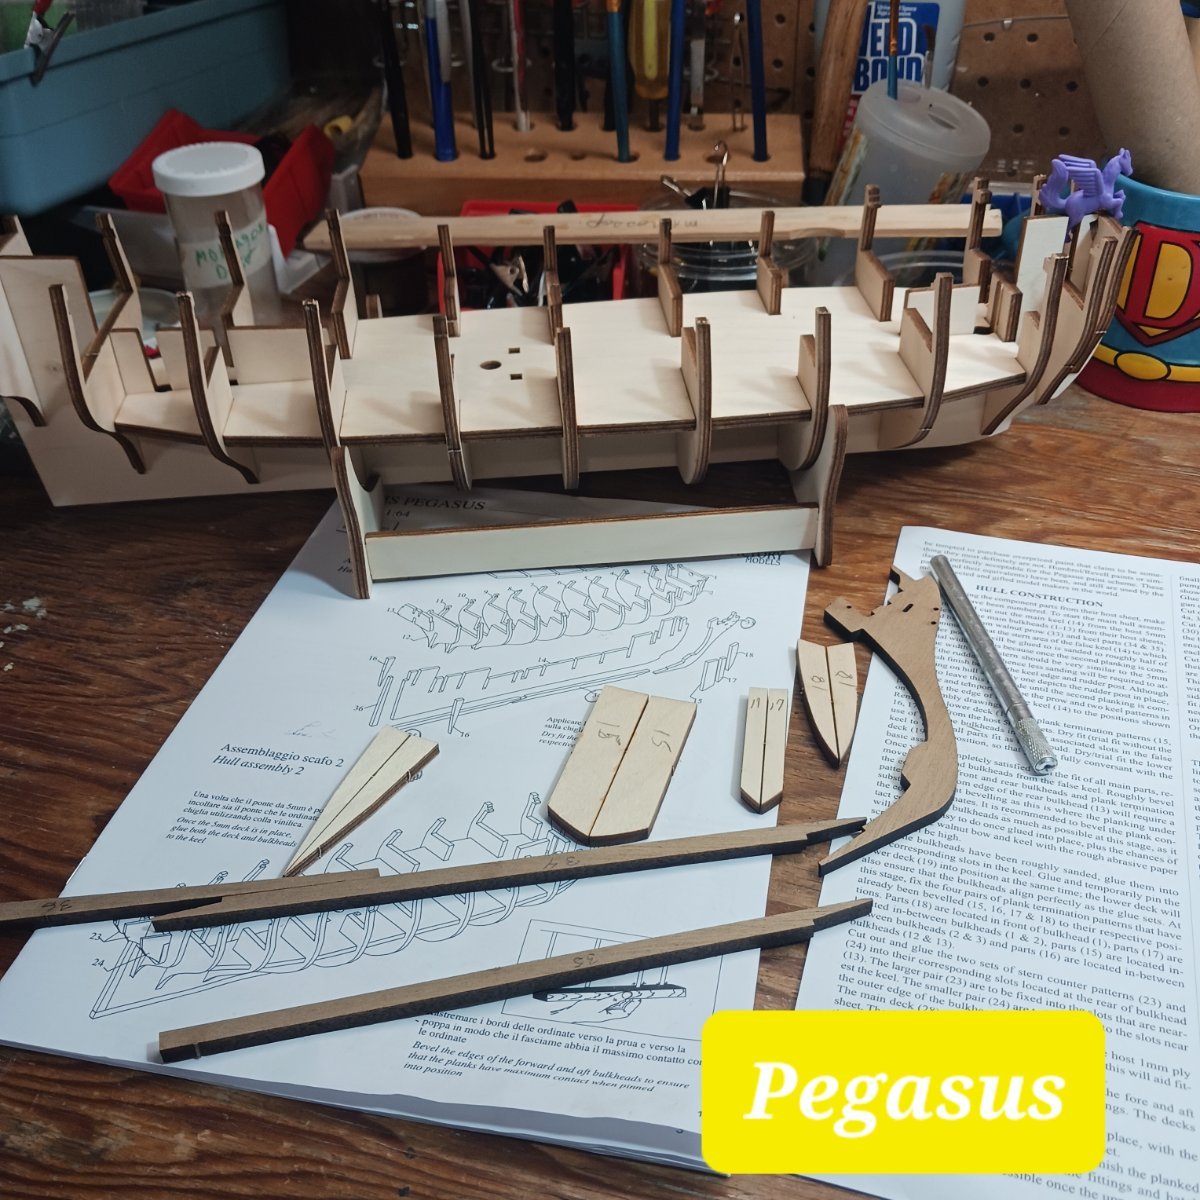
 Today I was supposed to go to work but it was raining, so I decided to do a kit opening page for my new log, the Pegasus. The contents of the kit look really good, as I put things away , and get ready to build. My keel is made of plywood, not mdf. Must be an older kit, I assume. I dont know much about the Pegasus, but she sank in Canada in 1777, a little over a year after she was launched. So putting things away, the keel fell out of the box, lol, so I decided to make the temporary stand, and dry fit everything. It went together really well. It does come with a lot of plans and books of understandable instructions. I dry fitted all the bulkheads and got all the keel parts ready. So tomorrow, I will start glueing and beveling the bulkheads, and also the four pairs of plank termination patterns. Then I will see what I need to do next. It is so helpful to know that if I run into problems, this is the place to be to get all the help I need here. Thanks so much for watching. Take care my friends. Bob M.


- 129 replies
-
- 23
-

-
- Victory Models
- Pegasus
- (and 2 more)
-
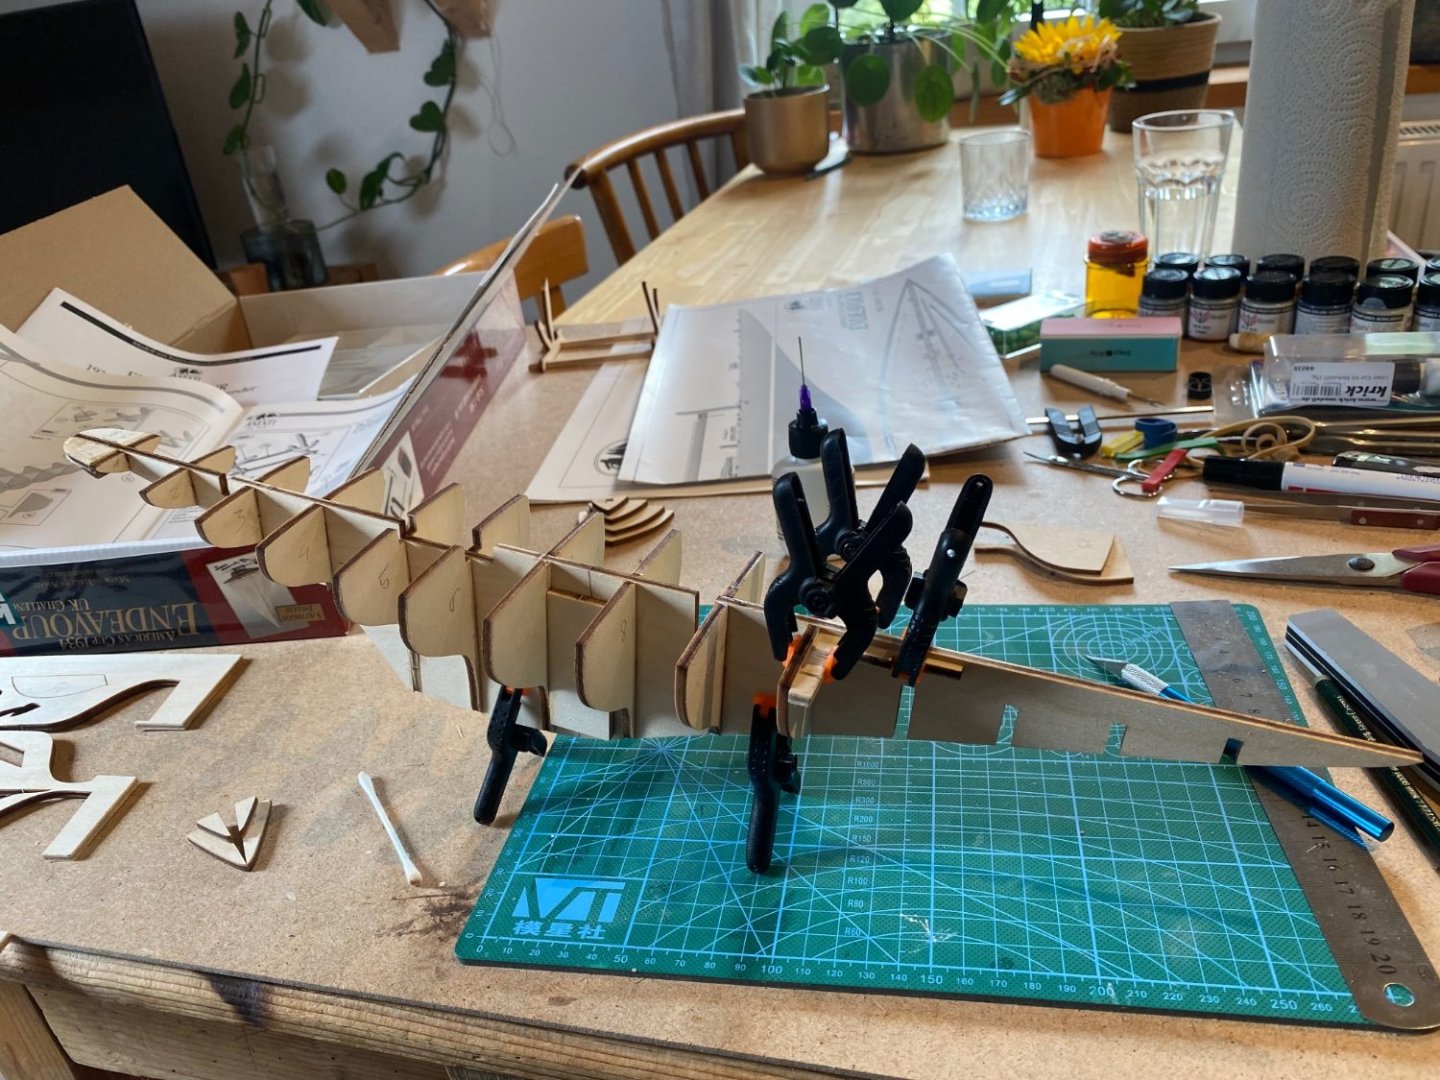
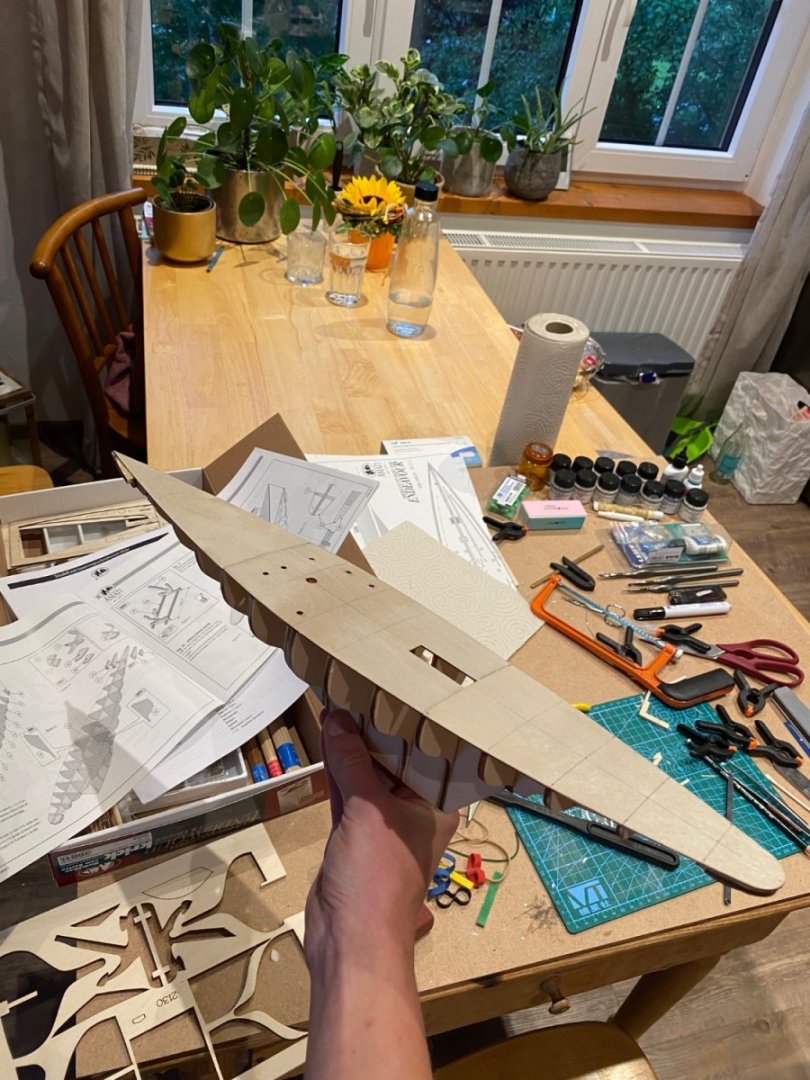
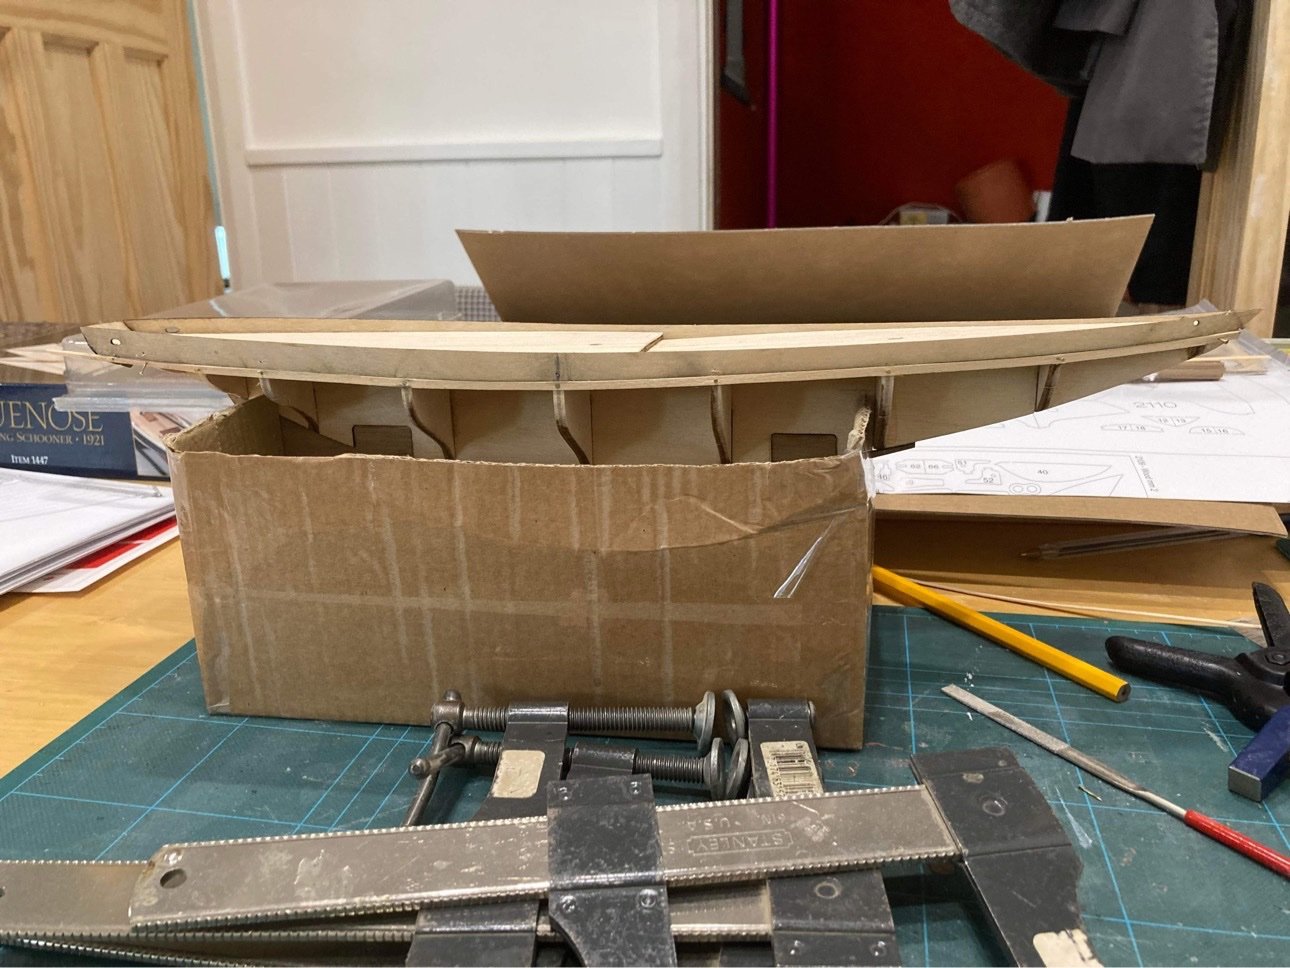
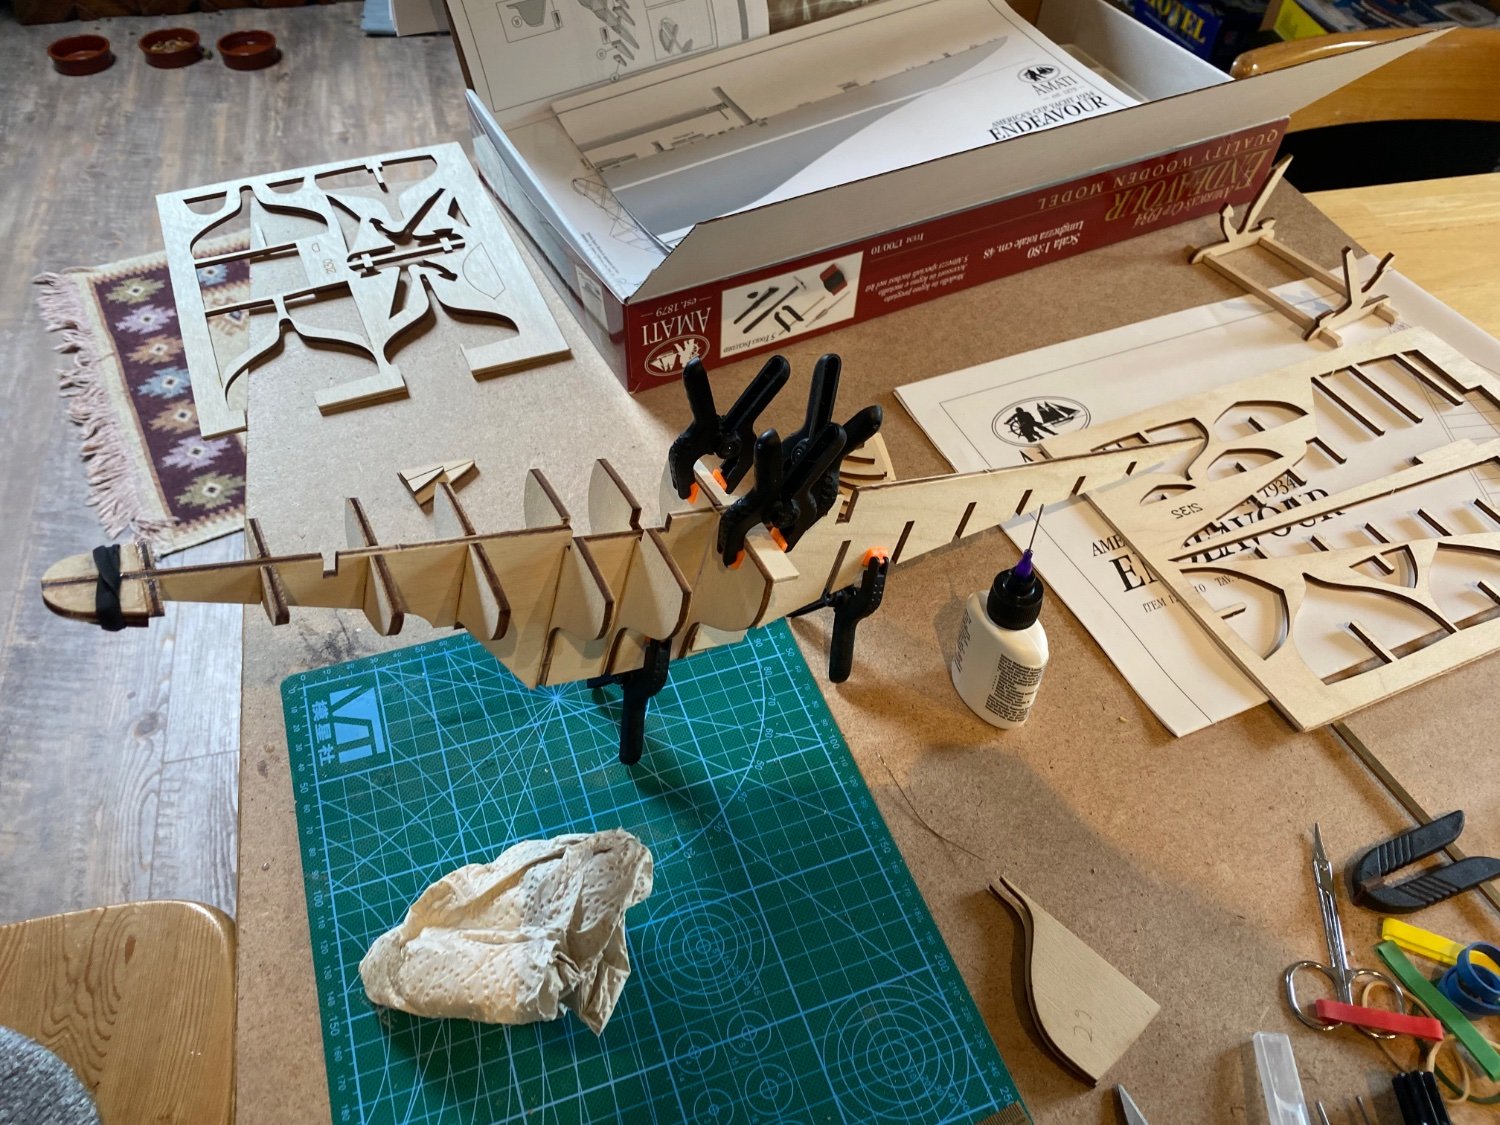
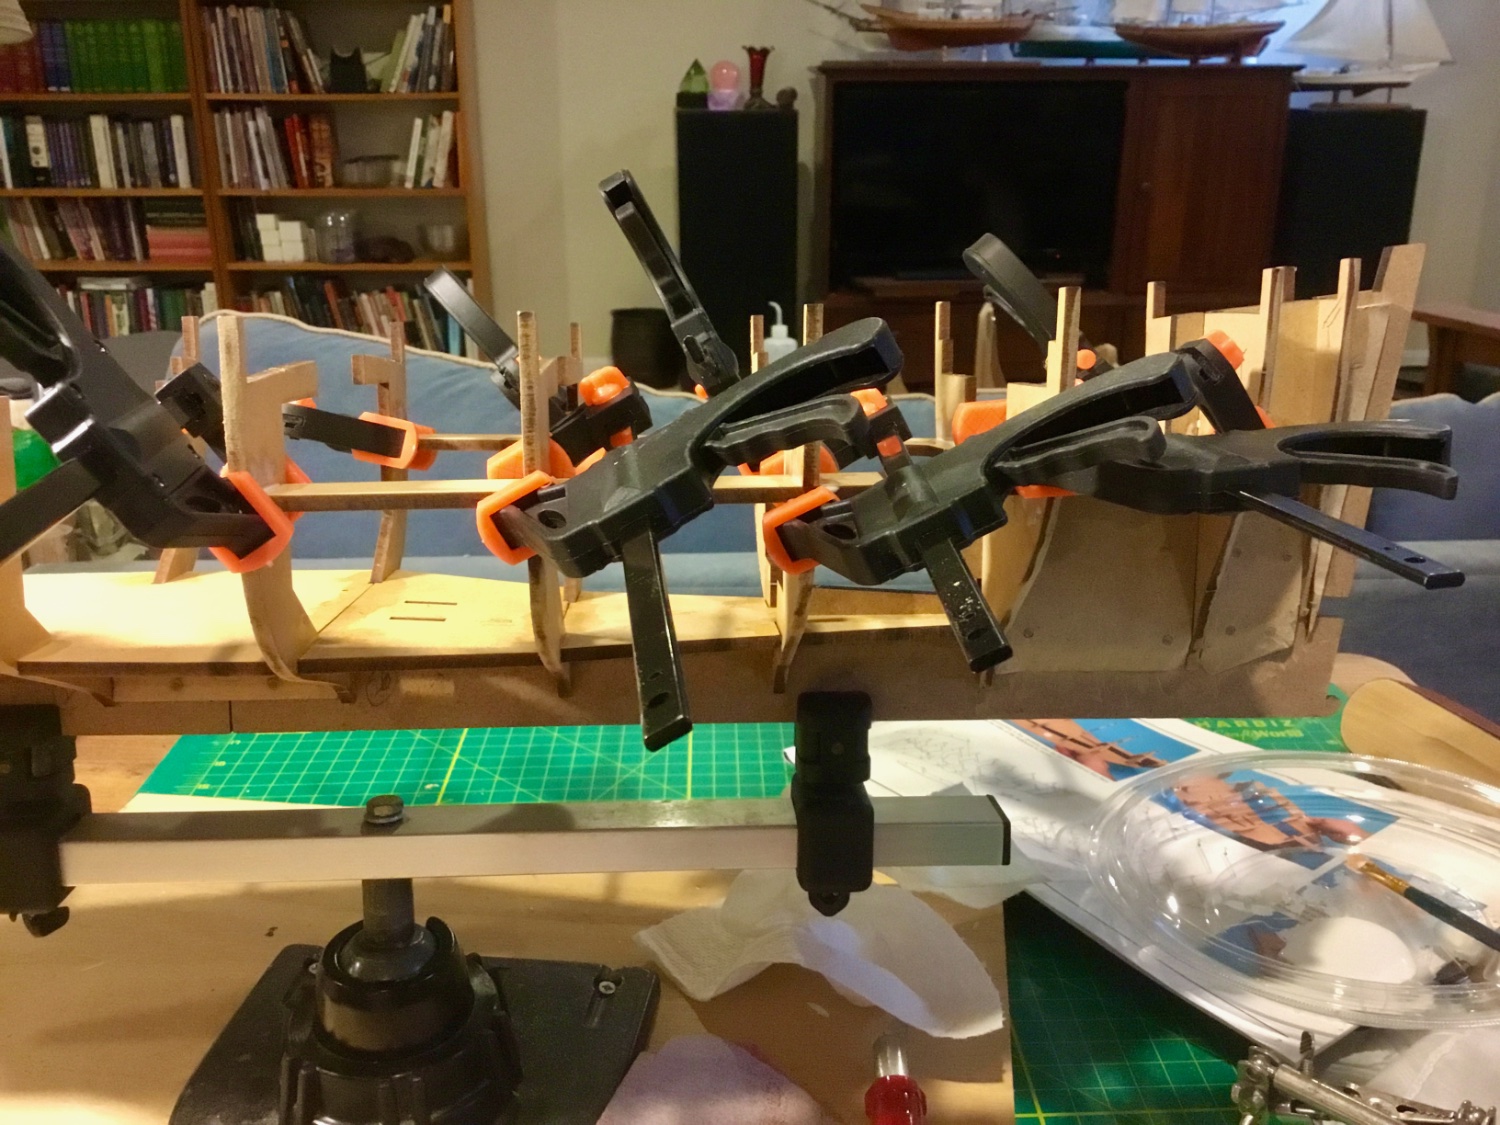
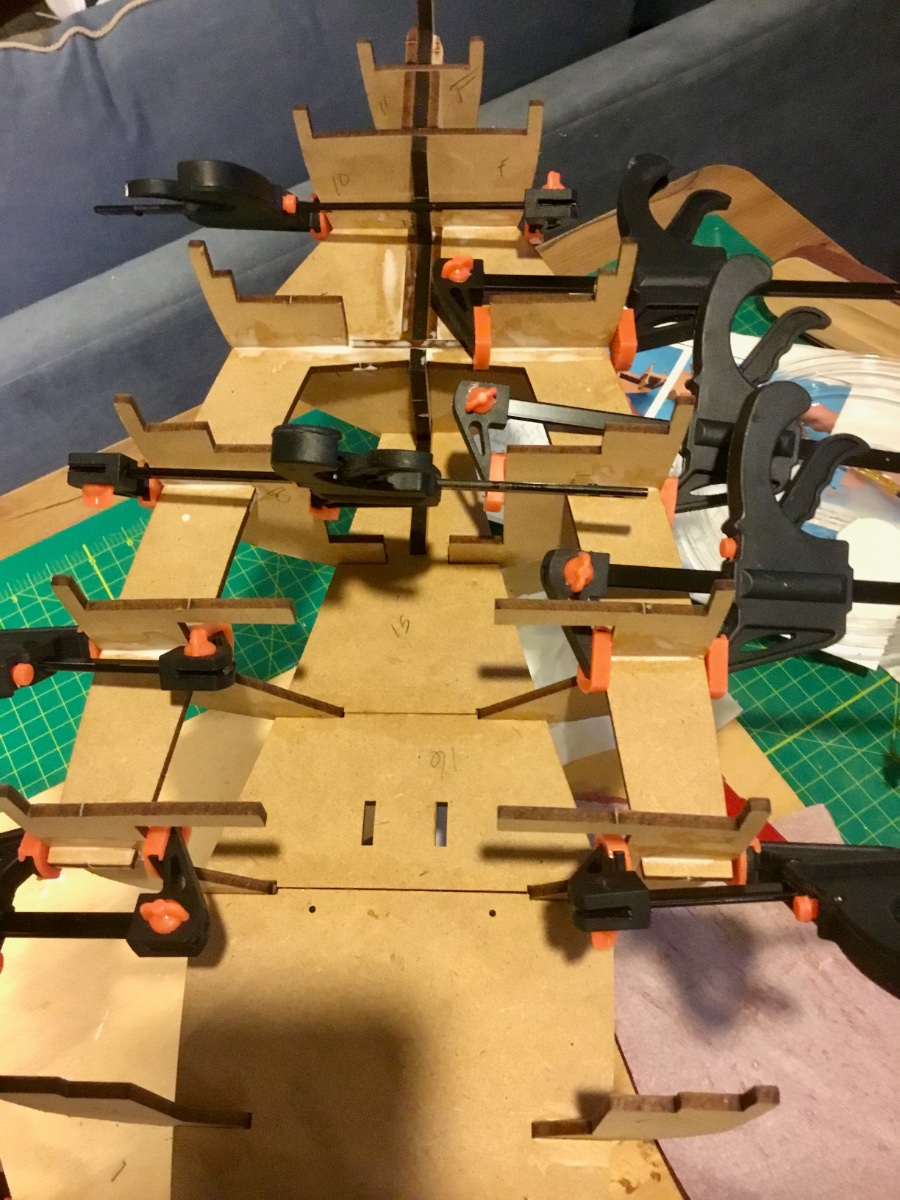
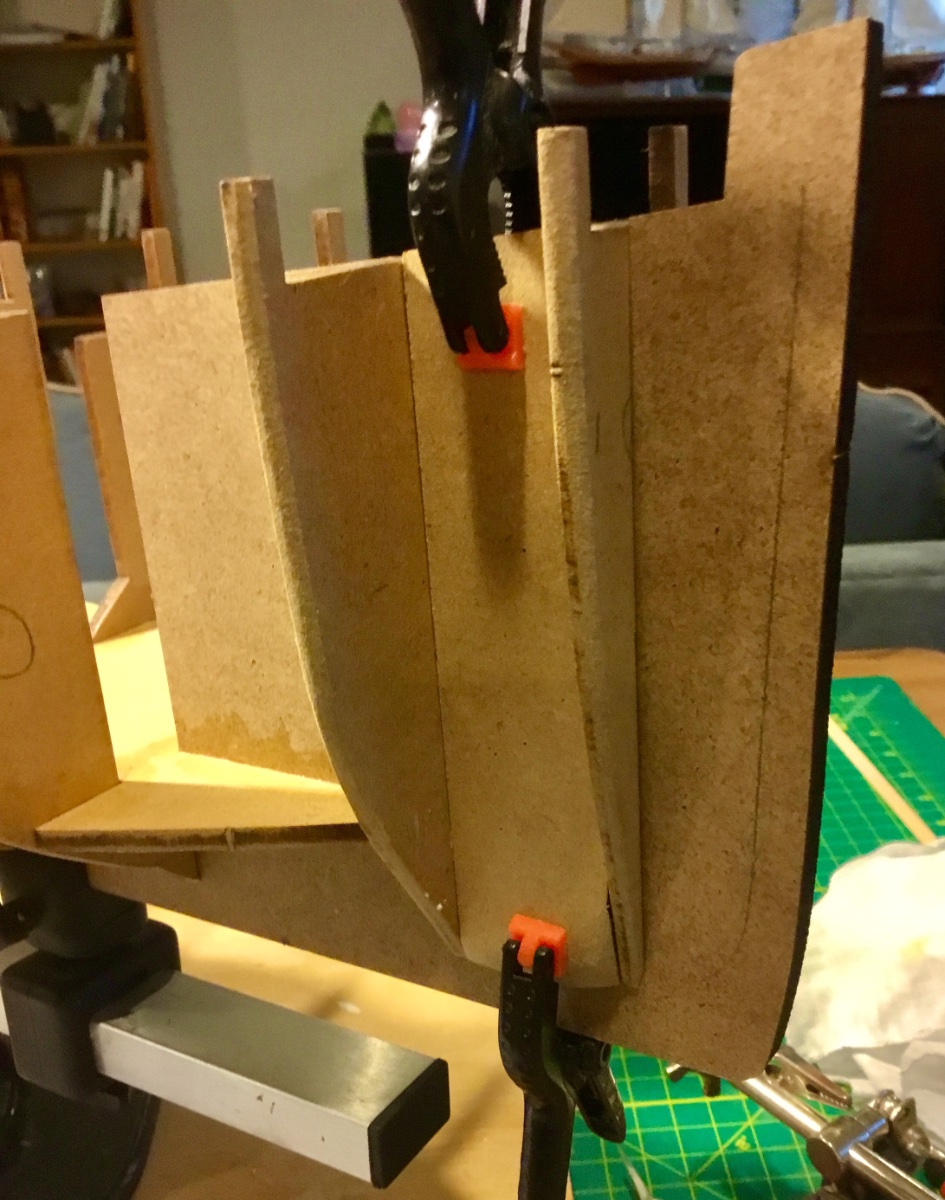
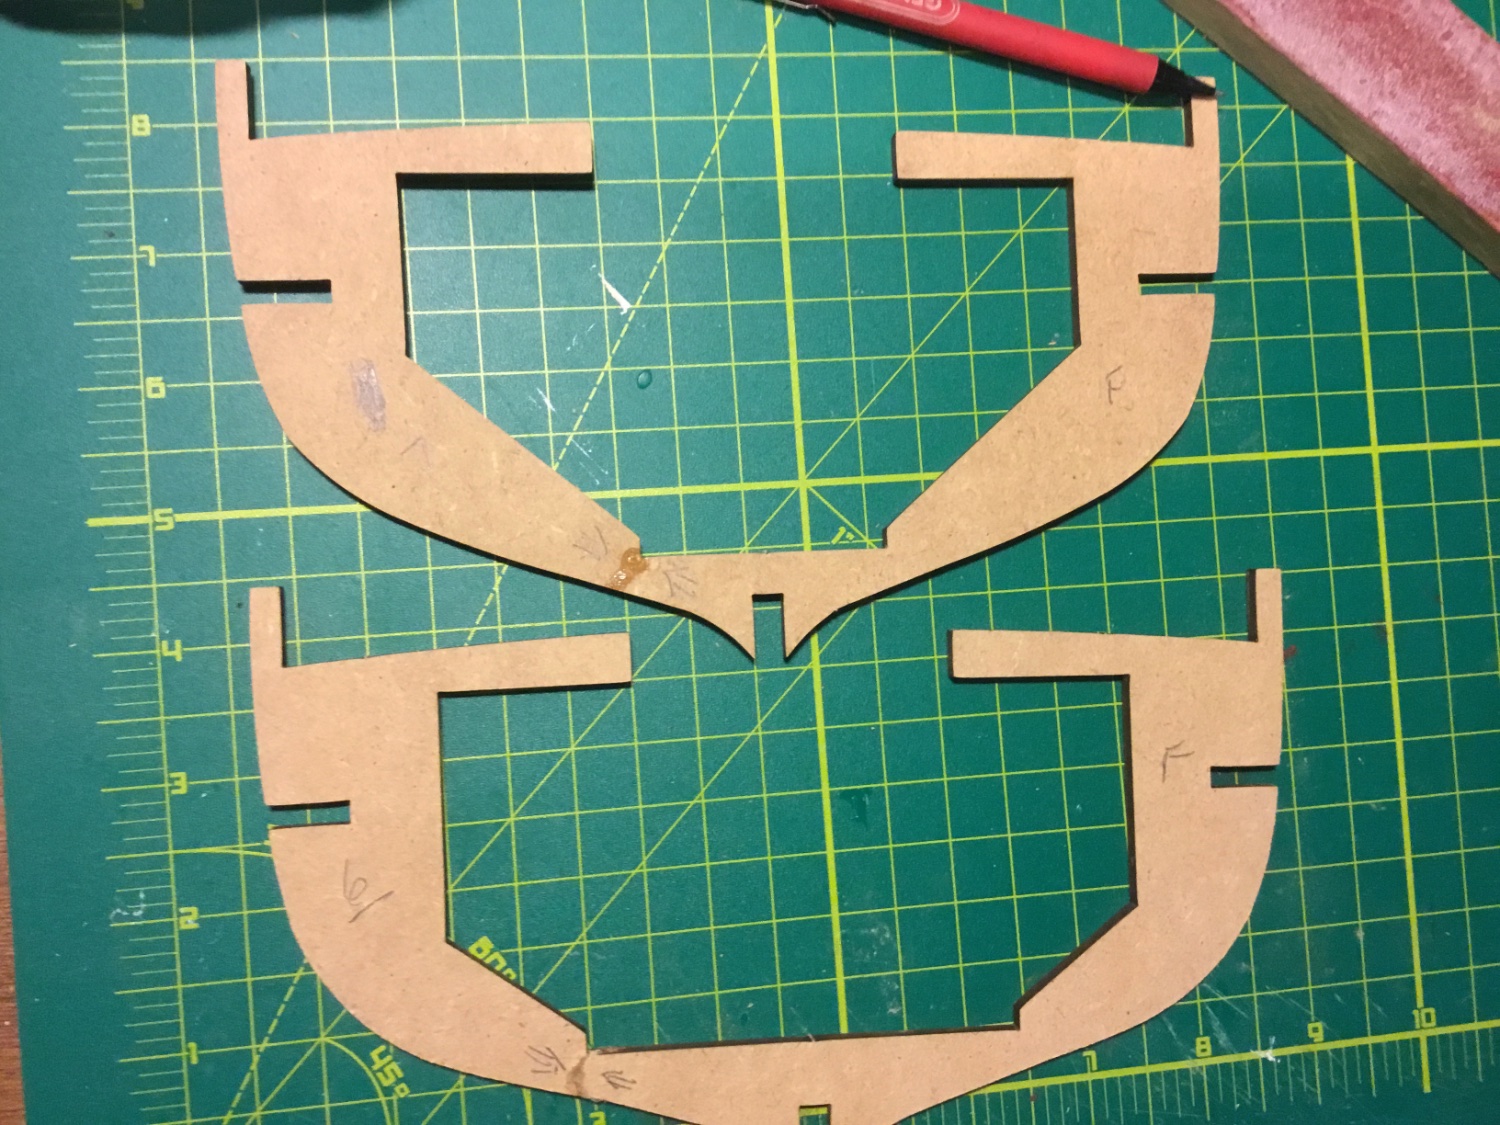
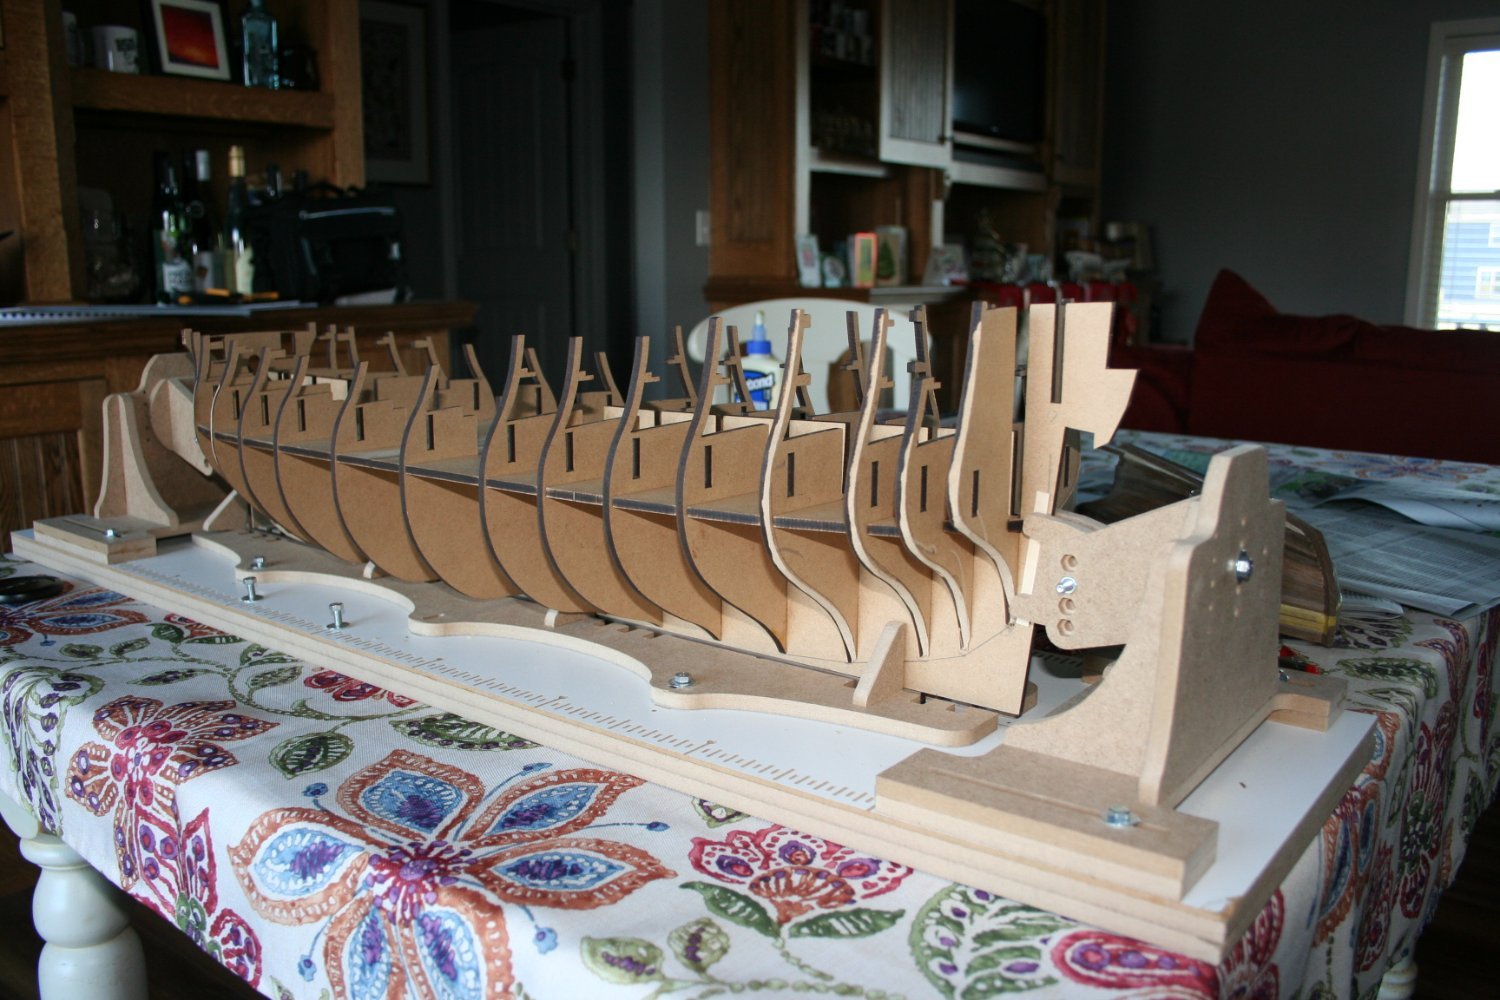
 Besides my first ever wooden build, the Goletta Elisabeth and a little side projekct, the Optimist Dinghy I decided to go for the Amati Endeavour 1:80 as my first bigger and more advanced model. I somehow really like the elegance and sporty look of those J-Class ships. Kit was openend and wow this is a whole different story than those other two kits I did. This will be way more difficult and time consuming, but I am on fire for it so checked out the instructions and plans and started constructing the hull right away. First step was to glue the two kiel parts plane together and adding the frames. Numbered them before and prechecked if they fit well. Needed some sanding first with some parts. To make sure to have them in a right angle to the kiel I and clamp them I constructed two rectangles out of some spare wood which worked out well. Next step was adding the rear and bow reinforcements and one reinforcement in the middle. Rubber bands did their job here. Net up adding the first deck and fixing it with the provided nails and again lots of rubber bands. Was a little bit tricky since the deck slightly bends to the right and left. Thats it for now. Net up is sanding of the frames, bow and rear parts to make the first layer of planks fit right. Will probably take some time.
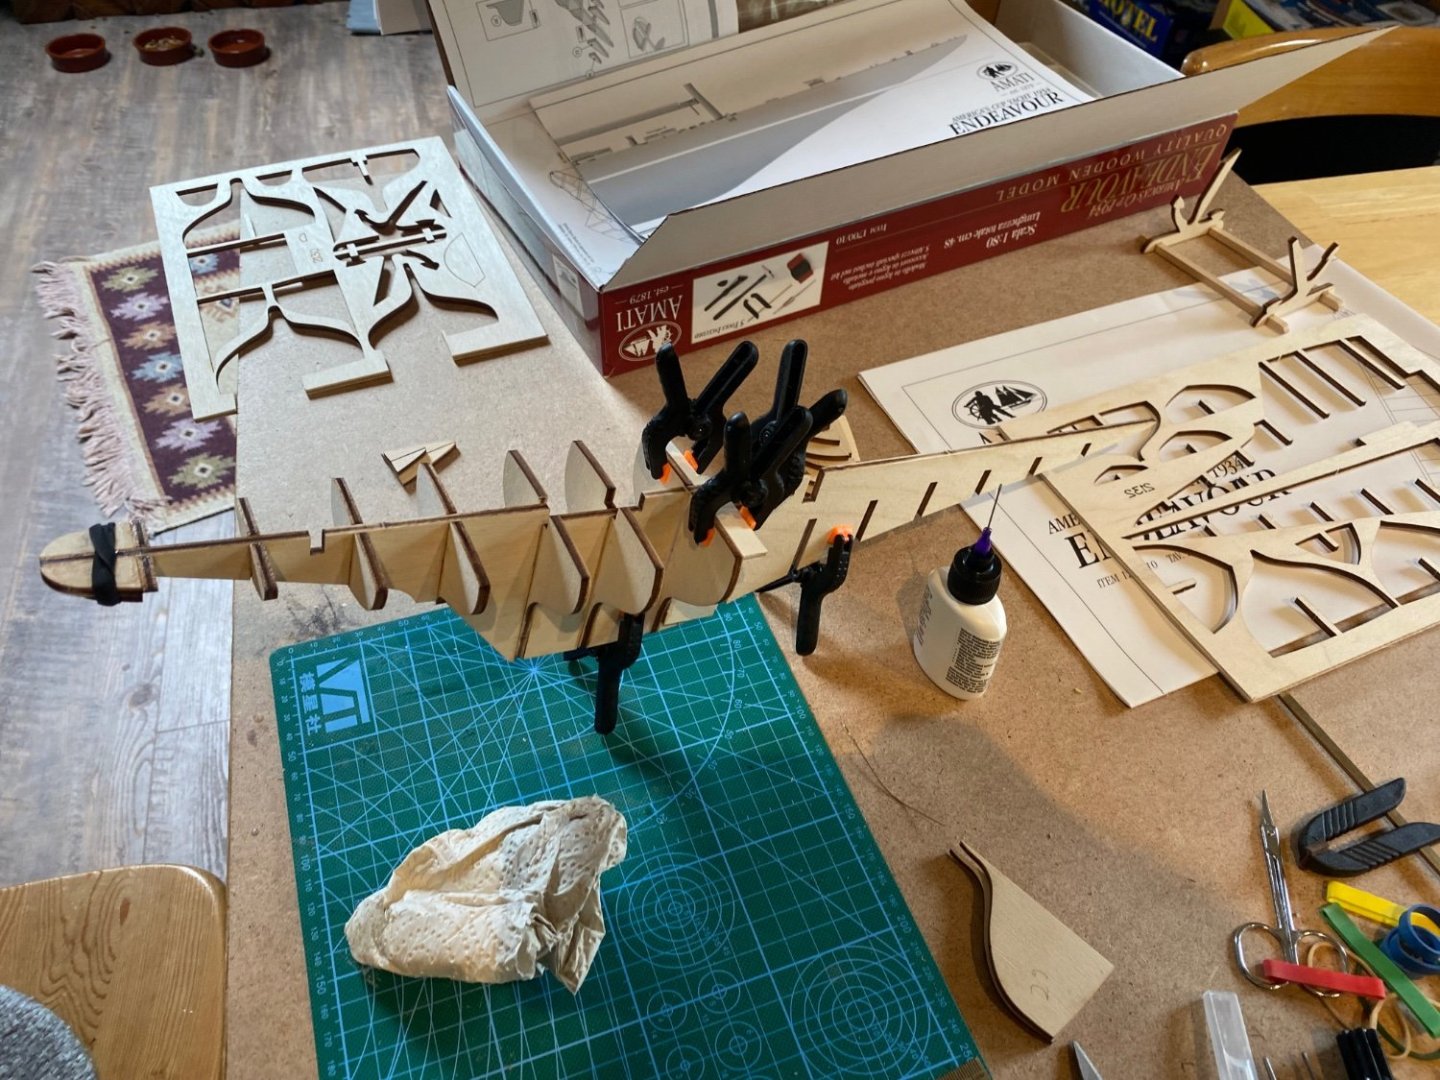

-
 I am starting a build of the Mississippi River Steamboat Robert E Lee. This is something that I don't know much about, and I would appreciate any advice. The kit is by Amati, and the photo of the box top shows the completed model. I have built several Amati kits and know that their attention to detail is superb, so I am confident that this will build up into a beautiful model. There are a lot of build logs of this kit on MSW and a lot more of other Mississippi riverboats, so I will forego the history lesson and post links to the other build logs. This will help me find them in the near future when I am trying to figure out some complicated assembly. Please let me know if I missed your build. Mississippi Riverboat Builds on MSW Robert E. Lee Steamboat by John Ruy - FINISHED - Bluejacket Shipcrafters - 3/32” to 1’ scale 1:128 Beautiful build, vintage kit, good history and discussion. Robert E Lee by rodgerdodger - FINISHED - Amati Beautiful build, ~7 months Robert E Lee by Script - FINISHED - Amati - 1/160 Mississipi Riverboat Beautiful build, incomplete log after system crash Robert E Lee by lazyguy - Scientific - scale 1/8" = 1.45’ Vintage kit finished after 27 years!! Robert E Lee by Mike Dowling - FINISHED - Constructo Plank-on-bulkhead hull, hand-built stairs, natural finish, 4 months Robert E Lee steamboat by bcochran - Pyro - 1/163 Vintage plastic model (1961), lots of historical information King of the Mississippi by john46 - FINISHED - Artesania Latina - scale 1:80 Beautiful build, long, detailed log, modeler passed away suddenly when nearly complete Robert E Lee by Dan Evans - Amati - 1:150 Incomplete
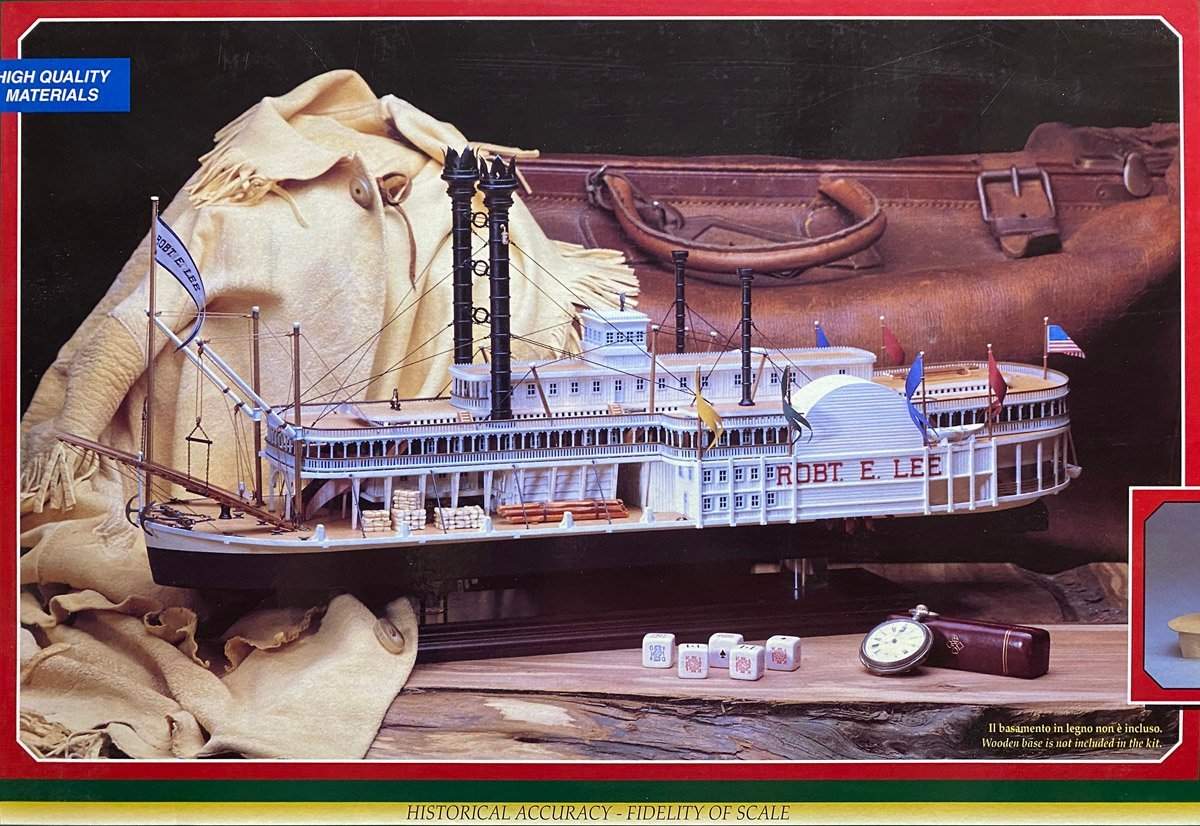
- 58 replies
-
- 2
-
-
- Robert E Lee
- Amati
- (and 4 more)
-
 Well its time for a new build now that ENDEAVOUR is ostensibly complete. My next choice of kit still had to have an Australian flavour so I chose the BOUNTY. Choosing which BOUNTY to buld came down to what I could afford and what was available. I considered the Artesania version but was not keen paying for a single sided planking and open side with interior. I also stumbled upon a sale for Amarti BOUNTY's through Premier Models in the UK so I ordered one and it arrived safe and sound. I was surprised on opening the box at the difference in quality between the Artesania and Amarti kits. The Amarti materials appear and feel much better quality and the use of timber rather than ply for the keel, stem and stern posts, channels etc means one don't have t find a way to mask exposed ply ends. The ply stock itself also appears better quality with far les tear-our/delamination that the artesania material did. I also like the Amarti rigging (blocks, deadheyes, hearts, and parrels parts as these too are timber and not laser cut ply. I also like the Amarti threads even though I would prefer scale rope but it appears that this build may be a commission and will be an out of the box build. So lets get to work: FRAMING: Thank heavens for DAVOSHIPMODELLER on YouTube. He has a playlist for the construction of the Amarti BOUNTY and the identification of kit issues starts at the pre-framing stage. The first big is the location of the Mizzen and the implication that notching the false keel has with the location of Frame 13. The most effective solution is to notch out Fame 13 and then adjust the length of the Mizzen mast down the track. The other main issue is the shape of the false keel stem support and the reinforcing parts on either side. They do not match the plan nor the shape of the laser cut timber stem. Best to fix now before any assembly take place. Other changes made also follow the DAVOSHIPMODLLER experience including cutting out sections in the frames between Frame 11 and 13 and also Frame 14 and 16 to permit planked decks to be installed should one wish to have open hatched on the main deck.
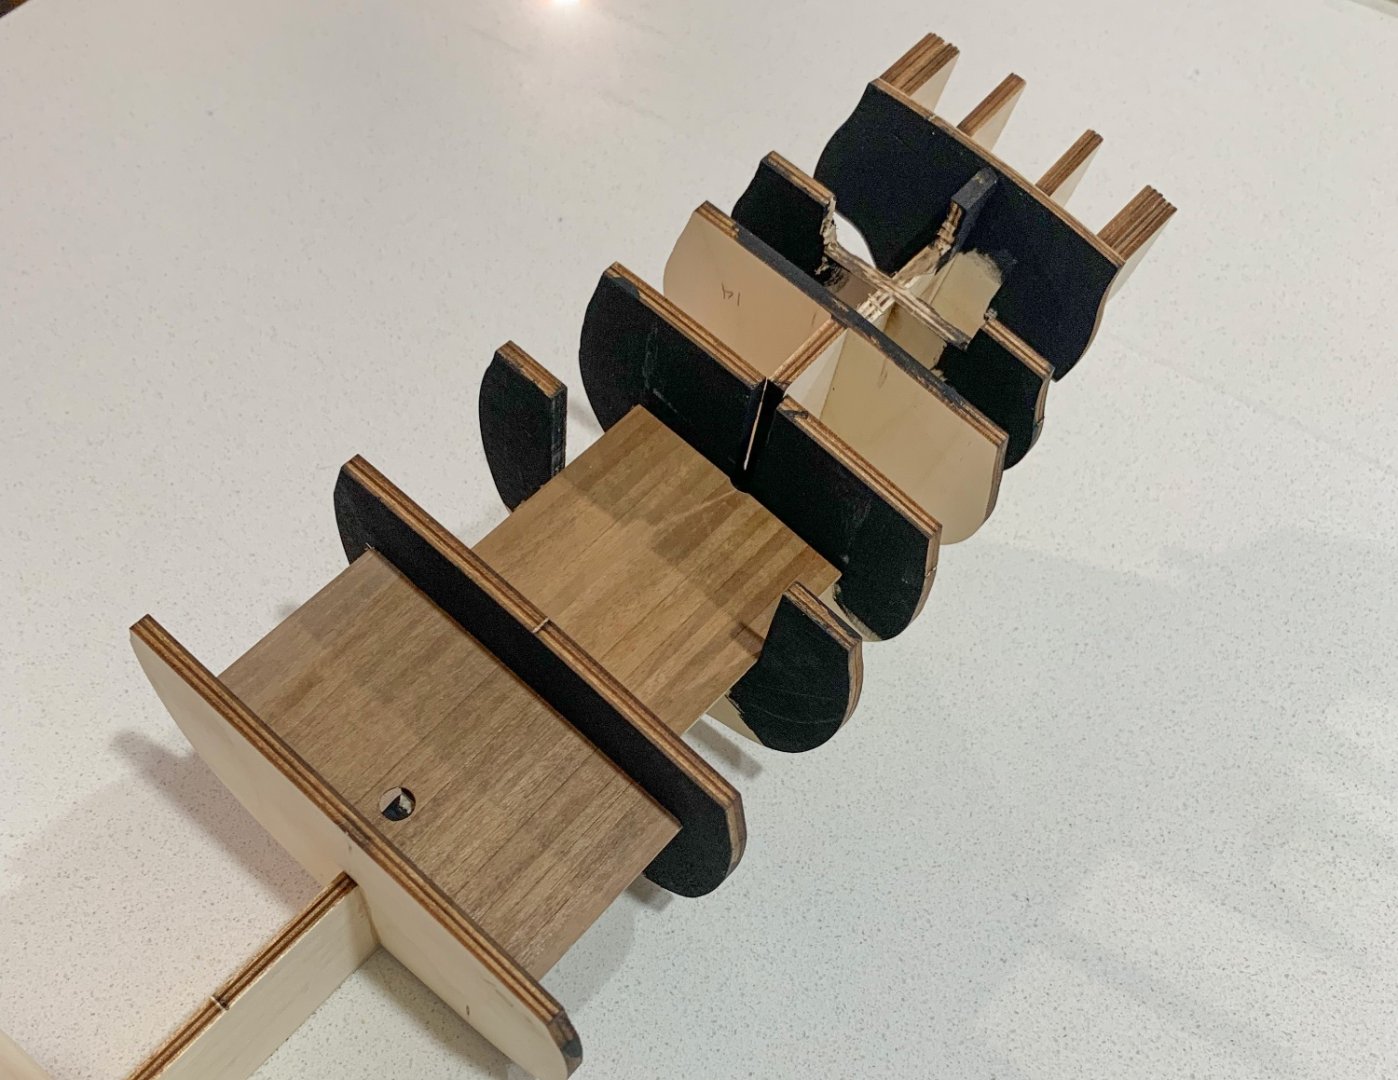
-
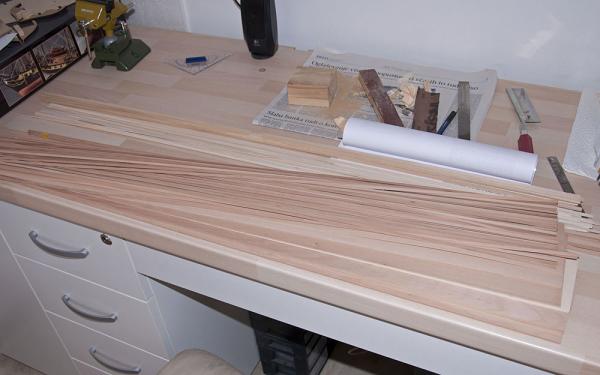
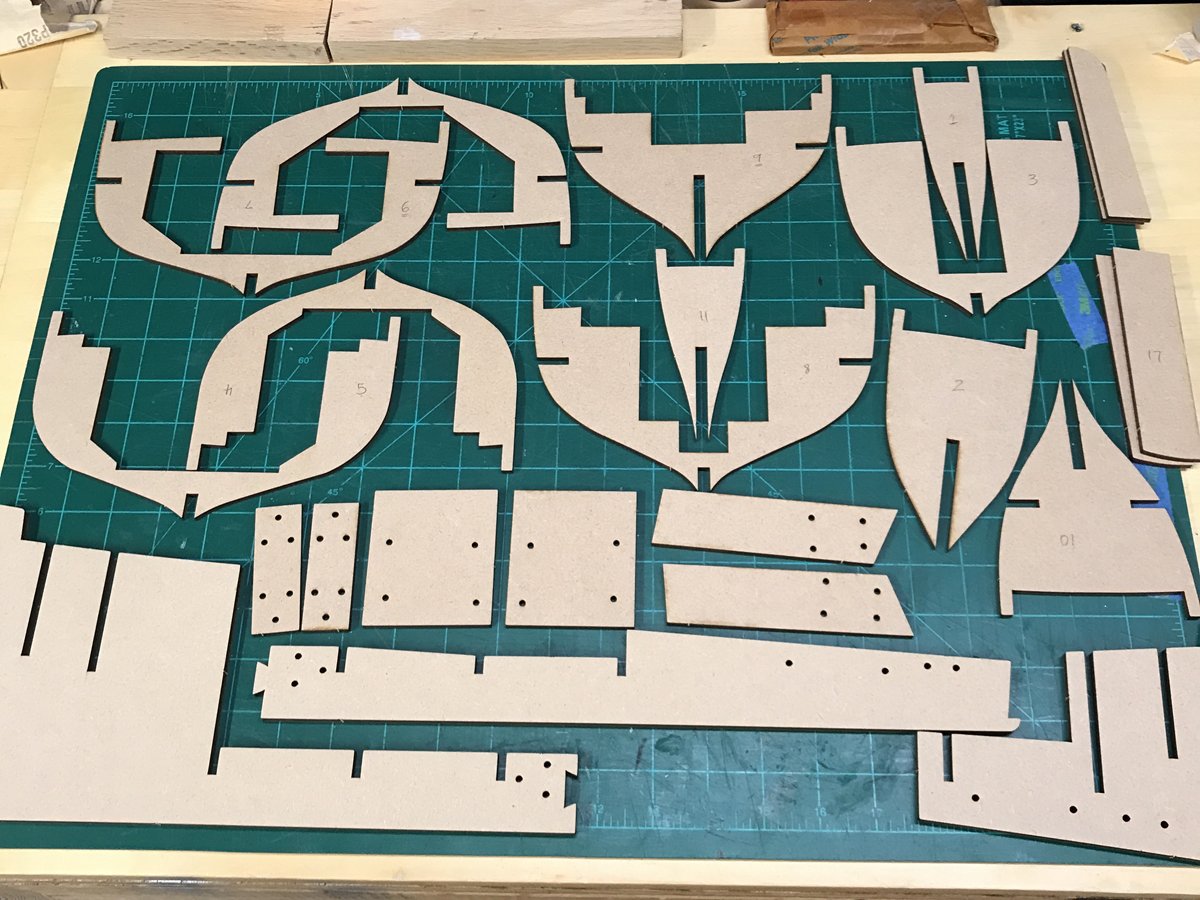
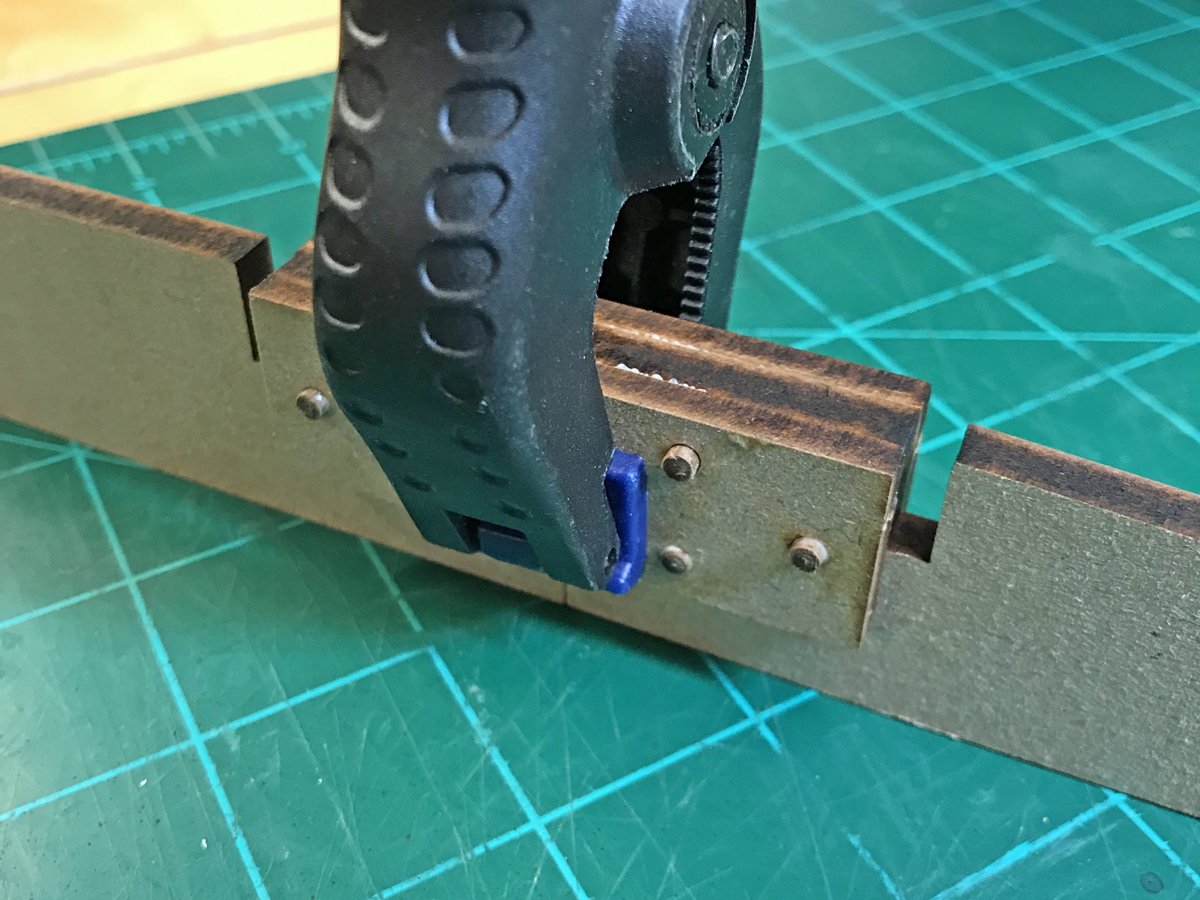
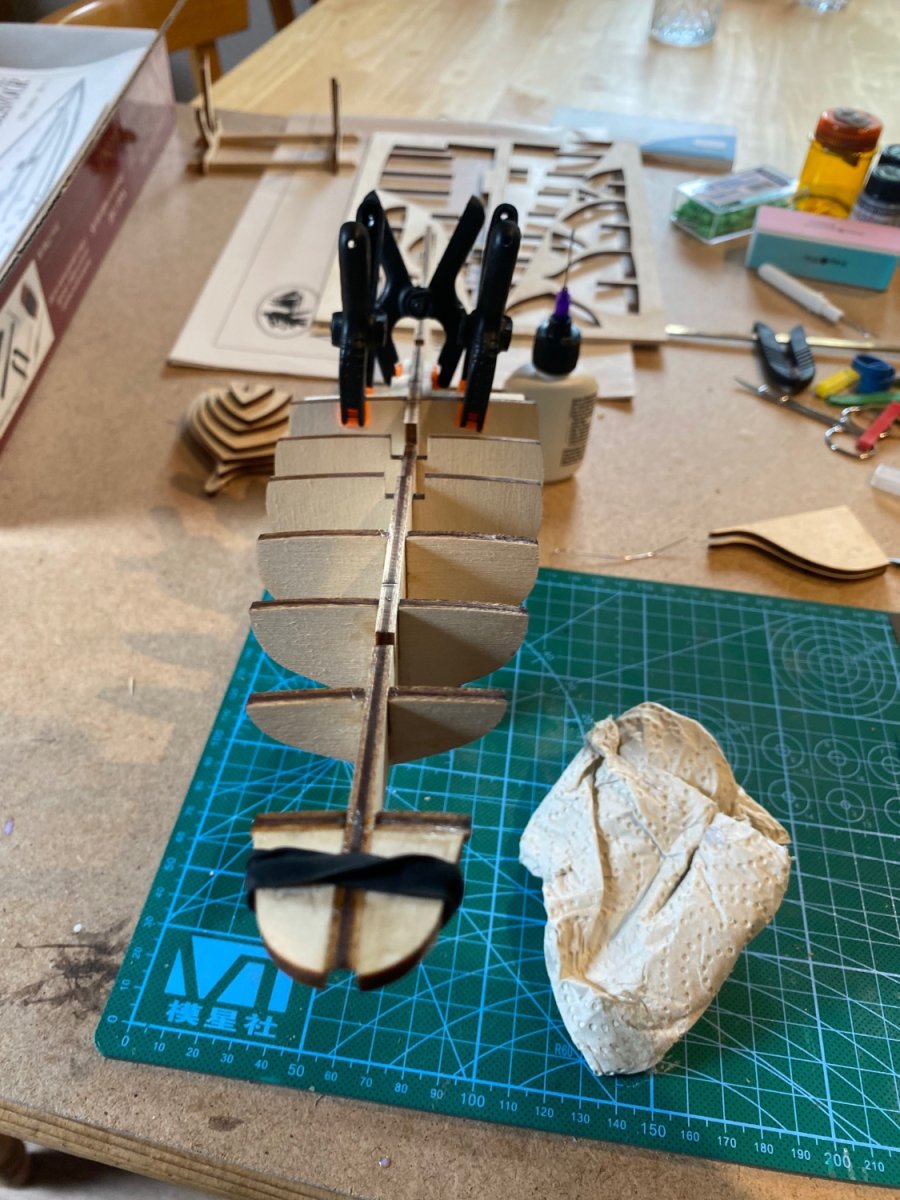
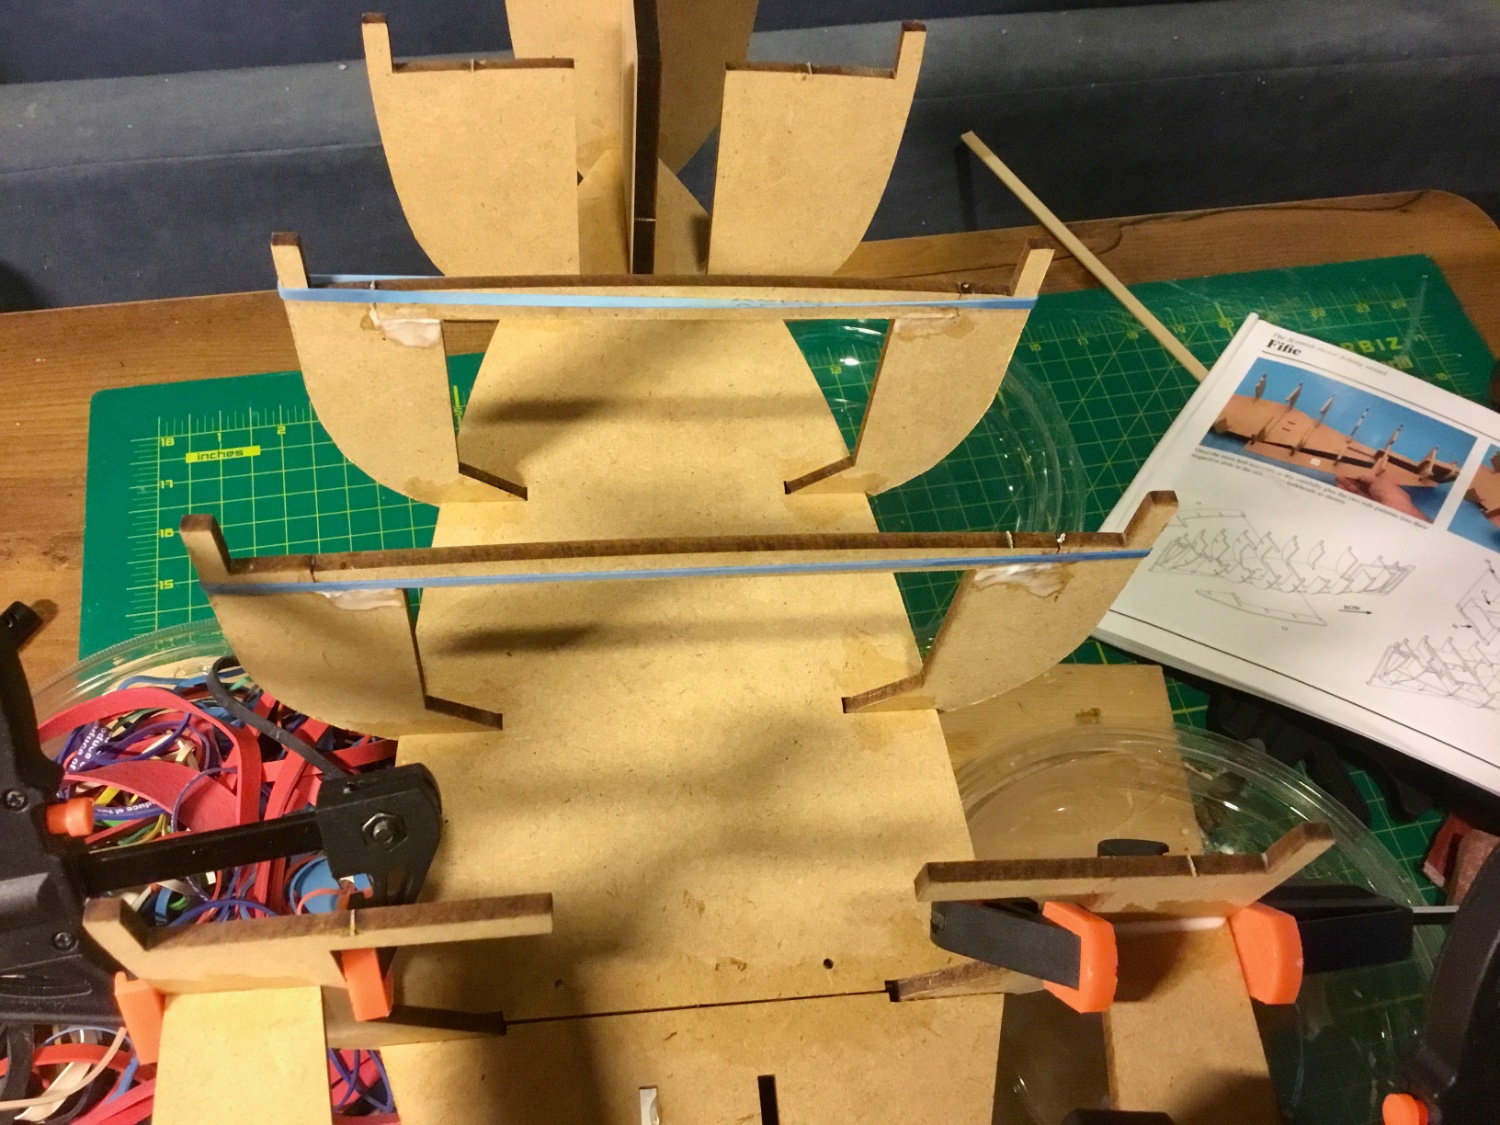
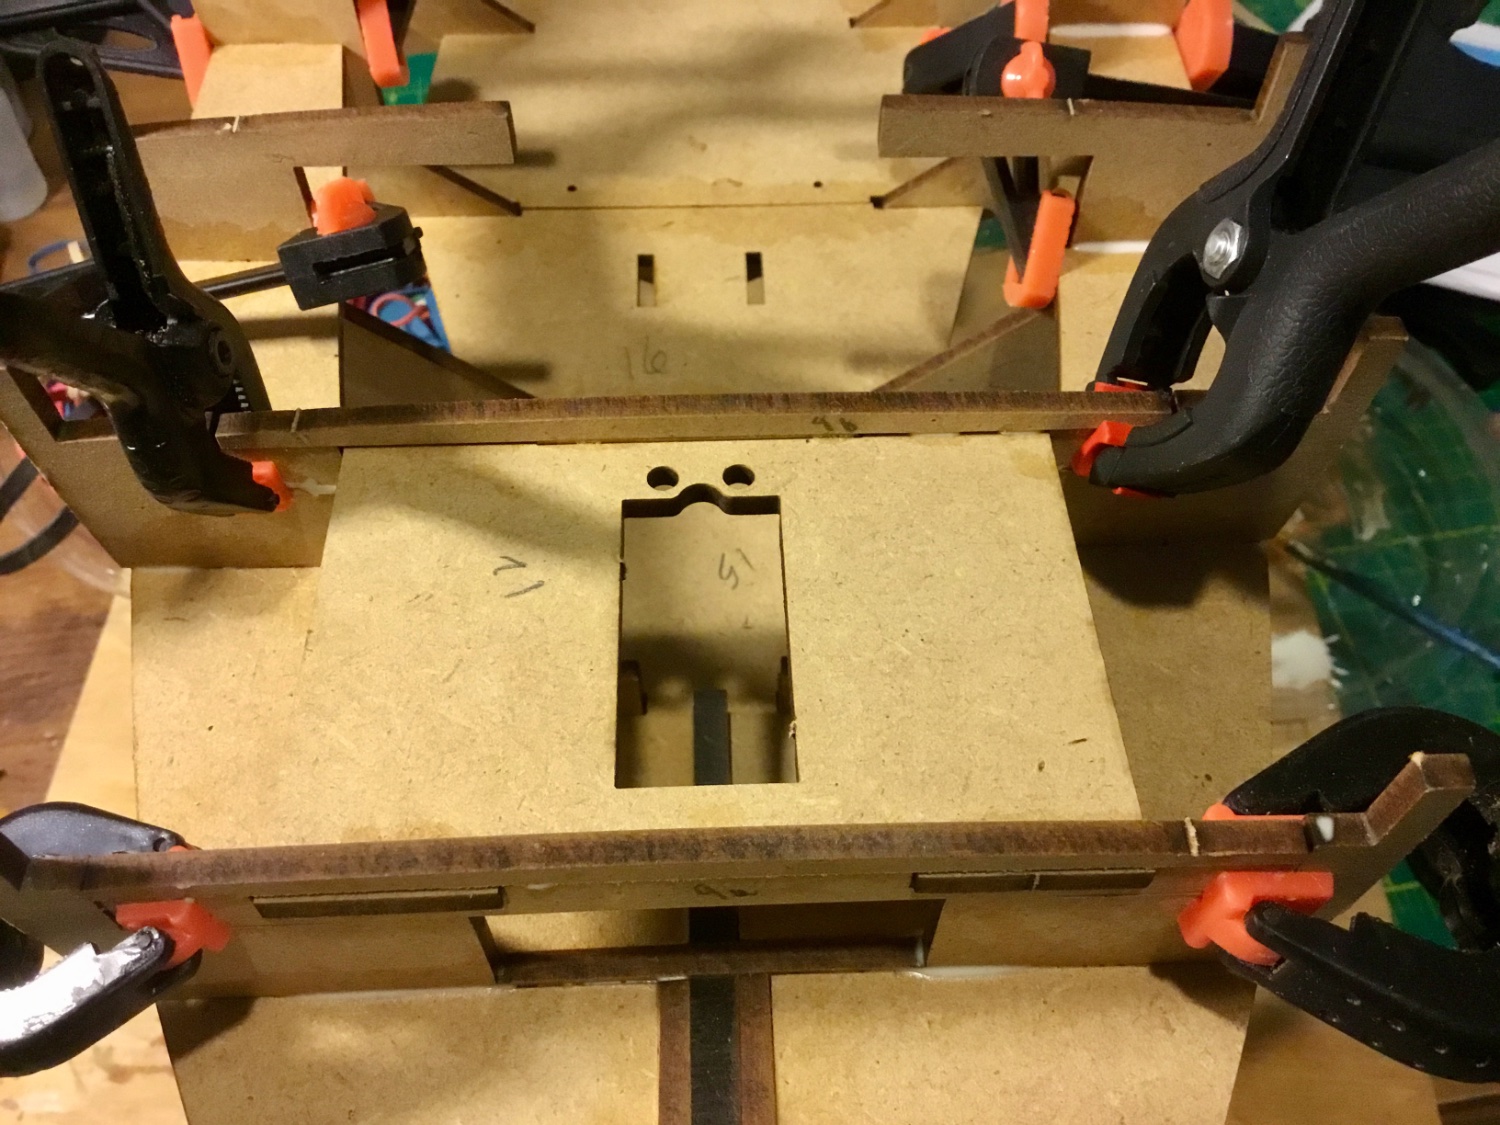
 Began build of Fifie Scottish fishing vessel by Amati. MDF hull parts presented a few problems. Sanding of parts required use of a respirator and shop vacuum because of the fine dust. Somehow one bulkhead broke and another almost did even though I thought I was being very careful. Never had that problem with wood frames. Plans called for numbering parts before removing from laser cut sheets and rough beveling fore and aft bulkheads before installation. It would have been nice if Amati had used the laser to number the parts and indicate an approximate line for the beveling. I assembled the hull parts following the directions , and used a batten to fair the frames. Next up is to install the main deck panels and then begin the first level of planking.
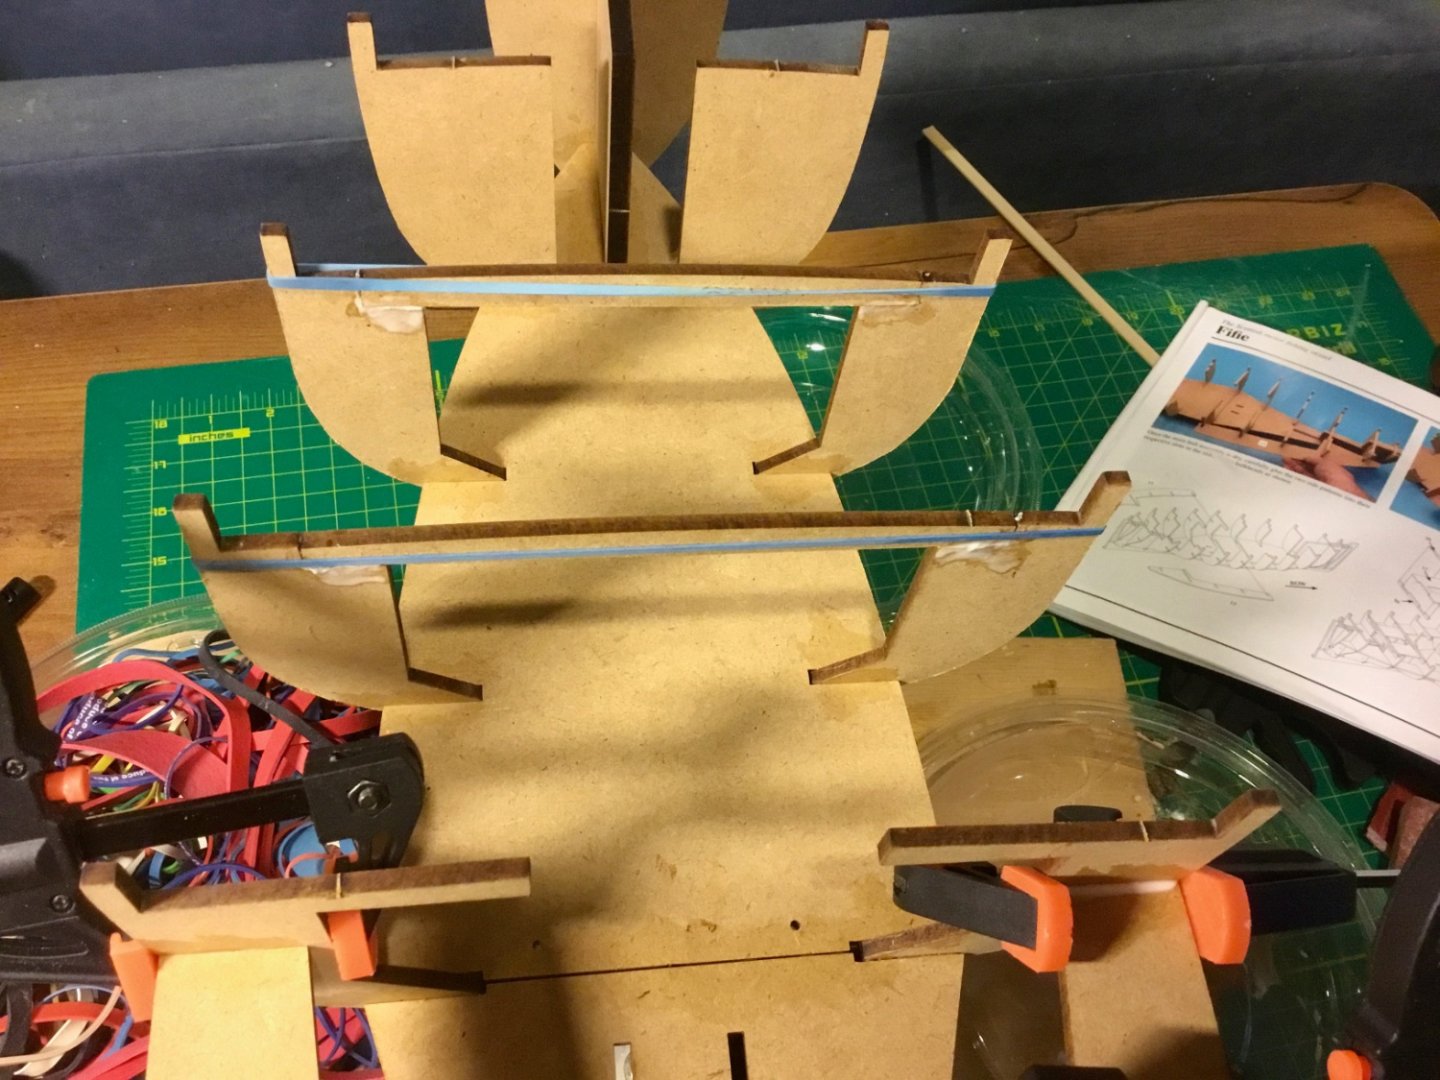


-
 I’m going to take another stab at a build log, I have been eyeballing this kit since Chris Watton gave his little preview of it way back when.... I found a few build logs on here but I think only one of them has been completed. I plan on doing my usual kitbashing - replacing most of the kit wood with Pear, Castello Boxwood, Maple, Holly, Redheart, etc.etc. I will probably break down and use some white paint where it’s called for but I hope to come up with some alternative to the decorative paper decals that are on the upper hull - thinking maybe I can do some inlay work or use some inlay strips or something as I don’t want to use the paper and I don’t really want that much bright coloration on my Revenge. I purchased the kit from Ages of Sail - first time I didn’t use CMB for a kit - even with a 5% discount CMB was over $30 more delivered.... I must say that Ages of Sail was top notch, a human answered the phone every time I called, they were knowledgeable, competitive and efficient, called right at closing - they still took my order, packaged it very well and got it out the next day. I won’t hesitate to buy from them again. Not affiliated, just great customer service and earned a great shout out.I won’t show the kit contents- James H. Has a great review on here and several logs show what you get. I must say that the kit is very nice, the supplied strips and dimensioned wood is very high quality, the MDF is great, etched brass, cannons and embellishments are well done. I’m not a big fan of the African Walnut (Dibetou) they provide but the laser cutting is top notch and as long as you are cautious with the grain direction it will be just fine. I will probably be re- making most of it with other woods though.
-
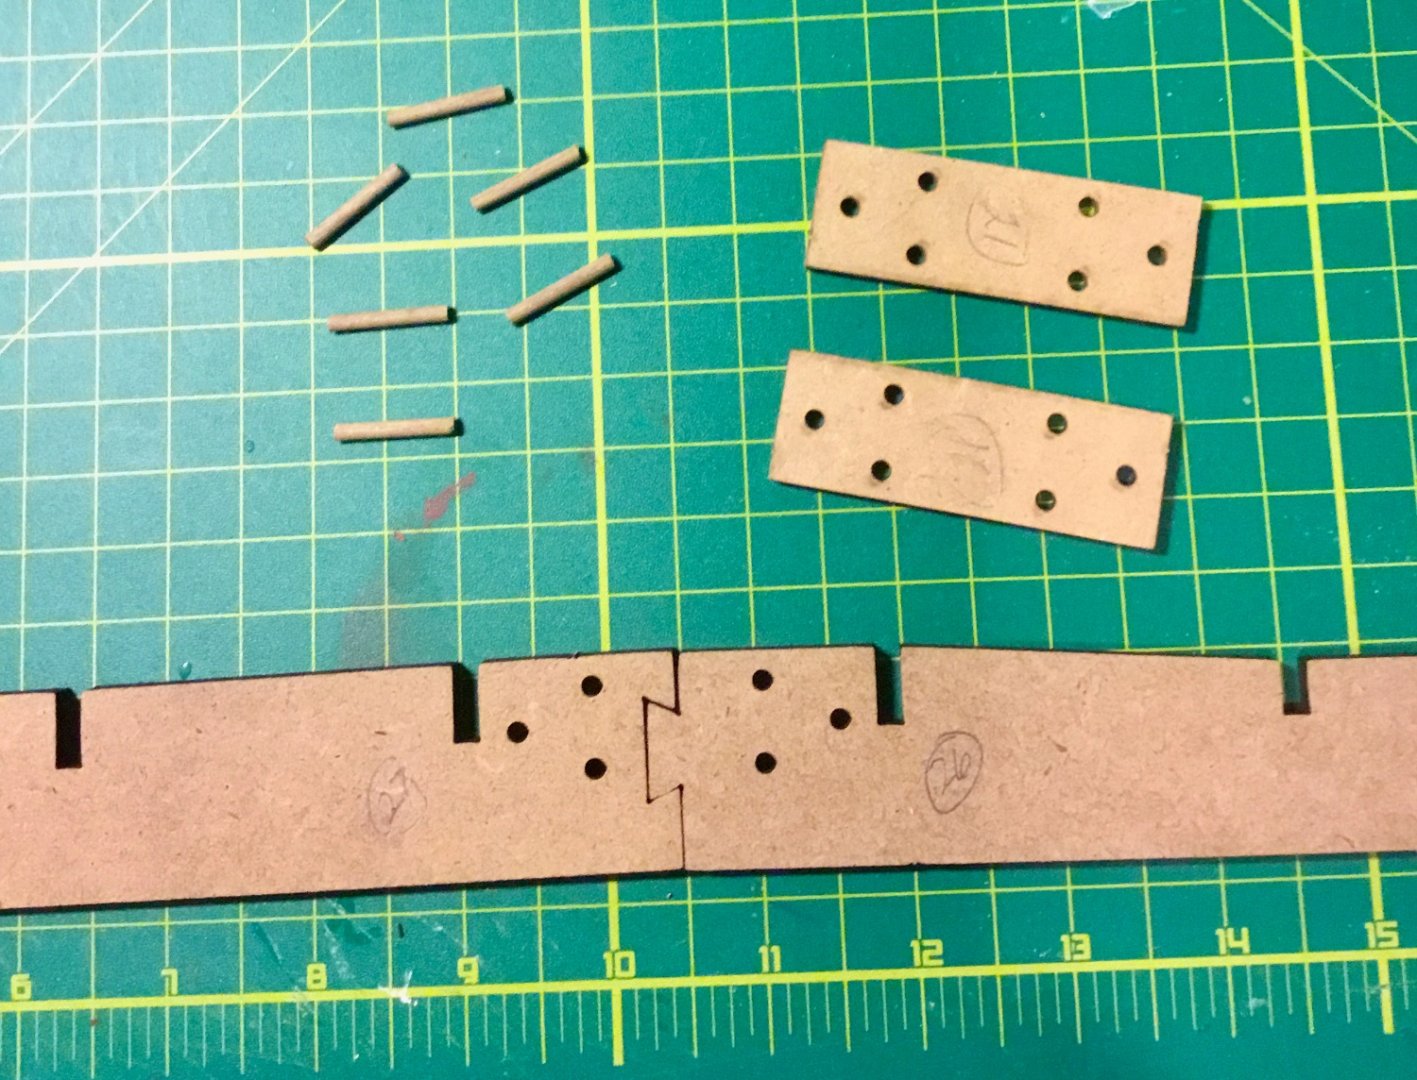
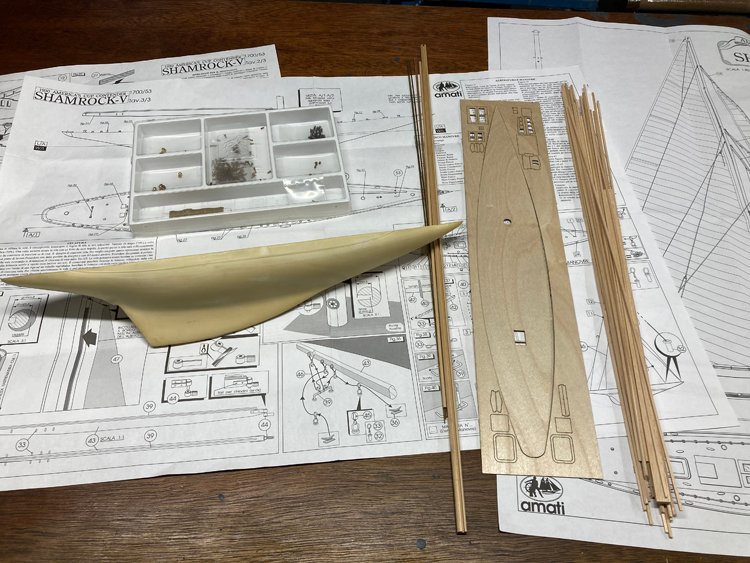
 Hello Again, Well, I certainly didn't expect to be building a J Class yacht until yesterday when a friend called and asked if I'd build his Shamrock V for him. He has had the kit collecting dust on a shelf for many years and doesn't anticipate ever getting to it, so asked me if I'd build it for him. I have learned that Amati makes a range of America's Cup yacht kits, but the Shamrock V is one that has been discontinued. Since yesterday I have been poring over the kit. It will prove to be a relatively simple build, but appears to be a high quality kit. The fittings are excellent and the instructions and plans are very clear and easy to understand. (I do have a question about the rigging, but I'll ask that in a separate post under the right topic.) This kit has a pre-cast hull ( a type of resin, I guess) which will cut down on the amount of work needed considerably. I have never added sails to a model before, but I think this is one model that definitely needs them, so I'll be reading through everything I can find on making sails. The fabric provided in the kit is very fine and I don't think it will need to be replaced. Here are a couple of shots of the kit: So, an unexpected change of pace. David
- 31 replies
-
- 13
-
-
- Shamrock V
- Amati
- (and 2 more)
-
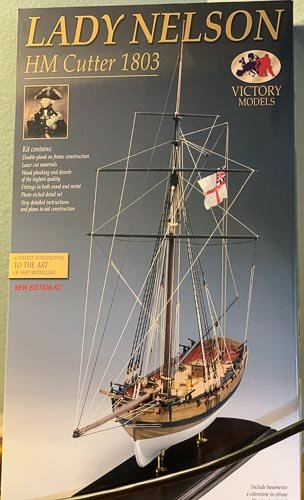
 I'm going to slowly re-create my build log on Lady Nelson I published on another forum. I've left that forum never to return so I'd like to have an active version of the build log I completed there. The rest of this post and this log is my posting my off-line copy of that build log. I hope perhaps it might help someone new to modeling. For me this simple kit was a reintroduction after and extended absence. I'll throw a few [NOTES] in it as I go, the log was started originally in January 2020. So here goes: ------------------- I started all my ship builds with a purpose; I learned the process with the AVS practicum, developed technique and accuracy with the Granado, painted with exotic woods to achieve color differentiation with the fully framed Fair American, achieved what I could of historical accuracy with Pegasus with plans from the Maritime museum and Antscherl's books, built a “74” with Vanguard. After 8 models I was done, finishing the last in 2017. Ultimately though I missed the building part so I recently purchased the Lady Nelson. It’s a small ship but the process is the same, it’s a nice model to spend time with, without spending a LONG time building it. My detailed build logs for the Fair American, Pegasus, and Granado were lost due to infamous system crash on Model Ship World, though the somewhat abbreviated Vanguard log is still there. Sadly I wasn’t smart enough to keep offline copies then. So, in the hopes of providing some entertainment, help with building models, or demonstrating how not too depending on your viewpoint here’s my log for the Amati Lady Nelson. The kit, despite the small craft, is another well designed Victory model series designed by Chris Watton, although he informs me it was 30 years ago. The material, parts, plans, are all of good quality. I [then] only build from kits by Amati or Caldercraft, I am confident I’ll have a good start when I open the box. [NOTE: I'm since a bigger fan of Vanguard Models and Syren Ship Model company. My current build is the HM Cutter Cheerful, link below.] I’ve reached the point where I’m far more dependent on the plans than instructions. That’s good in this case because the plans are well done and the instructions are surprisingly brief. I’m not sure a beginning modeler would get what they need with them, so then the importance of a website like Model Ship World to seek additional help. Without being overly critical the MDF in my kit is a bit soft and the walnut laser cut part sheets are too brittle, I’ve already broken and repaired a few parts despite being careful in removing them from the sheets. I would still buy the kit, maybe my wasn’t stored in the best place at the store I purchased it from. It doesn’t deter my recommendation for Amati Victory series models. I have a kit and now a job to do, who says retirement is boring.
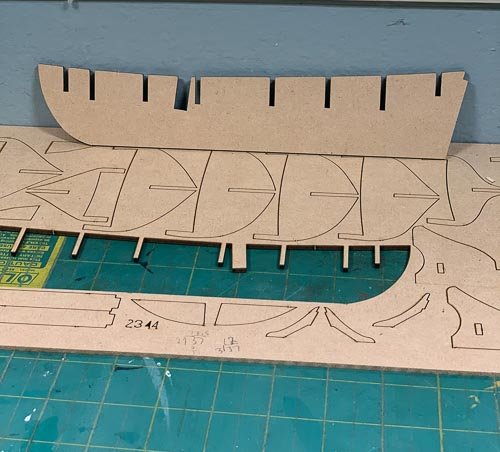
- 55 replies
-
- 12
-
-
- lady nelson
- victory models
- (and 2 more)
-
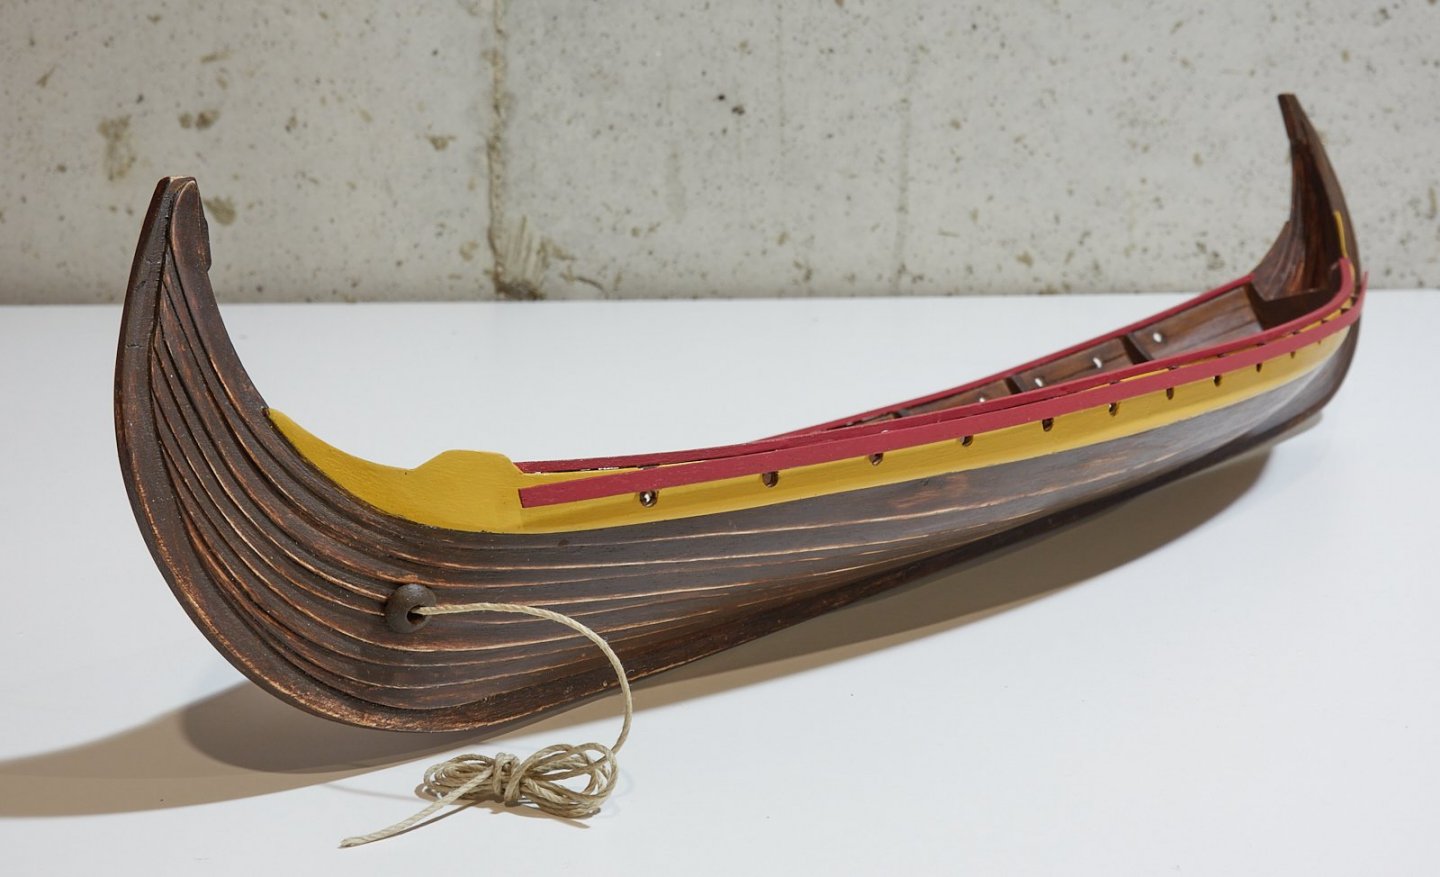
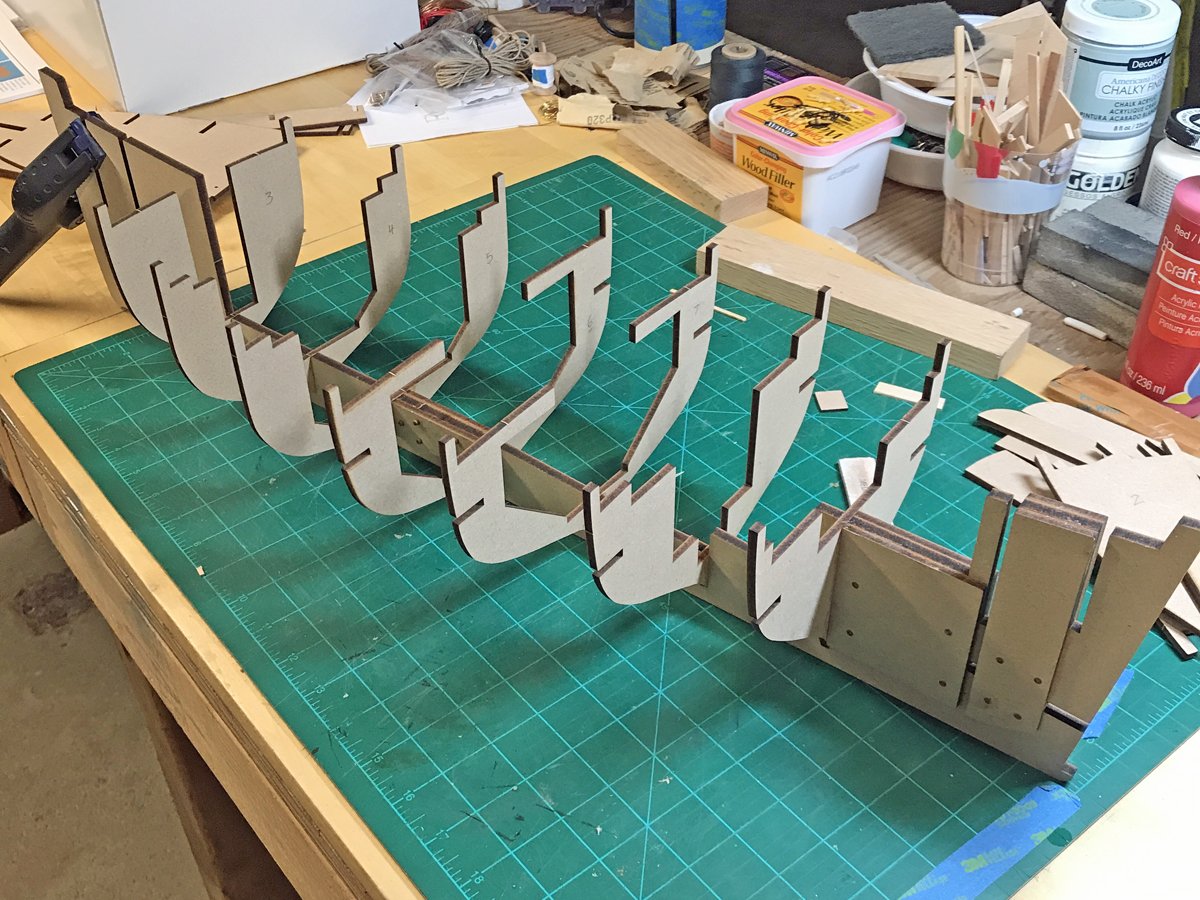
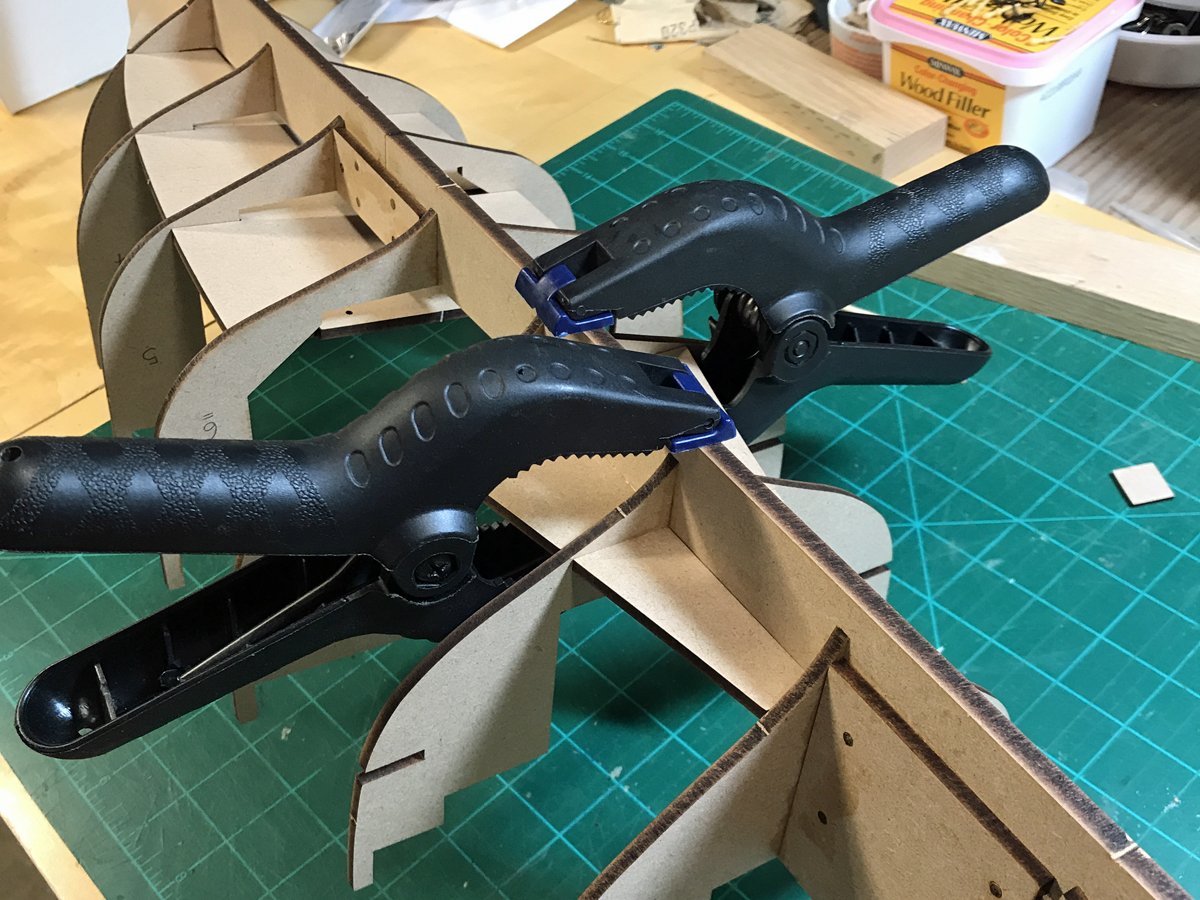
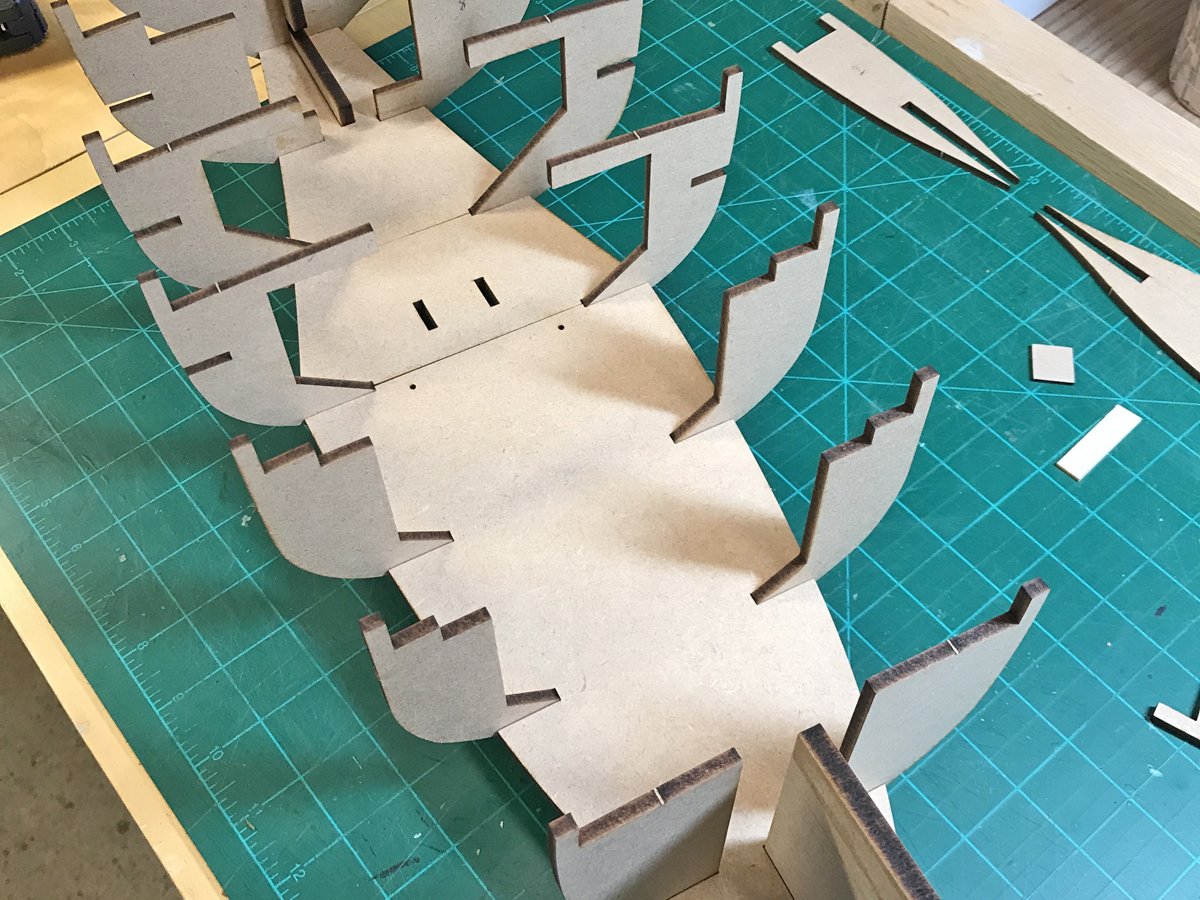
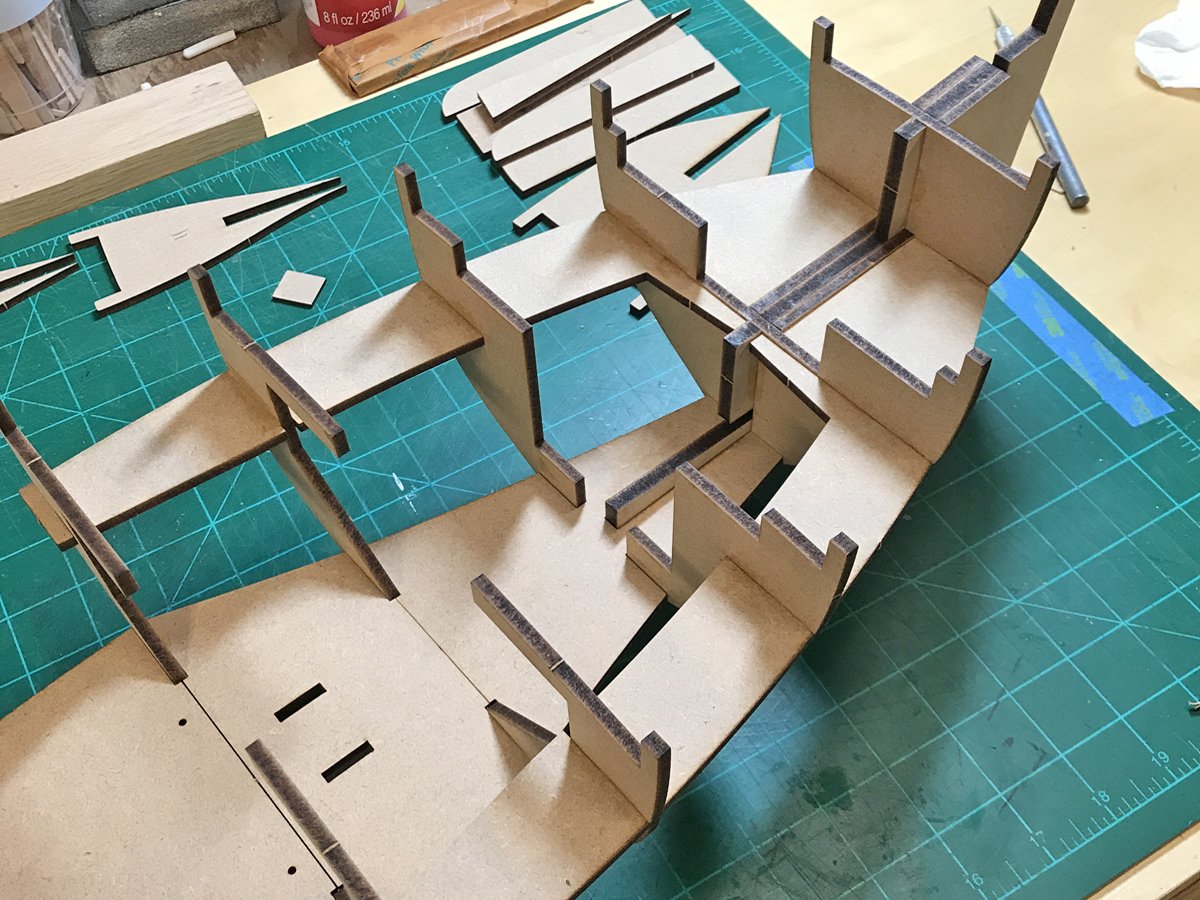
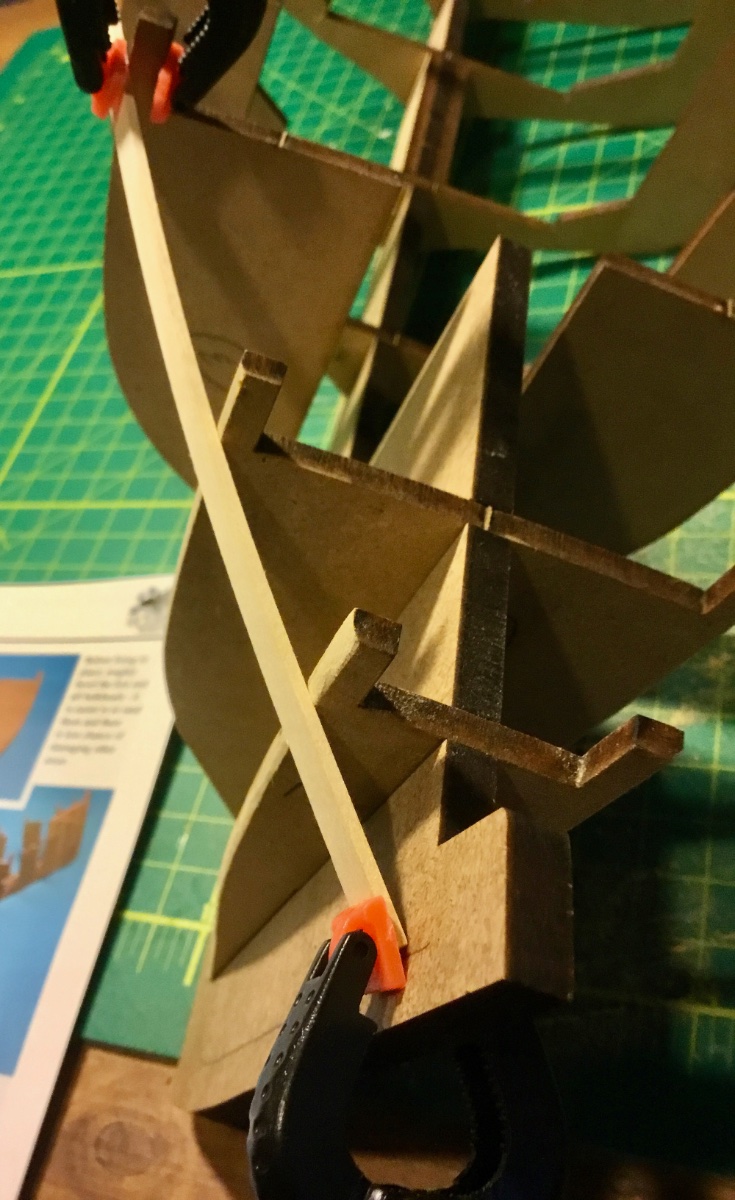
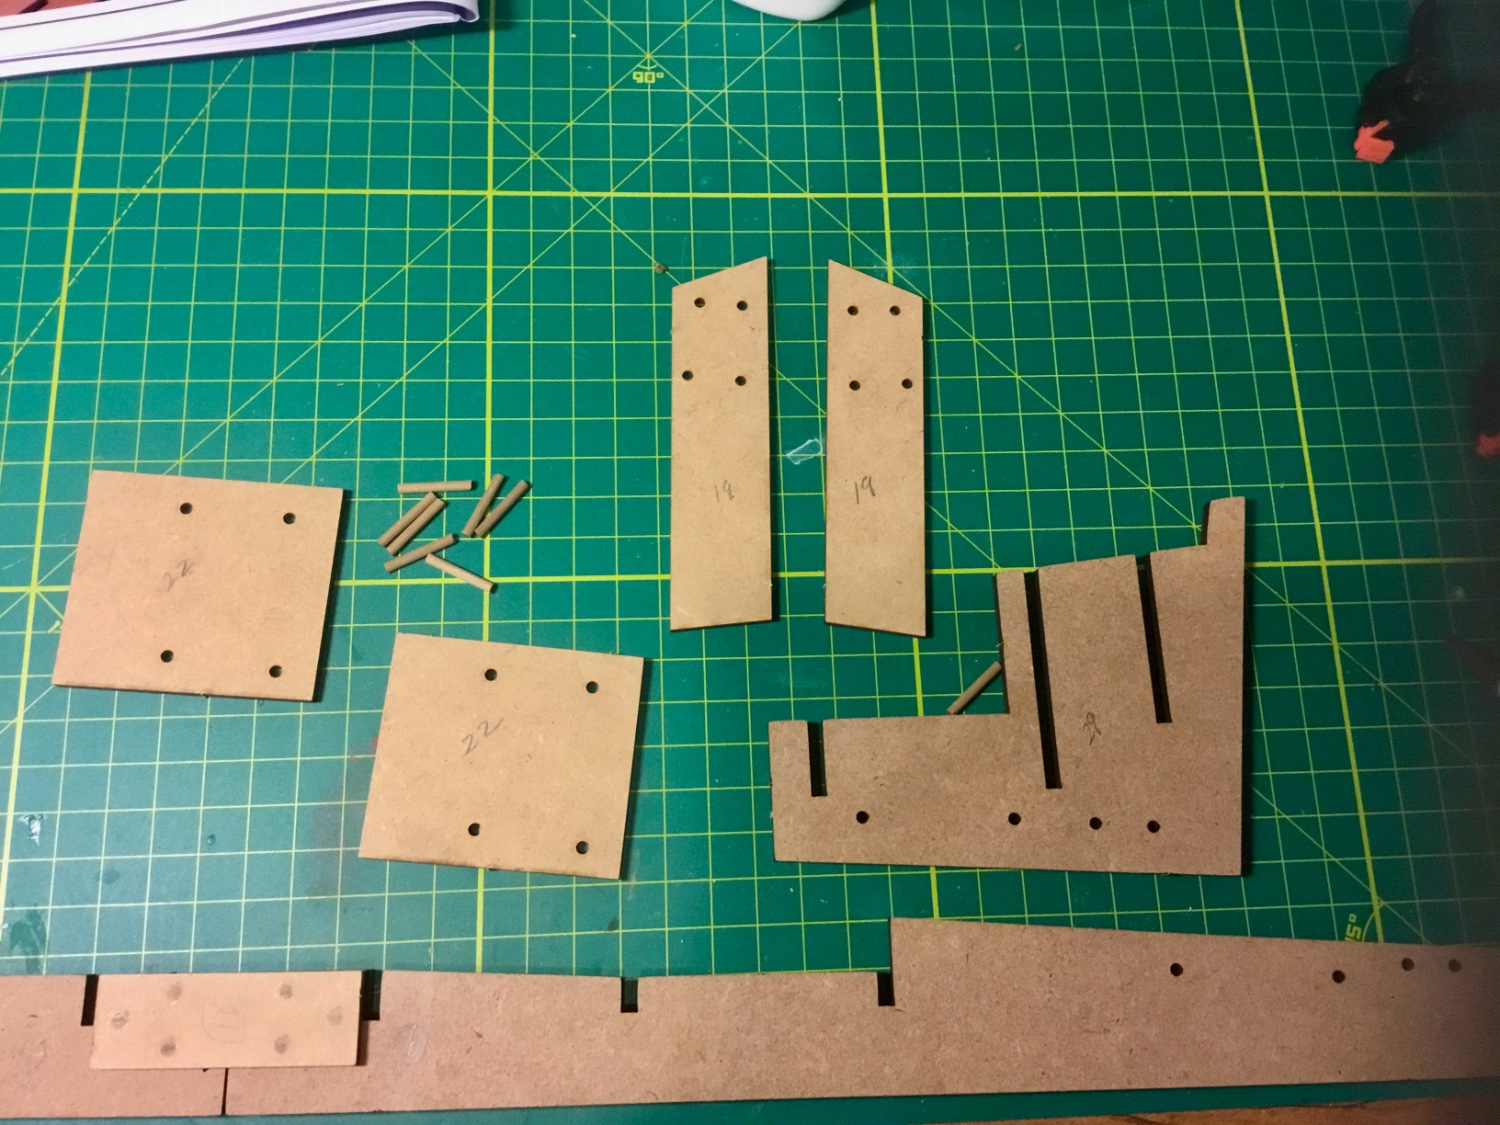
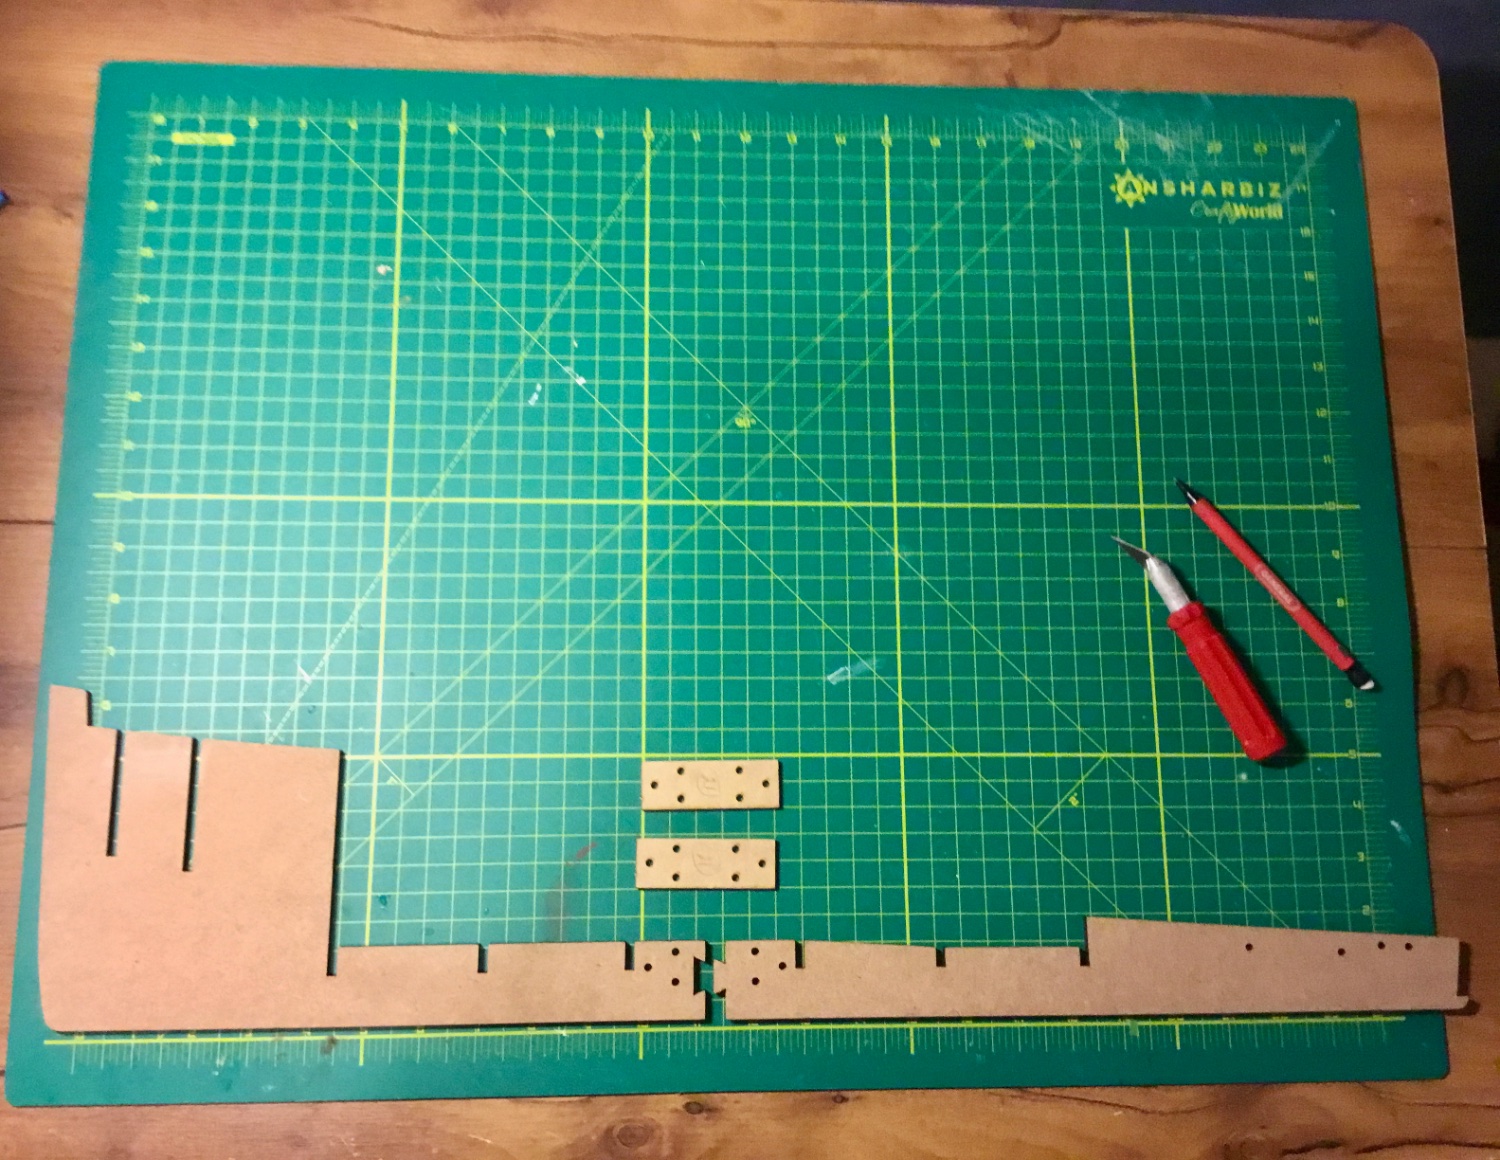
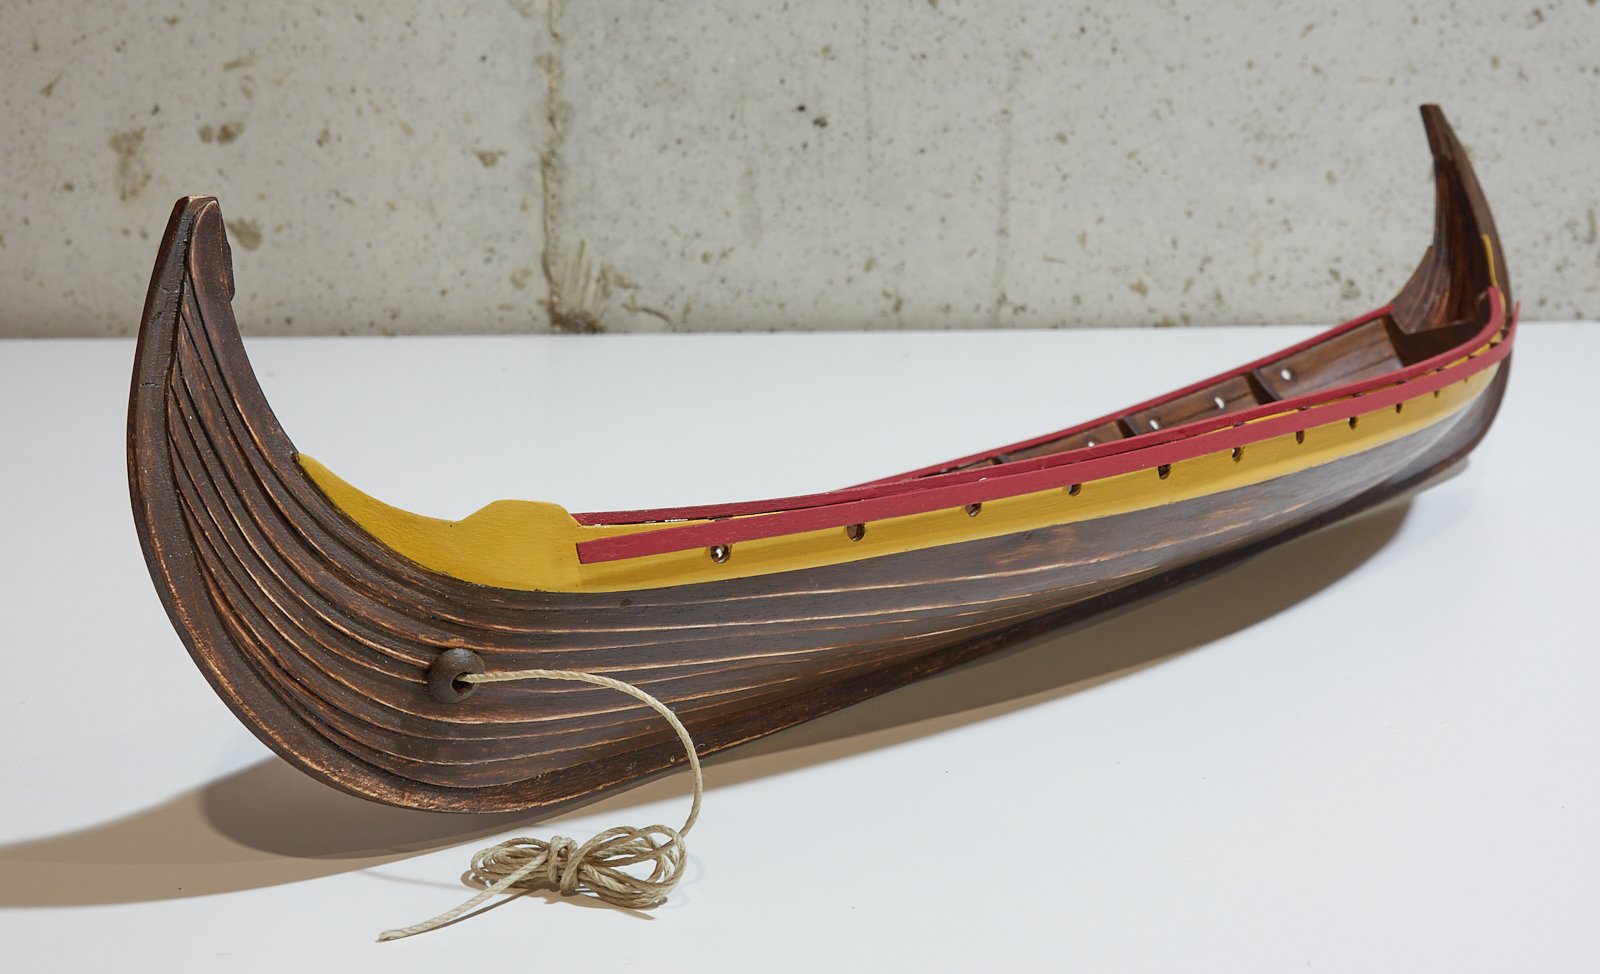
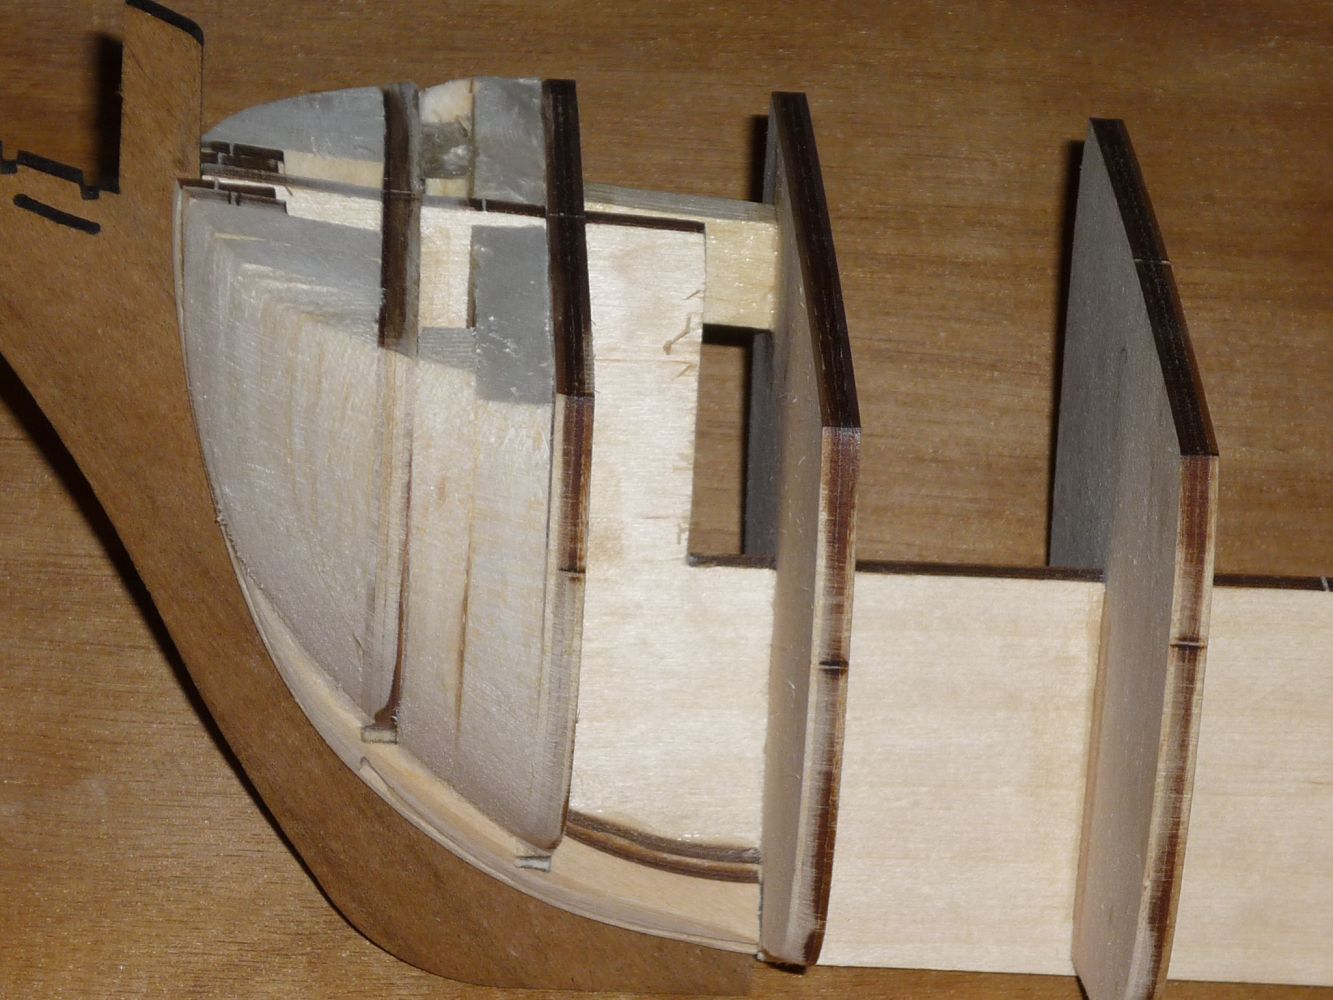
 In the belief that it’s better to get back on the horse than walk away, I decided to try again to construct the Amati Drakkar model. Of course, it’s better to not fall off the horse in the first place, but that option doesn’t usually exist for me. My first attempt ended when I decided that the hull was not forming along the ribs properly and was pulling too far away as I approached the gunwale. As it turned out I abandoned ship too soon. I have since learned that, with some effort, I could have disassembled the hull and tried again. Live and learn. Here is the hull as it looks today. Kind of a funky and beat-up appearance, looks like it’s had a few encounters with reefs or other solid objects. The cap rail on the gunwale is not part of the Amati kit, but fashioned from boxwood strips. Also, the planking inside the gunwale is not part of the kit, but an addition that I decided to add for reason I'll explain in a subsequent post. I always liked the red and yellow combination and thought I’d at least do my sail that way. So I needed no convincing, but cathead’s log convinced me that the red and yellow was a nice combination. In Matt H’s log I learned of the minor problem inserting the rope for the rudder after the deck is installed, so I decided to take care of that detail in advance.
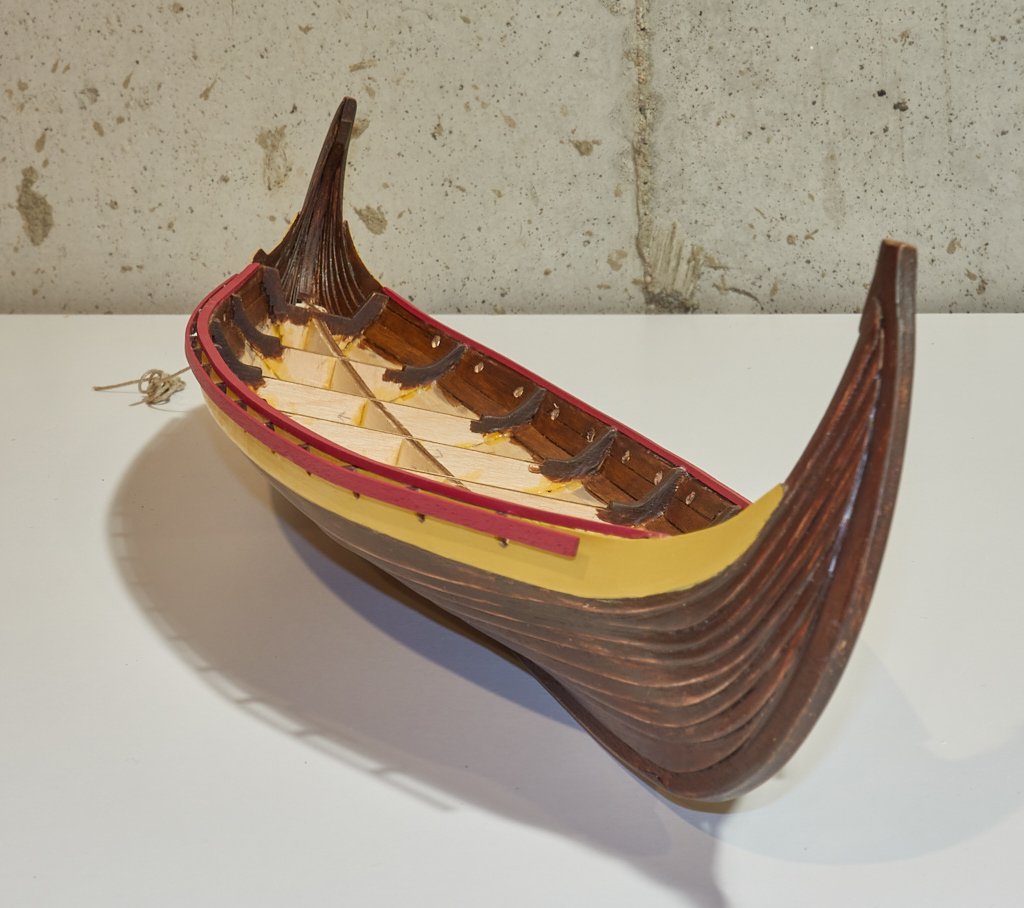
-
 :piratebo5:ok so I thought I would begin a log on the Bounty as their are very few around. I have viewed david's and roman's build of this great vessel a zillion times and hope to do them justice with this effort. due to my interstate work commitments updates maybe somewhat spasmodic but I will do my best. please be forewarned I'm no Damien Parer with a camera though! am going to bypass the usual pics of box contents etc and get into the nitty gritty. here goes..... I always use filler blocks its a little known fact that God created Balsa wood to specifically stop model ship builders from abandoning the project at this stage and on the stern ok heaps more to come just need to see if this worked before posting more. cheers vossy
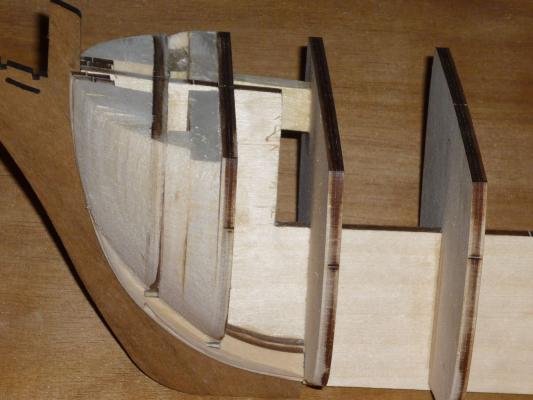


-
 A belated build log for HMS Vanguard. Bulkheads in place on the keel.
- 21 replies
-
- 4
-
-
- Amati
- Victory Models
- (and 1 more)
-
 Build log HMS Bellerophon Introduction A model of a ship of the line from the Napoleonic wars was something I wanted to build for a long time. From the range of kits available I ended up with 2 favourites. The selection of those two was because of kit quality (should be good), scale and size of the finished model. As my last 4 projects were all in 1/64 I tended towards the same scale. Finally I had to choose between Caldercrafts Agamemnon (64) and Victory models Vanguard (74). The decision for Vanguard was made because of the following points: - the 74 is the classical ship of the line -I can build the Bellerophon variant which I like for her direct connection with Napoleon (Here, in Switzerland, he had a much bigger influence (not all negative) than Nelson). - copper plates are of better quality - the scale is with 1/72 close enough to my favoured one and... - the overall size is 10% less. As additional information source I will use Brian Laverys book 'The 74-gun ship Bellona' from the Anatomy of the Ship series. After checking the available build logs and comparing them with the Bellona plans as well as with the Bellerophon plan in 'The Ships of Trafalgar' I think that I will check and perhaps alter a few points: - The bulwark of the quarter deck must probably be lower in its forward part to be similar to Bellerophon plans in the internet or to Bellona's profile. I will have to find out if the heightened bulwark was an later alteration and if it was in place in 1805. However in the book 'The ships of Trafalgar' is a plan for the Bellerophon which shows the lower bulwark variant. plan from the kit... ...and from the one available from NMM (on my wish list) The rail on top of the foremost gun ports is here interrupted. On other plans it is running through in one piece. As Bellerophone's skipper I will install a continuous rail (looks smarter). - The kit's gun carriages are very nicely cast and show a lot of details - but look different from all the examples available in books or the internet. I have no idea where they found a prototype like that. Replacing them would be a lot of work and money. I will try to rework them a bit. - The dummy guns on the lower deck are not quite satisfactory. Possible solutions would be replacements by full guns (again expensive and requiring a lot of work for an mediocre improvement) or the installation of 'dummy carriages' similar to those used by Michael (md1400cs) on his fantastic Vasa. - The stern should gain a bit more transparency. I could make lighter side galleries and leave a door to them open. I guess to change the whole stern construction to enlarge the visible part of cabin and wardroom would be too much work for a small and hardly visible gain. However the taffrail overhanging the skippers balcony seems to low - overshadowing the cabin windows. The Bellona model looks a bit different. I will try to cut back that overhang a bit. - The question if any, how and what sails will be bent on will be decided when starting on the masts. - I haven't decided yet if the colour scheme will be pre- or post-1800. The Nelson scheme has a dark elegance but hides the wood...
.jpg.1055f404192a3d063d853d1e24f5d34a.jpg)
.thumb.jpg.f5dd63fca70add6f8108c9fa35880549.jpg)
- 364 replies
-
- 11
-
-
- bellerophon
- victory models
- (and 2 more)
-
 Hi all. I’ve started my first build. It was a 50th Birthday gift from the in-laws. Made an okay start but now struggling. I’ve always fancied a go at model shop building and finally now have the opportunity. As you will see by the photograph below, I’ve made an okay start but now approaching a difficult section. I’d wrongly assumed that instructions would be specific, accurate and helpful. What I have in front of me now reads as follows… “Apply first planking. Some nails will help. At stem, leave enough space for cutwater positioning. Check thickness of keel.” It then goes on to say sand hull prior the second planking. okay, so that’s the entire planking instructions!?? Great. Q1) what is leave enough space for cutwater positioning on this ship specifically? Q2) check thickness of keel. Can anyone explain why? What do I do? I’ve read and watched many videos on planking but nothing is the same as this hull. I’ve also seen many videos now all showing several different methods of planking so no idea what to now do. As you will see, the deck is complete, bulwarks on…now the planking. any help will be much appreciated!
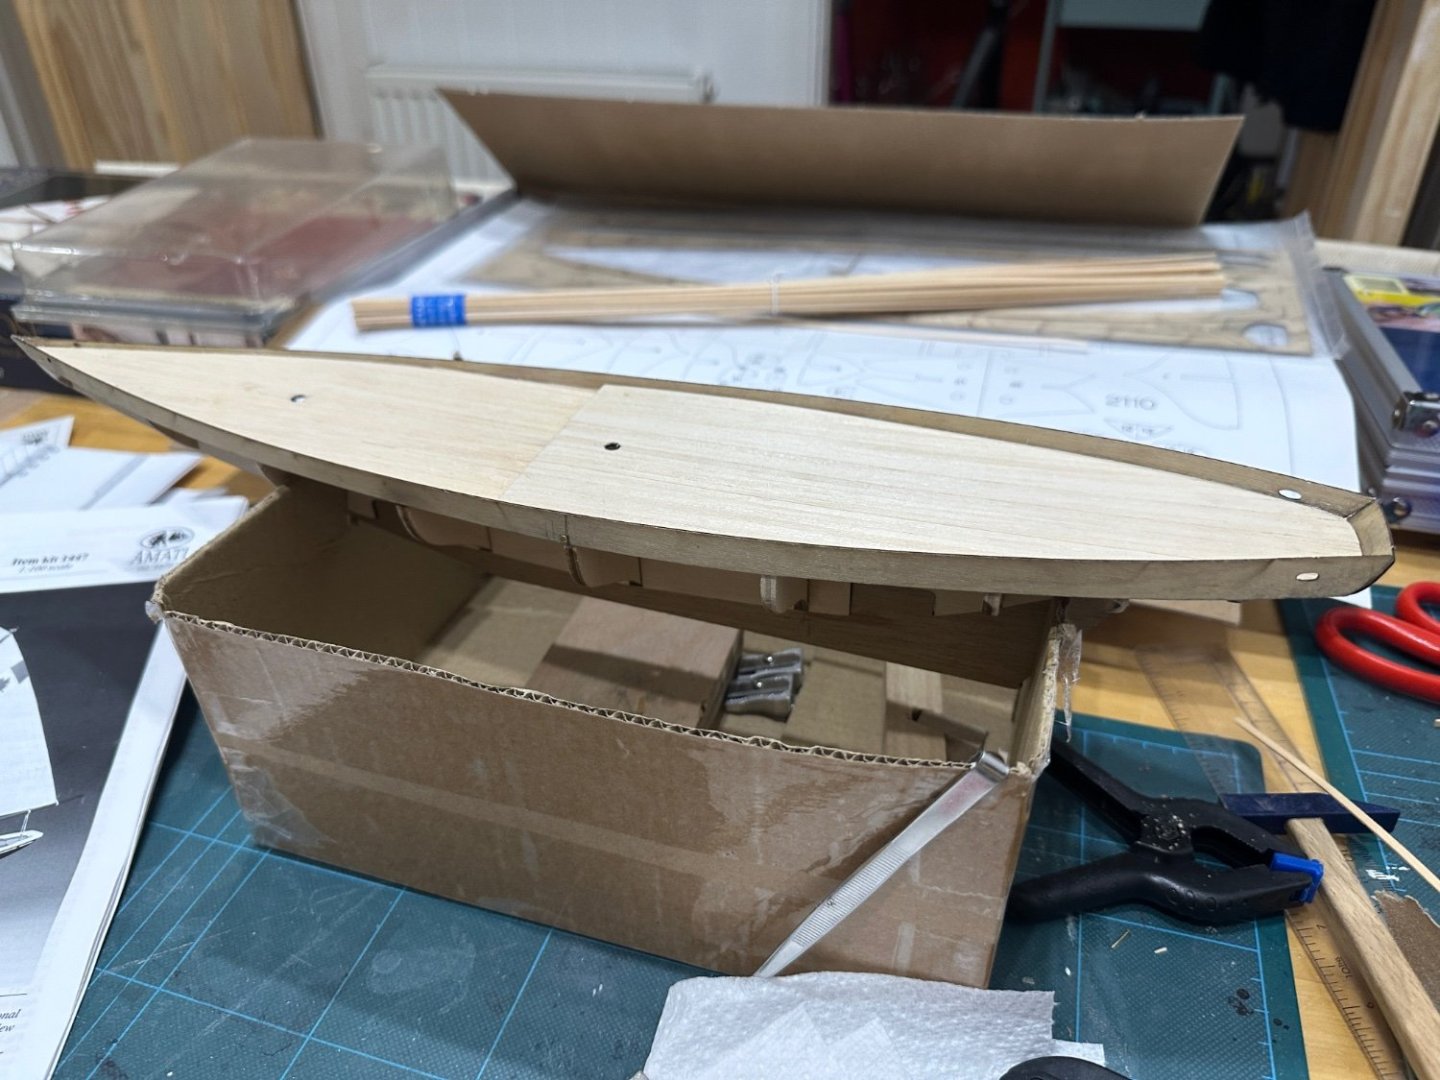

-
 Hi All, Something newish for me thanks to the inspiration of others on this site. I started this build several years ago, 2008? I got the basic hull and some Superstructure almost compete and thought it was time to drag it out again.... Reasons for this is that I am tired of sitting on my Chuff for the last couple of months waiting for surgery on a torn right Rotator Cuff and looking like I'll be languishing for a couple more month's to come. The scale and size makes things a little easier to accomplish with my left hand. 🙂 The Partworks version is essentially an Amati offering in 140 magazine issues and it seemed too good an opportunity to re-start proceedings. (I have the Trumpeter 1/200 version with MK1 Detail set and the Tamiya 1/350 version also.) I began this afternoon by ensuring all subsequent issues and contents were present and put aside the 1/400 Titanic for a future when I have both arms fully operational 🙂 So, don't know how far I can get but my best shot and it's better than casting around feeling "Disabled." The Hull looks good for the time it's been in storage, some attention with filling, sanding and primer will help The Superstructure components will be wrapped in PE I'm looking forward to getting stuck in!! (A very big "Thank you" to the Gentlemen currently building the Amati version, it's given me much needed inspiration!!) Cheers....HOF. Photos:
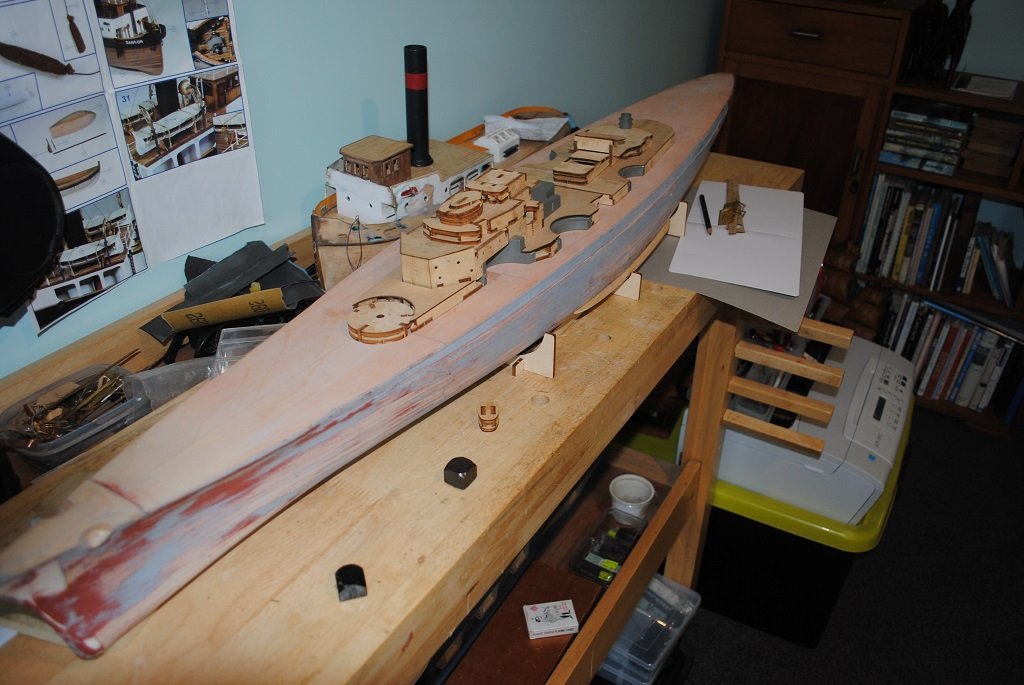

- 544 replies
-
- 15
-
-
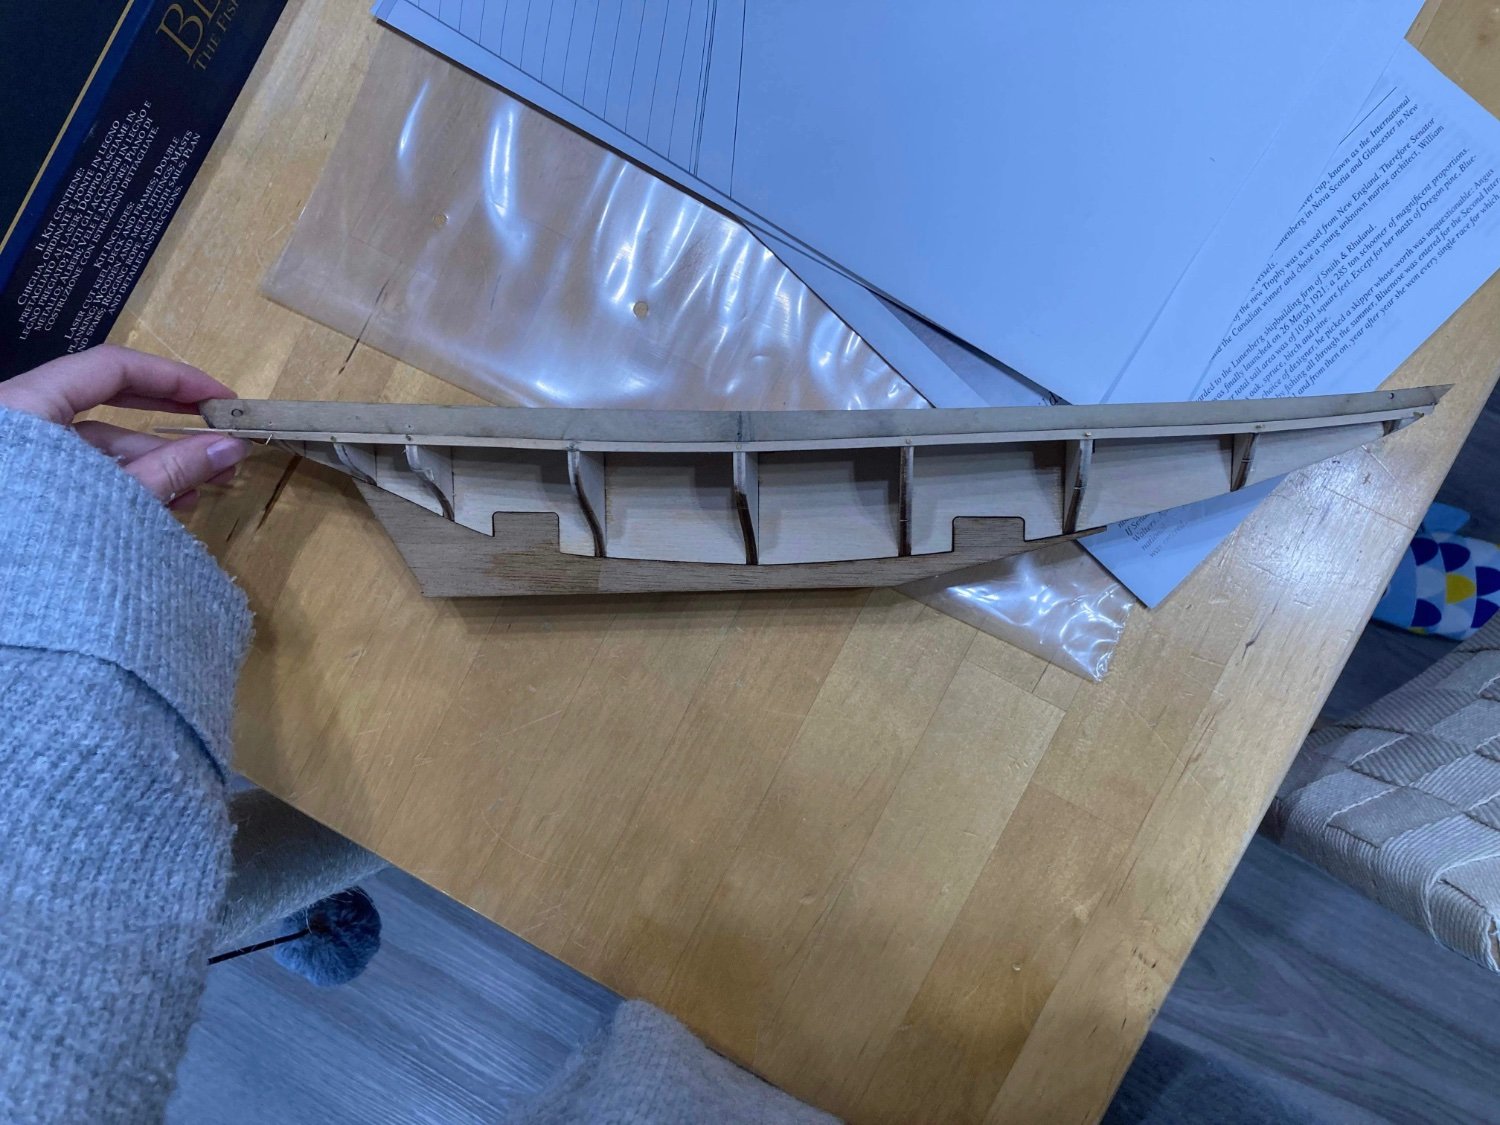
 Hello all. After completing Bluenose this will be my 2nd build. This time I wanted something with guns. There is a lot of very tempting kits and finally decided to go with Mercury, which attracted me even when I was buying my first kit. The first impression is that this kit is of very high quality. Instructions are one of the best I have ever See, especially I like separate plan sheets for rigging which will be quite a job to do. My plans: -I like natural finish of wood as seen on NMM Greenwich models. This mean that most of the model is going to be unpainted, and I am going to change A LOT of materials provided in kit. For most of the build I am planning to use pear wood, maple And some walnut. As Ebony I will stain pear wood. Today I received wood from Germany (2nd picture) . -There will be no coopering on hull, reason is above. -Deck planking. Laser engraved plywood deck looks good, but not good enough for me. I will most likely use maple, but have pear For backup. As this is my second build and still don't wont to overcomplicate it I am thinking to use "normal" straight Pattern for planking like on brig Syrene for example, instead of curvature shape. -Armament. From personal aspect I like the look of guns instead of carronades on deck more. Don't ask me why, just like them . So I am still in research if there is any possibility that Mercury carried guns before carronades or has sister ship. This can be Seen on HMS Cruizer (guns) vs. HMS Snake (carronade) and Le Cyclope vs. Le Cygne. I have already purchased 6pdr Guns but will wait with that. If anyone could help me with this information I would very appreciate it. -Sails. I am planing to do Mercury with partially set sails Well, that's it for the moment.
- 120 replies
-
- 18
-
-
- mercury
- victory models
- (and 1 more)
-
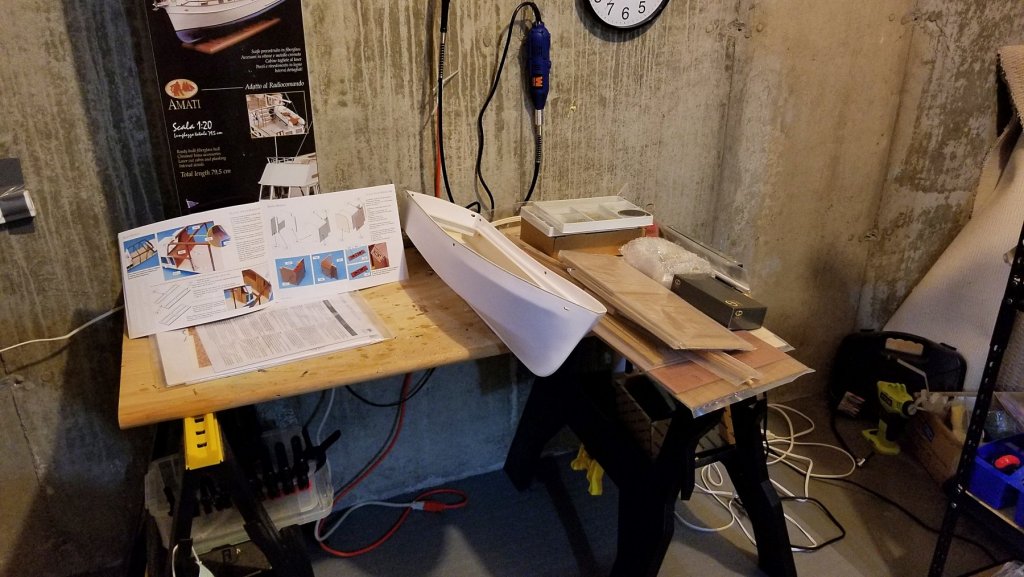
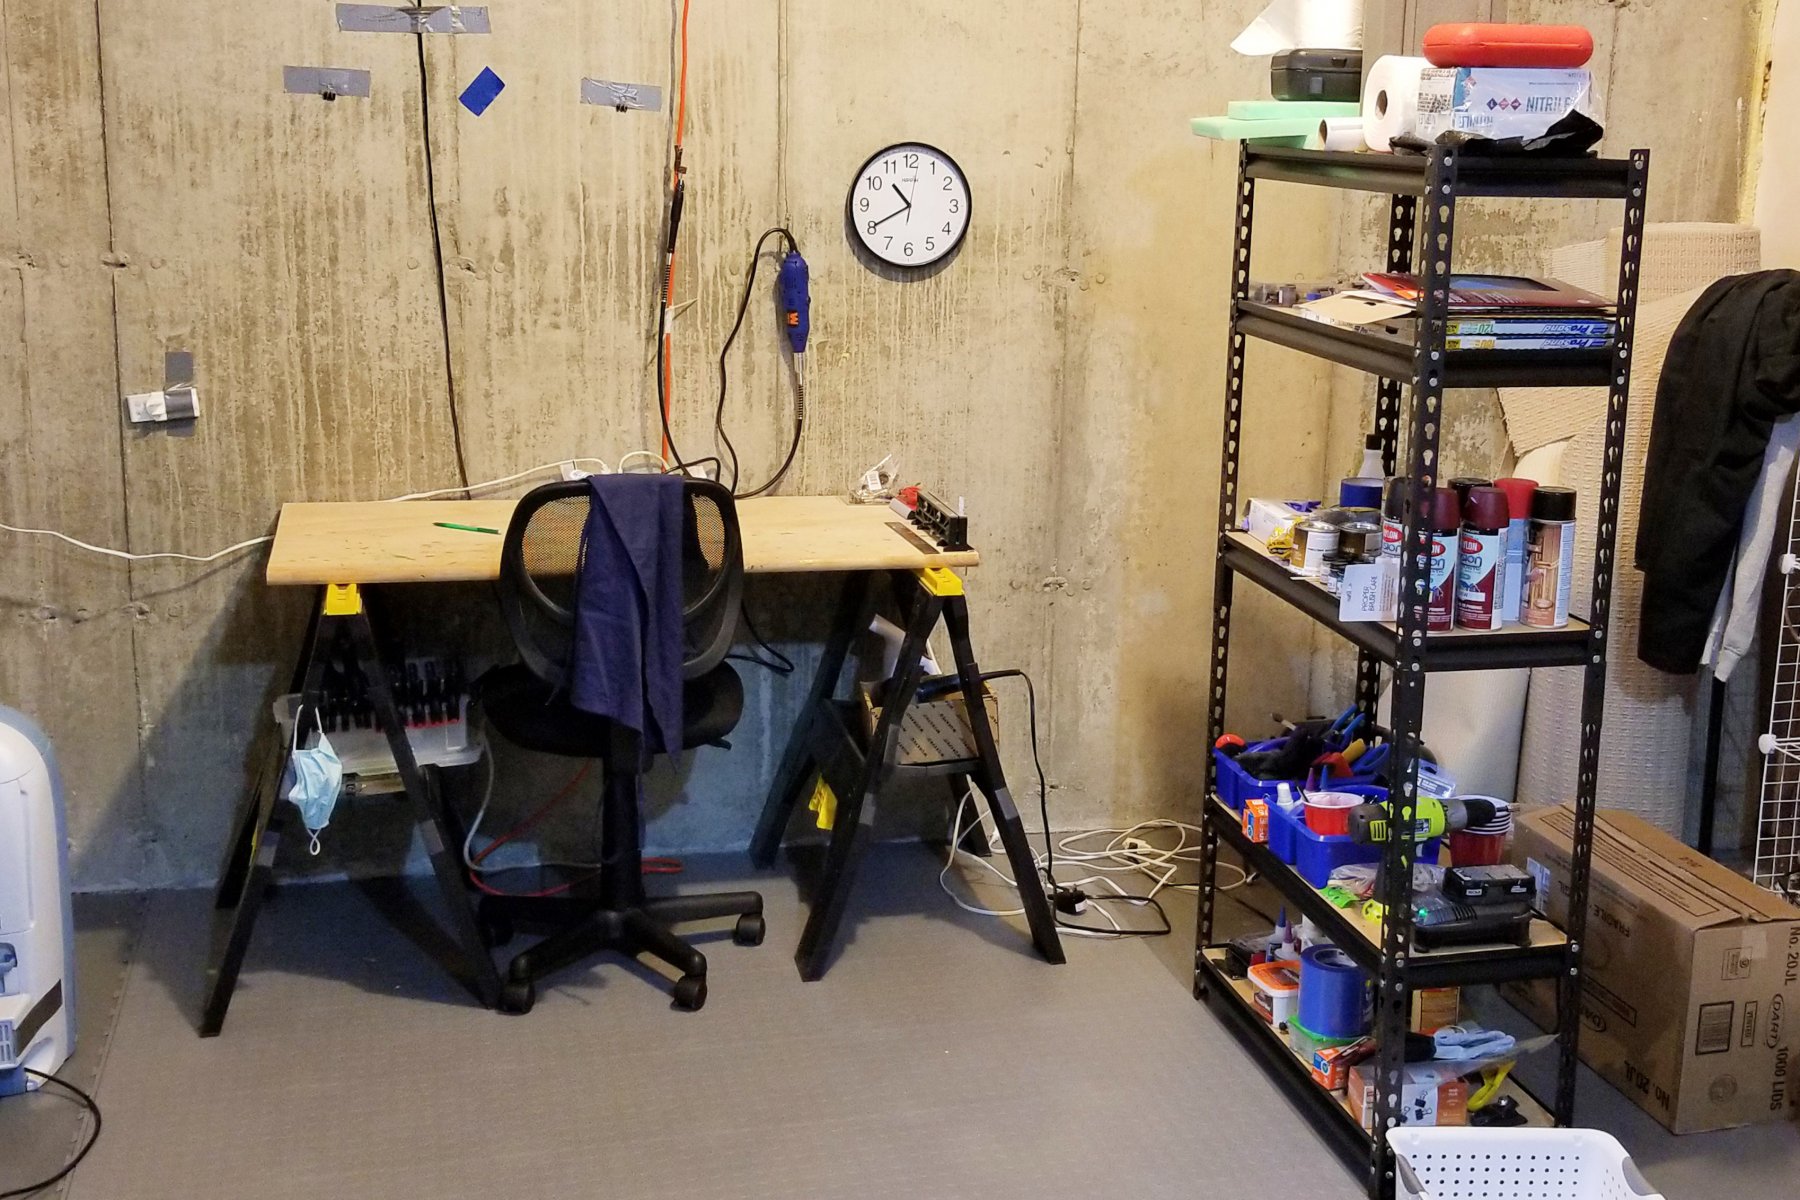
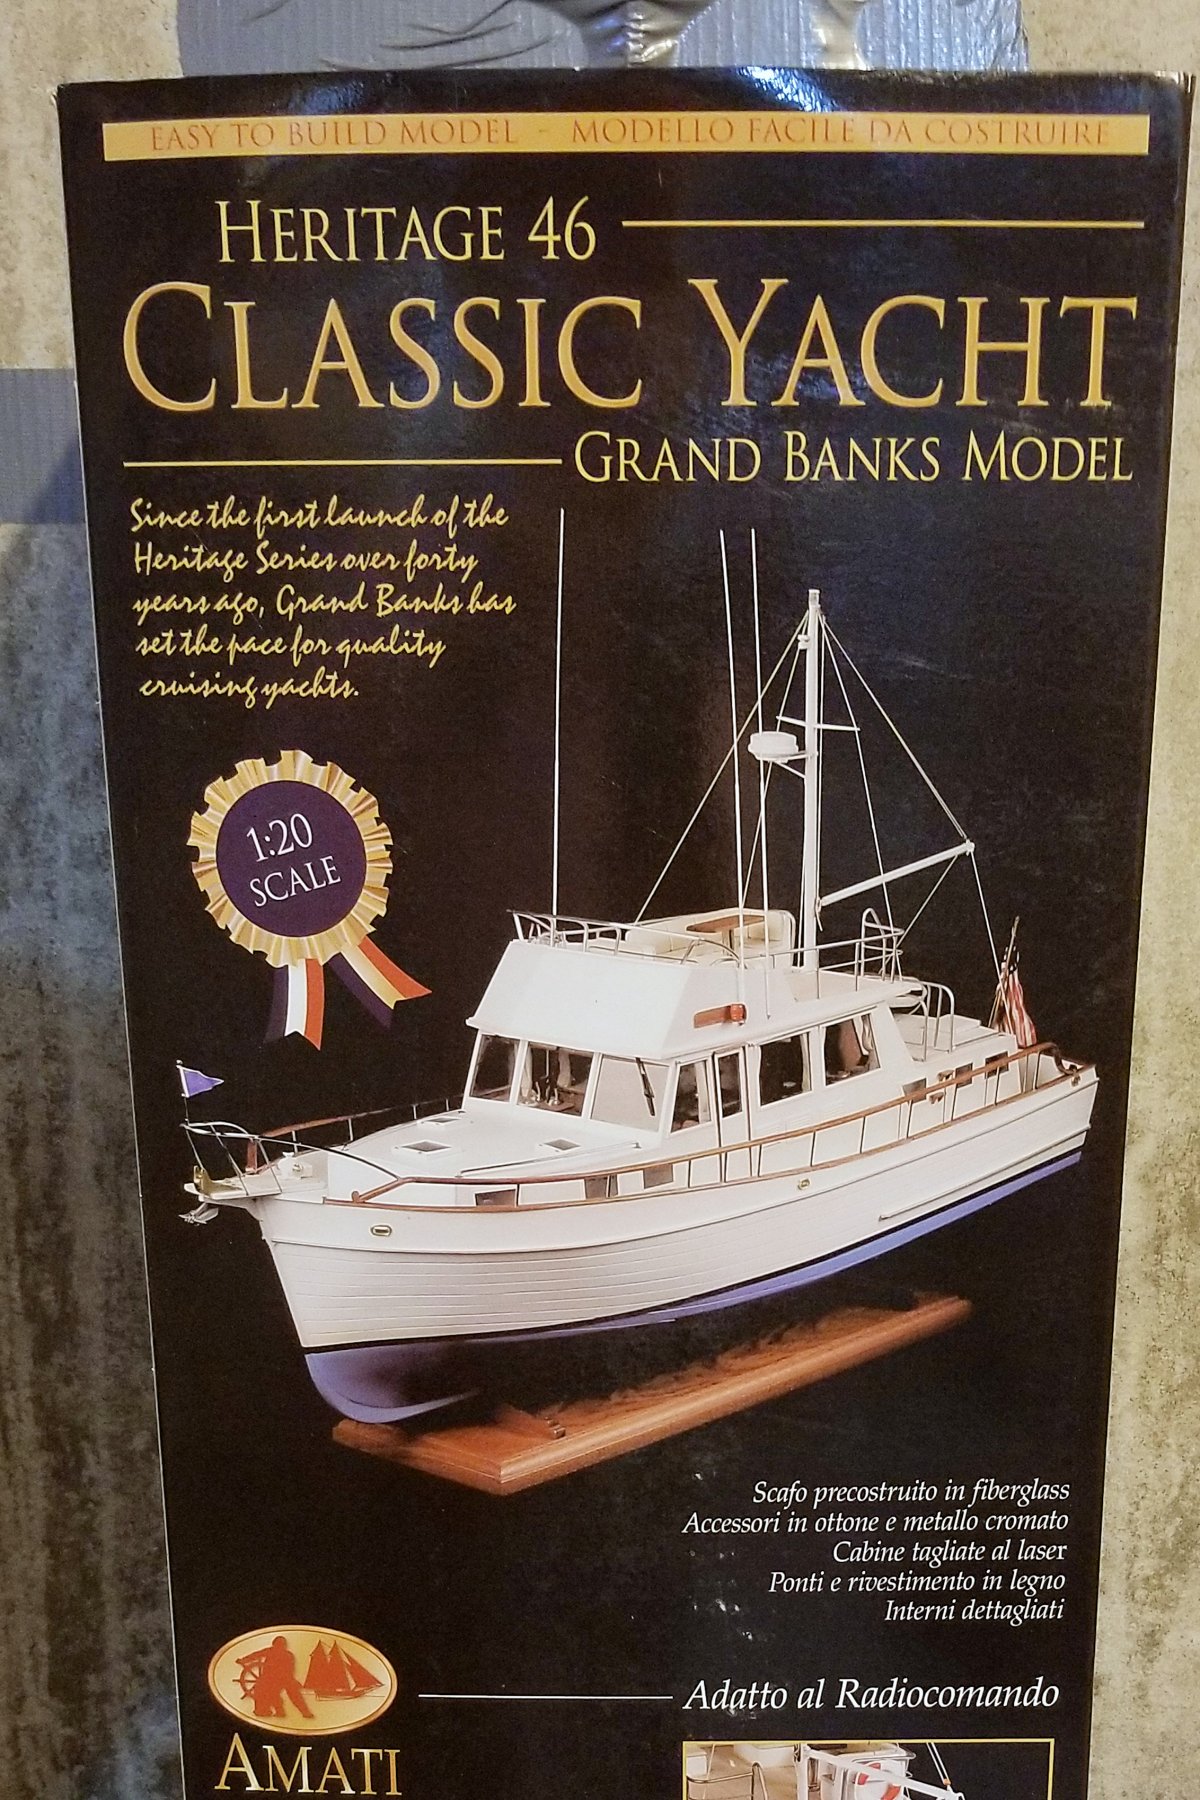
 Before getting to the model itself, I revamped my model building space. The rolling chair was gouging a hole in the concrete floor, and all of my supplies were in boxes and bags scattered on the floor around my work table. So I found some industrial plastic tiles on the internet (they just interlock and lay down -- no adhesion so easy to remove). The nice thing about them is that I can replace individual tiles if the chair eventually chews some of these up, or they get too groady. Then steel shelving to hold all the "stuff". See attached picture. Now I'm ready for this model. This is the Amati Grand Banks, and I'm not sure if there has been a build log done on this one before. See picture of the box cover. I picked this one to create some variety from the historical ships, some relief from rigging after the Revenge, and finally because it's Amati. I'm getting the sense that their kits stand a head above others, at least the manufacturers I have tried (AL, Bluejacket, Constructo, Dumas). There's a "what's in the box" picture, and the usual laser cut sheets, wood, and boxed parts are there. But this one has a pre-formed fiberglass hull, because it can be built for R/C operation. I'm not going to do that. The hull is REALLY thick and solid (compared to the Dumas Mt. Washington, which was a thinner plastic and also R/C adaptable). Finally, there is a very well-illustrated manual. See pic. Plus a number of charts to go up on the wall. So I'm looking forward to this one, and because it's not the usual double-plank construction, I'm expecting some new twists. Regards, David

-
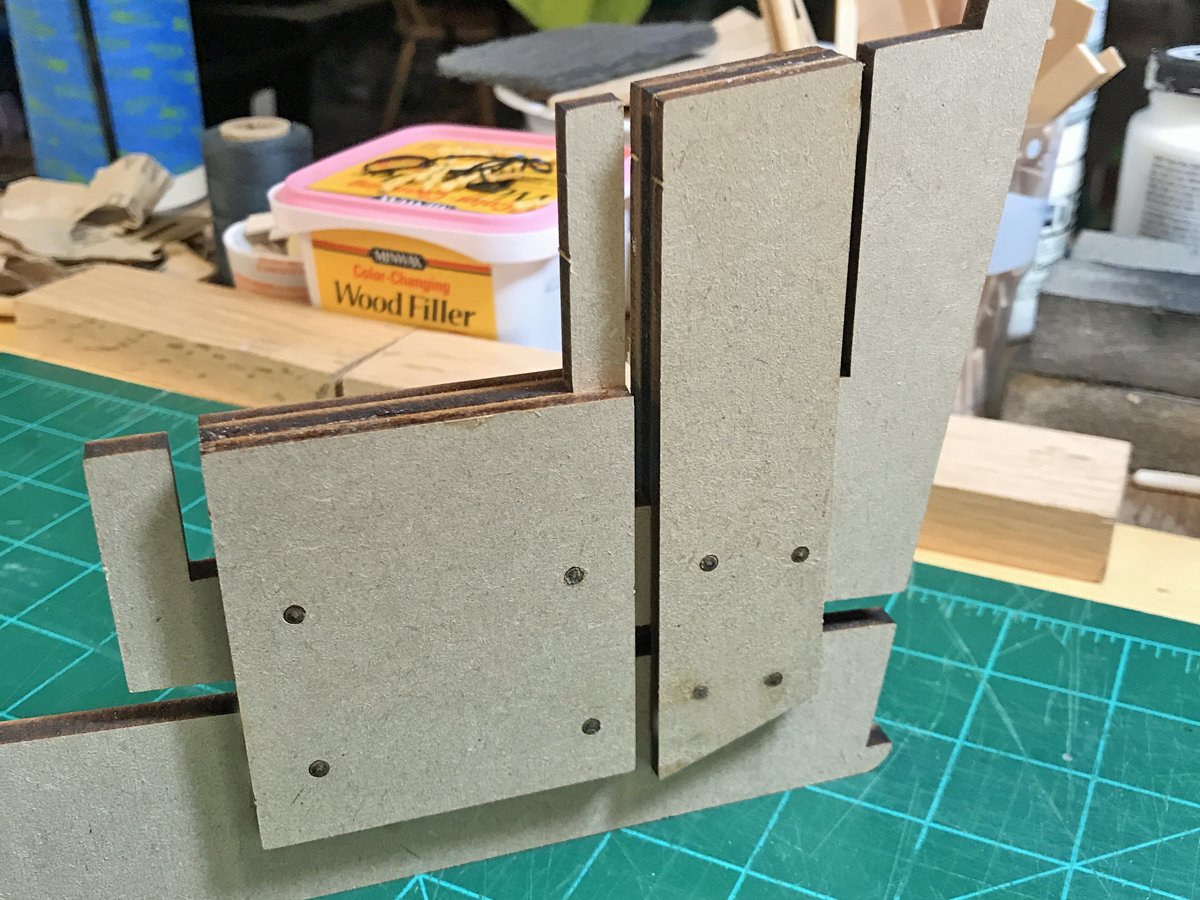
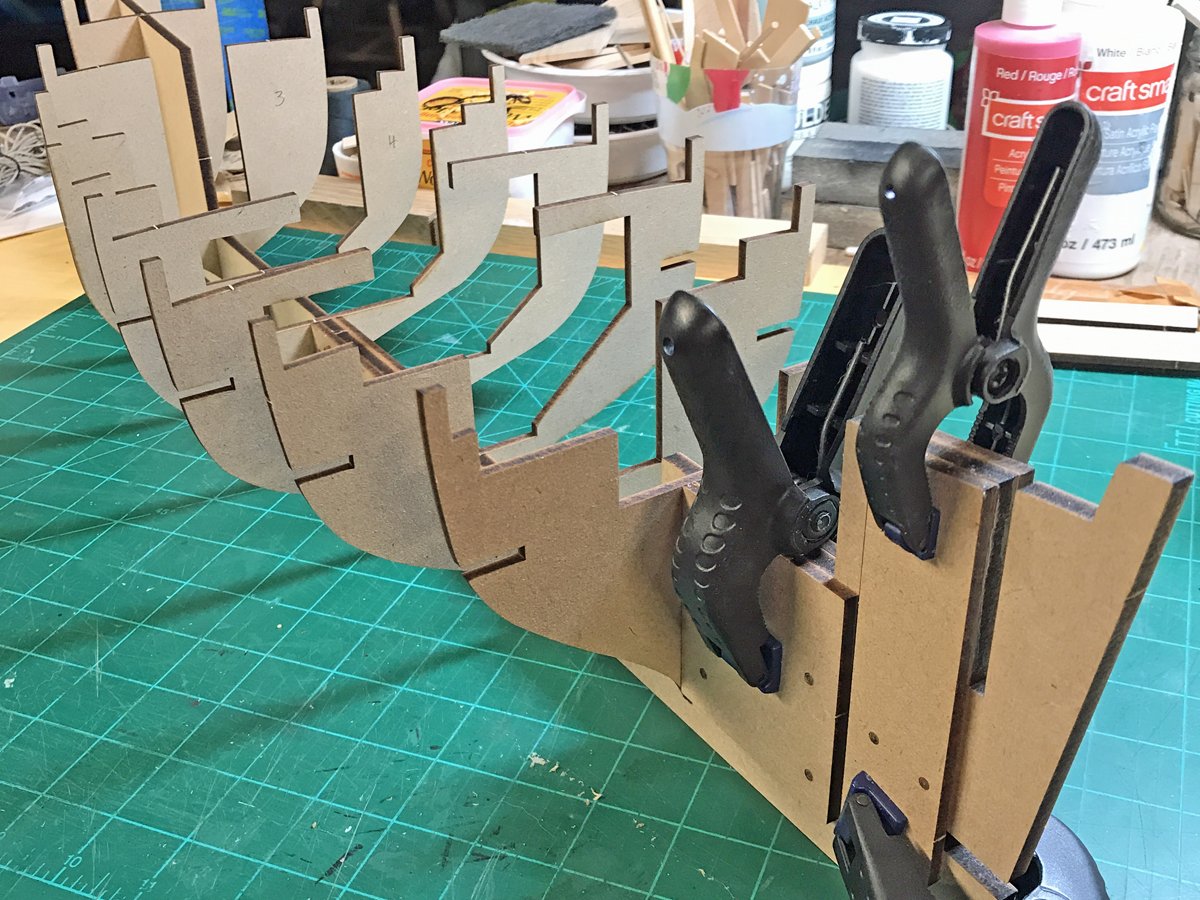
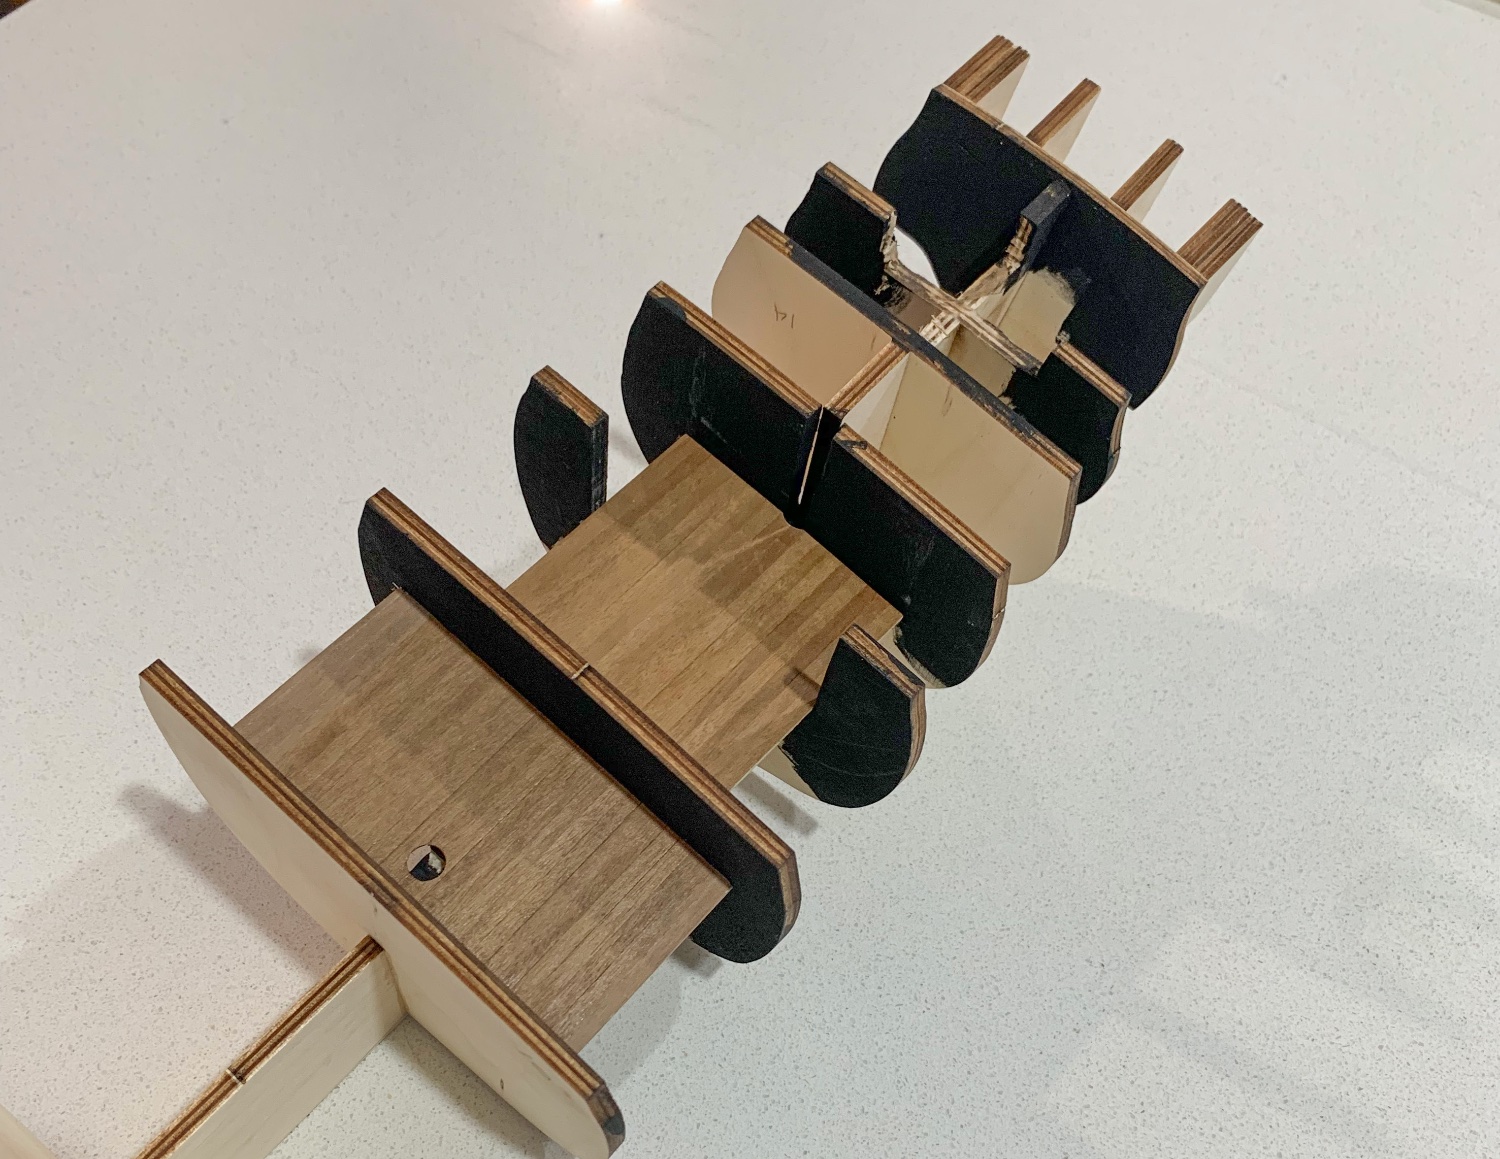
 I won’t spend much time going over the kit in general because James H did a very thorough job of that in his excellent review here. As James said, the box is packed with high quality material, a clear, full-color instruction booklet and 7 sheets of detailed plans. I’ve read lots of great things about Chris Watton’s kit designs here and from what I've experienced so far, the praise is well-deserved. A word of caution for those of you with limited work space...this is a BIG kit! I knew the specs going in but didn't fully appreciate the sheer size of this thing until I started dry-fitting the frames. I'm drooling over the possibilities in terms of adding detail to this build but you need to have plenty of space if you decide to give this one a go. I have fairly ambitious plans for this kit. I'll be displaying the Fifie as a waterline build in the act of hauling nets. I haven't quite figured out how I'll be pulling this off but I love the look of these boats in the water and really want to display it that way. I'd also like to add some crew if I can get my hands on some halfway decent 1:32 figures to rework into Scottish fishermen. With that said, here we go... A nice big box full of high quality stuff! The die-cuts here are very clean and precise...not at all like my previous build. Kudos to Chris Watton's clever engineering which makes assembling the frames problem-free and extremely sturdy. Even I can't screw this up! Stern assembly. The bulkheads fit perfectly without modification. Making quick work of the frames thanks to excellent fit/finish. Each part adds stability and guarantees correct alignment. This tray is intended to house the rudder servo if you plan to do an RC build but needs to be installed regardless. And just like that, if you're not going to be chopping the hull off at the waterline (probably a wise choice!), the sub-deck can be installed. I, however, will need to do some additional planning to add support and stability for the surgery to come. Stay tuned...
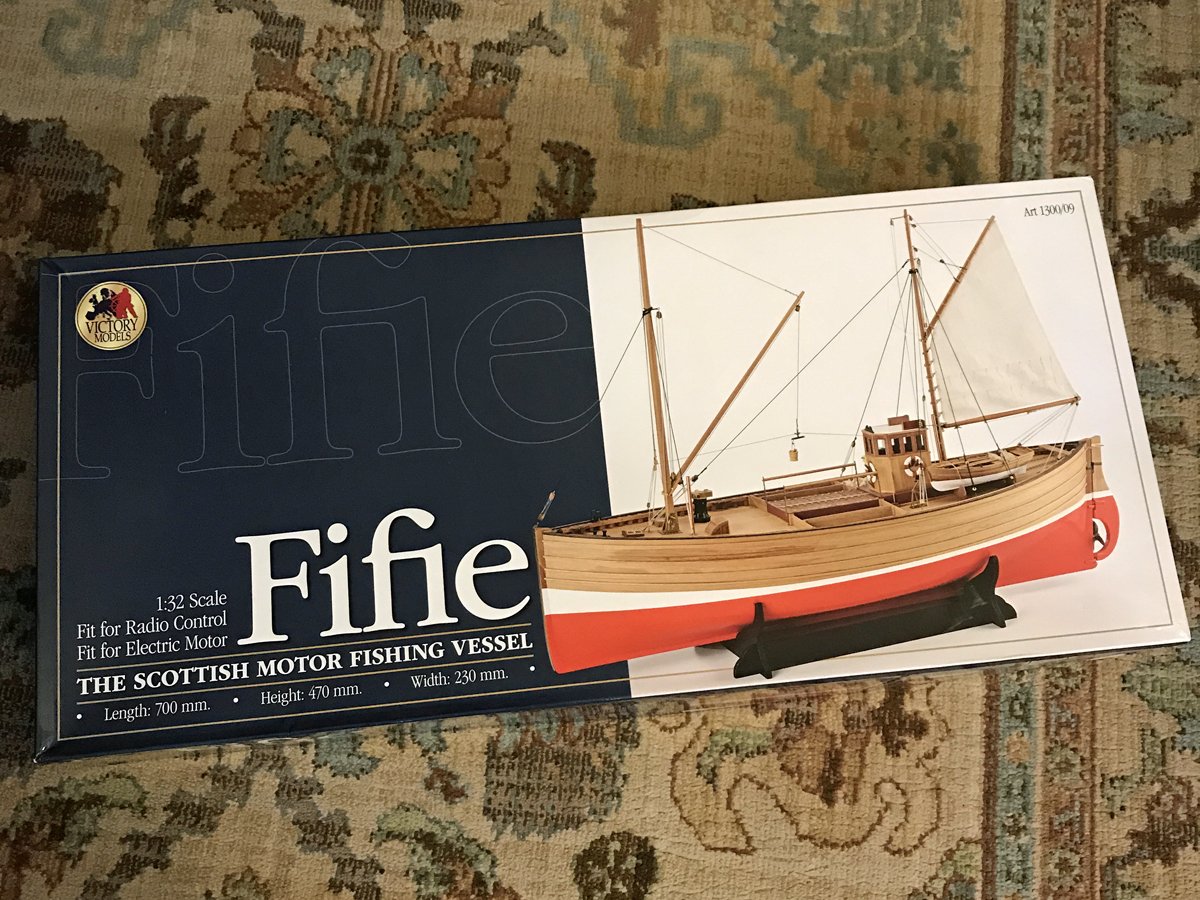

-
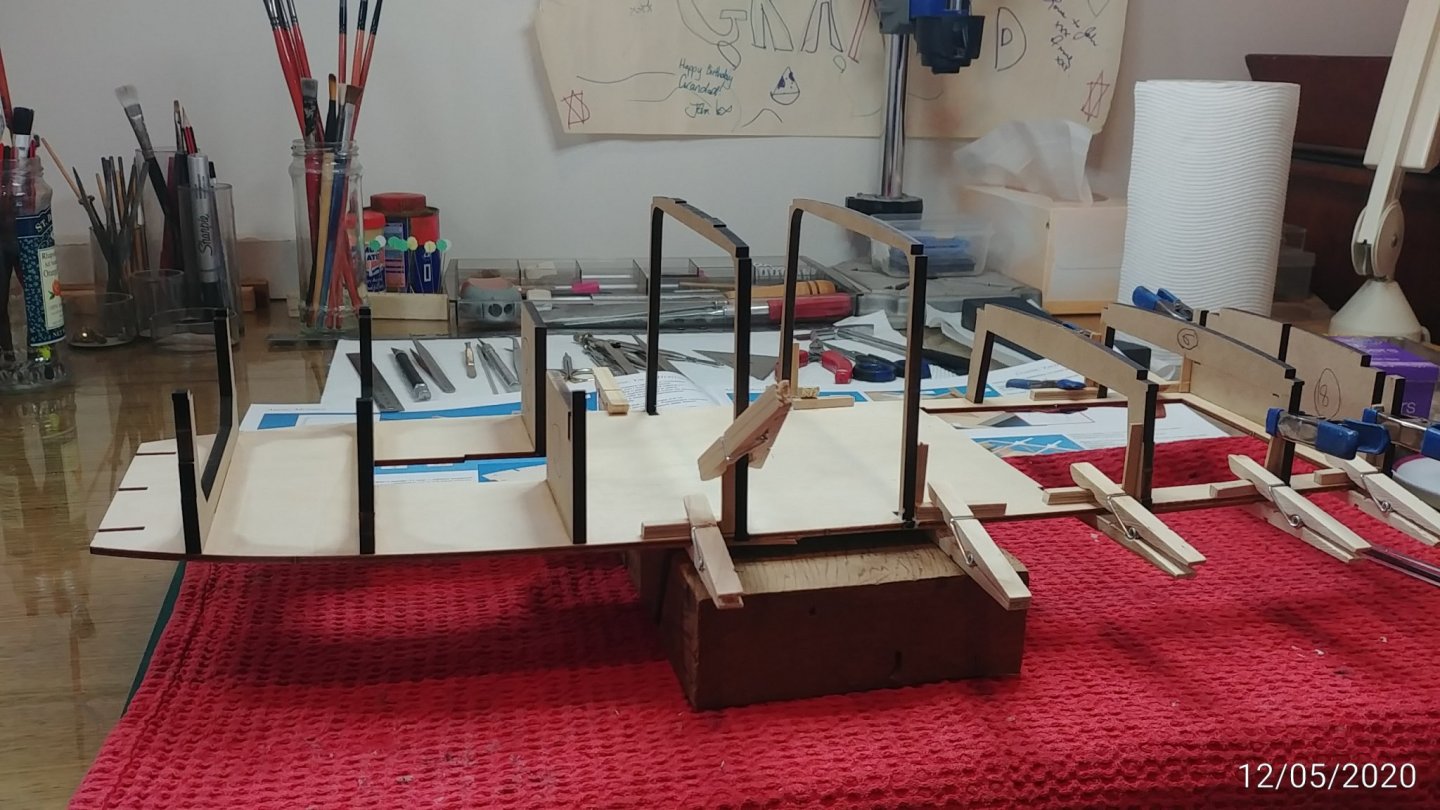
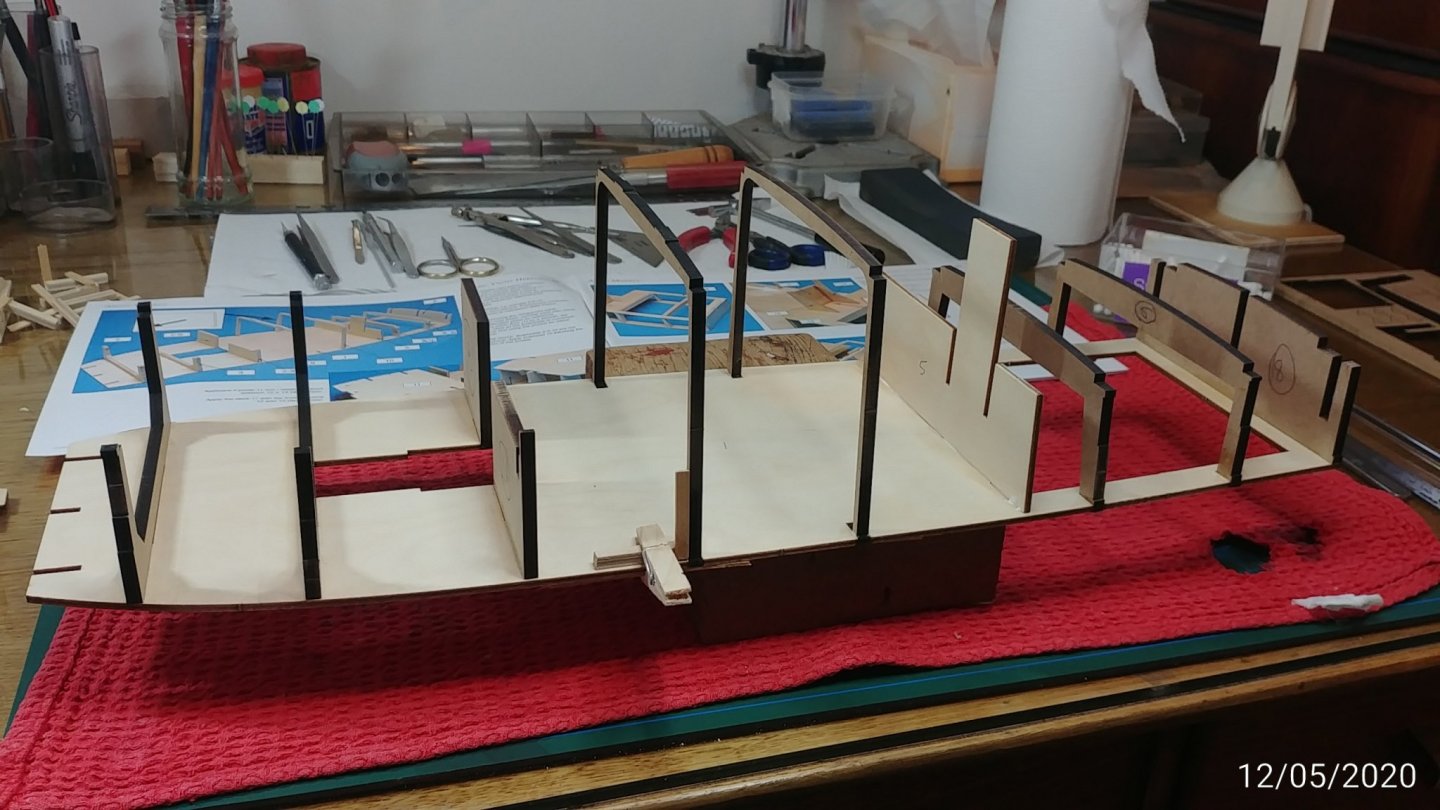
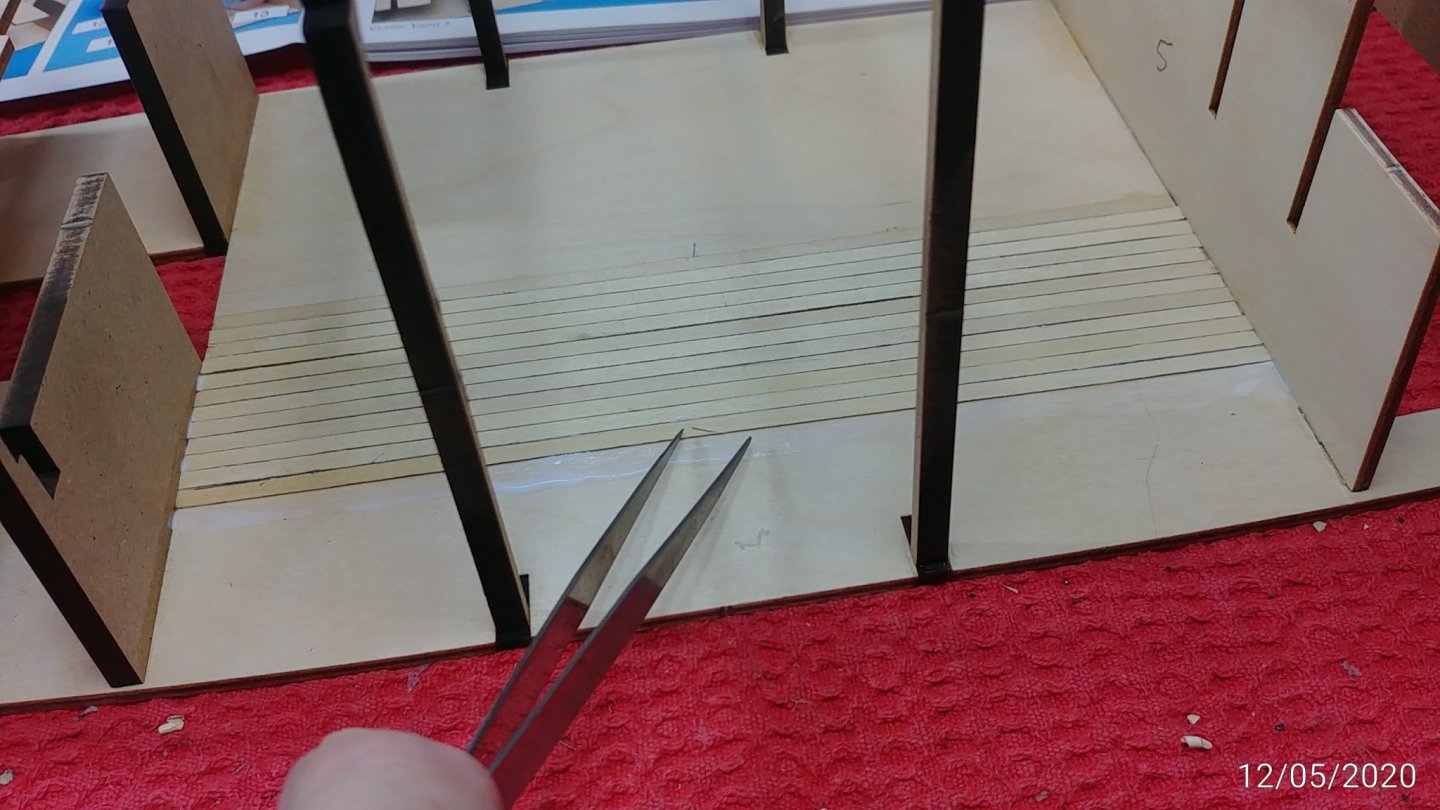
 Greetings. This is my first attempt at a build log, though it is far from being my first ship. Having recently finished HMS Kingfisher by LSS (see gallery), the Revenge caught my eye and I decided to have a go of it. For those of you who decide to follow along, please note that my work on models can be sporadic at times. I will try to post updates as I complete each page or 2 of the manual. Kit was ordered from Ages of Sail and here is what comes in the box.
.thumb.JPG.b502b12b698f33d9c520d313c72a58dc.JPG)
.thumb.JPG.2fb26fa28155bb95a2168493a9f220bb.JPG)
.thumb.JPG.ffdd5ae4c2bcec6ee2b201ba236a62a2.JPG)
.thumb.JPG.952986f5073ce021bc37794bd2de3114.JPG)
-
Hi all, I was just wondering, is Caldrcraft (1:72 version) the go to kit for Victory freaks? Is it the most detailed/accurate on the market? Indeed, is it the largest? Anyone know of any others to rival Caldercraft's version or any planned by other manufacturers in the pipeline? Cheers Chris
-
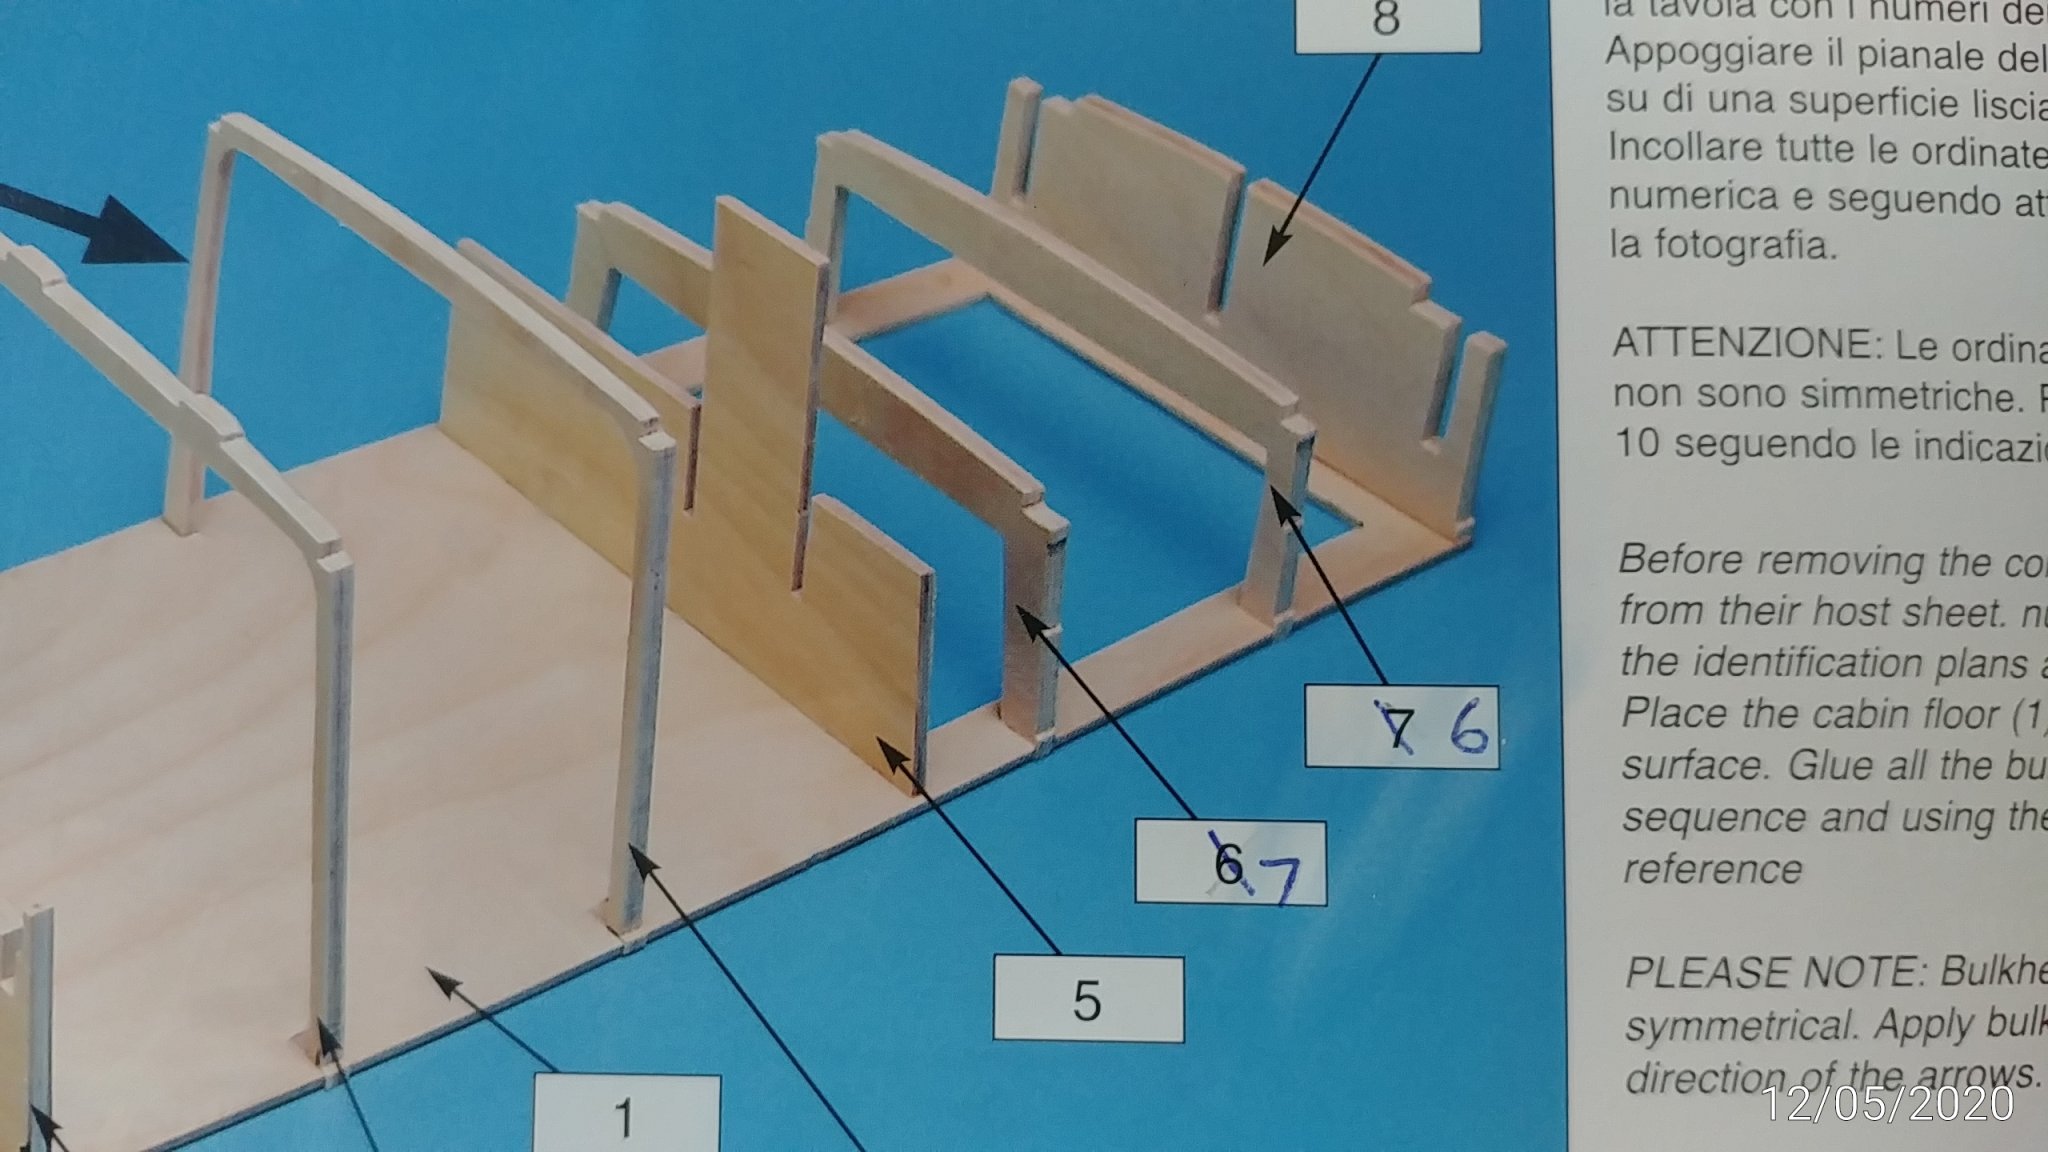
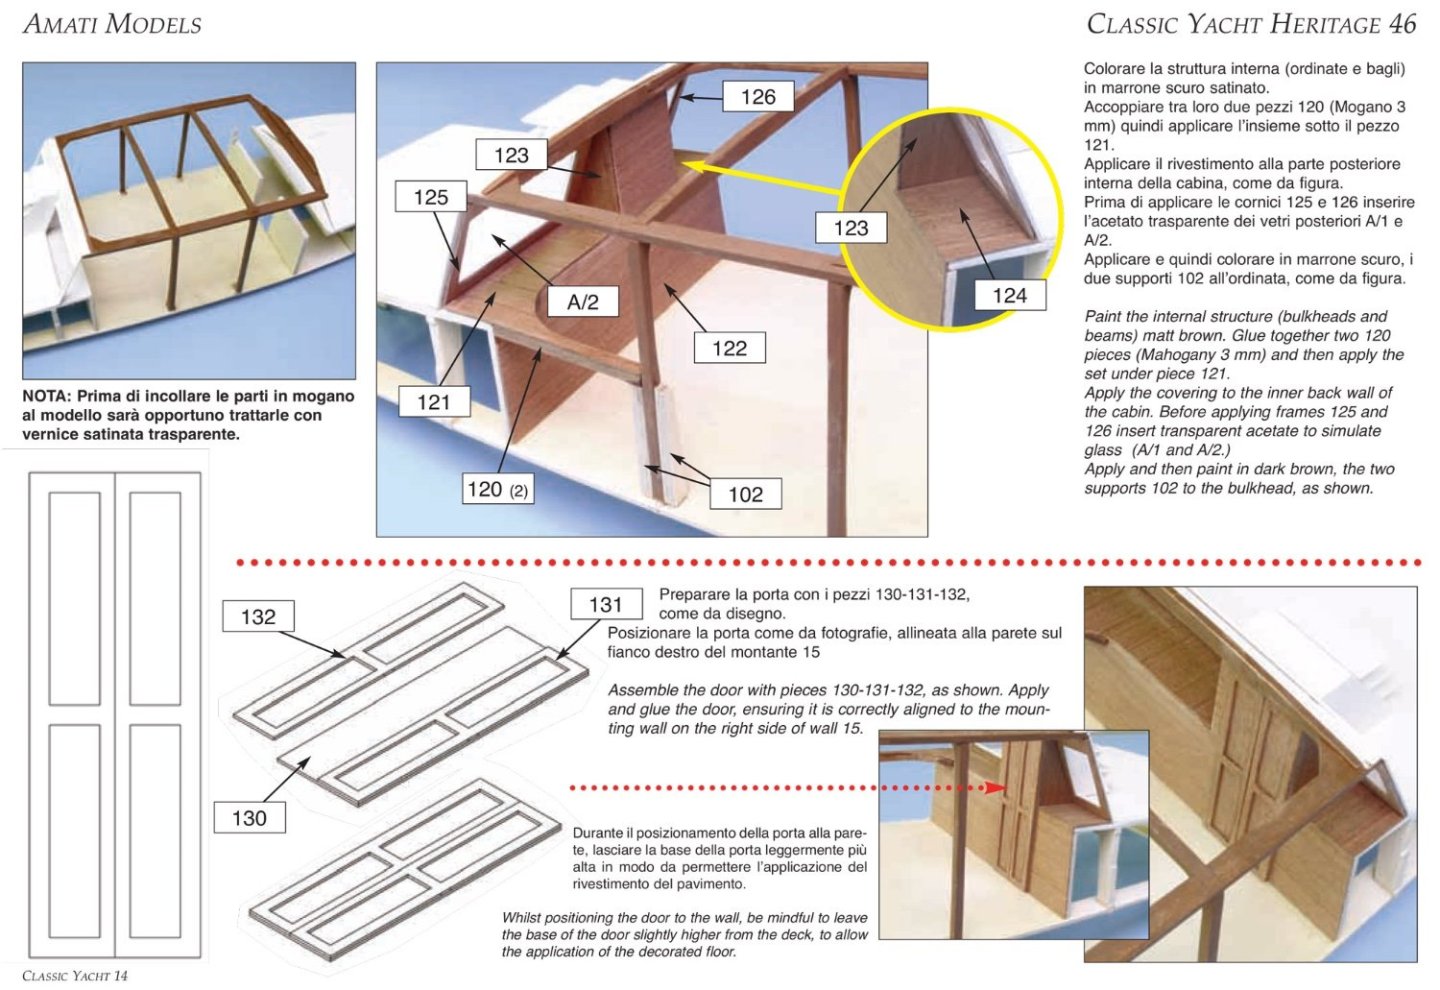
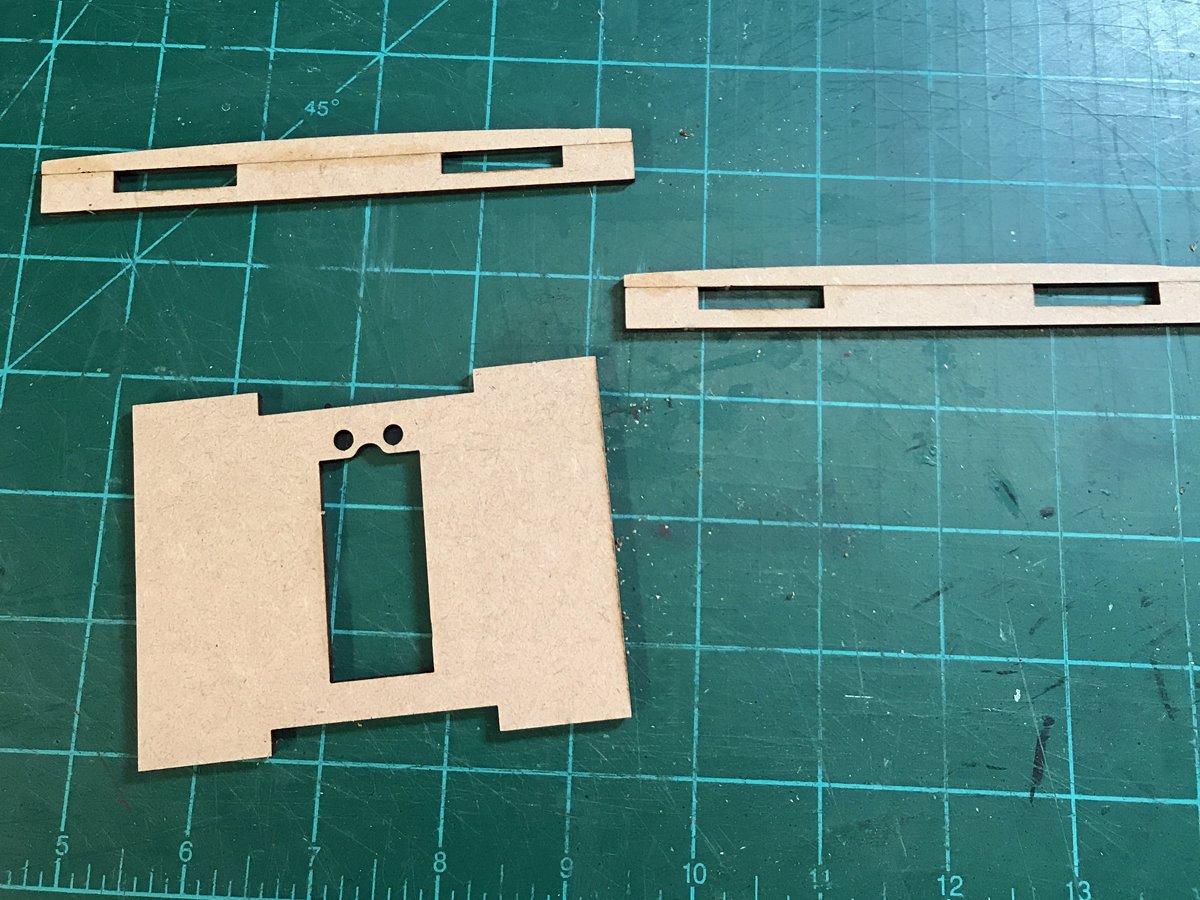
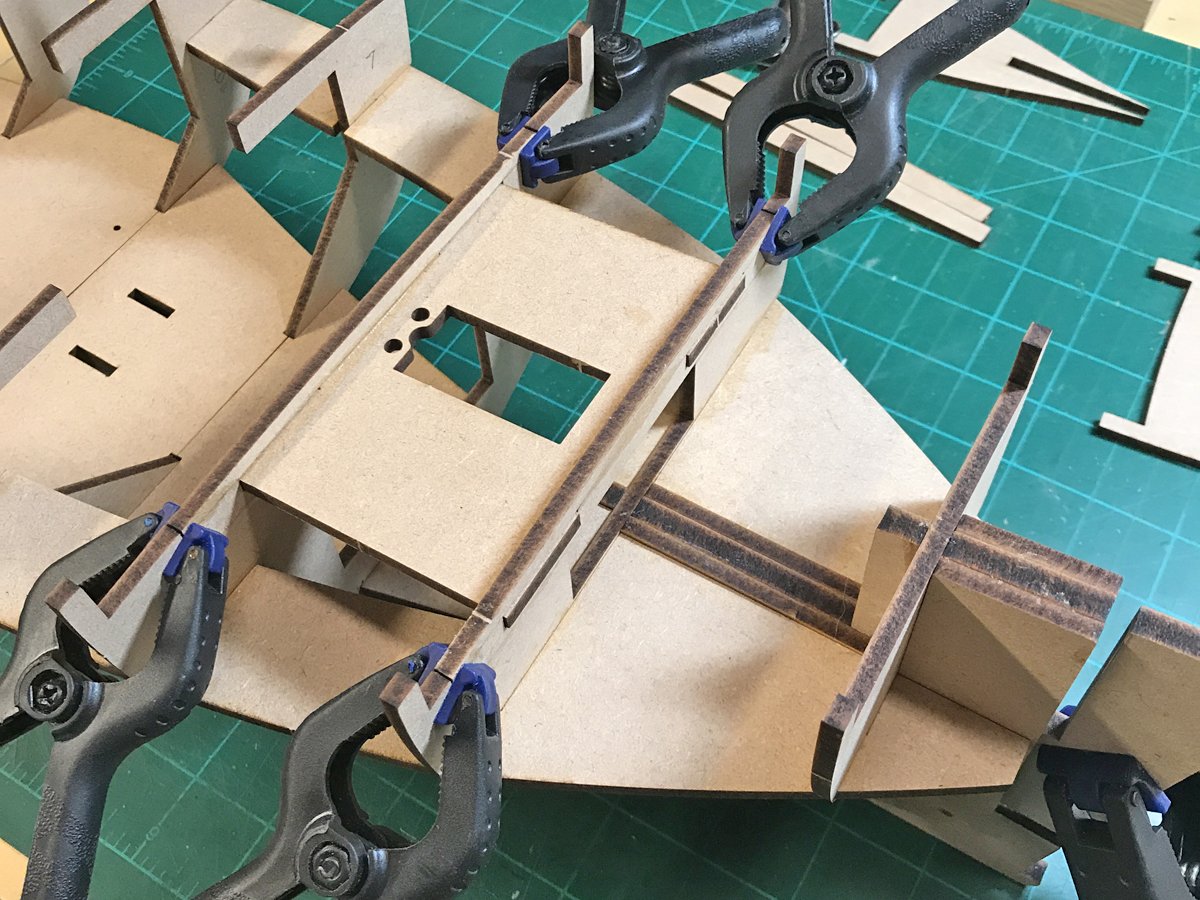
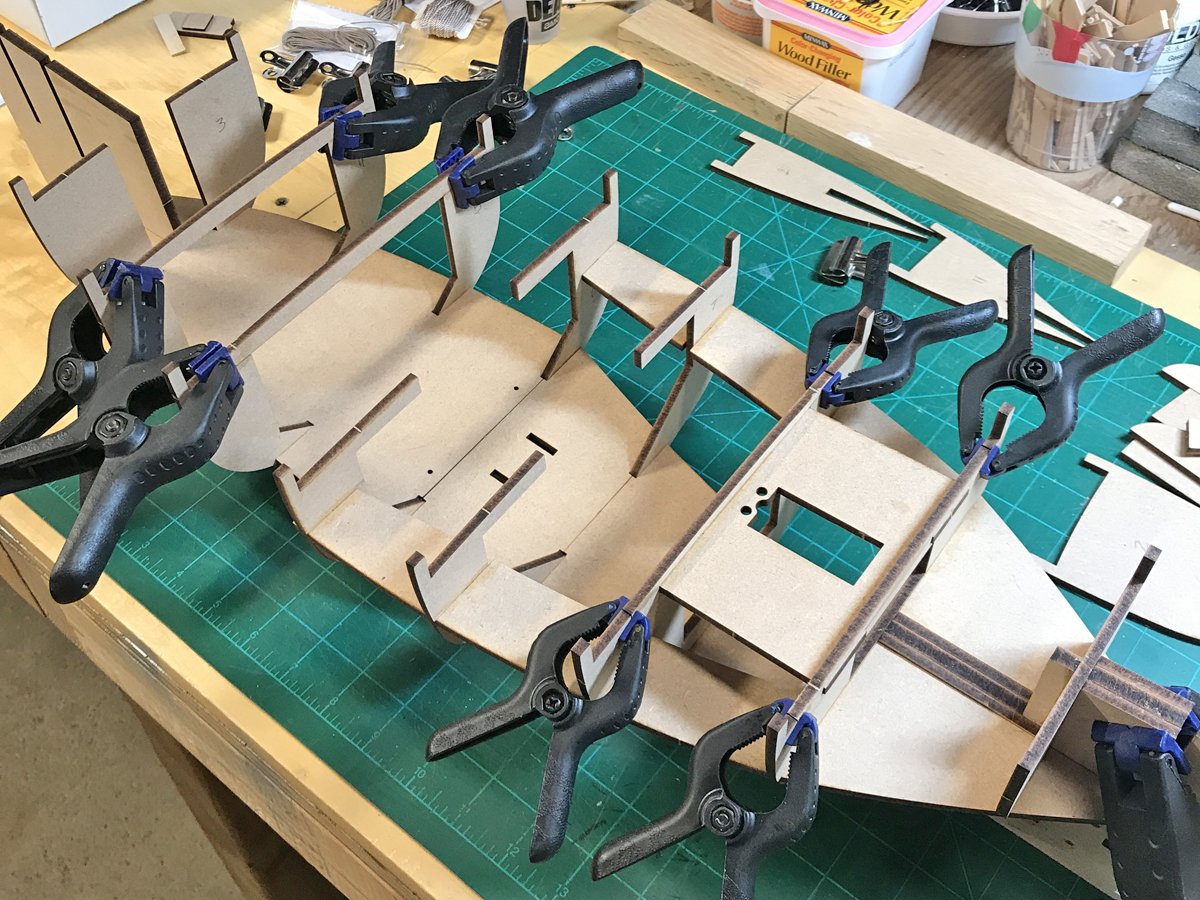
 This is the start of my build log. The first thing was to compare the Amati kit with my previous build which was the Caldercraft Endeavour. I thiunk this is much better, with sharper CNC parts, and much better documentation. Having said that there is an annotation error on Page 1 as pictured below in GB004. The parts wont go in the places described for 6 and 7 but it is obvious where they should be...the other way around. The kit has a very awful paper print cabin floor covering which simulates the parquetry of the real boat. While I am sacrificing some authenticity I am planking the cabin floor with leftover Endeavour decking which I will possibly stain to look like teak, or may leave it matt and blond to show up better inside the cabin when largely built in.

- 91 replies
-
- 6
-
-
- amati
- grand banks 46
- (and 1 more)
-
 Not much to see yet - this is the first planking of the hull just about finished.
- 21 replies
-
- 10
-
-
- mercury
- victory models
- (and 1 more)
-
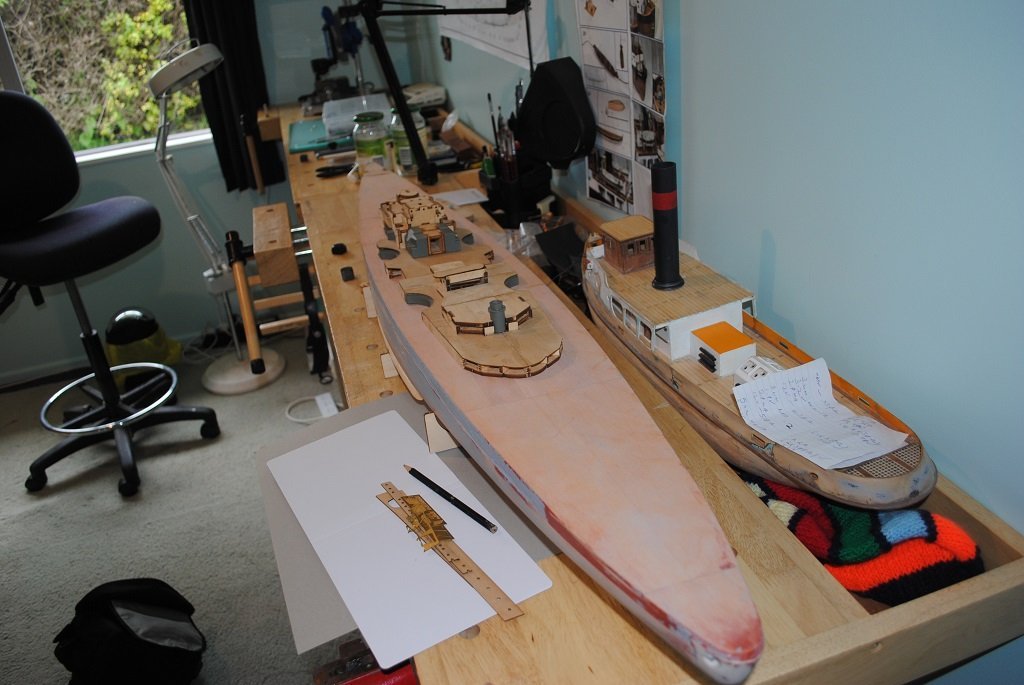
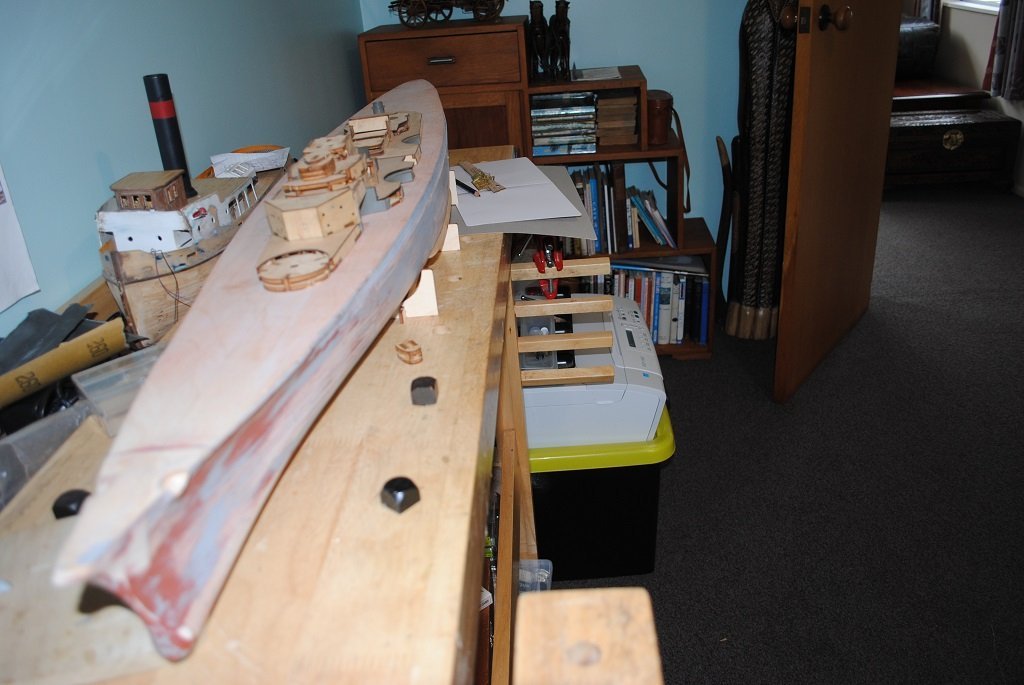
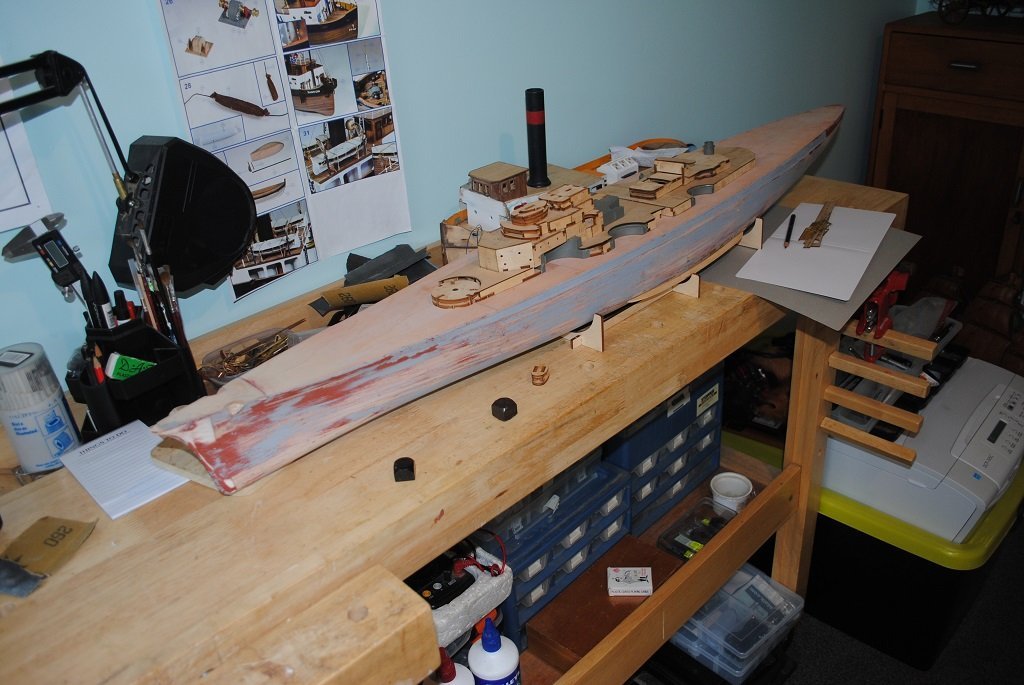
Back in 2020 I saw this post on MSW: 1:200 Bismarck - coming soon! The Bismarck kit was announced by Amati. I have built Amati kits before and know that they are top quality. I was working on an Aeronaut model of the Prinz Eugen heavy cruiser at the time - not a great kit but it turned out OK. I started checking the Amati site every few days, and over a year later I finally found it offered for sale on agesofsail.com. I ordered it immediately and am about ready to start.
-
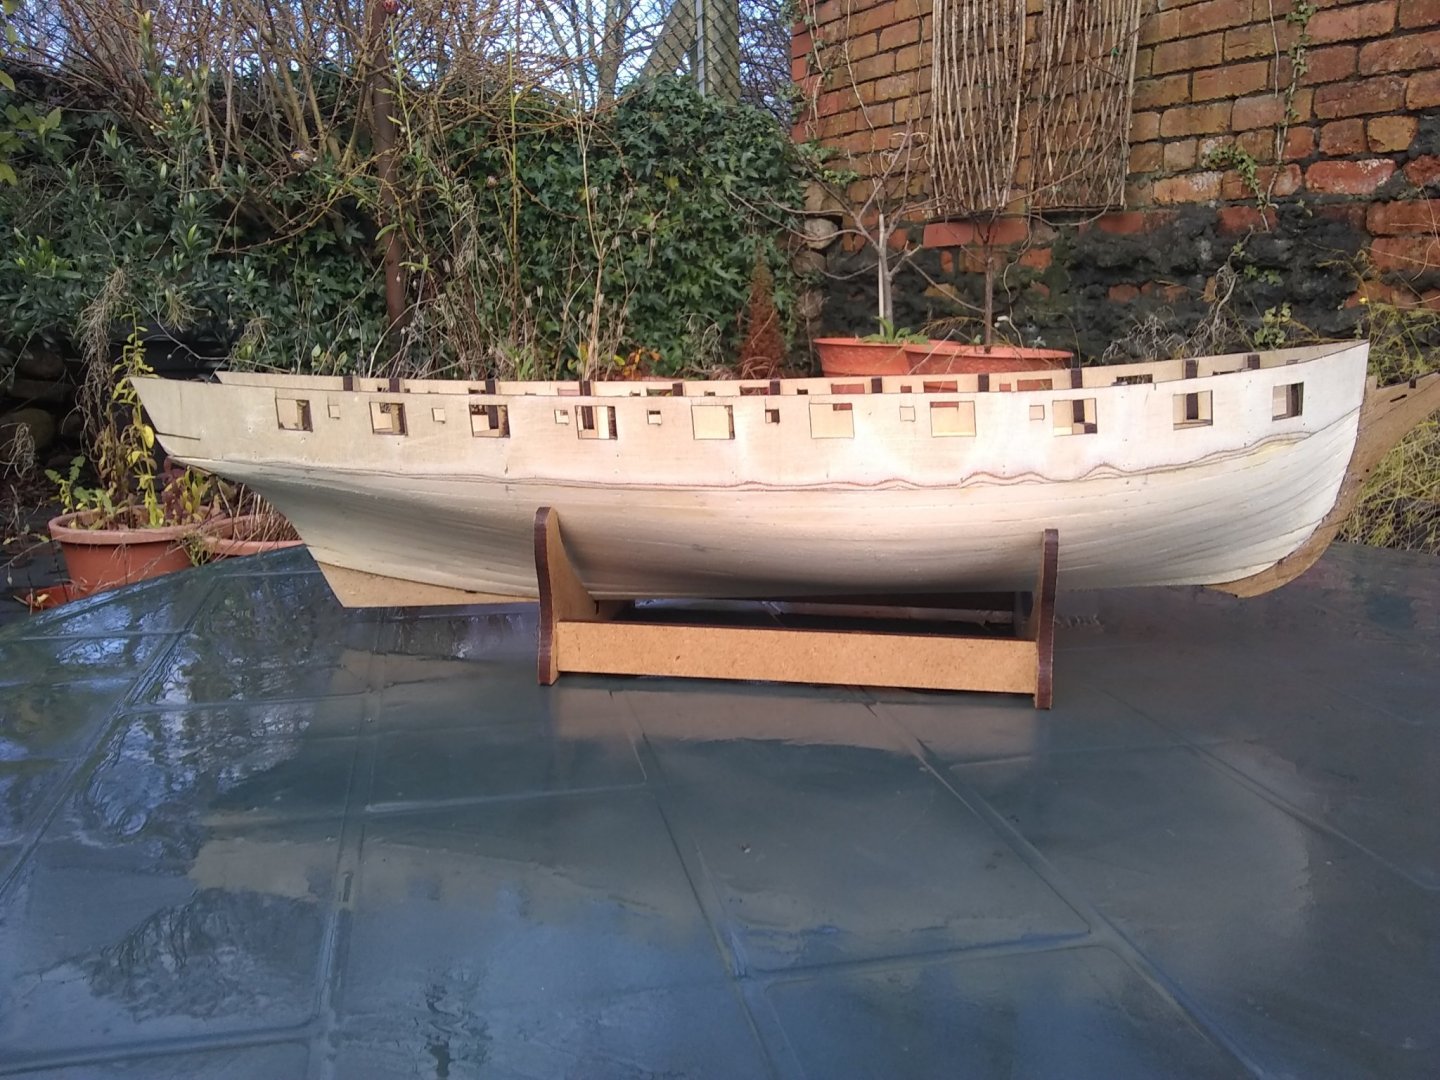
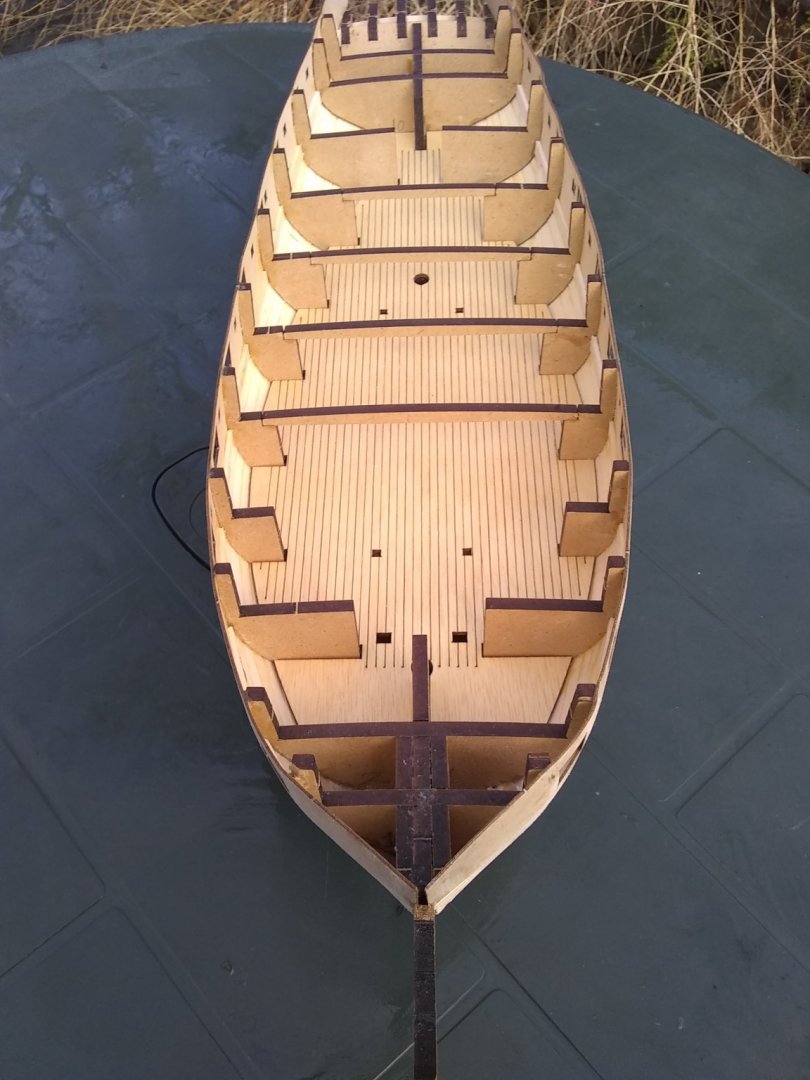
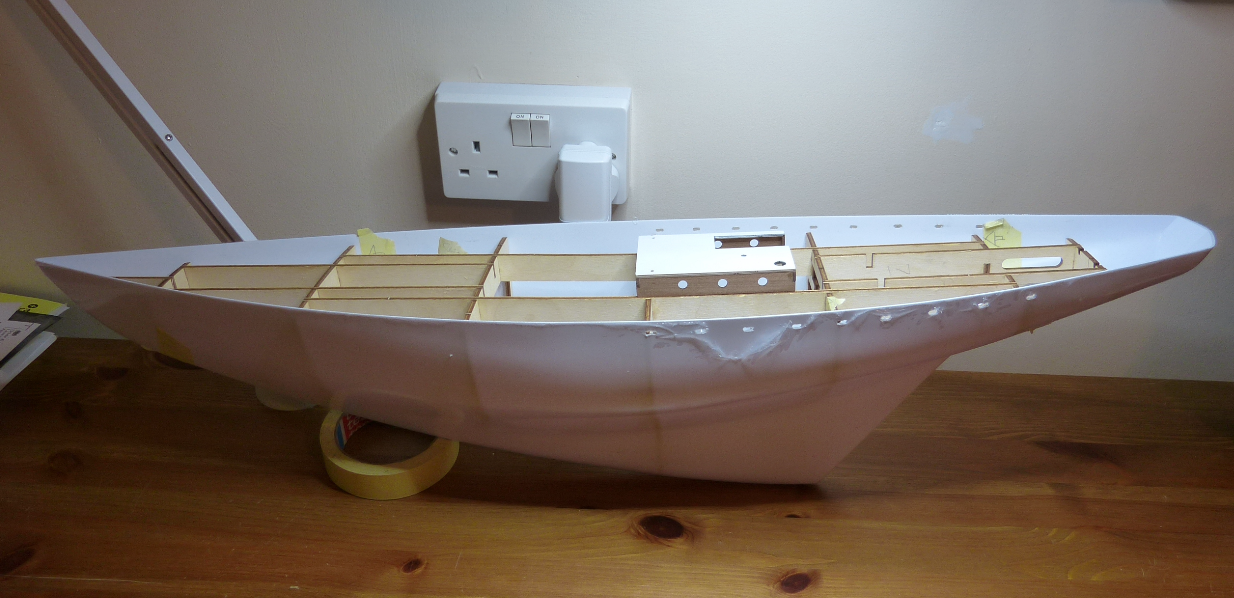
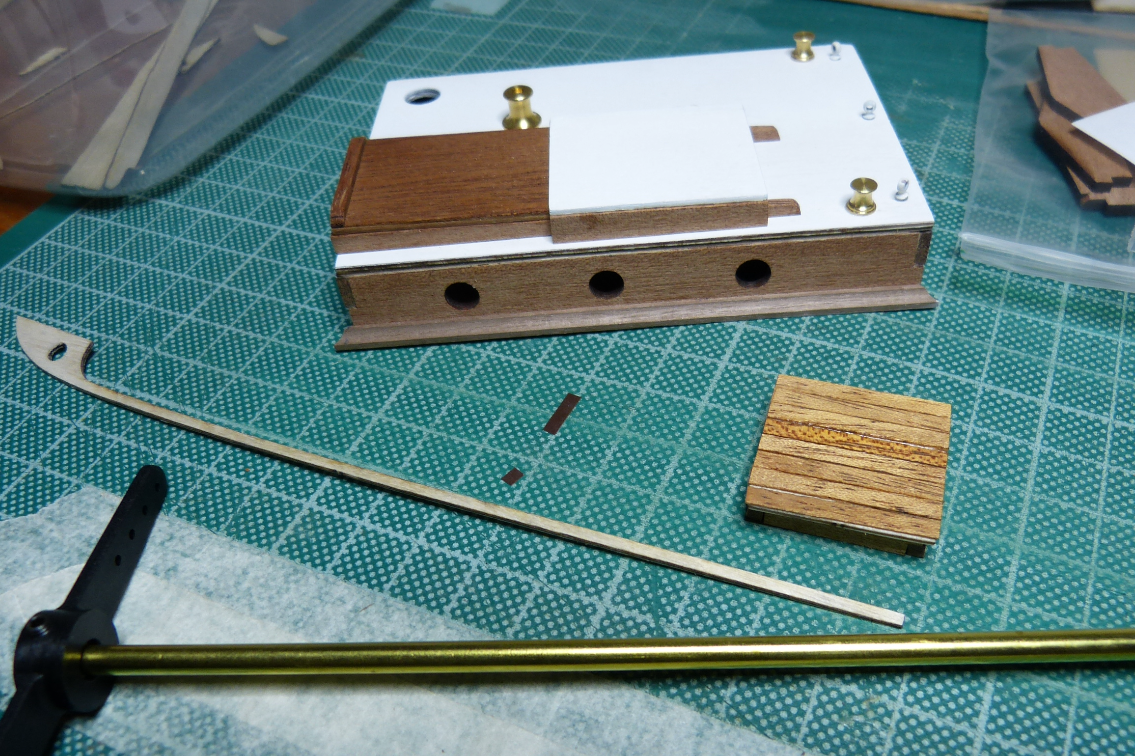
 My second attempt at building from a kit . . this time the Amati Dorade and I'm going to try my hand at adapting it to a basic radio control for very very occasional gentle pond sailing, so . . Here we go then . . A few years ago at the ripe old age of 70, I bought Model Shipways Bluenose. A real challenge . . totally amazing drawings of the original but a lot of scratch building. (pic 1 attached and build on another forum). This kit comes with Amati's own set of drawings, lots of shiny brass, sail cloth, threads, sheets and bundles of wood. So . . internal framing part glued but not fitted, 'scuppers' rough formed, main cabin started and planked hatch under trial . . . As I've never built anything for R/C I am on a very big learning curve . . so watch this space . . at least for a laugh !


.jpg.e49ca03a80db3d90af9803badf66f67b.jpg)


.JPG.70b099b11a0b0771affe335d5358e85d.JPG)

.JPG.47afcdccb637000a4b7324e5b2198c93.JPG)
.JPG.8482a49d5985a09677b0c1f55b9abfea.JPG)
.JPG.a51a8e65f4ec58fb76c117af0a44a1dd.JPG)