fnkershner
-
Posts
1,595 -
Joined
-
Last visited
Content Type
Profiles
Forums
Gallery
Events
Everything posted by fnkershner
-
Rusty now that you are back. As you know Jeff has been sharing your spreadsheet of replacement wood for the Syren. Can we get you to post it to MSW?
-
ROYAL CAROLINE 1749 by Doris - 1:40 - CARD
fnkershner replied to DORIS's topic in - Build logs for subjects built 1501 - 1750
As long as she provides more pictures for the next calendar. We will let her off the hook. She is a true artist and we are blessed by her work!- 883 replies
-
- 3
-

-
- royal caroline
- ship of the line
- (and 1 more)
-
Harvey - I just realized you don't have a build log for your Conny! Well Happy birthday bud see you tomorrow!! The admiral also says happy birthday.
-
Wow! another Syren. I will enjoy this. Charley - I just noticed we are neighbors. Well at least in the same State. And you are even closer to our illustrious Dr. Per. If you would like I can add you to the distribution of our local club. Just PM me with an email address.
-
Jim Byrnes Model Machines
fnkershner replied to Mahuna's topic in Modeling tools and Workshop Equipment
Happy Birthday Jim! Thanks for everything you do! -
I am going to suggest that the real reason you took these pictures outside was to tease us northerners that it is just coming into summer down under! Very nice looking work by the way
-
From your description it doesn't sound like you spile. I have found on my current project that the curve at the stem is so severe that I cannot get enough lateral bending. so I find I must spile. Comments? Except for the cost in wood I am beginning to enjoy spiling.
-
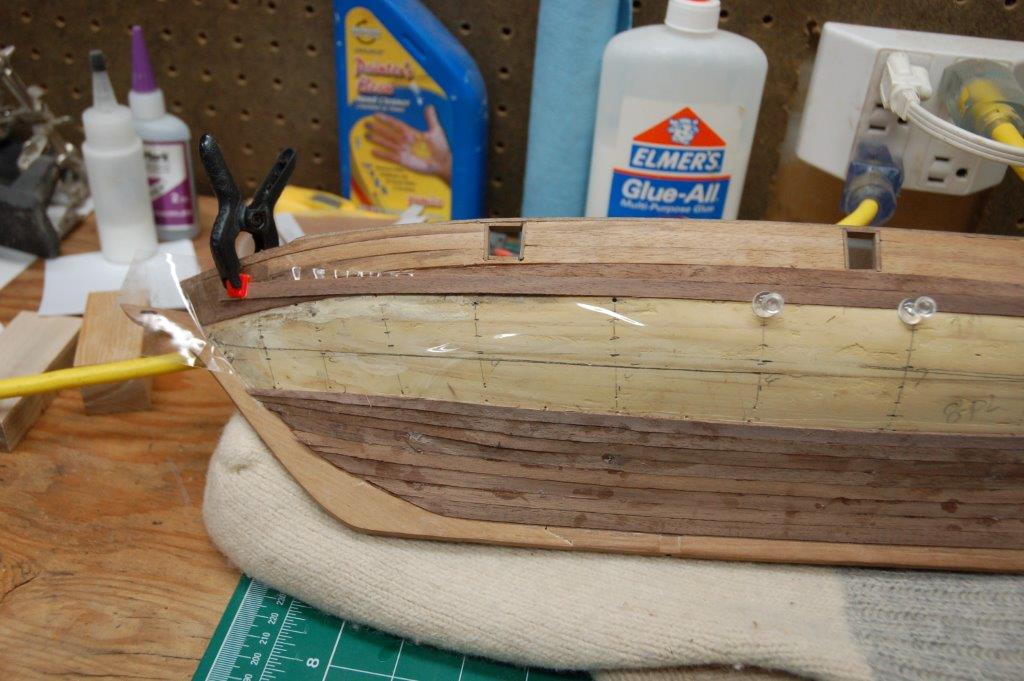
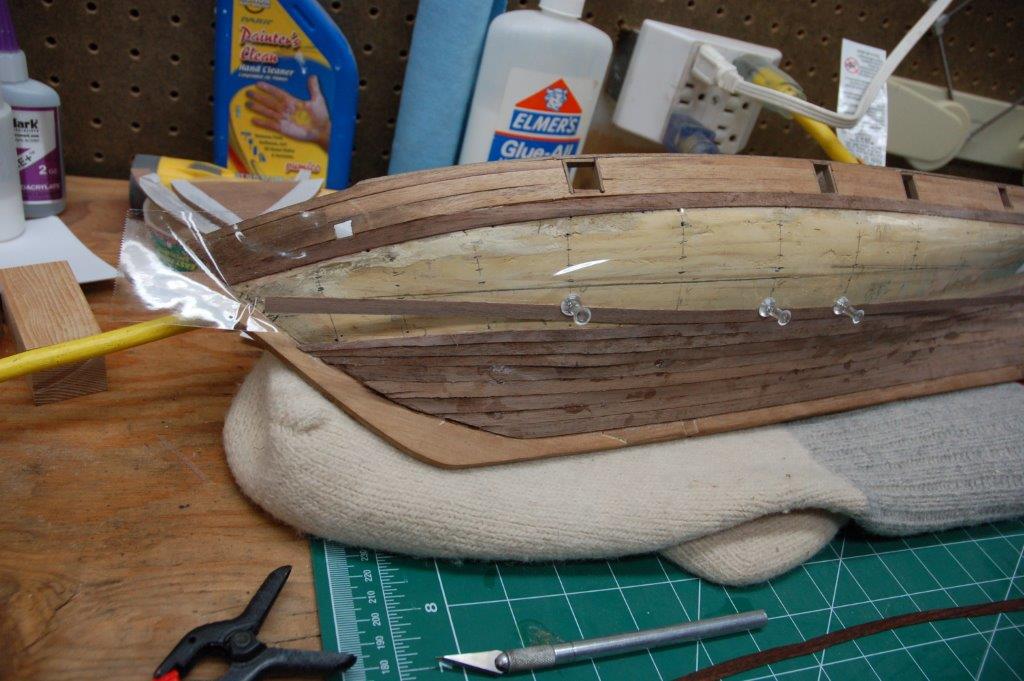
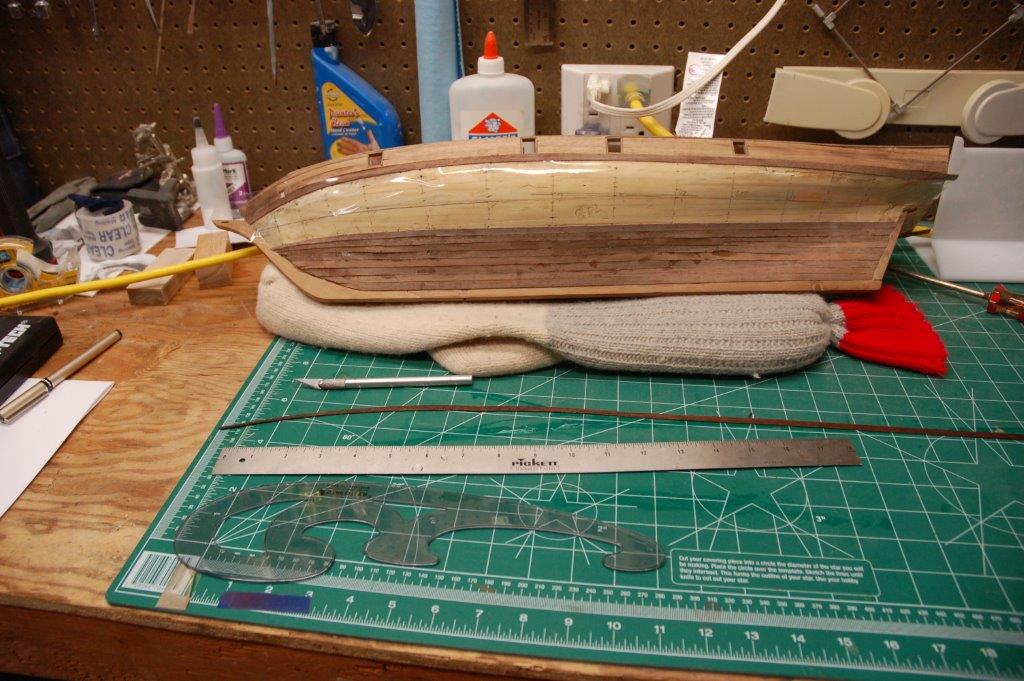
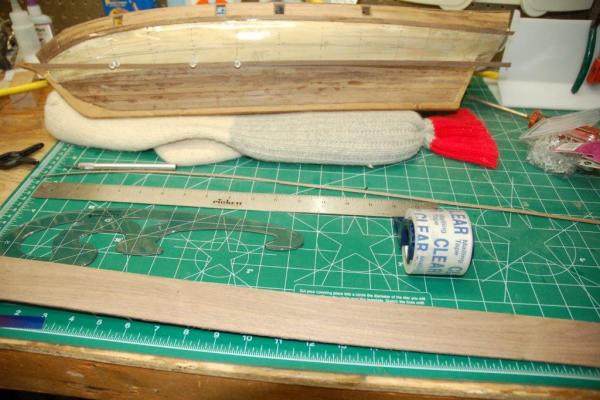
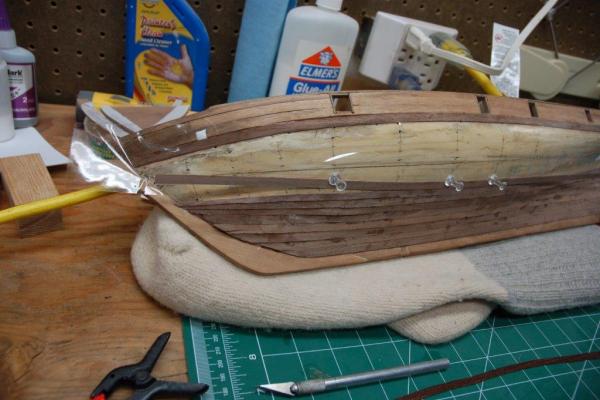
Ok Blackie as promised here goes. In addition to the steps above as you describe. I took 2 inch wide packing tape and laid it from the stem to the stern. One of the reasons for doing this is 2 inch wide is hard to bend laterally. I want the tape to lay as straight as possible. I also want it to cover one of the bands that need planking. Now for the next step there are many ways to do this I will describe what I did. The goal is to transfer the bulkheads and the edges of the planking to the clear tape. One of the easiest ways is to use a pencil and just mark the top and bottom of the area to be planked on the tape. In my case I used my proportional dividers to mark the hull with the bulkheads and the edges of each plank. I then transferred these tick marks to the Tape. Now peel the tape off the hull and lay it on a wide plank. So that all the tick marks show and are on wood. You will discover that when the tape goes from a curved surface to a flat surface the tick marks now form a curve. Next as you can see in the picture below. Use a French curve to connect the tick marks. and cut the plank out of the sheet of wood. The result will be a plank that is both tapered and curved. and it fits wonderfully on the hull. and it looks straight!! PS all of the above is the result of patient help from Chuck! THANKS! Now all I need is more wood In this photo you see the French curve, the tape and a sheet of wood to cut the planks from. You also see a completed plank.
-
Wow! I would love to see such a spreadsheet. In my spare moments (and while cussing at the planking) I have been doing research and thinking about my deck furniture and rigging. Please do send it to me!!
-
Augie - Is it necessary to spile since you are coppering?
-
Spile is when you create a plank from a wider sheet of wood typically 1 1/2 inches to 3 inches. This plank has a significant curve in it. It may also have a taper. If you look at the same pictures I posted you will see a plank laid in front of the hull that has been spiled. When you look at it laying in front of the hull you cannot believe that it will fit on the hull. But it looks great once it is in place. the only reason I have not installed it is that I want to make sure I have enough similar lumber to complete the hull this way. I see that I got a bit side tracked in this conversation and forgot to post my spiling steps. This should help. I will do that tonight. And many thanks to Chuck for his support along the way. The plus is I finally had a chance to use my French curves. Blackie I will tack this plank in place and take a picture to show you what I mean.
-
Steve - I am sorry I can't help with the silicone. I don't have any experience with that. But I can tell you from my experience with R/C sailing that you do want to seal everything with Epoxy. Out club often takes the sheet of ply and gives it a layer or 2 of West Systems Epoxy before beginning the build. For the first layer use a scraper to lay on a thin coat and then sand it off. Your goal is to waterproof the wood. When you add the second layer use a finer sandpaper for the finish coat. I do this to both sides of the ply. Having said all of the above I have had very little trouble with water inside. I have not found the need to drain it.
-
Ok I did almost exactly the same thing you did. Except I divided the hull into 3 instead of 2. I also use proportional dividers and I marked the width of each plank at each bulkhead. I first started planking from the bottom. I must admit now that I should have started tapering a bit sooner than I did. I also agree that it is almost a straight line from Bulkhead #7 to the stern. But if you look at the pictures I posted above you will see that a full size plank laid at the wale almost immediately climbs completely above the plank above it. This is why I felt the need to Spile. And If you look at the Spiled plank you see how much curve is needed for that plank. The opposite problem presents itself from the keel. the plank almost immediately climb so rapidly that I may have to create a stealer for the stem. Or Spile.
-
Where are the Cannon balls? What have you decided about the rigging? Most of my research seems to indicate that a true Baltimore Clipper only had 3 Jibs not the 4 in the kit, that was much later.
-
Blackie - How do you decide where to terminate your dropped plank?
-
Well I will confess I was first a math major then Computer Science. But you managed! Of course this assumes that the scale of the model is 1:64. Also the formula is the same either way. It does not matter if you multiply or divide first. And the Liberal arts education did come into good use here. You still had to do the research to see if 12" was proper. Are you planning on changing the supplied planking for a different size?
-
Lets see 3 X 64 / 16 = real size in inches of the plank. What do you think?
-
Thanks Blackie, I am even more impressed with how you met the stem. Very clean, did you create a rabbit?
-
very interesting.
-
Lou - In this case Edge bending is too extreme. Part of the reason it has taken me so long to get to this point is that I tried to do this without Spiling. I did do some edge bending and you can see that on the lower hull. Well I am committed now and I am learning about Spiling.
-
What a great project. very clean looking! I can't wait to see more.
-
Thanks for the comments. Blackie I would still like to see your drawing. There is never to much information. And now I agree with you that I should have started tapering at the bow sooner. As it is now the remaining width at the bow is almost exactly 1/2 the width at frames 6 & 7. And the width at the stern is almost exactly the same as the width at frames 6 & 7. So if I am careful there should be no need for stealers going aft. Now the Bow is the issue. Simply tapering will not get the job done. And even a drop plank doesn't seem to be the right answer. I should also mention that I have made my share of paper and card planks as well. Bob - I completely agree. Our issue is unique in that we want a continuous run from bow to stern. Not what you would see on a real ship. I think I have decided that all of my future builds are going to be coppered or painted. For this model I am finding that out of a 1 3/4 inch wide plank I can get about 3 planks that is approx. a 50% yield. so I am spending quite a bit of time in front of the thickness sander. I must also confess I was quite surprised when I cut my first spiled plank. I could not believe the curve (as you can see in the picture). I said to myself there is no way it will fit. But too my surprise if fits very nicely and looks good too! The only reason I have not glued it in place is I want to make sure I have enough lumber that matches. I should also mention there is no way I would even consider doing this with out my trusty Model Machines table saw and thickness sander. I have quick a canister full of Walnut saw dust.
-
I can't believe it is November and it has been 2 months since I updated this log. In those 2 months as most of you know there was a 2 week side trip to the America's Cup. So let me bring you up to date. As mentioned above I am doing 2 layers of hull planking, and there will be no cooper or paint. So I am using this as a learning experience to get the 2nd layer looking very good. At this point it has been mostly a frustrating experience. I have tried several approaches. I have also planked about 1/2 of the hull before I ripped it all off and started over. I am now on my 3rd attempt. I have also come to the conclusion that there is no other way for this to turn out right except for Spiling. This has led to much experimentation and lots of wasted planking. I now have quite a collection of Walnut planks of various sizes and widths. I finally decided to adopt Chuck's approach. I want to offer a big thanks to Chuck for my endless questions on the smallest detail. So let me lead you thru the steps and add some observations/comments 1. As recommended from many different sources I divided the hull into 3 bands. Each band was approx. 7 planks. 2. I started planking from the keel with the Garboard strake. I found that the first 5 planks would lay quite straight with no tapering on either end. This almost filled the first band. 3. I continued planking from the keel tapering at the bow and inserting a stealer at the stern. About this point the planking is 1/2 done on each side. It has been a long hard road but each try has been an improvement over the previous attempt. 4. Now as you can see from the pictures I have reached a critical spot. If you just layed a full width plank with no taper or bend you can see how far off it is from laying correctly. I could not see how a stealer or drop plank would solve this. I will not bore you with all the different things I tried and how much lumber was wasted. It may not look like it but those planks held by pins are at the widest park and completely straight. 5. Finally I succumbed to the Spiling demons. I will pick up this narrative in the next post.


-
GIL!! PSSM has not be the same without you. Welcome back! I hope you can make it to our next meeting. I am sorry we wont have a pot belly stove or windows and forest. but we will still have wonderful company. Welcome back! PS You could have left me the keys to your boat while you were gone.
-
And they did this over and over twice every 3 min! Amazing!