HOLIDAY DONATION DRIVE - SUPPORT MSW - DO YOUR PART TO KEEP THIS GREAT FORUM GOING! (Only 13 donations so far - C'mon guys!)
×


Moonbug
-
Posts
1,028 -
Joined
-
Last visited
Content Type
Profiles
Forums
Gallery
Events
Everything posted by Moonbug
-
 Nice job on the repair Peter. I always rationalize with the idea that the final product is going to basically last forever. So an extra hour, or day, or even week to make it right always ends up worth it!
- 293 replies
-
- 2
-

-
- pickle
- caldercraft
- (and 1 more)
-
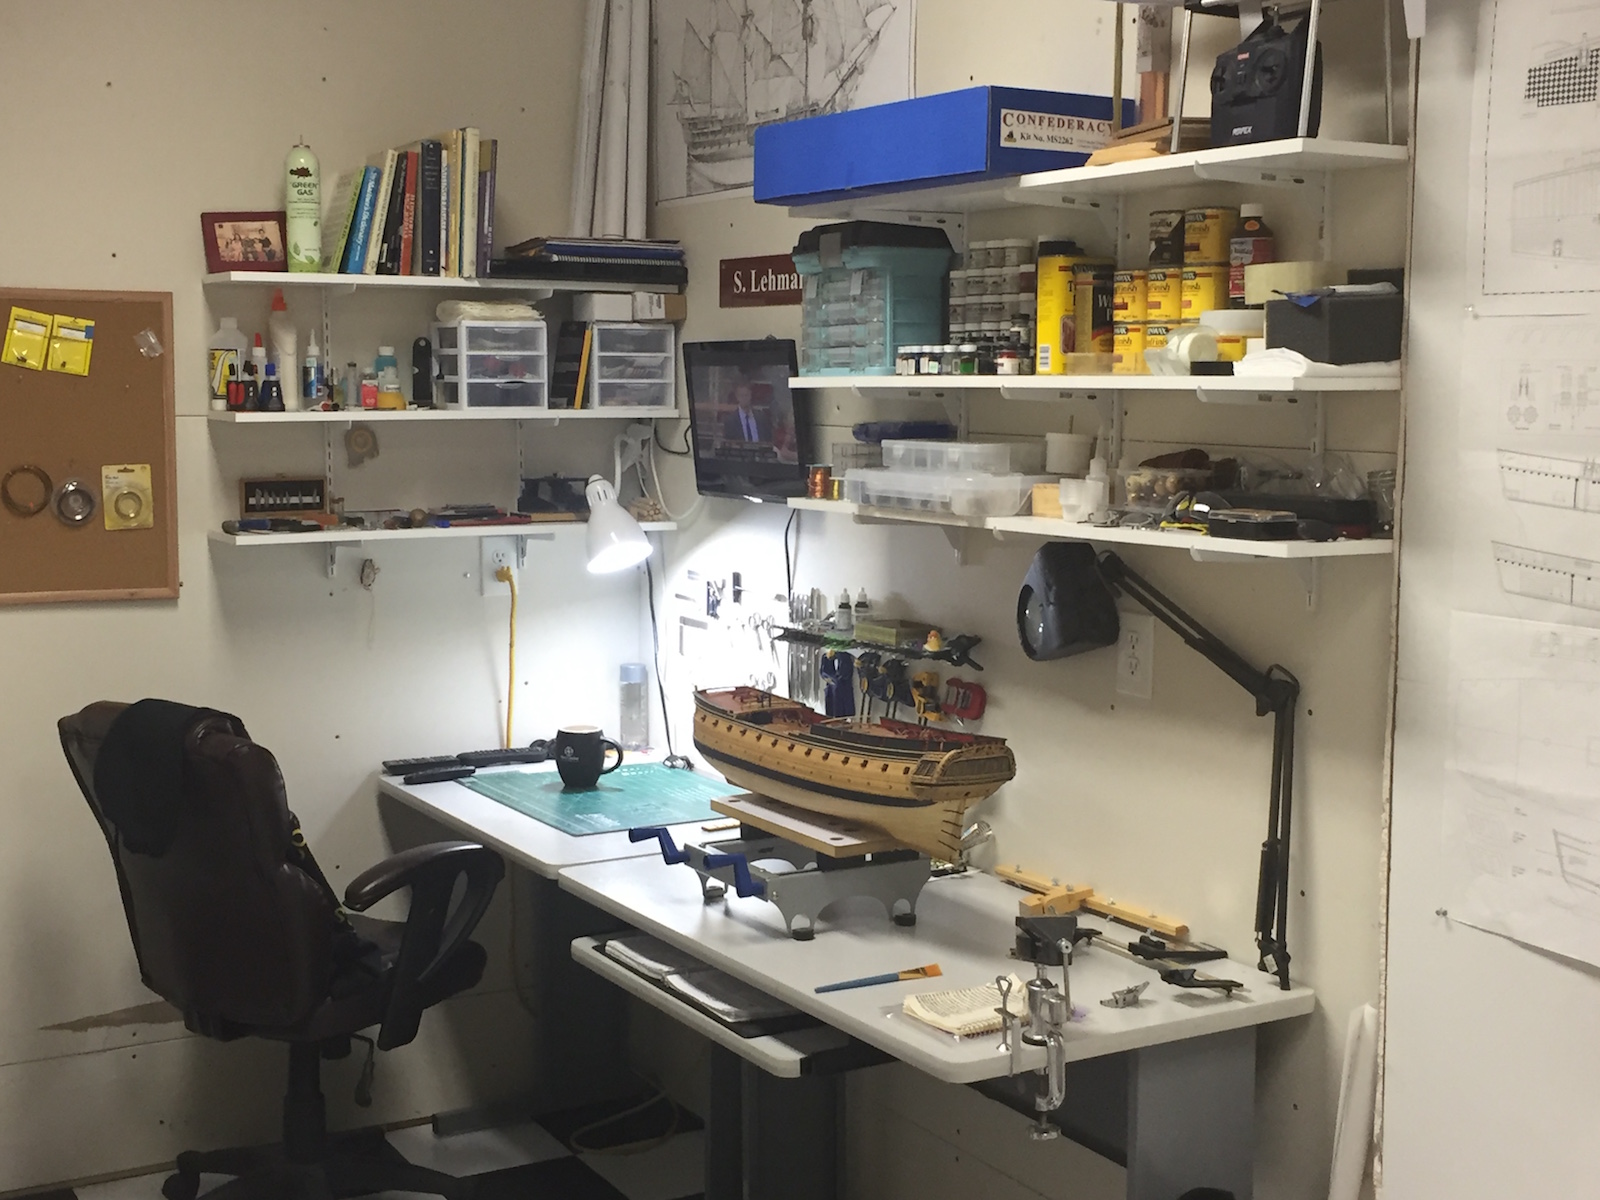
Hello all, We all lost a dear friend, great supporter and member of our Shipbuilding family when Augie Bruno passed in December. No one was as proud of his work or shared in his enjoyment of the hobby more than his lovely wife Diane. After being contacted by Popeye, Diane expressed how helpful and wonderful it would be if someone were able to finish Augie’s work on the Confederacy – both as a tribute to Augie, and as a way to keep us all connected with his memory. As Augie and Diane’s home is only about 15 miles from me, I was asked if I would be willing to take over Augie’s build. I had the pleasure of sharing a cup of coffee, some delightful cookies, and even more delightful stories with Diane – and she assured me that this is indeed what Augie would have wanted. So, it is with a warm heart, and substantial amount of humility that I’ll pick up where Augie left off. Thanks already - and in advance to Anja, Popeye, Mark and Sjors for their support. I’ll do my best give Augie’s build justice, and do right by Augie and Diane. As it stands – I’m embroiled in research, as this is my first American built ship, and I feel it’s important to get to know her as much as I can before I continue the build. Hope to have some actual progress to show soon, but in the meantime – here she is in her new shipyard. - Bug

- 2,191 replies
-
- 61
-
-
- confederacy
- Model Shipways
- (and 1 more)
-
Nicely done Mark, Thanks for the explanation on the micro-glaze & glass. Great information. - Bug
-
I agree with Mark! If that's mediocre - please don't ever look at any of my build logs. - Bug
-
Loving the door knockers! - Bug
-
Great work Sjors - she's a beauty with the timbers up! - Bug
- 1,616 replies
-
- 4
-
-
- caldercraft
- agamemnon
- (and 1 more)
-
Nice framing indeed Denis. And I hope you're staying warm up there. - Bug
-
Looks well worth the effort of the re-do. Nicely done. Interested to see how it ends up with the planking, etc. - Bug
-
Congratulations Nils! Beautifully done! As I've mentioned - I'll certainly be referencing when I get to the Pegasus! - Bug
-
Hello Jesse... sorry to hear about the feline intrusion. I just wanted to let you you know I've used the suggestion Capt Steven makes: stocking / pantyhose over the end of a vacuum hose trick in the past and it works quite well. Good luck, - Bug
- 1,306 replies
-
- 11
-
-
- syren
- model shipways
- (and 1 more)
-
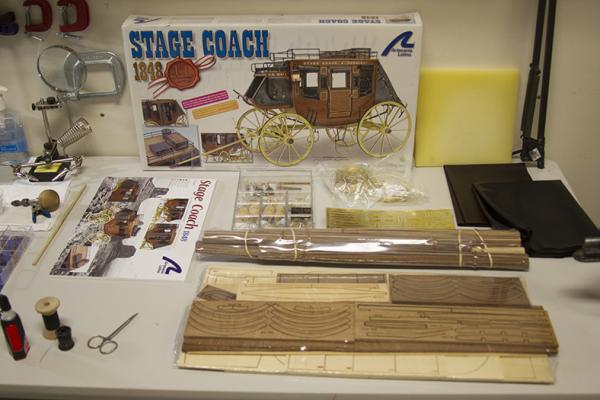
Thanks Frank! Appreciate the comment! The stagecoach is fun and something different, but is not a ship. *laff* -Bug
- 274 replies
-
- 3
-
-
- Santa Maria
- Artesania Latina
- (and 2 more)
-
Nice, clean looking work Frankie. - Bug
-
Thanks for the kind words Ian! And that binnacle looks fabulous! - Bug
-
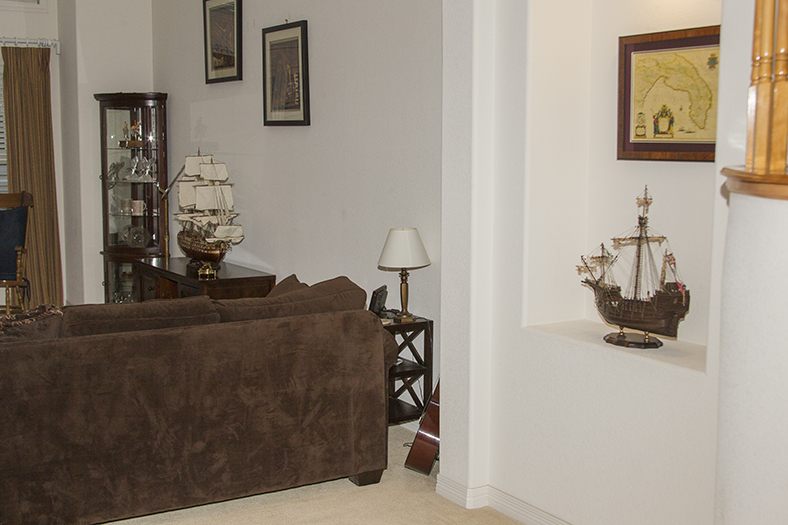
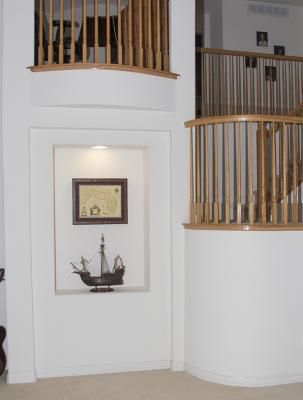
Well, here's her final resting place in our Foyer, just up stream from the San Juan Nepomuceno. :-) Incidentally, the old map is of a province in Italy I acquired while stationed there many moons ago. It'd had been sitting in my storeroom for 20 years, just waiting for an excuse to be framed and mounted. (Yes - I realize it's not Genoa, Italy where Columbus was from, but I think it's cool none-the-less) - Bug

- 274 replies
-
- 12
-
-
- Santa Maria
- Artesania Latina
- (and 2 more)
-
Hehe, good question Jan, I'm not entirely familiar with the print world, but I am very familiar with broadcast copyright laws. Most of them - in particular with regard to damages - revolve around misuse of material for a profit or denying the original owner profit. So, I think for the most part we're ok here since its use is almost entirely informational. ;-) -Bug
-
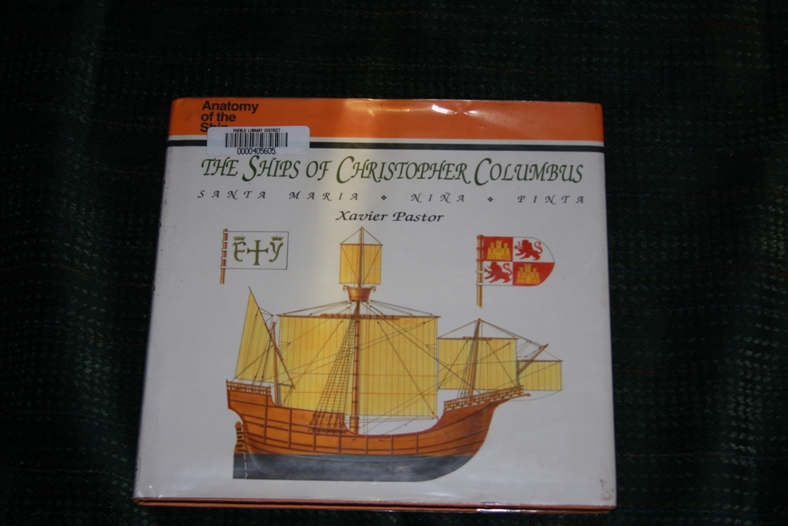
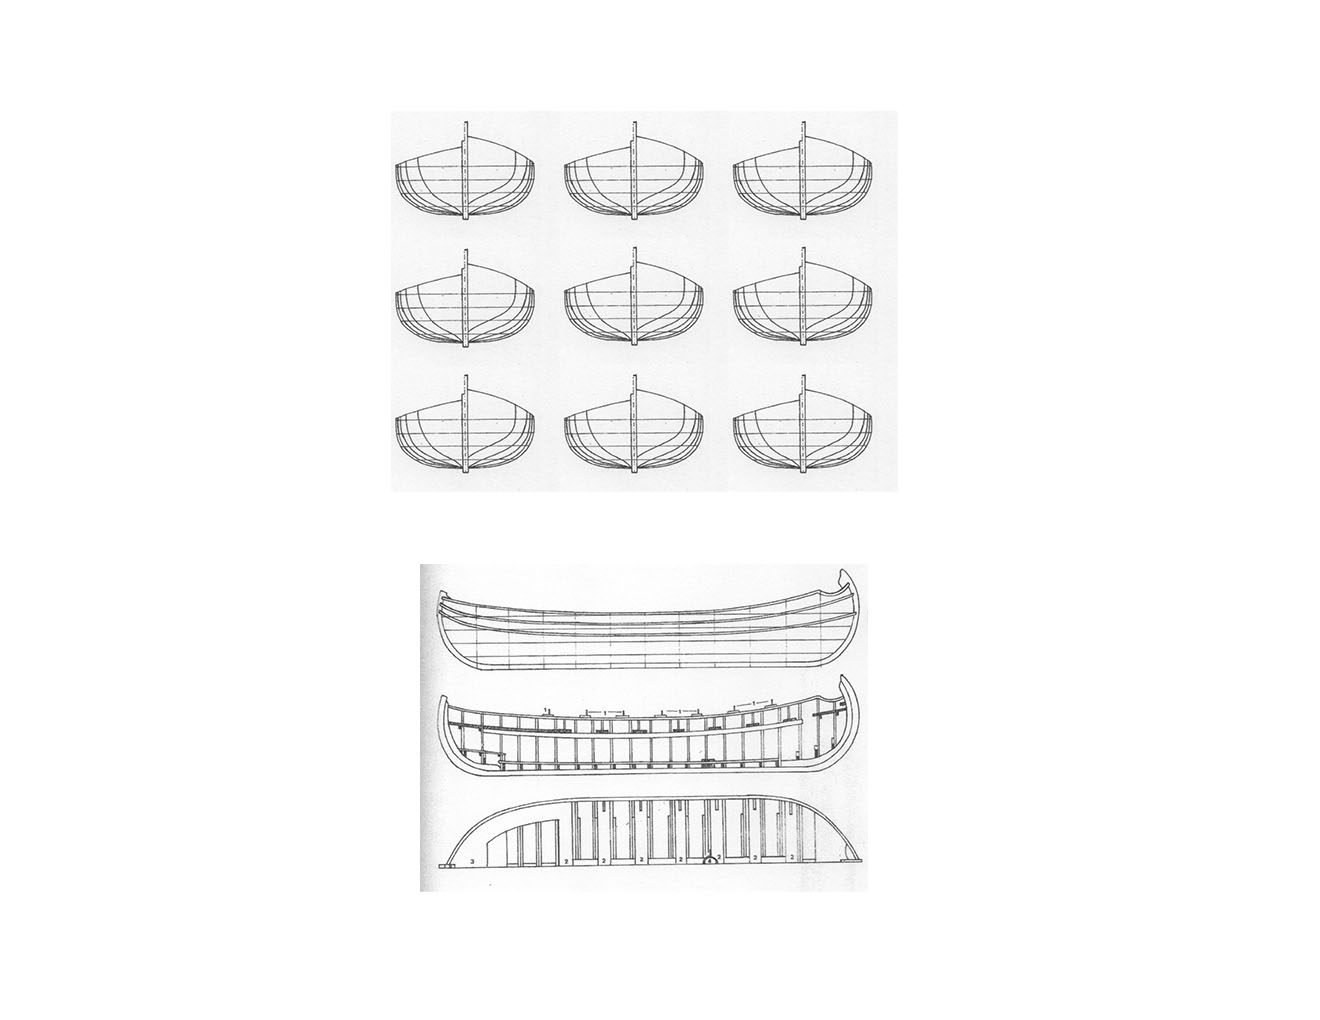
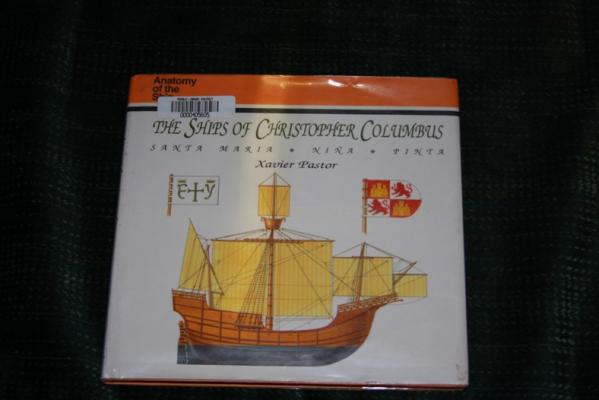
Good morning, Xavier's book is definitely what you're looking for. Here is the cover, and what the plans for the launch look like. - Bug

-
Thanks so much Joe - I wasn't sure about the aging at first either, but my original intent was for this to be an educational display for my girls' school. That was back before I realized I was going to be two years over deadline. ;-) Anyway, I learned a ton about tarnishing and aging from the forum (and mistakes of course) and am glad I went that direction. Thanks Richard, I appreciate it. I actually rigged a little pulley so the rear deck could be maneuvered up or down. Not easy mind you, but possible. *laff*. I had to leave that deck pretty open as a result, but I'm still happy with the overall effect. -Bug
- 274 replies
-
- 2
-
-
- Santa Maria
- Artesania Latina
- (and 2 more)
-
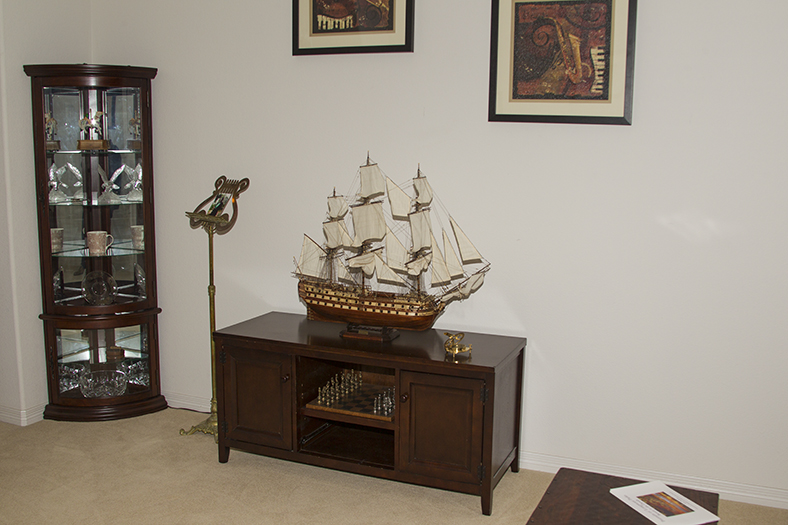
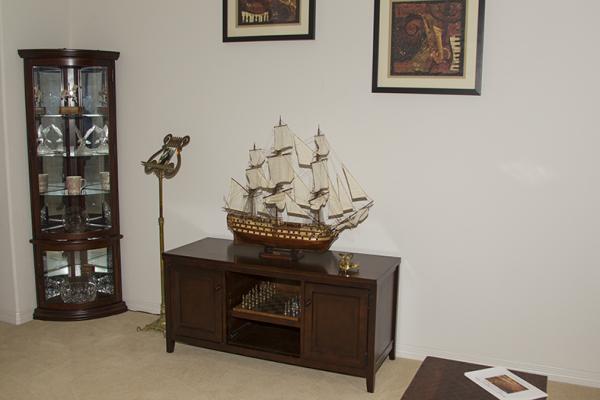
Thanks so much Sjors! I really appreciate it! I do like her where she is as well. We're thinking about moving her into the living room next to the San Juan. I'll post another photo and compare the two spots. :-) Next for now is this guy: A stagecoach I promised to build for the Admiral. Then, my next build is most likely the Pegasus. :-) I want to do a British vessel and my youngest daughter loves horses. - Sean
- 274 replies
-
- 6
-
-
- Santa Maria
- Artesania Latina
- (and 2 more)
-
Thanks very much Crackers, appreciate it! - Bug
- 274 replies
-
- 1
-
-
- Santa Maria
- Artesania Latina
- (and 2 more)
-
Thanks Grant and Don, I appreciate it! - Bug
- 274 replies
-
- 2
-
-
- Santa Maria
- Artesania Latina
- (and 2 more)