Landlubber Mike
-
Posts
4,547 -
Joined
-
Last visited
Content Type
Profiles
Forums
Gallery
Events
Everything posted by Landlubber Mike
-
 Very nice Martin. The cannons took a ton of time on my Badger - for a small part of the model, there are so many parts and opportunities to improve on the details. Great work!
- 467 replies
-
- 2
-

-
- fly
- victory models
- (and 1 more)
-
Those Dr. Slick scissors look very interesting. I've tried a few scissors in the past, but it's always hard to get a clean cut just above the knot without leaving little tails. Thanks for the tip!
-
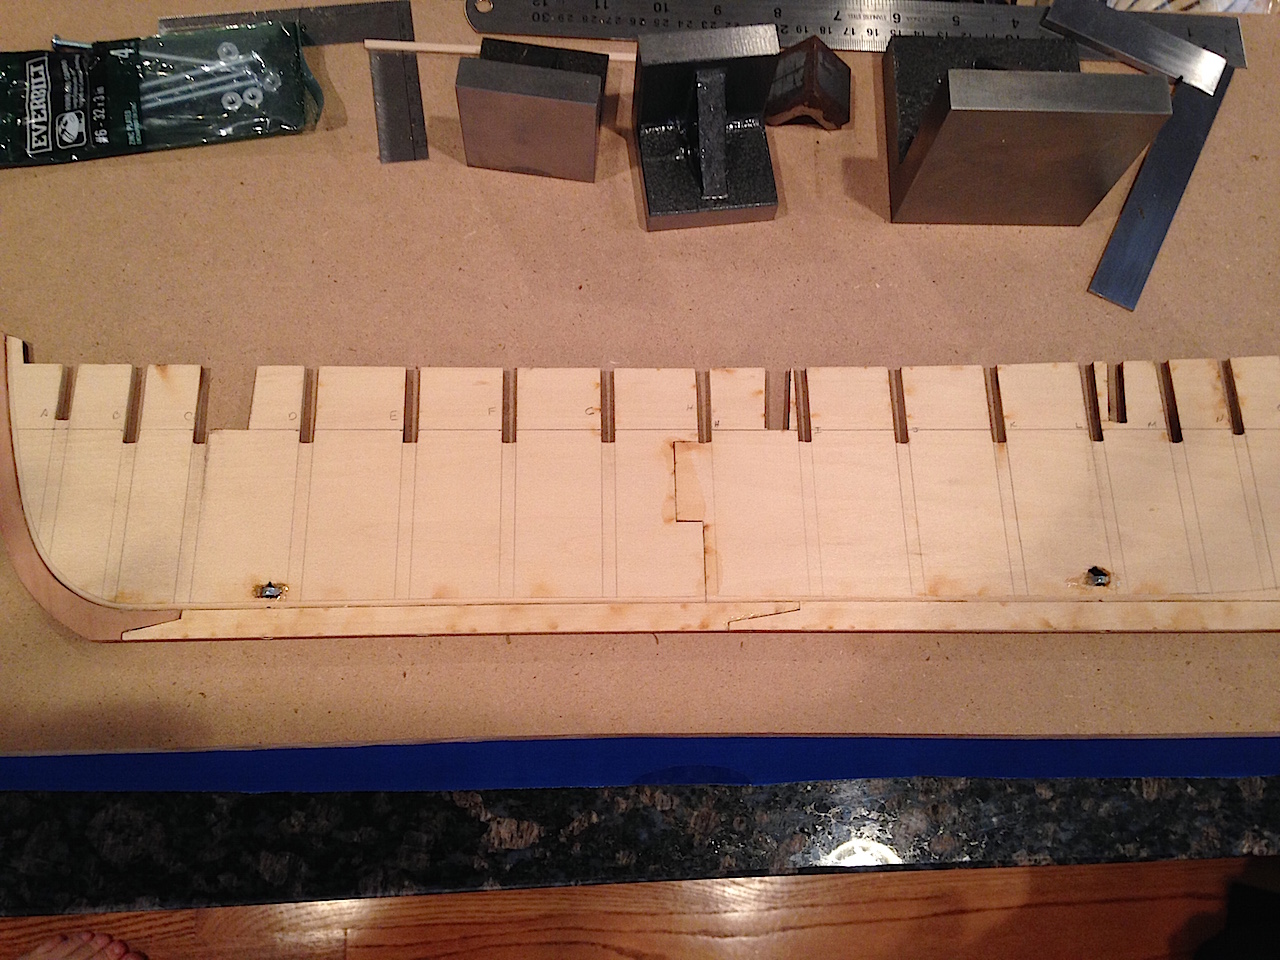
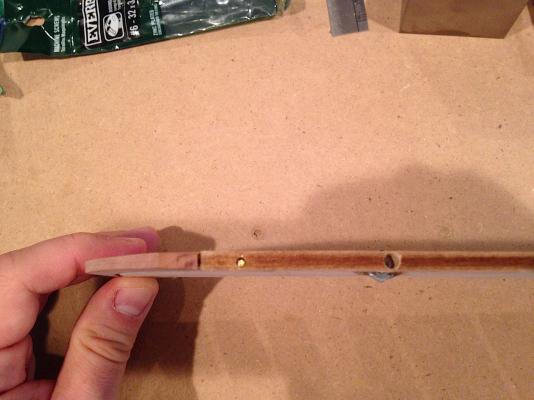
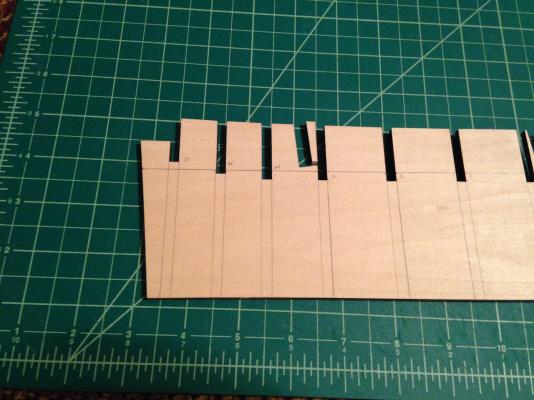
Just came back from a week at Disney with the kids, but had made a little progress on my Morgan before I left. First up was to house some nuts into the center keel for the mounting pedestals. I epoxied a couple of nuts for #6-32 machine screws about 3/4" (18mm) up into the center keel: I ended up cannibalizing the nuts from my Unicorn/Lyme build - the epoxy really held the nuts in place without needing any other support for the nuts. I originally bought 2" machine screws, but forgot that the screws had to not only go through the model and the pedestals, but also any mounting base. Thankfully I was able to find some 3" screws which hopefully should be long enough. The kit's instructions had what I thought was a helpful tip to install dowels or rods to pin/support the keel and stem into the center keel. I never did this on my prior builds, but I figured a little extra support never hurts - particularly since this kit uses basswood for the framing pieces. I ended up going with brass rod. I forget the diameter, but I think it was around 1.8mm or so. At that diameter the rod is pretty sturdy, yet small enough not to disturb the rabbet joint. Pretty easy to do: drill a hole, stuff a little epoxy into the hole, then hammer the brass rod into the hole. Even more fun in that I finally got to use the ball peen hammer that I got as a bonus from my first order with Micromark years ago when starting my first build. I installed four support rods: three along the keel (one near the stern and one through each joint between the keel/stem pieces) and one at the fore end of the stem just below the copper line).

-
Really looks great Ian. The cannons and quarterdeck are much improved! You're a brave man tackling the quarterdeck like that. I never had much confidence in the kit bulkheads. In fact, on my Unicorn, I must have leaned the model against something and now one of the bulkheads is warped. I have a similar splaying issue on my Pegasus because the redheart I used to replace the bulkhead extensions is weak - lot of flex to if and they broke in a few places. The upper hull planking seems to be fixing things but it's a pain because I need to clamp the opposite sides of the bulwarks with the quarterdeck support frames in place to keep the proper shape. I wonder if I might need to install similar posts as you did.
-
Looking really great Charlie. All that work upfront will pay off many dividends in the end.
-
Looking really nice Ken, very nice job! I think you'll like the result you'll get from using stains over paints.
-
I started something like that on my Pegasus and Morgan logs Cathead. Great minds think alike!
-
Thanks John, that's really helpful. I just took another look at your log and think I understand how the framing works with the plankshear, etc. A few more questions if you don't mind: 1. Did you pre-bevel the bulkheads before installation? If so, did you find the beveling diagrams in the plans accurate? I want to pre-bevel the bulkheads given how weak the center keel is, but don't want to over-bevel if the plans aren't accurate. 2. Did you reinforce the keel in any way? I'm thinking about installing bracing blocks between the bulkheads to ensure that the center keel stays flat. 3. Looking at your pictures, it looks like the short extensions at the top of the bulkheads are used to seat the plankshear. Are those short extensions covered up in the end by planking, etc.? From your log it looks like that is case, but if not, I'll need to figure out how to "paint" them in wood. Thanks John! Much appreciated my friend Thanks very much Don. I was planning on using castello boxwood for the ochre on the Morgan, as well as for the carvings, railings and masts on my Pegasus. I haven't worked with boxwood yet, but I think it would finish nicely. I'm going to test it with various finishes, including stains I bought from General Finishes, to get the effect I'm looking for (I have GF Yellow and Amber - the Amber looks very nice, at least on my tests on plywood). Osage orange looks really nice. I hadn't heard of it before, but just looked it up. Don't know if you saw this or not, but it turns a darker brown over time: http://www.wood-database.com/lumber-identification/hardwoods/osage-orange/
-
Spent a little more time on the Morgan last night. Finished the important steps of cutting the rabbets/sanding down the center keel at the bearding line, tapering the stem, and installing the stem and keel pieces. The rabbet/bearding line was pretty easy. I used a compass to mark the line along the keel, as well as along the bottom and side as a reference line for depth. I used tracing paper to copy the bearding line off the plans which I then transferred over to the center keel. From there, it was pretty simple to use an X-acto knife, files, and sanding blocks. This was one time I was glad the center keel was in basswood, as it was much easier to work than the MDF on my Pegasus (and without the nasty dust you get from MDF). That being said, I really wish Model Expo used something stronger for the center keel - I busted off another of the thin extensions last night Tapering the stem was fairly easy as well. I used a compass again to mark the center line of the outer edge of the stem as a reference mark to help ensure that I sanded the taper evenly on both sides. Pear is incredibly nice to work with, as it is tight grained and sands very smoothly. Last up was installing the stem and keel pieces. I hate this step, as it always seems harder than one would think. Even with laser cut parts, the stem and keel don't seem to line up perfectly (my pear stem actually worked better than the kit stem). You want the parts to be clamped tightly to each other, but using rubber bands or clamps runs the risk of the parts not being aligned on a flat plane with each other. On the other hand, if you glue them with weights on a flat board, then there is the risk that you aren't clamping the parts tightly together. I started with the stem and used rubber bands, then when it looked like the bond was firming up, I moved it to the building board, added the two keel pieces, sat heavy weights on the various pieces, and used c-type clamps to pull the parts close together. I said a prayer and went to bed, and thankfully this morning it all worked out Next up is to install some nuts into the keel for the pedestal mounting bolts. I'm also considering whether to add some dowels or brass rod to help reinforce the center keel and keel pieces/stem. Seems like a good precautionary step to take, especially since the rabbet reduces the joint line between these pieces.
-
Hi Ken, thanks for taking a look at my log. I was mistaken in mentioning the Minwax product - I actually tried out the Varathane stain, not Minwax. I found the particular post with pictures of my tests. Pictures are always tough to replicate what you actually see, but hopefully it gives you a sense on the coverage of the various stains: http://modelshipworld.com/index.php/topic/7267-hms-pegasus-by-landlubber-mike-amativictory-models-scale-164/?p=227035
-
Ken, I'm planning on using natural woods and stains in lieu of paints on my builds. Take a look at my Pegasus log, where I just applied General Finishes Black Stain - it covers like a paint, but isn't bulky like a paint. The General Finishes "Ebony Dye" is another alternative which is a bit thinner than the GF Black Stain. Minwax has a product that I think people have used. I didn't think the coverage was as good and uniform, but I didn't use a sanding sealer and was trying it out on plywood and dowels that I had.
-
Elijah, thanks for looking in on my Morgan log. I just read through your Phantom log and have to say I'm really excited for you - it's really great to see younger folks get into the hobby. I did some plastic models with my dad when I was around your age, which I really enjoyed. Like most people, I wish I had started ship modeling earlier. You learn a lot through the hobby - about ships, construction techniques, and things like patience, persistence and drive to build the best model you can You're off to a really fantastic start, and are taking a lot of important, critical steps now that will pay dividends down the road. If I look back at my own modeling time, there are stages were I spend 75% of the time researching, reviewing plans and other prep work, and only 25% (if that) on the actual construction. So, take your time, and ask lots of questions. Most of all, just have fun! Oh, and congratulations on your new baby brother! That's wonderful news
- 701 replies
-
- 4
-
-
- phantom
- model shipways
- (and 1 more)
-
HMS Royal William by kay
Landlubber Mike replied to kay's topic in - Build logs for subjects built 1501 - 1750
Mama mia, wow, you are a master! Amazing work on a gorgeous ship that us mortals can aspire to -
Thanks John, I really appreciate it! I've been studying your build log and website log quite a bit, it's been very helpful, thank you! I'm excited to finally start on this gorgeous ship. Hopefully mine comes out half as nice as yours Actually, quick question for you - on the knight heads and stanchions, how did you know how tall to make them? The plans aren't particularly clear, but maybe I need more coffee.
-
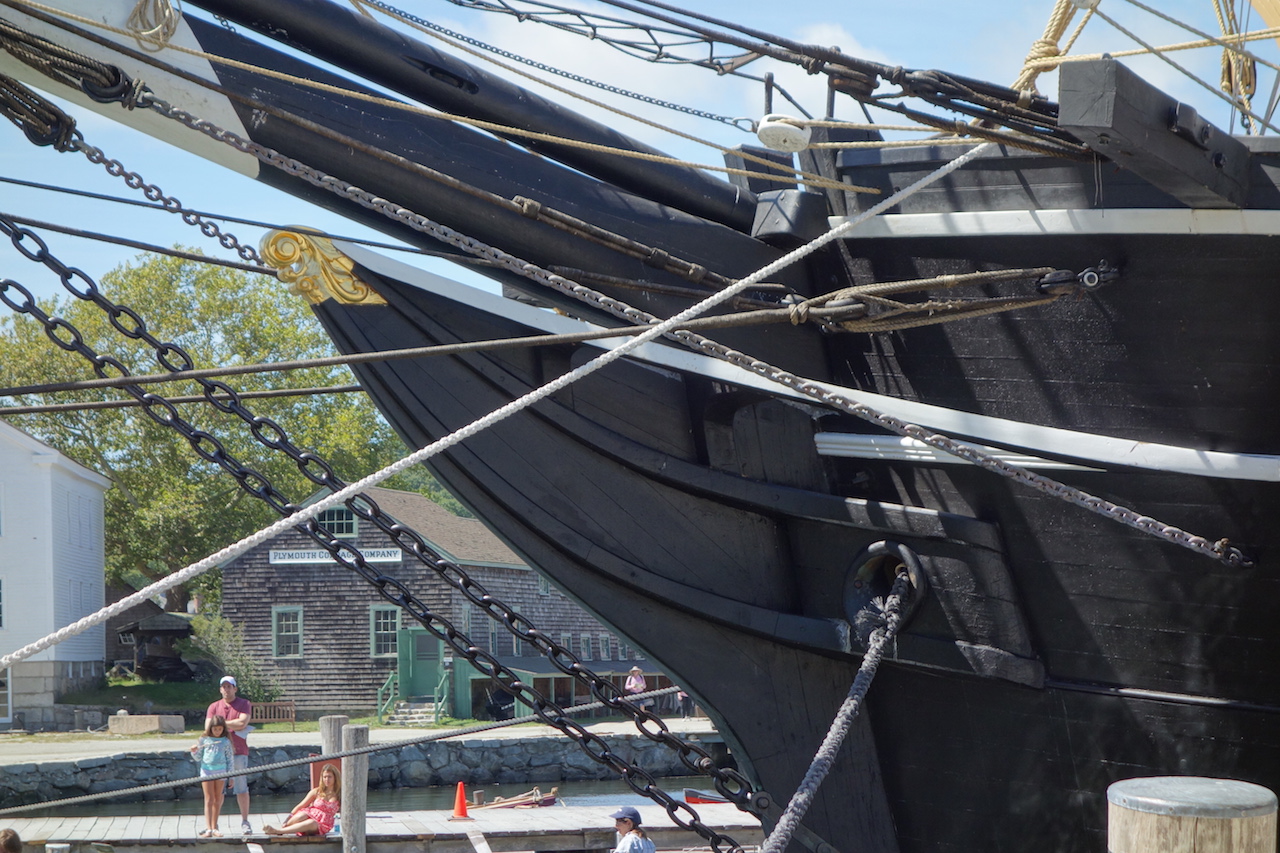
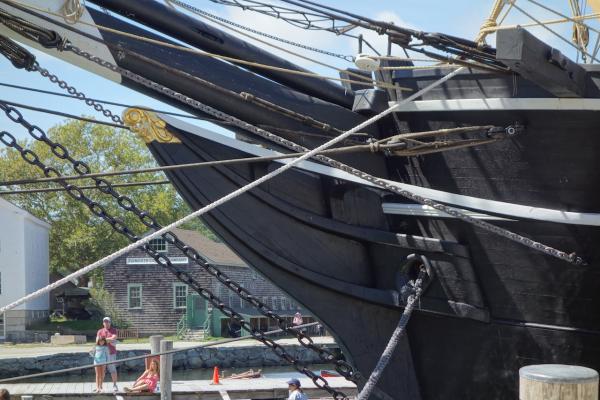
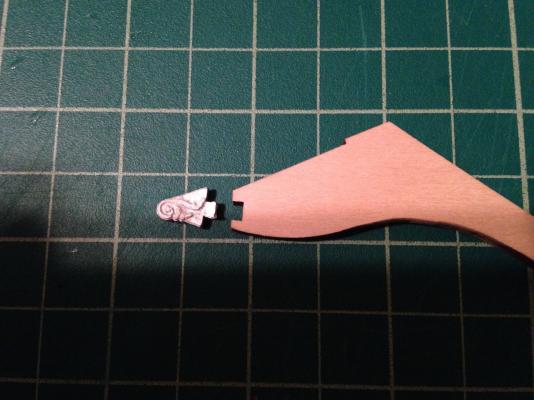
Billet Head The Morgan has a billet head at the end of the stem. It's a pretty intricately carved piece - here is a picture of it: The Mystic Seaport blog on the Morgan restoration also has a nice post on the billet head in case you are interested: http://www.mysticseaport.org/news/2013/the-billet-head/ The kit adds a cast billet head part, as you can see here. It's got a little stub that fits into a notch into the kit stem: It's not really that bad, but I think some of the details can be improved on So, I think I'm going to try and carve the billet head. I didn't add a notch into the stem at this time, as I think a better course would be to pin it to the stem so that the joint lines are much cleaner. An observation - from the picture above, it looks like the shape of the Morgan's current stem is a bit different from the kit's stem. I forget the time period the kit is from, but it looks like the shape is clearly different. Also, you can barely make out the seam lines on the pieces making up the stem. Rather than attempt to build a stem from various parts, I think I'll lightly scribe lines on the stem to represent those joint lines. Thanks for looking in!
-
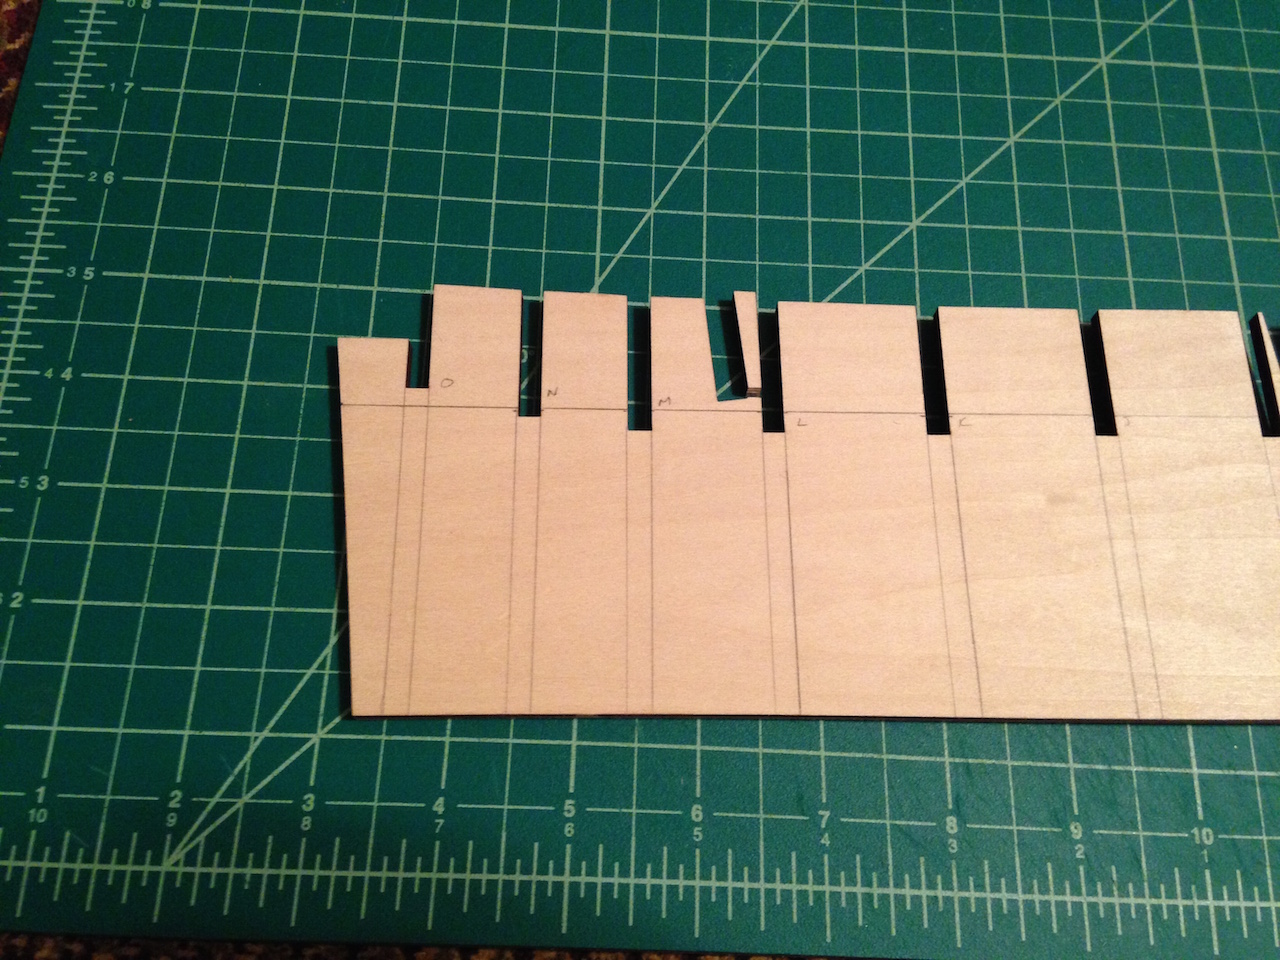
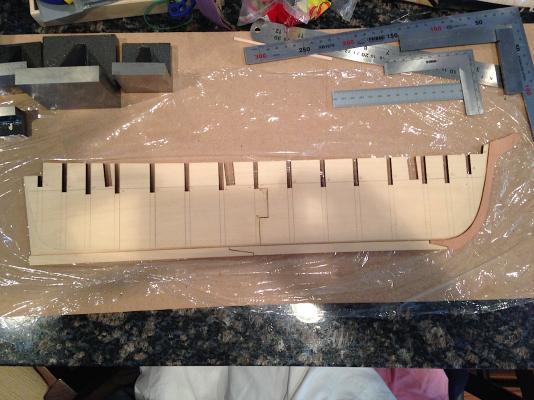
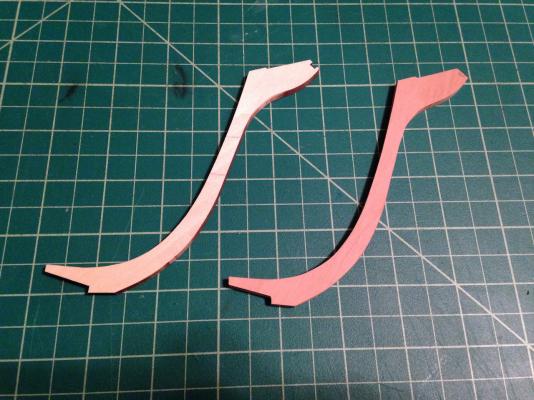
One benefit of getting a blizzard dumping two feet of snow is that I was cooped up in the house and managed to get some work in on my builds. On the Morgan, the next step is to prep the center keel by adding the rabbet and gluing on the keel pieces and stem. I'll probably add the stern post after the hull has been planked to help get a clean line into the stern post. I mentioned earlier that I'm going to avoid paint to the extent possible on this build. The nice thing about the Morgan is that the color scheme is very simple - black, white, and ochre. For black, I'll use pear stained black. White I'm still thinking about - either holly or possibly maple, or, if necessary, I will use a white stain from General Finishes. The ochre areas will be boxwood. The deck is a grayish color - I have some weathering finishes that I will try out on various woods to see what might work the best. I'm realizing that this is going to be a little complicated - for example, you don't plank the midship bulwarks. The bulwarks are essentially the inside face of the first outer hull planking. So, I'll probably need to use boxwood for the upper hull planking, then add a second layer of planking using pear. Thankfully there are a lot of detailed logs out there like John's so that I can have a better sense as to things. First thing to do was to recreate the stem out of pear, since the stem is black. I was a bit worried about using up so much wood in case I needed multiple attempts, so I considered cutting the stem in half and only creating the upper half in pear. I decided to just go for it because the kit stem isn't a very tight fit against the kit keel, and figured a one-piece stem would be stronger bond. I'm happy to report that I managed to get it right on the first try (usually doesn't happen). I traced the kit stem on a piece of pear, cut it out on my scroll saw, then used sanding blocks and my Byrnes disc sander to clean up some of the lines. I was using 5mm pear which was slightly thicker than the kit's stem, so a few passes in my Byrnes thickness sander and I was good to go. By the way, the keel is very fragile. I have no idea how this piece broke off I wish they had used something stronger like plywood or MDF.
-
Greg raises a good point - I think we get so focused on perfecting the tiny details that we forget that when the model is complete, the eye most likely won't catch very minor imperfections. Maybe one thing if you are entering a competition and having masters pour over your model with magnifying glasses, but for most of our purposes, I would think that these would ultimately be hidden. Remember, once it's in a case, most people won't be viewing it from 6-12" away
-
Martin, I hear you on clumsiness and ignorance. Hopefully after two more kits (Pegasus and Morgan), I'll be ready for the Lyme. I also have the Euromodel FWZP on the shelf, so maybe I build that with the Lyme sometime in the future (at the rate I build, that will be 10 years from now). Crackers, see, I was hoping that by building the Lyme, nobody could point out what are sure to be many mistakes. Now that I hear you have the plans, I'm going to really have to up my game, thanks! Good thing I scrapped the earlier kit-based build!
-
Hi Mark, thanks for commiserating my friend. I actually thought of you when shutting this one down The lines are different, so I will have to take them off the plans. What I plan on doing is first going through the Pegasus hull construction, then the Morgan hull construction, which requires some scratch building as you set the hull (and other things) up. I'm learning a ton from the Pegasus, and I imagine I'll learn even more from the Morgan. So when I start back up on the Lyme, I hope to be a little more knowledgeable and have a decent game plan. On the question of 1:75 versus 1:64, the kit is in 1:75, so I took the NMM plans of 1:48 and converted them to 1:75. I also copied a set at 1:48. 1:75 is a bit of an add scale, so I could change to 1:64. I kinda like the idea of trying it at 1:48, but that would require a lot of wood and space. I have some time to think about it.
-
Mark, hang in there my friend. Looks like you've got a good solution in the works, so just stay with it. I was scolded by my wife for using a few choice words last night taking three tries to make various planks for my upper hull planking, so we've all been there. Just looked up domkop - maybe I should add some foreign words to my arsenal. Either that, or I can just call myself "cabbage head" or "pudding head," as my girls would get a kick out of that.
-
Hey Joe, thanks for looking in. Sorry to hear about the framing - I can only guess at your frustration. One thing to consider is that Model Expo I think will replace parts? Maybe you can fix the framing that way?
-
Looks really great to me Jason! The boxwood and finish look really nice. I took the same "Frankenstein" approach on my Pegasus. If you're going to cover it up with copper plates, why bother using good wood? I have a love-hate relationship with walnut. I think it looks gorgeous when it is oiled, but working with it at this scale is tough given how splintery it is. I was really glad to get through the lower hull planking. I needed a mental health break after The upper hull planking so far seems to be a little easier, at least on the Pegasus, where I haven't needed to spile. Lots of custom planks to be cut around the gunports and sweep ports though.
-
scroll saw choice
Landlubber Mike replied to hamilton's topic in Modeling tools and Workshop Equipment
I bought the Dewalt that people recommend off of someone on Craigslist, basically brand new, stand, light and extra blades, for less than half of what it was retail. I saw a lot of scroll saws on Craigslist when I was looking - I think lots of dads out there buy them to do a project with their kids, then have no other use for them. -
Nice work Scoot, looking very solid. Just out of curiosity, have you thought about whether you are going to single plank your build, or double plank it? The instructions say you can plank with 0.5mm planks as a second planking. I am thinking of doing that for the lower planking, particularly to get a nice smooth hull, but the upper planking I might single plank. Looking closely at the Morgan, it looks like the upper hull planking has planks beveled at the edges - I don't think 0.5mm planks are thick enough to bevel to get that effect, so I might single plank the upper hull.