


Landlubber Mike
-
Posts
4,547 -
Joined
-
Last visited
Content Type
Profiles
Forums
Gallery
Events
Everything posted by Landlubber Mike
-
 Beautiful pristine work! Really nice job!
 -
I think Verlinden does some 1/48 and 1/35 life rafts with figures. CMK I believe has some that might work in 1/72 scale. I think if you search using "dinghy" you can find them. Your Phantom is coming along great Craig!
-
Just caught up with your log and watched your insertion video. Wow! You're really getting good at this SIB stuff Glen! I was getting very nervous watching you scrunch down the masts and sails and push it into the bottle. Almost like you needed to spray some WD-40 or other lubricant (not going there!) to get it in. Glad it all worked out! One thing I realized at the end of your video is that having such an angled bowsprit could have made things much more difficult if the bottle had a longer neck. Looked like you had just enough room to be able to tilt the hull to get it in. Something for me to consider if I ever get around to trying to scratch a SIB build. A question for you if you don't mind. Did you let the resin water dry and then glue the bottom half of the hull on top? Or did you put the lower half of the hull in while the resin was drying which served to anchor it? In my mothballed SIB build, I was trying to figure out what way made the most sense. I was concerned that it the hull slipped into the wet resin, I'd have resin on the hull in places I didn't want it. I've seen others insert the hull first, then pour the resin into the bottle letting it settle in around the hull. That avoids the issue of accidentally dropping the hull into the resin, but seems like it could be tricky pouring the resin and having it settle equally around the hull.
- 134 replies
-
- 4
-

-

-
- Captain Kidd
- bottle
- (and 3 more)
-
F4U-1A Corsair by DocRob - FINISHED - Tamiya - 1/32
Landlubber Mike replied to DocRob's topic in Non-ship/categorised builds
Nice Rob!! -
Nice scores Craig! Have you heard about when Andy is going to ship?
-
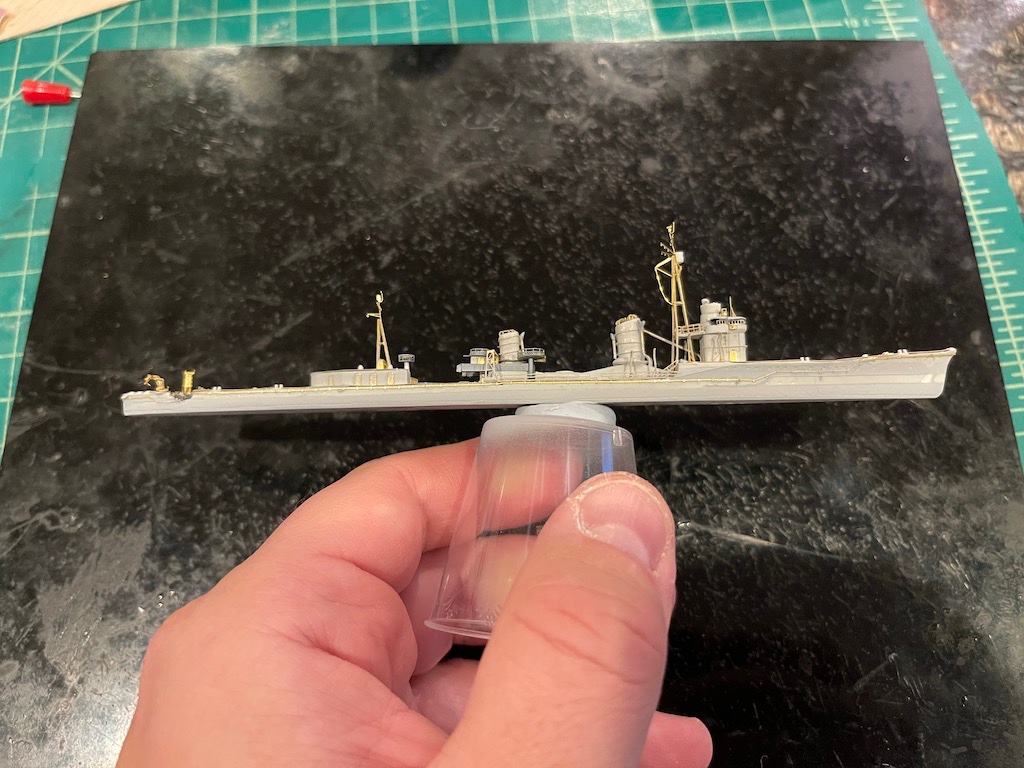
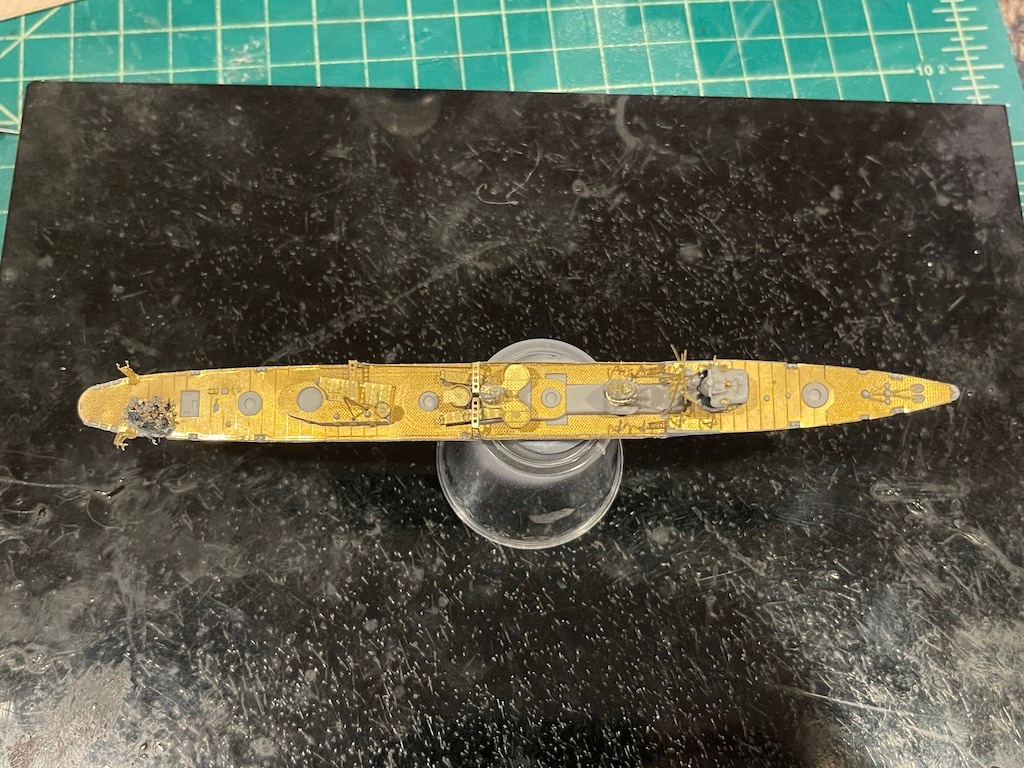
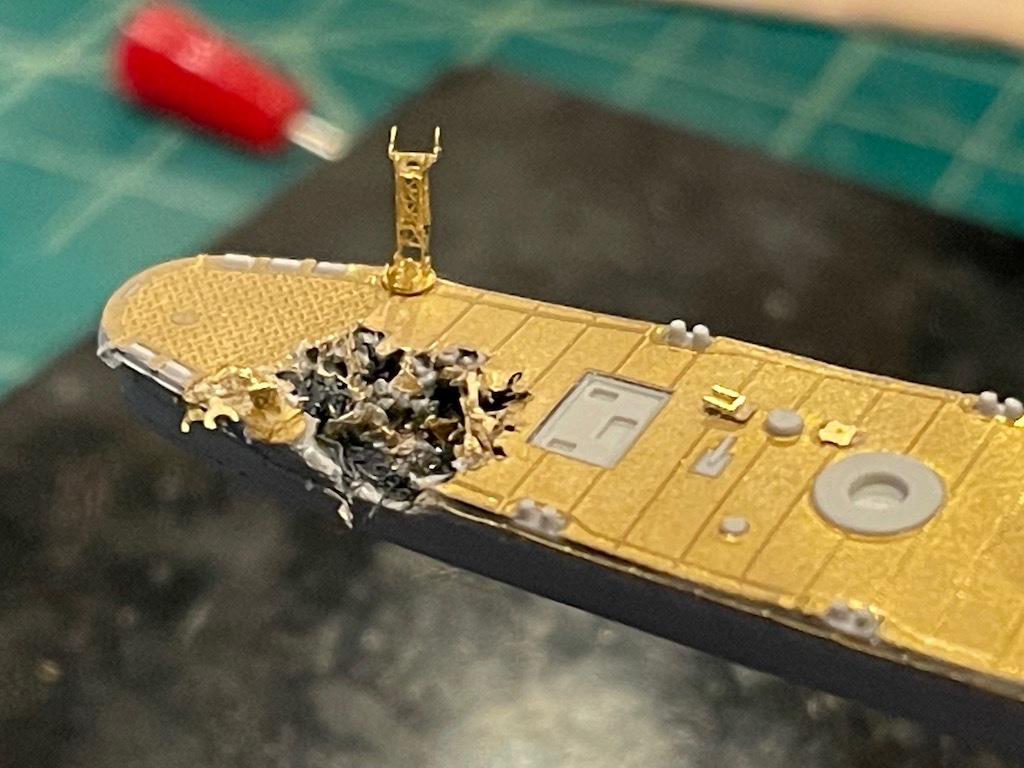
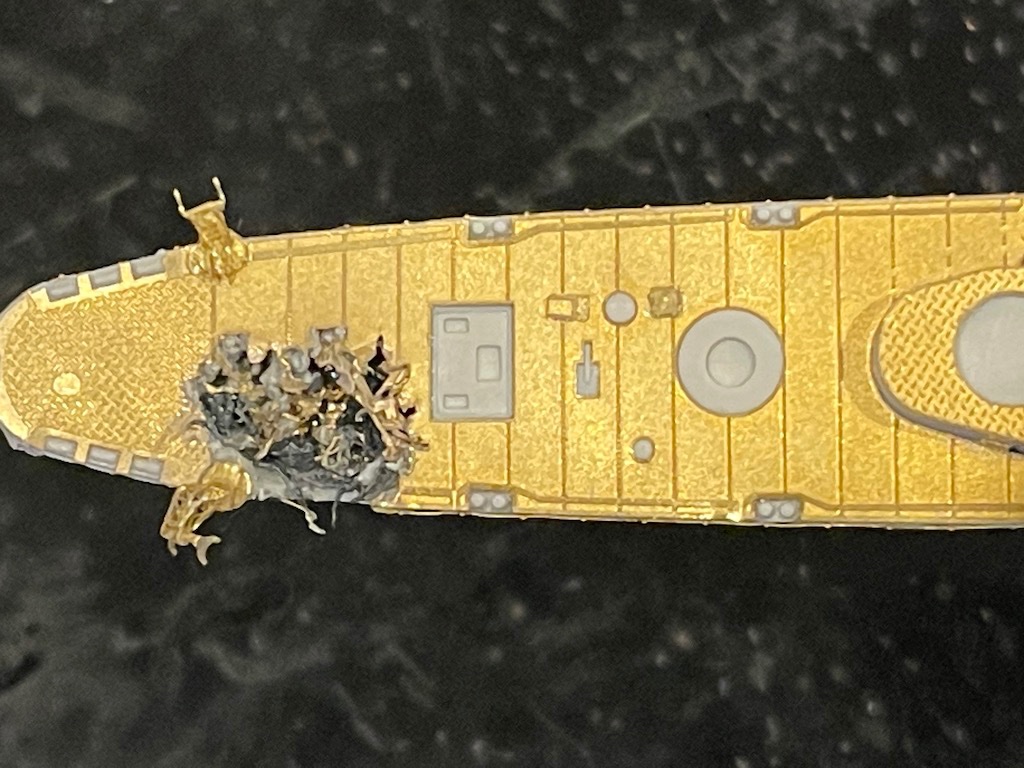
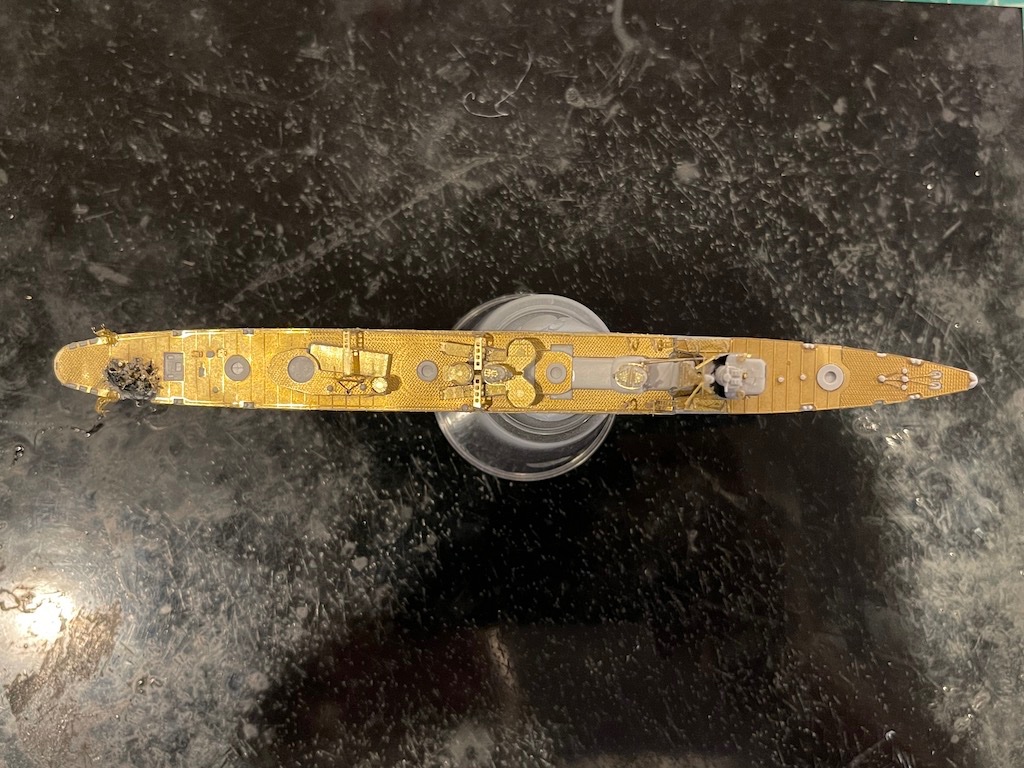
Hi EG, thanks for looking in my friend and your thoughts. I ended up enlarging it a bit, in part as I wanted to show one of the paravane towers broken down and twisted. Plus, I can show twisted railings and other damaged items from the blast. When I looked at pictures of bomb damage, it was interesting - the extent of the damage seemed to be related to where the bomb actually exploded, and what was in proximity to it. Sometimes bombs when through the deck and exploded and there wasn't much visible damage. Other times, if the bomb exploded near ordinance - whether above or below the deck - the damage was quite extensive. I went with a little more damage in that it seemed to fit the theme of the diorama of the ship being fixed by the IJN repair ship Akashi. Anywhere, here are some pictures of where I am now, and of the damage. I'm pretty much at the point of being able to prime and paint, but am waiting for my work on the Akashi to catch up so I can do both at the same time. I did go ahead and use tape to etch in the hull plating lines. You can see them a little more on the Akashi because of the height of the hull and the fact that the Asashio had degaussing cables. Thanks for looking in!
-
Fantastic stuff Ron. Your sea is very lifelike with all the colors, shapes, etc. Really well done my friend!
- 542 replies
-
- 1
-
-
- Sphinx
- Vanguard Models
- (and 3 more)
-
F4U-1A Corsair by DocRob - FINISHED - Tamiya - 1/32
Landlubber Mike replied to DocRob's topic in Non-ship/categorised builds
I've used masking sets for insignias from Montex on my F3F builds. Was fairly easy, just have to make sure that you don't get bleeding under the mask. I also came across these guys a few weeks ago when researching masks and decals for my upcoming Avenger builds: https://kitmasx.com/ For what it's worth, some insignia are fairly easy to replicate via mask. I saw a Plasmo video (I think on a Buffalo build) where he used the kit decals as a template for the US star mask. Just put masking tape over the decal and traced out the star. Rest of the insignia was fairly easy in that it only involved circles for the outer edge of the insignia and for the red circle in the middle of the star. -
Hi Bari, glad to hear that my log was of some help. You're right that the kit instructions are not very clear, which is a bit frustrating. Even worse, as I mentioned above, closing up the cockpit was a real pain in the posterior! 🤬 If you have time, post your build progress. If you don't want to start a separate log, you're more than welcome to share on this log. I'm hoping to wrap this build up by the end of the year once I get a few other projects out of the way.
-
Great job Jack!
-
Nicely done, and what a collection!
-
For priming larger areas, areas to be masked, areas that may have imperfections that will need to be filled, etc., my go-to primer now is Mr. Surfacer. It's a fantastic smooth finish that withstands taping very well. You can get it in 1500, 1200, or 1000, which is like grit on sandpaper in terms of how much it will fill depressions (like sandpaper, the lower the number, the more it will fill, i.e., it is "coarser" to use a sandpaper term). You can use it through an airbrush, or get it in rattle cans. I usually airbrush it, but the rattle cans work very well and aren't prone to clogging or spitting as the Tamiya rattle cans. They also come in multiple colors like light grey, black, and white. Only issue is the stink - better to do it outdoors, or indoors with access to a window and/or venting unit. For things that wont be masked like cockpit interiors, figures, etc., I'll use Vallejo primers for the convenience. I thin it down with their thinner and add a few drops of flow improver, and it works nicely. Same thing when airbrushing Vallejo Model Air paints or Vallejo Varnishes - even though they say you can use straight out of the bottle, I always thin them down and add a bit of flow improver and have not had issues. I do think you need to do a more thorough cleaning of your airbrush when using Vallejo however. Even if it looks like you can run water through it and you're done, I believe it leaves trace amounts of a residue that will slowly accumulate and gunk things up. So, after a session I'll wipe down the needle and clean out the nozzle using a small bristle brush followed by a metal needle. That helps a lot. You can also run a bit of lacquer thinner through the airbrush which will get rid of anything you missed. This is an absolutely fantastic video from Vince Venturella that goes over the four basic components of paint (pigment, binder, solvent, and additives) and the additives that are out there and what they do. Vince has really, really good videos that are geared towards miniature painting, but I've learned a ton watching them and have a much better understanding of paints and techniques that I can apply to model building.
- 71 replies
-
- 10
-
-
-
Same to you Craig and all my friends here!
-
F4U-1A Corsair by DocRob - FINISHED - Tamiya - 1/32
Landlubber Mike replied to DocRob's topic in Non-ship/categorised builds
Thanks Rob - I didn't realize the dampening actually passes through the paint, that's very interesting. I wouldn't have thought that possible, but it's clear that must be going on to get to the hairspray layer. Looking forward to your progress on this one! -
Looks really great! Really nice finish on the cast pieces.
-
F4U-1A Corsair by DocRob - FINISHED - Tamiya - 1/32
Landlubber Mike replied to DocRob's topic in Non-ship/categorised builds
That looks great Rob! I haven't yet tried the hairspray chipping method yet. How does the water end up stripping/chipping off the layer on top of the hairspray? Is it because the paint doesnt have a chance to fully cure on top of the hairspray so it flakes off? Also, if you don't mind, does it matter what paints you use for the bottom coat and chipping coat? I saw one modeler building a Japanese aircraft who used Tamiya enamels for the base aluminum coat, then applied a chipping medium and a follow on coat of something other than enamel. I think he said something about the enamel being a stronger paint for the chipping effect, but could be mistaken. -
Sorry, just catching up on your log - great progress so far! And a lot of congratulations to throw your way - daughter, pup and grandson the fisherman!
- 97 replies
-
- 10
-
-
-
Hey Craig, looking forward to this build. Looks like another goodie. A year or so ago, I looked into how to do spoked wheels. There are a lot of approaches out there, including from Plasmo, on Model Cars Magazine forum, etc. A guy put a jig he made up using the Model Cars Magazine forum approach on Shapeways. Here is the 48-spoke jig (there is a 72-spoke one as well I believe): https://www.shapeways.com/product/Z3BMGHPPJ/wheel-tool-48-spoke?optionId=43346329&li=marketplace
-
Great start Kevin - looking forward to this one coming along!
-
Nice work Edward!!
-
What do you guys think of the shooting plane? Wondering how much I would use it, but you know, need to tell Santa what I want for Christmas...
-
Looks great OC - the weathered bones effect you got with your washes looks really spot on. Nice job!
-
I just took a look at Sprue Brothers - they have the same 41 kits listed as Andy's, and a couple of extra decal sets. So, they must be pretty confident that these are in the containers coming over from the warehouse in NZ.
