Landlubber Mike
-
Posts
4,549 -
Joined
-
Last visited
Content Type
Profiles
Forums
Gallery
Events
Everything posted by Landlubber Mike
-

Hock knives
Landlubber Mike replied to Landlubber Mike's topic in Modeling tools and Workshop Equipment
Very clever - thanks for sharing that! -
Hock knives
Landlubber Mike replied to Landlubber Mike's topic in Modeling tools and Workshop Equipment
Thank you! -
Hock knives
Landlubber Mike replied to Landlubber Mike's topic in Modeling tools and Workshop Equipment
Thanks very much guys. Not sure that I would ever make pens to sell - I think I'd be even harder on myself to make them absolutely perfect. Right now I just enjoy puttering around and trying out new tools, techniques and finishes on them, and then give them out to family and friends. In terms of selling, it seems like there are a ton of people already selling pens. For many, they are mass producing using fairly inexpensive pen kits and blanks. There was one guy on the pen forums who cranks out thousands of pens a year, and had it down to the number of seconds it took per step per pen. I think if I did that it would seem too much like a job, and I probably wouldn't enjoy myself being my boss. I prefer to make them using higher end kits and more interesting blanks. Working with the burl and spalted woods takes a lot longer - you have to be careful because the wood can have cracks, voids, and punky spots that can catch your tools and chip or crack or otherwise ruin the blank. Then there is the finish as well - if there are cracks and voids, you have to fill them to help stabilize the blank and end up with a smooth finish. So, the finishing can take quite a long time. With all the steps involved, and higher priced materials, I would probably end up barely netting minimum wage when all was said and done. 😬 -
I always thought these were sharp looking subjects. Your upgrades are going to make it even better. I'm in for this one! Do you make the decals yourself or do you outsource them? I'm a bit stuck on what to do for decals on my Charles Morgan. Part of the problem is that the stern lettering is white, and white letters require special printers. I'm using ebony so not sure I want to print using white paper with the background surrounding the letters blackened from the ink.
-
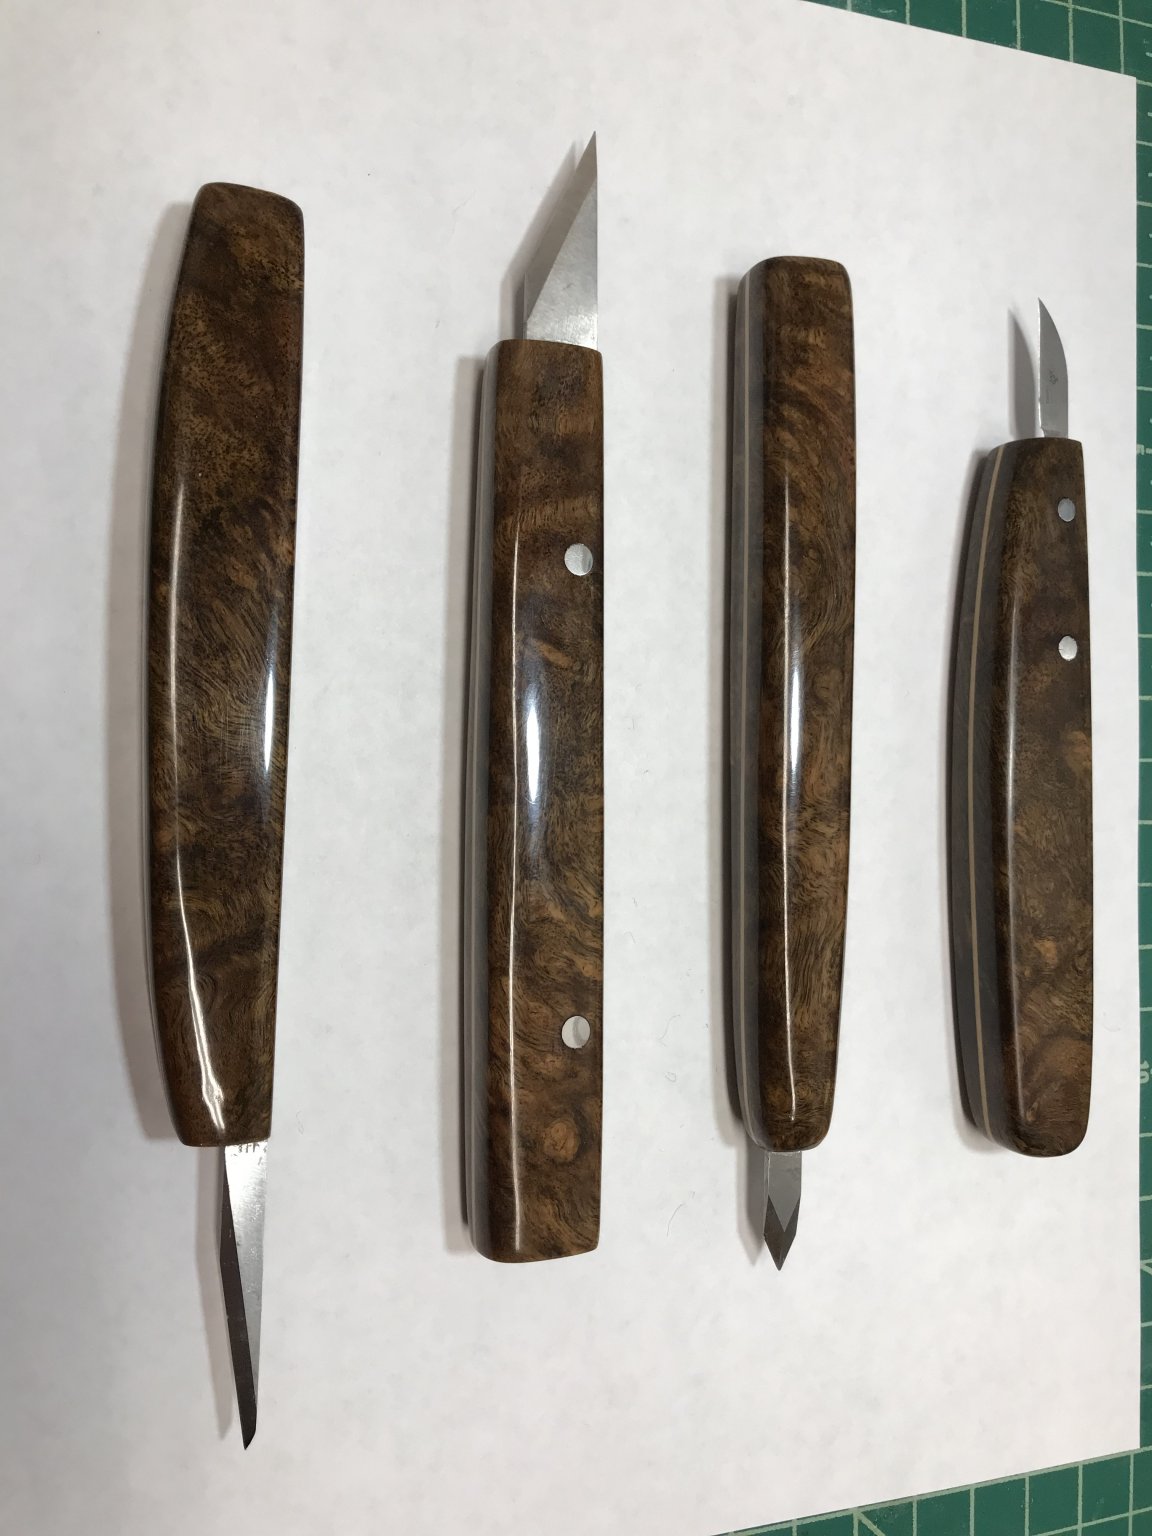
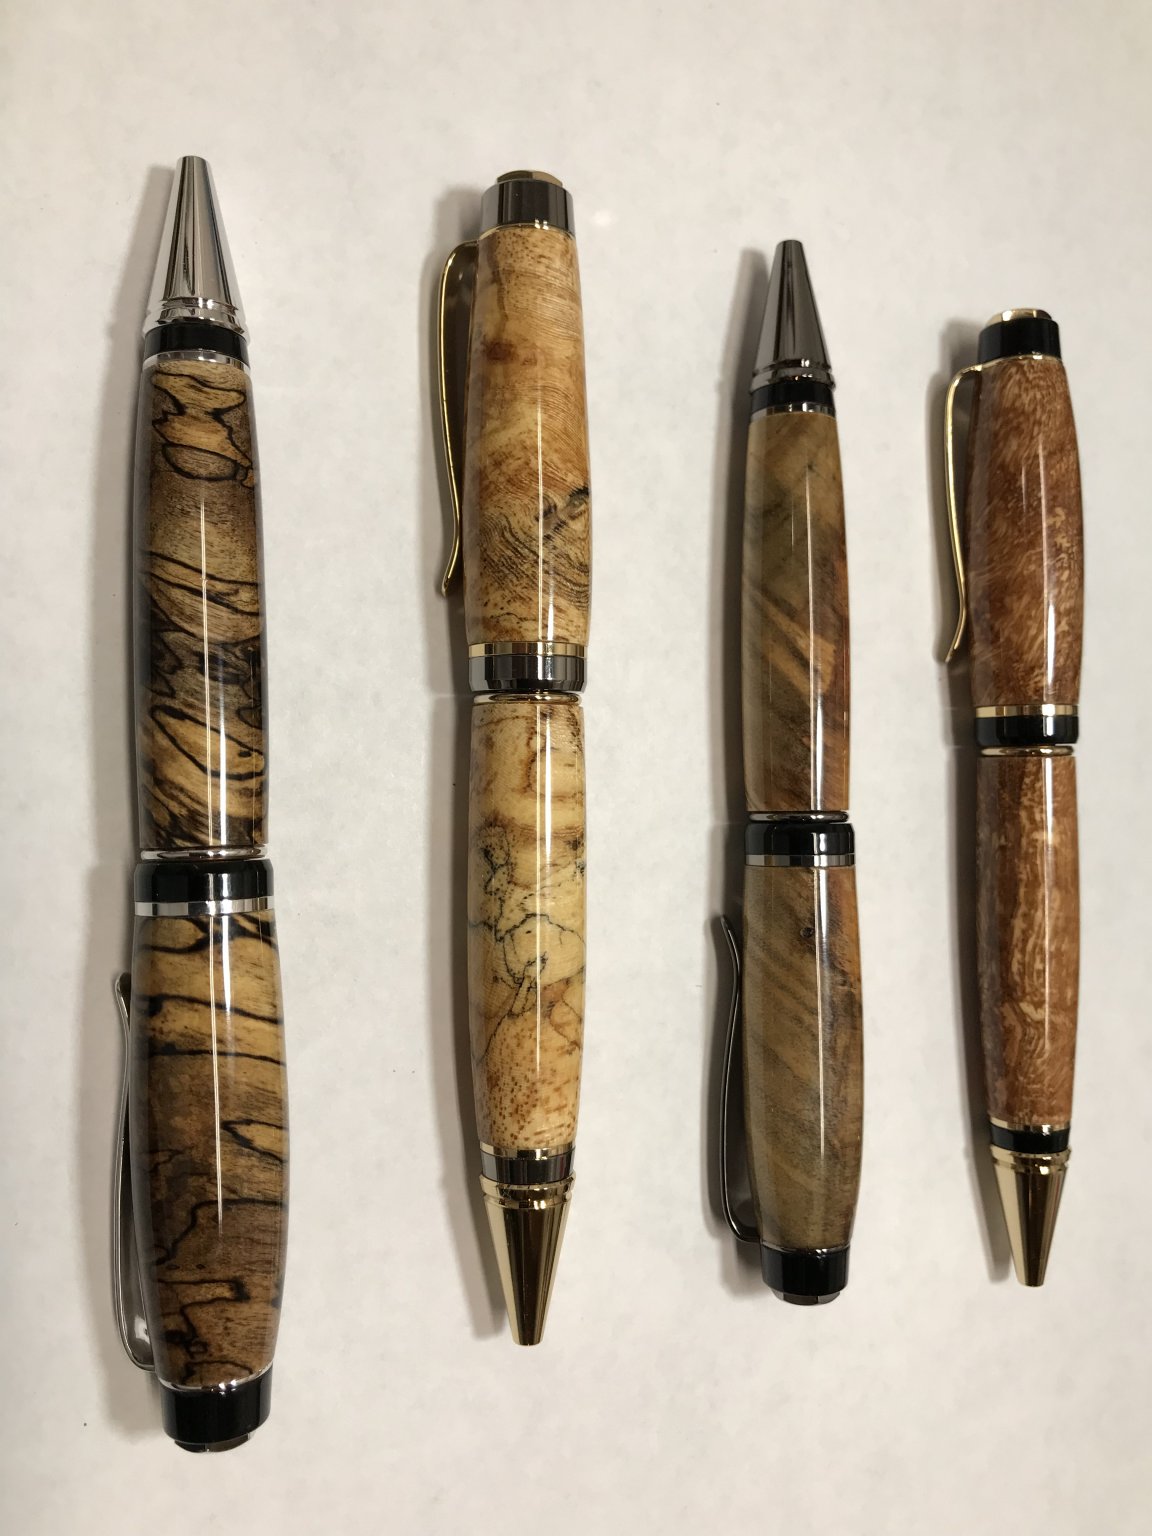
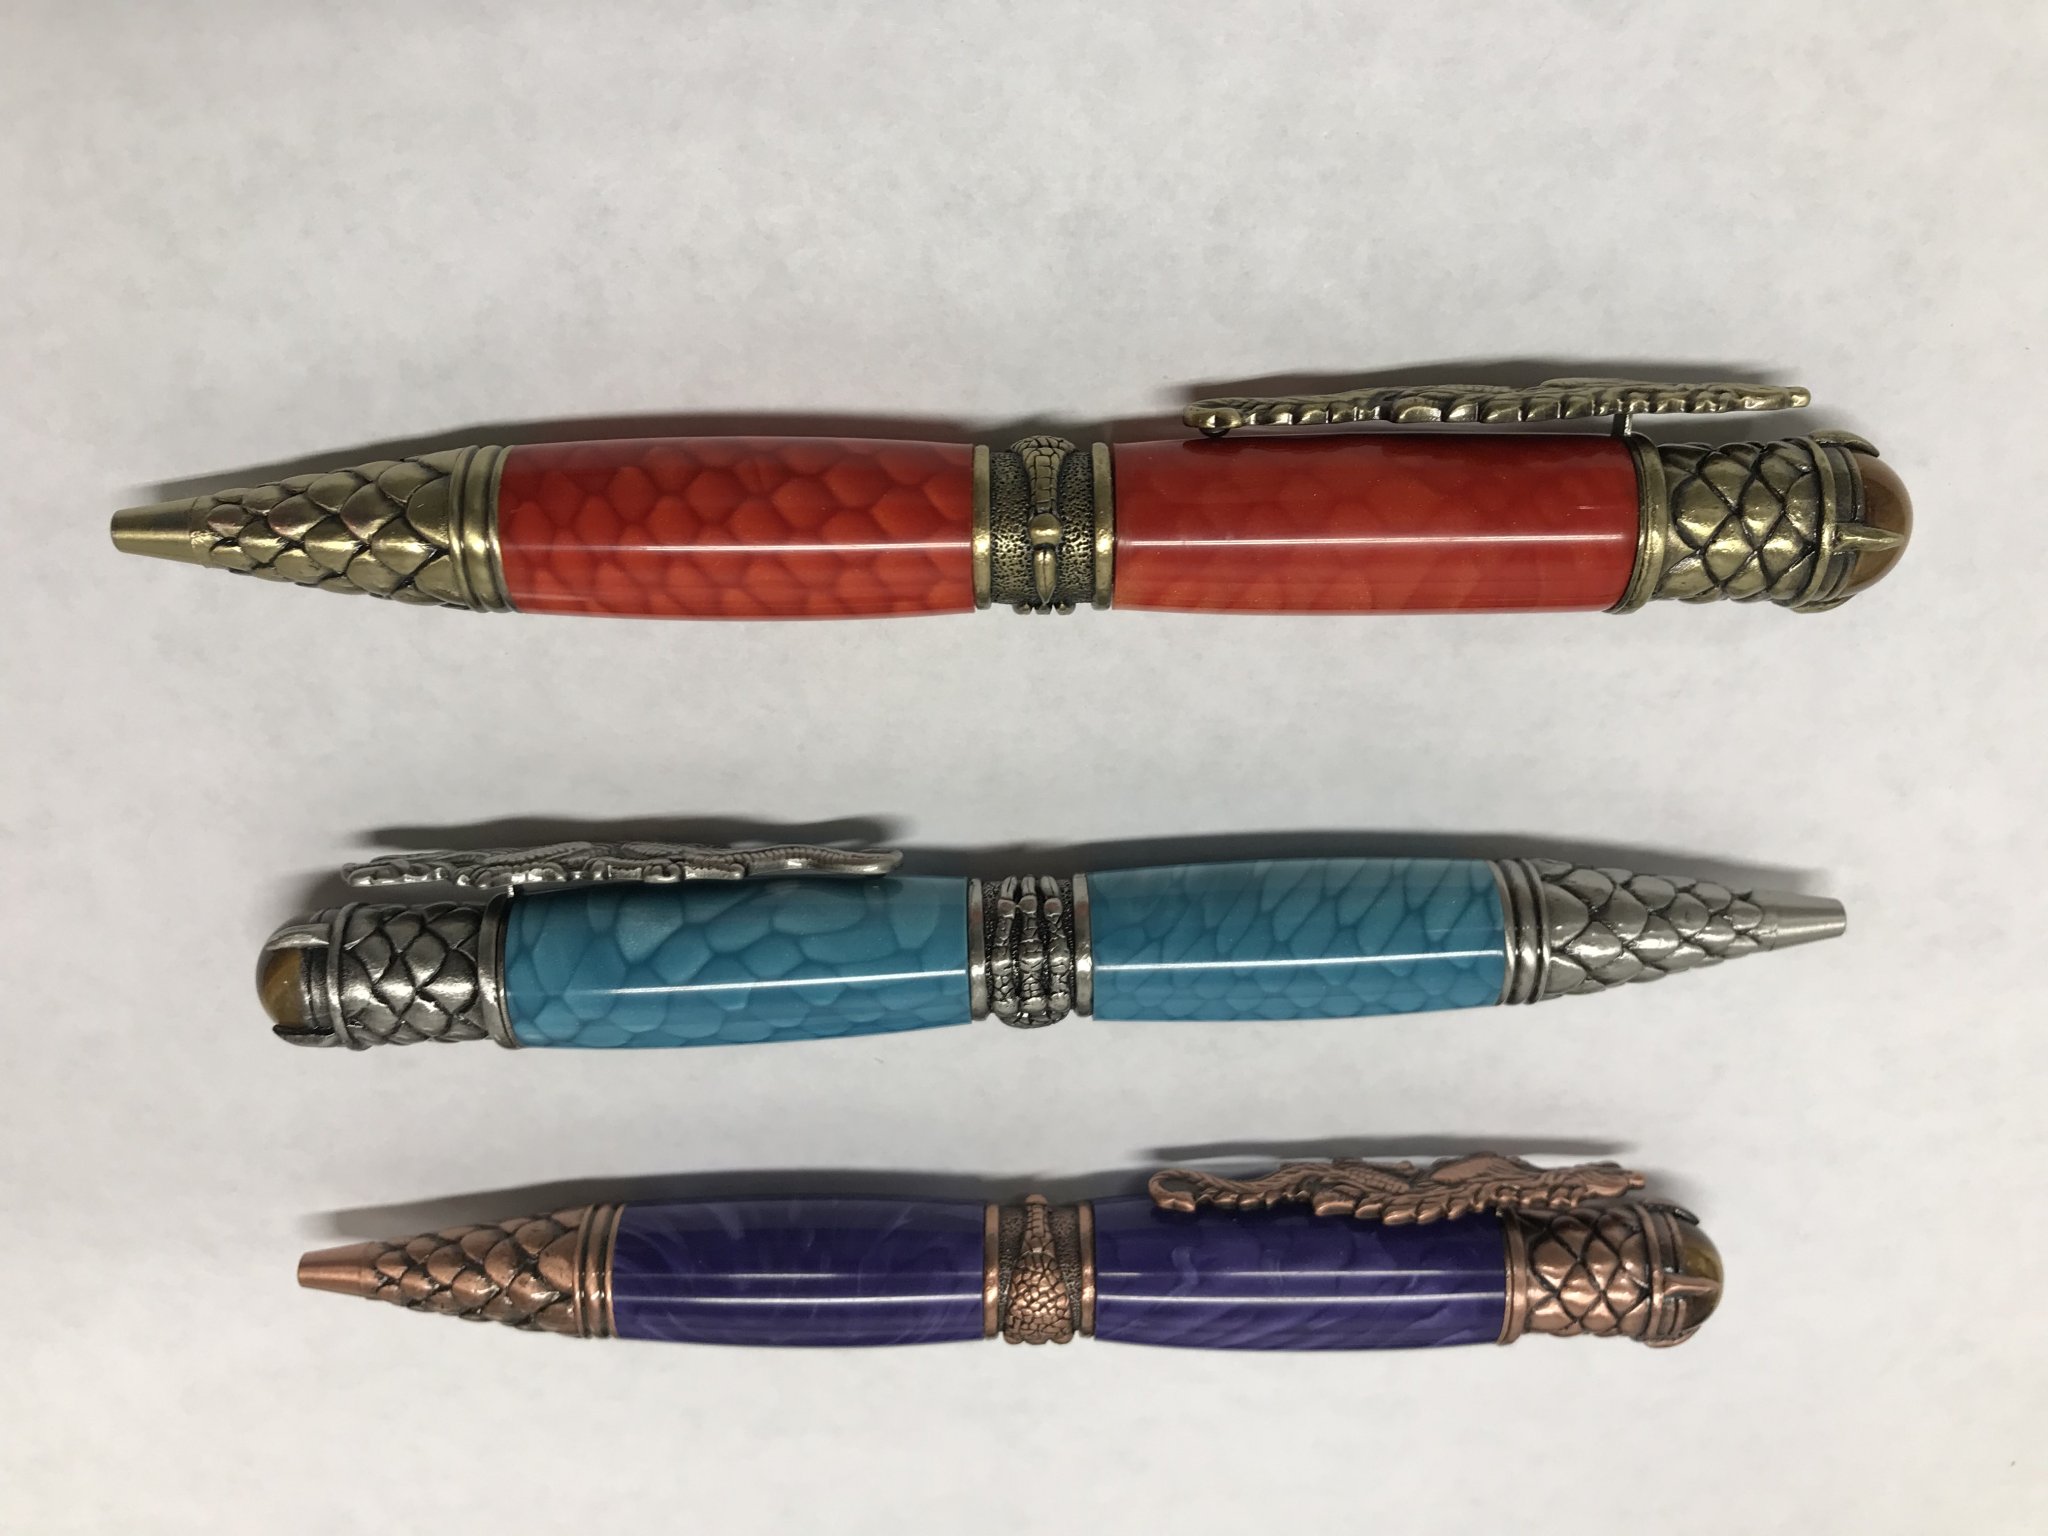
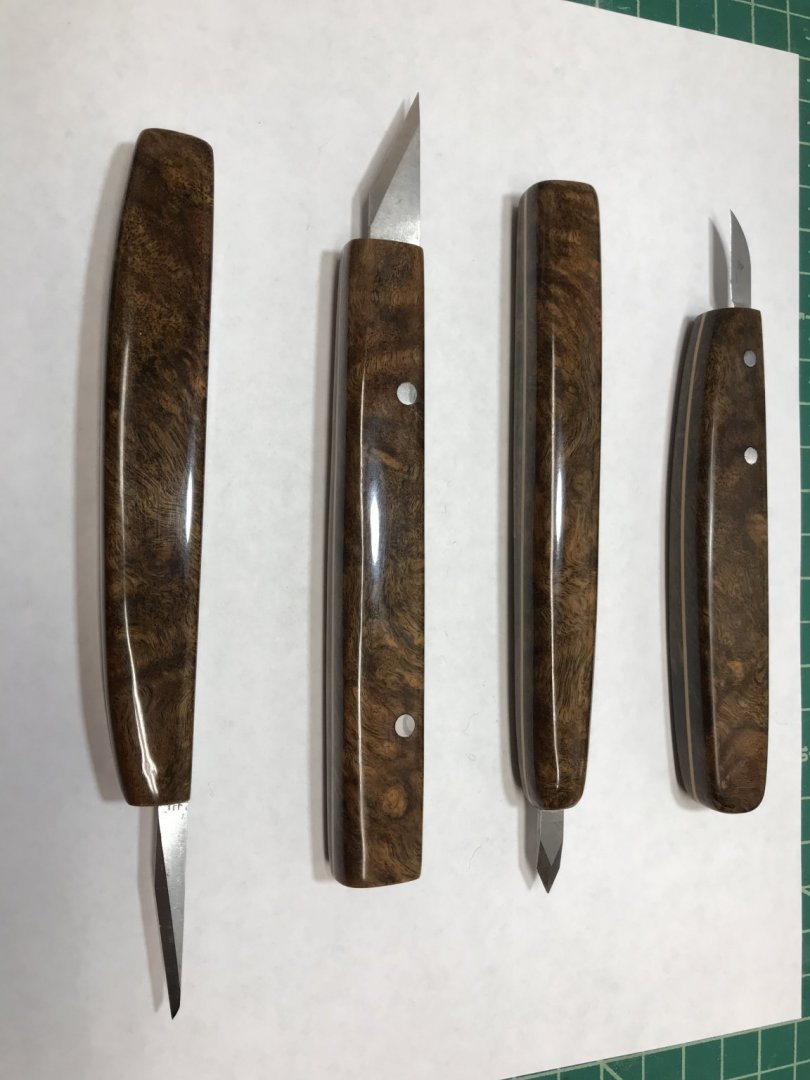
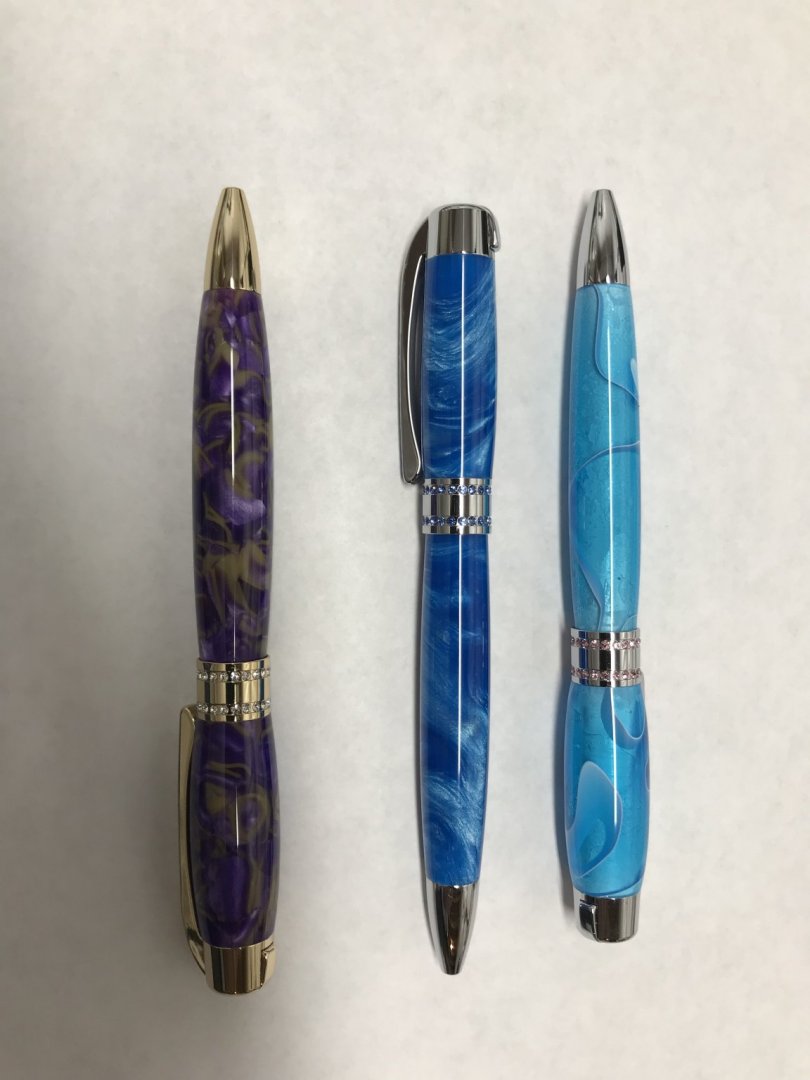
A few months back, @vossiewulf posted pictures of some gorgeous knives he made using blades from Ron Hock, Japanese blades, etc. (haven't seen vossie on here in a while, hope he is ok). I thought I'd give it a shot since I had the tools to add handles, and went ahead and bought a few from Hock. He sells some knives already with handles, but I thought it would be more fun to put my own handles on. I ended up using Sindora burl for these knives (from left to right, two violin knives, a marking knife, and his 1" carving knife). I had purchased a block that I was going to use for pen turning, but decided to split it into four blanks that I used for the scales. For the spacer piece that went alongside the blade in between the two scale halves, I used boxwood. The finish is what I started using when I turn pens - a coat of boiled linseed oil, followed by a few coats of boiled linseed oil/medium CA mixture, followed by a few coats of medium CA. From there, I used micro mesh pads from 1500-15000, then put them on my buffing wheel. Fun little project if you're looking for something different than building models. F Last few months I got sidetracked into a new hobby and started turning pens. I had a lathe so I figured why not try it. Well, like most hobbies, it can suck you in and before I knew it, I ended up upgrading to the larger bed Sherline lathe and bought a few other accessories. I pretty much went from knowing almost nothing about lathes to now being fairly proficient, which should carry forward into model work. It's also been fun learning about different woods, finishes, etc. In ship modeling we try to go for wood with minimal grain. In pen turning, I personally prefer turning wood with lots of character, including burl woods, spalted woods, etc. They tend to be trickier to turn given that they have cracks, voids, punky wood parts, etc., but the natural beauty just can't be beat in my opinion. Here is a batch I recently made using spalted woods from Hawaii: You can also turn acrylic blanks. Lots of interesting bright colors, patterns, etc. I prefer the wood pens, but my daughters like the brightly colored ones, so I what can I do? Here are some I've made from acrylic for my kids: Anyway, just thought I'd share. Sometimes it's nice to take a break and try something different. Frankly, I think delving into these other areas will make me a better modeler because of the techniques and other experiences I have learned which can likely be transferred over to model work.


- 10 replies
-
- 16
-

-

-
Very nice! With all those holes in the deck, looks like you have a lot of fun details to add. The crane and platform are very cool items of interest on this ship. What are those raised lines on the hull sides for?
-
The disc sander is one of my most used tools too. It was a big game changer for me.
-
Very nice! That looks like a fantastic kit. Great to see subjects other than 18th century British warships with dozens of cannons
- 227 replies
-
- 5
-
-
- BlueJacket Shipcrafters
- Stephen Hopkins
- (and 2 more)
-
Nice work!
-
Nice work Kevin. If I was handy with photoshop, I’d create a “Kevin the Riveter” picture like the old “Rosie the Riveter” pictures.
-
Kevin, this is the picture from the Pontos upgrade set for the Revell 1:144 Snowberry. From what I can tell, the Parkins set for the 1:72 Snowberry kit will probably replace/enhance even more than the Pontos upgrades for the 1:144 kit.
-
Awesome! I love the lines in this ship, can’t wait to see where you go with it! I bought a FSM back issue that had an article on a Yahagi build. Was beautiful- took the guy 800+ hours if I remember correctly. Not exactly sure why.
-
Jeff, I’m like you and prefer to use different woods rather than paint. Woods that are available in strips are walnut, cherry and mahogany. You can also take a wood like pear and stain it. I’m doing the same on my Pegasus and La Renommee builds. For Pegasus, since it’s copper plated, I went with a black lower hull (just used kit walnut), pear stained walnut for the upper hull, with boxwood stained blue and red heart for accents. For my Renommee, I’m planning to use walnut for the lower hull and cherry for the upper hull and deck (and masts). I found some cherry veneer sheets and dowels at Woodcraft, and am going to use the lighter cherry on the deck and darker for upper hull. Pear is a nicer wood to work with than walnut, and takes stains well. Still have to make sure you get the stain even, which can be tricky on bigger areas. I actually like the look of walnut and darker hulls generally, though I know a lot of people prefer lighter hulls planked with woods like boxwood.
-
Amazing work Greg. What a masterpiece! Shows how beautiful plastic kits can work into when in a skilled modeler’s hands. Will look forward to your next ones!
- 345 replies
-
- 5
-
-
- graf zeppelin
- trumpeter
- (and 2 more)
-
Both came out fantastic! I hope mine comes out half as nice. On your Yukikaze, did you add anchor chains to the bow? Or were the chains molded into the deck piece? I'm wondering what to do with the Shimakaze, where Hasegawa decided to mold them into the deck. The chains are pretty crisp, and I can probably pick them out with paint, but it seems to me that it would look more realistic with better depth if I installed my own chains.
-
That came out awesome Slog! Very nice job!
-
Euromodel is out of business? Looks like their website is still up and running.