Landlubber Mike
-
Posts
4,547 -
Joined
-
Last visited
Content Type
Profiles
Forums
Gallery
Events
Everything posted by Landlubber Mike
-
 Looks great Bob. Might have been a poor kit, but sure turned out to be a beautiful model in your skilled hands. Hope 2019 treats you better
- 359 replies
-
- 4
-

-
- prince de neufchatel
- model shipways
- (and 1 more)
-
Very cool work Dave. Love the enhancements and following all your creativity! I saw you mentioned you build the Wanderer in wood. Do you have a picture of that one? I'm working on the Morgan at the moment, but have thought about scratch building another whaler like the Wanderer once I'm through the kits on my shelf.
-
Beautiful work Vince!
-
Thanks Paul. I'm leaning too towards the "gangway" theory with the gratings flush with the deck - makes more sense to me, and seems to be consistent with Chapman's Plate XXXII and Venus plans. I still have some time to mull things over. Many thanks for all the thoughts!
-
Many kits, including Amati, unfortunately have different colored sheets, even of the same wood. As Chris said, it should be fine if you are planning to use paint.
-
Thanks Mark and Keith - dissipation of smoke does make sense. Seems like there is no definitive answer here. Unfortunately there is not much information on Swedish ships out there, and few models. I have a little bit of time before I get to the main deck, so I'll stew on it a little more. PiratePete, who is putting together very helpful build notes for the Euromodel kits, and I had extensive discussions over the weekend about these gratings. Maybe some of this information can go into his build notes. Many thanks for everyone's thoughts on this topic! Very interesting!
-
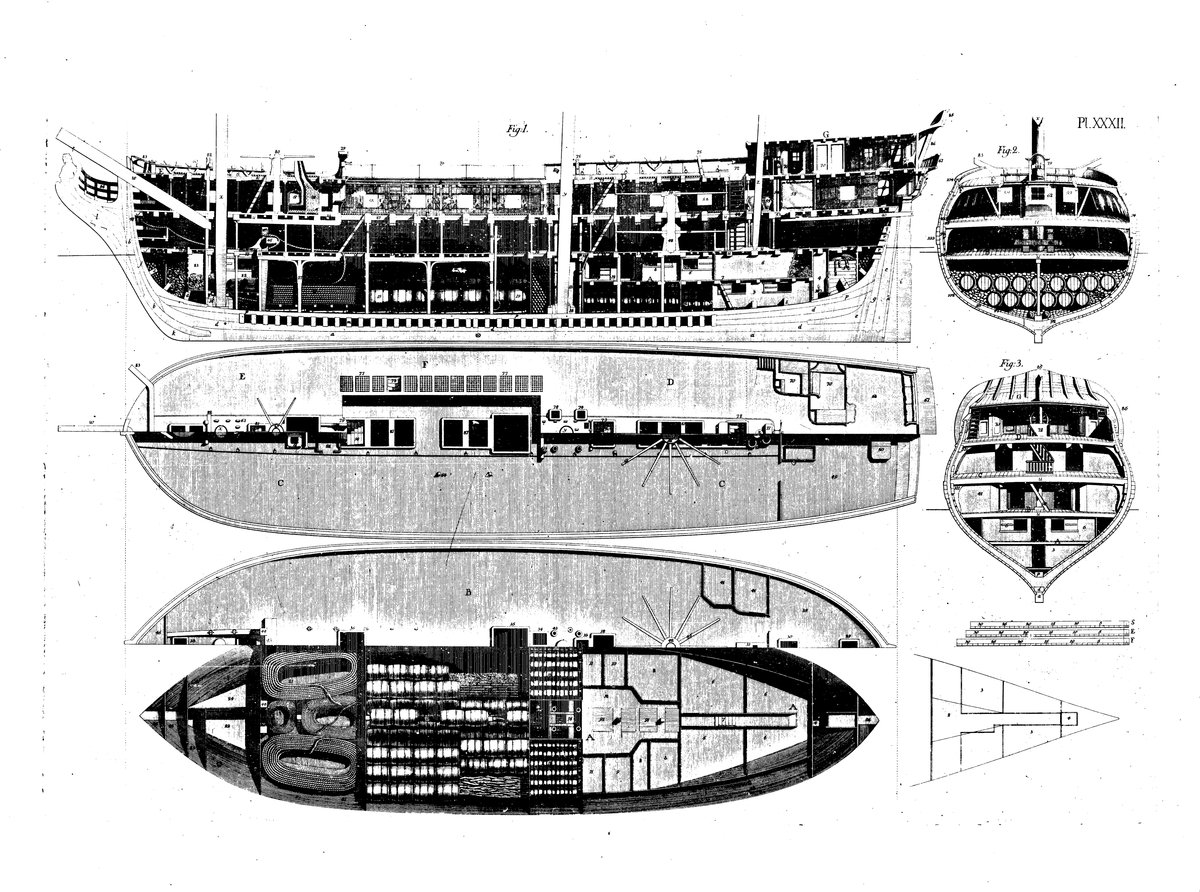
Putting aside the kit, the plans shown above (Plate XXXII and of the Venus) were drawn by none other than Fredrik Henrik af Chapman, who was a naval architect, dockyard owner and manager, etc. and was the author of Architectura Navalis Mercatoria (1768). He was kind of a big deal, and my guess is that the plans in the Architectura, including Plate XXXII, were pretty carefully drawn. That's what gives me a little pause. https://en.wikipedia.org/wiki/Fredrik_Henrik_af_Chapman https://en.wikipedia.org/wiki/Swedish_frigate_Venus_(1783)
-
Thanks Jud. That echoes exactly what Mark said. It's odd though in that (1) the plans suggest no coamings, and (2) there really seems to be no purpose for them other than possibly cosmetic (no need for ventilation when that wide open waist is sitting there). I also think that it would be odd to have them flush with no coamings given that there is the ladder hatch opening - seems dangerous to have an open hole in the floor like that without at least coamings to protect people running around on the deck.
-
Amazing work Hubac. And your research is incredible. Blown away by how detailed you are
- 2,699 replies
-
- 4
-
-
- heller
- soleil royal
- (and 9 more)
-
Beautiful work. Coming along really nicely! Not sure if you figured out the cannons yet, but in addition to Chuck’s, check out the ones from RB Models. A bunch of us working on the Pegasus went with them to replace the oversized cannons Amati threw in the kit. I picked mine up from Cornwall Model Boats. They are well done and come in lots of different sizes.
- 714 replies
-
- 2
-
-
- lady nelson
- victory models
- (and 1 more)
-
Hey Phil, looking very nice. Caldercraft makes very nice kits. I started with the Brig Badger, a model very similar to the Supply. Two things I’d point out: 1. The reason you are getting cracked planks at the stern is that the last bulkhead wasn’t bevelled enough. You can see that sharp line on the aft edge of the bulkhead which is causing the issue. The last bulkhead usually needs to be bevelled a lot to have a smooth line to the counter. I didn’t fully appreciate how important bevelling is, and ran into similar issues on my Badger. The important thing is that the plank lay as flat as possible along the full width of the bulkhead, without kinking or gaps when running the strip to the prior and next bulkhead. When bevelling, I usually start in the middle of the ship where the bulkheads don’t need much bevelling and work towards the stem and then to the stern. I lay the plank on the target bulkhead, and then see how the run is when it comes to the bulkhead in front and the bulkhead behind it, sometimes going out two bulkheads. You’re looking for gaps between the plank and bulkhead and kinks in the plank when running it to the surrounding planks. You may find that you have to go back and work on a bulkhead you finished earlier, sometimes needing to add back material. But taking your time during the process, as dull as it may be, will save on sanding or otherwise fixing issues with the first planking. The good news is that this is just the first planking. You can probably sand away most of that hard edge and add filler if necessary to get a smooth run to the stern. 2. I think the Supply might be one of the older Caldercraft kits that may not have the detailed instruction manual that some of the newer kits like the Badger has. You could always download the Badger manual. It really helped me, though I might have done some of the things in a slightly different order. For example, I’m a lap modeler and would have finished the exterior of the hull with the rails, etc. before installing the cannons. I can’t tell you how many times I knocked into the cannons and had to reset them and sometimes re-rig them. Almost threw the model out the window more than a few times! Now I try to do all the exterior hull (and in some cases, interior) work that requires me to manhandle the hull and then do the more fragile work. Good luck!
-
Hey Mark, all good points. It seems though that the plans show the gratings to be flush with the deck, and possibly without coamings. I just haven’t come across other ships with a similar set up of gratings on either side of an open waist like that.
-
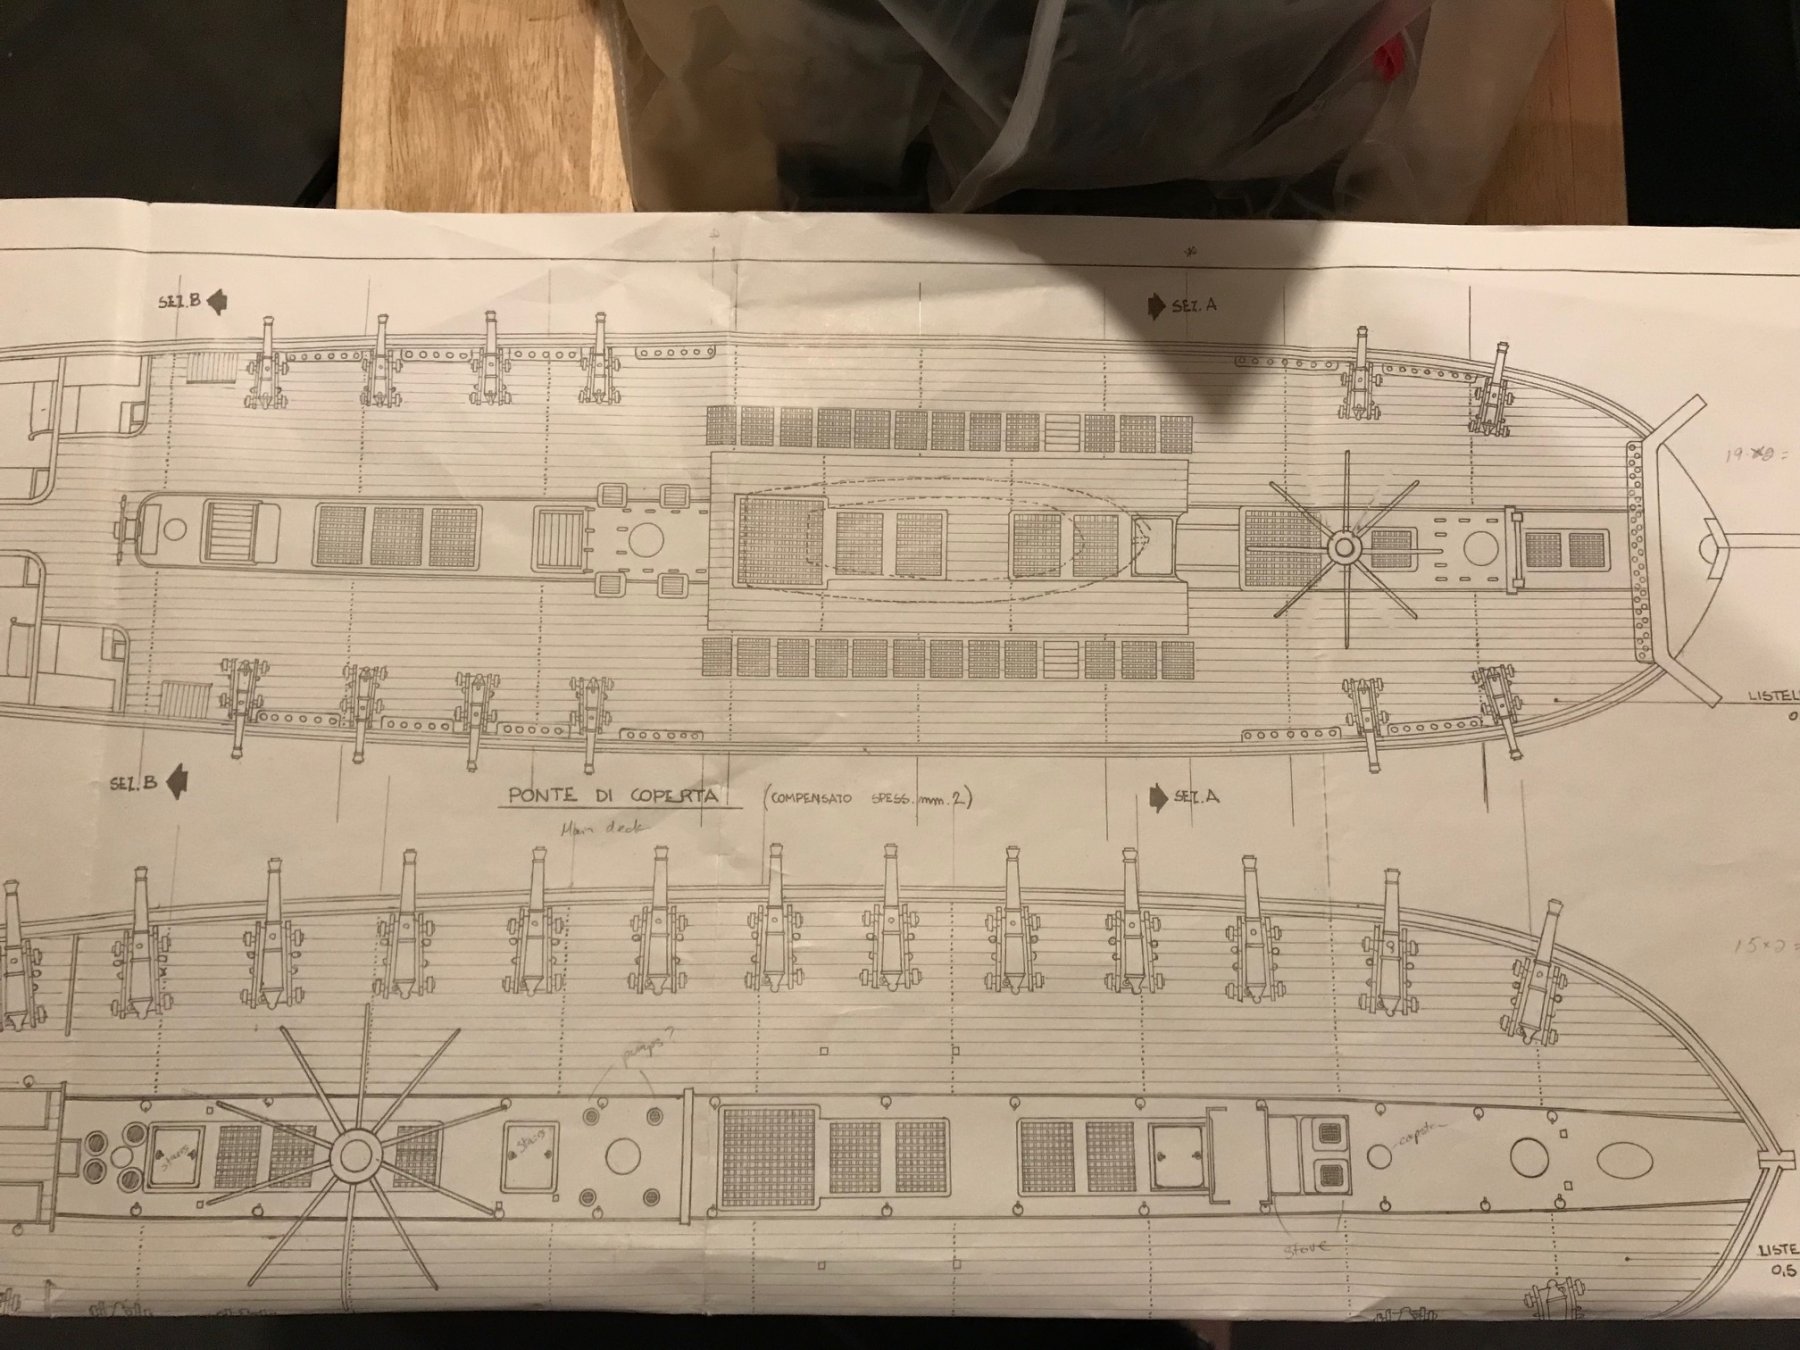
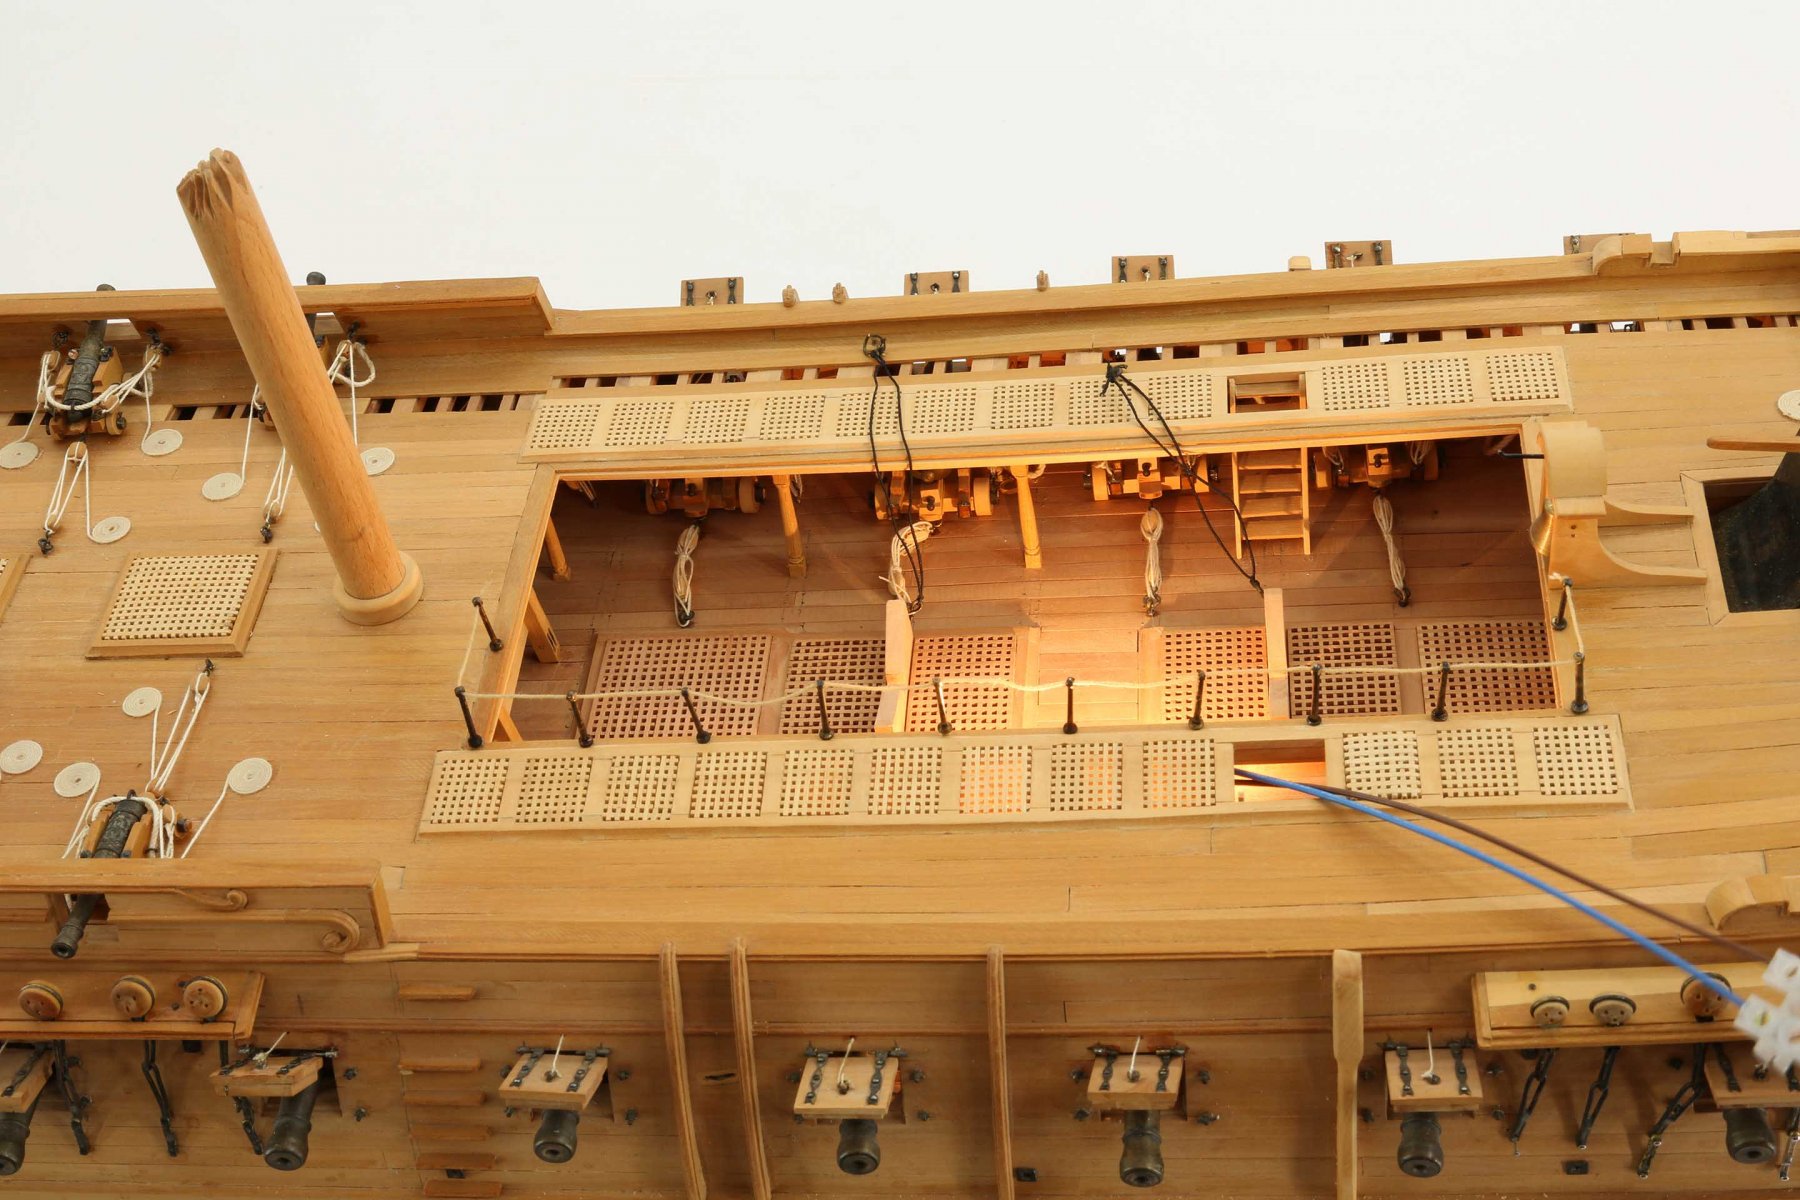
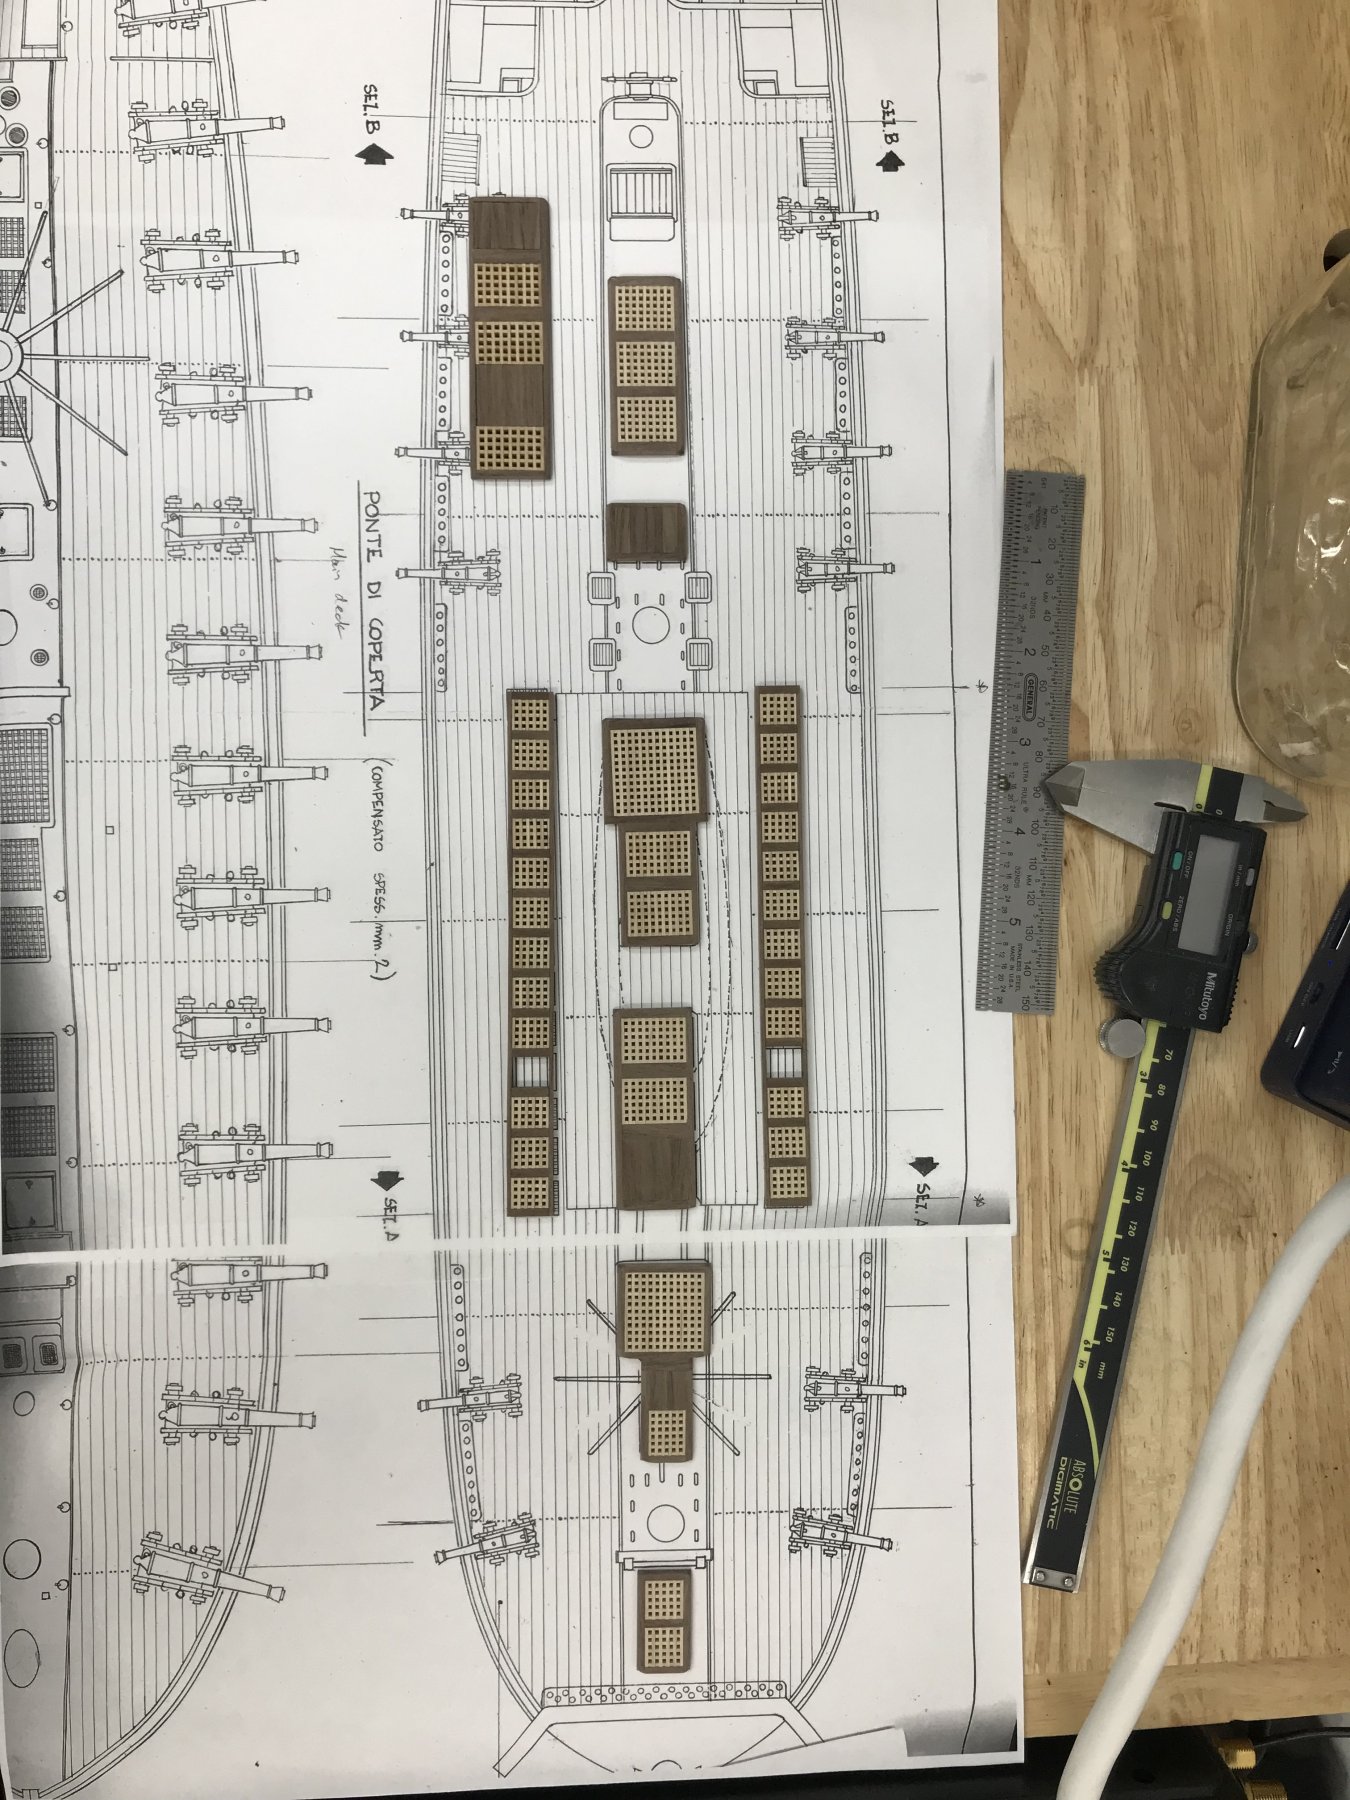
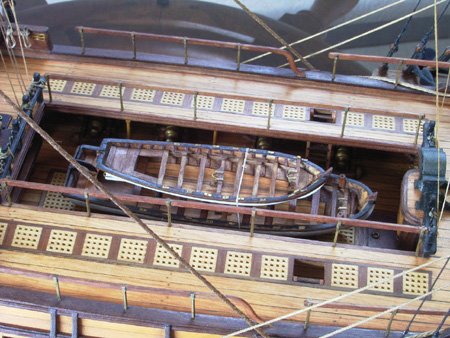
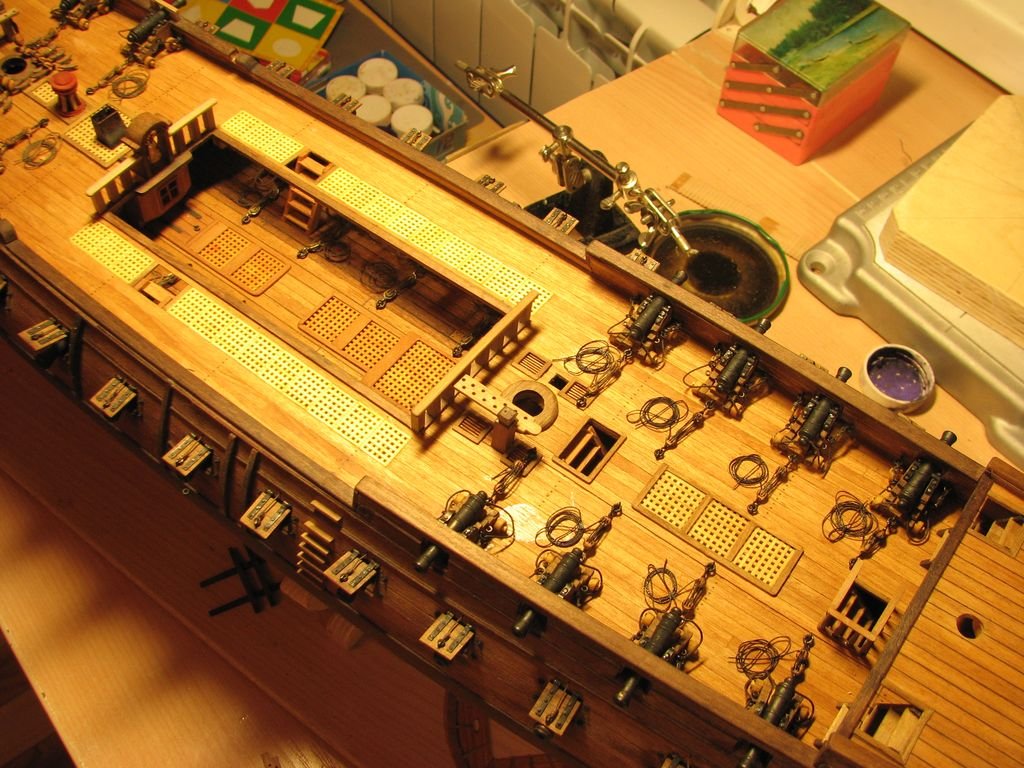
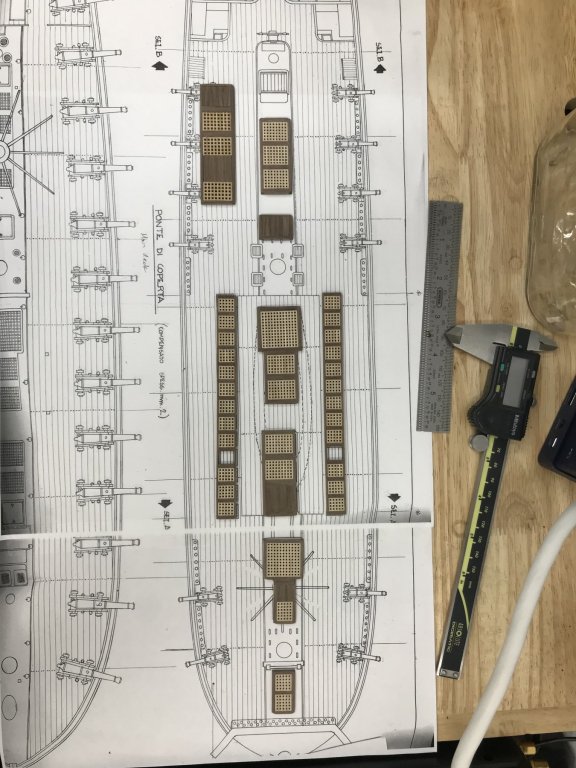
I'm building the Euromodel La Renommee, which has a line of gratings (along with an open hatch for a ladder) alongside a fairly open waist on the main deck (see top figure in the plans below): Given the wide open waist, it doesn't seem like the gratings are necessary for ventilation. Whether they are raised or not, plenty of water will fall through the opening onto the gun deck below. So, are these purely cosmetic? Or is there some kind of function I'm not seeing? Given the open hatch within the row of gratings, it seems fairly dangerous if the gratings were flush with the deck. On the other hand, having them raised seems to dramatically reduce the walkable area around the waist. Chapman's Plate XXXII from his Architectura (on which this kit is based), along with his plans for the Venus, both seem to suggest that these waist gratings are flush with the deck given the lack of shadowing which is evident around the central grates on both sets of plans: Builders of the model have been pretty evenly split as to whether the gratings are flush with, or rise above, the main deck. Some even have just installed the gratings on the main deck with no coamings. For example, see the following: Flush with coamings: Raised with coamings: Flush no coamings: Just curious if anyone has any thoughts as to whether these should be raised or flush, and whether the grates should have coamings or not. I've been researching this but can't seem to find a definitive answer, and looking to other models hasn't helped given the various approaches taken. Thanks in advance!


-schematics.jpg.8921567a44f1ed6eaa974d646a278ea7.jpg)

-
That’s a really fantastic deal on a great kit. Nice score! You can always download the instruction manual for the Caldercraft Granada. It’s a very detailed manual that should be of help. My guess is that the two kits don’t vary much in terms of construction.
-
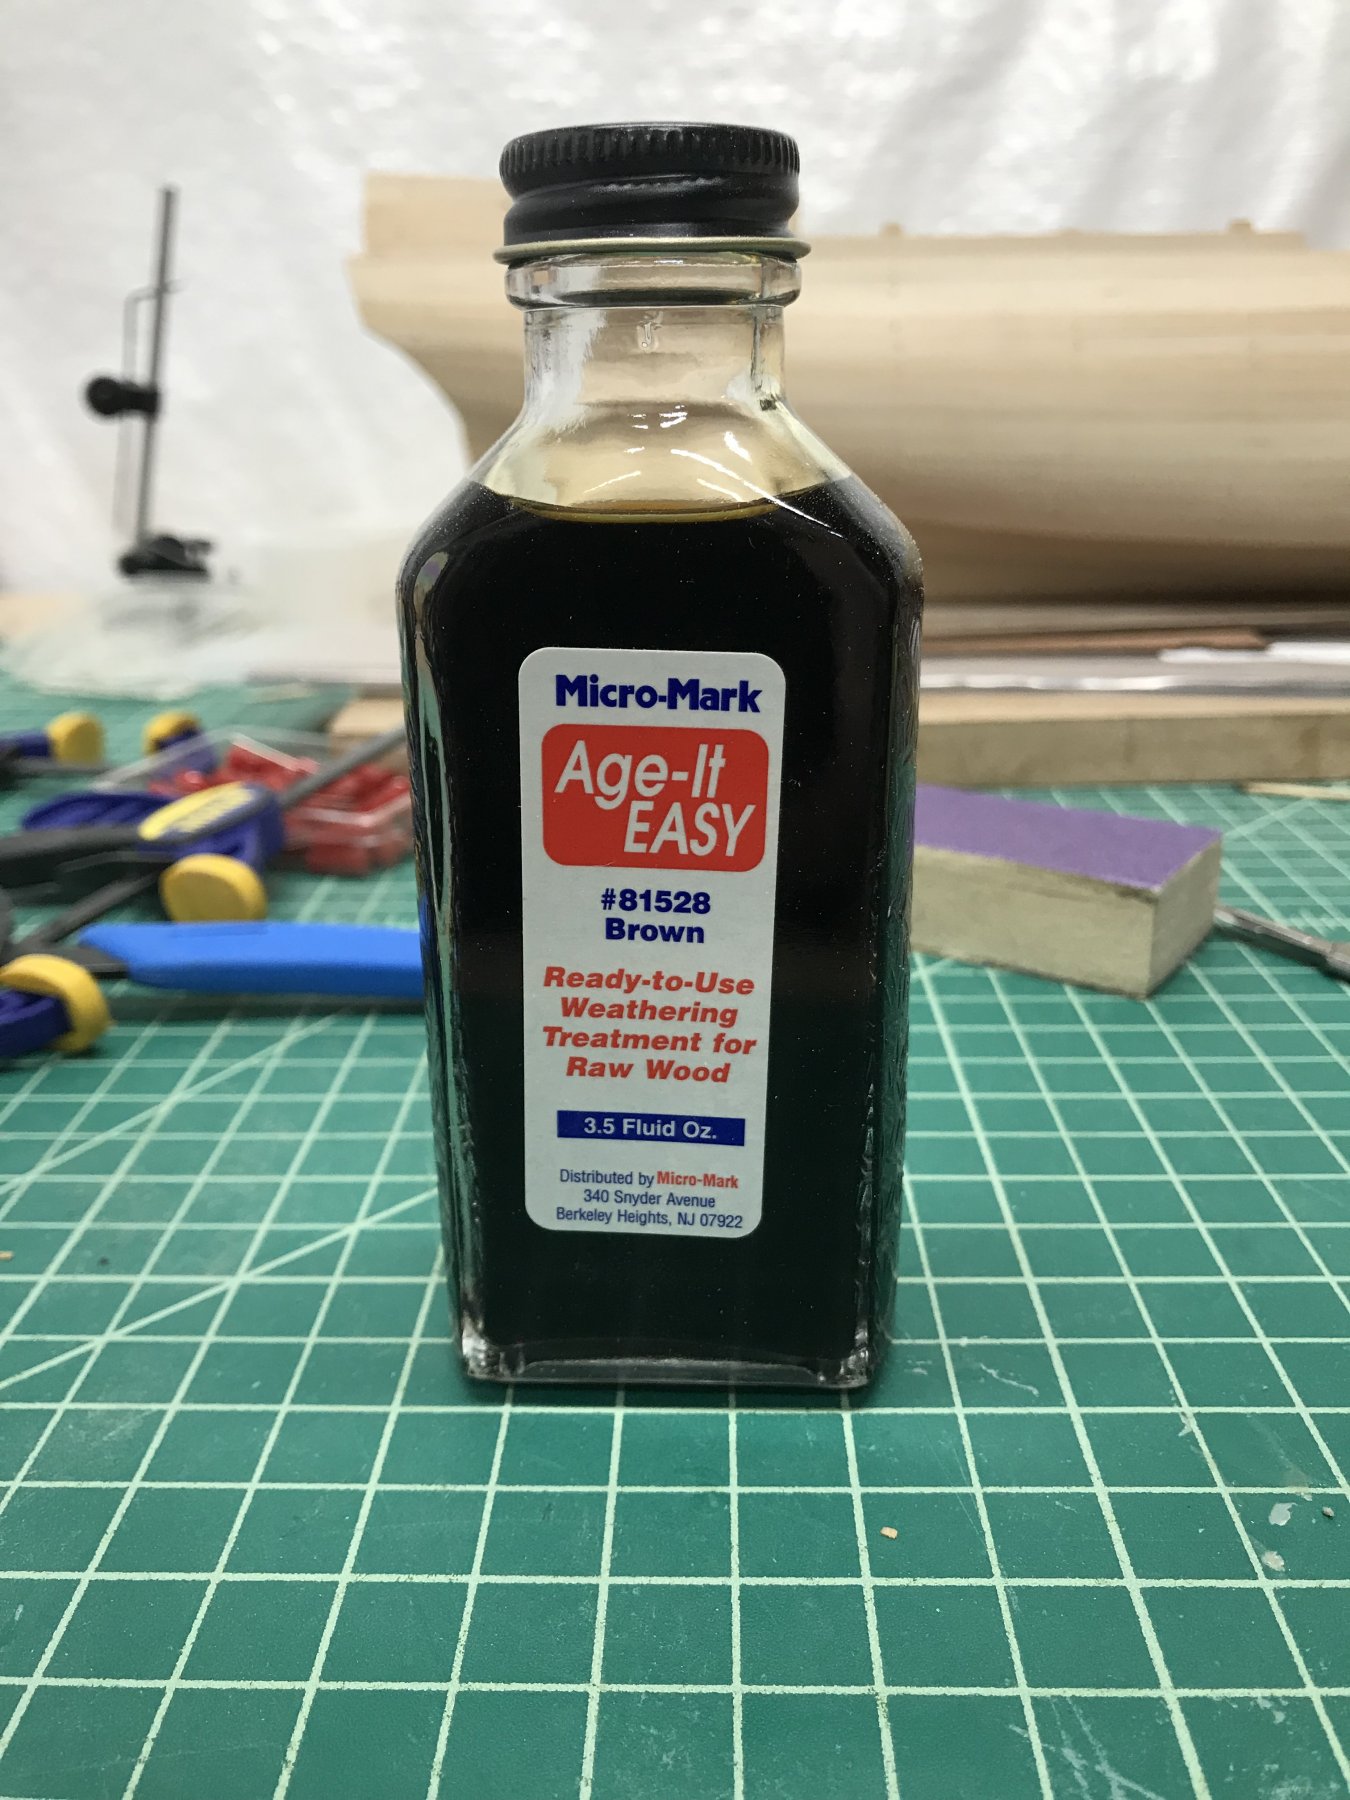
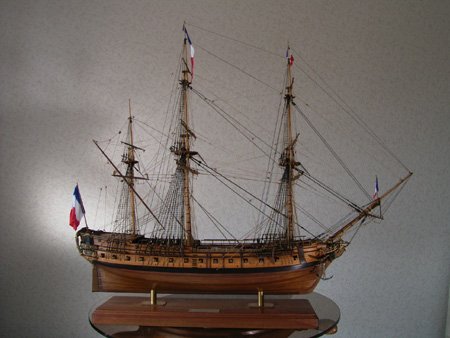
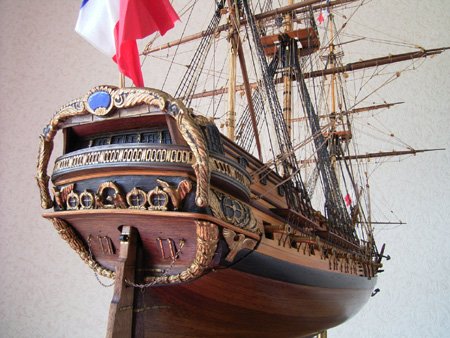
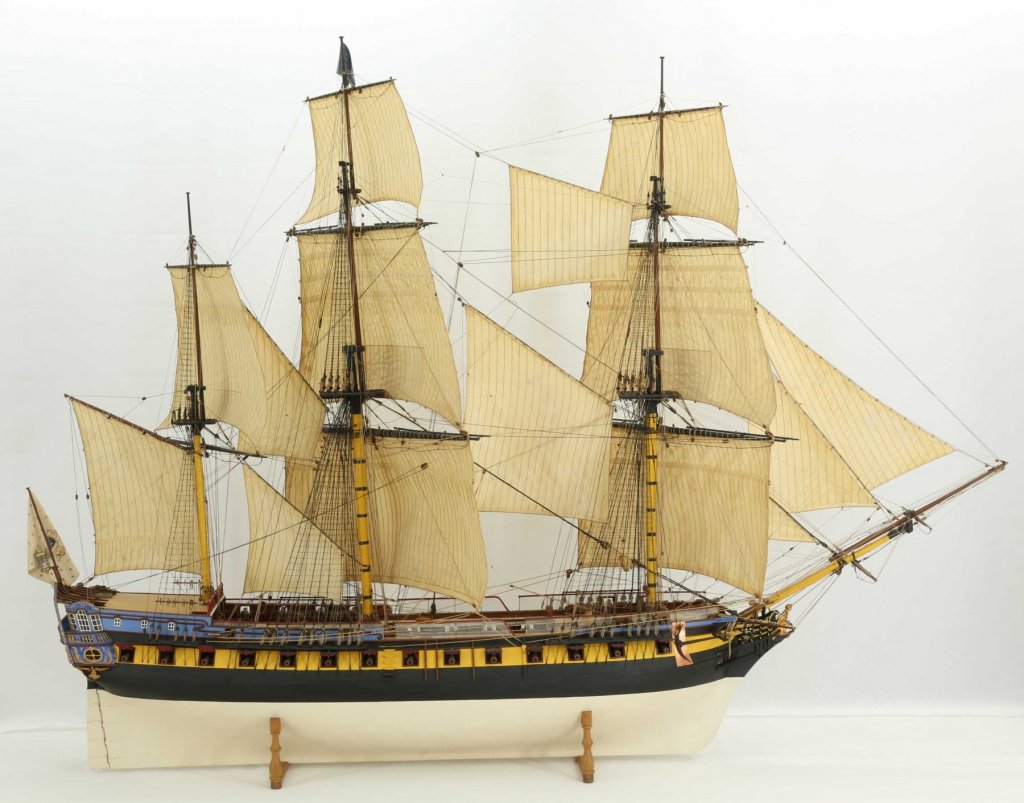
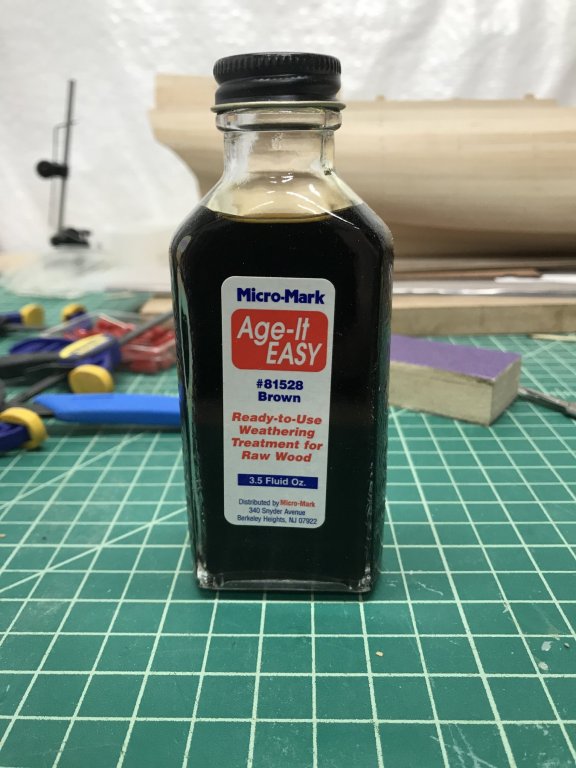
Thanks very much for all the likes. Mark - the "highlights" concept is something I've been thinking about. Seems like colors on the sides of hulls typically ran into the stern as well. I had posted a few weeks ago (and you kindly had replied and helped me think through some of the issues) of inner bulwark planking - e.g., if I go with red, do I have to do both the main deck and the gun deck to match (as well as the port sills)? If the bulwarks are red, do the gun carriages have to be in red? Etc. What I might do instead is go with blacks and golds (using washes, etc. to bring out the details) for the decorative pieces. The Kenji Nakajima model below took this approach and I really like it (he added blue in a couple spots of the decorations on the stern). Where I will deviate from him is that he used the kit cast pieces - I'm likely going to scratch my own because while I think they are pretty good, I don't think that they fill out the teardrop shape of the quarter galleries the right way and some of the lower decorative elements are not in the right scale. So, it will be a bit different and hopefully look half as nice as his model. Pete - The Age-It is water-based, and goes on very nicely. I tried a bunch of the General Finishes stains but the Age-It looked nicest to me. It turned the gratings a nice golden bronze, which complemented the dark walnut coamings when tung oil was used. Unfortunately, it looks like the best time to apply is after the gratings are completed because of all the gluing and sanding of the camber that you need to do to assemble them. I tried to apply glue only to the bottom of the gratings so that it didn't penetrate too far at the top so that the stains will take. Will see what happens. I agree about too much color. It's nice, but I almost like the more simplistic 3-color scheme you see being used by folks in Europe (pear/boxwood/ebony). Here's a model on one of the websites that uses a lot of color - nice, but not really what I'm going for (the sails are fantastic though). Jason - yeah, the gratings are a bit tedious, especially when you have to do as many as are on this ship. But, they provide a nice detail I think. I figured I would knock them out at once since I was already cutting wood for the coamings, and making them at the same time would make it easier for consistency of dimensions. As usual, I grossly underestimated the amount of time it would take to put them all together. I have to say though that the Byrnes table saw with sliding table and the Byrnes disc sander make the job much easier, especially to get straight lines and uniform dimensions. The painting with wood thing isn't too bad. I probably could have built this straight from the box as the wood quality is very nice, but the color of the wood used for the keel was way too blonde relative to the stem. It just wouldn't have looked right to me, and I struggled for a while with whether to just stick with it or buy new wood for consistency. This is not a Euromodel-only issue of course. Caldercraft and Amati stock their kits with different walnuts and walnut ply which is all over the place in color variation. My Corel Unicorn wood was quite consistent, and MS kits use basswood so the color there is pretty consistent. It seems like some of the newer European kit makers are using more consistent wood, so maybe that will carry over to the others I mentioned who otherwise put out really nice kits. You just have to plan ahead. It's been quite tricky in places on my Morgan build where one side of an item may be black and another in a different color, so you end up laminating different woods together. I like the challenge though. It also forces me to work more precisely knowing that I can't rely on wood filler and paint to clean things up. Probably the big thing is the added cost of the new woods, but on my current builds, I bought the kits off eBay or MSW members at prices low enough that even replacing the kit wood still makes me pay less than buying the kit retail. I also like the fact that I feel like I'm doing real "woodworking" and not just model making in using various tools, finishes, etc. It's been a lot of fun learning these things and playing with all the toys - almost as much fun as the model making side. I've recently learned a lot from Vossiewulf and his posts on tools - that is a man that knows and loves his tools!
-
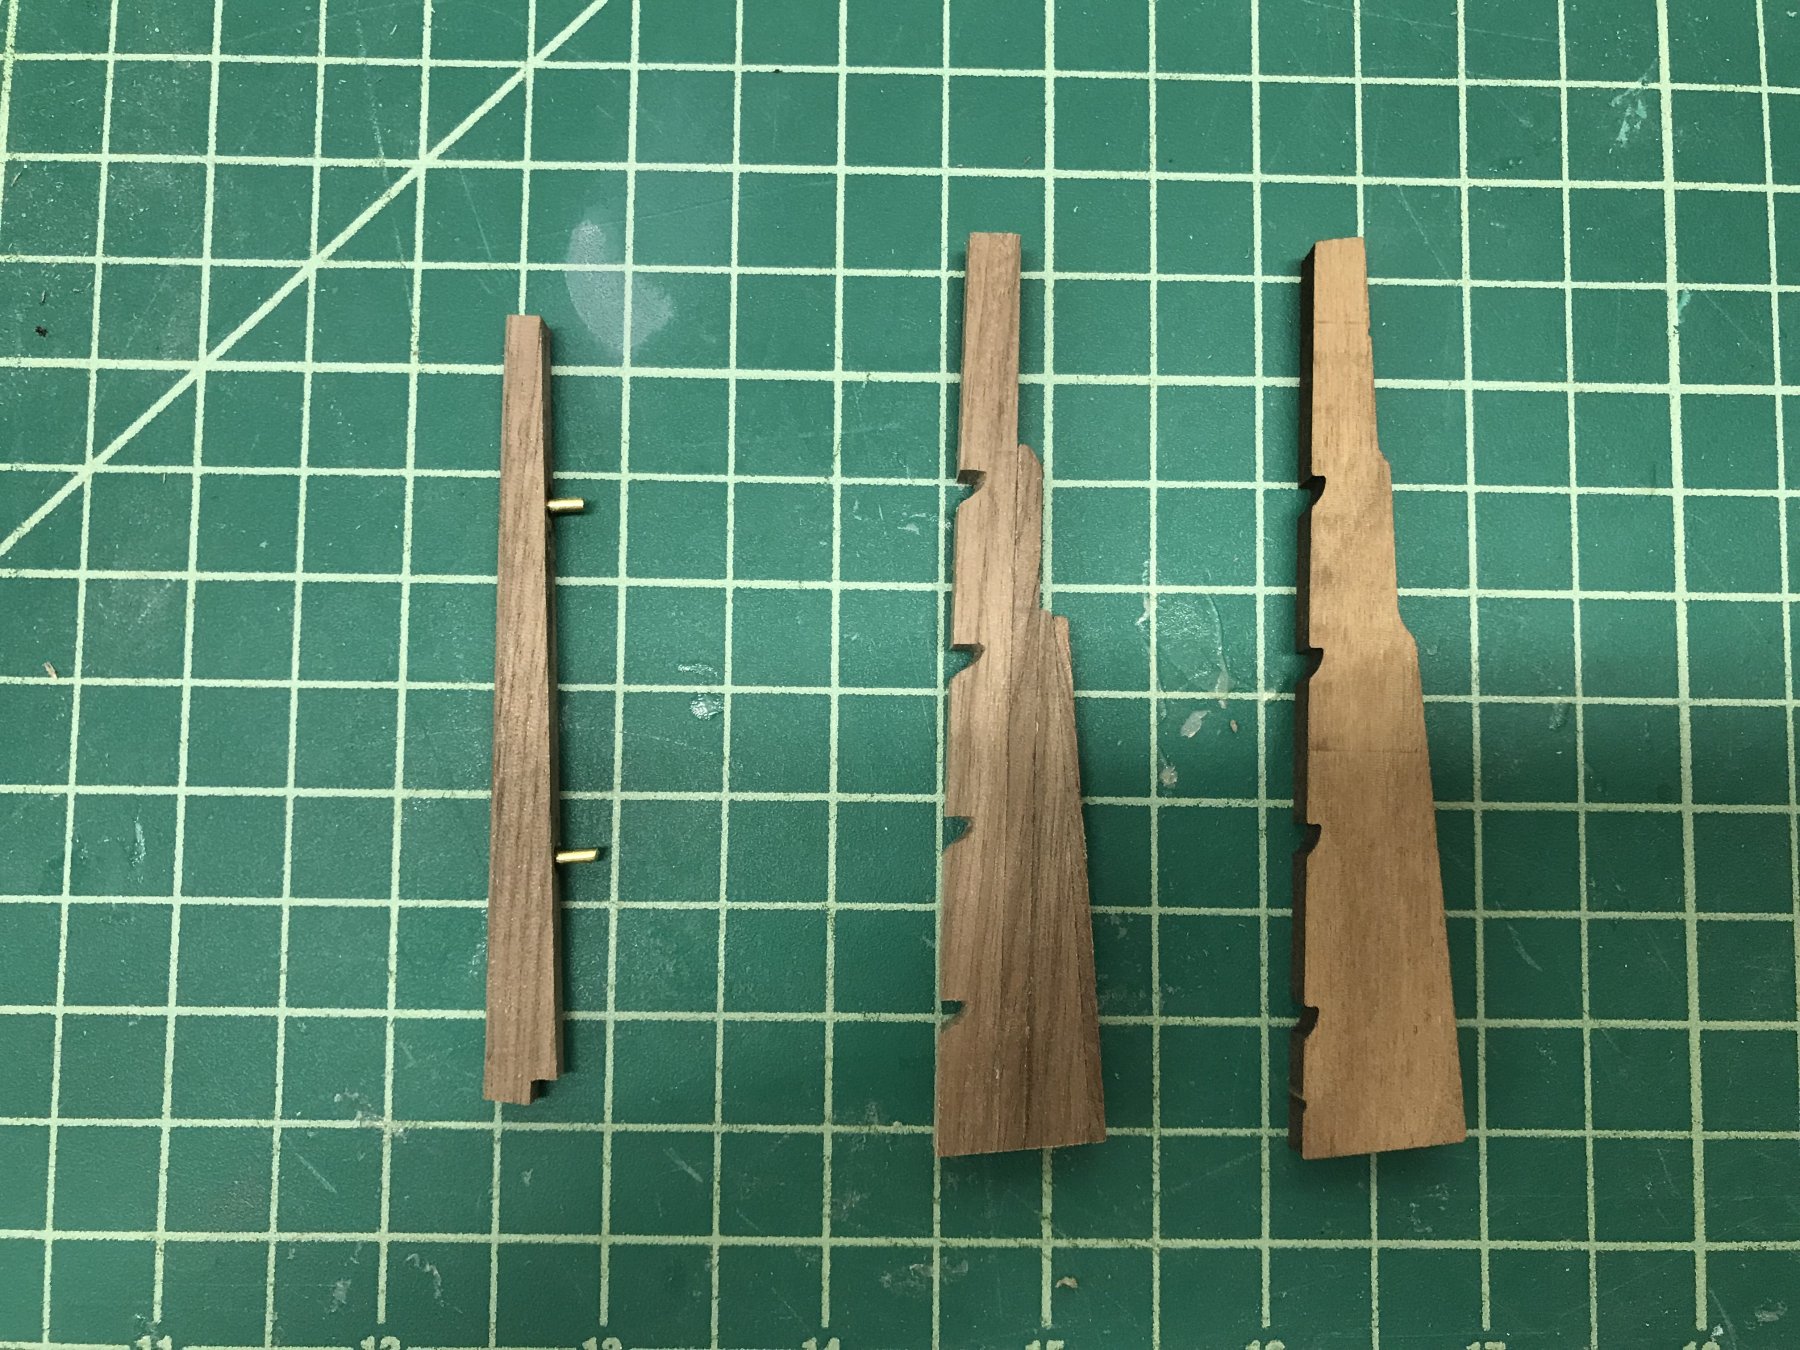
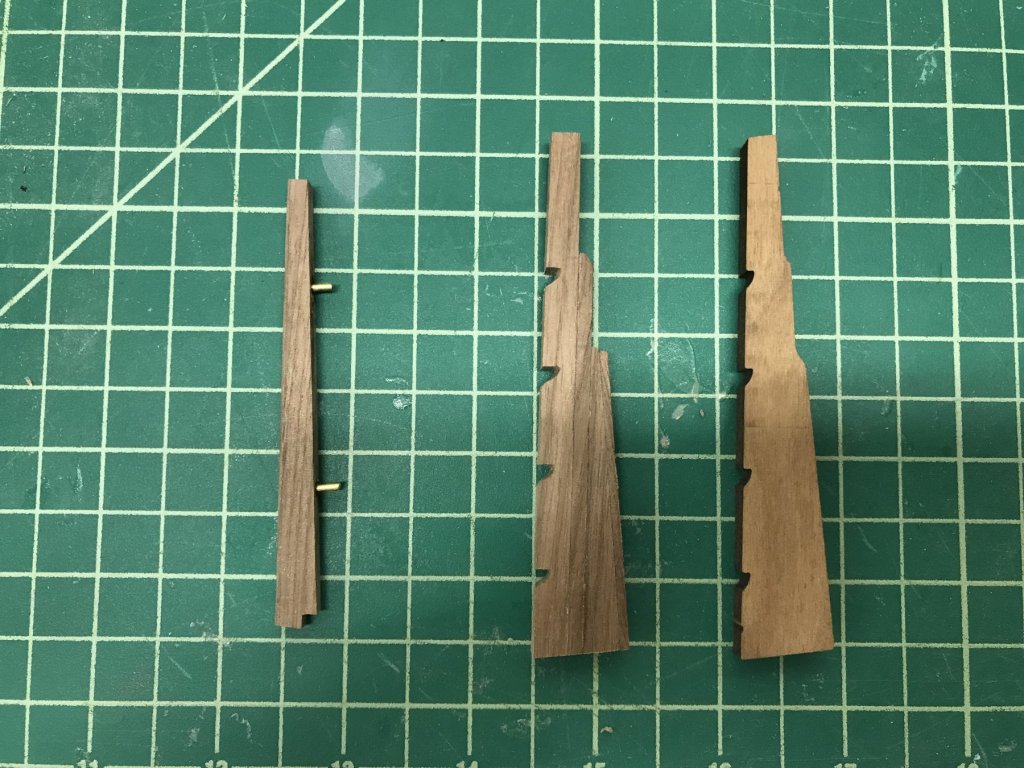
Happy 2019 everyone! I’ve made some progress over the holidays and last few weeks. In getting ready for the second planking, I built the stern post and rudder using walnut from Crown Timberyard. Since I’m not planning on painting the lower hull, I was a bit uncomfortable using the kit wood which had different woods for the rudder and stem versus the keel, leading to a pretty big color difference. Kit manufacturers really should as a matter of course stock a kit with consistent woods or at least colors/shades. I added brass rod to the stern post to help position it when running the second planking so that it ends up nice and flush. I built the rudder using in three sections, though the wood is dark and despite marking the edges with pencil, the edges may not show up when the wood is oiled. I’ll finalize the rudder once the stern post is installed, including adding the bottom sole (the kit rudder is in the right): I spent some time working on the various hatches for both the gun and main decks. I originally thought the kit didn’t provide enough grating material so went to buy more but the cost on the Euromodel site was awfully high. So I went with some gratings from RB Models. You can see them in the piece on the upper left side of the picture below - really nice quality, but unfortunately the grating openings for the ones I bought ended up being slightly too oversized I thought. After building the three sets of gratings for the gun deck using the RB Model gratings, I realized that I miscounted the the amount needed relative to what the kit provides. Stupid me, I double counted the gratings on the gun deck under the opening in the waist, which are also shown in the main deck plans. Turns out the kit barely gives you enough to complete all the visible gratings, so I went with the kit gratings which are more in scale. The one piece using the RB Models material is completely hidden so the disparity won’t be noticed. So, crisis averted but it would be nice if the kit provided more material to be able to construct all gratings (visible and hidden) in the kit, and at least to have some extra in case of mistakes, poor material, etc. In the RB Models piece, you can see the gratings look darker than the kit gratings. I used the brown Age-It from Micromark and really like how it darkened the gratings, which typically seem too light for me. So, l’ll likely use this to darken the other gratings as well. I’m still mulling over the ultimate color scheme. I’m leaning towards keeping the colors simple in browns and black, but have thought about adding reds and/or blues (blue seems to have been used in Swedish ships) for more color. I’m already using reds and blues on my Pegasus, so I might just stick with browns and black. Since I’m painting with wood, that would enable me to use the kit cannons and not have to scratch them in redheart, etc. Thanks for looking in!
-
Miniature Hand Tools
Landlubber Mike replied to Julie Mo's topic in Modeling tools and Workshop Equipment
Sorry, I have their miniature chisels and a few of the miniature planes and spokeshave you can see here: http://www.leevalley.com/us/wood/page.aspx?p=72391&cat=1,41504 I assume I can use the waterstones (I also bought a couple of diamond sharpening pads in different grits today) to keep the miniature planes and spokeshave sharp? The Veritas jig is going back. Now I can go shopping for some of the items you mention. I've bought the $10 hobby files before, and you're right, they are crap. I'll go back to your earlier posts and look for your recommendations on needle files and riffler files. Thank you! The micromotor looks like I great investment. I'd love to get to the skill level of putting in nice decorative carvings on my models. Never thought the Dremel would be a good tool for that (I have an older, heavy plug in model). I'll look for your recommendation there as well. I believe I bookmarked some of your recommended suppliers. A big thank you again - really appreciate it! -
Miniature Hand Tools
Landlubber Mike replied to Julie Mo's topic in Modeling tools and Workshop Equipment
That's really helpful guys, thank you! When I was at Woodcraft, I bought this Flexcut slipstrop for some of my bonsai carving tools (gouges, etc.). Looks like that is similar to what Jaager was suggesting: https://www.amazon.com/Flexcut-Slipstrop-Polishing-Deburring-PW12/dp/B00FX9MHIG/ref=sr_1_2?s=hi&ie=UTF8&qid=1547086645&sr=1-2&keywords=flexcut+gold Vossie, it was reading your Lady Nelson build on tools that really got me thinking that I should try to add toys -- I mean tools -- to the workshop and take care of them by sharpening them, etc. I have a Sherline lathe and mill, and am not intending to do any large turning or milling work (I could see doing something like pen blanks or like-sized things). In the past when I've used the lathe, it was to make masts, and even then I just used sandpaper, not actual tools. I figure I should try to pretend I'm a real woodworker. Right now I have the Veritas mini chisels and a bunch of the miniature planes. It sounds like I can just get away with a watchmaker screwdriver sharpener and those small waterstone files to keep those sharp? I have a bigger waterstone that I bought to hone some bonsai tools that I own and need to sharpen, but those small ones look like good options and aren't going to break the bank. I bought these on a whim a few years back as well https://www.amazon.com/gp/product/B000KIAE08/ref=oh_aui_search_detailpage?ie=UTF8&psc=1 They aren't expensive, but can I just use the waterstones to sharpen them, or do I need something else to sharpen them? Those big bench grinder wheels seem to be way overkill. I suppose I'm trying to figure out if I should return that Veritas Mark II honing guide since it seems like I don't really have (or use) any tools that would benefit from it. I don't see myself needing many expensive tools for the lathe, etc., but I eventually would like to get into carving decorative elements for my model ships and have thought about ordering a set of chisels from Mikhail that folks here have liked. Many thanks for any advice. -
Miniature Hand Tools
Landlubber Mike replied to Julie Mo's topic in Modeling tools and Workshop Equipment
Sorry to resurrect this thread. I bought the Veritas Miniature Chisels mentioned at the start of this thread a couple of years ago, but never really used them. I also have some of their miniature planes that I also haven't used yet. How do you sharpen the chisels? I went to Woodcraft today and bought the Veritas Mark II honing guide for narrow blades, but it looks like the guide can't accommodate very short chisels like the Veritas miniature chisels. The blades are so short that the guide can only clamp on the handle of the chisel, which are round so you can't lock the chisel into place on the guide. I have some longer chisels that I need to sharpen (from PSI Woodworking I think), so I will probably keep the Mark II honing guide I suppose. How are you guys sharpening your Veritas Miniature Chisels? Is the Kell Guide listed above the only one on the market that works for these (link is here: https://www.garrettwade.com/kell-british-made-deluxe-honing-guides-gp.html) ? Also, for the miniature planes, how do those get sharpened? Sorry, I'm a total novice when it comes this kind of stuff. Thanks in advance! -
Amazing work as always Igor. You are a true master! Thank you for sharing with us. One question - did you wait a while to cork it to allow the resin to dry? Just wondering if you’re experience has shown that it’s best to keep the bottle open for a few months before forming.
- 82 replies
-
- 2
-
-
- boat
- lak-design
- (and 1 more)
-
Thank you! It’s been harder to find research in Swedish warships than one might think. I suppose I could try writing the museum in Stockholm but I think I’ll just go with the more simple color scheme. Thanks again for the info! I always learn so much on here, no matter what the question.
-
Wow, stunning work Jason!
-
Thanks guys this is all very helpful information. Still not sure about adding “colors” to the build. I’m already adding blues, reds and whites to my Pegasus build, and not sure I want to take a similar approach here. There is a simple aesthetic elegance of working in as few colors as possible, as seen in the work by the European masters. For now, I think I’ll go with brown for the gun deck bulwarks and port sills - that will make things much easier. I can decide later as I move up to the main deck whether to add redheart or not.