clearway
-
Posts
2,238 -
Joined
-
Last visited
Content Type
Profiles
Forums
Gallery
Events
Everything posted by clearway
-
 my default drill bit is a 0.68mm bit in a pin vice then use a bigger drill if needed and use a pin vice as opposed to actual drill though it goes for you fingers and wrists when drilling out for belaying pins- the position for the bulwark frames should be on the plans somewhere, but there are a few build logs on here for this model. Keith
 -
the tranverse curves atop the frames is the deck camber and should be left- if the midship frames are right use them as a datum- also check the height at the beak with the bulkhead right at the front - hope that makes sense- however just insert the frames and adjust by eye till they "look right" compared with other builds you see- this stuff can drive you nuts at times!!
-
Hi Emmet- the rigging chord from billings is white-but the lashing behind the foremast doubling looks white because it had just been glued- for the lashings on the stays to the yards i used some light grey thread bought from a sewing shop as white looked too obtrusive- on this pic i have enlarged the lashing and you will see the strops for the topgallant shrouds belayed to the deadeyes. hope this helps explain more clearly also in ship yard been tidying some of the spaghetti in the waist before i start on foremast. take care all Keith
-
just no more crazy glue experiments!😇
-
nice davits! when doing the running rigging you will regret mounting them now though- that,s why i have the brackets on the hull but no davits yet, but nice seeing her recovering from near annihilation😉 Keith
-
thanks for comments and likes all- ahhh that be a kevel for the topyard lift that be if it is to the rear of the mast- when you look at the quarter deck on my victory just in front of the steps you will see what i mean☺️. more progress in shipyard with the frames bevelled, also decided to not bother with the built up ply bow and added timbers from scrap ply from kit to run planks all the way to the bow, next i will build up the fashion piece for the stern prop extension and see about if i can manage that tuck! take care all Keith
-
a lot of prep work here can save a lot of pain later on Jeff- too many jump right in with the glue pot. Keith
-
shame but in times of trouble stick with what you know- looking at the plates though you can see where the nail details are off-set at the top of the pic a tad so you can get the overlap- think fishscales 🤨
-
Hi Emmet- that sheer line to the bow is way too steep (unless you are into extreme roller skating!- did they include a quick take off deck into her??? 😁There should be a side elevation of the frames on the plan - looks to me like the two end frames need fettled deeper onto the keel piece- or maybe the middle frames need to come up a notch? on mine the deck at the bow is only 2mm or so higher than midships- i have included a pic from some mantua 1/98 victory i have from that rebuild i did showing bow profile. also loved the bit with the kids "finish the house to go to college escapade"- talk about teaching responsibility and dedication!😁 Keith
-
Ty Bossman glad you like her, Emmet all the standing rigging is in black (stays, shrouds, backstays and strops) but where the stays running forward are connected to the mast collars or strops on the tops, i used a light grey thread- the white blob is the P.V.A. that had just been applied. Any rigging to the deadeyes on the shrouds and backstays is white) I was going to stain all the running rigging using tea leaves but because the model depicts her as she looked within past 40 years left the running rigging white as per you see now- so any white rigging you see is for trimming the yards and sails- if modelling her Trafalgar style then you will need to model the bows in the style Caldercraft have depicted. Hope that makes sense. Keith
-
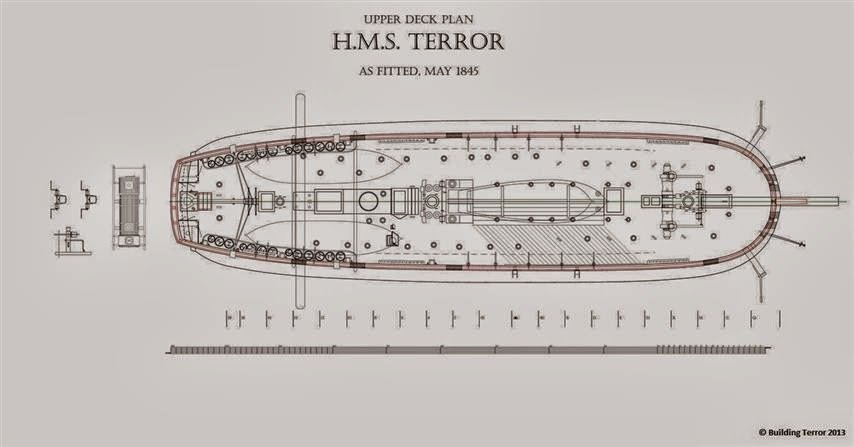
i was thinking the same thing - imagine walking on that in wet icy conditions!🥺 I seen the way the davit was attached on that drawing and you can see the anchoring points on the 1845 plan - it's those tricksy other ones that i think are actually for fishing the anchors? Keith
-
just think-at least she is a smaller than your HMS Victory 😁
-
not at all Emmet i am from Cumbria and we enjoy a good bit of banter, or as we say in Cumbrian dialect "as fra cumbria an we enjoy't crack". Nice to see people who are not afraid to push themselves ( i hadn't built an open fire and fireplace before until i wanted one and learnt basic bricklaying by trial and error, and have built two for this house and two for other people). this forum is all about meeting like minded people and sharing ideas/ experience. Keith
-
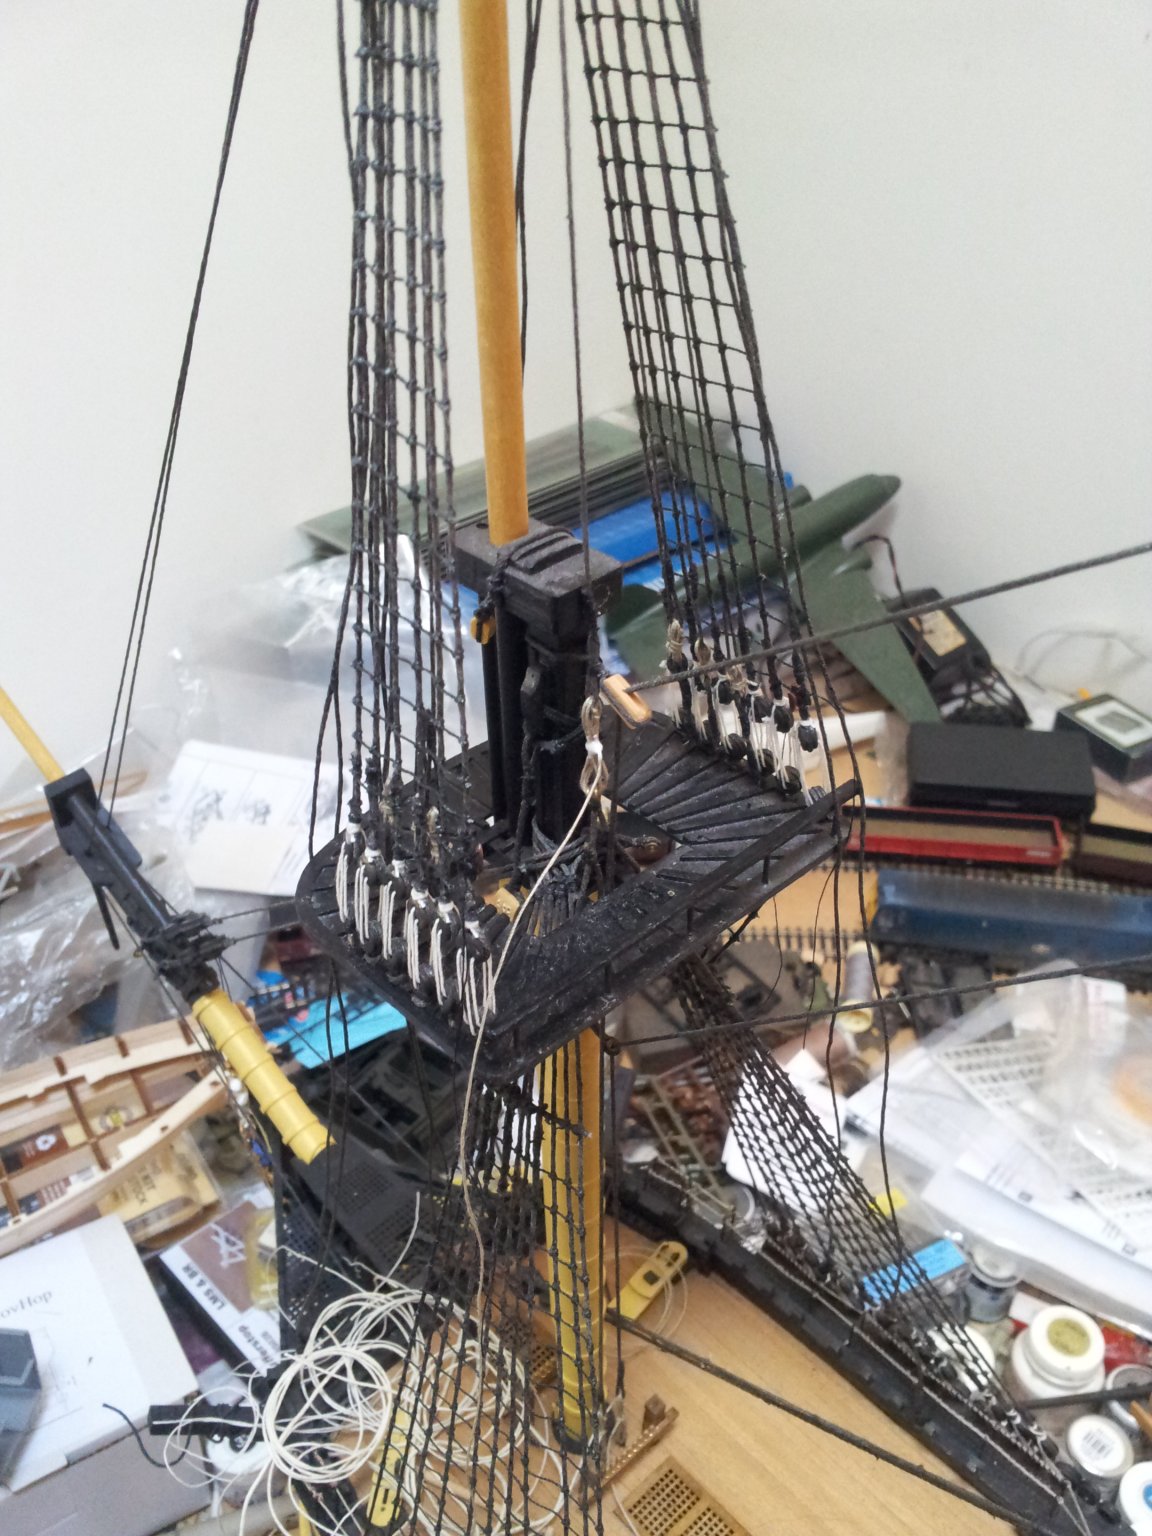
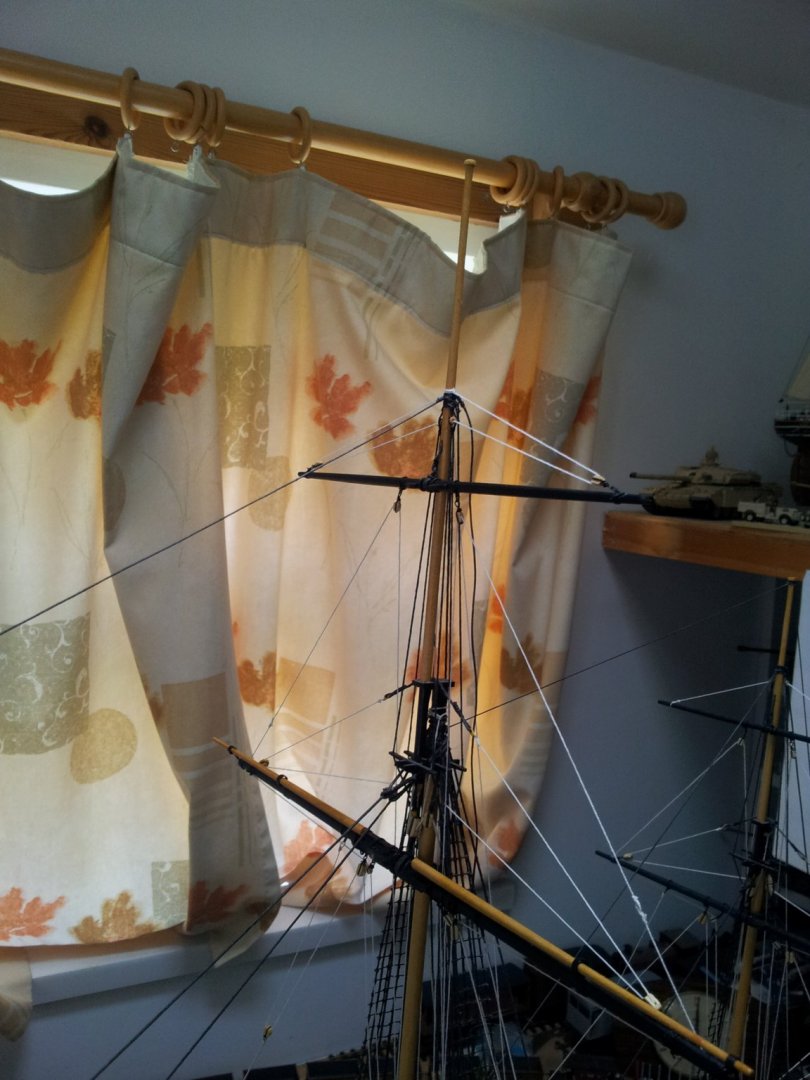
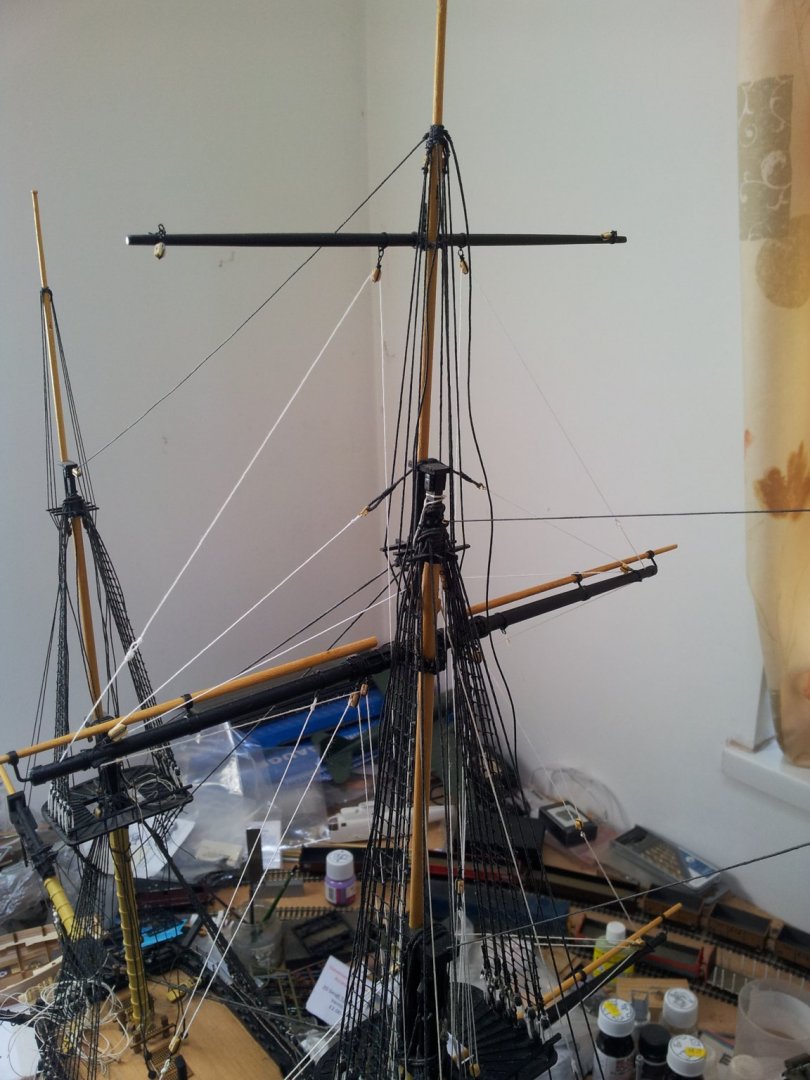
Ty for the comments likes and views folk- yes Emmet the main topgallant yard is on eye level when on the bench (i am 5' 10") - yours wont be as bad being smaller scale but you will still need to stand so lower work station would be a good idea for you. back in yo olde shipyard and the main topgallant lifts are rigged and finally got round to finishing the rigging of the main topgallant stay to is collar on the foretop. take care all Keith

-
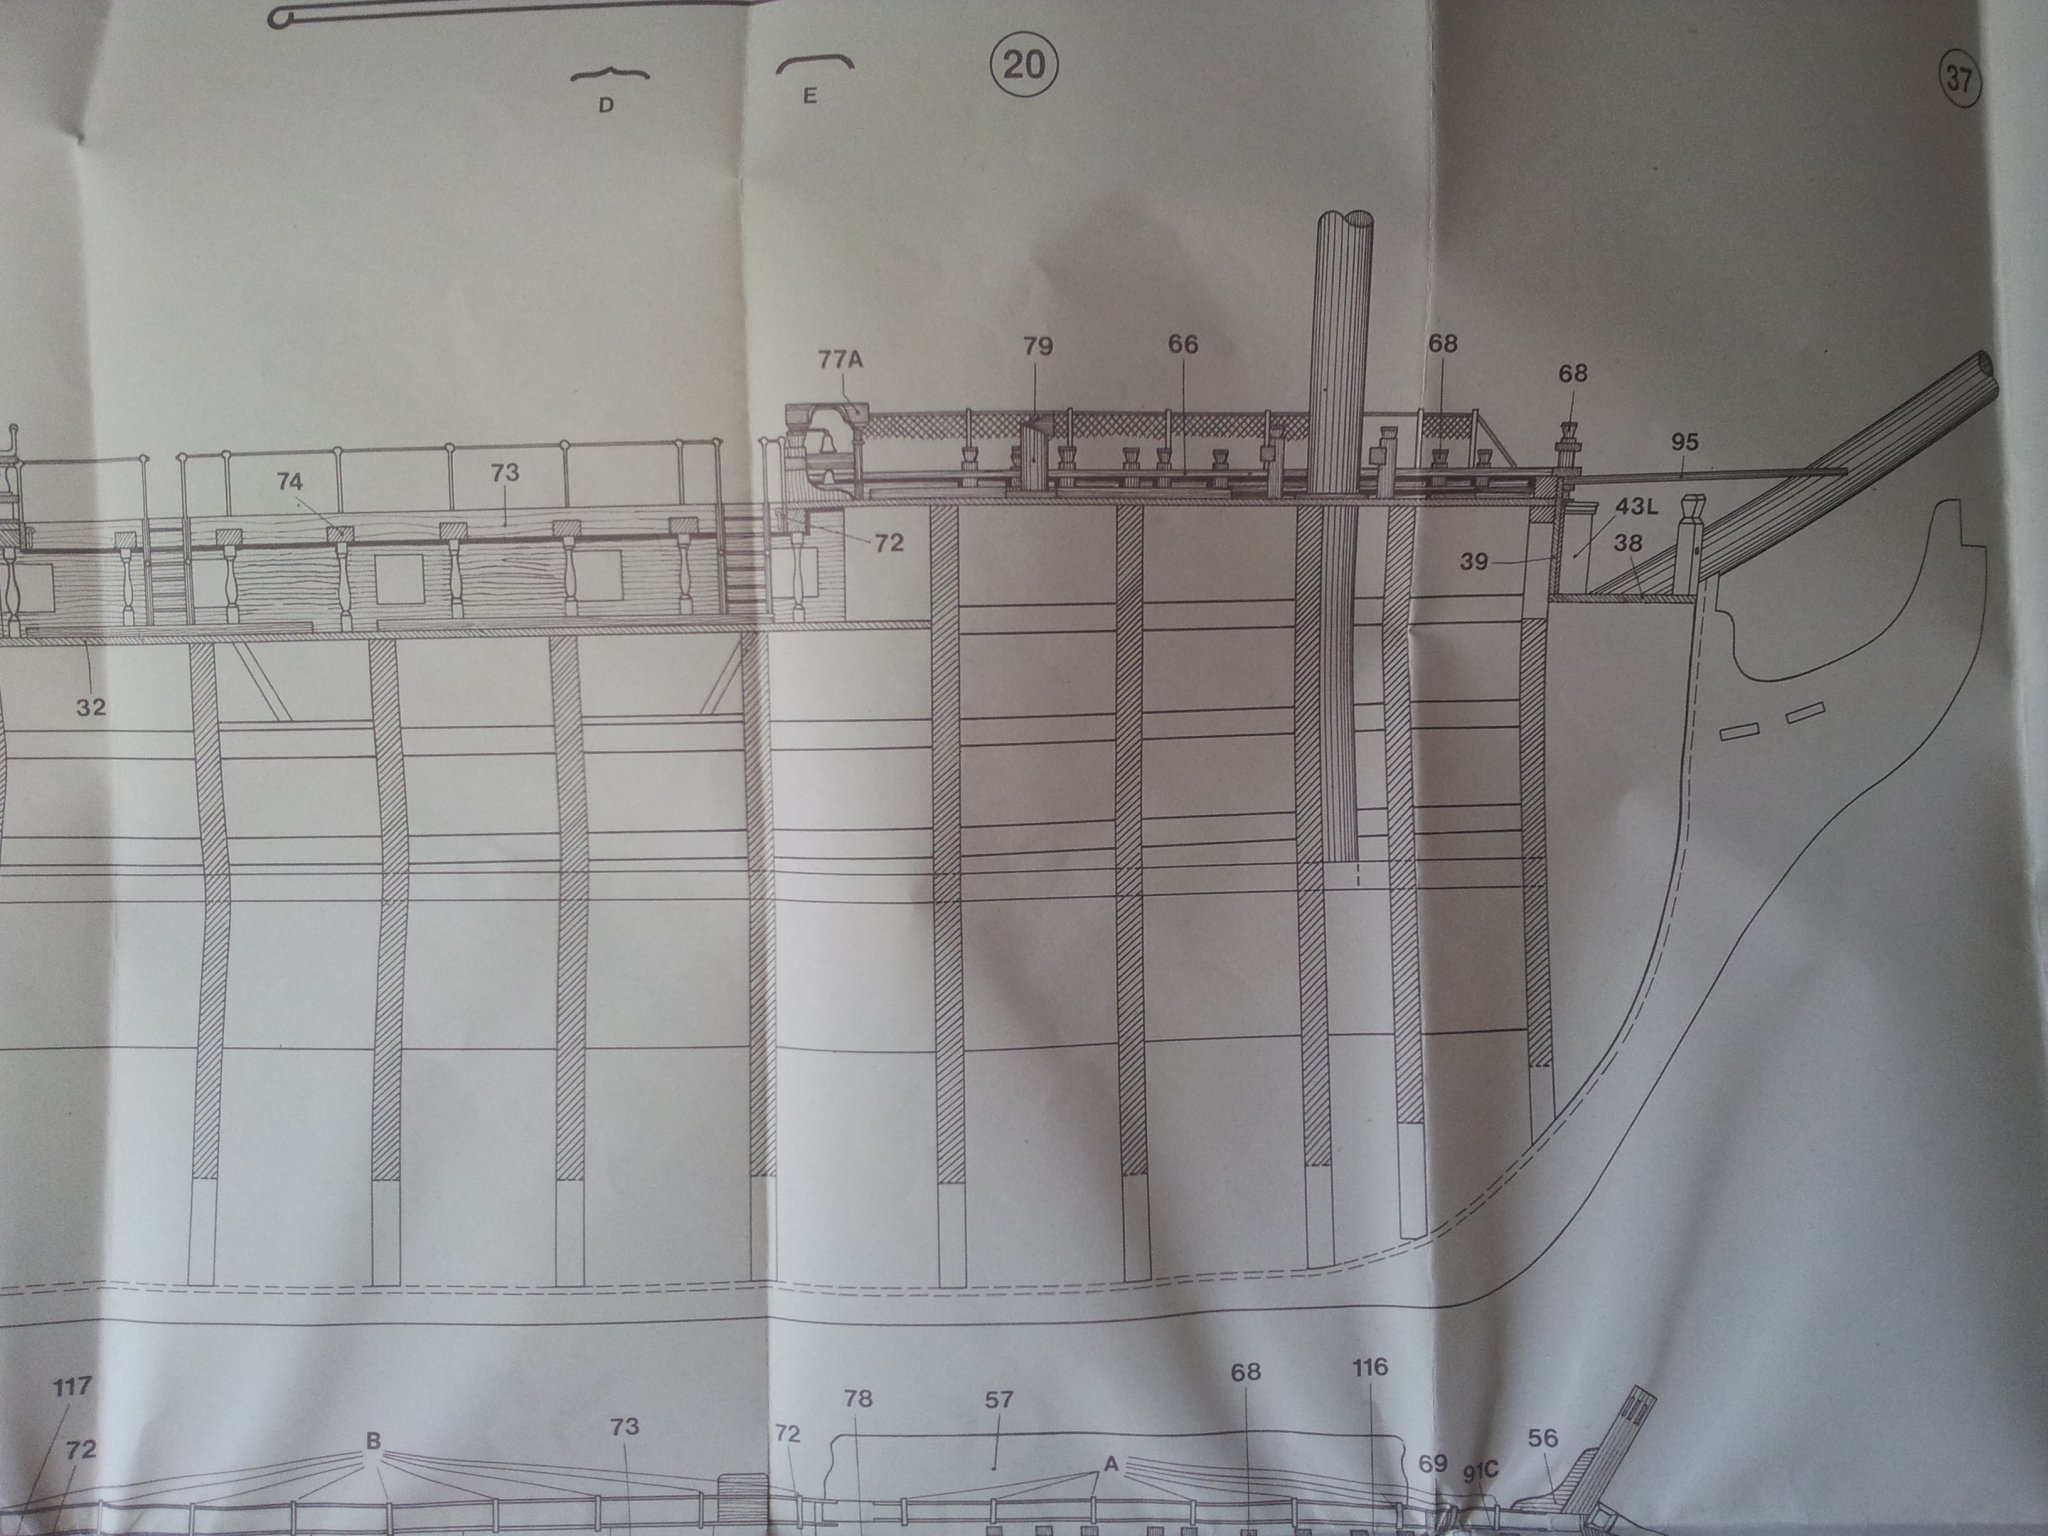
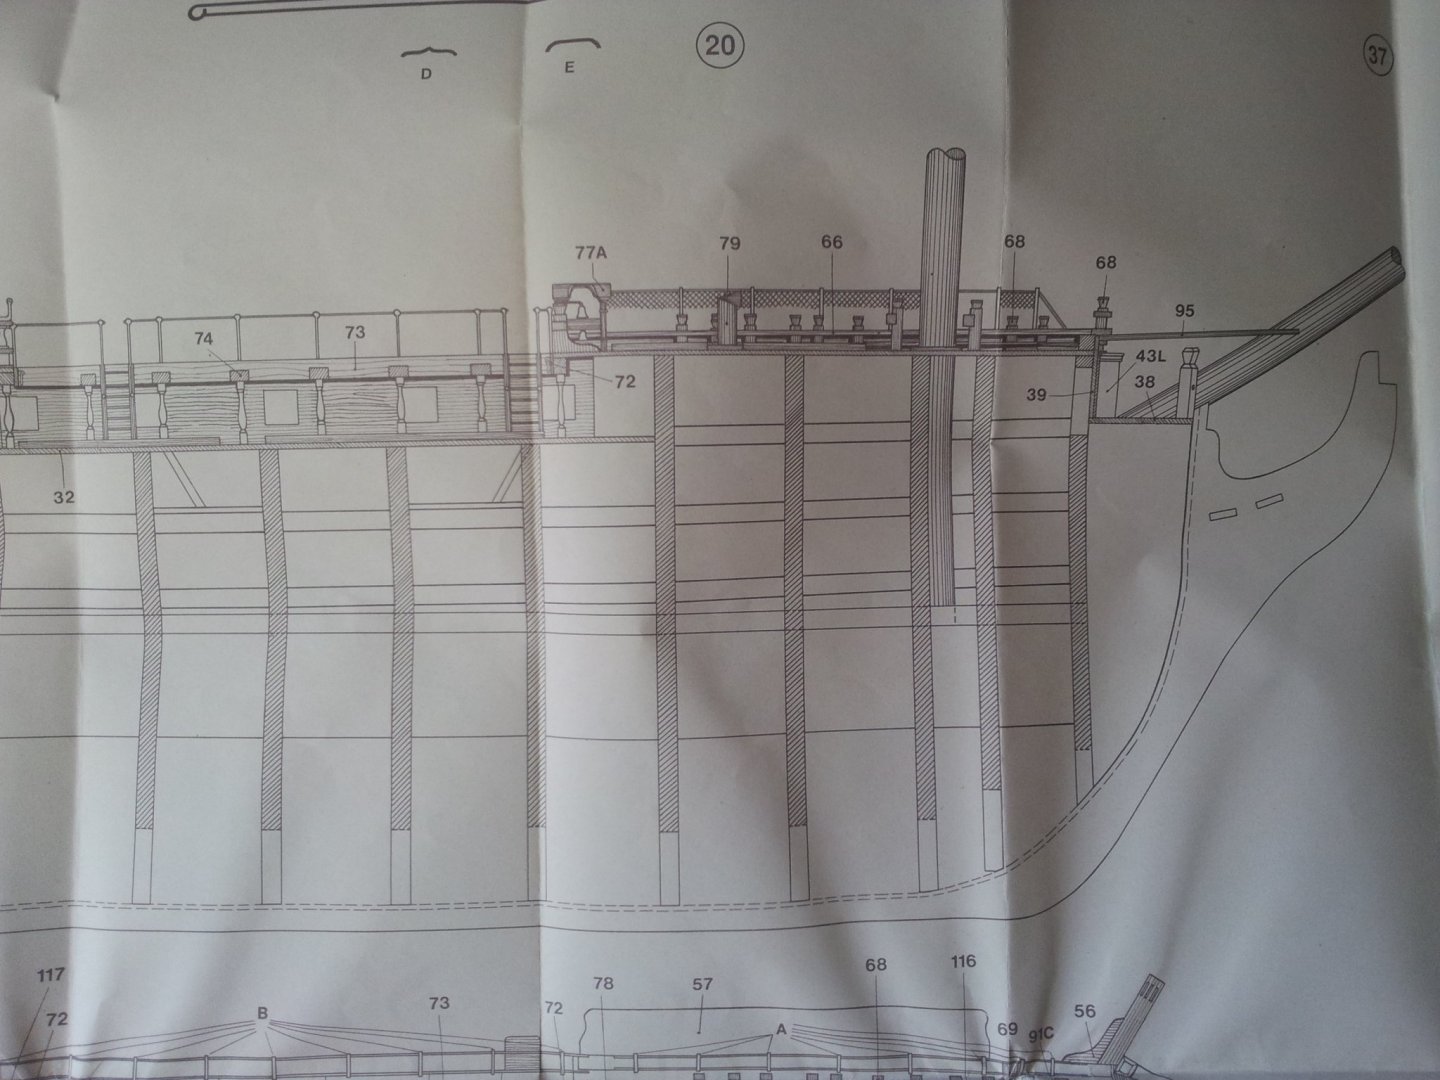
Cheers Keith after a second cup of tea this morning went to michael betts blog where he has the 1845 plan and you can see the square irons for the posts which are square (occre have them round!)- need to find out how the cranes were attached to the posts??? the long platform abreast the stern at the lifeboat cradle is described as a bridge in the cutaway drawing in the time life book- the two timbers that stick up might well be mooring bollards (still see them on wooden fishing boats) thake care all Keith
-
at least you have taken the wise road of checking before applying glue Emmet- a lot of people jump right in assuming manufacturers have made all the cuts accurate and have to do a lot of un- building to retro cure problems they have found. Keep up the good work Keith
-
after studying the plans sent from keith (cheers again in order) i suspect that the inboard fittings that look like davits on the plan are actually the iron crutches for holding the spare spars shown on midship section- questions- if this is the first re-fit as exploration vessel did they keep them for the final re-fit before the expedition, and if extra davits were fitted did they follow same format as midship section plan- getting as bad as finding answers on "curse of oak island"😜 take care all keith
-
Ty Emmet and ty for the likes and views as always everyone, and yep it might be an idea! Luckily i have a dedicated modelling cave which the admiral seldom ventures into- it's mineeeeeeeeeee allllllllll mineeeeeeee hahahahahahaha🤪, but bon the serious side the yards are sooooooo wide i nearly head but them when sitting down even tho the hull is 18 inches back from edge- need to sit up straighter when sitting down! Keith
-
should sand down and look better- good way about doing scale length planks is it will be easier tapering them to fit the planking lines. Keith
-
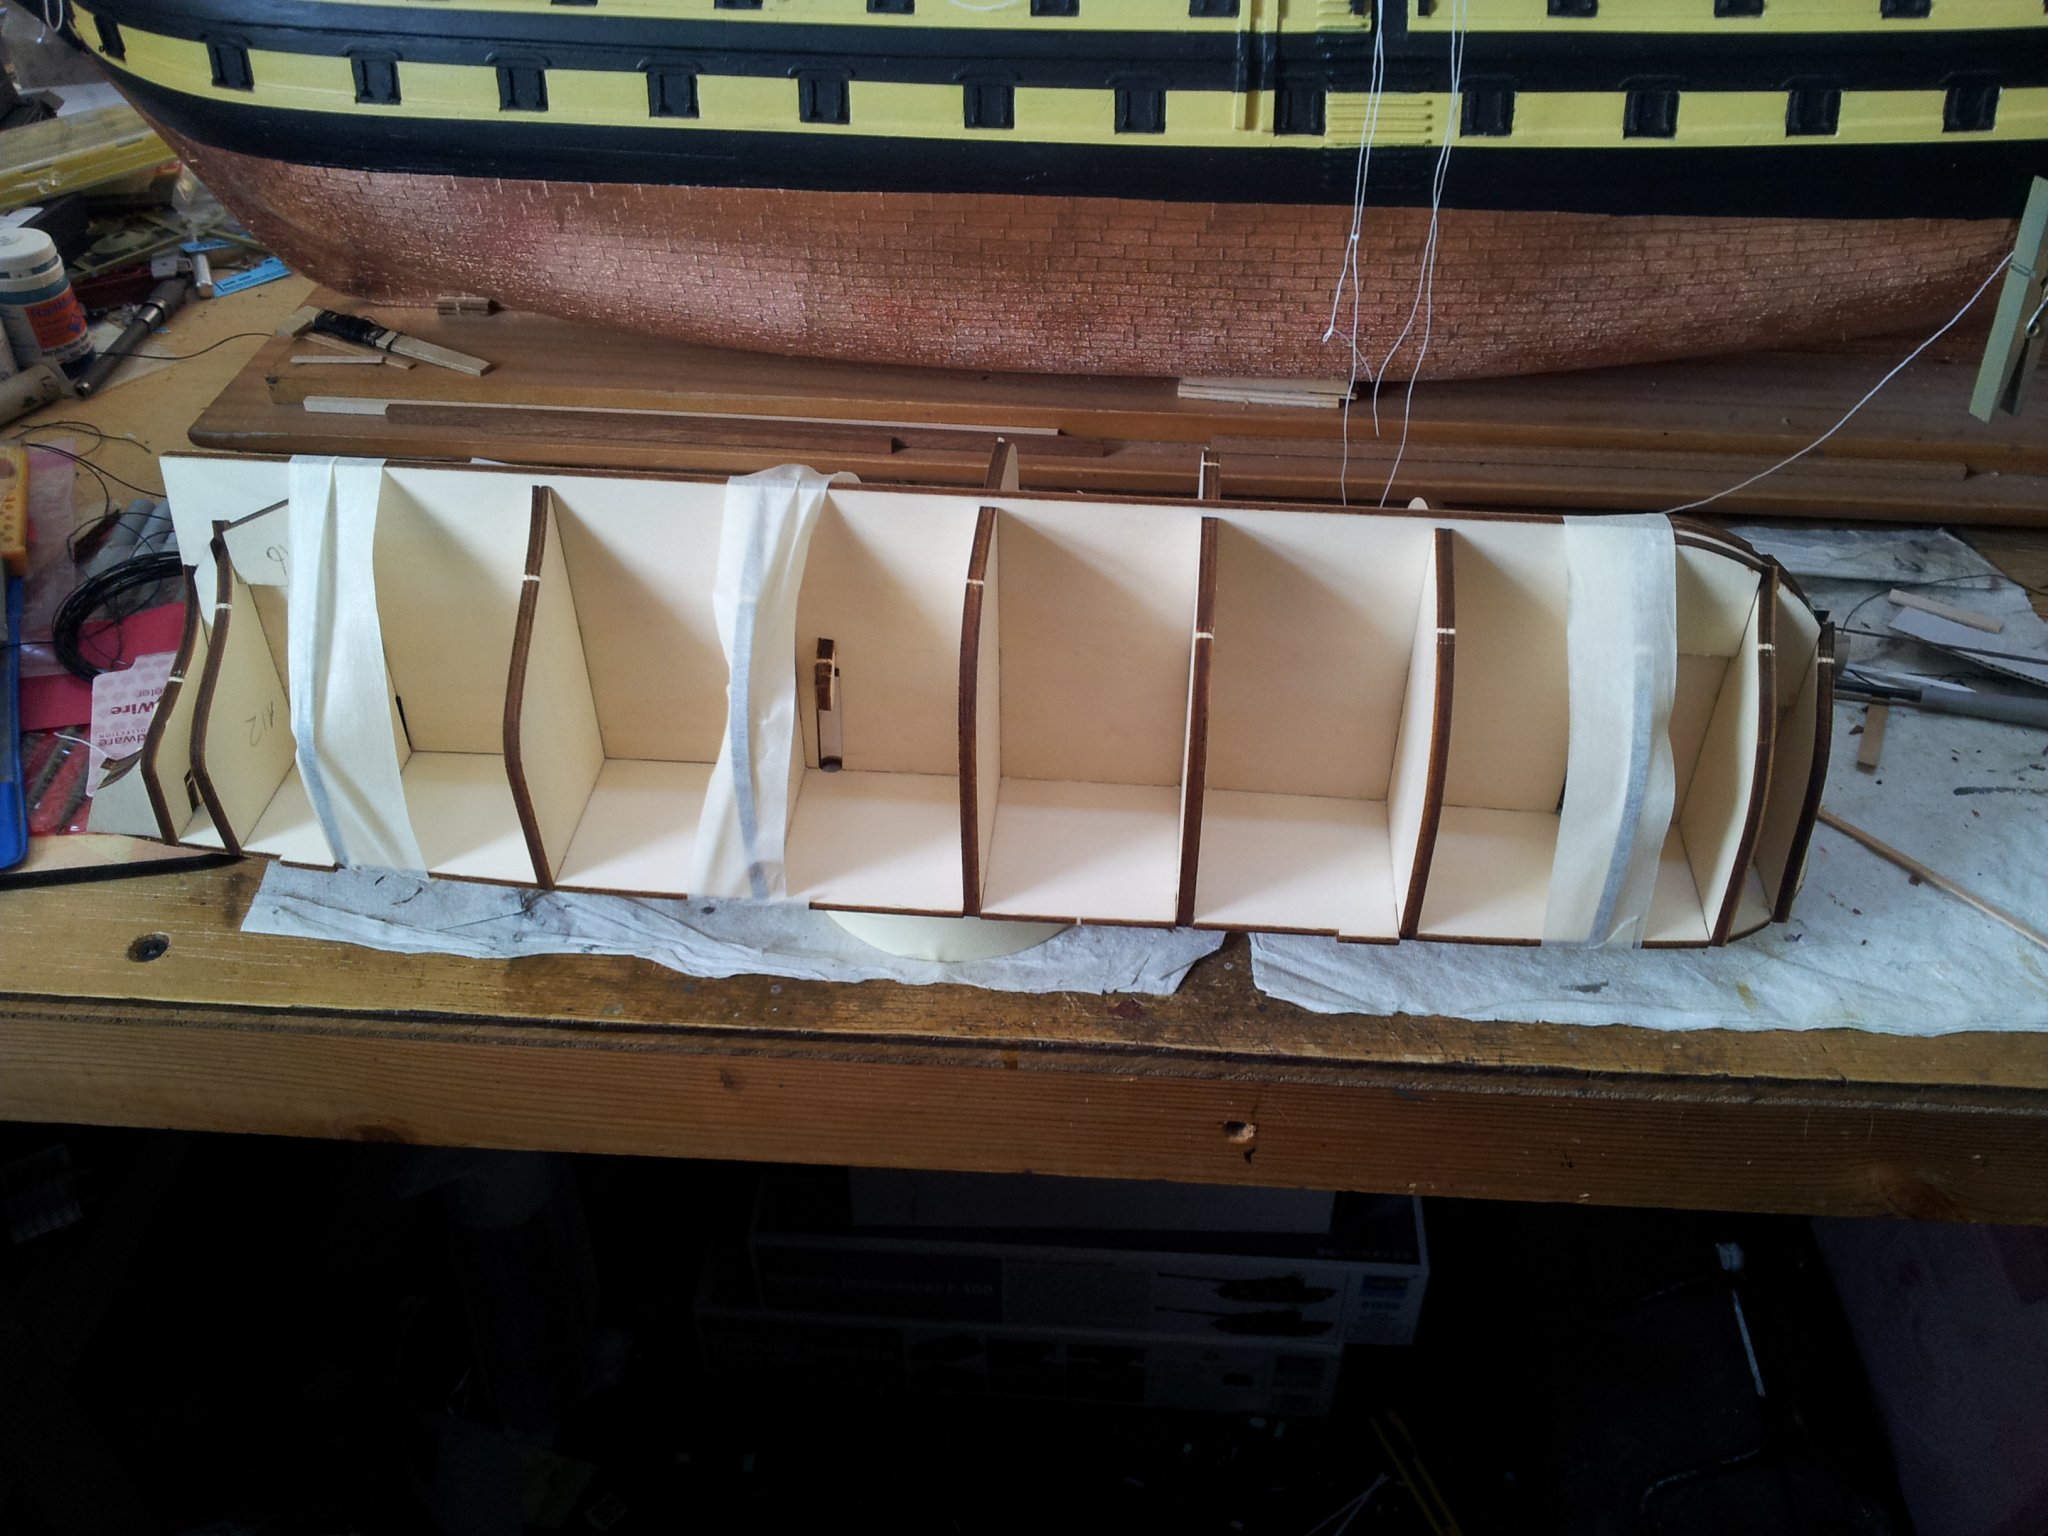
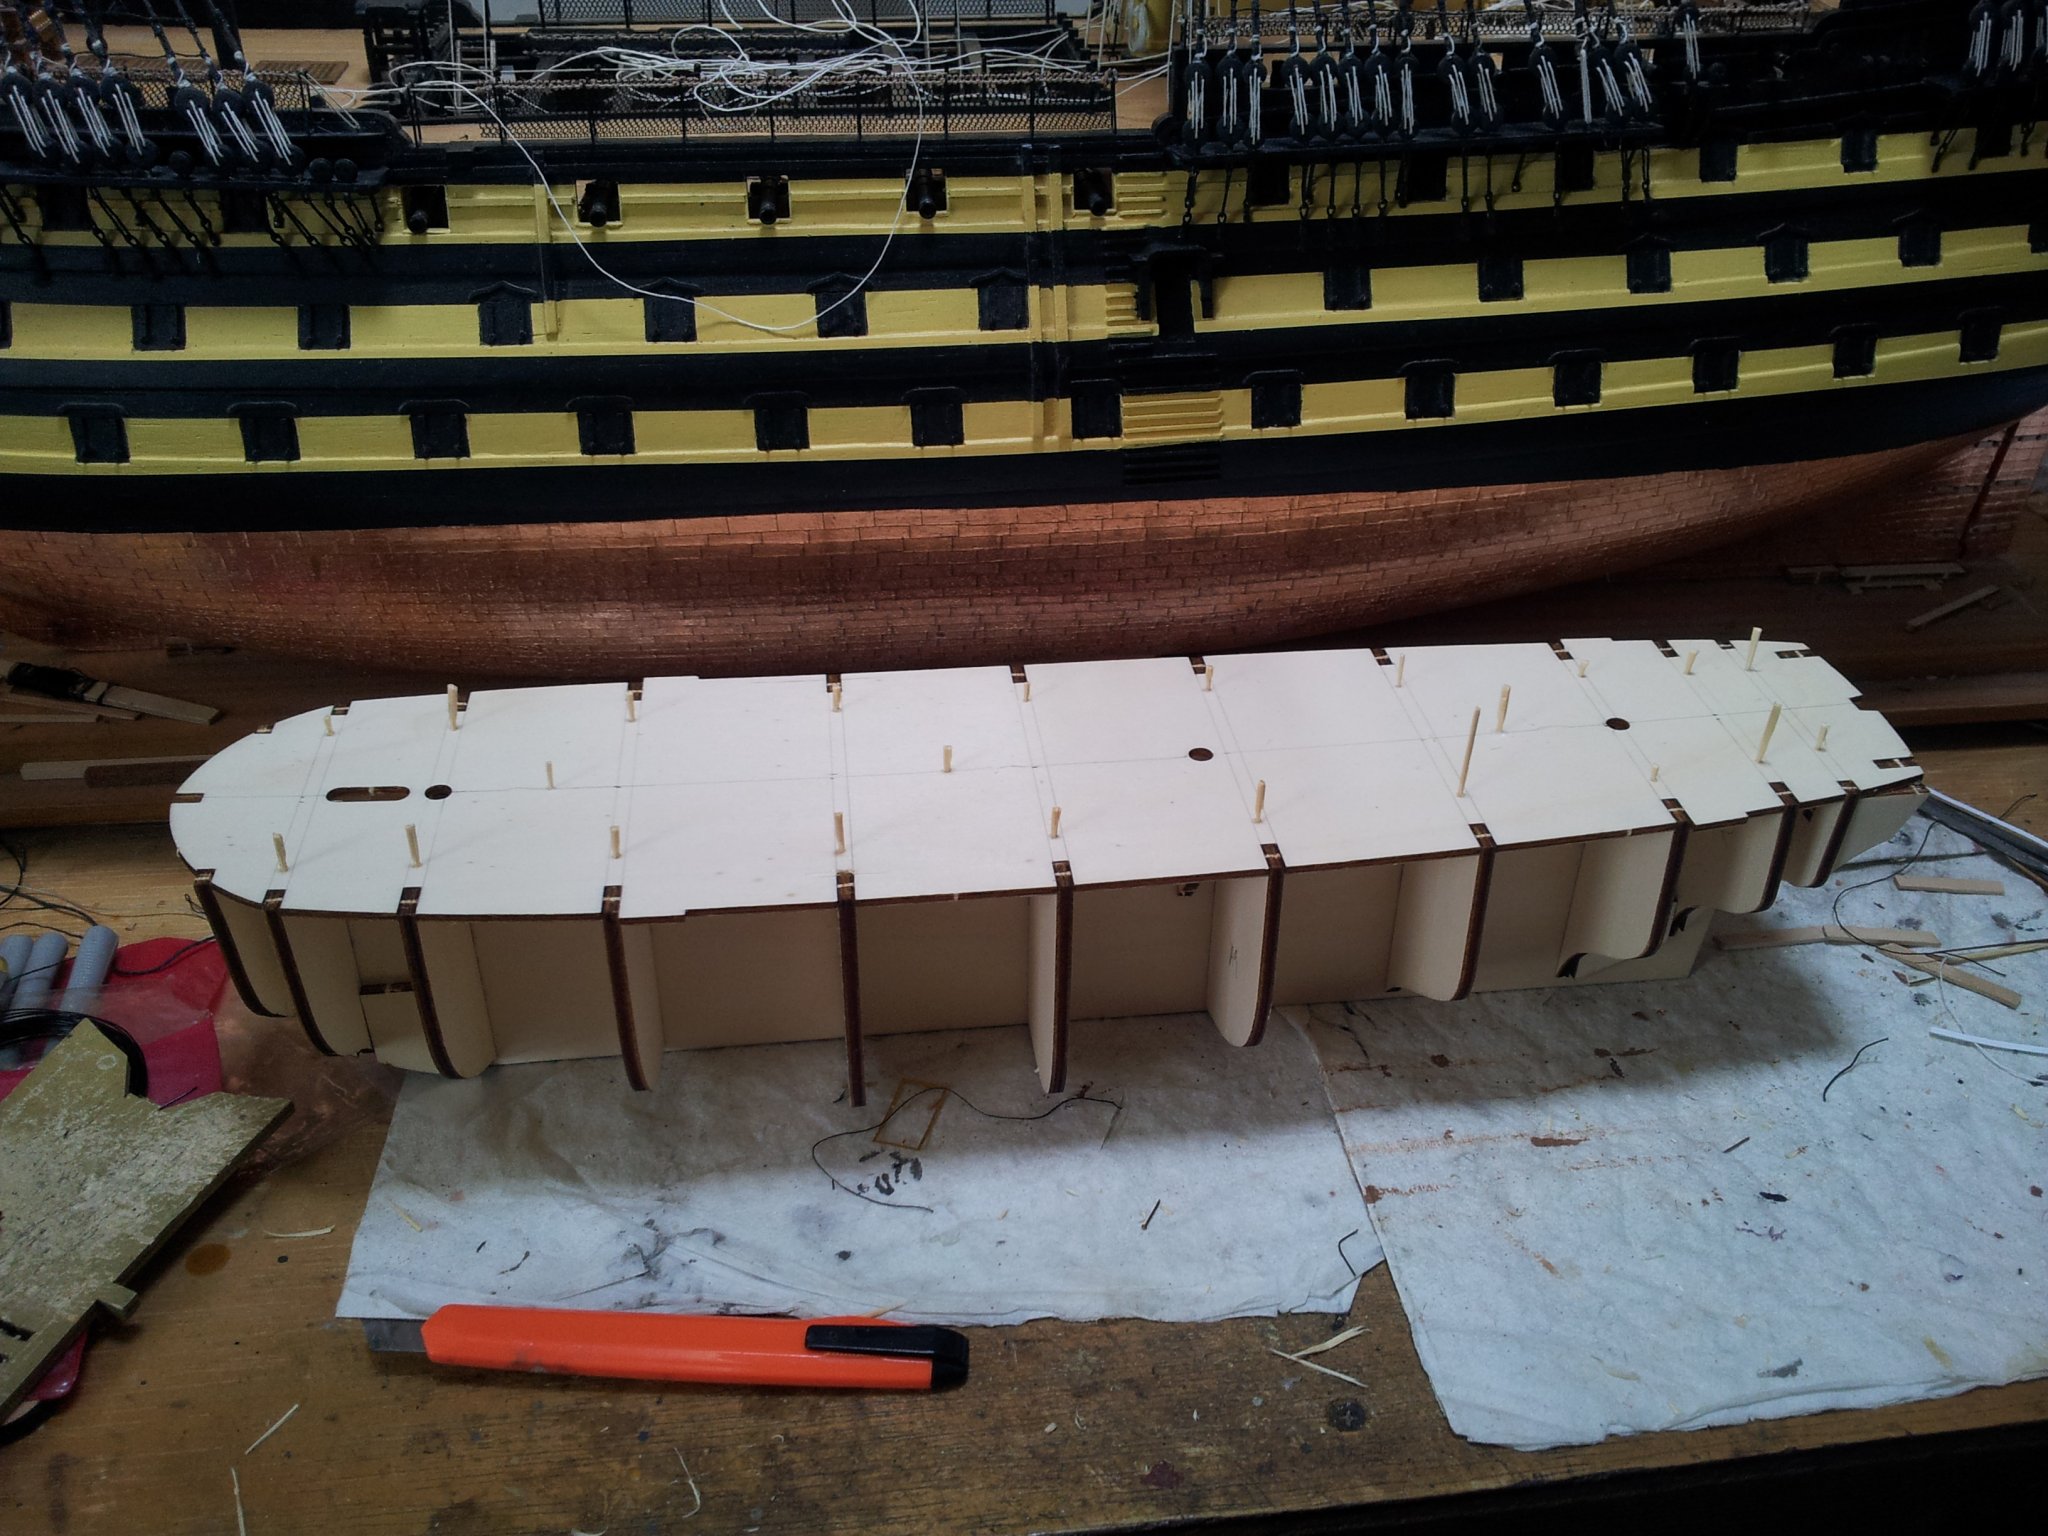
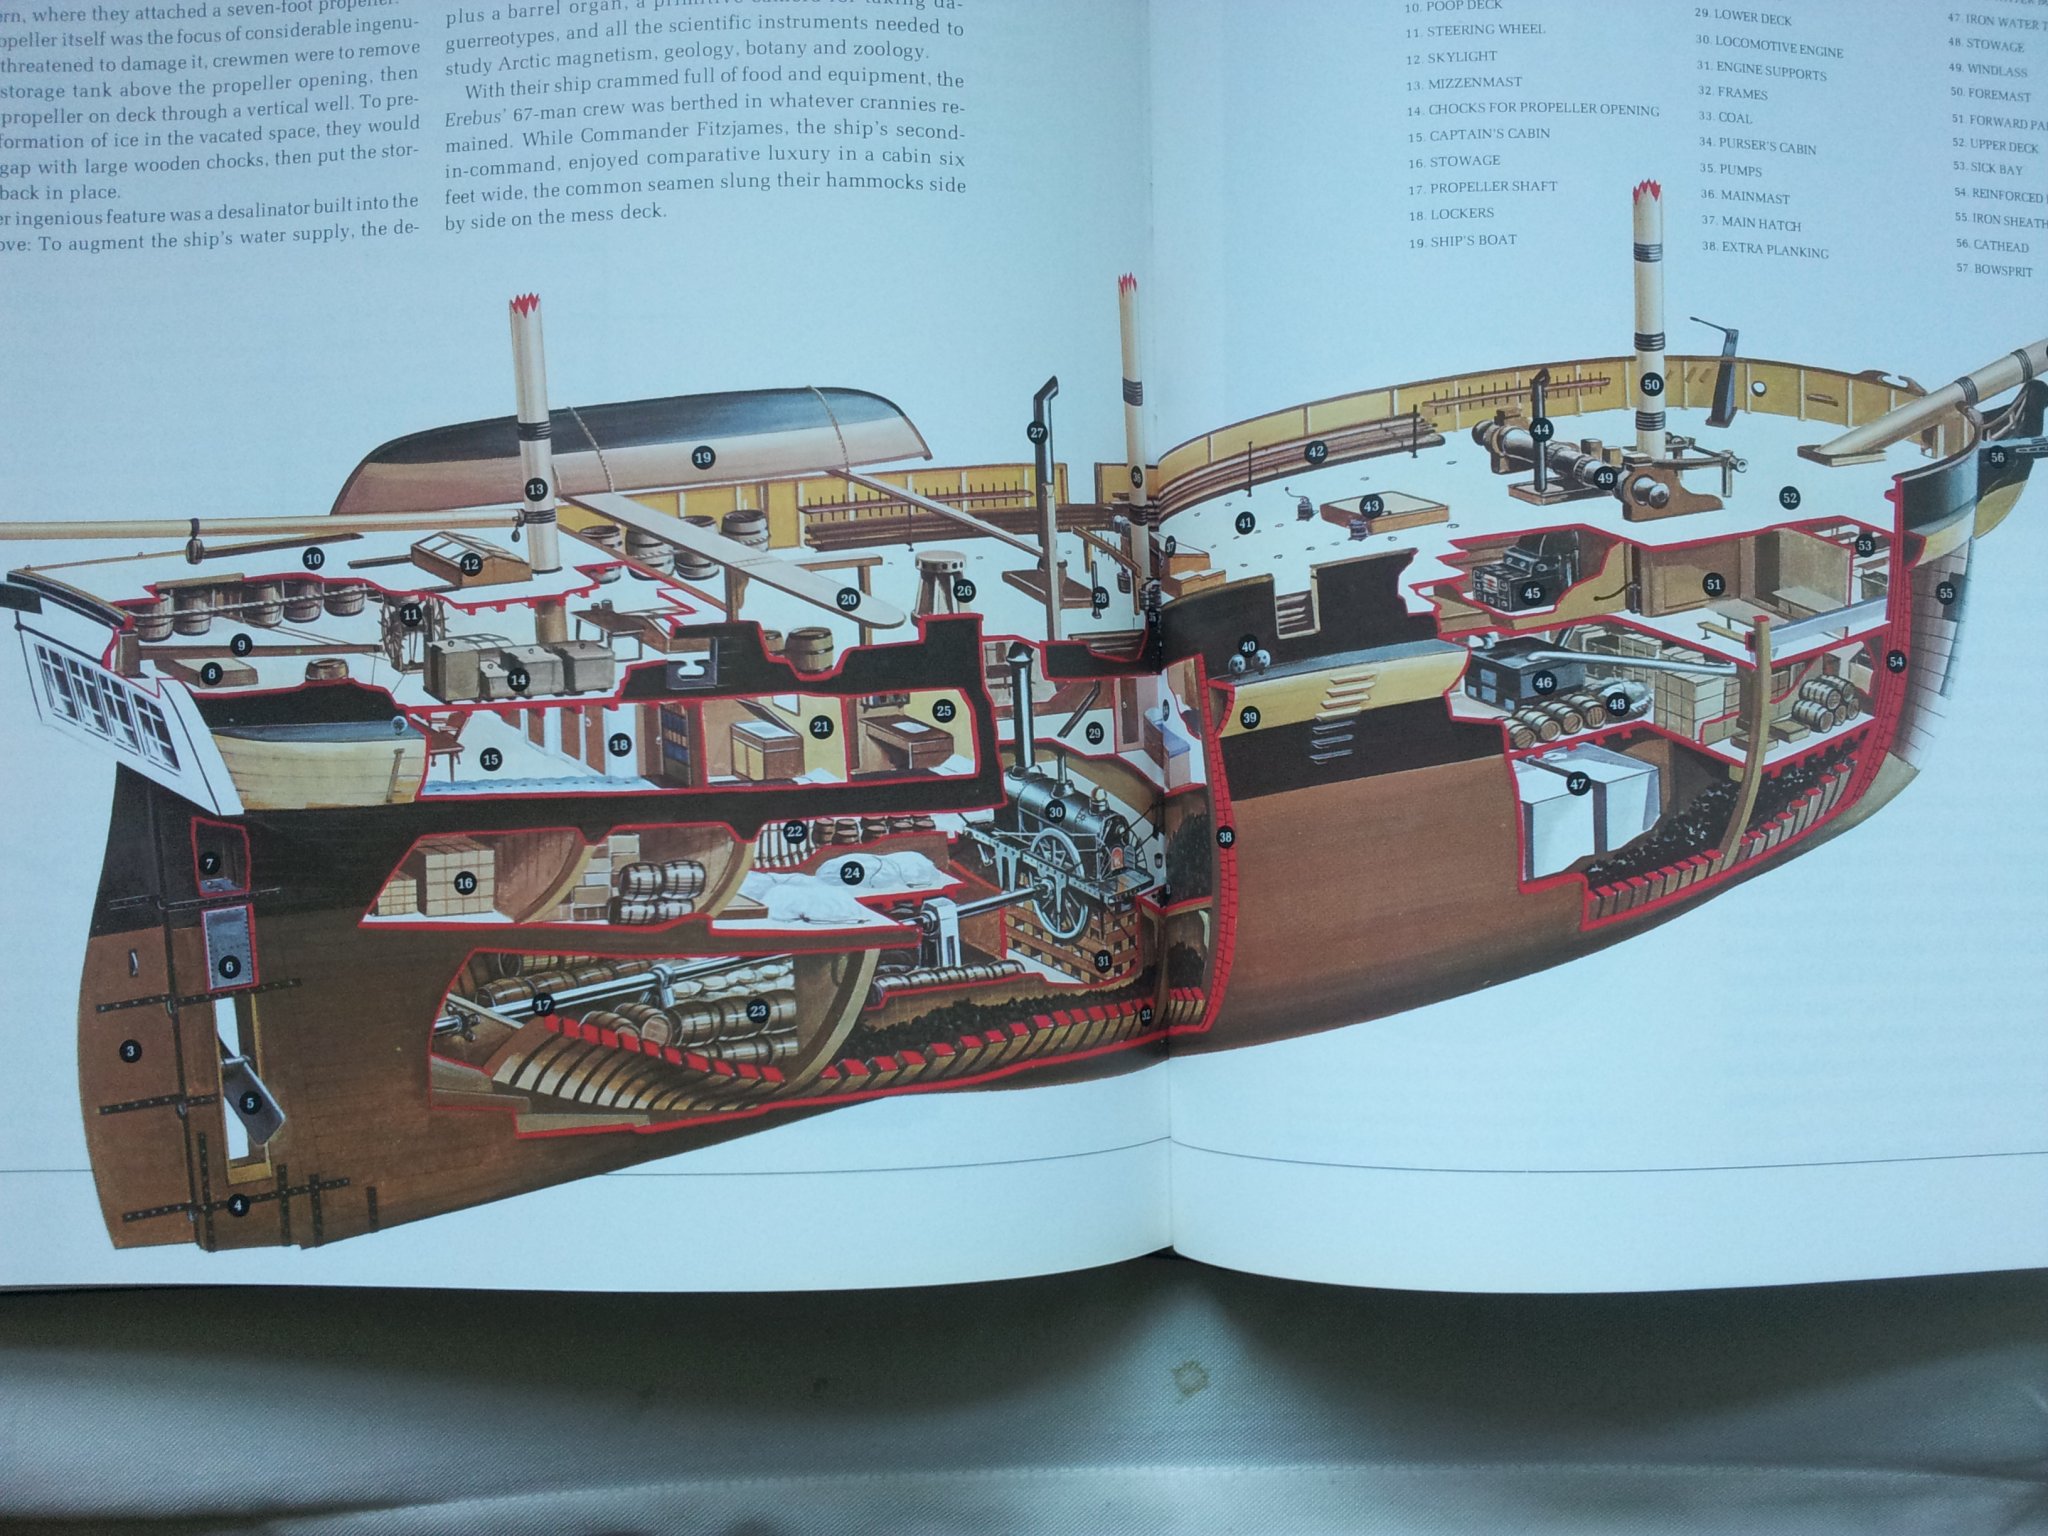
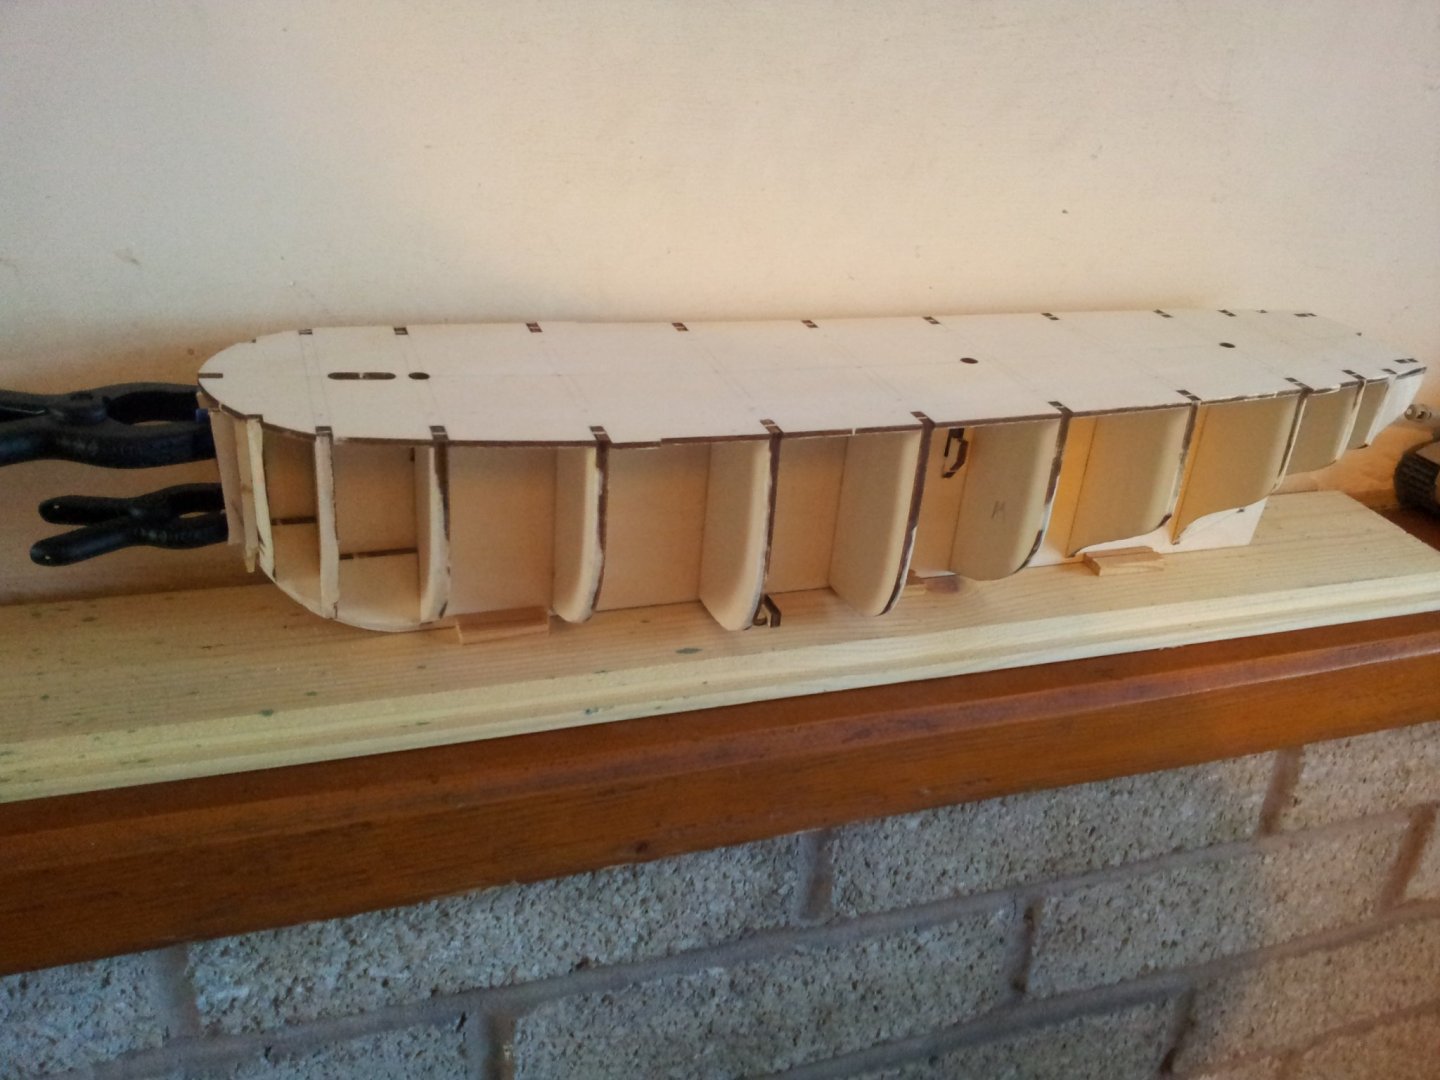
got the deck attached- first glued and held with masking tape for 24 hours, then drilled and bamboo treenails inserted (cocktail sticks trimmed down). also found this cutaway drawing of erebus- although not 100% accurate does show some stowage. take care all Keith


-
got the topgallant sheets and clewlines rigged- nearly totalled the build by accidentally catching one of the yards when belaying the lines- safe to say lots of self depreciaton and fluttery bowels (she didn't half rock on the building cradle)🤕😵. next up the lifts take care all Keith

-
excellent and many thanks Keith- much appreciated😁- the weird proyrusion outboard could be handrails for the steps- the stuff inboard might be spare masts and spars- i have an old set of seafaring books from timelife with a cutaway picture of Erebus and although not 100% accurate it is interesting- will dig it out later and put a pic on here. Keith
-
now that i would have loved to see- proper mad scientist moment 🤪
-
also on bluff bowed ships you will end up with banana shaped planks at the bow- see chuck's planking guide on modelshipworld, but the run looks o.k. to me
-
pulls up a chair and watches with empathy at the pleasure and pain people inflict on themselves🤪😁 keith