HOLIDAY DONATION DRIVE - SUPPORT MSW - DO YOUR PART TO KEEP THIS GREAT FORUM GOING!
×


hof00
-
Posts
1,642 -
Joined
-
Last visited
Content Type
Profiles
Forums
Gallery
Events
Everything posted by hof00
-
 As you "Fair" the Bulkheads at the rear, the Transom will also get "Faired." You should find that it will just "Flow." Cheers....HOF.
 -
Thank you Sir, Those are very kind words indeed!! Looking forward to your Build Log one day soonish. (I shall be following with interest.) Cheers....HOF. (Harry)
- 70 replies
-
- 2
-

-
- pen duick
- artesania latina
- (and 1 more)
-
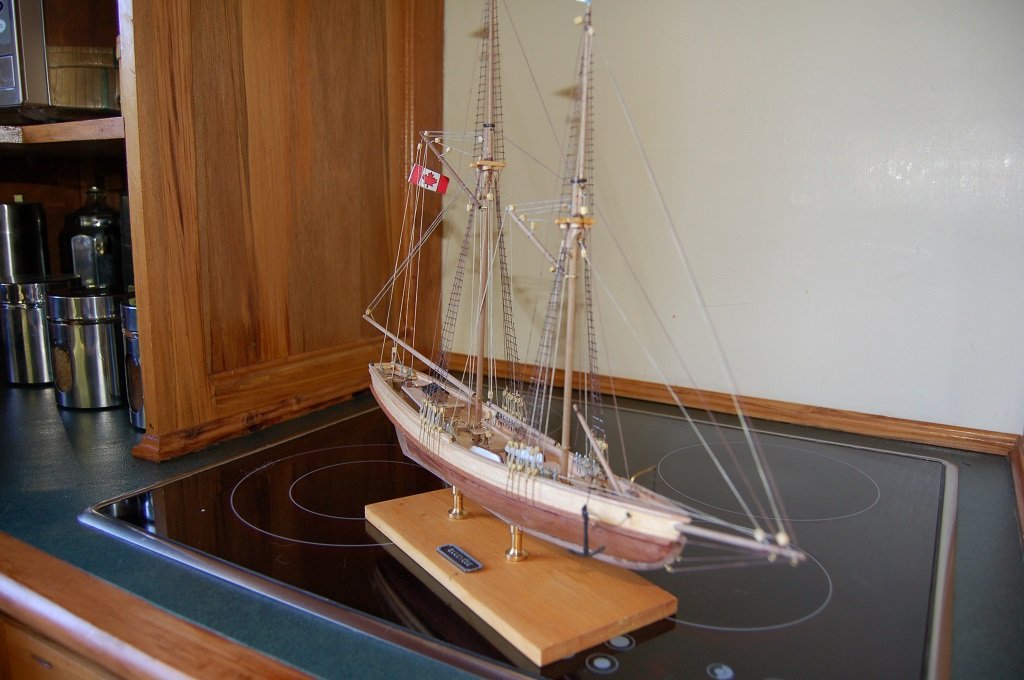
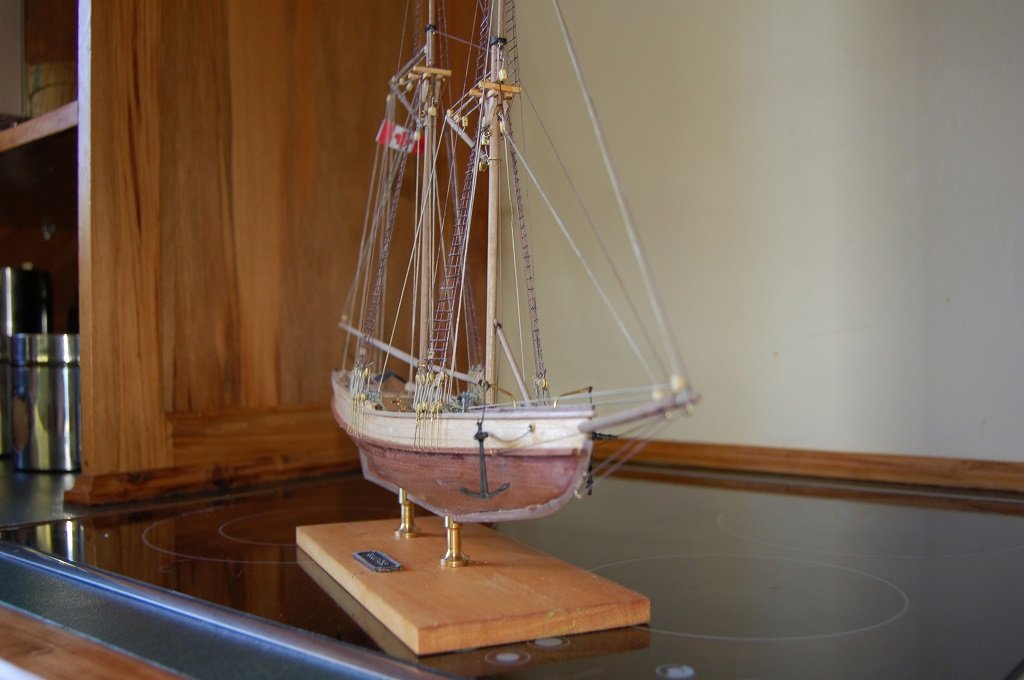
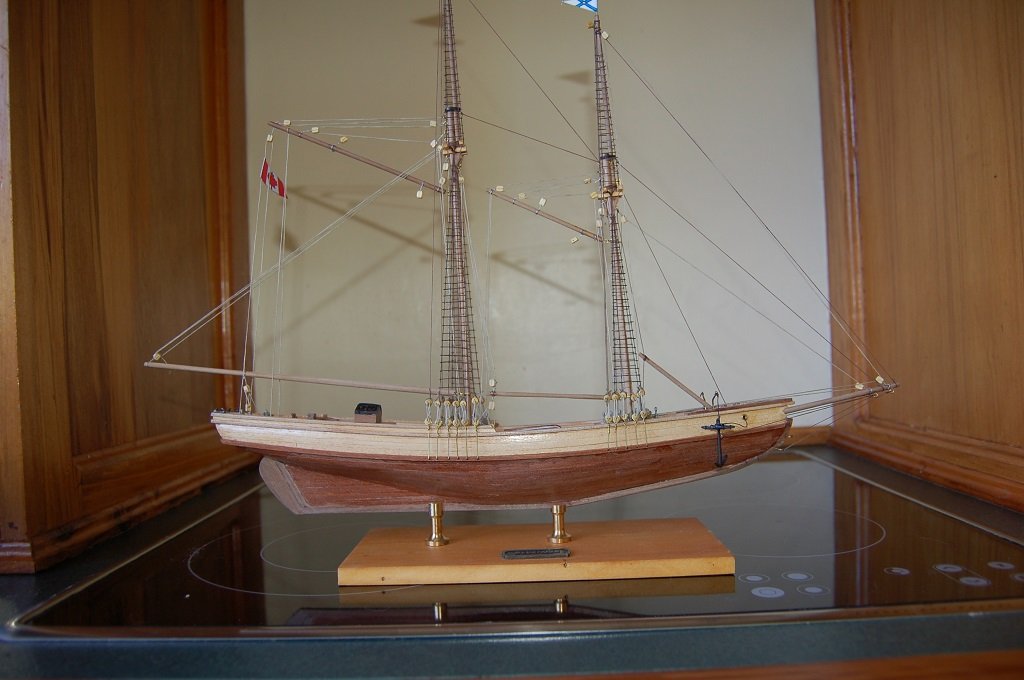
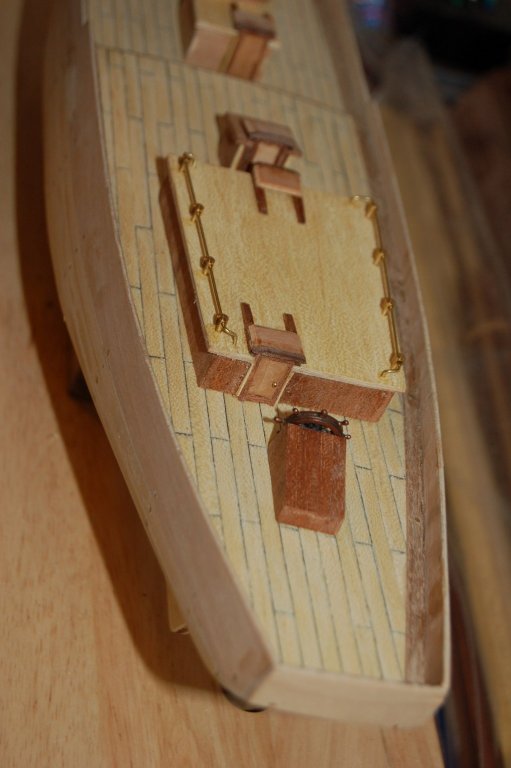
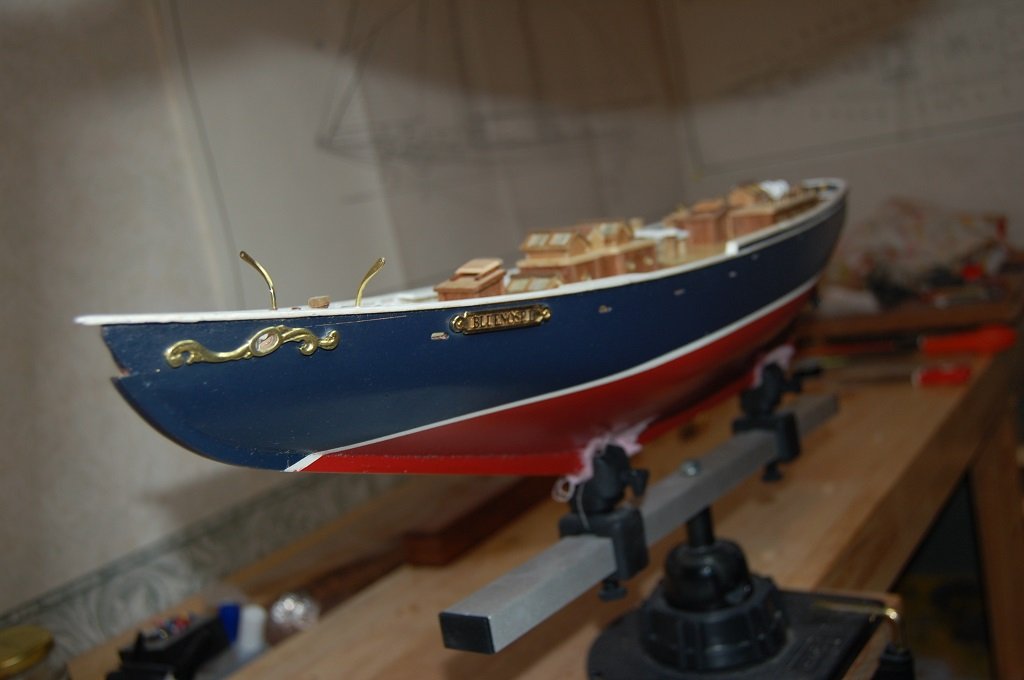
Hi Chap, Thank you for the compliment!! Pen Duick Deck procedure, (For me anyway), as follows, probably easier to give you the "Full Monty" version. (I had the same question ) I started with a Margin Plank, I had some 1.0 X 3.0 mm Mahogany strip lying around, I guess you could use the Basswood that the Kit provides, just personal choice, I used the "Micromark" planking Clamps to hold the curve. (Make sure the Margin is perfectly flush with the outside of the False Deck as all subsequent Planking follows this and gives symmetry both Left and Right.) For the King Plank, this is 15mm? (Cant Recall.) Anyway, King plank cut to length, C/L drawn on, my Joggle interval was about 25.0mm along the C/L from the termination of the Margin Plank. Vertical cuts about 2.0mm each side of the King plank and tapered back to the Apex of the next Joggle, about 80', if that makes sense. (A bit of trial and error here, keep in mind how long each segment of the King Plank is and how many Deck Planks are Joggled in to each.) Planking laid from the Outside In and slightly tapered where it meets the "Joggle." (Caulking is Pencil rubbed on both sides of each Plank.) (The Mahogany used for this is very brittle, all cross cuts were made with my Proxxon Table Saw, cutting with the Grain, "Super" sharp Scalpel.) Note: The Mahogany is very brittle "Period", very easy to fracture the Deck House/Skylight components!! Don't forget the Centre Line on the False Deck!! Have a look at the below URL. I printed these out, (A4), to assist with calculations/guesstimates ) http://5500.forumactif.org/t1271p50-pen-duick-d-artesania-latina Sails? I initially thought that these were o.k., not so in my purchase.... Main Sail - Too short lengthwise by abbot 10.0mm, Both Boom and Gaff Flying Jib - Acceptable Fore Sail - Too tall Jib - Too tall Top Sail - surprisingly o.k. The "Hemming" was not good, at the apex of the 3 Fore Sails there was a huge excess, "Lump" of material. I think that the material "Weight" was probably about right for the Scale. Maybe I got a Monday Morning or a Friday Afternoon Sail set. The Kit does provide a plan for Sails if you wish to make or get someone to make them. Maybe it was just my particular Kit? Anyway, It's proved to be a really good build thus far. Happy to try and assist/offer advice if you decide to take the plunge!! Cheers....HOF.
- 70 replies
-
- 4
-
-
- pen duick
- artesania latina
- (and 1 more)
-
Nice job Sir!!
-
Hi Chap, It was a bit late after they got attached.... Decided to just go with what I had. Cheers....HOF.
- 70 replies
-
- 3
-
-
- pen duick
- artesania latina
- (and 1 more)
-
Thank you Sir. Not too far away from completion. (The Kit Sails leave a lot to be desired.) Cheers....HOF.
- 70 replies
-
- 2
-
-
- pen duick
- artesania latina
- (and 1 more)
-
Hi Carl, Thanks for that. BNII was my second attempt at building a Model Ship. This was complete a few Years ago but the Model Ship Forum that it was initially on shut down. Since there are several BNII Builds in flight at the mo. I thought it opportune to resurrect my BNII build log in the hope that it will assist. (Still working on the Pen Duick.) Cheers....HOF.
- 21 replies
-
- 2
-
-
- bluenose ii
- artesania latina
- (and 1 more)
-
Nice work Sir!! It's really coming together now. (You'll be finished before you know it.) Cheers....HOF.
-
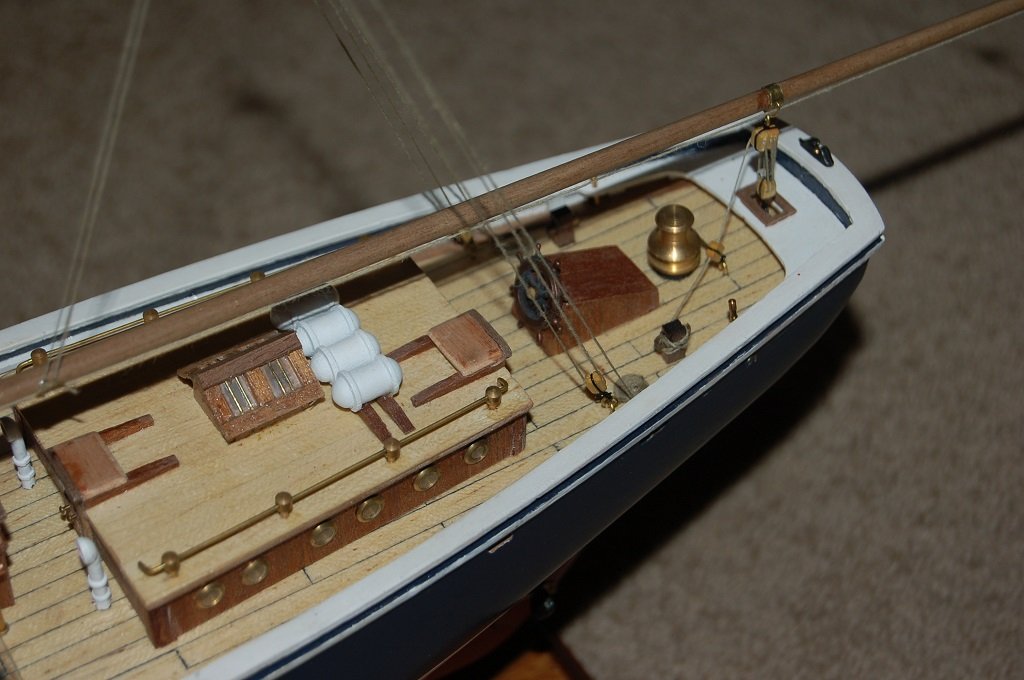
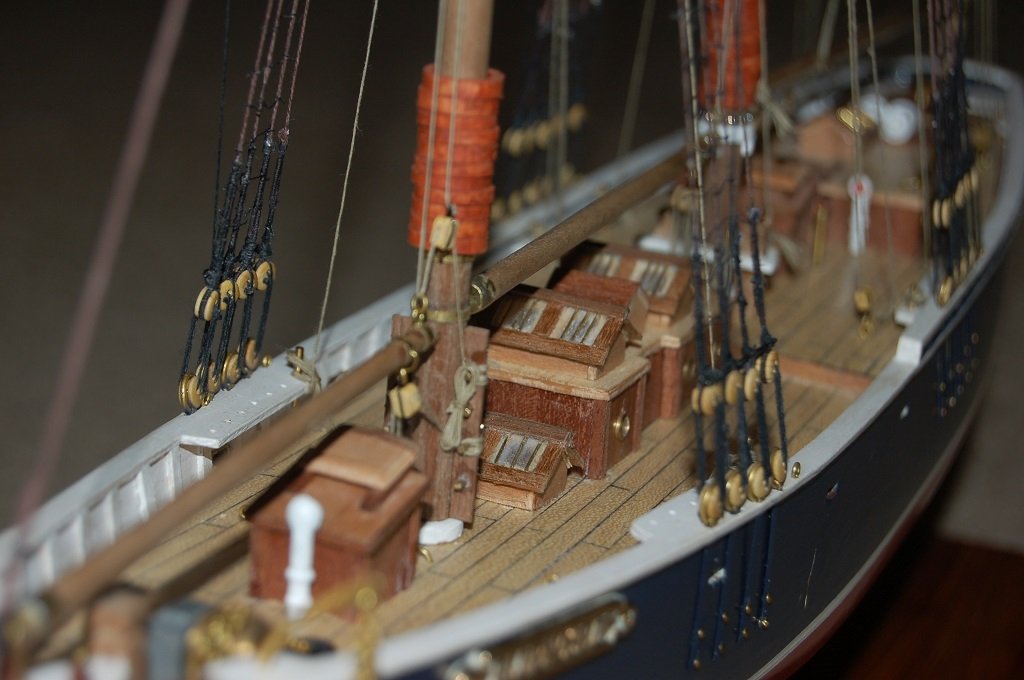
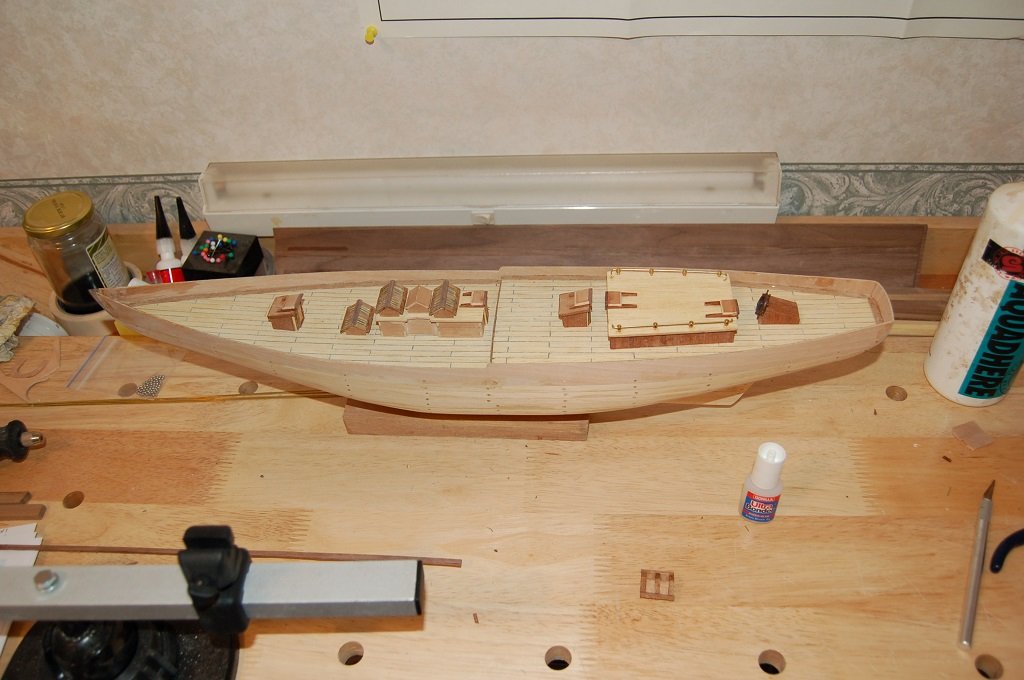
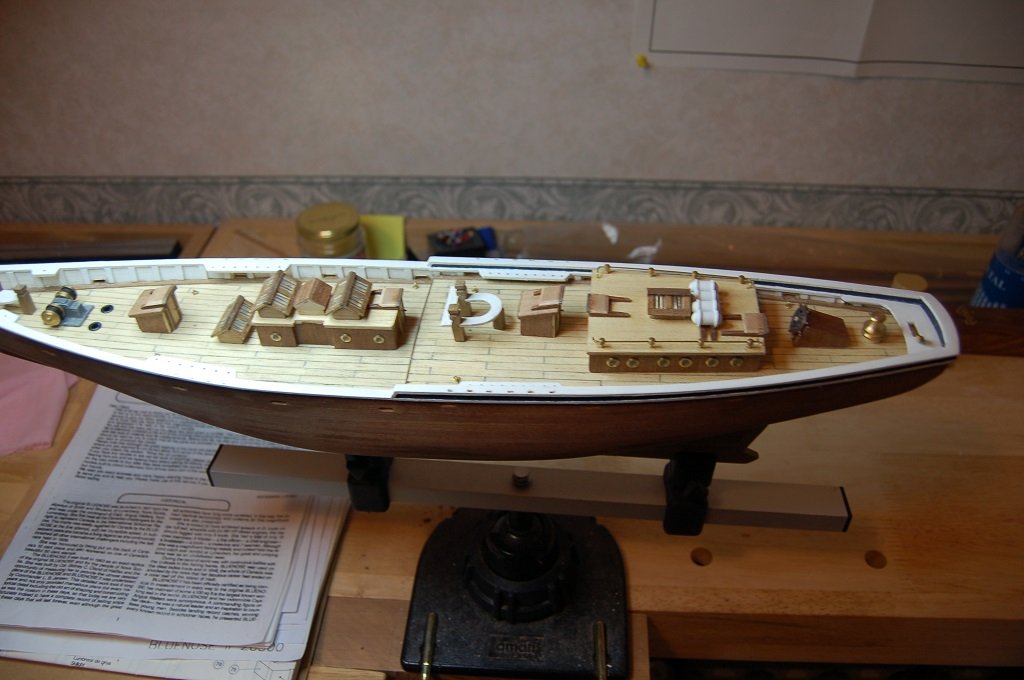
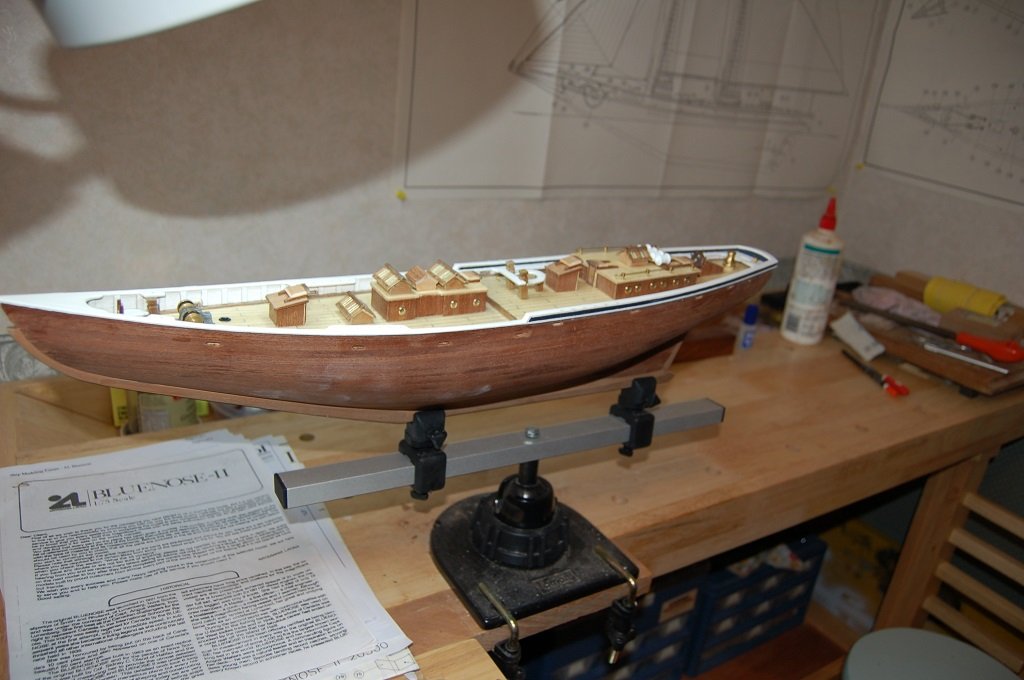
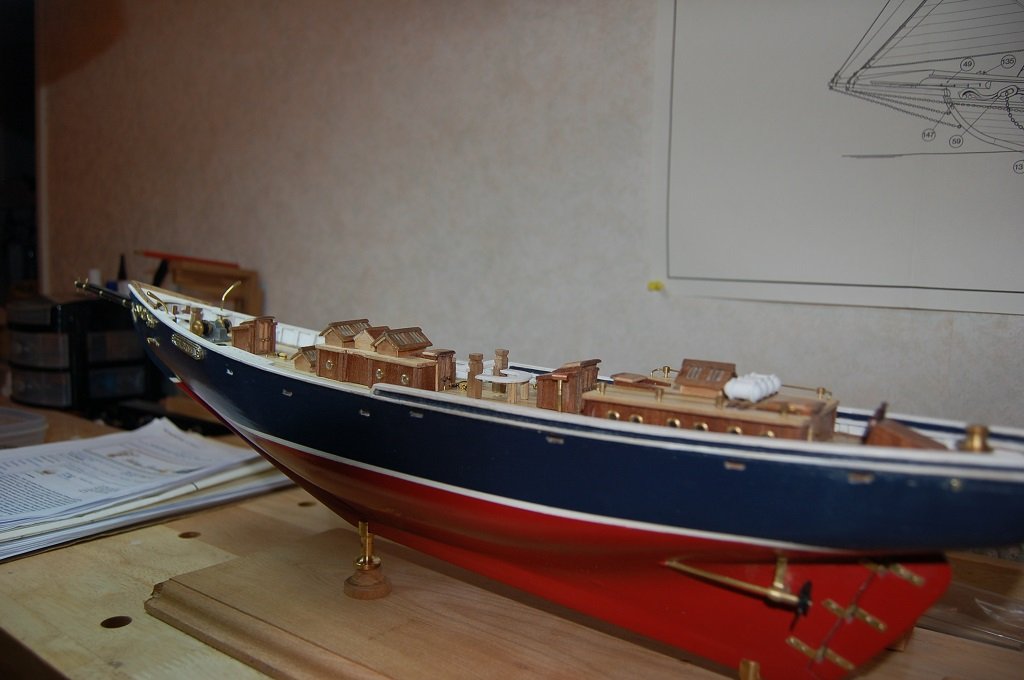
Hi Chap, Thanks for the reply and compliment. The Cabin Tops are "Planked" with "Ramin?" (May be a little difficult to see from the photos.) The Skylights also have a Walnut Veneer on them. Deckhouse sides planked with Walnut also. (Tabs got covered up.) Port Light/Holes are aftermarket from Hobby World, Montreal. (Glassed Brass, I had to have something better than the A/L offering) Rigging was Simplified as per Mr Earl's instructions. Anything that I can help with, I'll try my best to assist. Cheers....HOF.
- 21 replies
-
- 2
-
-
- bluenose ii
- artesania latina
- (and 1 more)
-
That's awesome Chap!! Are you going to do "Lifting Rings" also for the Hatch Covers? (Detail stuff) Cheers....HOF.
- 453 replies
-
- 6
-
-
- thermopylae
- sergal
- (and 1 more)
-
Nice start!! Yup, agree with removing Nails, Filler, Sand.... (If the Nails were the same as my version, they are Brass? (They sand quite nicely if you can't get them out. Slide an old X-Acto 11 Blade under the Heads and twist the handle. ) Your Kit, (From the Box Art), is the same "Vintage" as the one I built a few years ago. It's got a few "Foibles" but nothing that cannot be overcome with a bit of planning/thought. Cheers....HOF.
-
Thanks Robert/Ryland. This Build was originally on "The Ship Modelling Forum'" Now sadly closed. My second ever build. Cheers....HOF.
- 21 replies
-
- 2
-
-
- bluenose ii
- artesania latina
- (and 1 more)
-
Here's a very few Pictures that I have for your particular build. (Before i knew anything meaningful) Enjoy!! Cheers....HOF.

-
I seem to have issues with the "Edit" but wished to extend my regards to John Earle in putting me on the Modelling path that has kept my "Nose Clean" for many years. If i can "Wax Lyrical" the Hobby has kept me well "Grounded" for many years and issues. (Meditation in my Ship Room, if you will.) Cheers....HOF.
- 21 replies
-
- 3
-
-
- bluenose ii
- artesania latina
- (and 1 more)
-
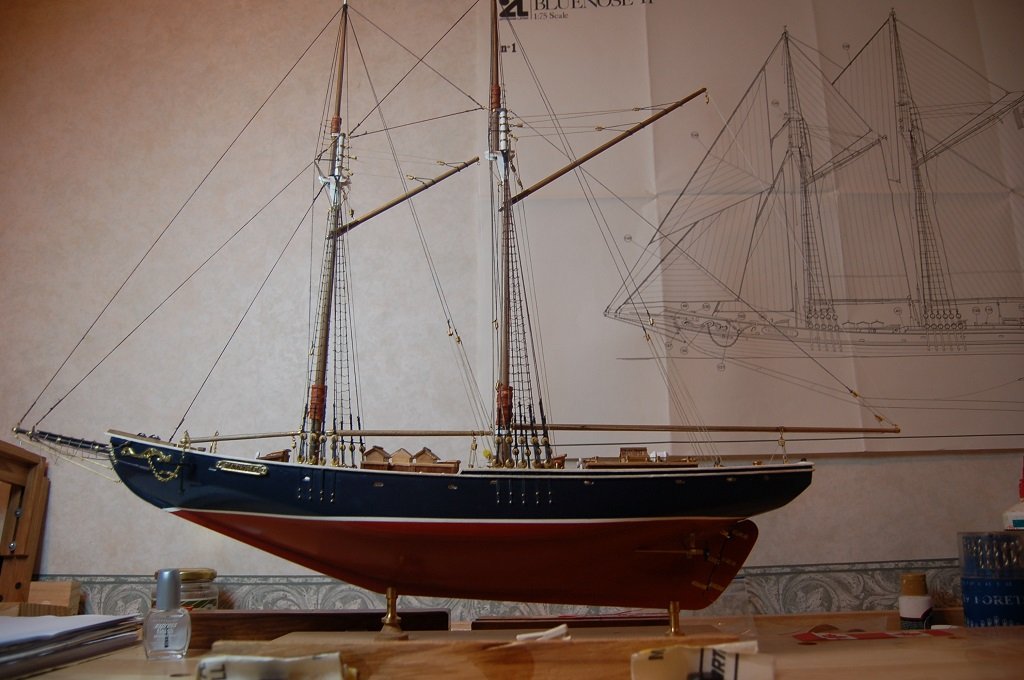
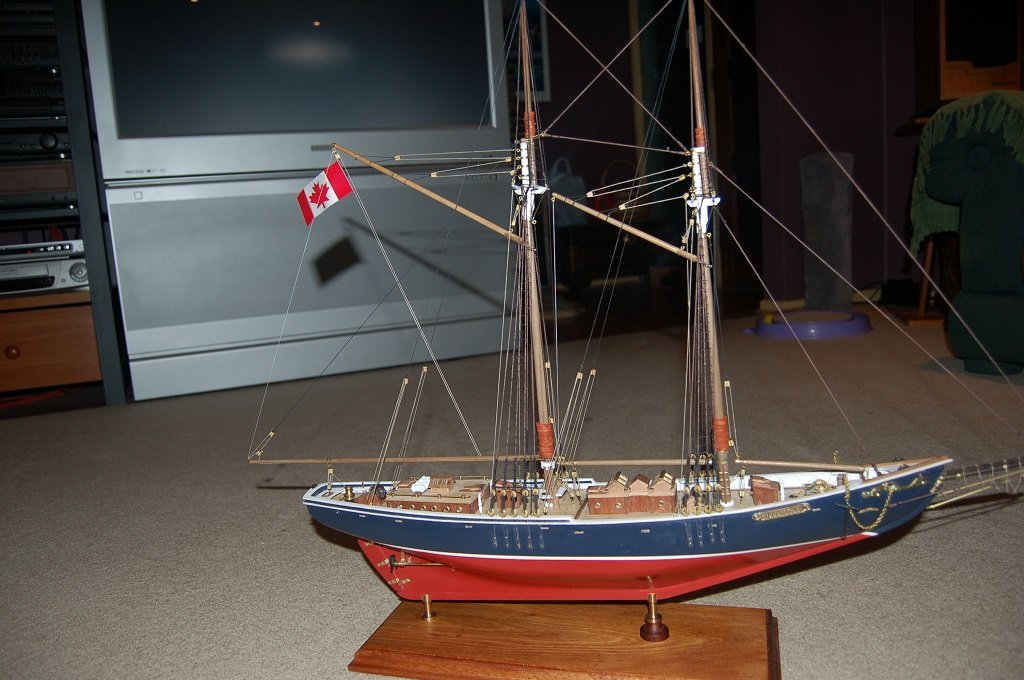
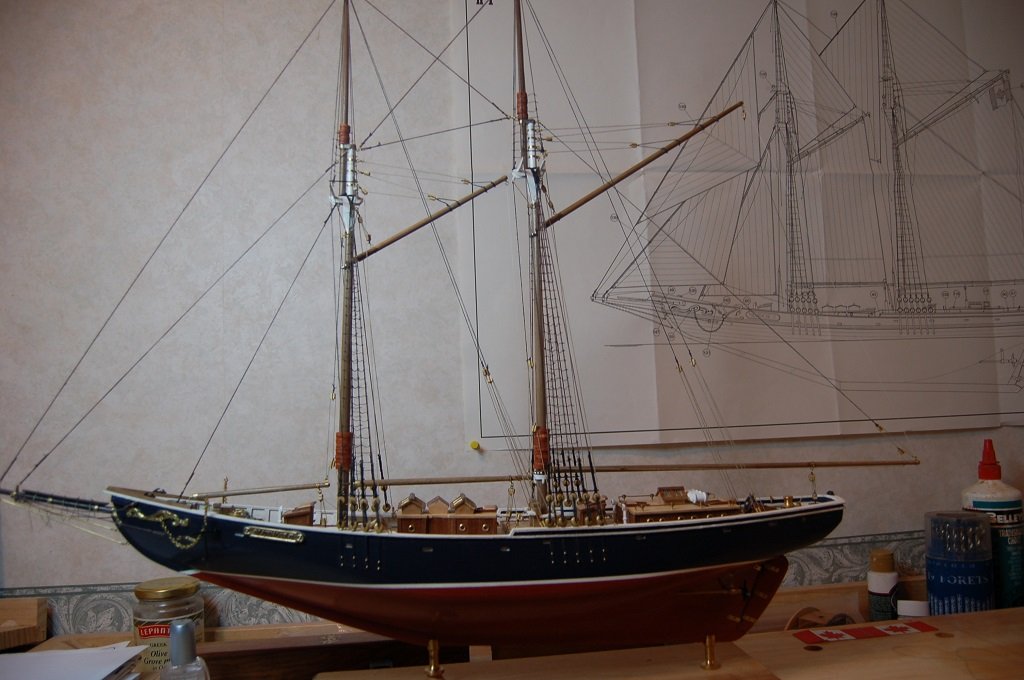
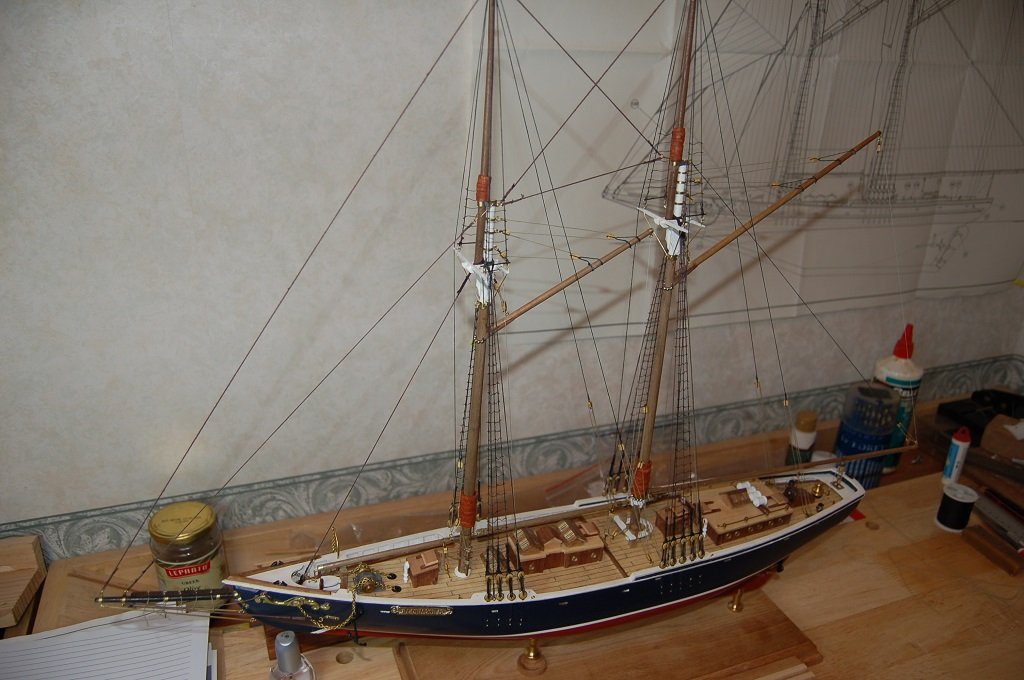
Hi All, Thought I'd share my Bluenose II Build a few Years ago. My second ever build with guidance from Mr Earl. (Definitely not deceased!! ) So, some photos in the may provide some inspiration/guidance to others. Hope the photos are in some semblance of order.


- 21 replies
-
- 6
-
-
- bluenose ii
- artesania latina
- (and 1 more)
-
Yup, Agree, Install the Stern Bulwarks after the sides. Rather difficult to install Bullheads/Planking after deck Fittings/Etc. (Is this what you mean?) But, in saying so, you need to put a bit of abrasive Paper on the Deck so that you can get the Camber of the Deck into the base of the various deck Fittings, Wheelhouse/Engine Cover/Hatch Covers/Etc., but, I am sure you know this anyway. Wheelhouse/Internals look good, wish I had done that. (Never mind.) Cheers....HOF.
-
Hi Chap, Have watched a couple of these builds, very interesting and I may have to get myself one in the not too distant future. I'd like to follow also. Cheers....HOF.
- 50 replies
-
- 2
-
-
- 18th century longboat
- model shipways
- (and 1 more)
-
Hi Mike, That's pretty good!! What Diameter is it? Is this a company or an individual? Cheers....HOF.
-
Hi Chap, Having not built anything before with Cannons, I don't know. with "Comparison" there doesn't seen to be an awful lot of difference, however, I am no "Aficionado" on such matters. (Personal choice?) Cheers....HOF.
- 291 replies
-
- 2
-
-
- bounty
- billing boats
- (and 1 more)
-
Awesome work Sir!! The Wheel is even on the correct side for New Zealand!! Cheers....HOF.
- 339 replies
-
- 8
-
-
- dumas
- Chris-Craft
- (and 3 more)
-
Nice work. This was also my first foray in ship modelling, however, I paid a little more than $8.00 for mine. Cheers....HOF.
-
Hi Mike, Planking at the Stern, (From memory), is a little more than the sides, if anything. I guess if you "Test Fit" the Bulwarks it should become apparent how much Planking you'll have trim. Also, a Test fit of the Bulwarks will let you know if your Scuppers are level with the Planking on the Deck. Cheers....HOF.
-
Looking good!! The Figurehead sets things off nicely. The Cannons are slightly larger than the Kit supplied versions but I do not think that these detract from the overall model. (If your like me, I don' particularly like Plastic on my "Wooden" Ship either.... ) (Did you order direct from Calderdraft?) Cheers....HOF.
- 291 replies
-
- 1
-
-
- bounty
- billing boats
- (and 1 more)