hof00
-
Posts
1,656 -
Joined
-
Last visited
Content Type
Profiles
Forums
Gallery
Events
Everything posted by hof00
-
 Good luck with this subject!! I have been tempted many times to purchase this rut never had the courage. (I've got stuff "On The Hop" anyway.) Happy to follow along!! Cheers....HOF.
- 105 replies
-
- 1
-

-
- thermopylae
- sergal
- (and 2 more)
-
Nice Chap!! Plans, (Mantua/AL), don't show Main Royal/Sky Sail Backstays, but, I'm sure your aware of this....) Braces: There are a couple of Mizzen Braces that terminate on the Lower Mainmast just under "Hounds." Double Blocks, not Single, as shown on plans.... Apologies, probably teaching you to suck eggs.... 🙂 Cheers....HOF.
- 525 replies
-
- 2
-
-
- cutty sark
- mantua
- (and 2 more)
-
Hi Chap, Absolutely awesome work!! I have a question for you and others that are attempting your Build.... I have this model in storage plus the MK1 detail stuff. How come you didn't use the Deck Recognition Transfers? (Maybe I'm incorrect?) I believe there are products that ensue Decals adhere to complex contours. Dumb question.... Cheers....HOF.
-
J3 Piper Cub by Steve 12345 - FINISHED - 1/4 scale
hof00 replied to Steve 12345's topic in Non-ship/categorised builds
Nice work Chap!! Need to ask the challenge if you "Cream" the Cub.... (You can't cream a ship model.) As I said many months ago, I used to do this stuff some years ago, but, the piloting skills left much to be desired. A lovely model, I hope that you will get some great flying time!! (Also hope that you'll get some time back into Ships/Cabinets soonish!!) Cheers and Regards to all!! (I guess the four stroke sounds great!!) Harry (HOF) -
Yup, Agree Chap.... I've got a 1/200 Bismarck, Hull complete. The detail is good but I wanted more, so, went for the Trumpeter version with MK1 detail set. (God knows when I'll get to that....) I also have a 1/8 Fokker DR1 partially built , (Partworks/Hatchette) Its expensive to purchase this way but I guess that it gives an "Opt Out" if your not enjoying things. For both kits, I've got all the "Bits" and I've seen some really nice RC Bismarck's on a German Web Site, Casting no aspersions, I think their kits aren't too bad not too bad, Amati? Anyway, following the build, looks pretty damn fine at this juncture!! Cheers....HOF.
-
Hi Chap, Your probably better off in Aussie. (Warmer) It's getting rather "Chilly" here.... Cheers....HOF.
- 525 replies
-
- 2
-
-
- cutty sark
- mantua
- (and 2 more)
-
Hi Chap, Looking at your build, I have one word, "Outstanding!!" The detail is absolutely superb. I thought my version of this kit was good, and, I was happy the outcome but yours just takes it to another level altogether!! Cheers....HOF.
- 525 replies
-
- 4
-
-
- cutty sark
- mantua
- (and 2 more)
-
Hi Greg, An awesome international build!! Just one question, are you leaving COG and Popeye behind in the rapidity of your build? Cheers....HOF.
- 1,090 replies
-
- 7
-
-
- showcase models
- vendetta
- (and 2 more)
-
The Crew look a little more "Comfortable" now!! Awesome work Chap!! Cheers....HOF.
- 82 replies
-
- 4
-
-
- boat
- lak-design
- (and 1 more)
-
So, a question regarding "Blast Bags" did you drill them using a small drill first or just go with the "Max" diameter? (This is another one I've got in storage for a "One Day" thing, Inc. Mark 1 Detail stuff.) My compressor needs a "Tank" to provide some definition. I've got a 1/350 Tamiya, a 1/200 Part woks one but I think the Trumpeter version is the ultimate. Following your build with interest looks awesome!! Cheers....HOF.
-
Thanks Chap, Yup, a bit of "Digital Dust" so to speak. (Doing some career searching....) Hopefully get some done this long weekend. Cheers....HOF.
-
Good Evening Mr Osmosis, I have built this version, it worked out o.k. Have a look at Mr J Earl's website, helped me heaps!! (Google) Heaps of photos if you require. (got mine on E-Bay also after a short bidding war many years ago.) Enjoy!! Cheers....HOF.
- 22 replies
-
- 2
-
-
- bluenose ii
- artesania latina
- (and 1 more)
-
Nice work!! I have this Model in the Closet, thinking about a Radio conversion.... Any ideas/links? Cheers....HOF.
-
Hi Chap, Your work is absolutely First Grade!! (I've been following....) If I can reminiss when I was a young Lad, (A couple of years ago), my Mother used to wrap me up in "Cotton Wool" with the excuse that I was Anaemic, I don't think that I ever was, God rest her soul. Anyway, in the time that I had to stay at home, I used to cut out pictures of aircraft/ships/cars from magazines, I just couldn't understand at the time, why they could not be something solid, something that I couldn't hold, something 3D.... The Picture's that I cut out that is....)) I guess that I now strive to do this, 3D that is. What you are doing in Card just resonates so much with my youth. Fantastic Sir.... Awesome!! Cheers...HOF.
-
You are also lucky enough to not experience Earthquakes!! Everything that I have/in flight, I need to consider Seismic bracing/restraints. Harry.
-
Ditto.... I don't think that I can really say anything more constructive that has already been said!! It is nice to see one "Card" one "Plastic" built in "Synergy" so to speak. I have the Trumpeter and MK1 upgrade waiting for me in storage. (Oops... also have the 1/200 Hatechette/Partworks, (Hull Complete), and Tamiya 1/350 version, will I ever get to these?) (A Bismark wannabe perhaps....) I guess thing about the "Card" Version is that's its pretty much finished, Wot does that really mean in so much as colour/Etc? Aware that there is plenty of "Touch-Ups" required. Awesome Both!! Regards.... HOF.
-
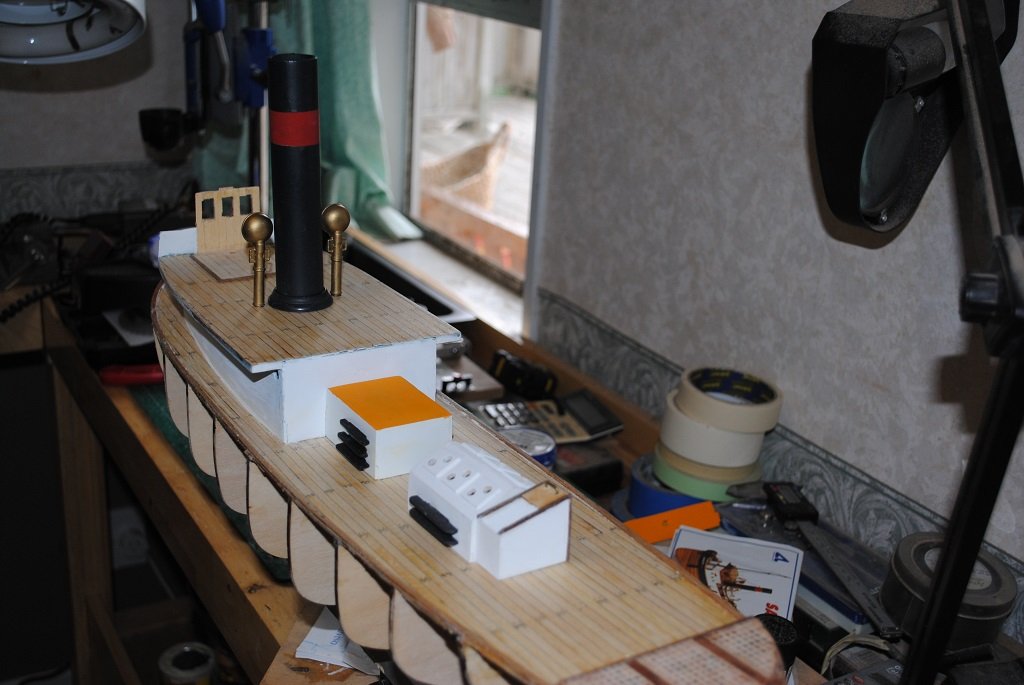
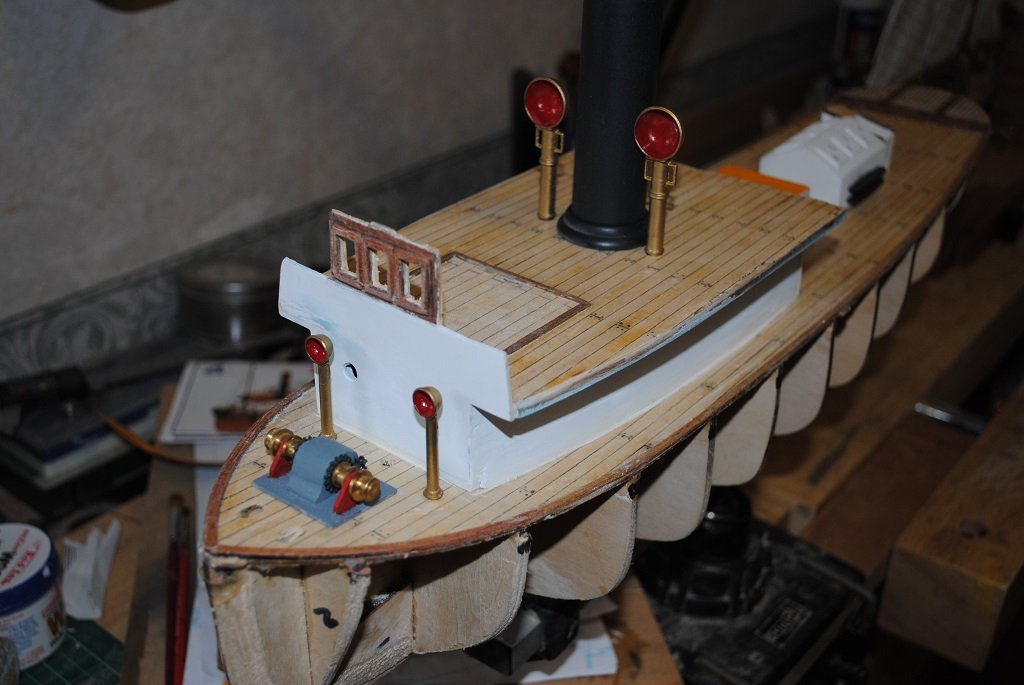
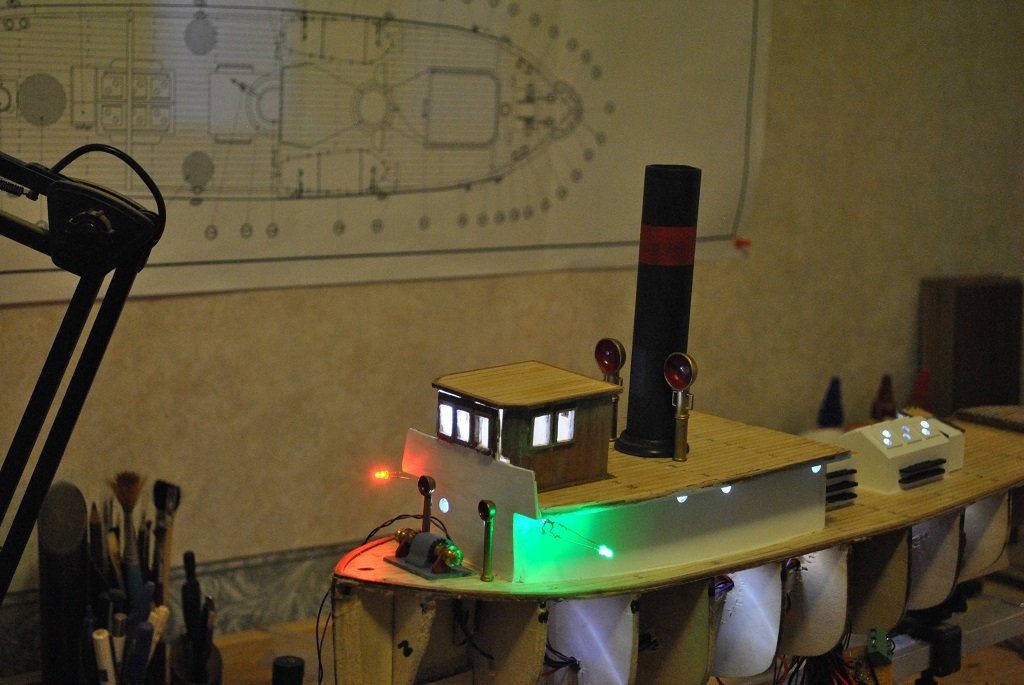
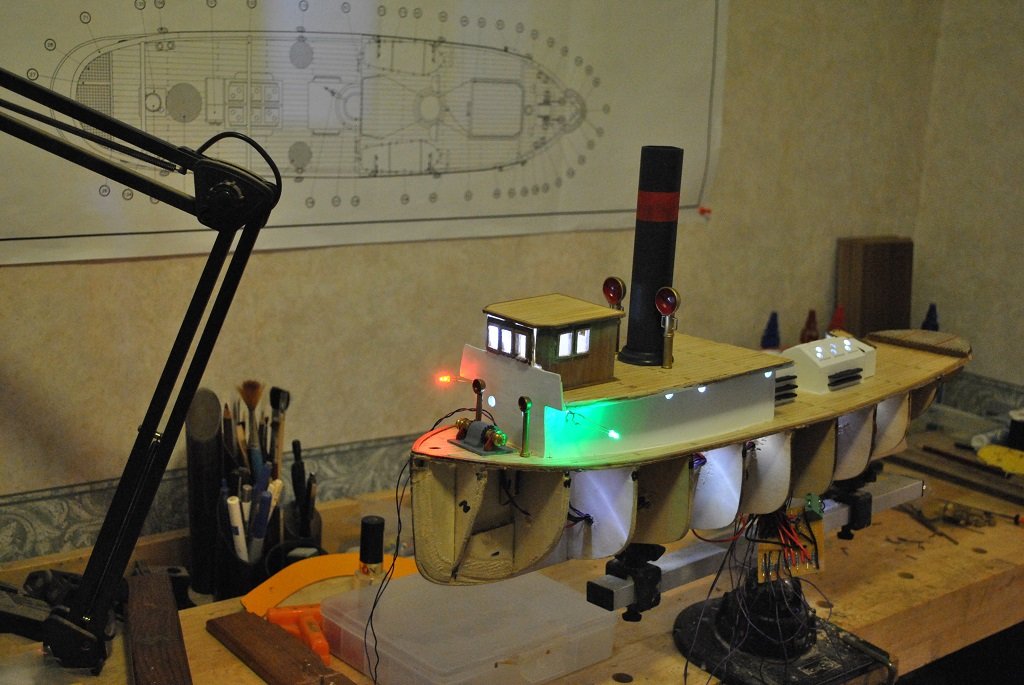
Hi All, A Mock-Up.... Progress? I think the "Tear Down" has been worthwhile thus far. Looks like a bit like a Christmas Tree.... I guess this is soon the time of year. LED installed in Deck House/Engine Room (High Intensity LED's Not Cheap!!) Installed also in the Wheelhouse and "Navigation" lights Mast Lights will come eventually, wiring installed. I'll drill out the Nav' and Masthead Lights to accept the LED's Cheers....HOF.
- 118 replies
-
- 9
-
-
- sanson
- artesania latina
- (and 1 more)
-
Hi Chap, Have you thought about LED's in the Searchlights? Just a thought... Cheers....HOF.
-
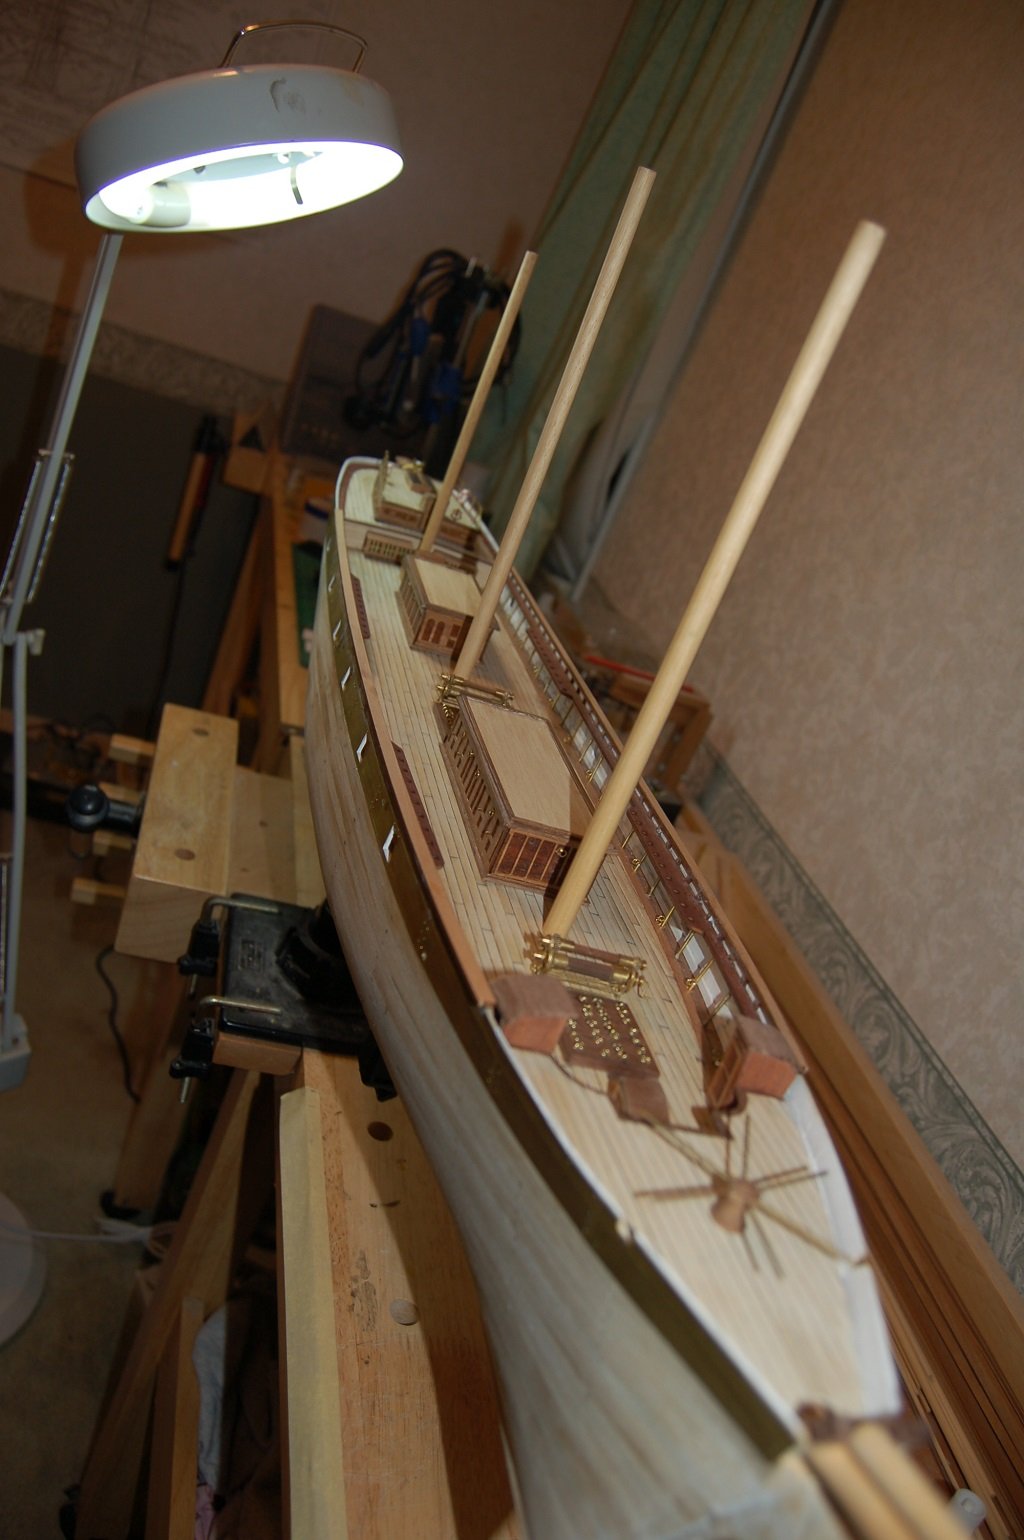
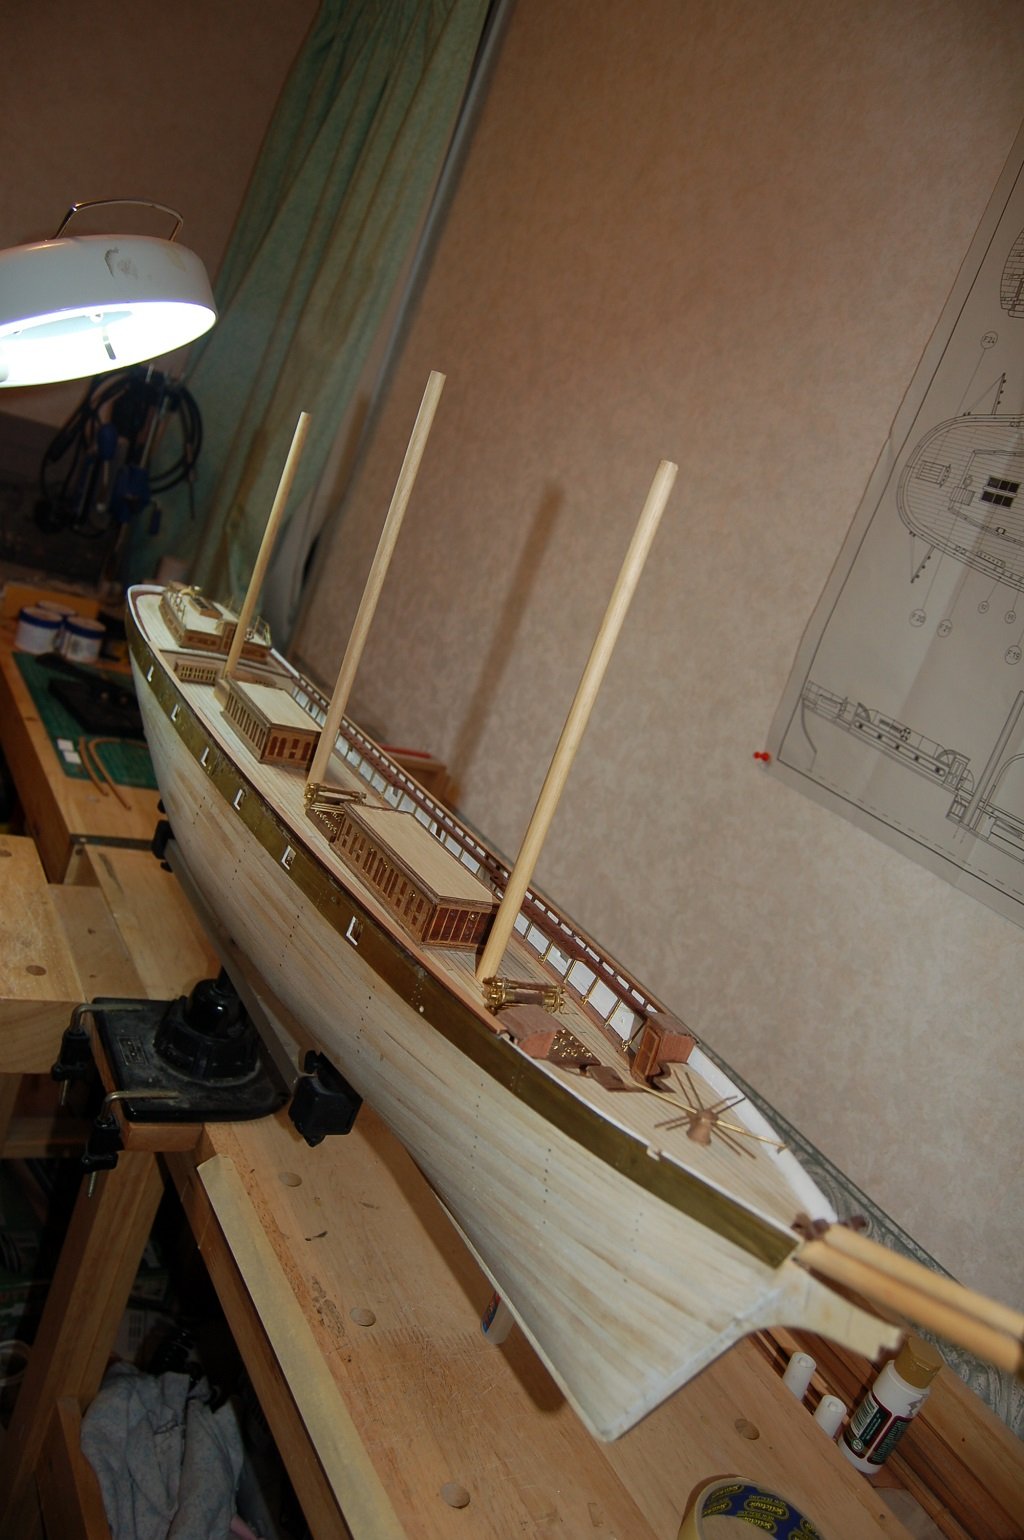
Hi Chap, To answer your questions: The Brass Bulwarks came in the same sheet of PE, from memory there were three sections, (Lengths), per side and the afore mentioned Stern piece that I struggled with. The "Freeing Ports" were cut out prior to fixing on the Bulwark Planking. Once in place, the Bulwark planking "Freeing Ports" were removed using the Brass as a Template so to speak. The width of these, I guess from False Deck level to the Top Gallant Rail Level. And, yes, the Top Gallant Rail was fitted after the Pin Rail/s, Stanchions otherwise I would never have been able to fit these. (There is also some other detail that goes into the Inner Bulwarks prior to fitting the Top Gallant Rail. (I'll find a photo.) Yup, the Fore Deck butts up to the WC's. Just a note here, I put a 1.0 X 1.0mm strip around all the rear edges of the Foredeck. (I performed this before fitting.) The Pin Rails were modified also, there are not enough holes for all the Backstays for the Fore and Main Masts. Enjoy!! Cheers....HOF.


- 55 replies
-
- 6
-
-
- cutty sark
- sergal
- (and 2 more)
-
Hi Chap, Yup planked on the outside of the Bulwark "Extensions" with 0.5mm I guess Basswood. Brass was installed afterward and extensions removed post this. Decking followed. Your Metal Working skills are good, mine poor.... The Poop Deck Bulwarks i resorted to wood, as per the photos. The PE as far as Mantua couldn't be shaped, come Hell or High water.... Main difficulty with this subject, the difficulty, mine anyway, is the fact that Rigging, is in the main, "Inboard." As stated, lots of images. (I'd like to see your "Execution" better than mine!!) Hmm....Unsure about the Humidity "Excuse." We have Temperature/Humidity fluctuations in the Antipodes also!! My memory of the "Skeleton" was that it "Slotted" together with no issues, just "Pinned" my False Decks. Happy to help/advise. How can I help further? Cheers and Regards, Harry. (HOF)
- 55 replies
-
- 1
-
-
- cutty sark
- sergal
- (and 2 more)