Louie da fly
-
Posts
7,989 -
Joined
-
Last visited
Content Type
Profiles
Forums
Gallery
Events
Everything posted by Louie da fly
-
 Oh, I know, I know. I have toyed with the idea of doing a diorama - but first I want to finish what I'm making.
 -
To be expected. Viking shields were much thinner in reality than most people think. 8-10mm thick at the centre, reducing to 5-6mm at the edge. At 1:72 scale, that's somewhere about a tenth of a millimetre! Obviously impossible to have them that thin, but it is possible to make shields much thinner than the ones supplied in the kit. Wood's no good because if it's that thin it warps or splits. I used multiple layes of facial tissue glued together for mine and after a bit of experimentation it worked - but my shields were bowl-shaped - Viking shields are flat. You might just try card, or perhaps because card is also prone to warping) thin metal - brass or aluminium.
-
Pat, I had a look at the documentary - thanks for that. I'd seen most of those dromon pics before, except for the one with the red square sails. There's been a lot of speculation on the true form of dromons - these ones are of course modern reconstructions (as is my own model), and there are an infinite number of ways to interpret the evidence that's come down to us about them. These are quite valid interpretations, but I do prefer Prof Pryor's ideas (with some additions and alterations from my own study and observation). I appreciate your alerting me to this.
-
Good plan. There's enough good about this model to make it worth retrieving. And what you're doing so far is very good - you'll end up with a far better model than you would have, had you completed it way back then. Which, after all, is what it's all about.
-
Thanks everybody for the likes and comments. Apparently so. I forget the reference, but apparently it was not all that unusual. However, once the wind is reliable, there's no good reason to wear your rowers out, so you'd probably stop rowing. But for example the Argo reconstruction that rowed and sailed from Greece to Southern Russia in the 1970s did it every now and then when they needed extra motive power IIRC. However, the wind has to be from directly astern and not too strong - if the ship heels more than 10 degrees it is in danger of capsizing, and any heel would interfere with the oars of one side. Maybe I'll use those guys. We'll see. Banyan, I started looking at that video and then the computer ran out of internet. I'll have another look later.
-
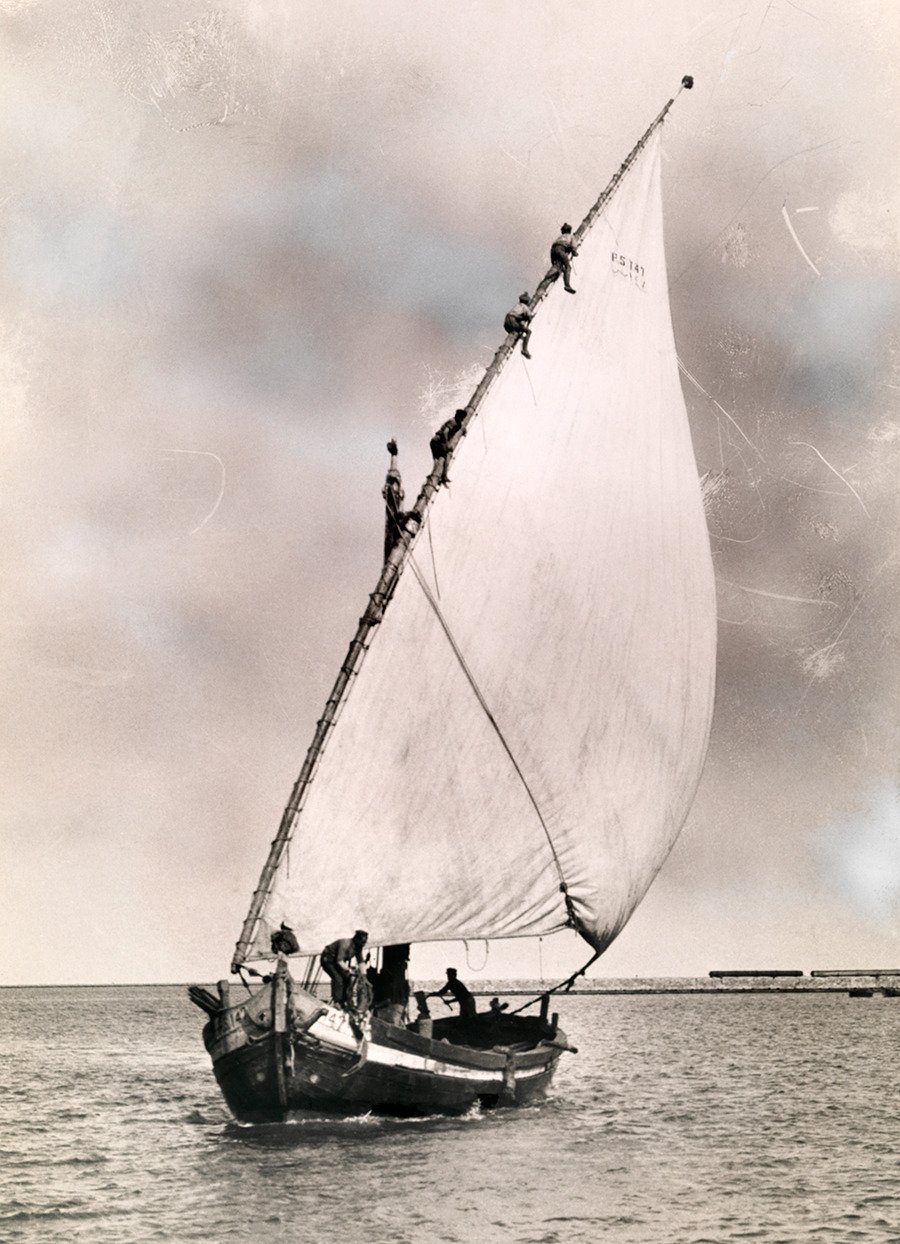
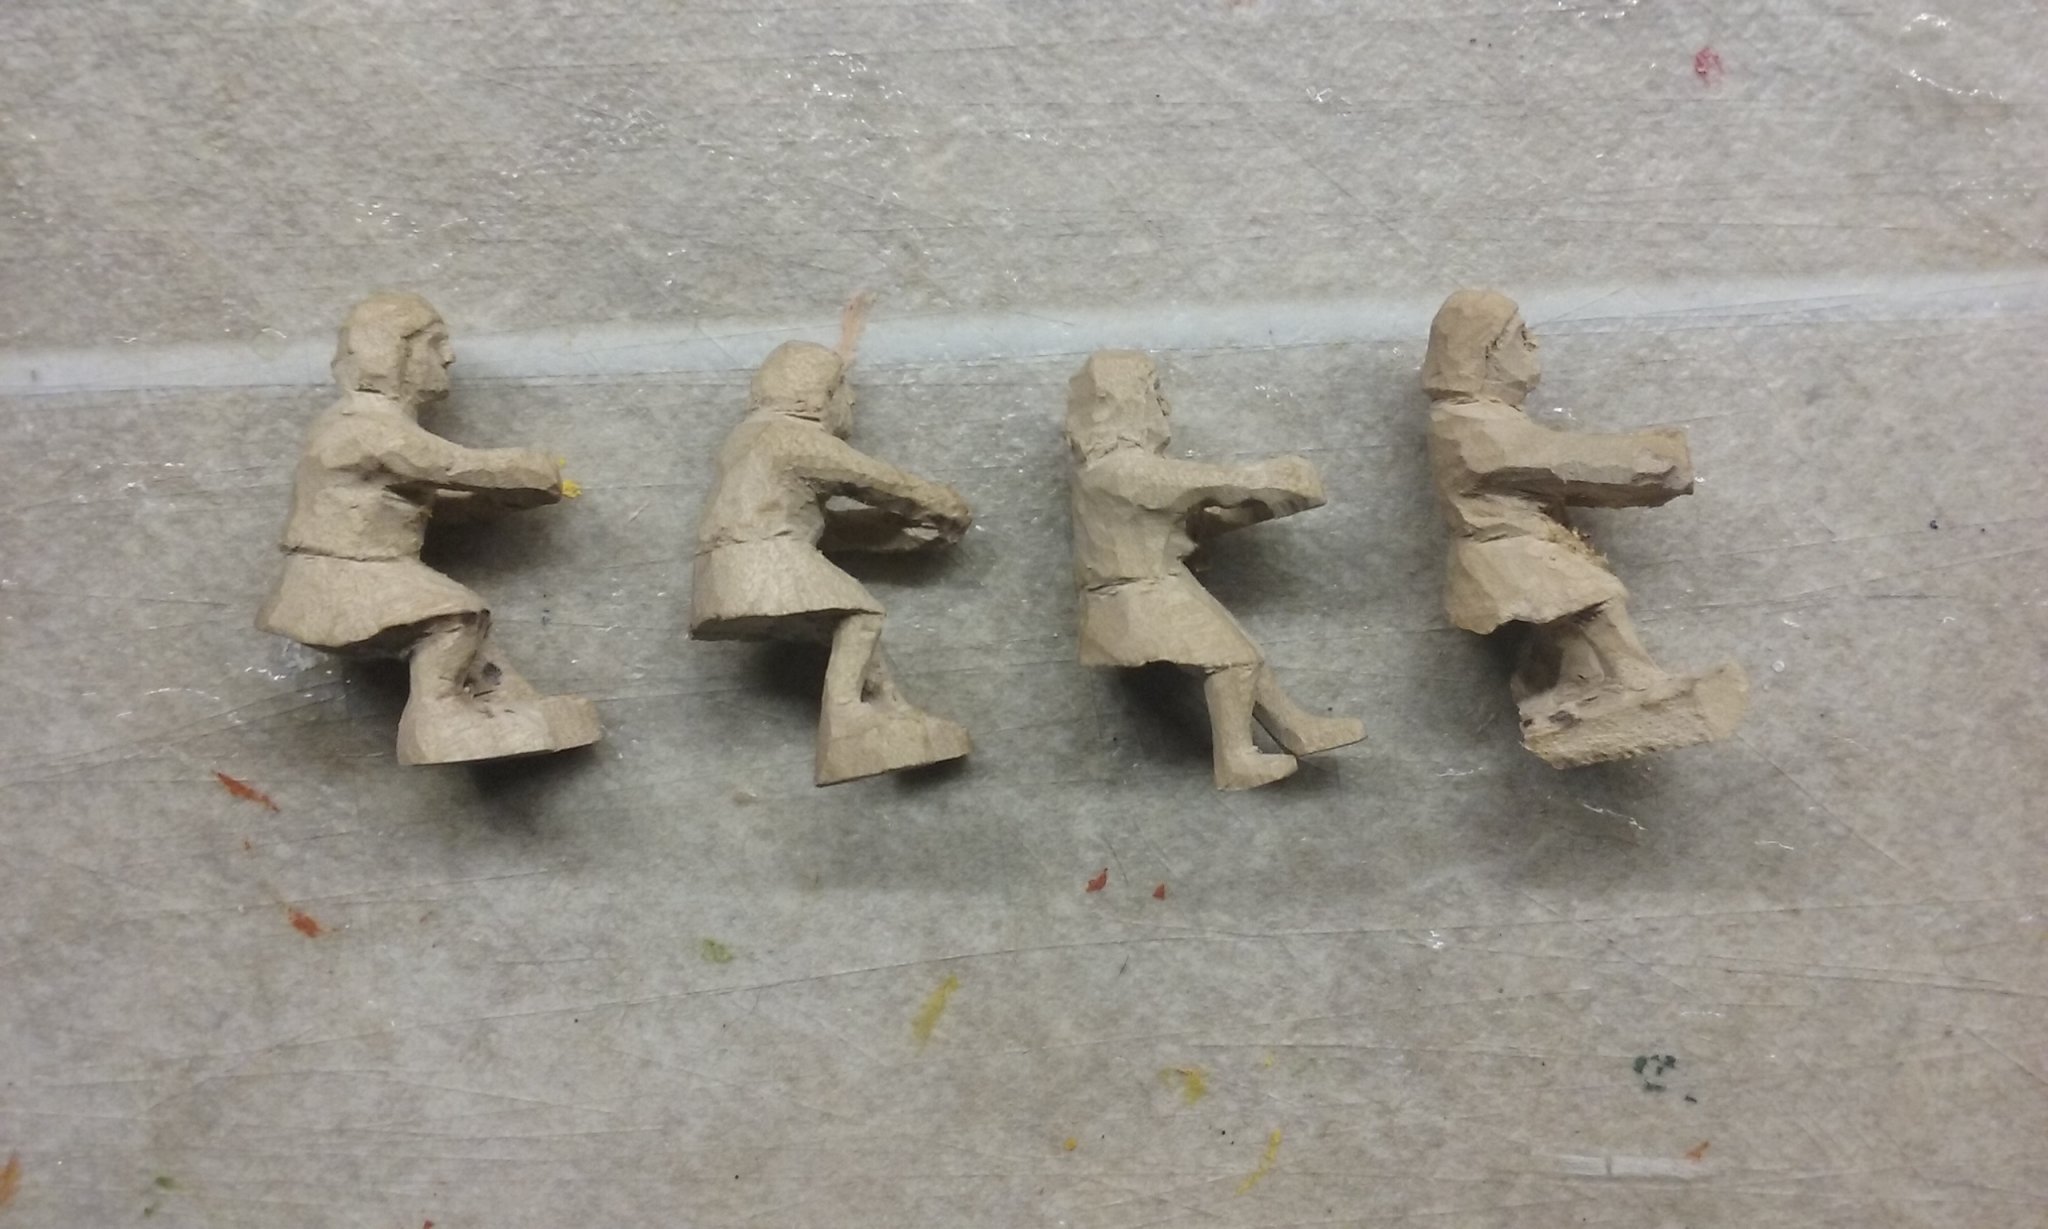
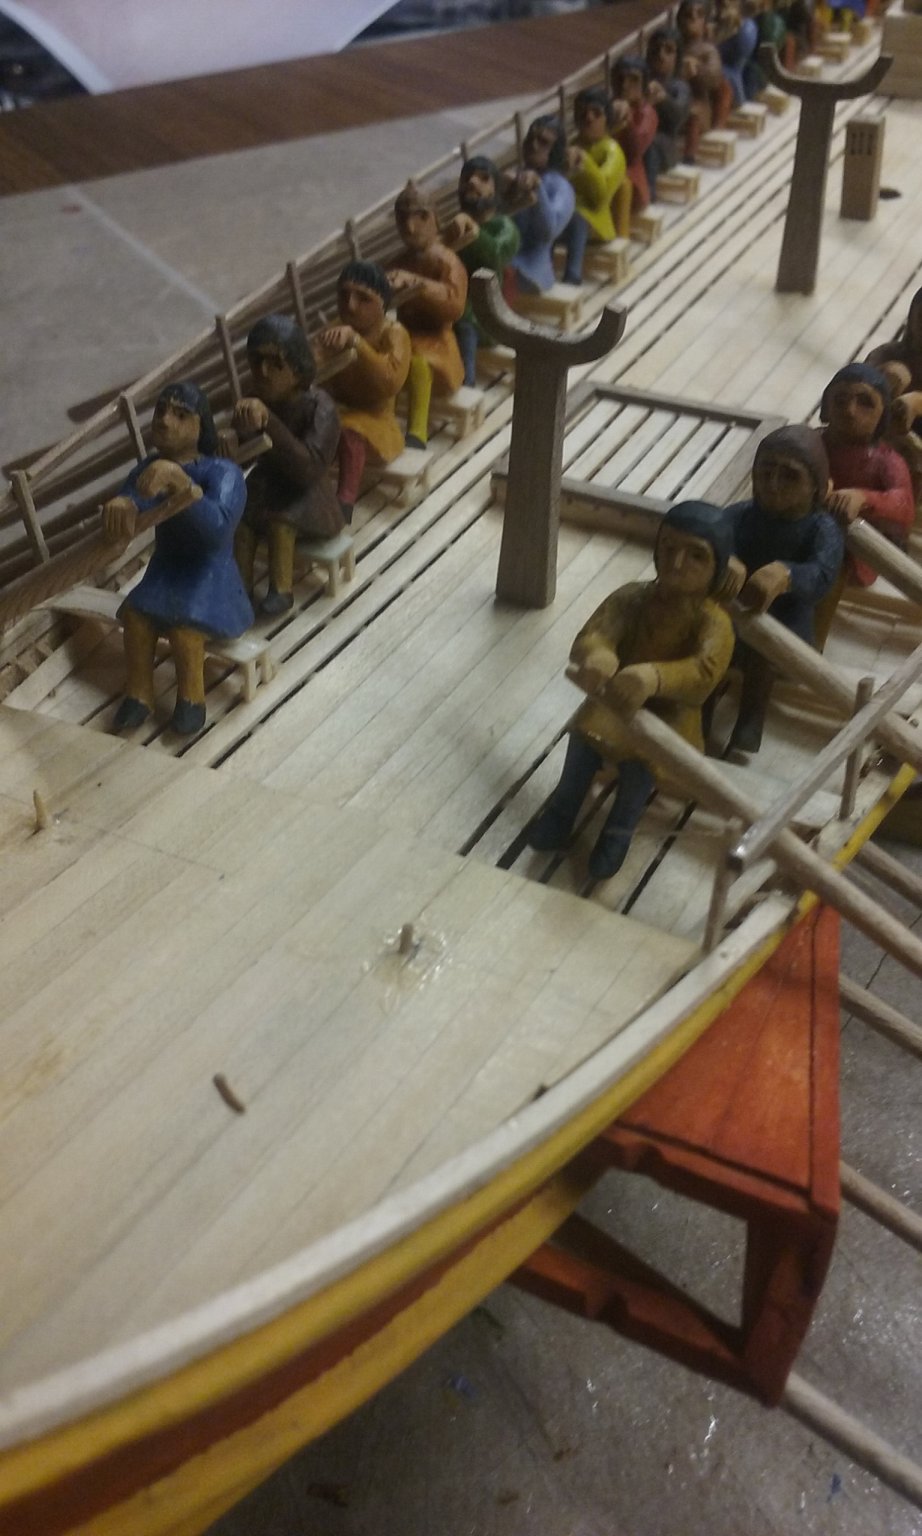
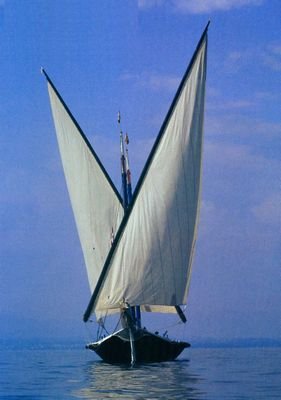
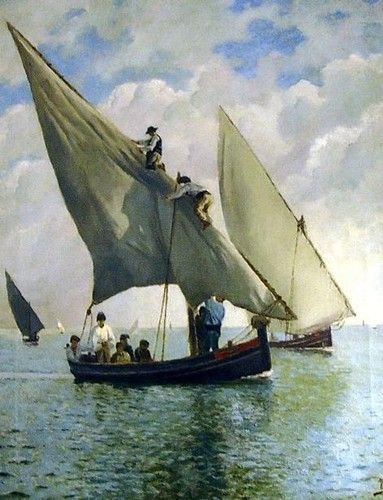
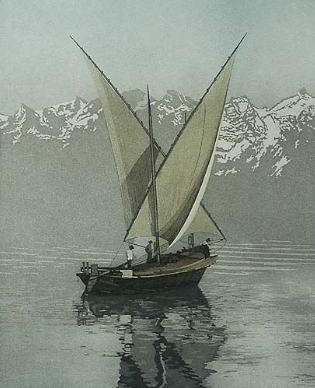
And now it can be told. I was planning to change the final configuration of the ship - rather than have her under full sail I decided that it would look really cool to do a bit of "living history" - to leave maybe four pairs of oarbenches empty and carve new figures to take the place of those oarsmen I'd already done, but assign them to "other duties". I'd have the foresail hoisted but still furled, with two or three guys up on the yard unfurling it: and a bunch of others in the process of hoisting the after sail like this: or perhaps this: I even carved four guys based on the picture above: Then I changed my mind. Good though this might be, I really think it wouldn't look as good as an overall display as my original idea, to have both sails fully set and drawing (the wind directly aft - the only circumstancs the sails would be set in a dromon because of its low freeboard) and "goosewinged" as in the pictures below. So there you go. I'm happier with this idea - I think it will look a lot better. Perhaps I could feel that my making these new guys had gone to waste, but in fact it was fun - a welcome relief from doing so many figures all the same. I don't really care if they never get used. If I'm not stuck on a "sausage machine" production line, I really do enjoy carving.


-
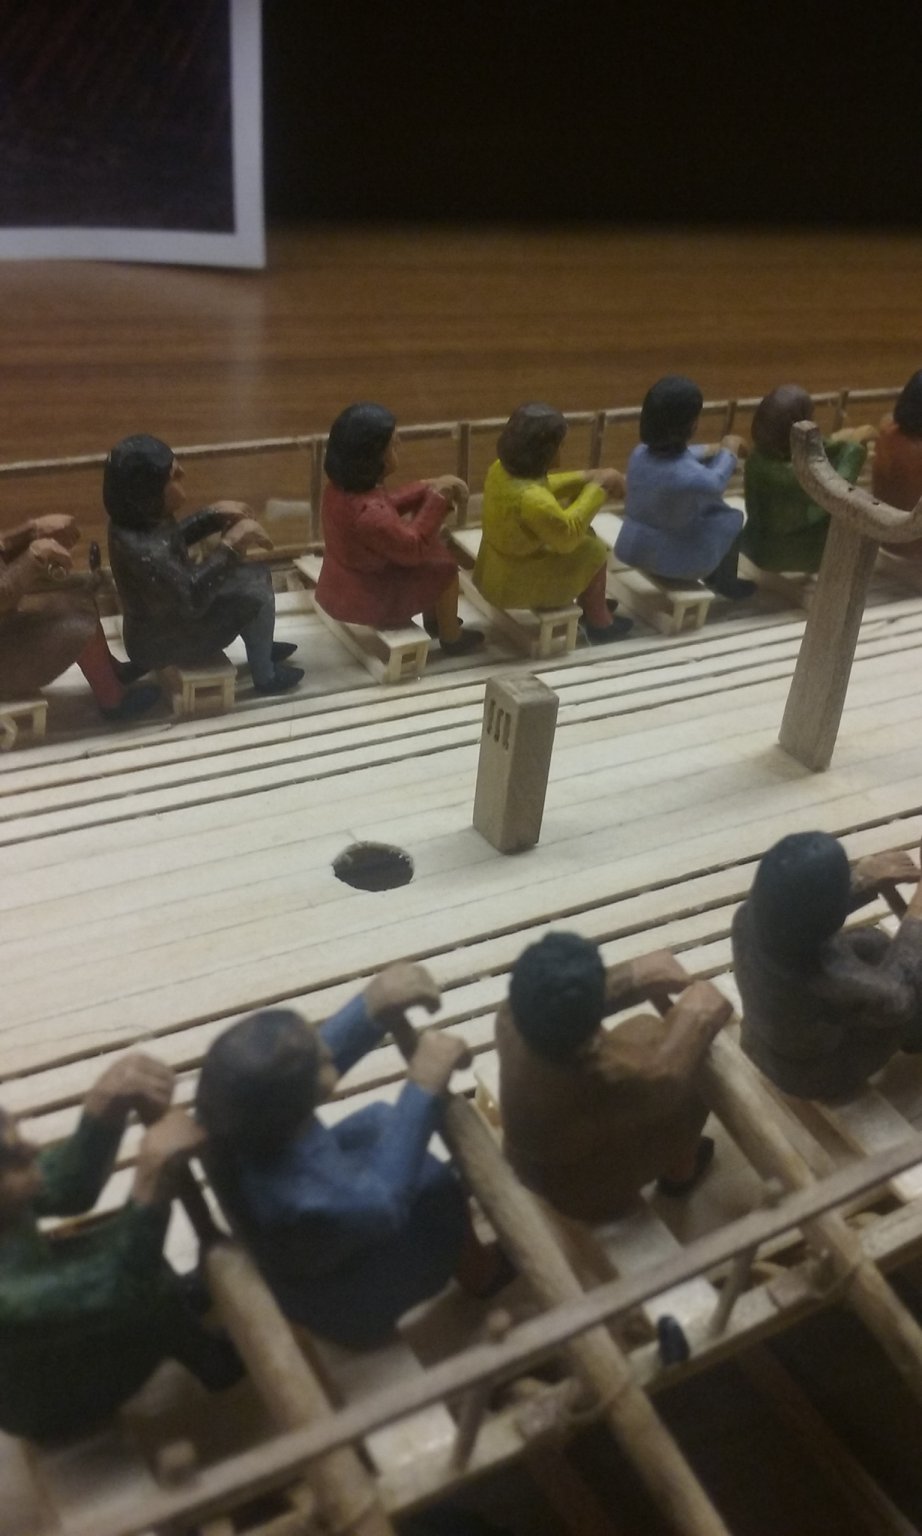
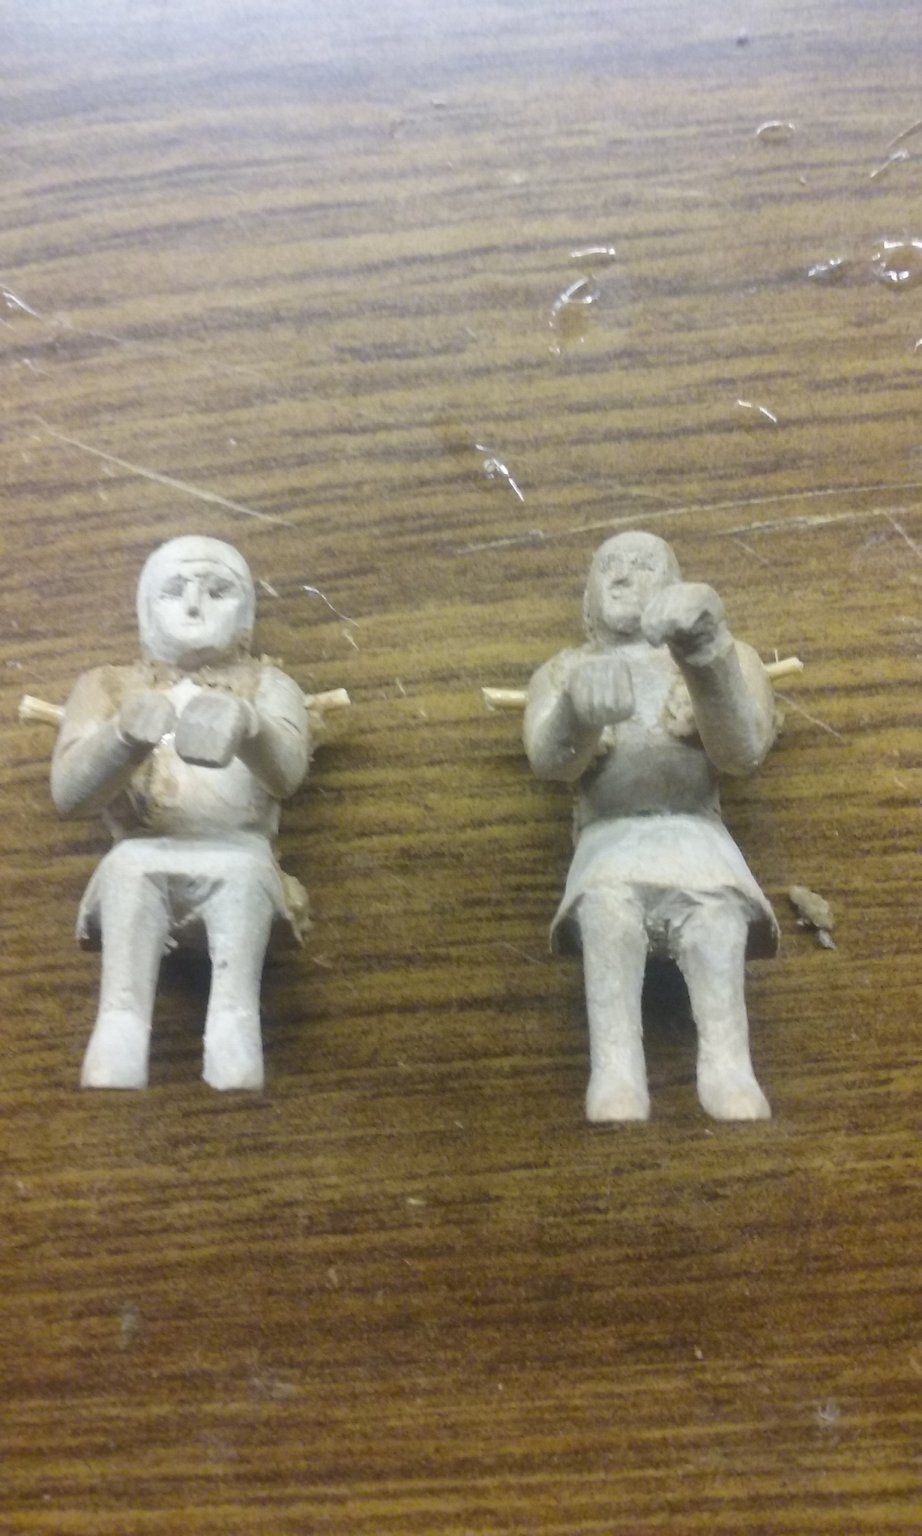
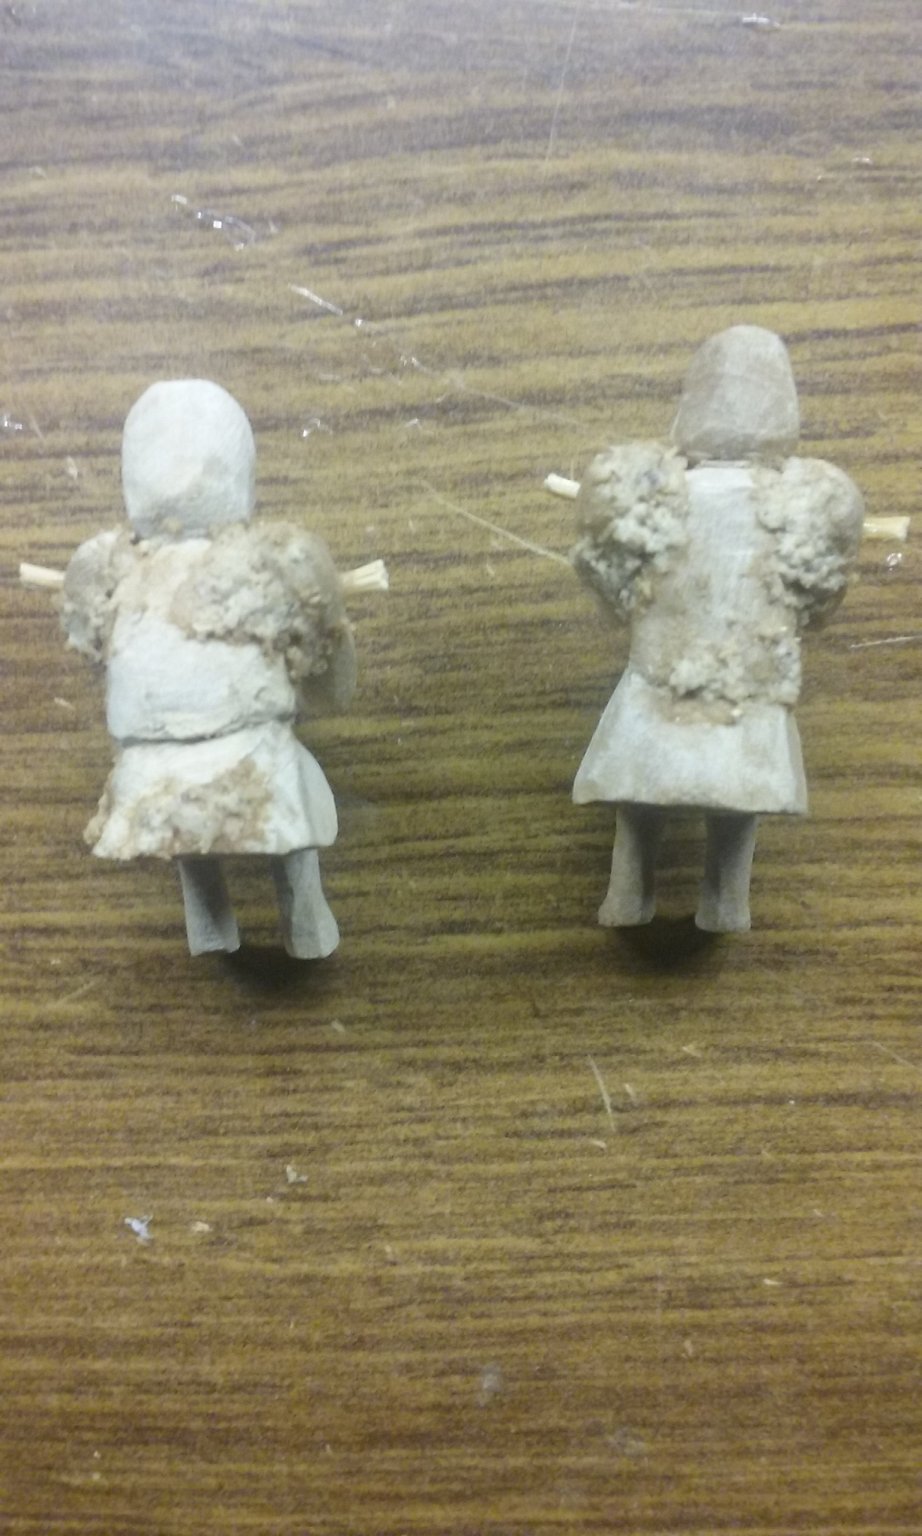
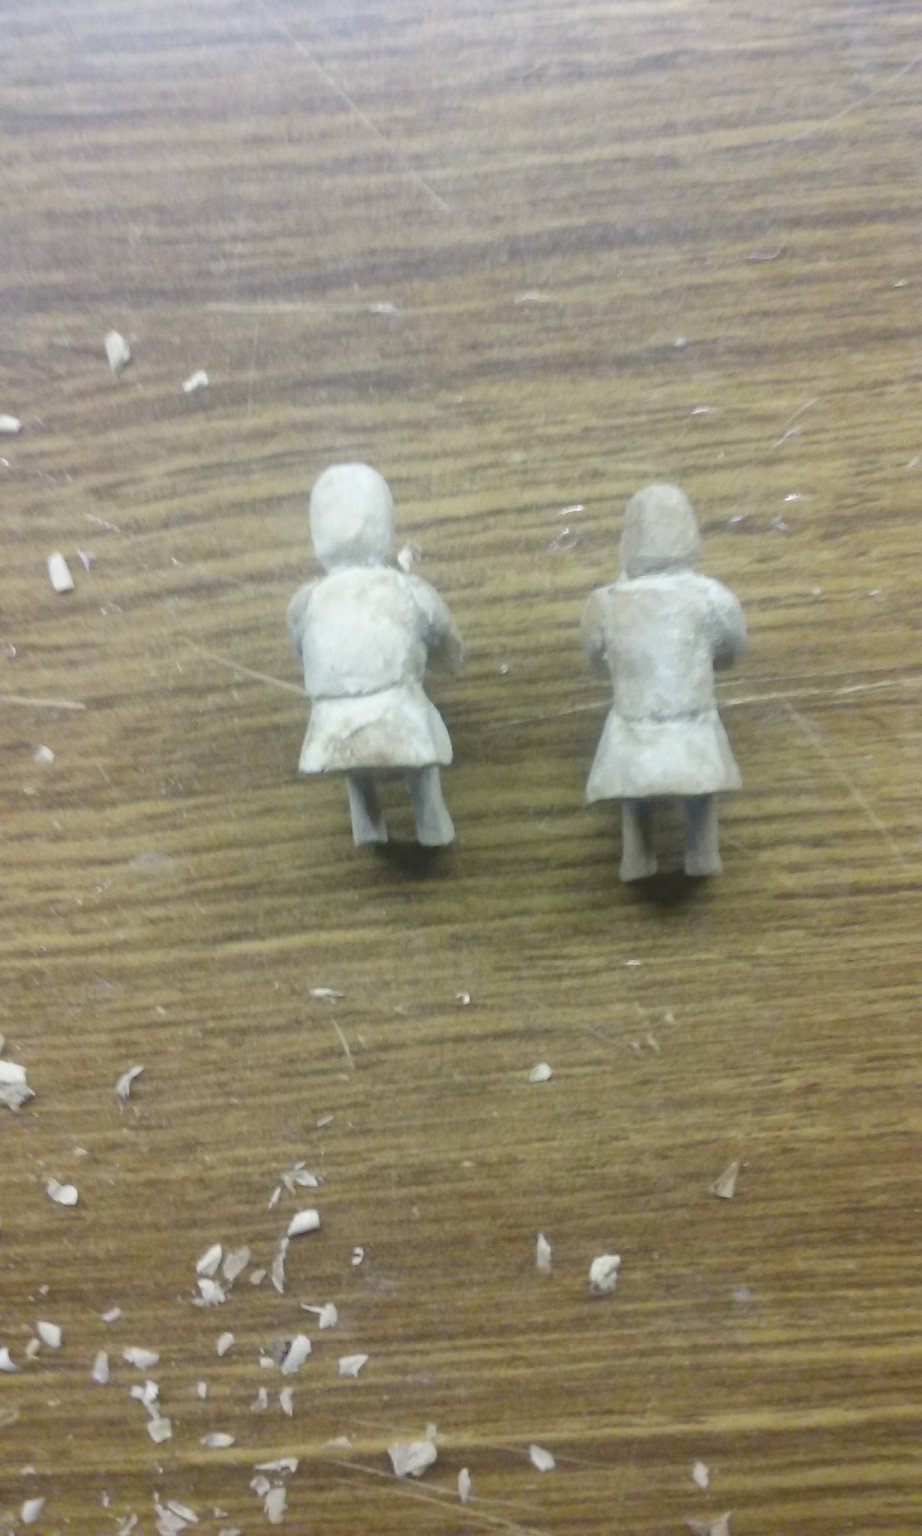
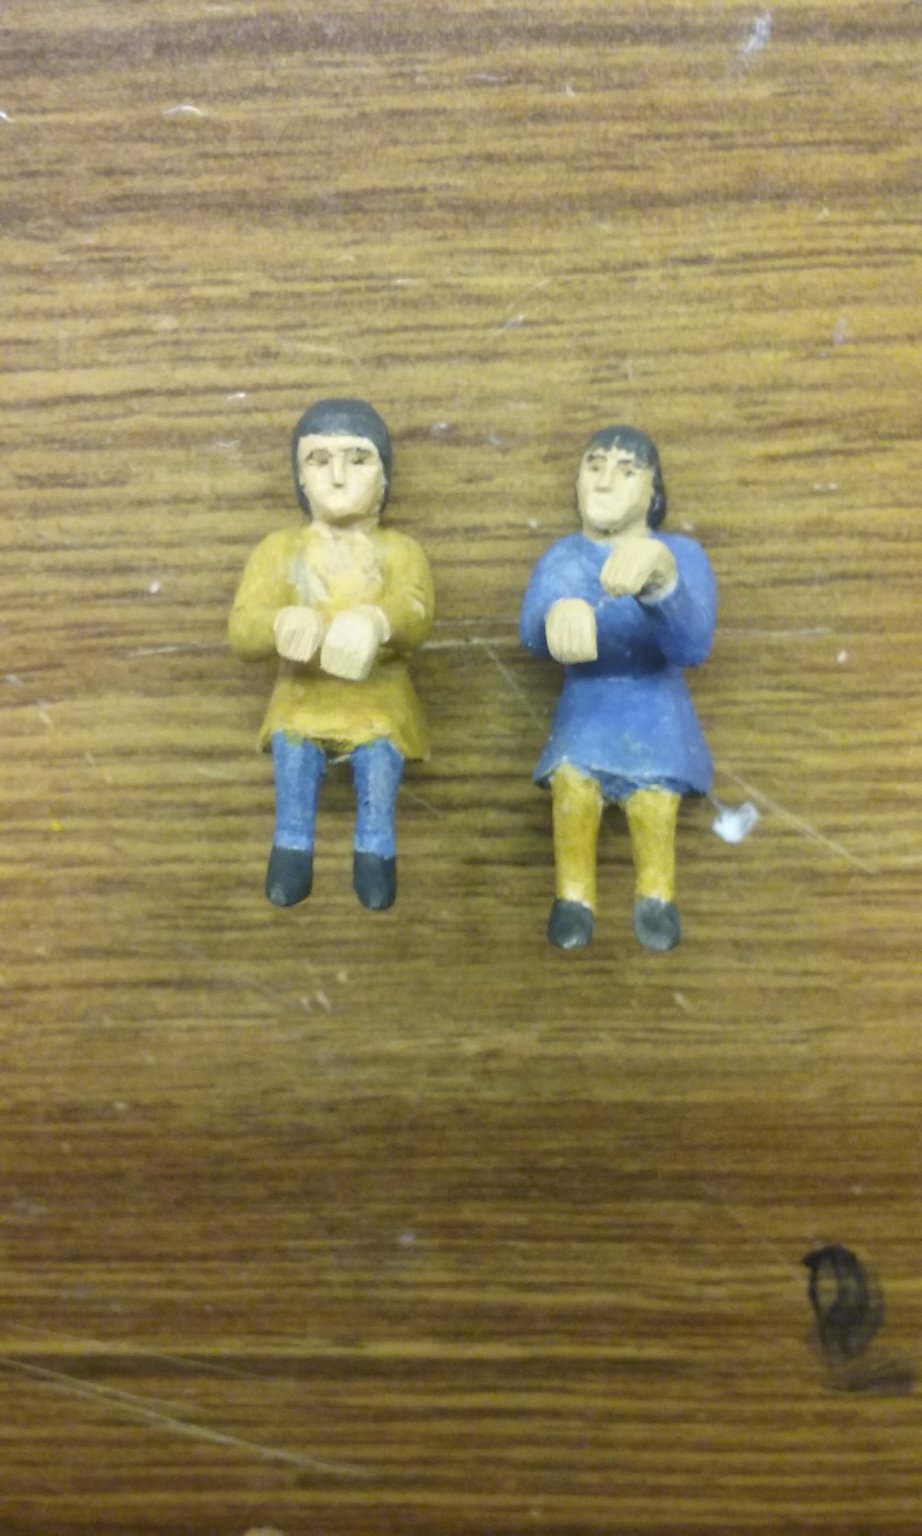
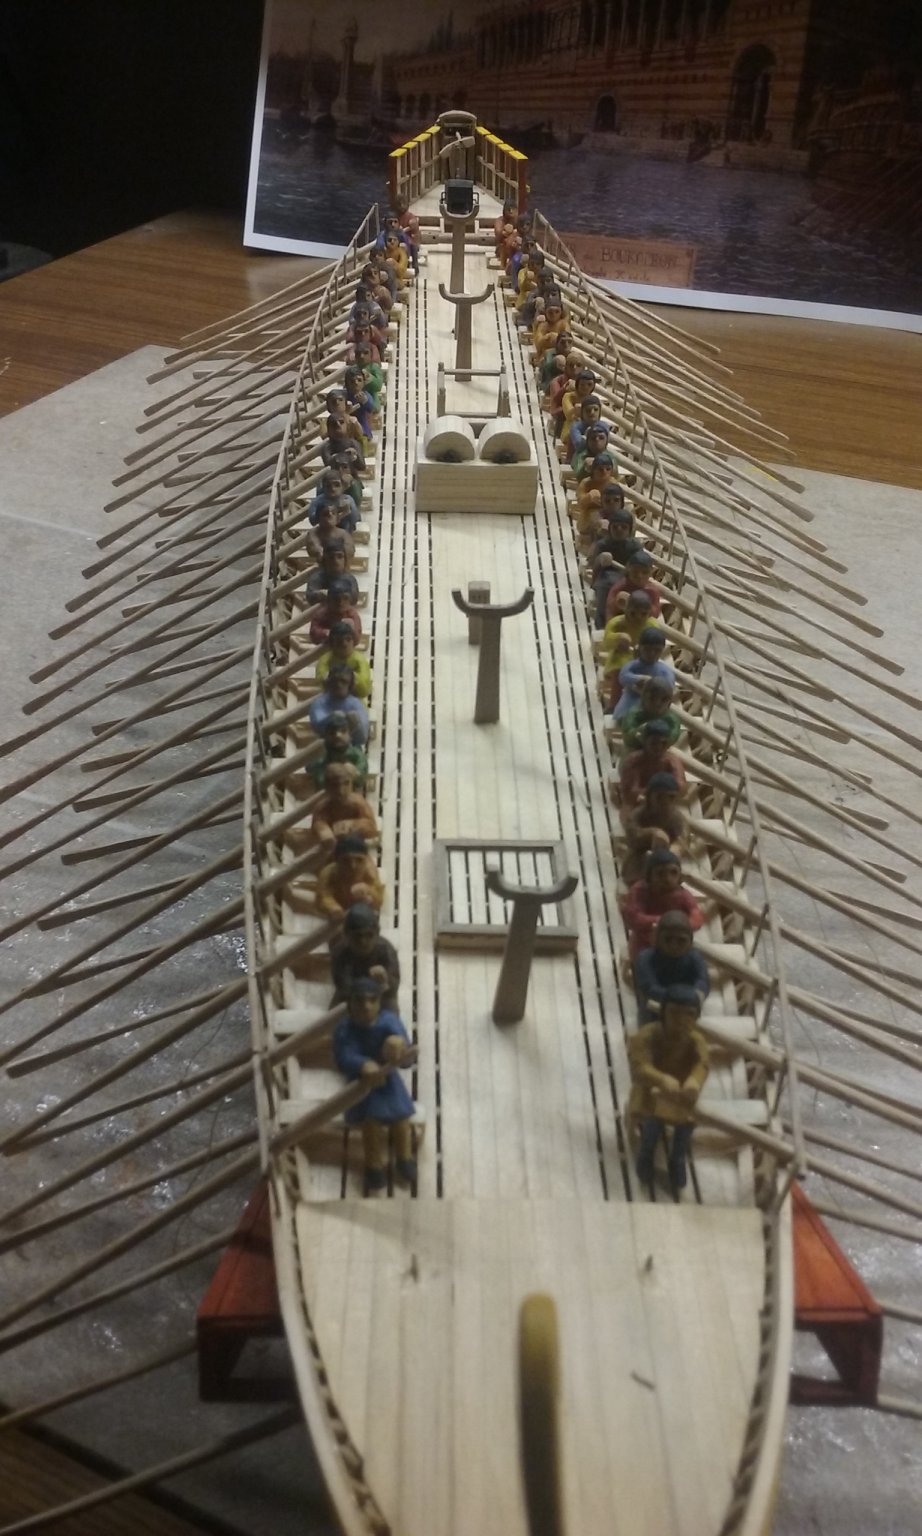
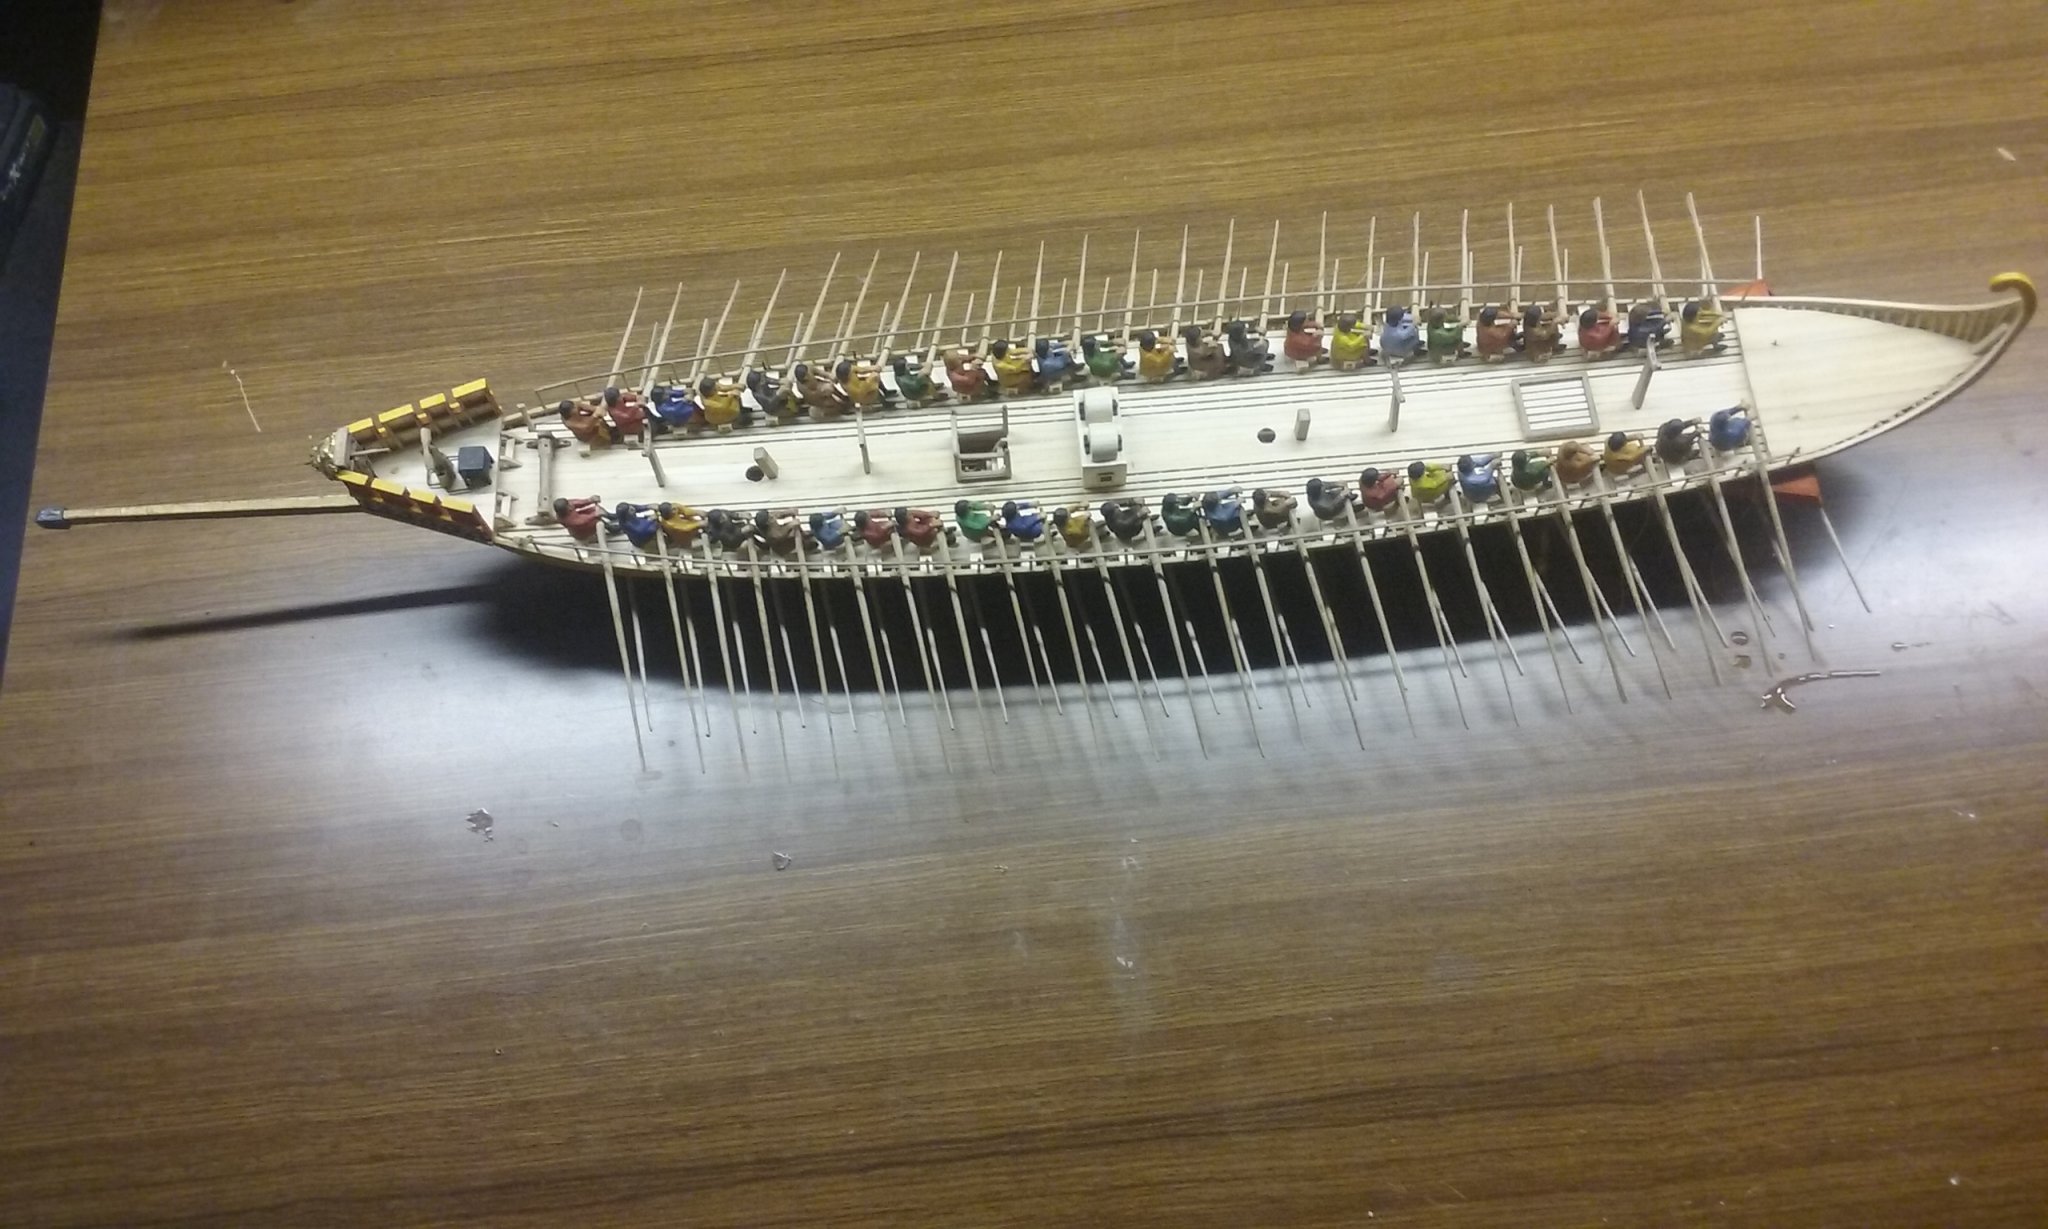
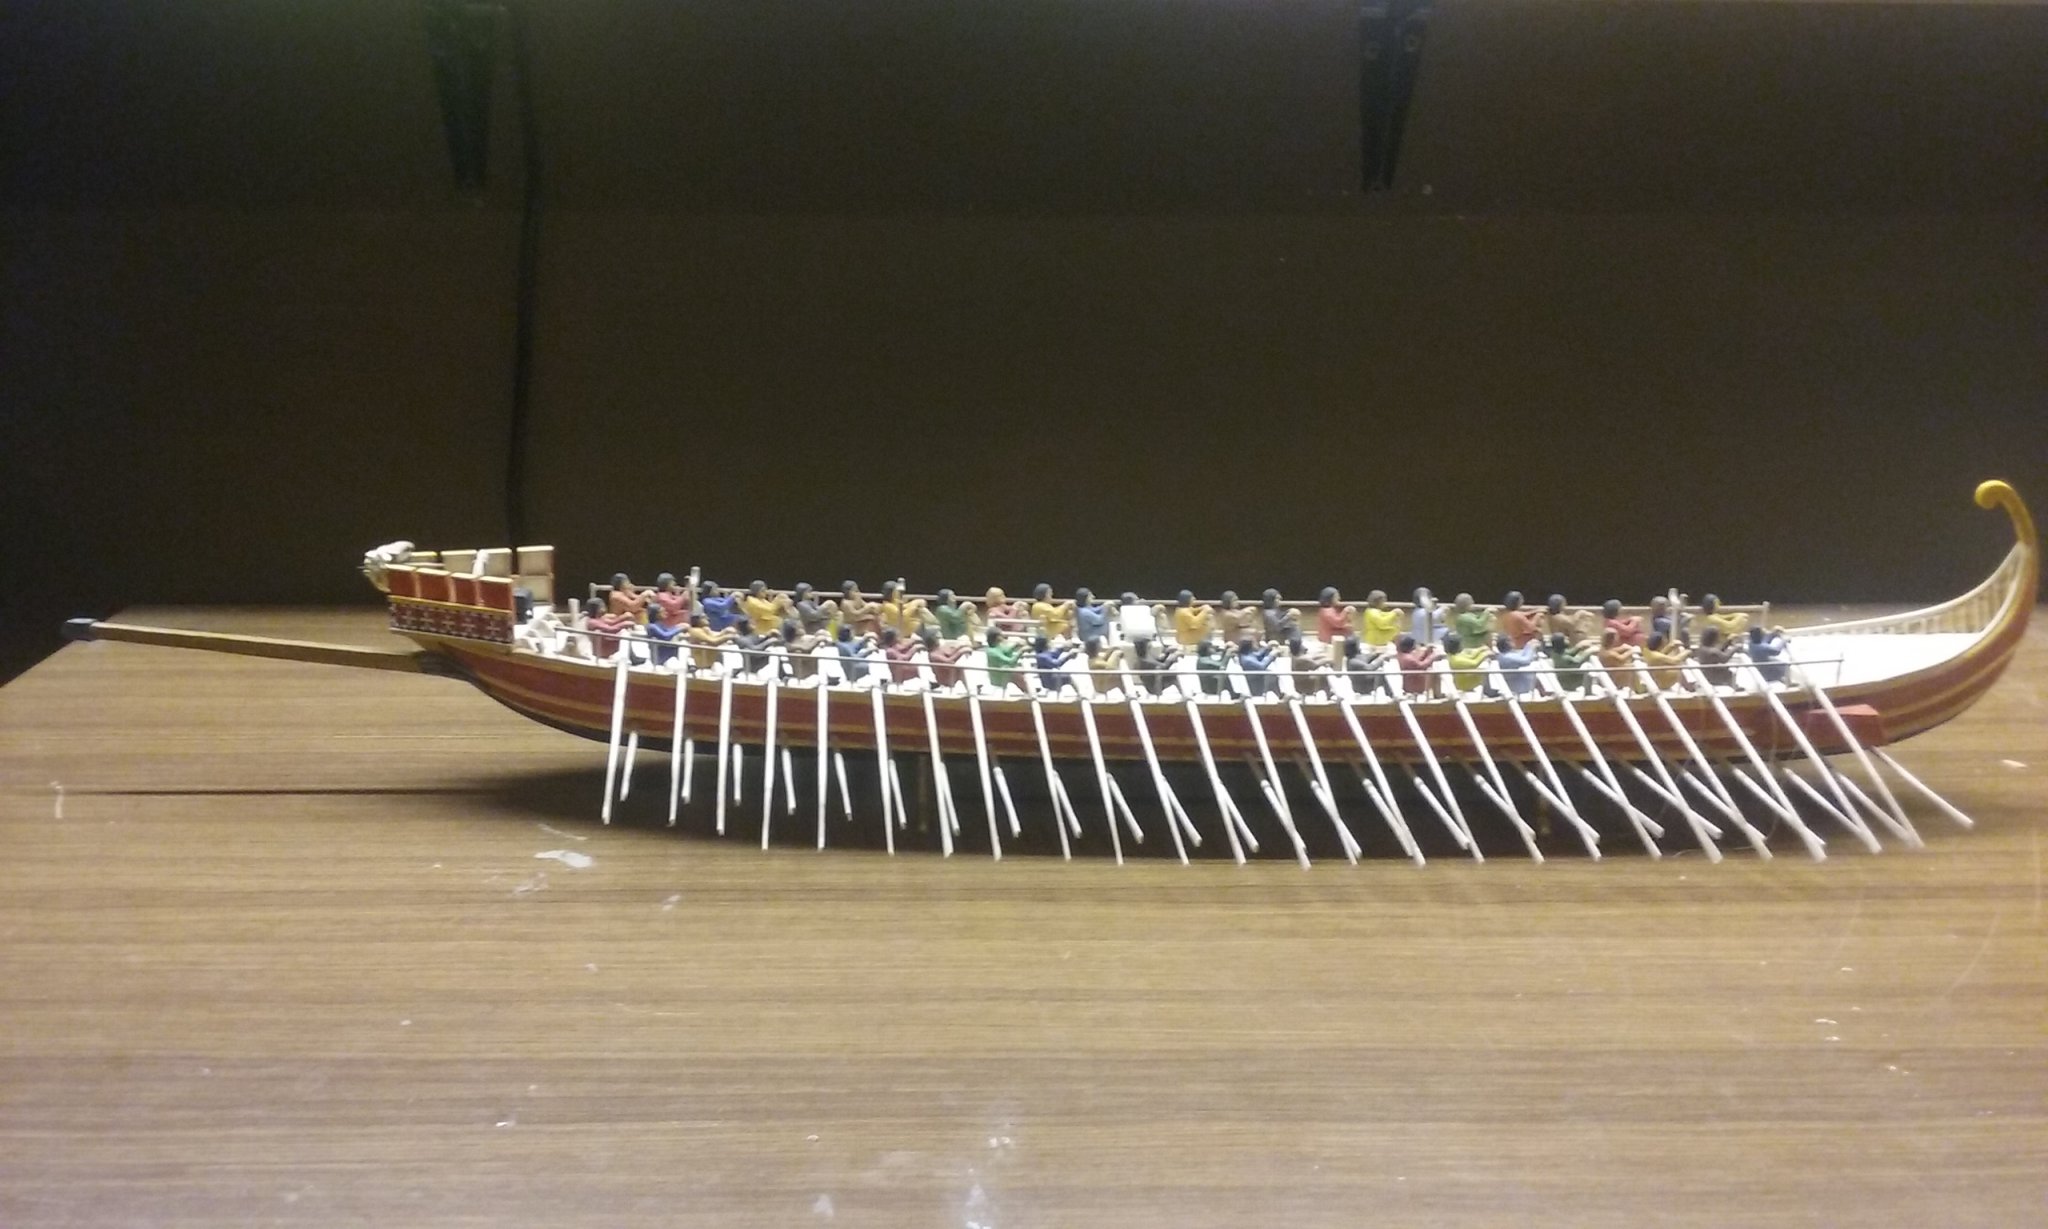
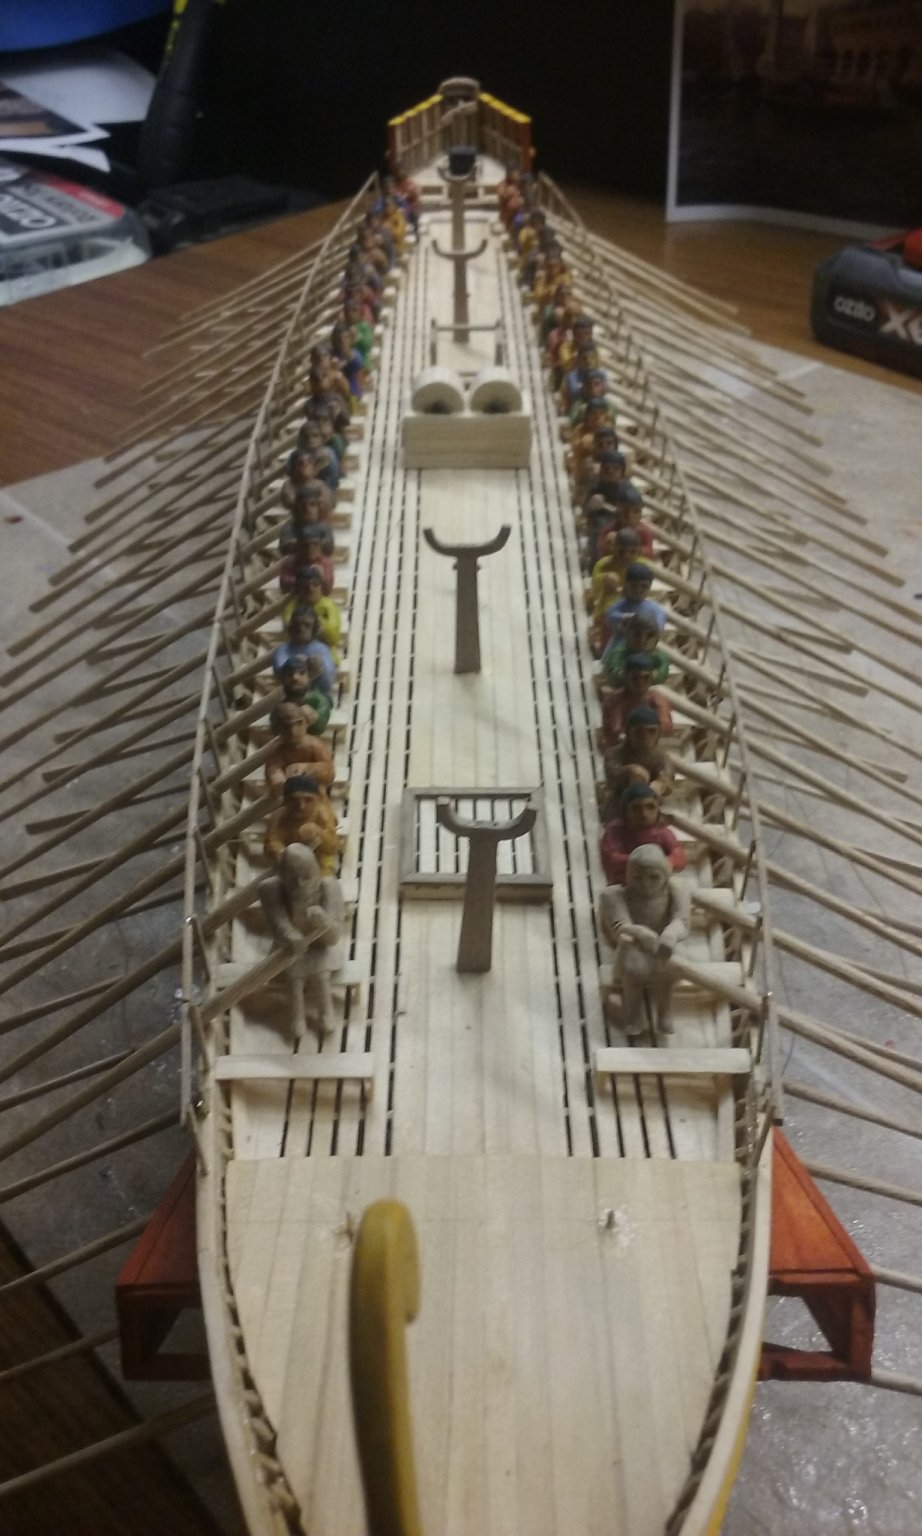
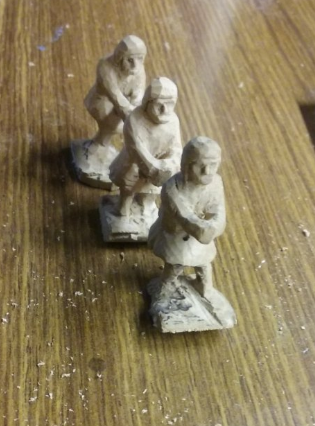
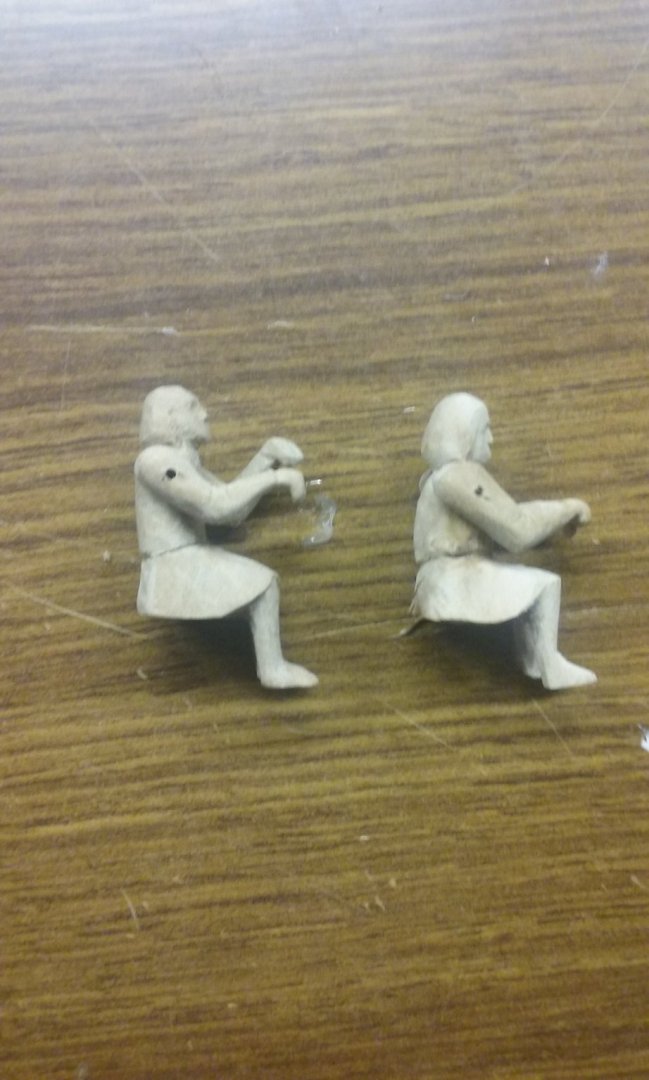
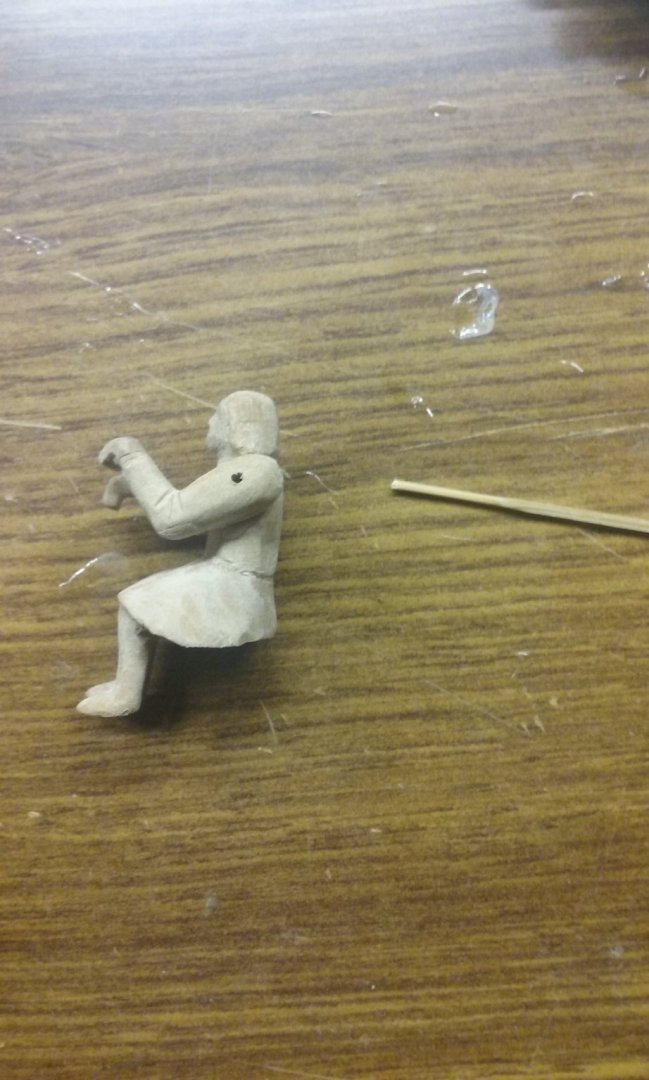
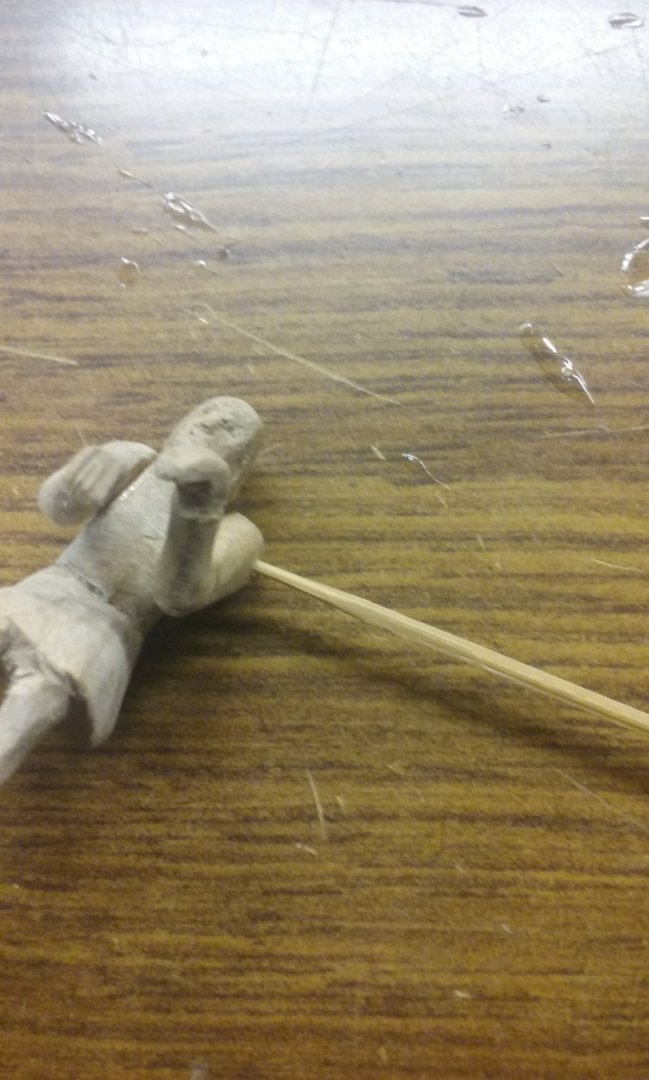
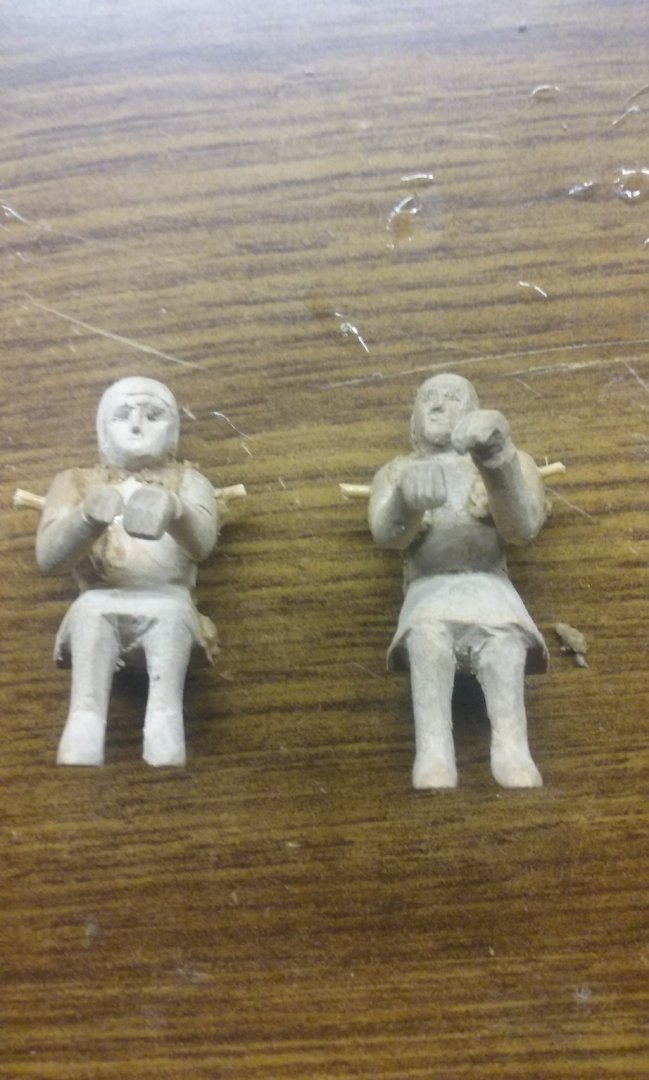
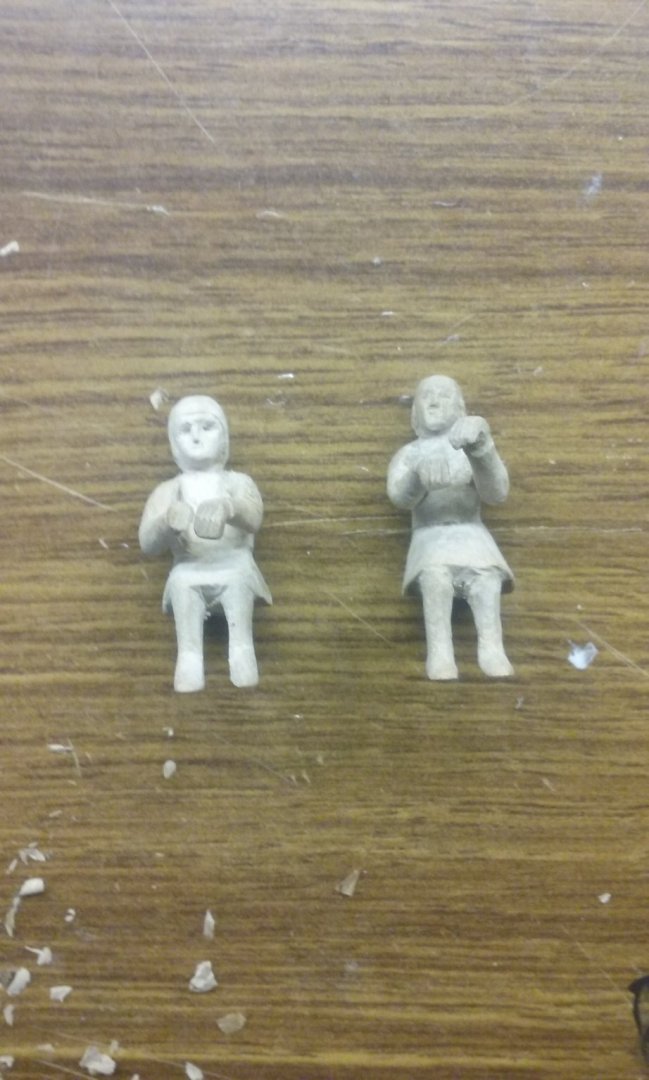
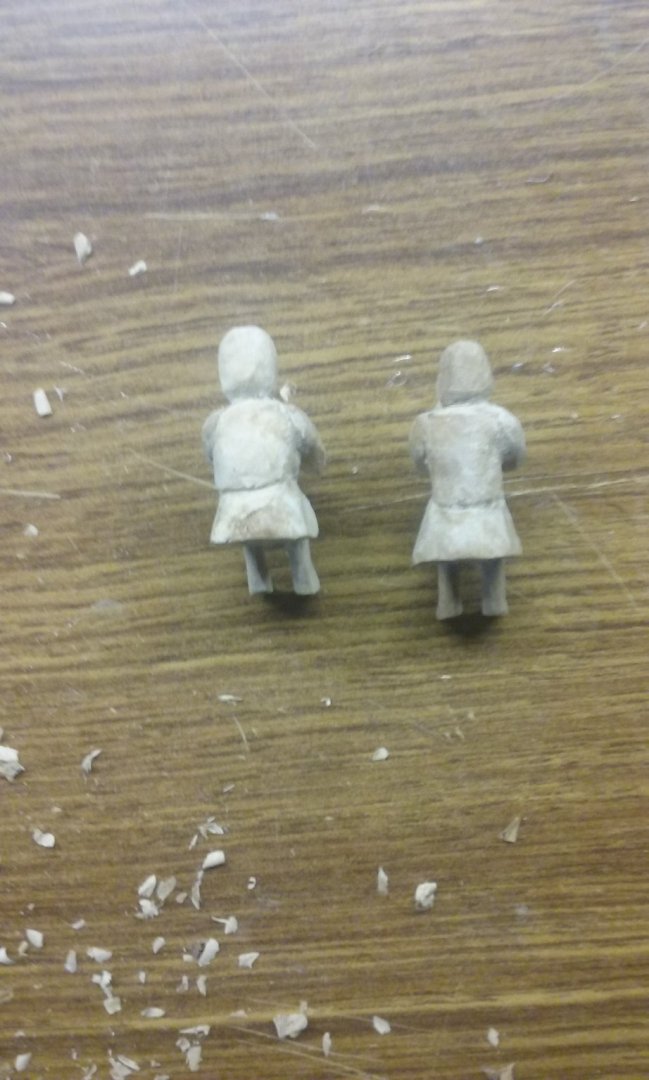
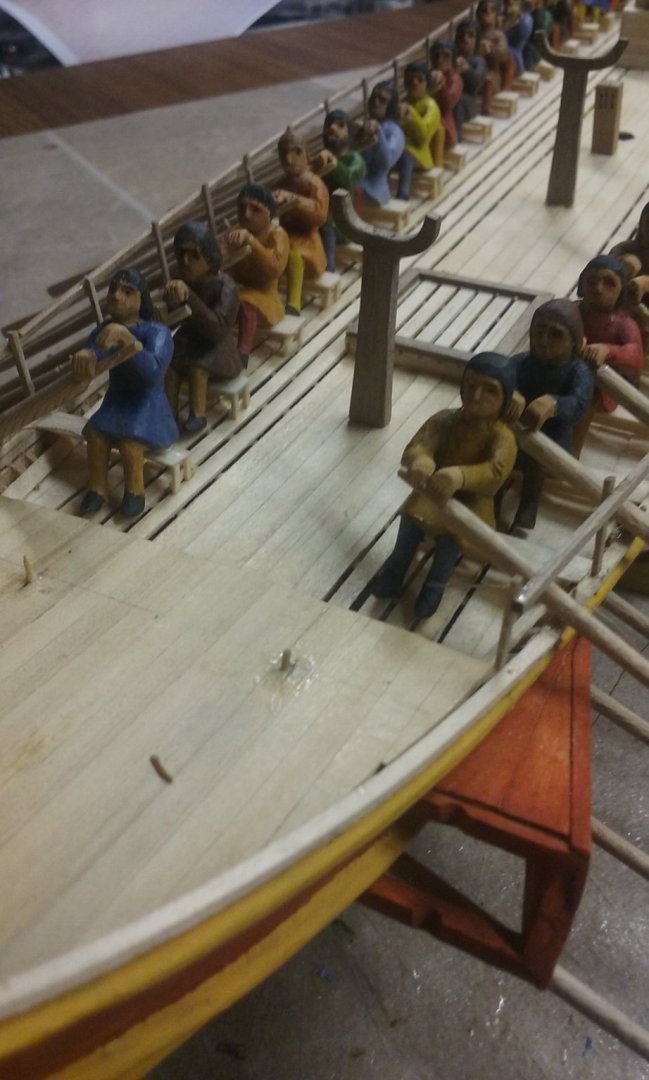
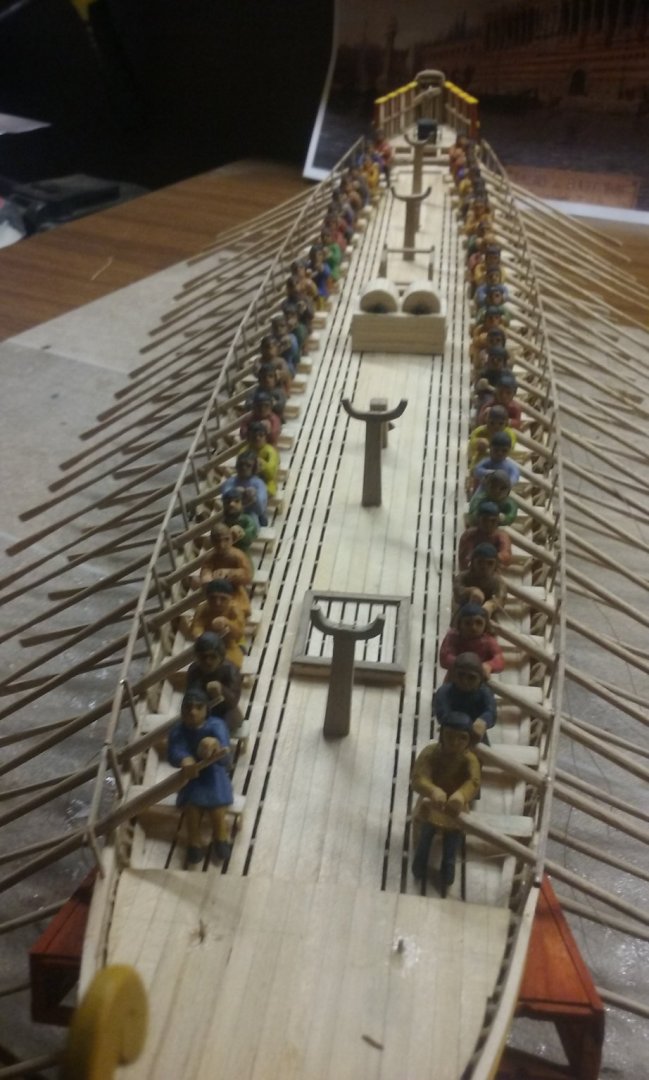
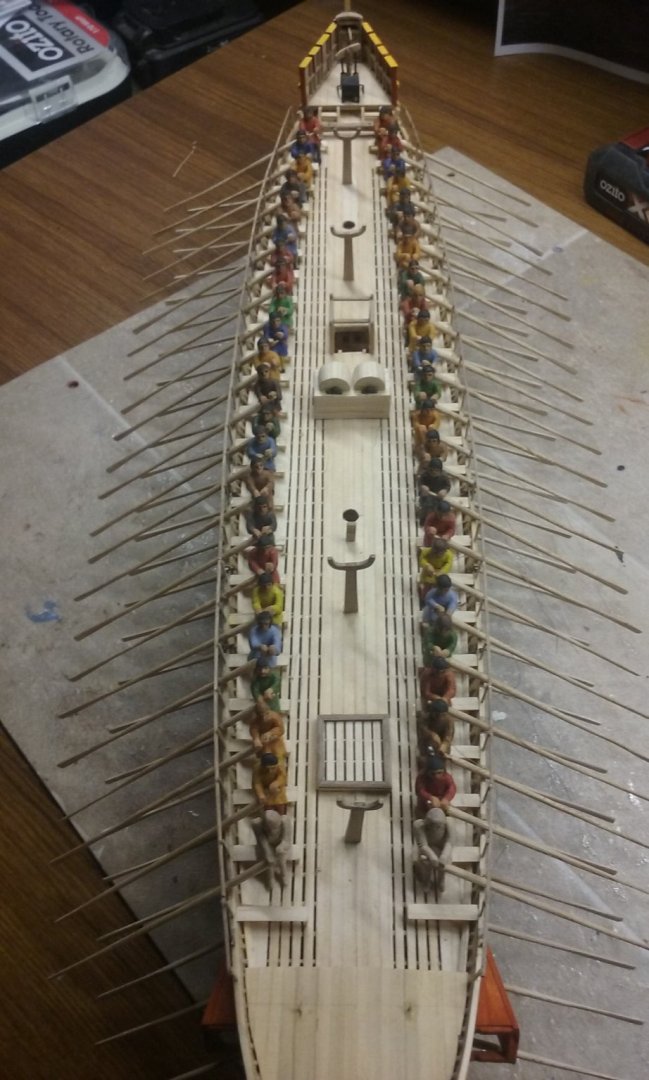
Working on the very final pair of oarsmen. Arms carved and glued on, and holes drilled at the shoulders for bamboo pivots, to fix the arms firmly to the body and allow me to swivel the arms for best fit to the oarhandle without them breaking off: Filler added - rather than try to get each pair of arms exactly right (an almost possible task fitting and re-fitting to both rower and angled oar-handle) I carved them so the hands fitted on the handle as close as I could make it, and allowed a bit of extra at the shoulder, and added filler to close up any discrepancies. And trimmed to shape and sanded smooth And finally, painted. And, at last, all the oarsmen in place! (breathes great sigh of relief). If I never carve any oarsmen again, it will be too soon! Another thing. I discovered the halyard knights were really too small - they were only about half a metre (18 inches) tall at 1:50 scale - this is the knight for the after mast, but the foremast one is pretty much identical. so I made new ones about waist height. Then I thought about it some more and decided they might be tall enough now, but probably a bit flimsy to take the forces imposed on them by the halyards. So I made heftier ones. Pretty happy with these now. A real milestone achieved.


-
That is a windlass just under the break of the sterncastle, isn't it?
- 179 replies
-
- 4
-

-
- shipyard
- wütender hund
- (and 1 more)
-
Nice work on the painting. Pretty difficult at that scale. However,may I suggest you replace the purple with another colour? In the Middle Ages there were sumptuary laws which laid down who could wear what clothes, so the best stuff was reserved to the upper classes, and jumped-up merchants couldn't swan around in the clothing of their "betters". And though these laws had to keep on being re-issued because they were so sadly neglected and often ignored (like Finland), the one thing that was totally forbidden was purple - it was reserved for royalty and only royalty. Anyone wearing that would have been in very deep trouble.
-
That's all a bit wierd, Cathead. You'd think the manufacturers hadn't tried out making the kit themselves to see if it all worked, before they put it on the market. I have no answers to the length of the planks or to the width of the deck insert. But I think what you're doing is the right answer. In the long run you have to deal with what's in front of you rather than what is theoretically the right thing to do (when it doesn't work!). The problem with the deck interfering with clamping the planks was always to be expected. To be honest, based on your previous record, I'm looking forward to seeing what ingenious solution you come up with to solve it! And I do like what you've done with the transition from clinker to carvel at the ends. Simple and elegant.
-
Thanks everybody for the likes and the comments. And Cathead and Jamie, that made my day! I love the parrot sketch. "The only reason he's on his perch is that he's nailed there!" "WAKE UP POLLY!" Chuck, apparently the main difference between oars and sweeps (I had to look it up) is that a sweep is single, held with both hands (so you need your rowers to be in pairs, one for each side of the vessel) whereas an "oar" is used in pairs by the one oarsman. So yes, technically these should probably be referred to as sweeps. And you're right, the size of the oarblades determines the width of the holes, not the other way around. But with this model there are no surviving oars, and contemporary illustrations aren't reliable, so I'm reverse engineering - the dromon's oarports are copied from a surviving oarport in a strake from one of the Yenikapi galleys, and I've based the width of the oar blades on that.
-
Very nice, Paul. Very crisp, clean work. She's looking really good.
-
That's very good, Silverman. What timber are you using for the planking? It seems to have a very visible grain.
-
That's very nice work, Chris. At 1:600 they must be tiny, but they really make the model.
- 28 replies
-
- 2
-
-
- airfix
- queen elizabeth
- (and 2 more)
-
Nice work. Those masts are really looking good.
- 71 replies
-
- 3
-
-
- great harry
- henry grace a dieu
- (and 3 more)
-
And yet it became the dominant vessel type for at least a century, and was copied in the Mediterranean. So it must have had a lot going for it. Probably cargo capacity had a lot to do with it, and though the square rig had been common in the Mediterranean in Roman times, it had been largely replaced by the lateen. Was there something about square rig that gave it an "edge" over the lateen? You're doing great things - correcting such things as the frame that was too small will help you avoid problems later on. Keep up the good work.
-
OC, I'm gobsmacked by the quality of the paintwork on your figures. My dromon oarsmen are pretty much the same scale as yours, but the paintwork on mine is much more basic and plain - I haven't the skill to do the kind of shading you've done. (OTOH you didn't have to carve all yours! ) BTW, I don't know if anybody's mentioned it before, and at the risk of sending you off on another tangent, have you read "Death to the French" by C. S. Forester? It's a novel about a rifleman who gets separated from his unit during the British withdrawal to the Torres Vedras in the Spanish campaign, and lives off the land fighting the French until their retreat as the British advance, and he is able to rejoin his unit. Fictional (apparently) but with fascinating period detail of what it must have been like to serve as a rifleman at the time.
-
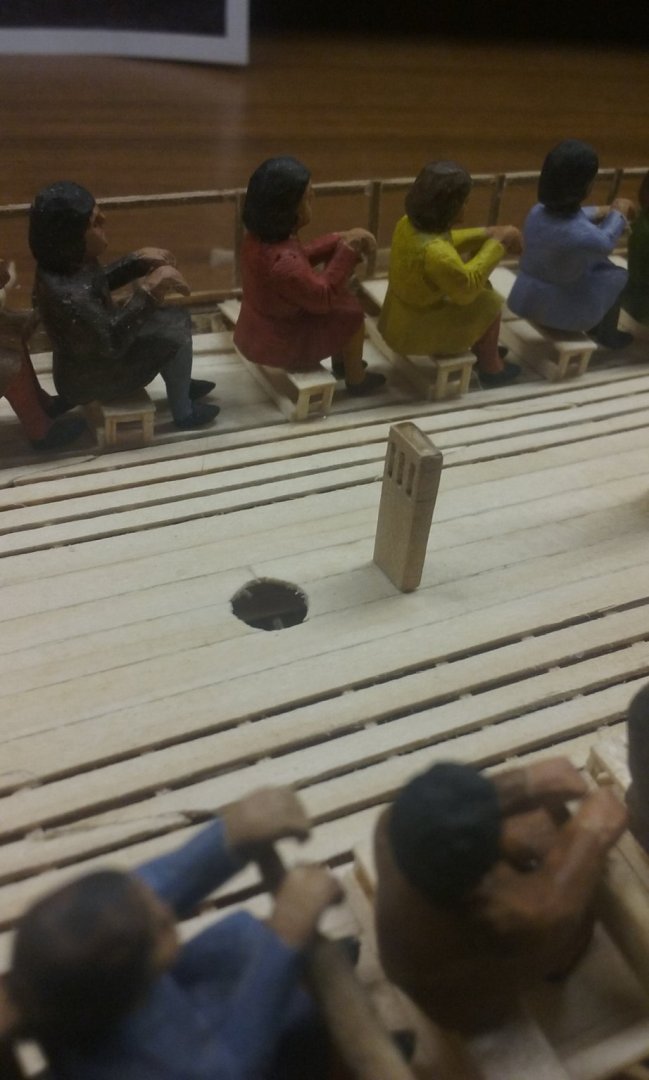
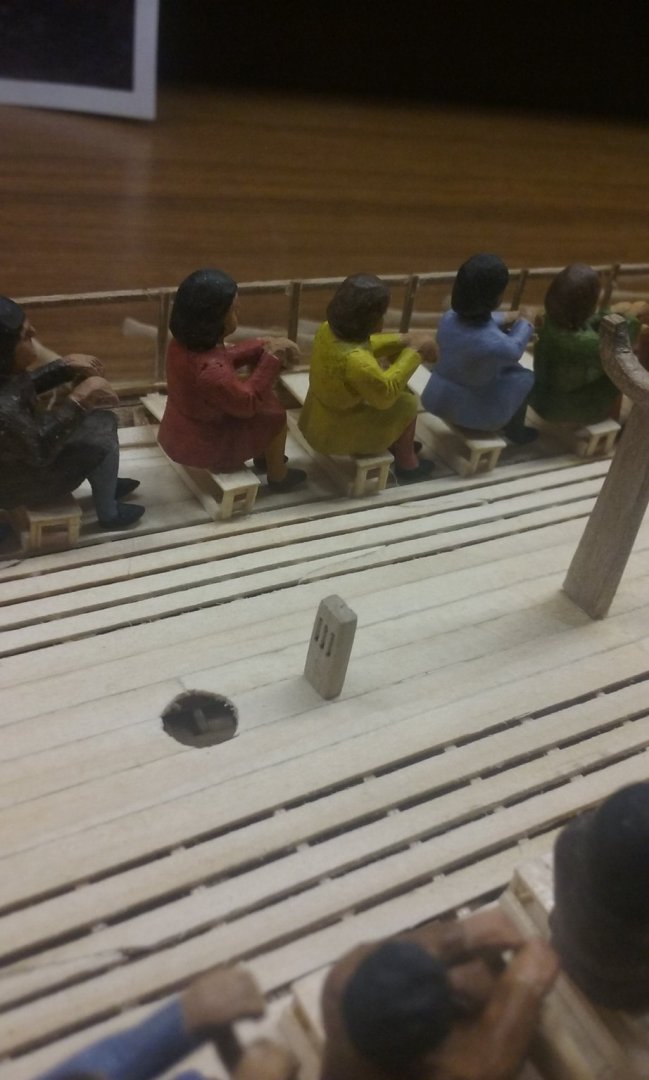
Woo hoo! I'm on MSW's facebook page! Apparently because I've been silly enough to carve all those oarsmen. But it's a real privelege to be up there with all those amazing examples of the shipmodeller's art. Speaking of oarsmen, I've completed another two and put them in place, and got a further two under way (the ones nearest the camera). Which means that once those are complete there'll only be one pair of oarsmen left to do! I won't know what to do with myself . . .

-
Yes, each step completed is not only a step towards the completed model, but it's also an achievement in itself. You're doing well and one day you'll be able to look back on this and say "It was really worth putting in that effort." And you'll have a model to be proud of.
- 74 replies
-
- 4
-
-
- mantua
- thermopylae
- (and 1 more)
-
Even if she is really a Man. Oh, no - that was Elizabeth I. But - depending on which body found on the ship was the Queen's - she either did or didn't have quite deformed feet, and bespoke shoes especially made to fit them. Well, that's convinced me - I won't be buying that stuff. Nope - it's quite visible, though probably not noticeable unless the attention is drawn to it. Oops. Sorry! Probably right, and you're completely right that now is the time to fix it, rather than come back later when it's much harder. Or worse, leave it and have it sneer at you every time you look at the completed model. It's all looking very good, Andrew. And I do like the way you are being so methodical and thoughtful about the whole process. Keep up the good work!