GuntherMT
-
Posts
2,213 -
Joined
-
Last visited
Content Type
Profiles
Forums
Gallery
Events
Everything posted by GuntherMT
-
I am very sad to hear this. My condolences to all of his family and friends.
-
I just used walnut and glued them to a lightly sanded surface of the yard with PVA and let it dry. After it's well dried, I then sand the cleats to their final shape and size while they are on the mast so that I can match the pairs by eye. Since the cleats and the yards are both wood (in my case boxwood for the yard/mast), I think PVA is the best wood to use. Gives me time to get the positioning right before the glue sets, and if it does come out wrong, easy enough to just pull it off, do some light sanding and re-do it.
-
Beautiful machining work, the mortar turned out fantastic.
- 456 replies
-
- 4
-

-
- finished
- bomb ketch
- (and 2 more)
-
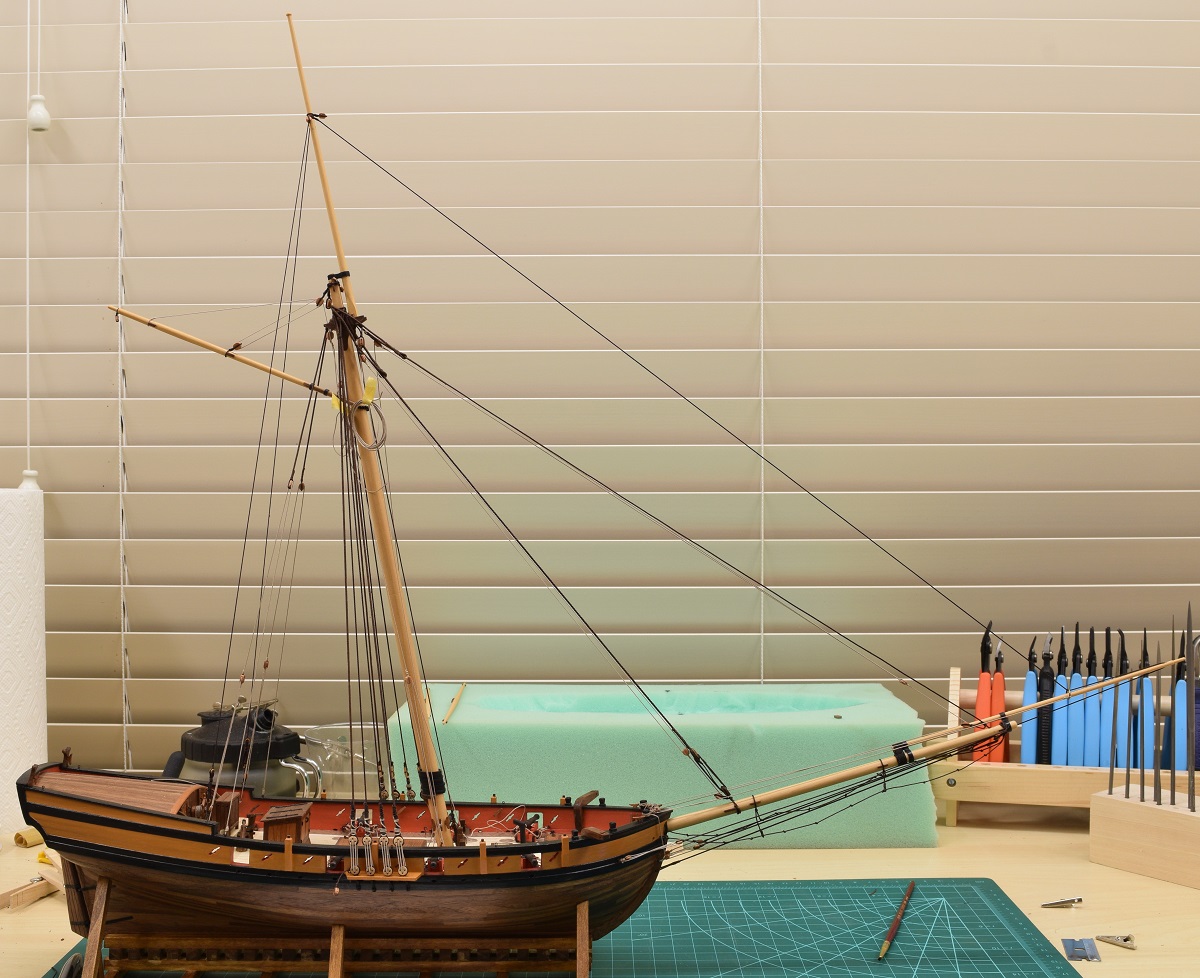
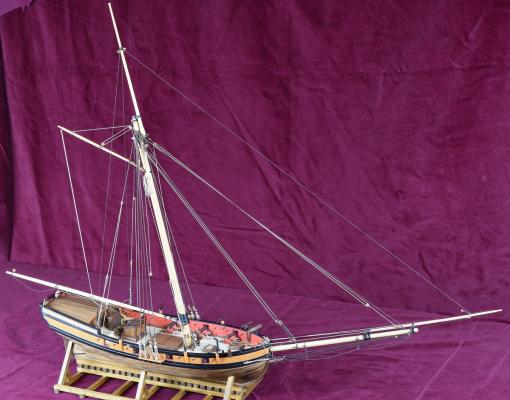
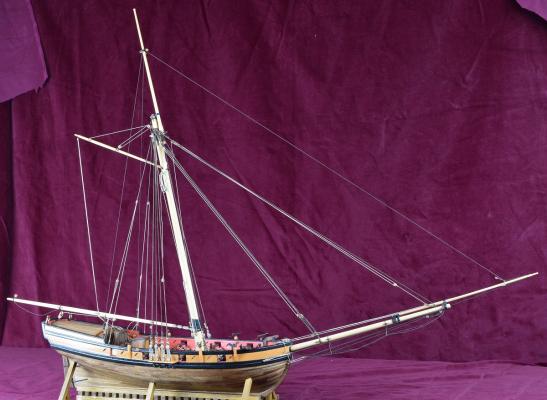
So after spending a wonderful long weekend in San Diego enjoying the Festival of Sail, I haven't gotten back to the AVS yet because I had to catch up on work and some other issues. Today was fix the plumbing in the house day, and then I wasted the rest of the afternoon & evening finally watching the final season of Justified off of Amazon streaming service. If you don't check the General Nautical Discussion forum - here is a link to the thread I started where I've posted over 100 photo's of the ships from the Festival of Sail - http://modelshipworld.com/index.php/topic/11351-san-diego-festival-of-sail-2015/ I have gotten back into the hobby room and pretty much figured out where I was when I last left off, and am going to try to get re-started on the rigging tomorrow and see what I can get accomplished. In the mean time, I took a couple pictures of where it was left off prior to the trip. Seems I managed to skip taking pictures and documenting the last couple of work sessions based on my last update here vs. what it looks like today! The jib traveler/inhaul arrangement looks much better now I think, and the main boom is mounted with foot-rope and the flag halliard, as well as the traveler on the cabin top (blackened brass) and the boom sheet is rigged.
- 831 replies
-
- 22
-
-
- Armed Virginia Sloop
- Model Shipways
- (and 1 more)
-
Furling a boom-footed forestaysail
GuntherMT replied to deltrott's topic in Masting, rigging and sails
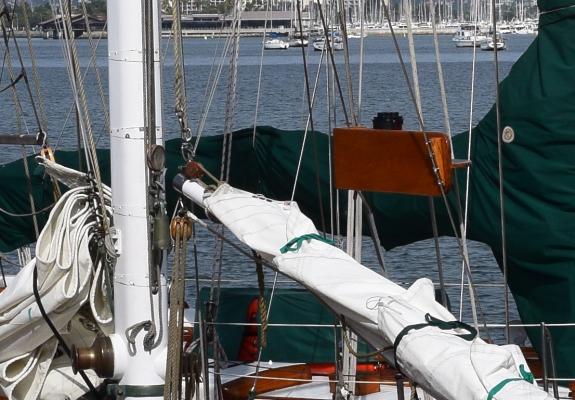
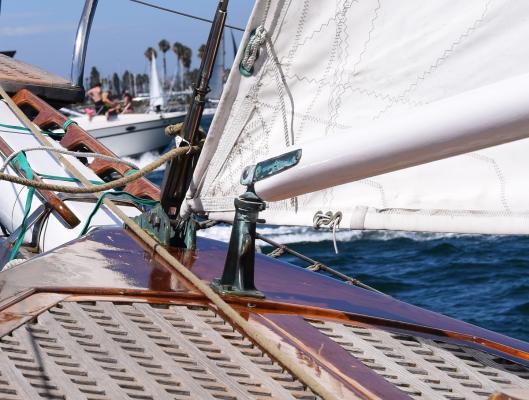
Not sure if this will help you or not, and the pictures aren't the greatest since I didn't see this thread before taking them, so they weren't actually attempts at photographing this specific feature. The Curlew was launched in 1926, and uses this boom-footed staysail rig. On the Curlew the tack is secured to the deck just ahead of the swivel point for the boom. The clew is attached to the boom with a rope attached to a single hoop that rides the boom, and the rope goes through a block on the end of the boom and secures back to about midway along the boom. They have no problem getting the sail tightly furled to the boom when it comes down, but I wasn't paying attention to that specific feature at the time, so did not notice how much they had to adjust the clew when it was done.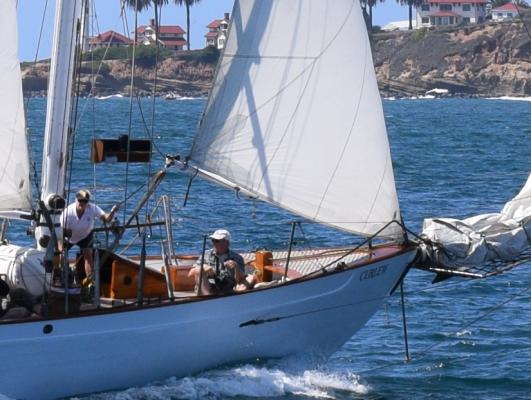
-
Too what degree are shrouds and stays served
GuntherMT replied to markjay's topic in Masting, rigging and sails
My understanding (and the method I used) is that all the shrouds are served where they wrap the mast, but only the shrouds that will be exposed to chafing by the sails would be fully served to the dead-eye. In the case of my AVS this meant that both the leading and trailing shrouds were fully served, but in some ships only the trailing, or only the leading shroud would be fully served, depending on the sail plan. -
Very nicely done. It's a very unique presentation that I've never seen done before, and the model is great! Also, great looking pup!
- 188 replies
-
- 1
-
-
- Sherbourne
- Caldercraft
- (and 2 more)
-
Nice to see an update Dave, I really like the treenails.
- 306 replies
-
- 1
-
-
- armed virginia sloop
- Patrick Henry
- (and 2 more)
-
I glued the masts on the Carmen (first build), but on the AVS the mast is held only by the rigging, and I see no reason to glue it, since there is no way for it to come loose without the rigging all being ripped out, at which point there is a disaster afoot that glue wouldn't have helped with!
- 389 replies
-
- 2
-
-
- scottish maid
- artesania latina
- (and 1 more)
-
I've only done the single ship with cannons (not carronades) and I couldn't figure out a reasonable way to rig them off the ship. I did use hooks on both ends of the tackle so that I could pre-rig the tackle, and then hook it into the eyebolts and tighten them. Was still quite fiddly and time consuming, but I have no idea how I would have done it prior to fixing the carriages in place, since I wouldn't have a way to get the proper positioning of the carriages with all the ropes in the way, and also no way to get the lengths right on the ropes (the breach lines mostly) without the guns on deck. I'm sure there is a way, and I'll keep prowling build logs until I see the magic system!
- 659 replies
-
- 4
-
-
- syren
- model shipways
- (and 1 more)
-
Welcome aboard Greg, Looking forward to seeing you start your build. It really is an enjoyable model to build. As far as sequencing, it's the rigging. There are many things that should be attached to the mast/bowsprit/boom/yards prior to them being attached. In addition there are blocks that are seized to other parts of the rigging (like the forestay and jibstay). Seizing these prior to placing the stays would make it much simpler. Basically, when you get to the rigging portion, take the two chapters (standing/running) and put them together, then go through them page by page all the way through, making notes on what items get attached to what. Whenever you see something that needs a block attached, go through the sequence and see if it could be attached before other things are placed. For example - Put all the blocks that are attached to eye-bolts on the deck in place on the deck before placing the mast, or the riding bitt! Don't put the top-mast on the main-mast until you have placed *all* of the blocks and stuff that wrap around the main mast, even though the instructions have you placing the top-mast on quite early. Speaking of the top-mast, it's impossible to assemble it per the practicum. Once the cast fitting is placed onto the main-mast, the only way the top-mast can be put through the fitting is from below, since the square 'foot' of the topmast is larger than the circular opening in the fitting. You either have to wait to place the fitting until you are mounting the top-mast (probably the right way to do it), or do like I did, and insert the top-mast from below, and place the fidd later, instead of prior to assembly. I should have probably kept detailed notes on sequencing, except that I'm very unlikely to ever build this kit again, so I didn't. Sorry about that. Having said all of the above - I really have found the practicum quite helpful at keeping me on track, as I tend to wander and lose focus, so a specific order of doing things (up until the rigging) really was a great thing for me. Even when I've ignored methods in the practicum, I was still using it as a sequence guide, and there are a lot of great tips and tricks for a new person to the hobby. When you get to the rigging if you don't do like I did and try to blindly follow it page by page, but instead read through all of it and make yourself notes and a plan, it will work great I believe.
- 831 replies
-
- 8
-
-
- Armed Virginia Sloop
- Model Shipways
- (and 1 more)
-
You are a lot braver than me, I went with much simpler builds for my first & second builds both! Good luck, and enjoy the journey.
-
At this time I have no plans to add sails. I was considering doing furled sails, but I think I'm probably going to leave the poles bare on this build. I think to do sails (even furled ones) right, I'd need to understand the running rigging better, which hopefully will happen in the process of finishing this, so that I can properly plan for them and adjust accordingly when I do choose to try that in a later build.
- 831 replies
-
- 6
-
-
- Armed Virginia Sloop
- Model Shipways
- (and 1 more)
-
Excellent idea, and it certainly sounds like it should work well.
- 389 replies
-
- 4
-
-
- scottish maid
- artesania latina
- (and 1 more)
-
I just finished making some eye-bolts. I just used small brass rod - .020" from K&S Engineering which is typically stocked at Hobby Lobby or your local hobby shop. You can also order brass rod in whatever size you want from here - http://www.specialshapes.com/roundsolbars.html
- 467 replies
-
- 1
-
-
- fly
- victory models
- (and 1 more)
-
I really like that anchor, it is nice to see you making a non-western style anchor to complement the ship. Well done!
- 270 replies
-
- 3
-
-
- red dragon
- artesania latina
- (and 1 more)
-
Thanks all, While this may be true, the fact that *I* can figure a lot of this out now that I'm running into it and re-reading the plans/instructions again, makes me believe that if I'd realized it and had done a thorough read through with notes for the purpose of determining what could be done when, I would have eliminated a lot of the issues I'm running into. Don't get me wrong, the practicum has been a huge help throughout this build, and even with the rigging he has some great tips & tricks, but the order of the assembly in the rigging phase only is.. not well thought through, or at least not written well. Based on the photos he did quite a few things on the actual model in a different order than the writing. I'll admit that as a QA analyst, I tend to be overly critical, but I think that someone writing a practicum shouldn't expect the reader to read ahead and change the order of things on their own, especially if it's only their first or second build, which is the target audience of the practicum in the first place.
- 831 replies
-
- 3
-
-
- Armed Virginia Sloop
- Model Shipways
- (and 1 more)
-
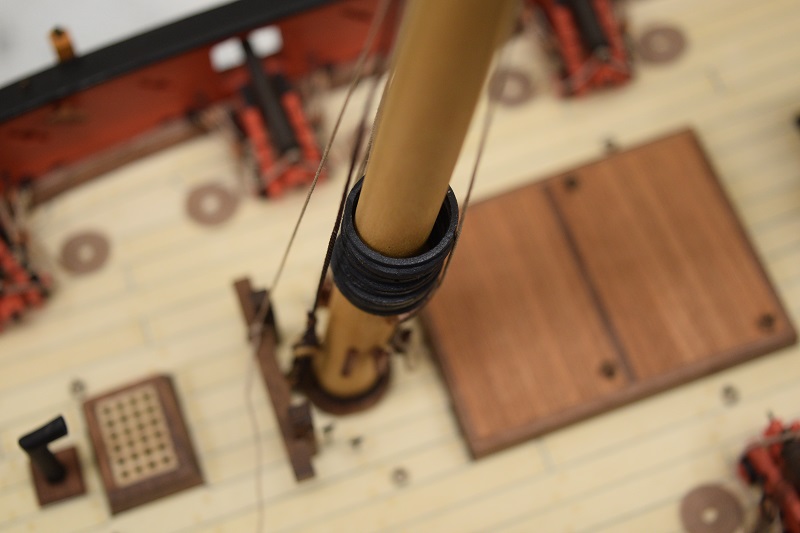
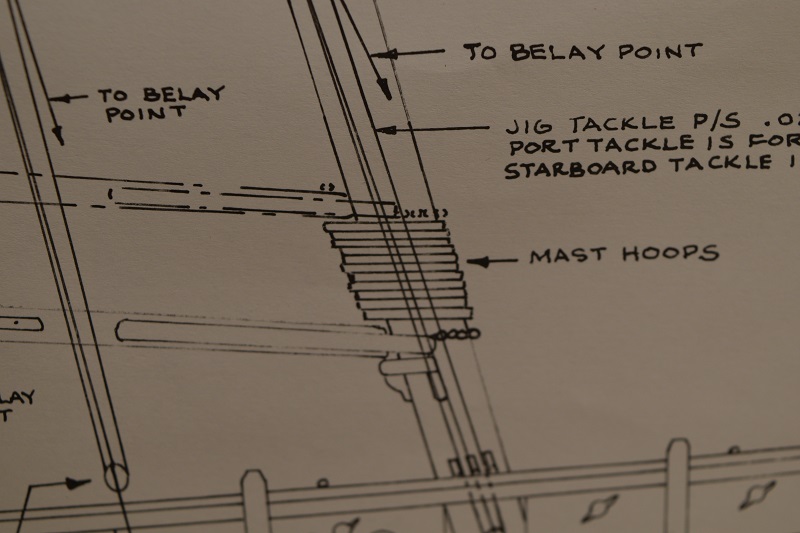
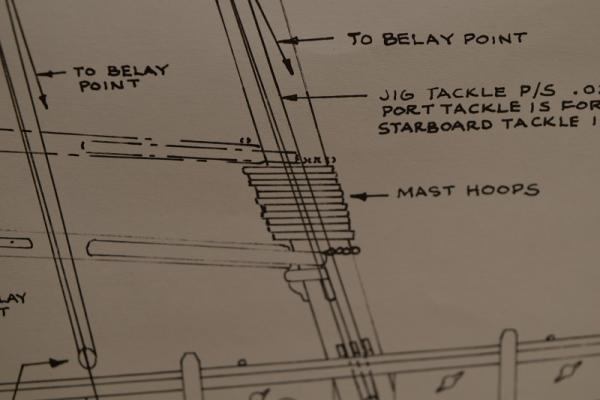
I think they are probably a little large, but without any context to compare them to, I doubt that anyone would notice or think they were out of place. Of course the only thing I have to compare to myself is the AVS. Here are a couple shots of the hoop size on the plans, and how they look on the ship. These are the kit hoops.

- 389 replies
-
- 3
-
-
- scottish maid
- artesania latina
- (and 1 more)
-
Actually the deconstruction part is already done. It's the reconstruction part I need to do now. Side note: Anyone planning to go to the San Diego Festival of Sail next weekend? I'm going to go and waste lots of time sailing multiple times per day as well as in the parade of sail on Friday and would be down for meeting up with anyone else who is going to be around sometime during the weekend if it worked out.
- 831 replies
-
- 4
-
-
- Armed Virginia Sloop
- Model Shipways
- (and 1 more)
-
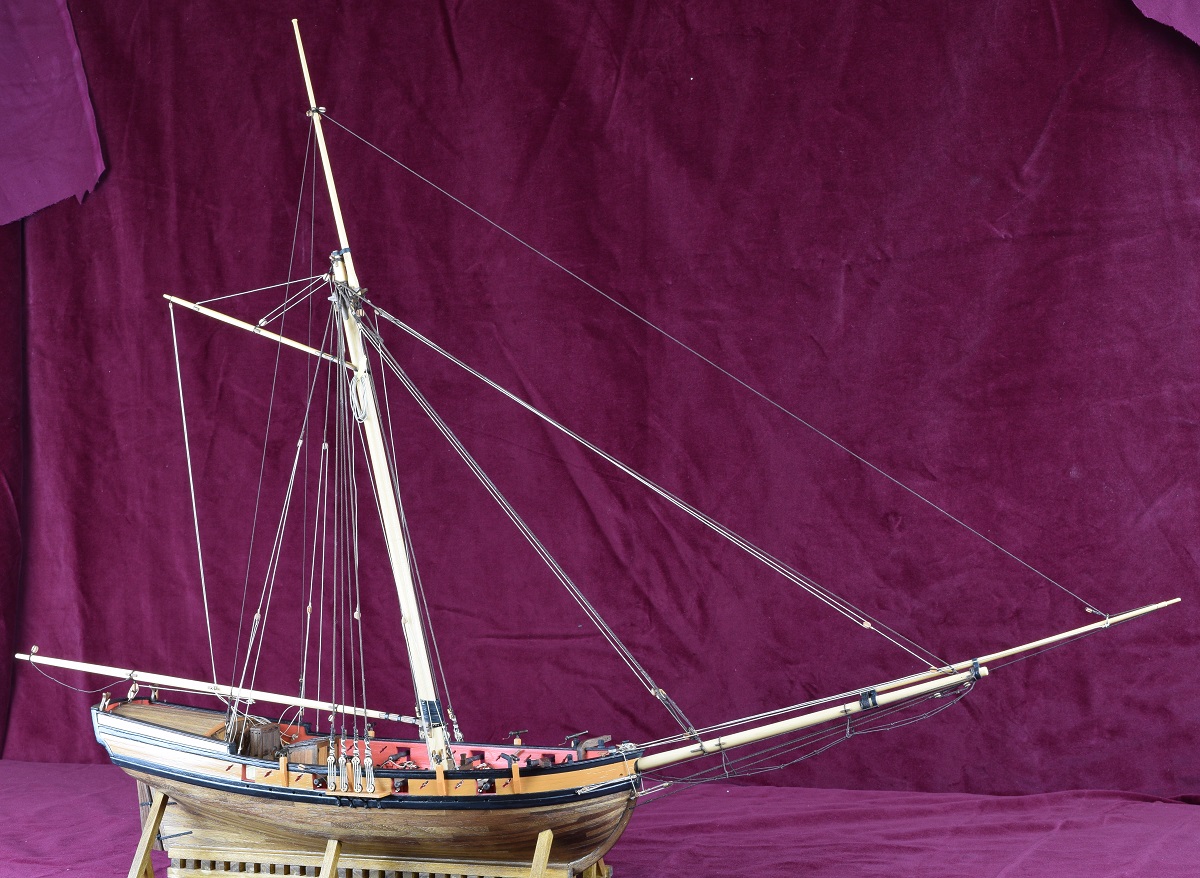
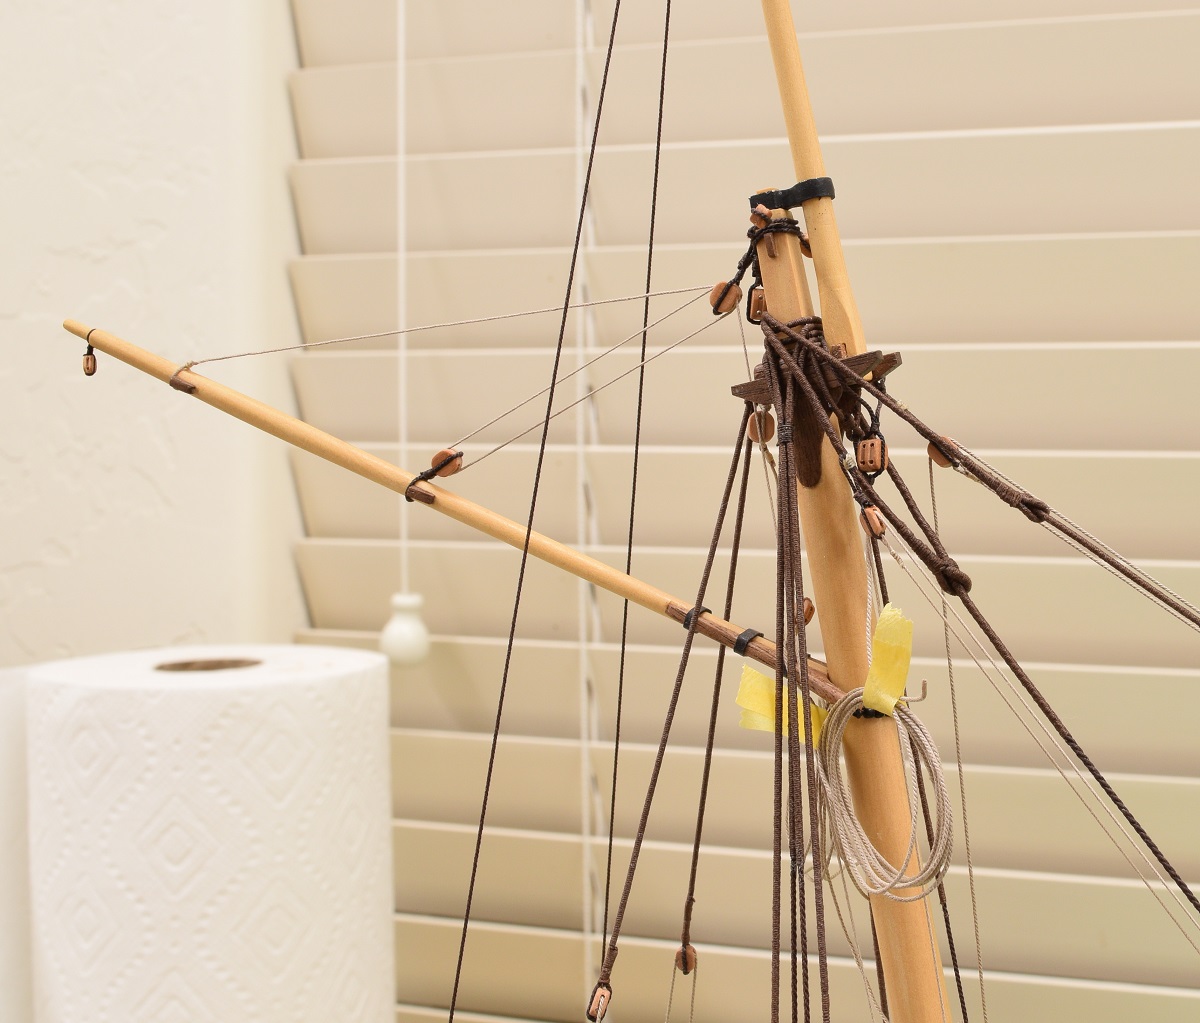
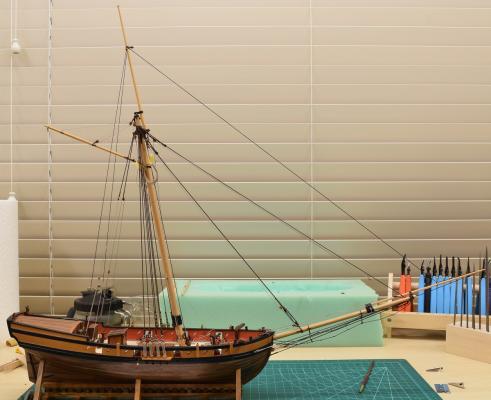
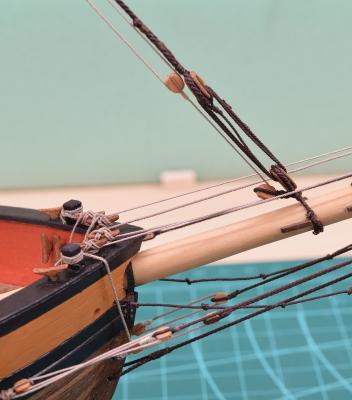
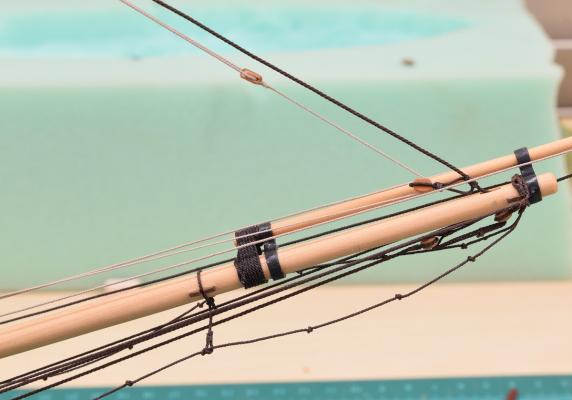
Standing rigging was completed by adding the bowsprit shrouds, and I'm working through the running rigging now. I have already learned an important lesson in rigging. No matter how good I think my research and sources are on the rigging, walk through the entire process myself, at least a few times, and make my own 'order' and checklist. I'm running into so many things that really should have been added at a much earlier time because it would have been so much easier, whether it be the blocks that are seized to the stays, to the various blocks on the masts, or the Jeers block. All of them could have been done easier (and better) at much earlier stages in the rigging. Anyway, I've completed the following (I think): Bowsprit shrouds. Jib Halyard, downhaul, and tackle. Fore Staysail Halyard, downhaul, and tackle. Gaff rigged and mounted. Gaff Peak Halyard and tackle. I've also added a bunch of blocks to the mast and top mast, as well as some ropes that attach to those blocks which can be seen taped up into coils. Some photo's. I have also realized that the jib traveler ring is too far back on the jib boom, and because I'm an idiot I already trimmed the in-hauls that hold the traveler ring, so I removed both of those, and tomorrow I'll redo that entire thing so that the dark rope that is the farthest one out on the jib boom will be much closer to the tip of it, giving me more room for some of the other lines and tackle that have to be added.


- 831 replies
-
- 24
-
-
- Armed Virginia Sloop
- Model Shipways
- (and 1 more)
-
Looks good. This is the first build I've seen that uses that system of building two halves and joining them together. I wonder what the benefit is to doing it that way?
-
HMB Endeavour by mikec - Eaglemoss
GuntherMT replied to mikec's topic in - Kit build logs for subjects built from 1751 - 1800
Great looking rigging, and that mouse is fantastic. What do you do to get that 'tarred' effect on the served line like where the collar is around the bowsprit? -
You'll find that in many cases (especially the lanyards for the shrouds) that the simple act of threading them through the dead-eyes or blocks will make them pretty easy to keep taught. When I'm working on the rigging and want to hold a line in place temporarily I just use a small alligator clamp and clamp the end off to some piece of rigging that's handy in the direction I want it to go (more often then not that means clamping it back to itself). Once I'm happy with the alignment of everything, I'll seize the line in place, and then remove the alligator clamp and trim the excess.
- 389 replies
-
- 4
-
-
- scottish maid
- artesania latina
- (and 1 more)