

captain_hook
-
Posts
675 -
Joined
-
Last visited
Content Type
Profiles
Forums
Gallery
Events
Posts posted by captain_hook
-
-
-
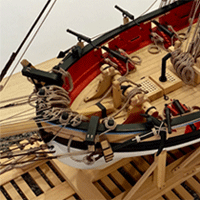
The Badger and the AVS - both 1:48 scale.

- BenD, Edwardkenway, GuntherMT and 6 others
-
 9
9
-
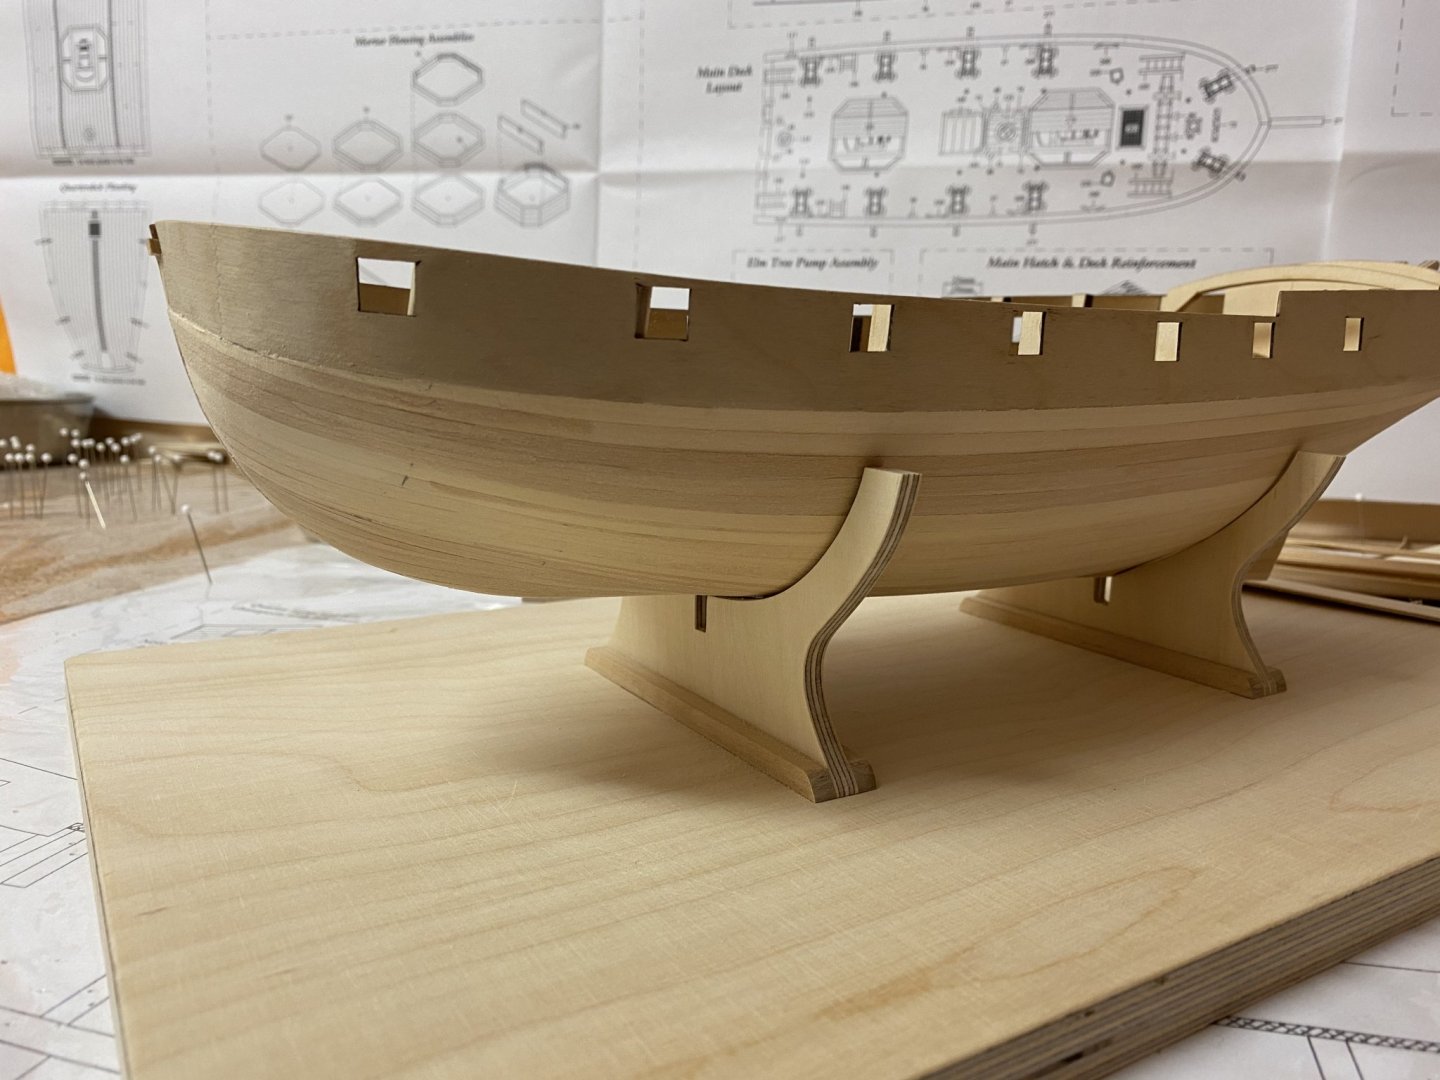
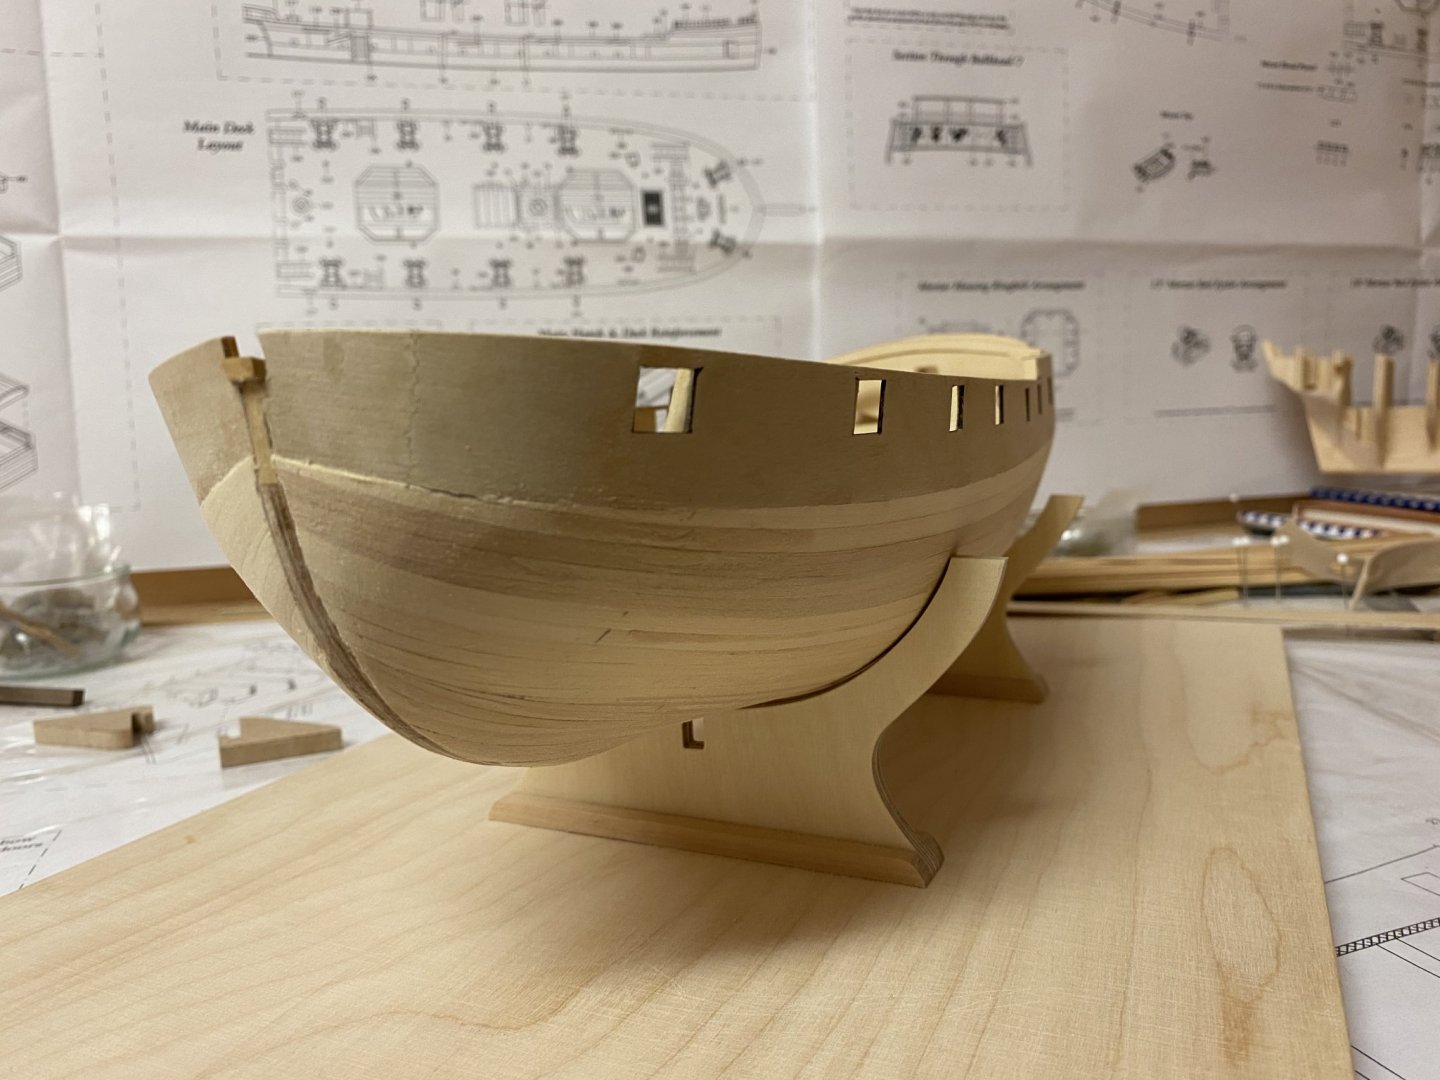
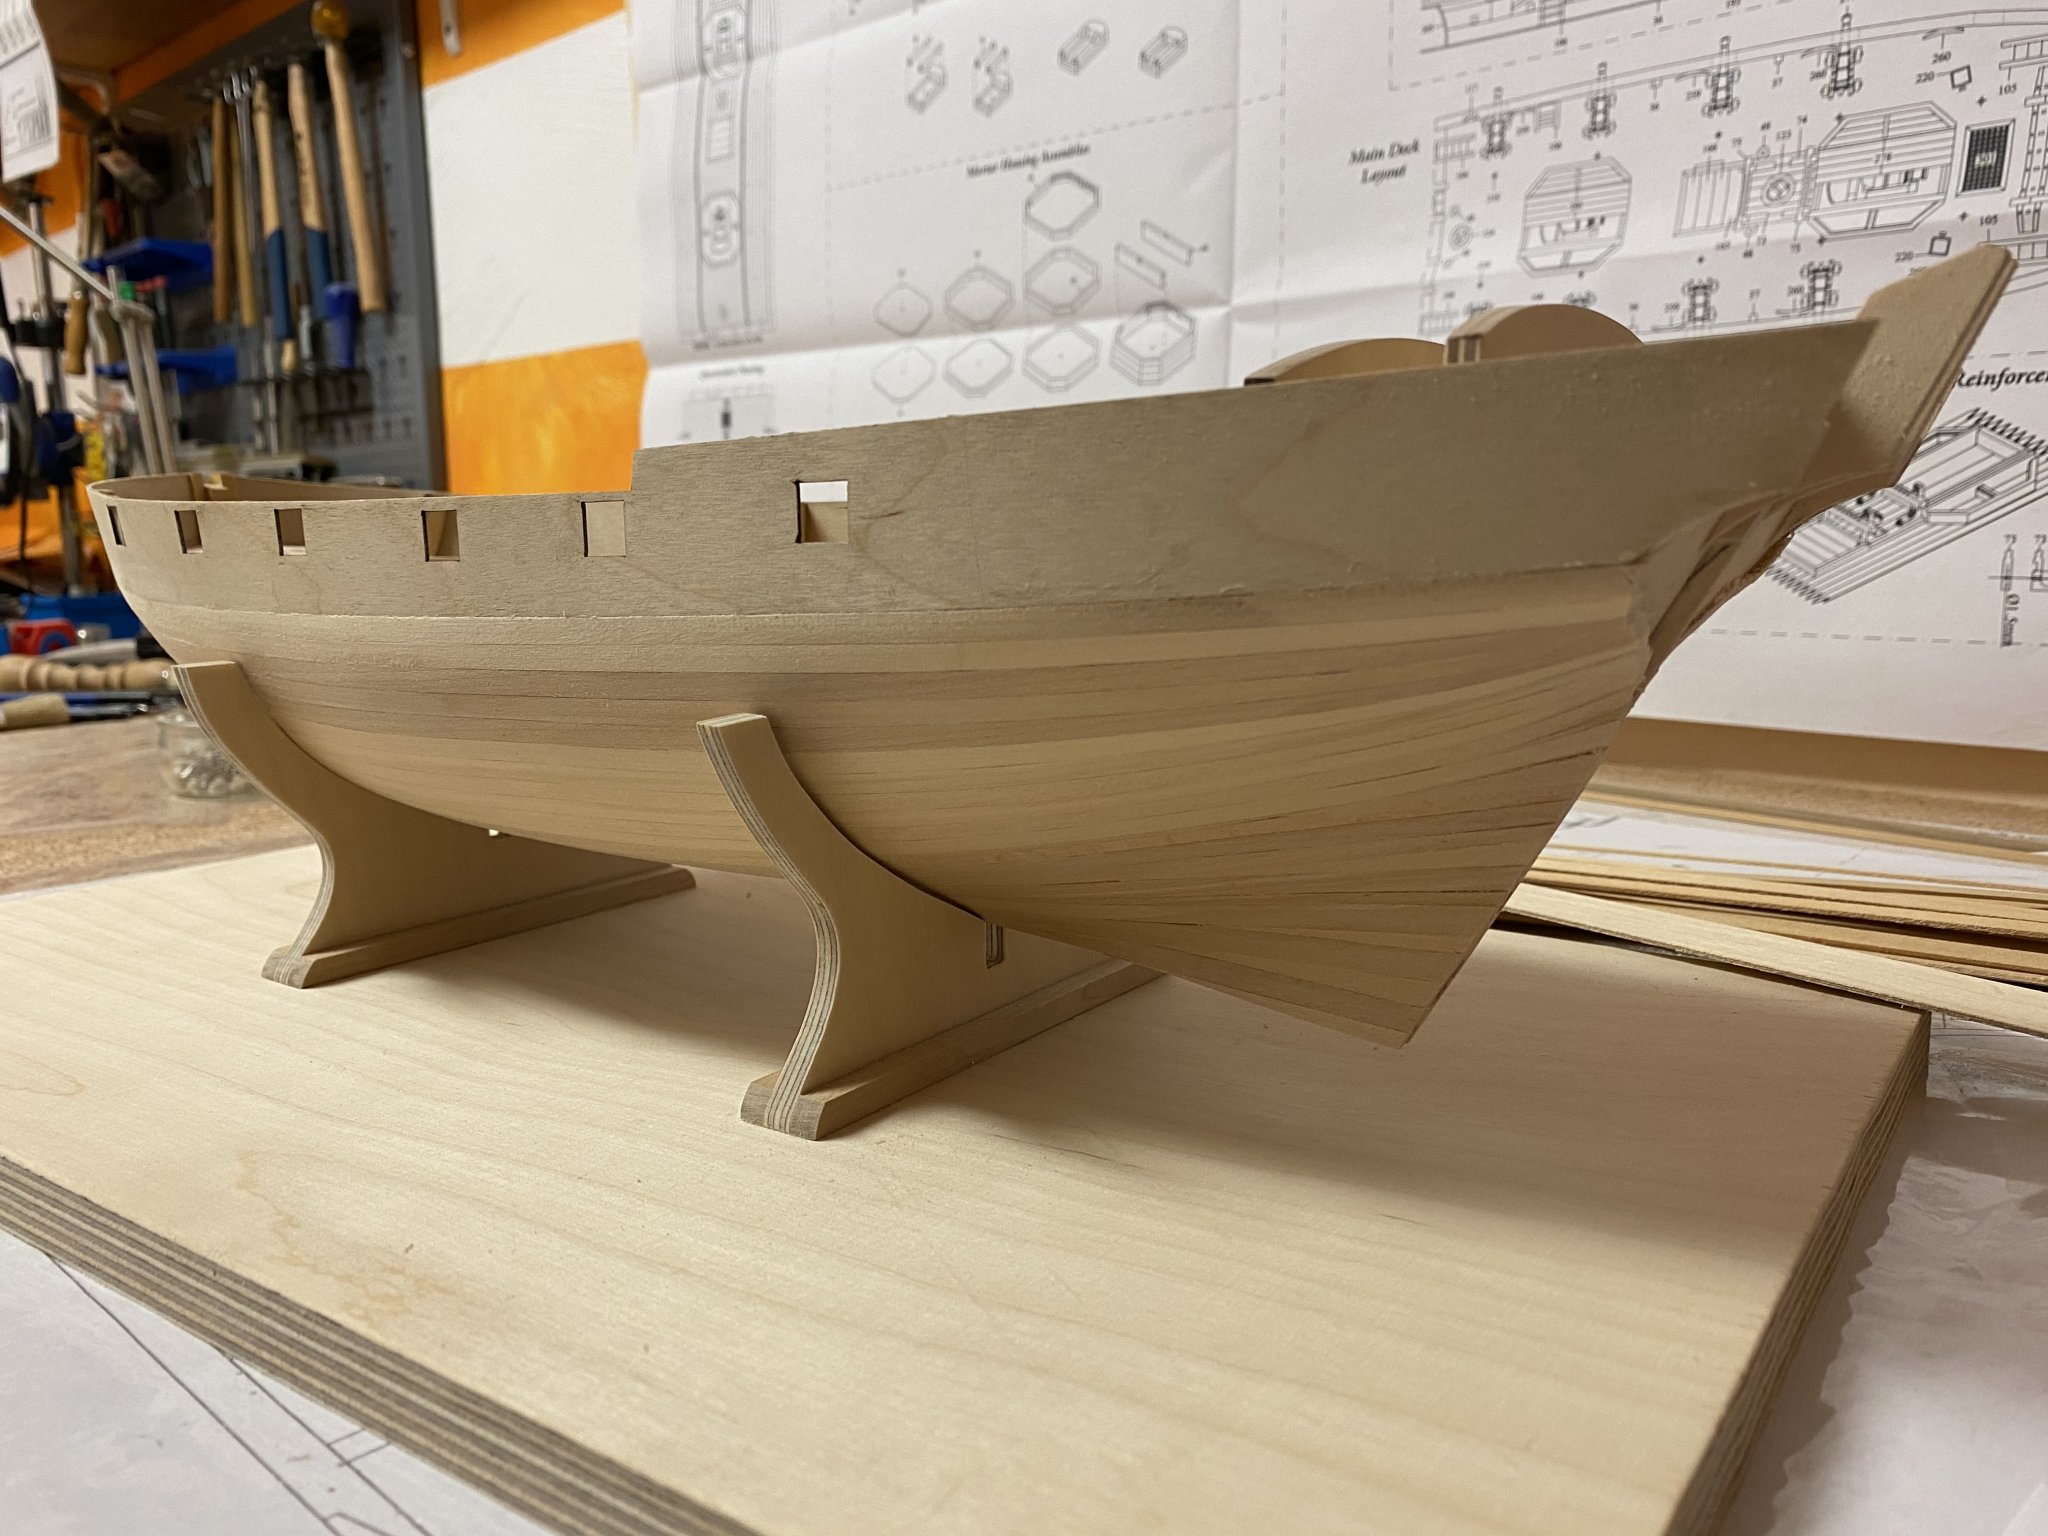
Finished the first planking today. As my stock of basswood stripes depleted during the planking process I had to improvise a little, so the planks vary in colour and size. Already sanded the hull with 80 grit sandpaper. The 1,5mm basswood is thick enough to be sanded to shape without the need of using wood filler and I can glue the second planking directly onto the sanded hull with white glue. Will give it another sanding with finer paper and some tuning of the basswood later and add the rabbit.


- GrandpaPhil, mugje, Landlubber Mike and 5 others
-
8
-
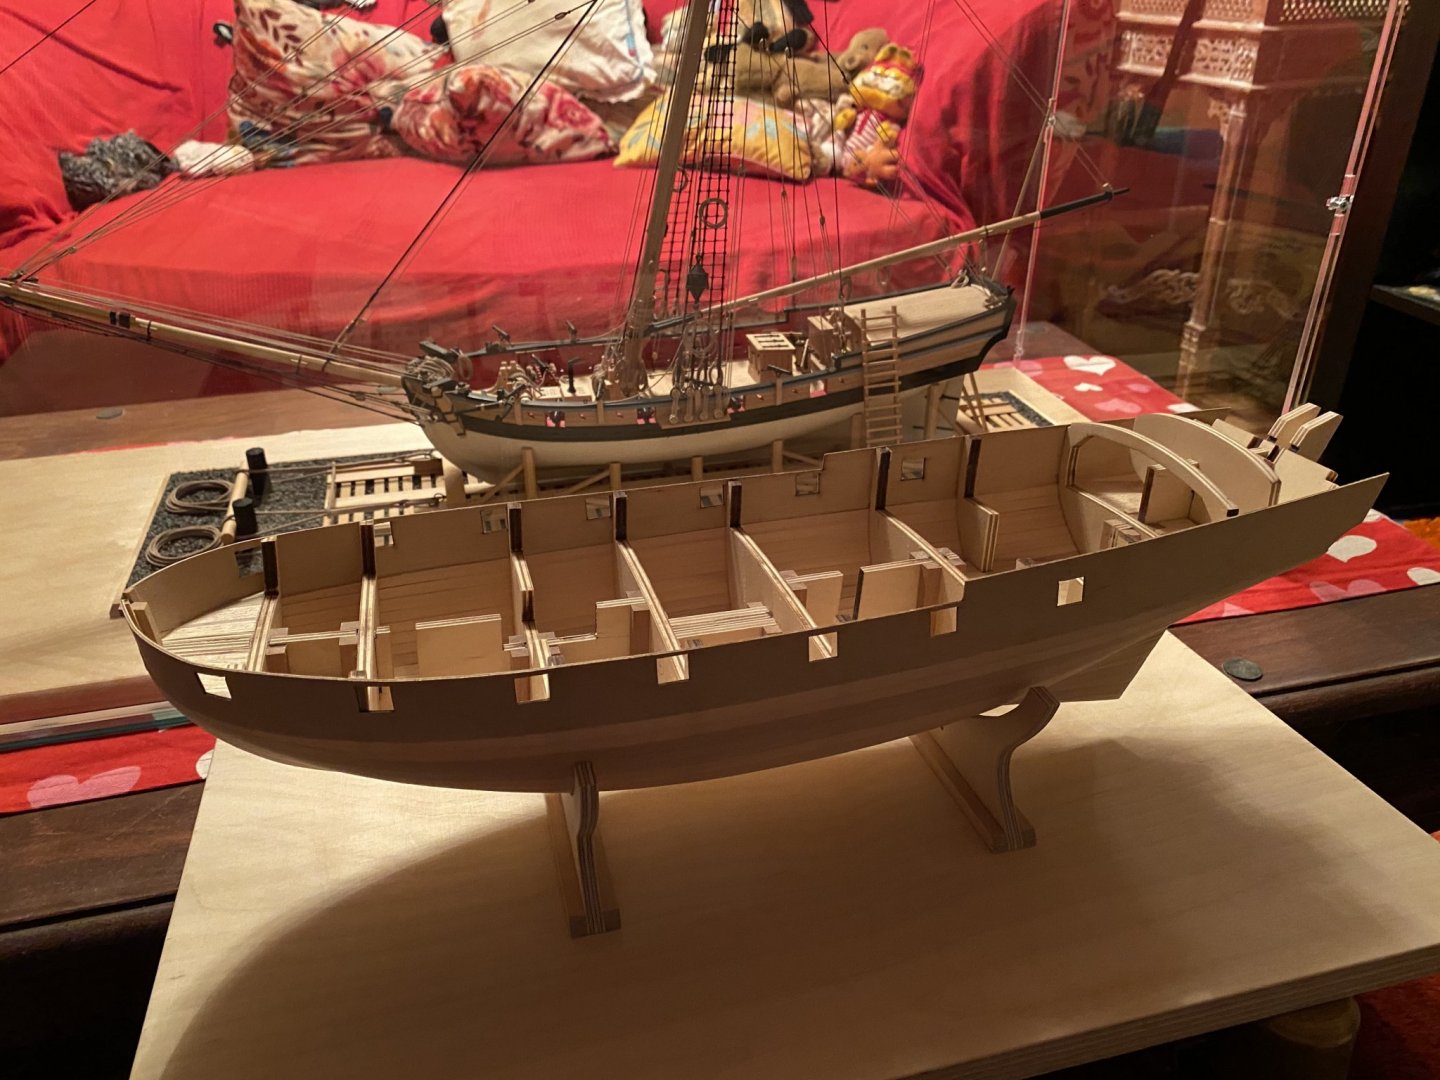
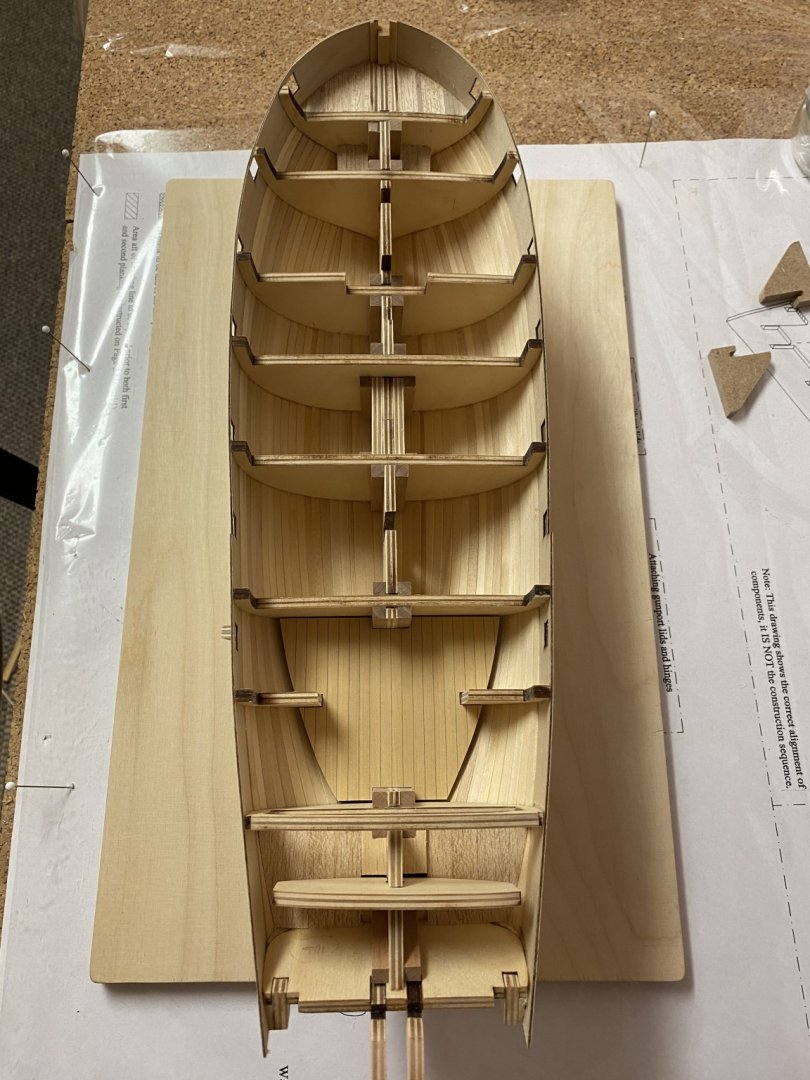
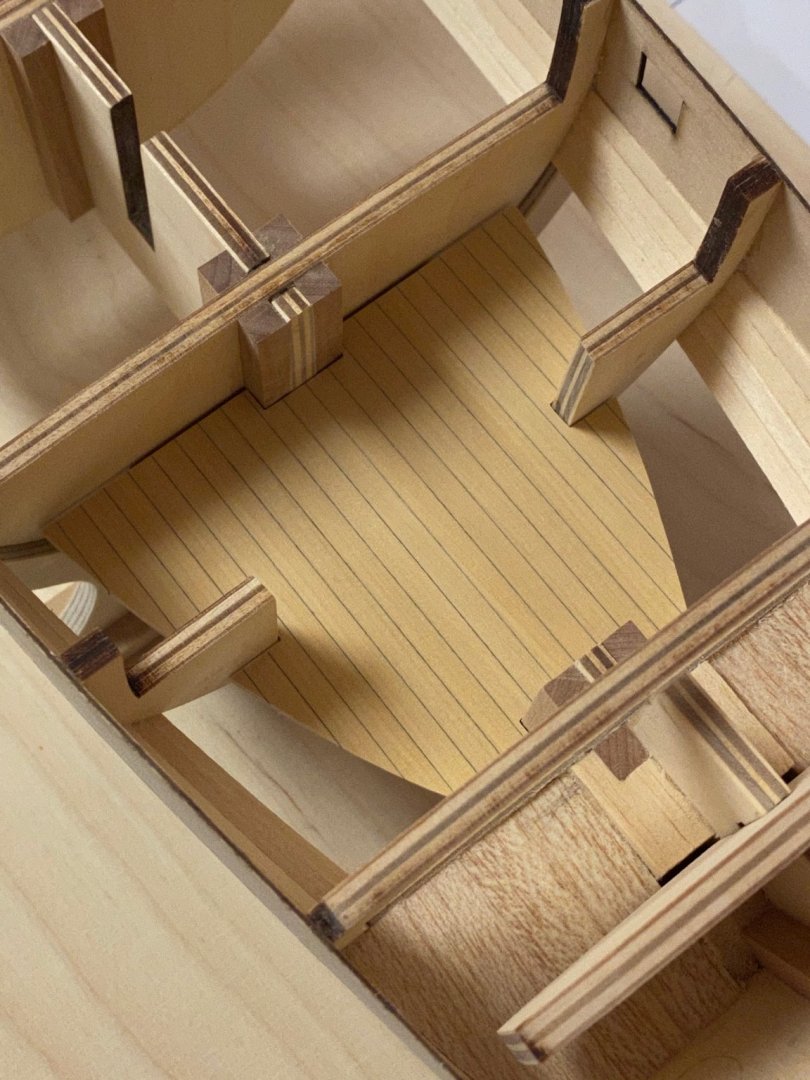
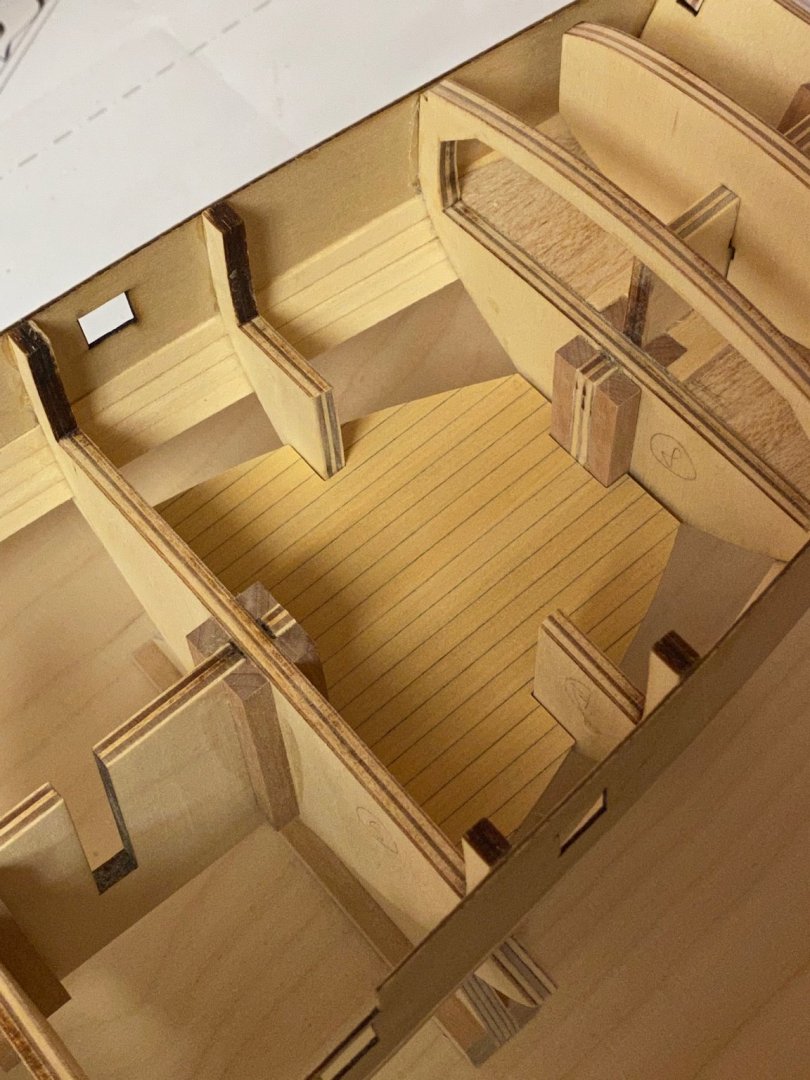
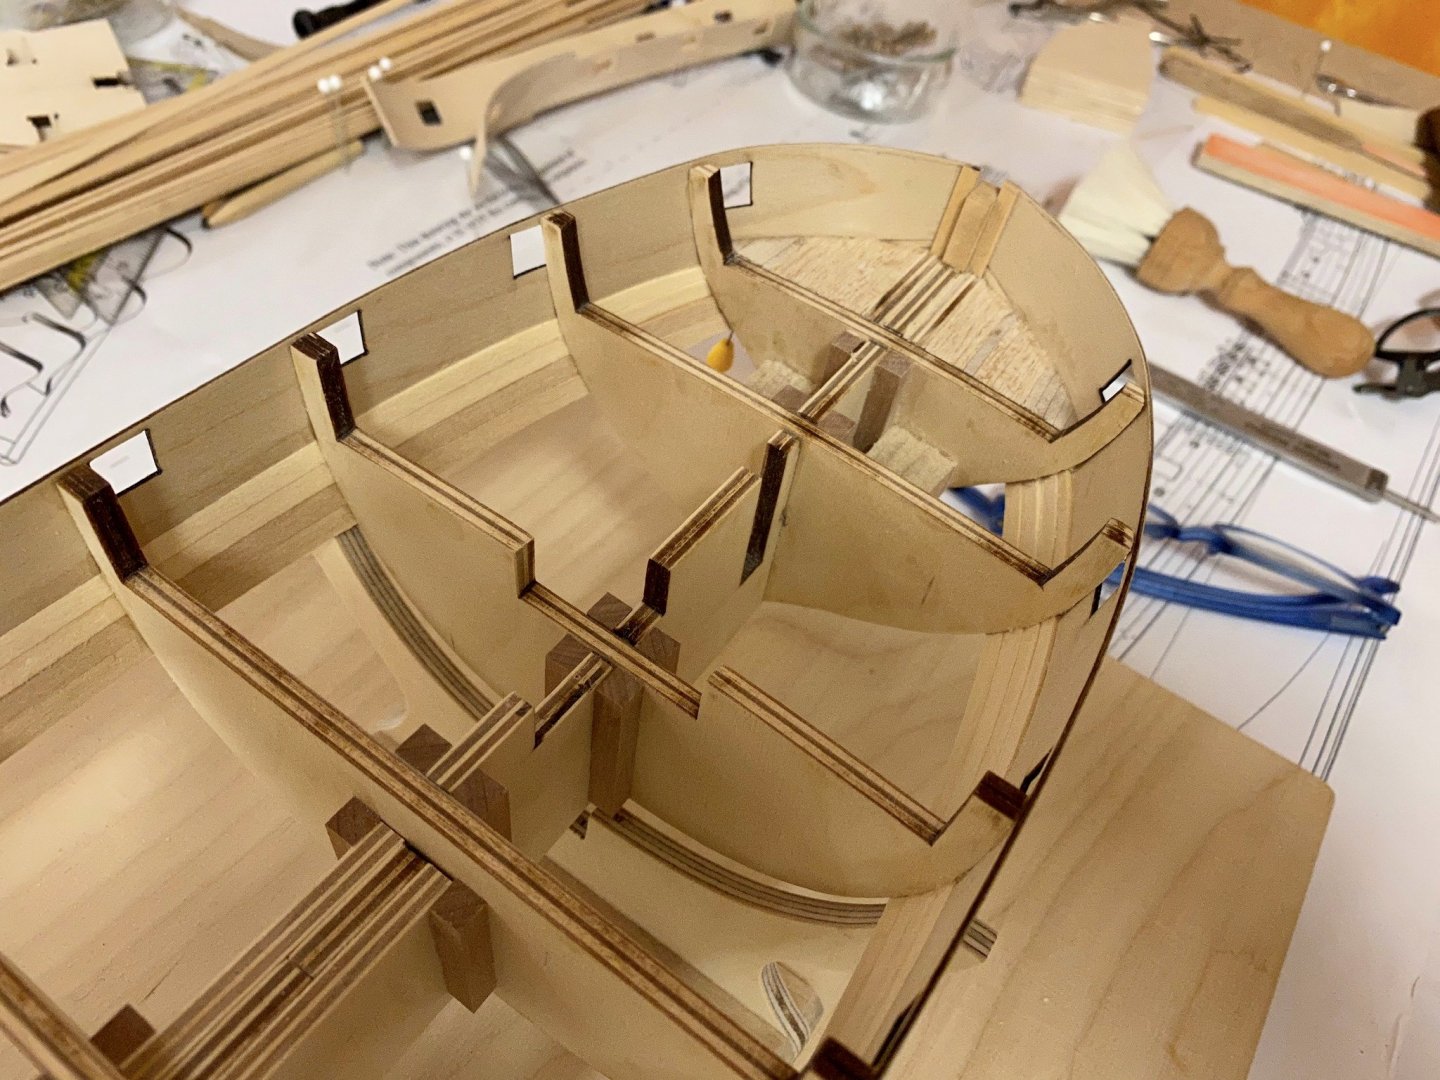
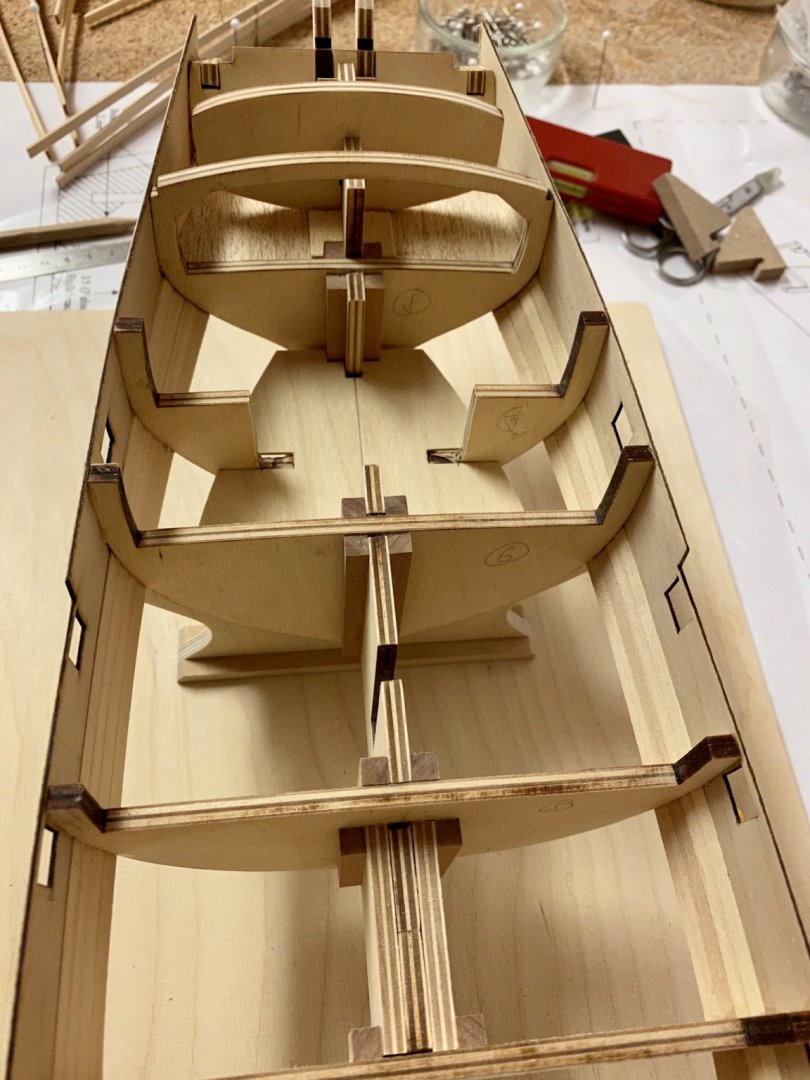
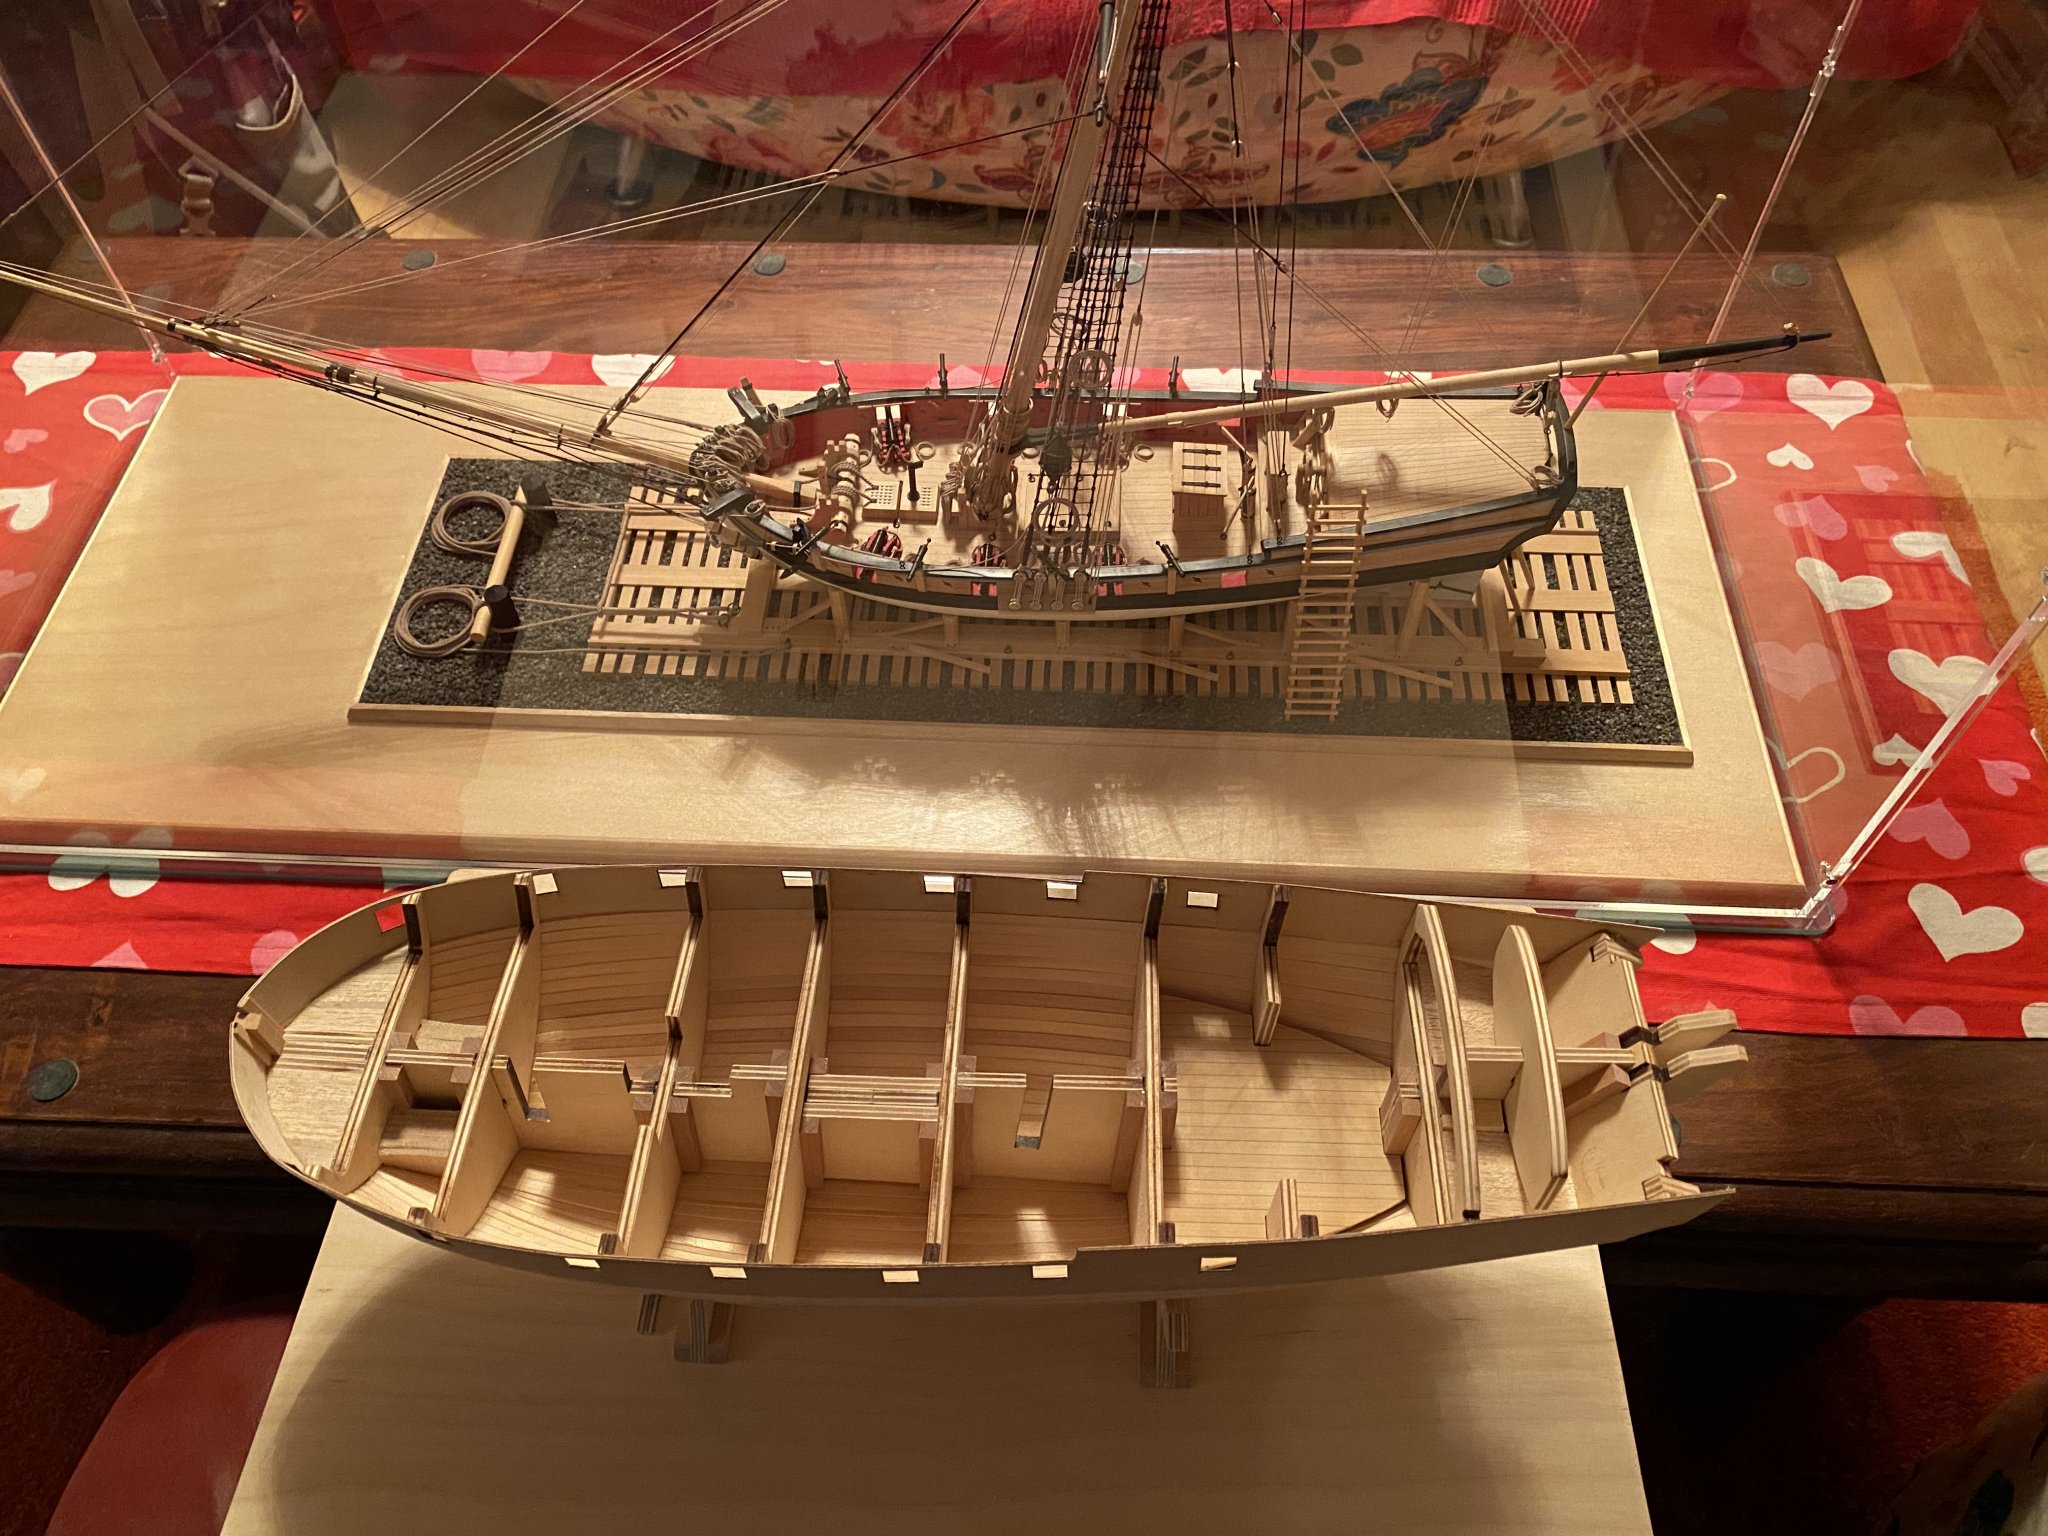
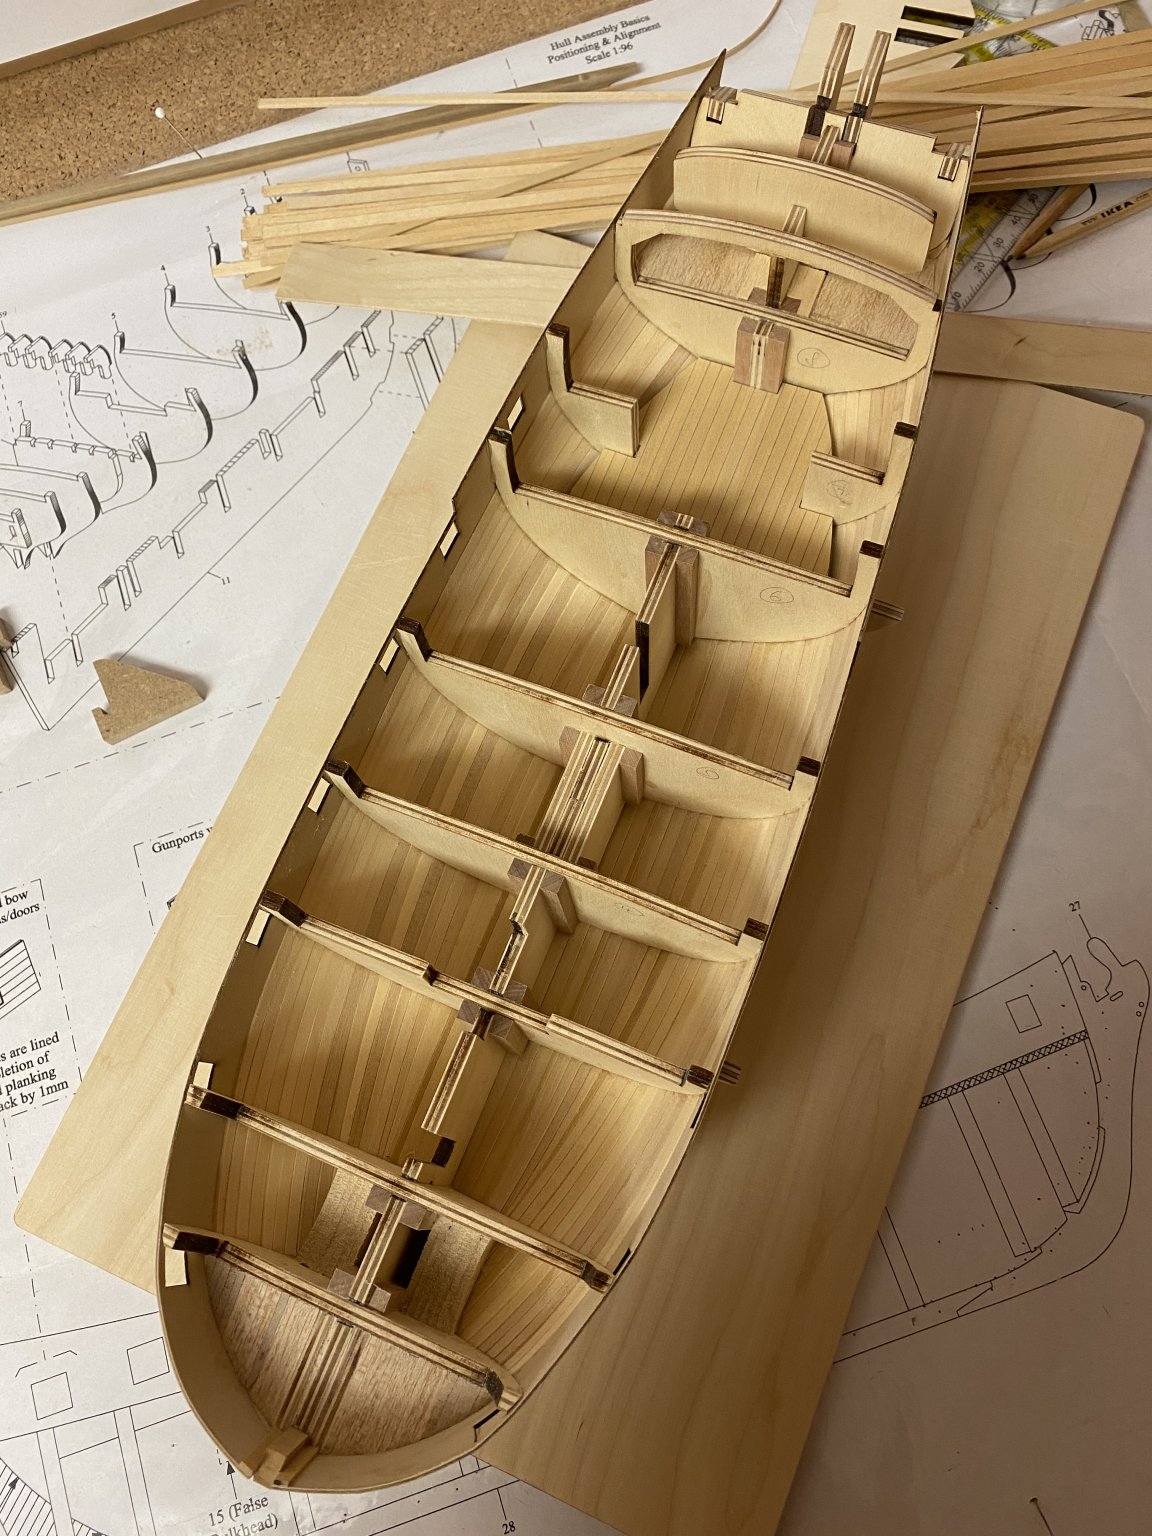
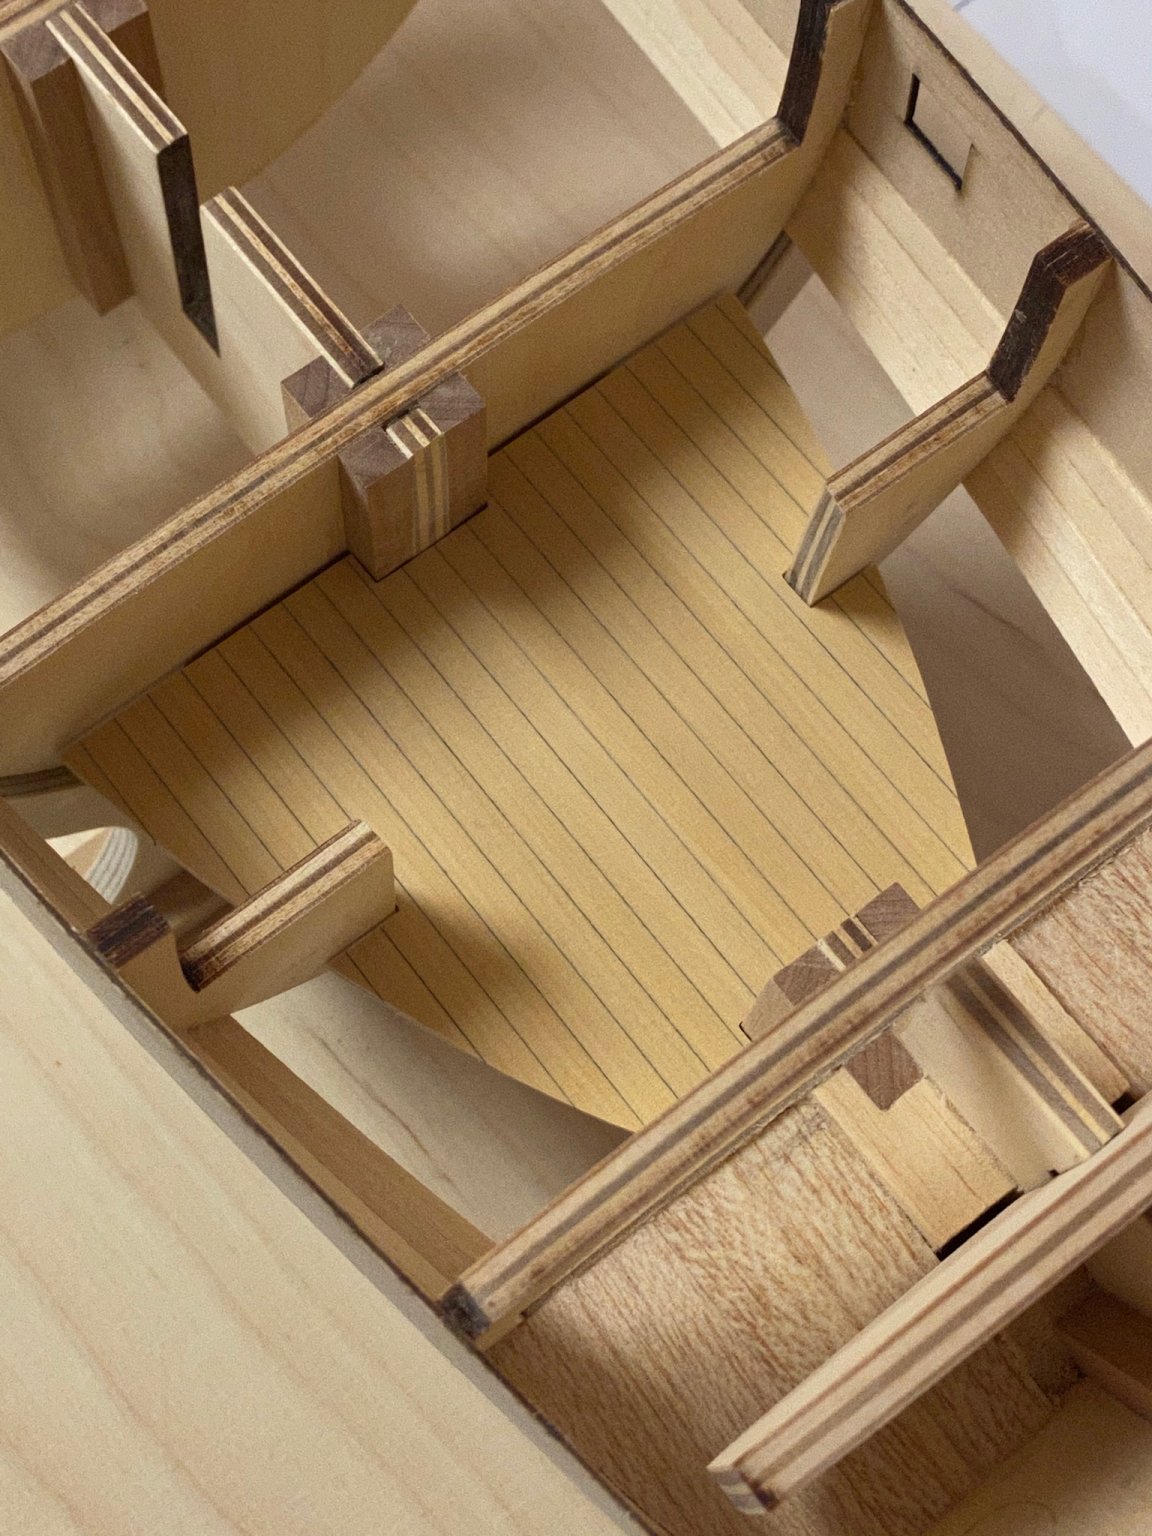
Installed the subdeck, not glued yet. It is planked with 3/16‘‘ boxwood stripes. I think about adding some fake walls to cover the sides of the bulkhead and the filler blocks but they won‘t probably be visible through the hatch. Maybe I will just paint that black before the false deck is attached. I will also skip the treenails on the subdeck because they won‘t be seen there too.
- Ron Burns, mugje, GrandpaPhil and 4 others
-
7
-
Only small progress. First planking has begun. But I have holiday for the next three weeks so next days I will be busy in my workshop..
- mtaylor, GrandpaPhil, Ryland Craze and 5 others
-
8
-
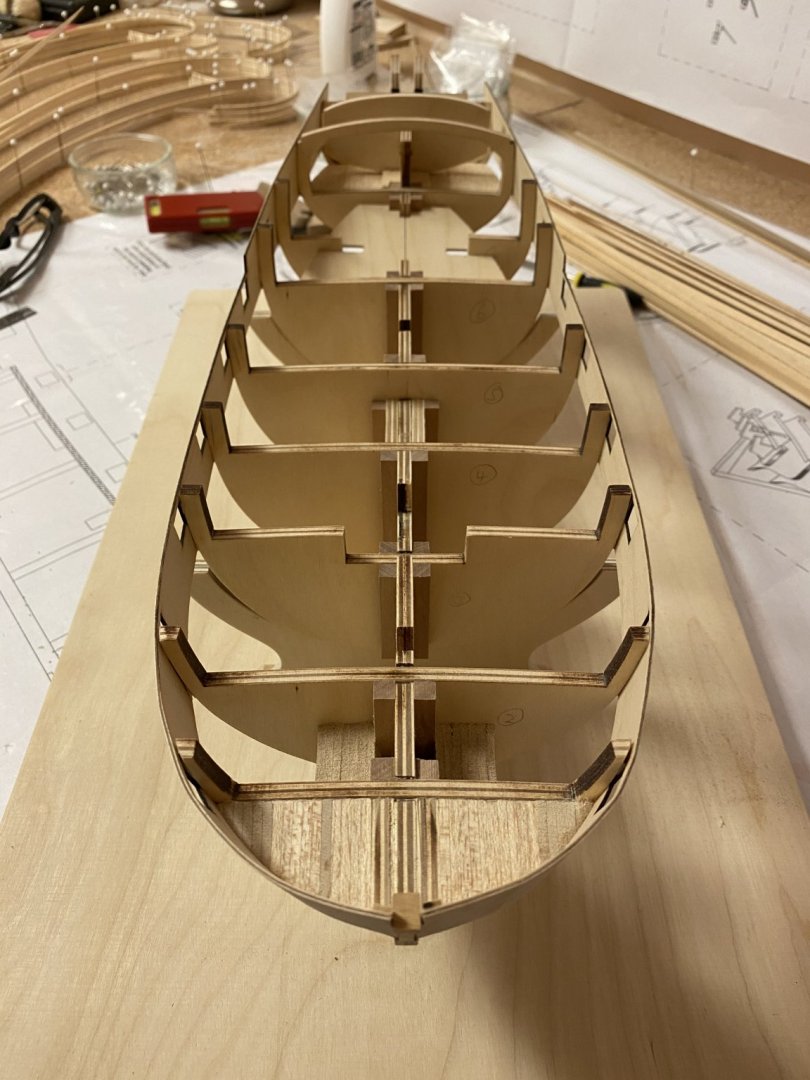
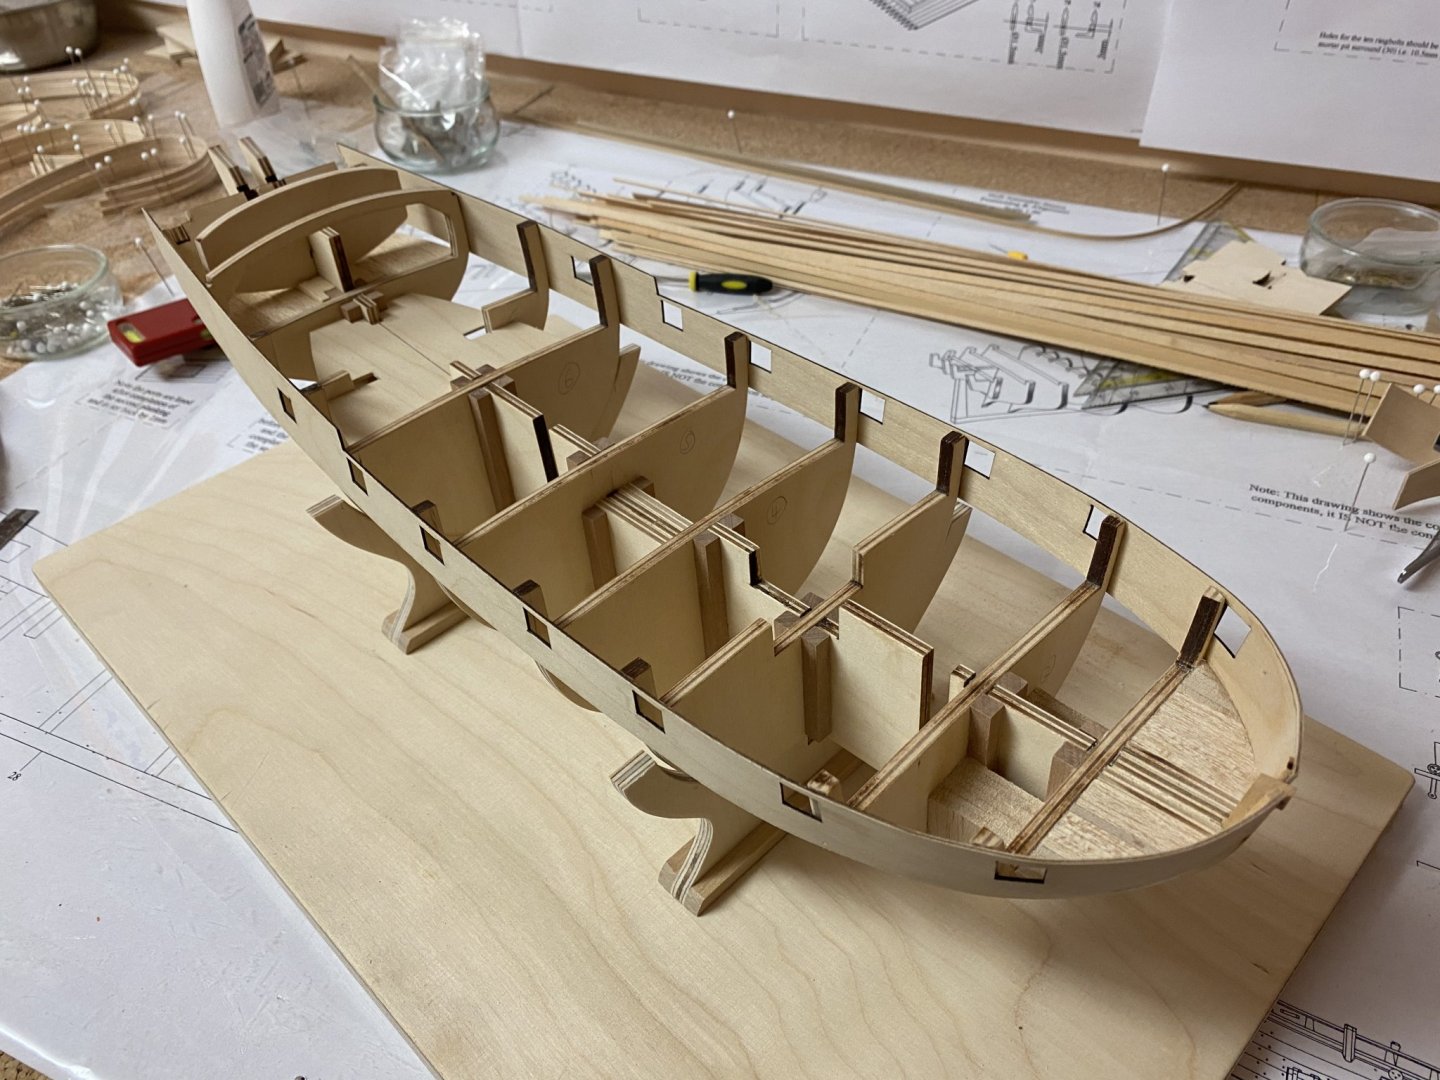
The bulkheads, false keel, deck and gunport pattern are all laser-cut to build the basic structure and to avoid as many errors as possible, which can't be corrected later. From that on it will be mostly scratch-building.
- mtaylor and Edwardkenway
-
2
-
-
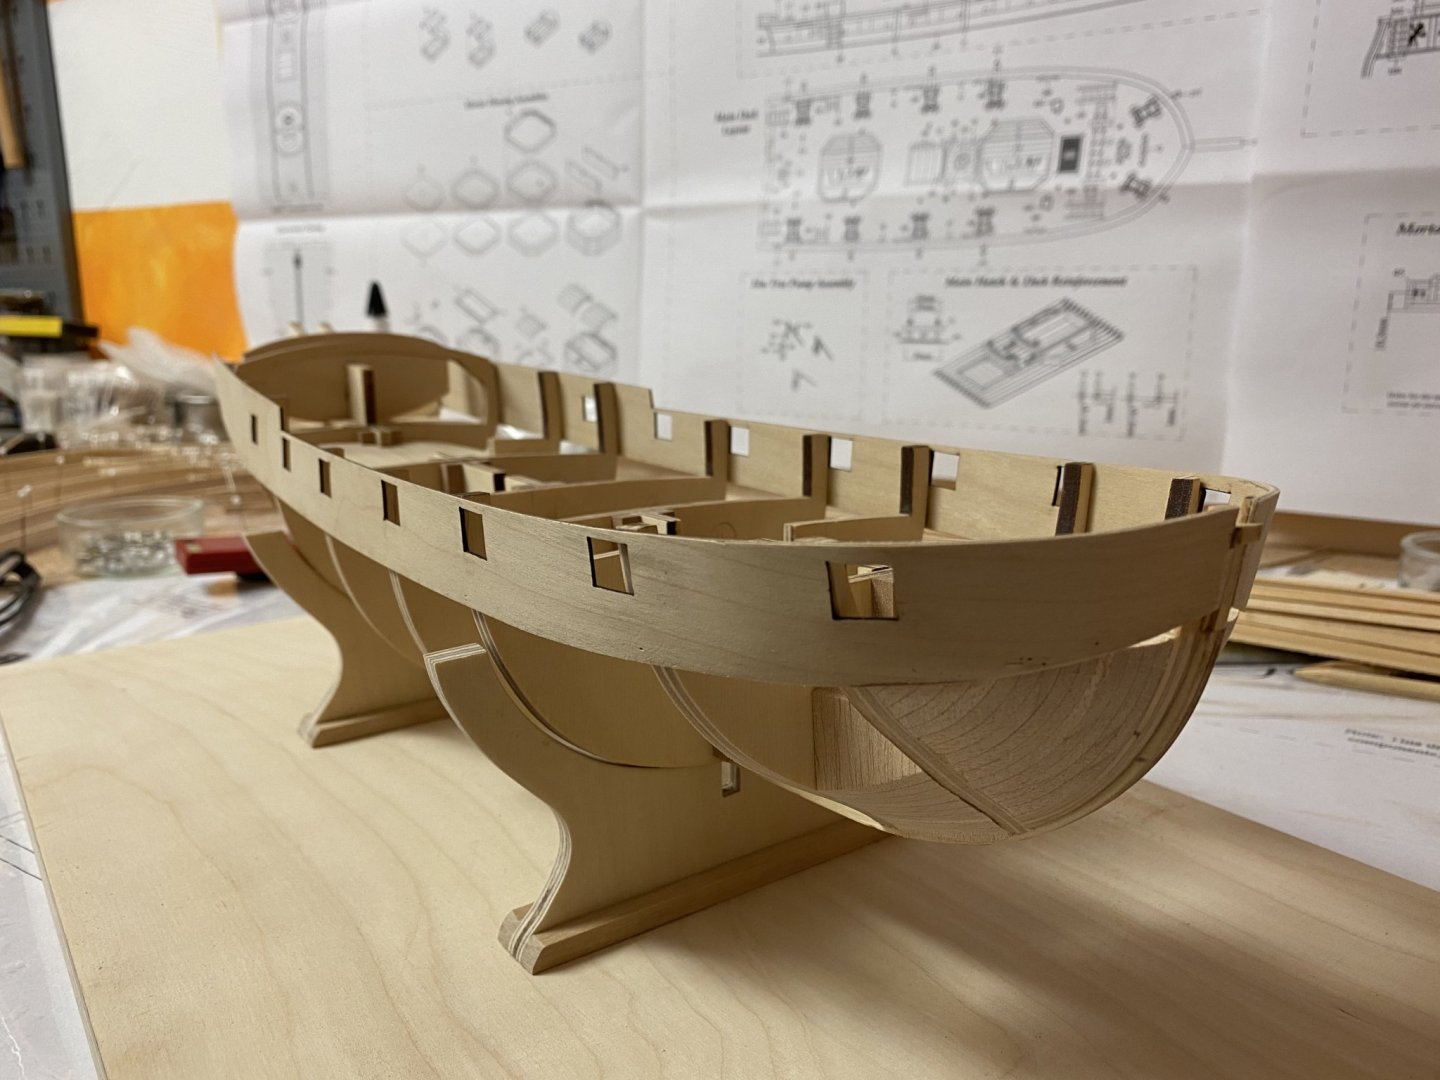
Thank you guys. The gunport-pattern has been installed, it is slightly smaller that the one on the plan. Now I‘m ready for first planking which will be done with 1,5 mm x 5 mm basswood strips. Now the shape of the hull can already be imagined...
- GrandpaPhil, mtaylor, JpR62 and 7 others
-
10
-
Thank you HardeeHarHar for your interest. But I‘m afraid the first planking has to wait until I finished that on my side-project. Stay tuned..
-
-
Congratulations! A really beautiful ship.
- mort stoll and mtaylor
-
2
-
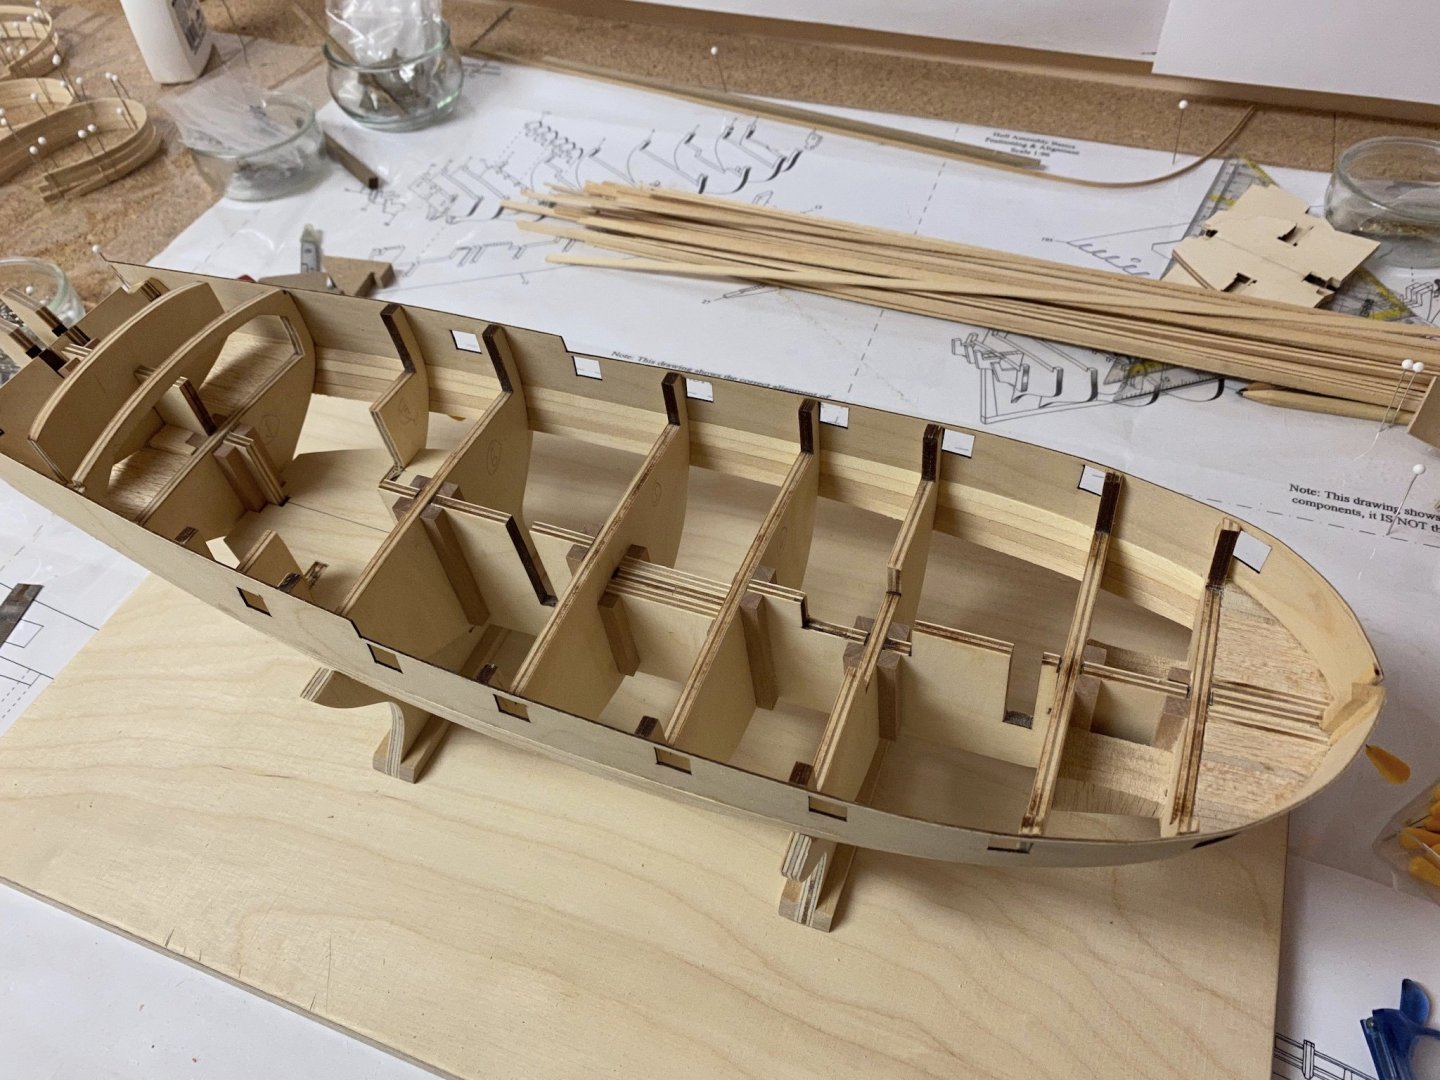
This is my first semi-scratch build and it is more like an experiment, which may possibly end in an epic fail. I bought a Caldercraft Badger and Granado kit from eBay (from a guy who probably gave up this hobby) some years ago for a reasonable price and the Badger had been already started but with some mistakes. I kept both kits in storage and did some easier builds instead. A friend of me had recently bought a simple CNC laser engraving machine (to cut ribs for RC-Planes) and I had the idea to build a bigger version of the Badger instead of fixing the already started kit. I also would like to add some extra details and make some changes to the hull and structure according to the NMM plans. There has been a discussion about this before to prepare that build.
I decided to enlarge the plans to 1/48 scale, redraw the bulkheads with Corel Draw to add a rabbit, redesigned the center plywood piece as two parts instead of one (because the machine’s working area is restricted to 30cm x 40cm) and create dxf-files to let him cut the parts. After some trial parts he was able to cut all the bulkheads, the false keel, plywood deck and gun pattern for me. Although the engraving machine was not designed to cut 5mm plywood, the parts are usable. So I started to build a 1:48 version of the Badger, which will be approximately 80 cm long and 70 cm high. I will mainly use the supplied Caldercraft plans but enhance the build with the NMM plans that I will also use for reference.
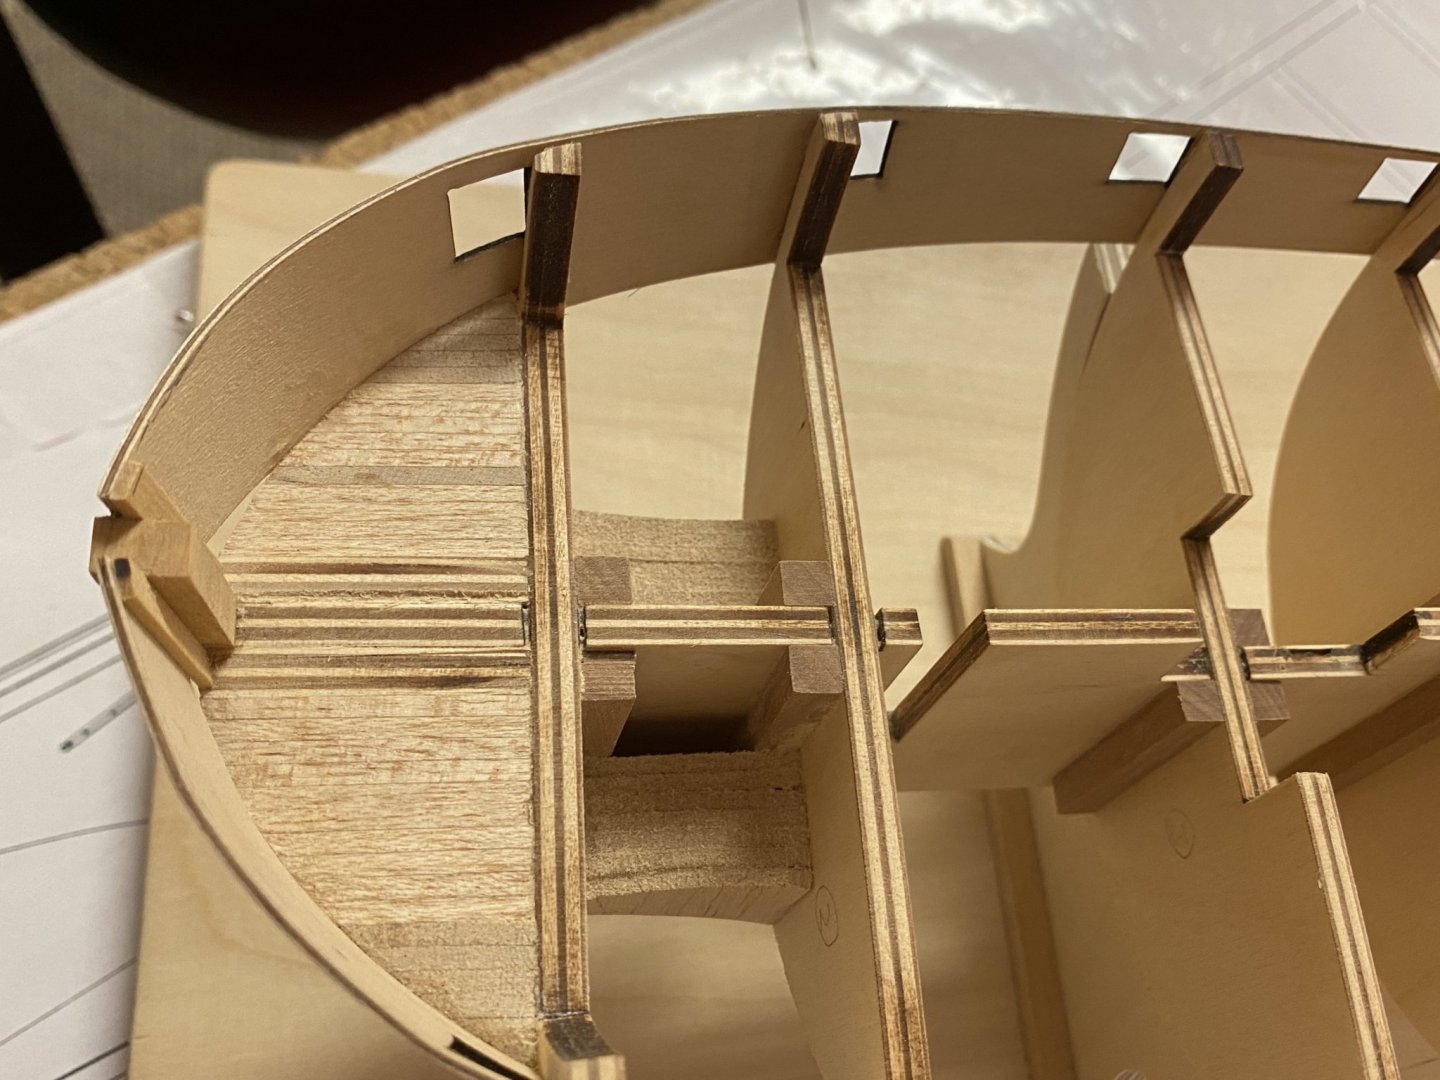
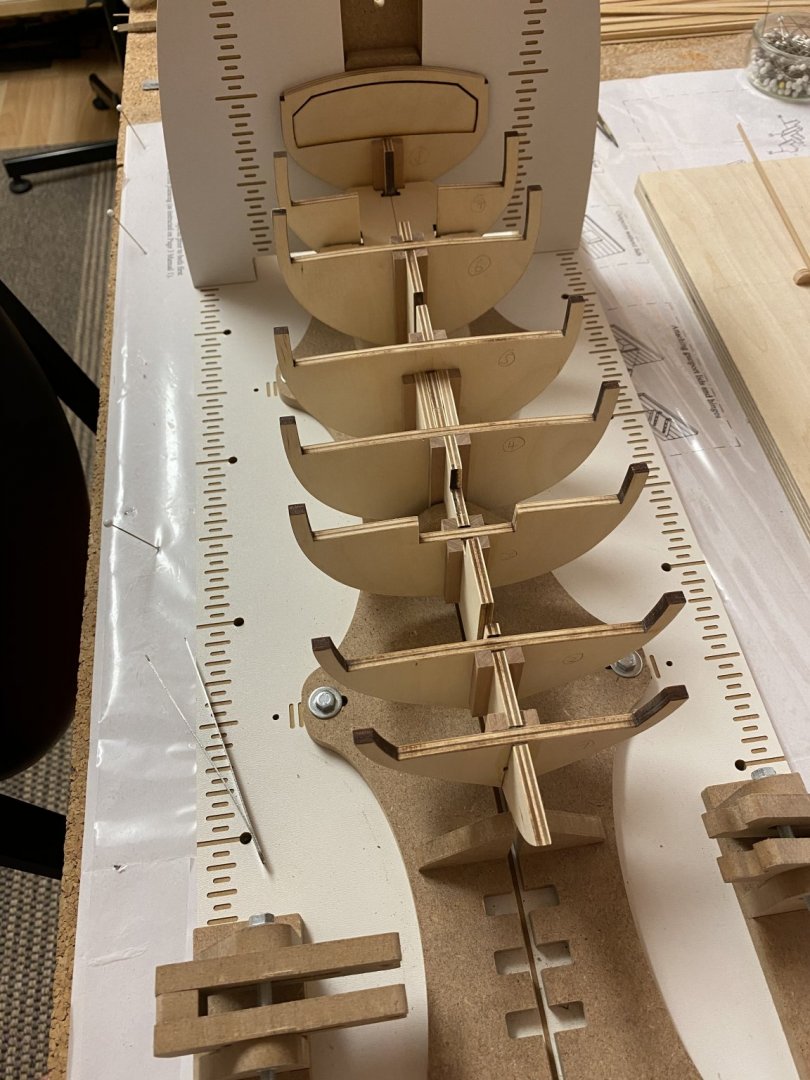
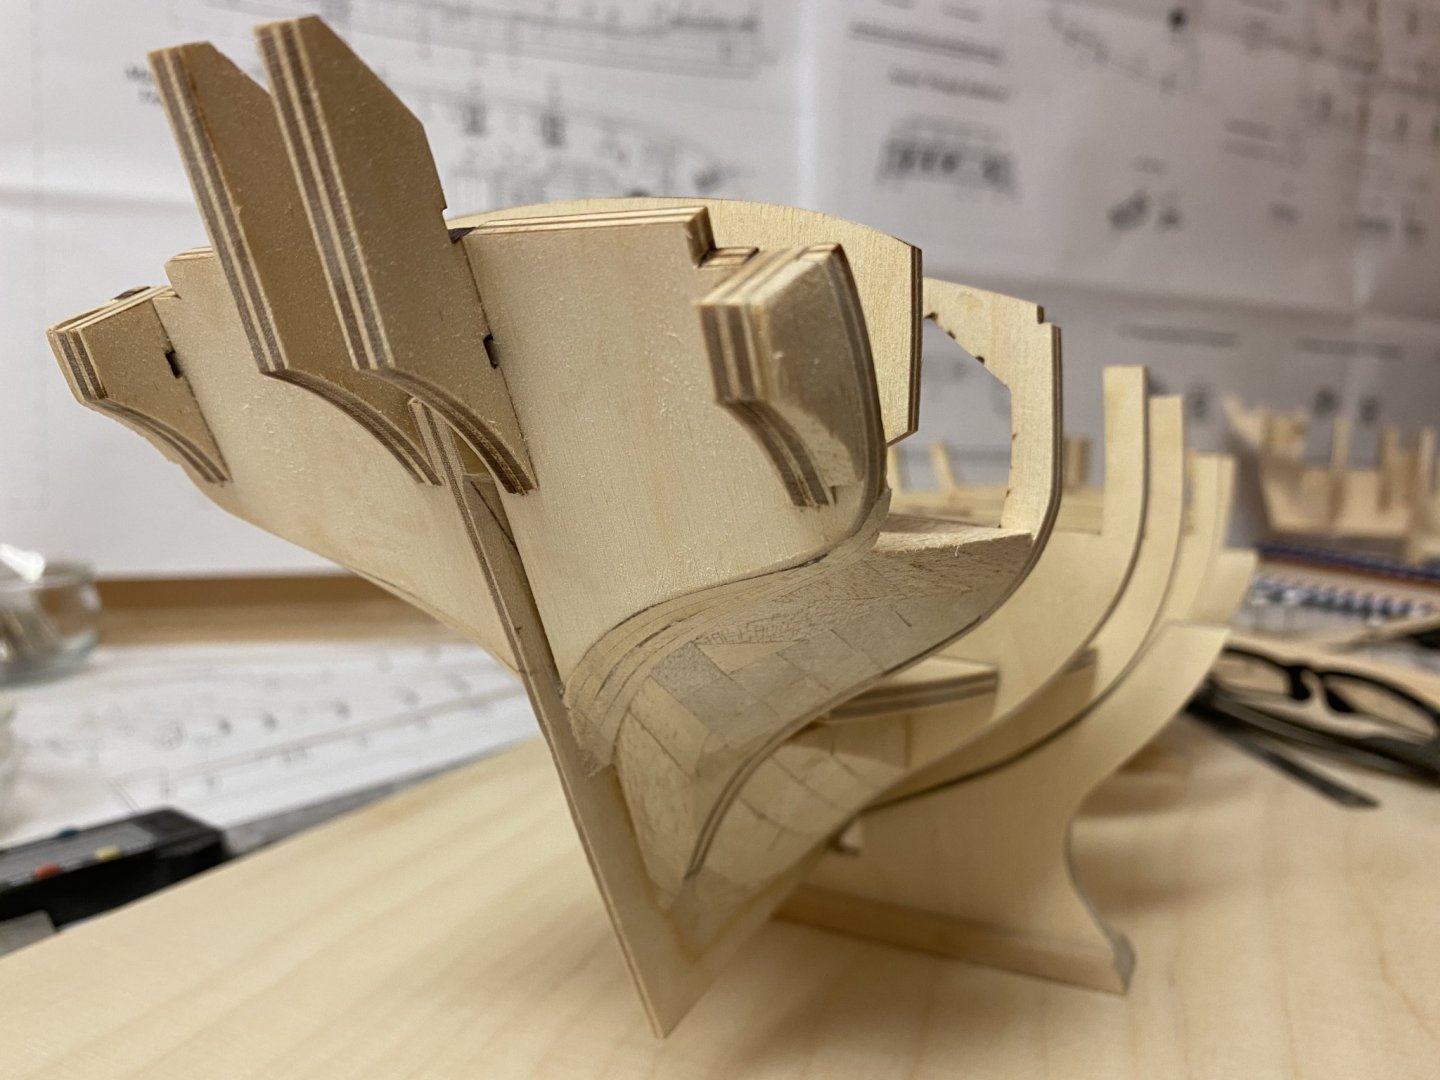
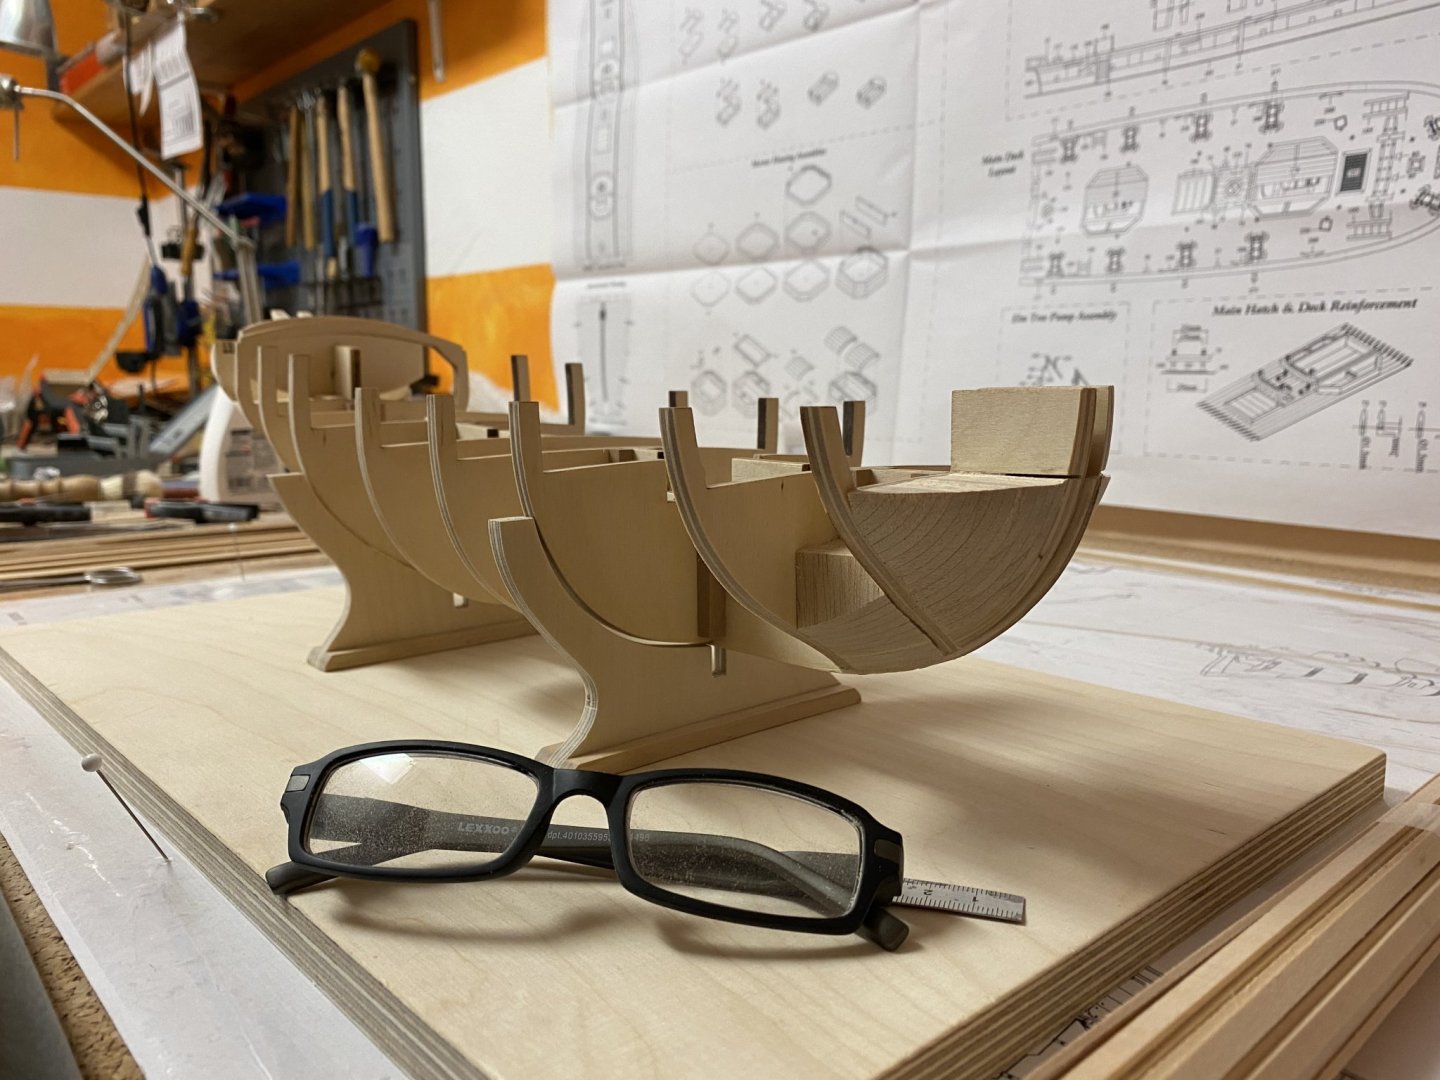
The Badger is a small brig (former US merchant vessel Defence) that allows me to do some custom work and will be a nice addition to the AVS as both ships have a lot of similarities and are build in same scale. Also it allows me to stay with 1/48 scale some more time. I made a start already, building a rack to put the model on during construction, gluing all bulkheads together and adding some balsa fillers to give the first planking more gluing surface. Bevelled all bulkheads, sanded the filler blocks to shape and already prepared the 1,5mm x 5mm basswood strips for the first planking.

-
Thank you very much Gunther. I wonder where you have been all the time.
-
Nice! At 1:87 scale it is still looking very detailed but not to bad to handle and store. At 1:48 you would need an extra room to store the village. Are you going to put it into a clear case after finishing it?
-
On 6/22/2020 at 10:50 AM, Backer said:
I'm glad that my 35 years of study finally come in handy
")
My generation grew up at a time when we had to learn Dutch and French at school. Then we did our military service in Germany. And when we go on holiday we usually have to be able to speak English.
Always handy for reading books 👍My German corner WW2
Only the German designs. So no Czech, French, English, Russian, etc ... models that have been converted by Germany. That is another part of the collection
Wow! You can play a whole battle scene with all that armory!
- mtaylor, Edwardkenway, Baker and 6 others
-
9
-
Very nicely done. The Robotime dioramas are all crowded and stuffed with things. But I guess that is what gives them the spirit.
- Egilman, Old Collingwood, mtaylor and 3 others
-
6
-
Wow, that is a lot of stuff.
- Canute, Old Collingwood, mtaylor and 2 others
-
5
-
-
Absolutely stunning! What will be the overall dimensions of the village if I may ask?
- popeye the sailor, Egilman, Canute and 4 others
-
7
-
-
You‘re doing a great job. Nice rigging as well.
-
@merchen: Hallo, das sind echt wunderschöne Modelle, vor allem die Schnitzereien sind eine echte Augenweide.
Da dies ein englischsprachiges Forum ist, haben wahrscheinlich einige der Teilnehmer Probleme mit der Übersetzung der Texte und lesen dann nicht mehr weiter. Die Bilder und Berichte sind hier zudem (vielleicht irrtümlich?) in der Kategorie Allgemein / Behandlung von Holz eingeordnet, da gibt es generell nicht so viele Beiträge und Besuche. Besser wären sie im Bereich „Eigenbau“ (scratchbuild-models) oder der Gallerie aufgehoben, da ist die Resonanz deutlich größer. Falls es Probleme mit der Übersetzung der Texte geben sollte, helfe ich gerne. Viele Grüße und nochmals ein großes Kompliment. -
-


HM Brig Badger by captain_hook - Scale 1/48 - Modified from Caldercraft plans
in - Build logs for subjects built 1751 - 1800
Posted
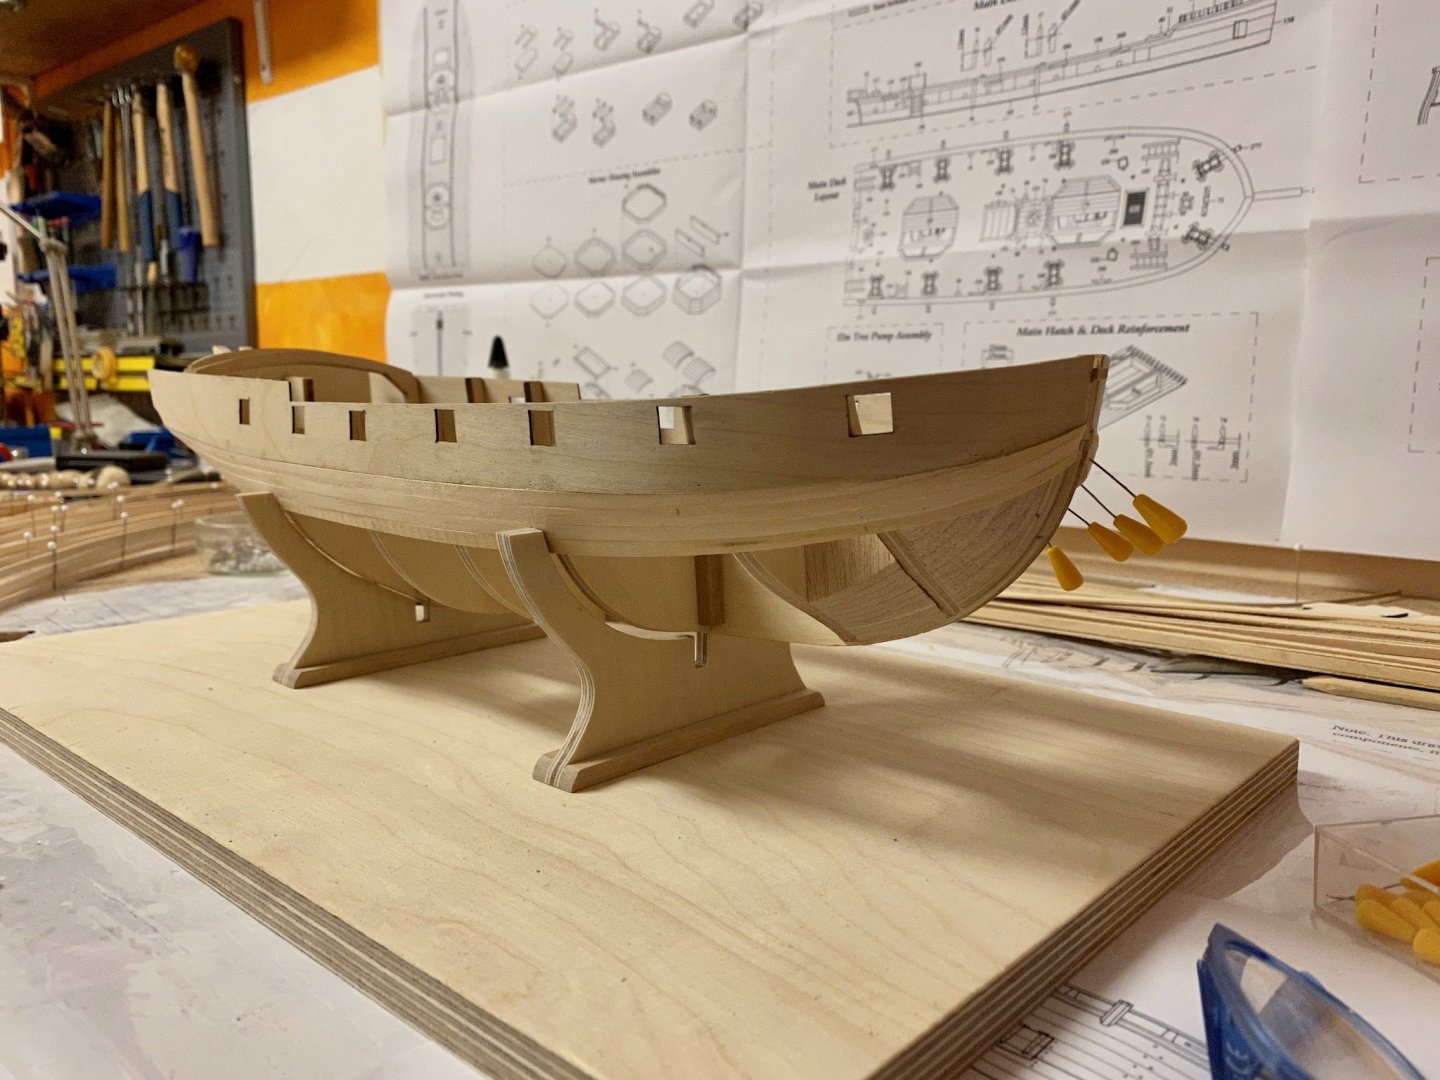
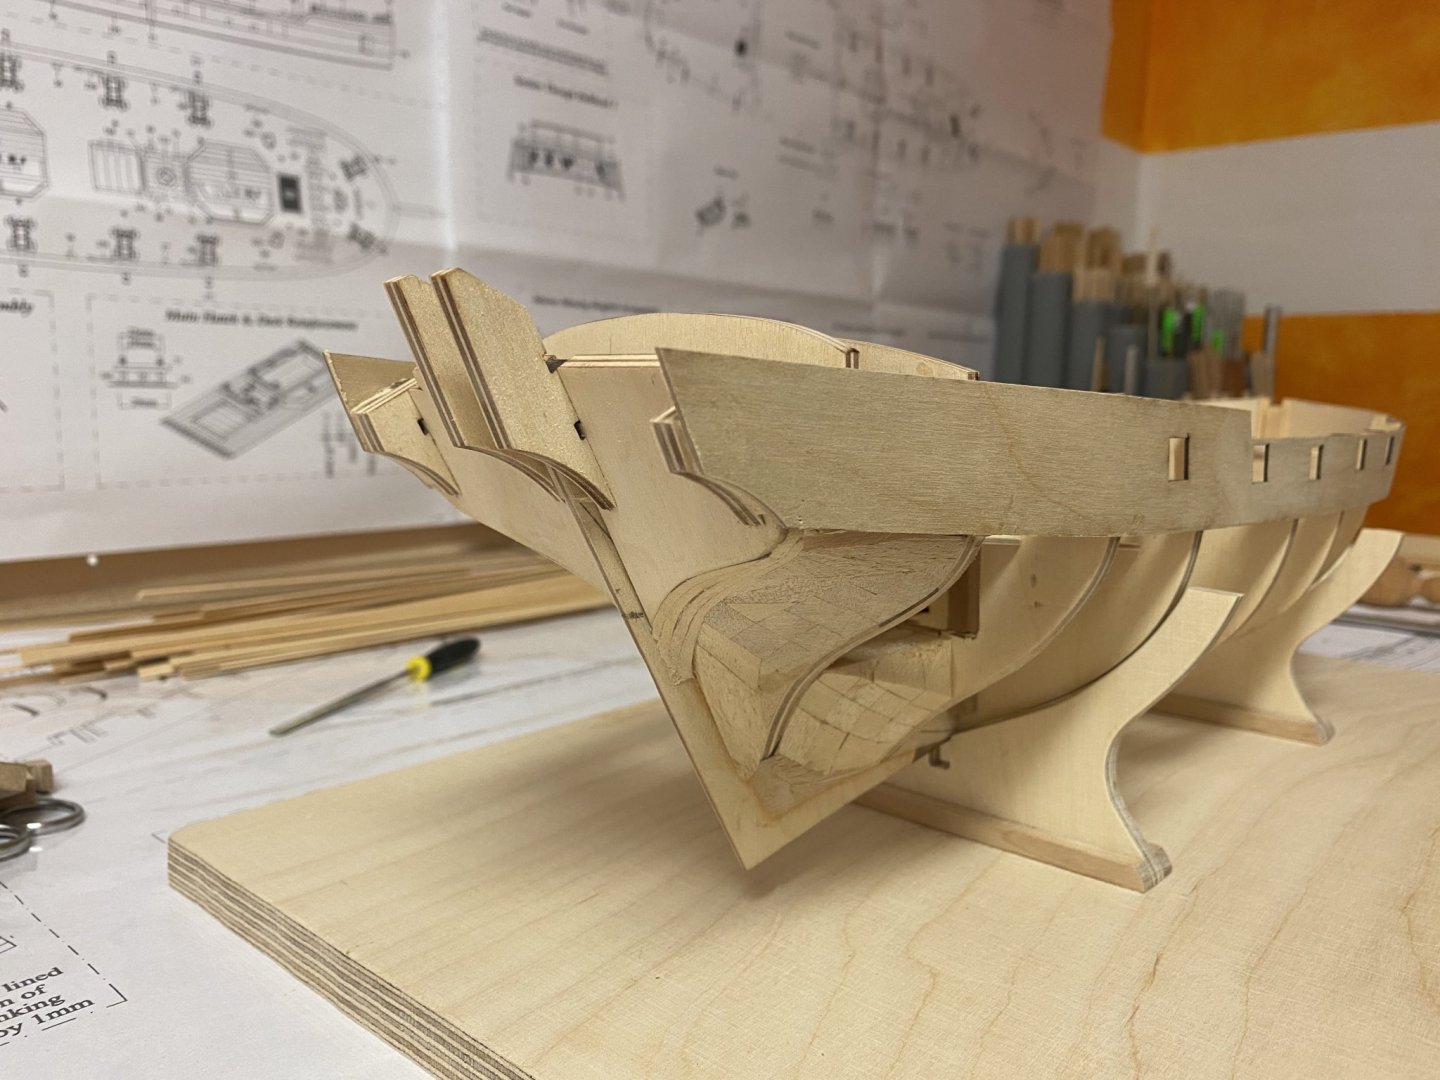
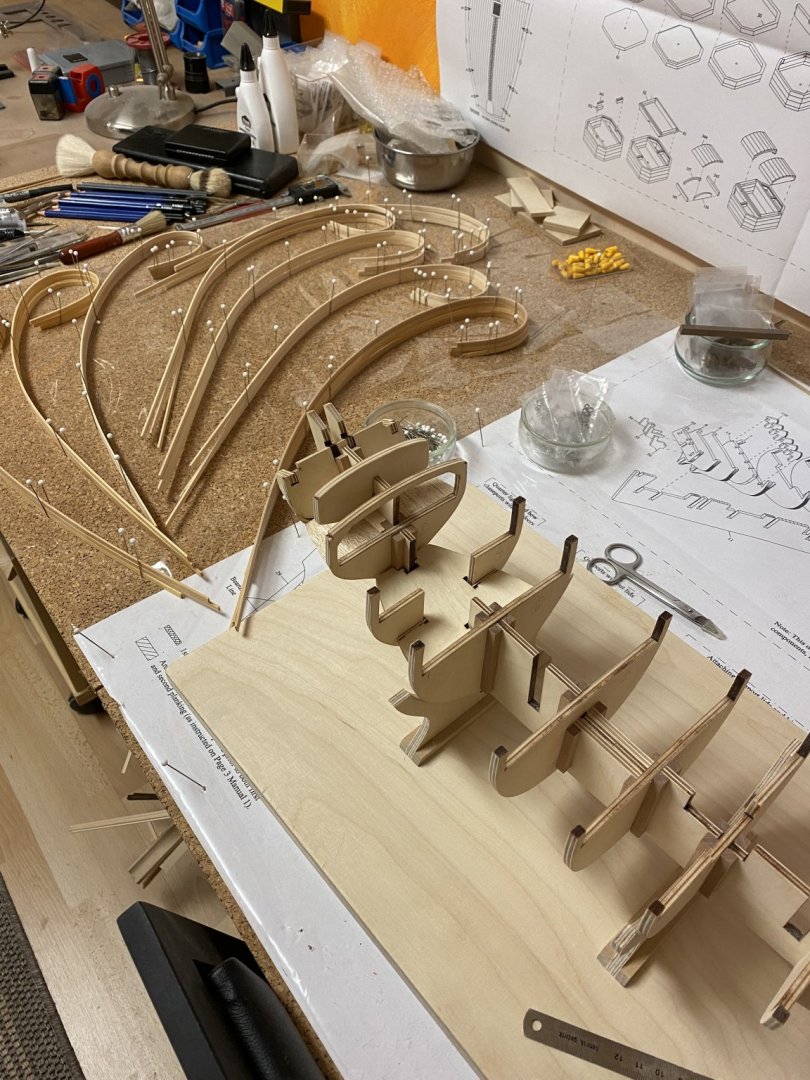
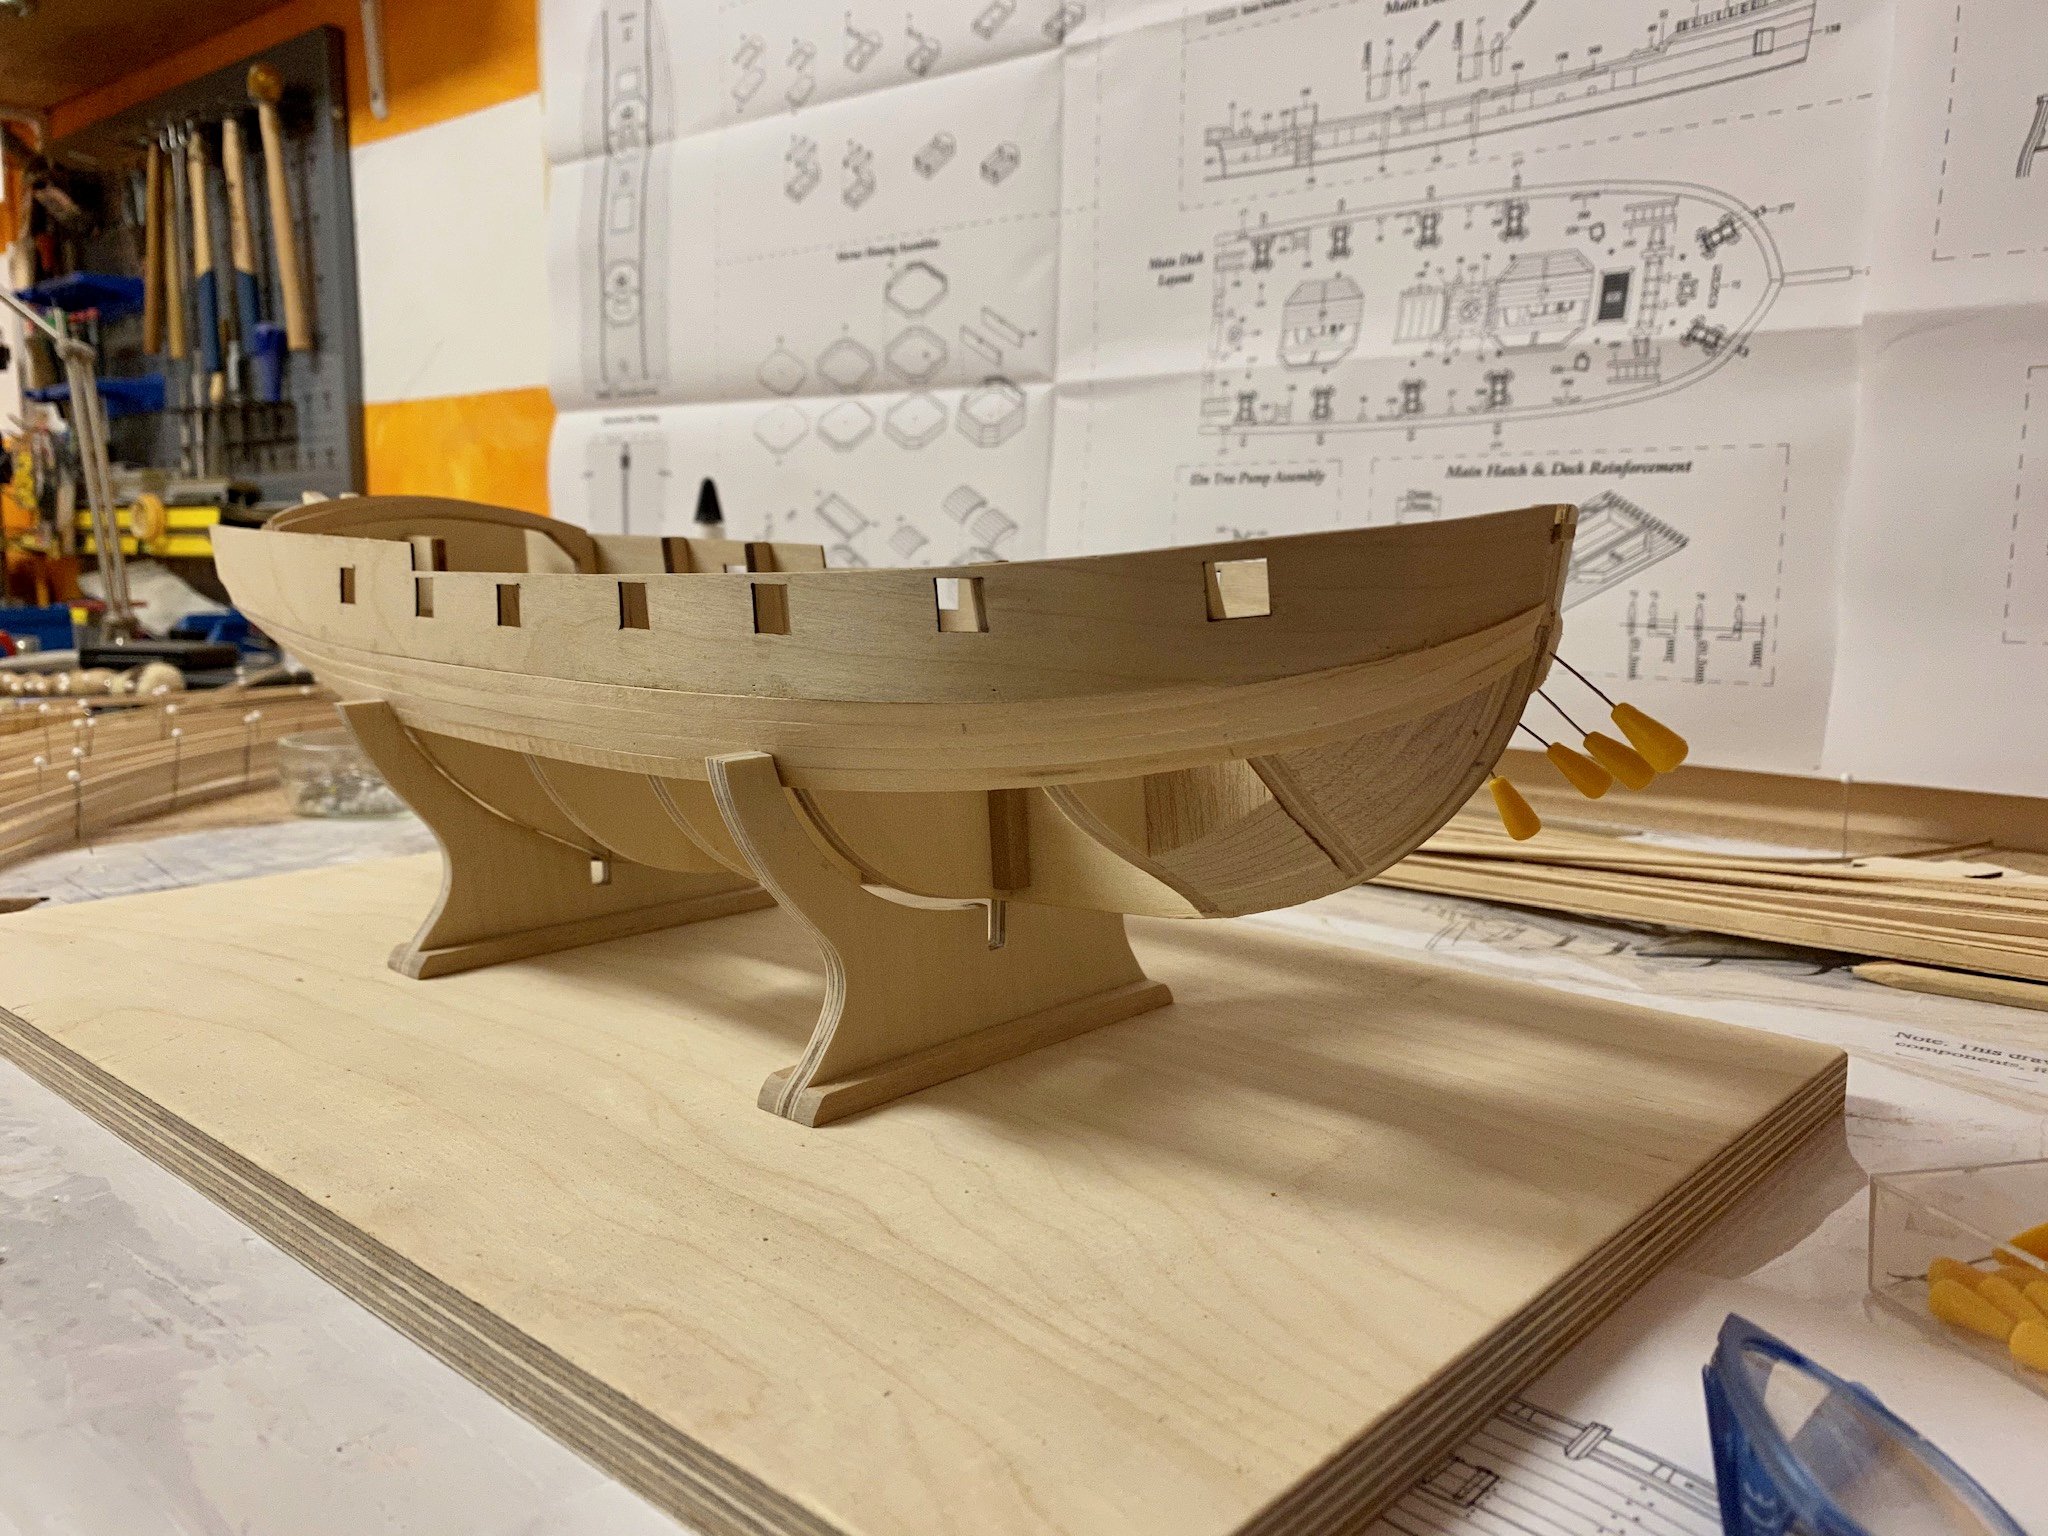
Thank you mugje. After some final sanding the first planking is now complete. I glued some pre-bend basswood stripes inside the hull to strengthen the planking (although the basswood stripes are still solid) and to fix the gunport pattern in place as I’m going to remove the bulkhead extensions next to test fit the false deck. I will plank the inside before the outside to secure both bulkwards are of equal height and the guns will later center the gunports. But first I have to build all keel parts next. As the weather gets better every day - some outside shots this time.