


Ronald-V
-
Posts
1,442 -
Joined
-
Last visited
Content Type
Profiles
Forums
Gallery
Events
Posts posted by Ronald-V
-
-
Thanks everyone. It is of course a little duller when dried so it definitely needs a few more coats. I will sand between coats with grid 400 and will see where it will bring me. But at first glance i'm quite happy and proud of my planking job
")
Only now can I see what I've done in the past months haha 😄
- FrankWouts, AJohnson and Oboship
-
 3
3
-
Cannons look great! Are you going to rig them fully?
-
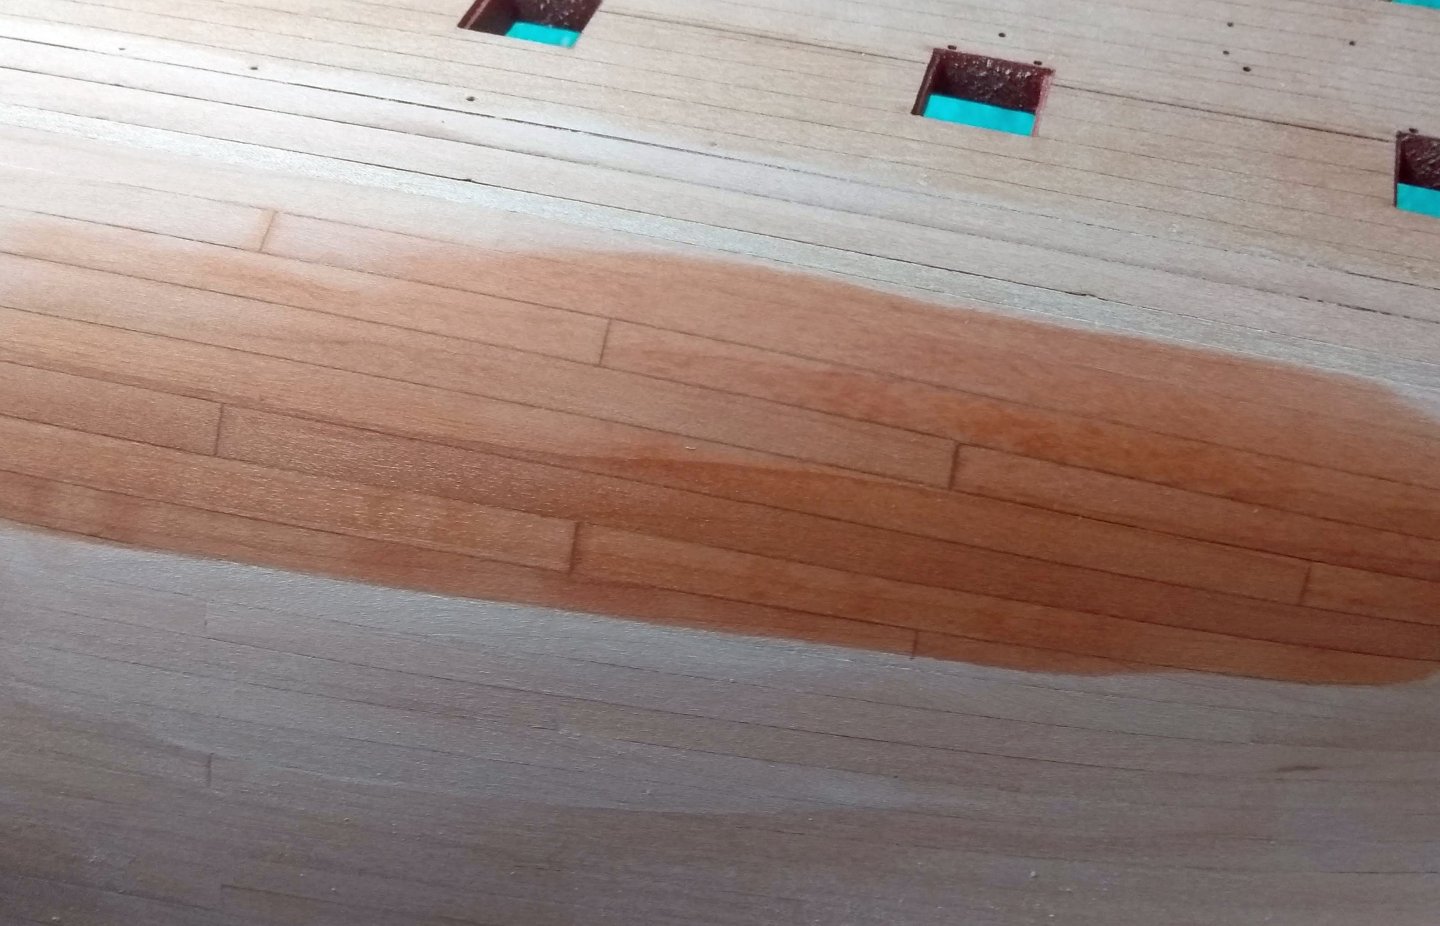
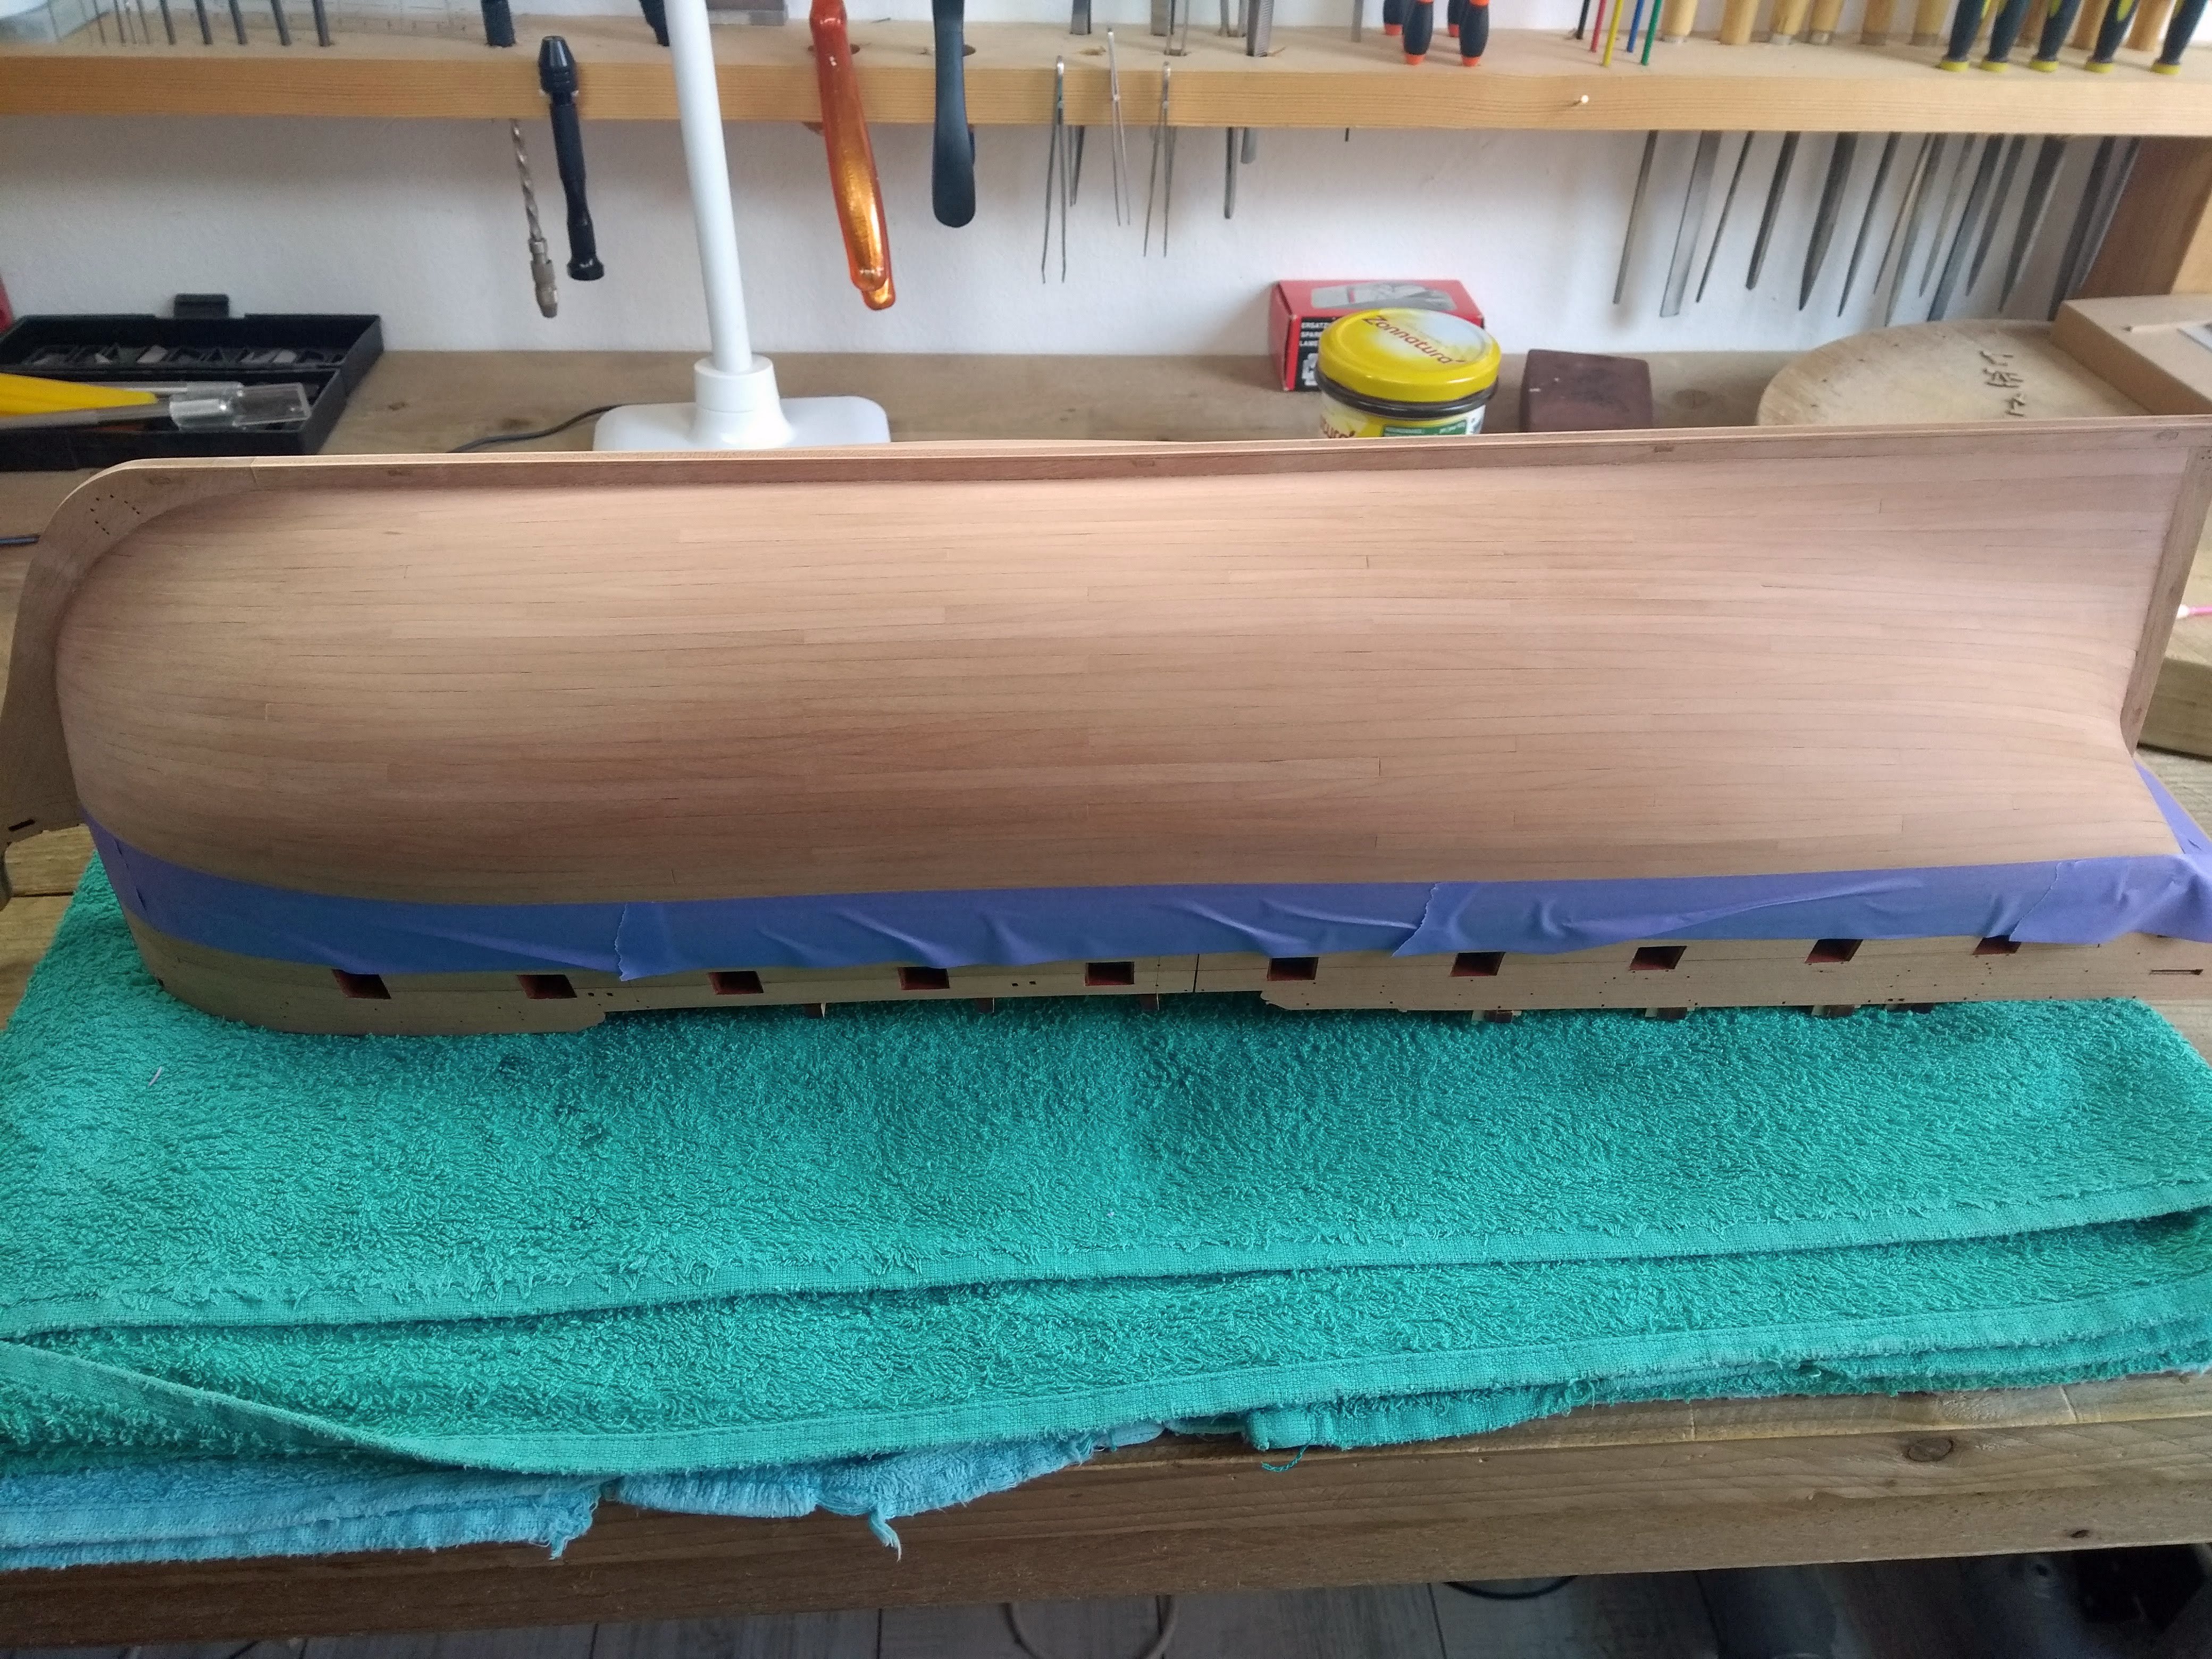
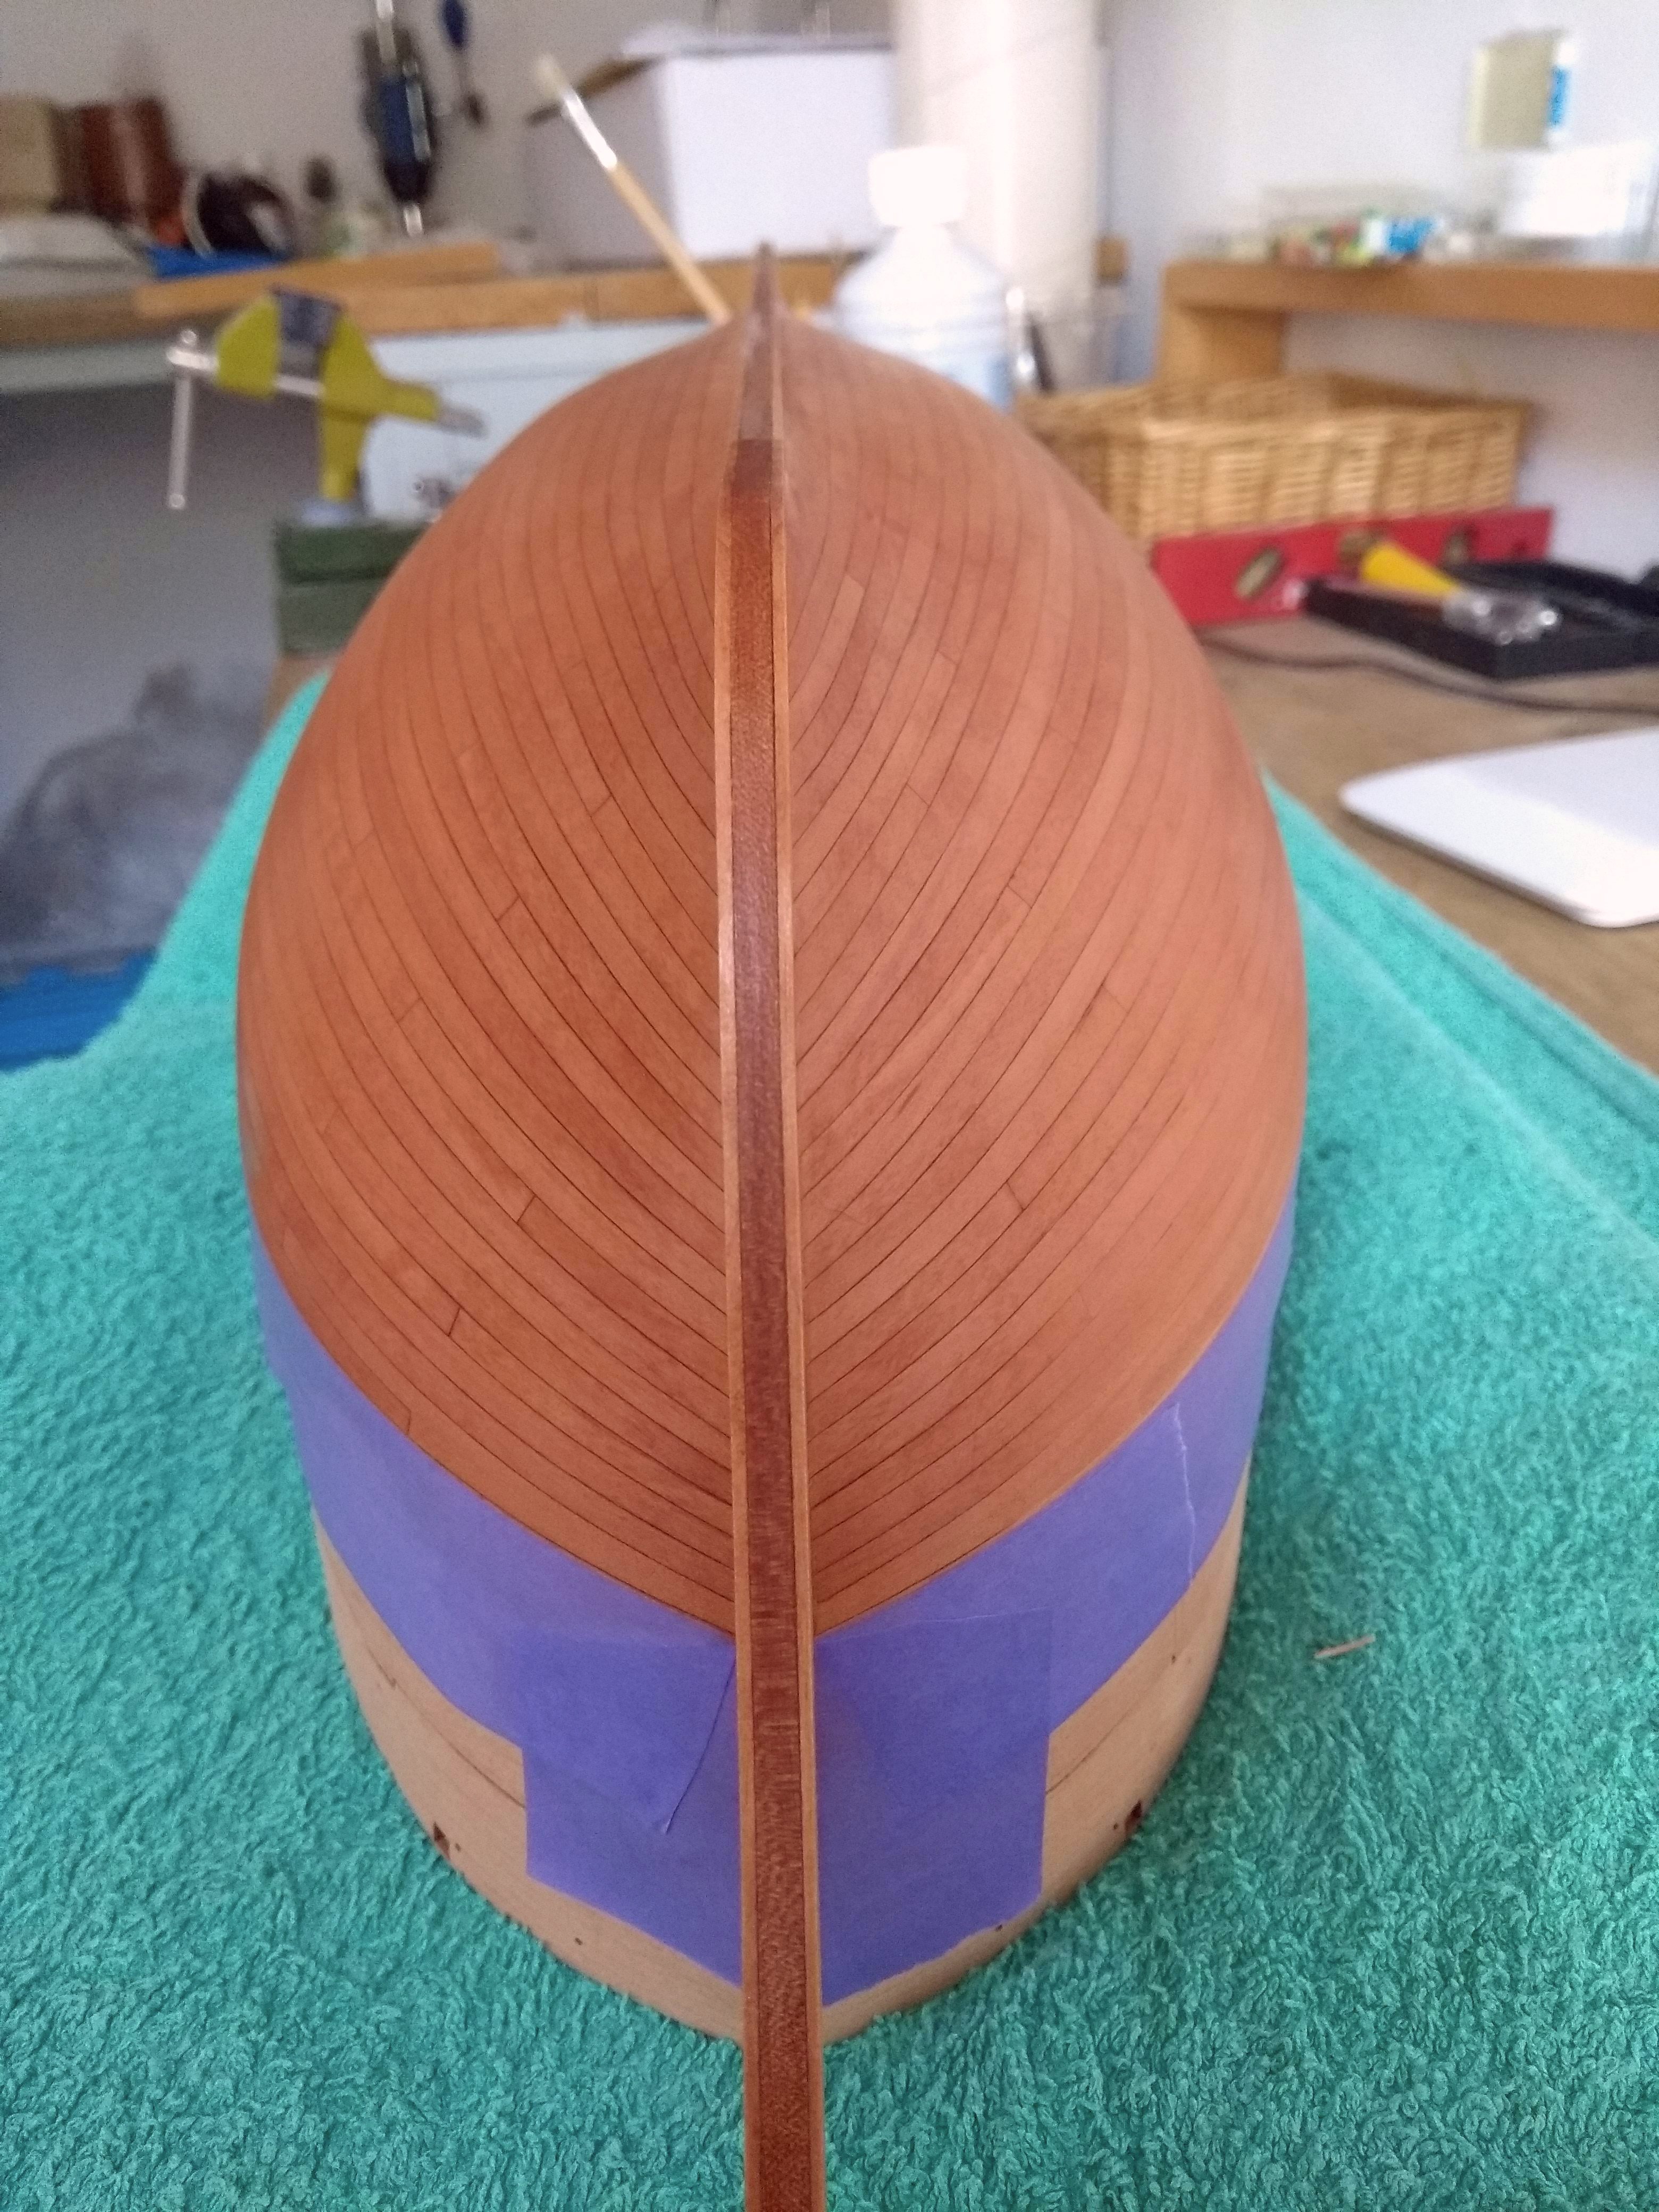
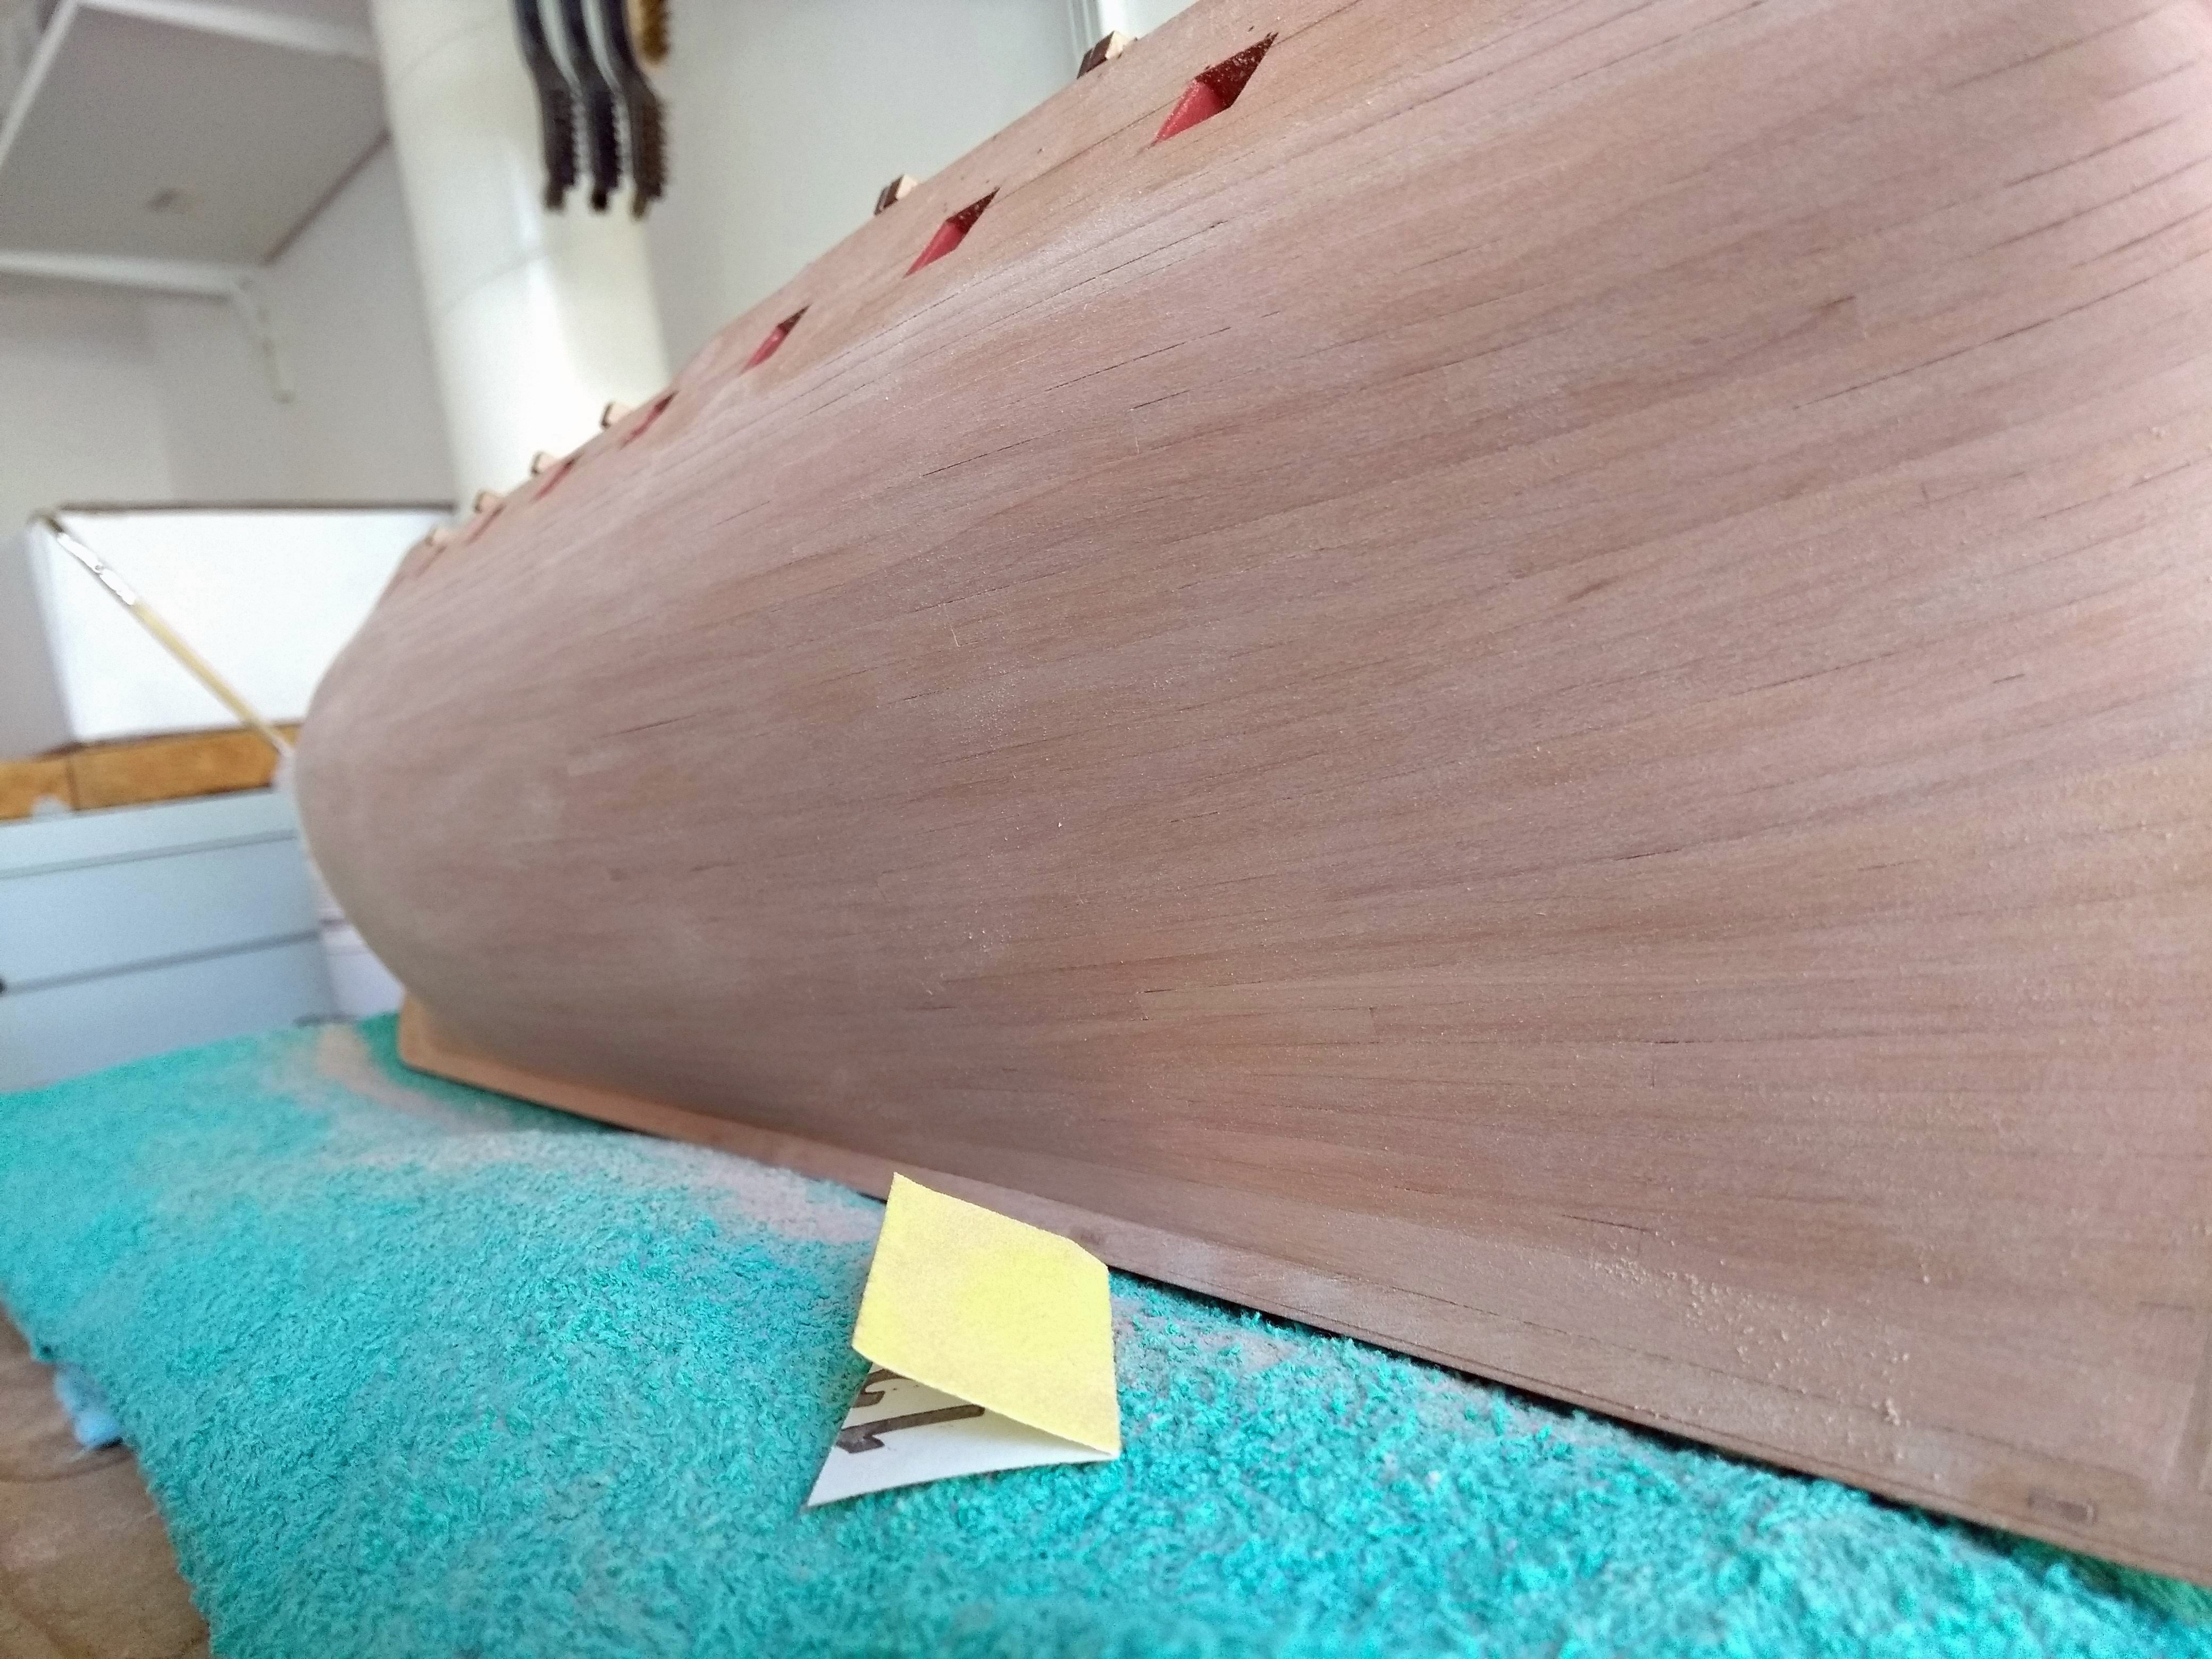
Just a little peek, because I'm quite excited what's happening with the wipe-on poly.
I first taped off the location of the wales so the oil wouldn't get on that area.
By the way, I just use Polyurethane lacquer and dilute it with white spirit (about 60/40) Minwax like our friends in America use is unaffordable here
In the second photo I just applied the WOP so it still has to dry, but it looks already quite good!
Here and there still a few little white spots of glue residue, but nothing major.

-
19 minutes ago, AJohnson said:
That planking looks super Ronald!
 As for the gaps you mention, then I can’t see any that are nearly as large as the etched detail deliberately put in the bulwark sides anyway! Good job!
Thanks for your kind reaction Andrew! It isn't a large gap, but I have the tendency to focus too much on the negative, and then it's looking quite large in my head
")
That's the cool thing with this hobby, for me there are many valuable life lessons hidden in modelship building. I learn a lot to deal with mental things that can derail me otherwise in life. Another example that I've learned with this hobby is staying in the moment, just focus on the part you are building and don't look forward how much needs to be done. In the past this could really paralize me and just give up.
Model ship building for me is more than just building a miniature of a war ship
- AJohnson, PaddyO, Knocklouder and 5 others
-
8
-
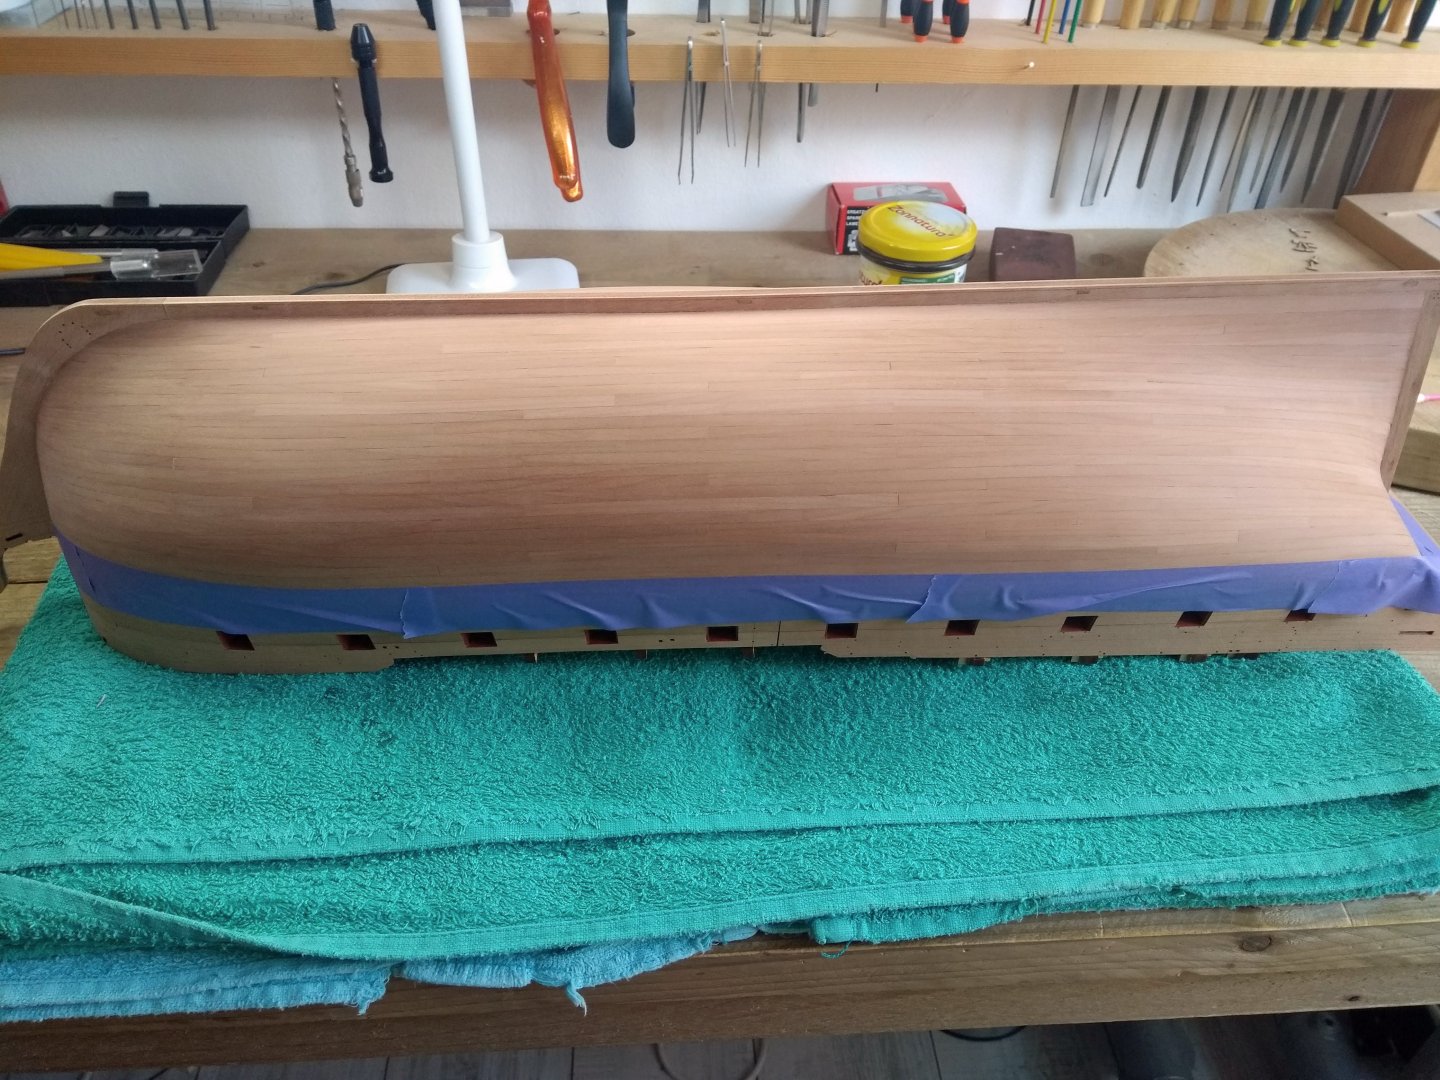
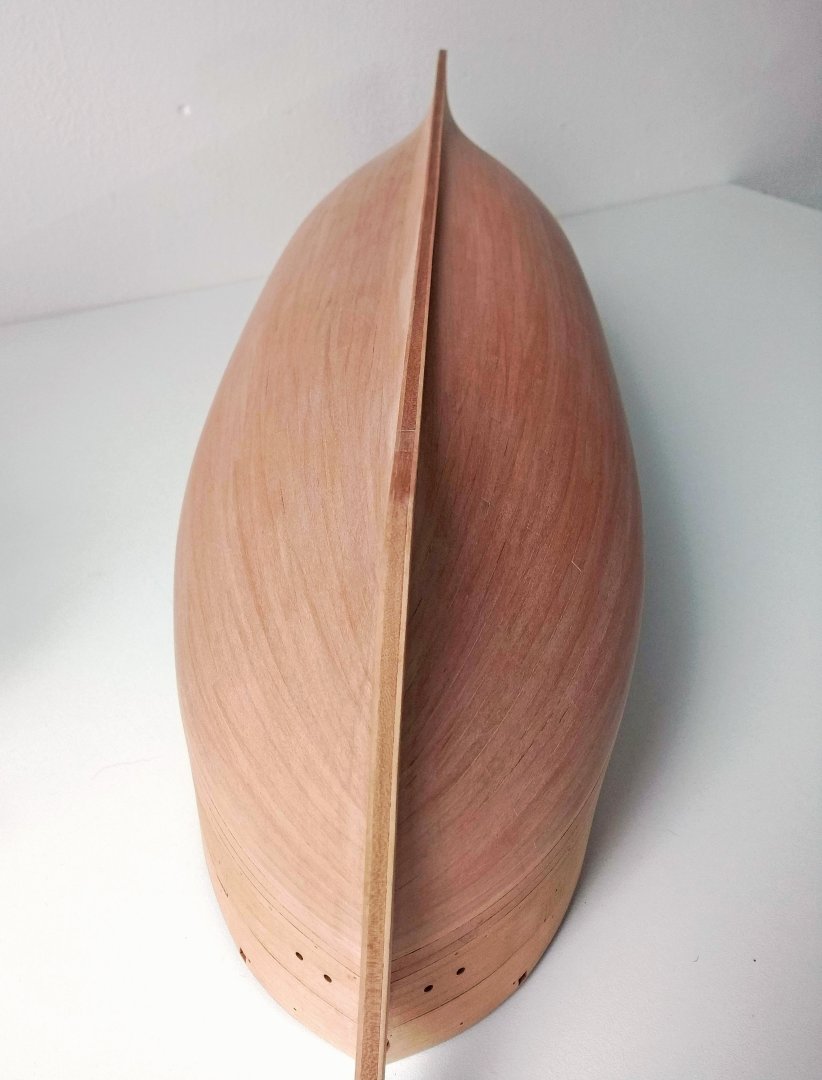
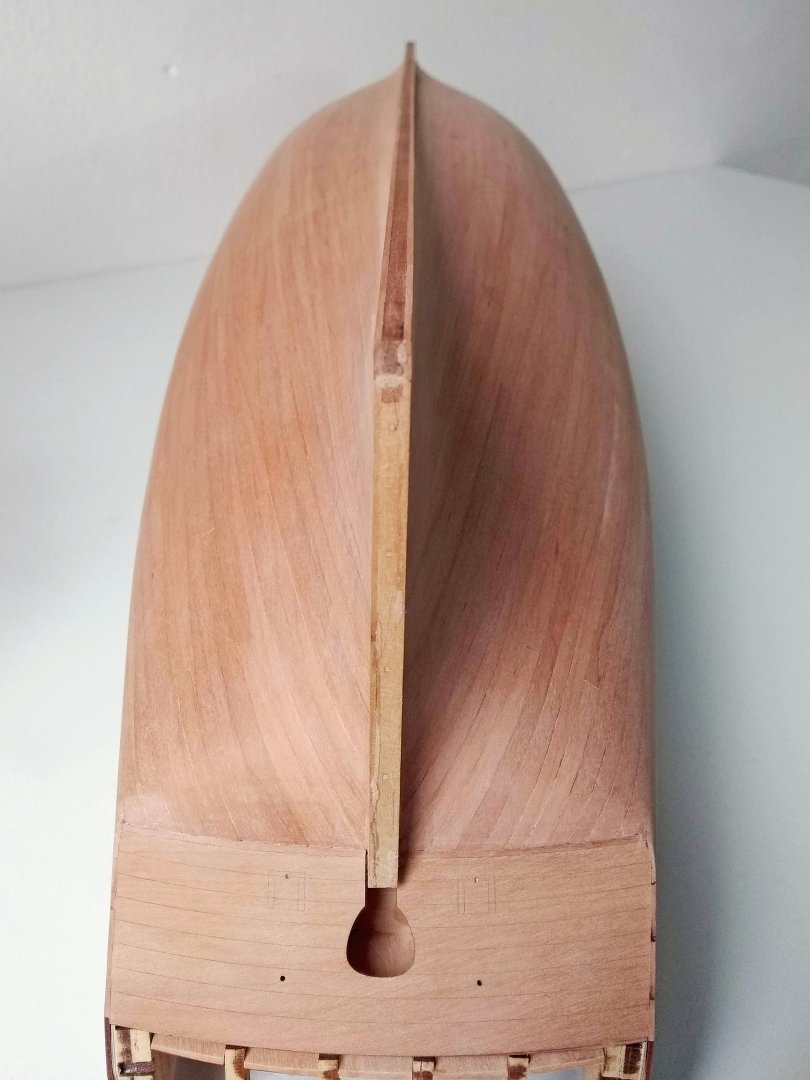
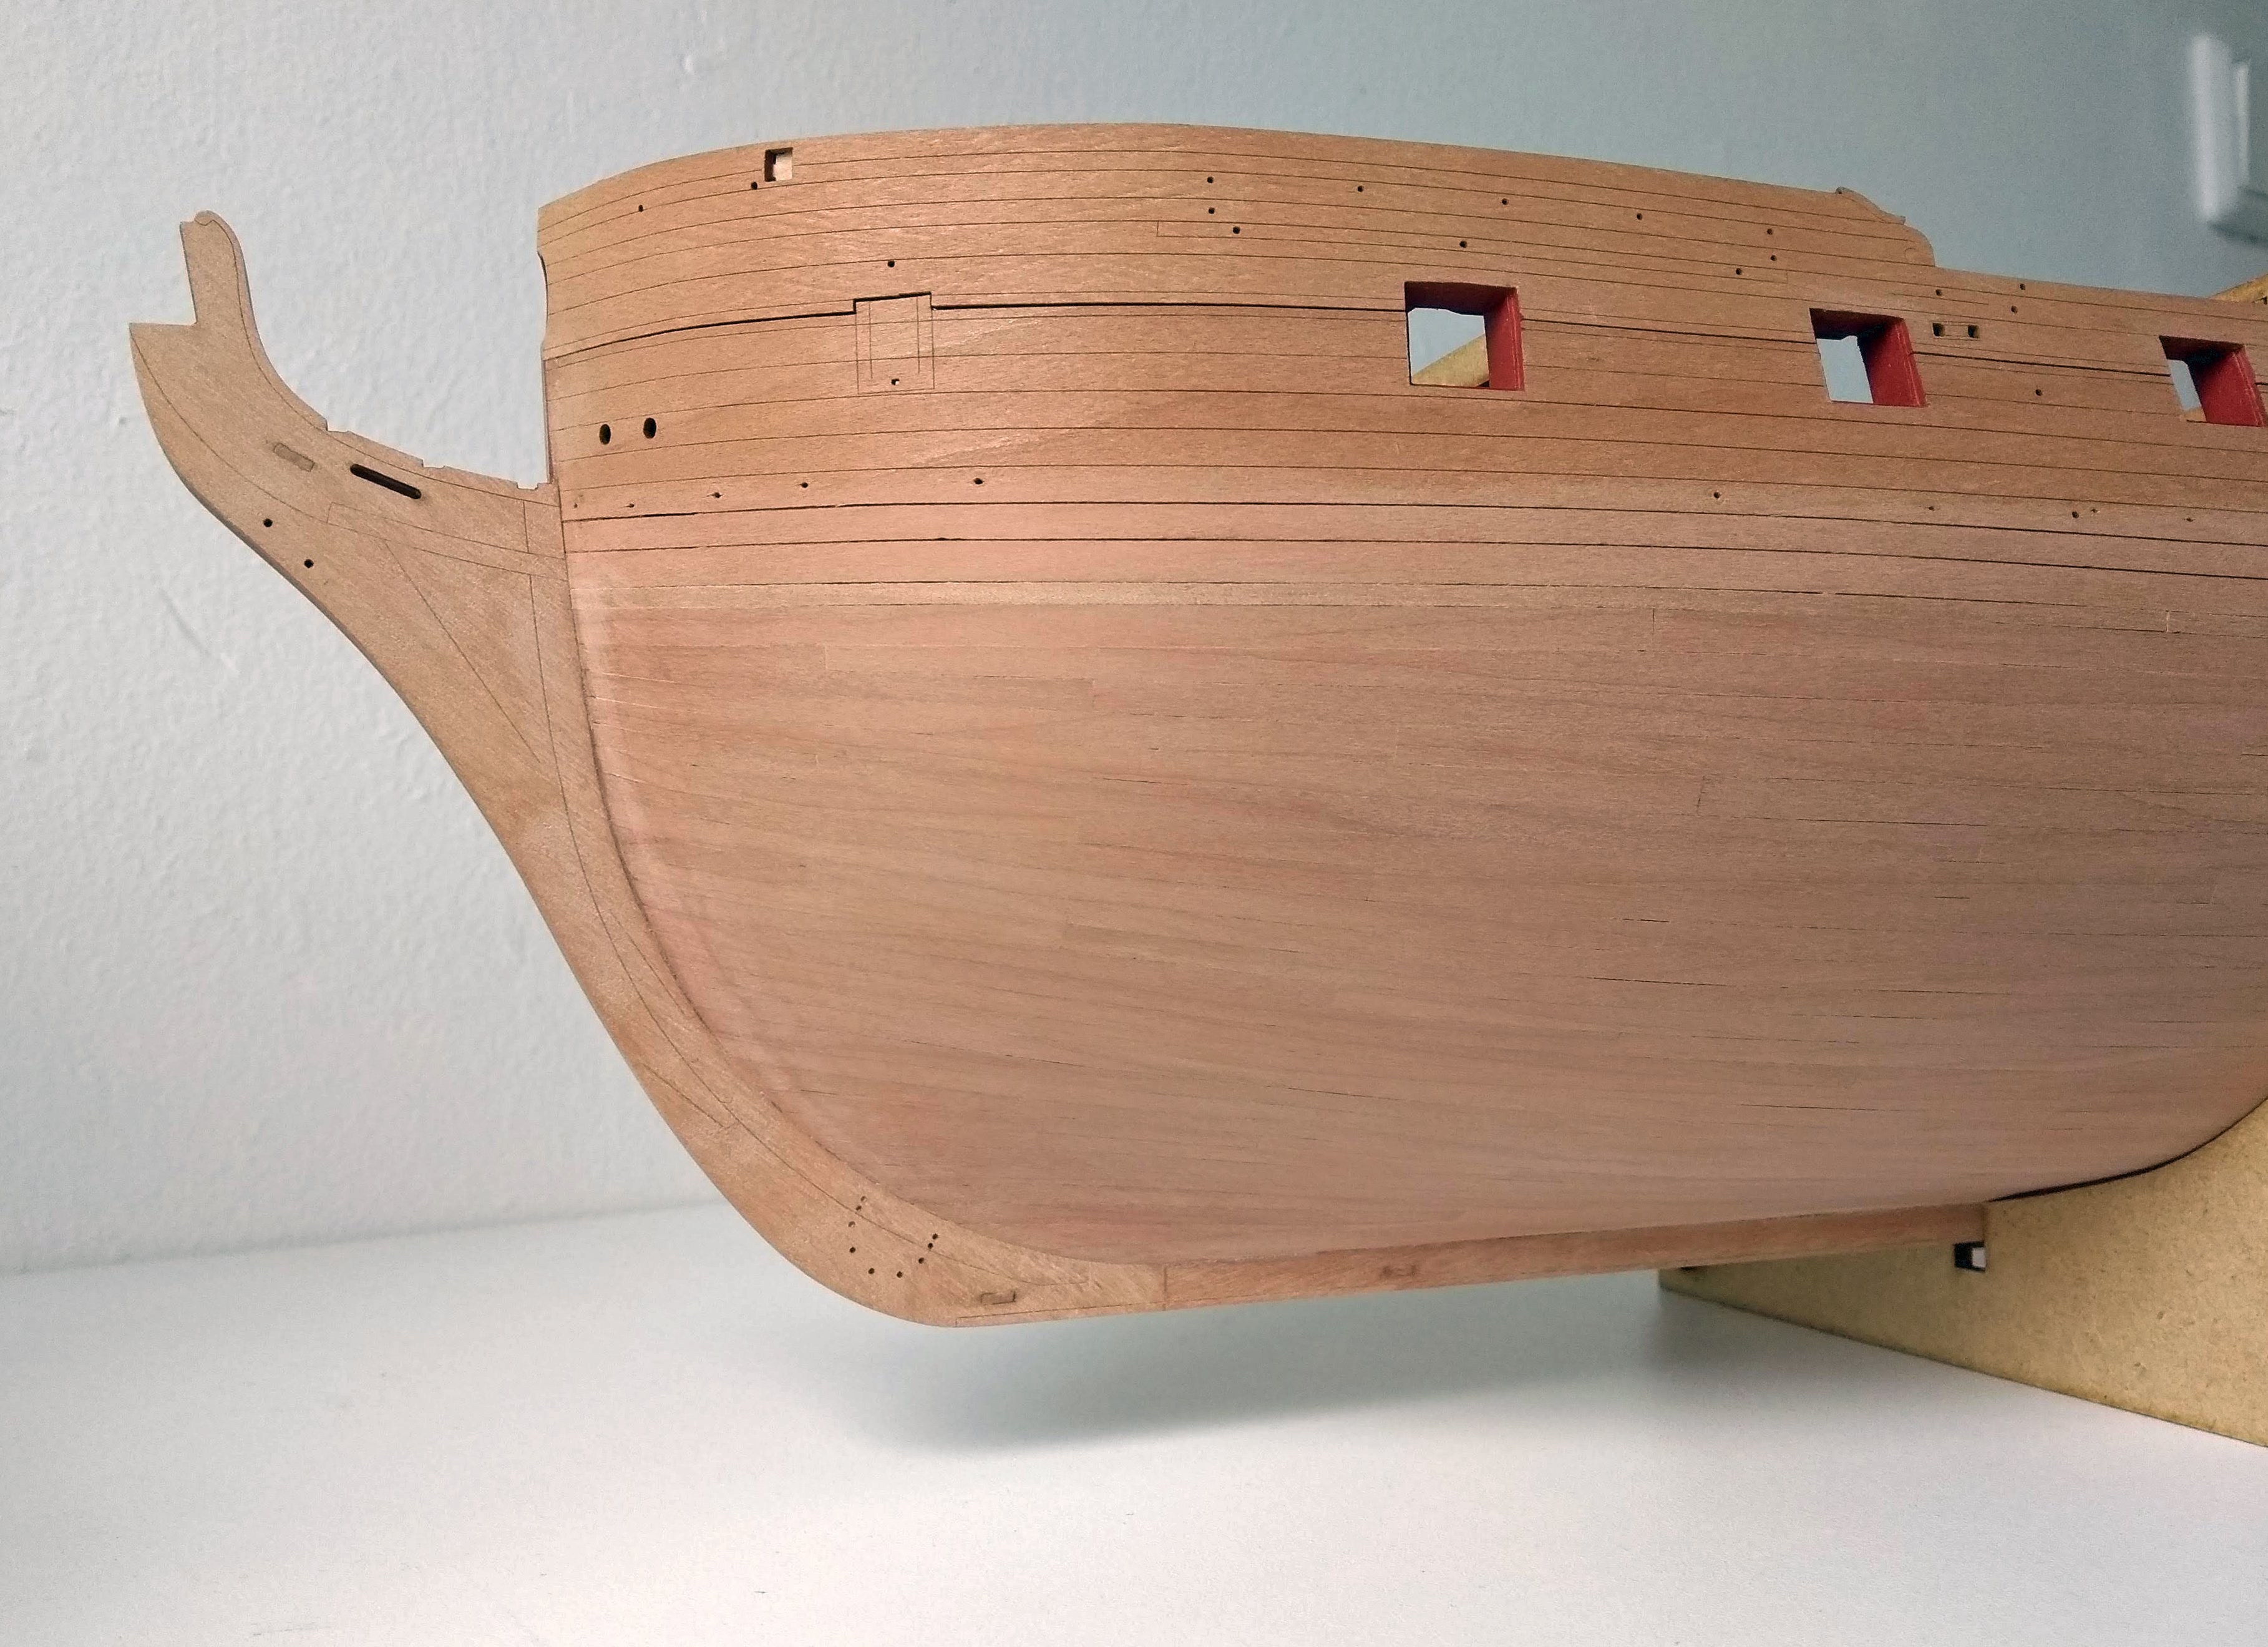
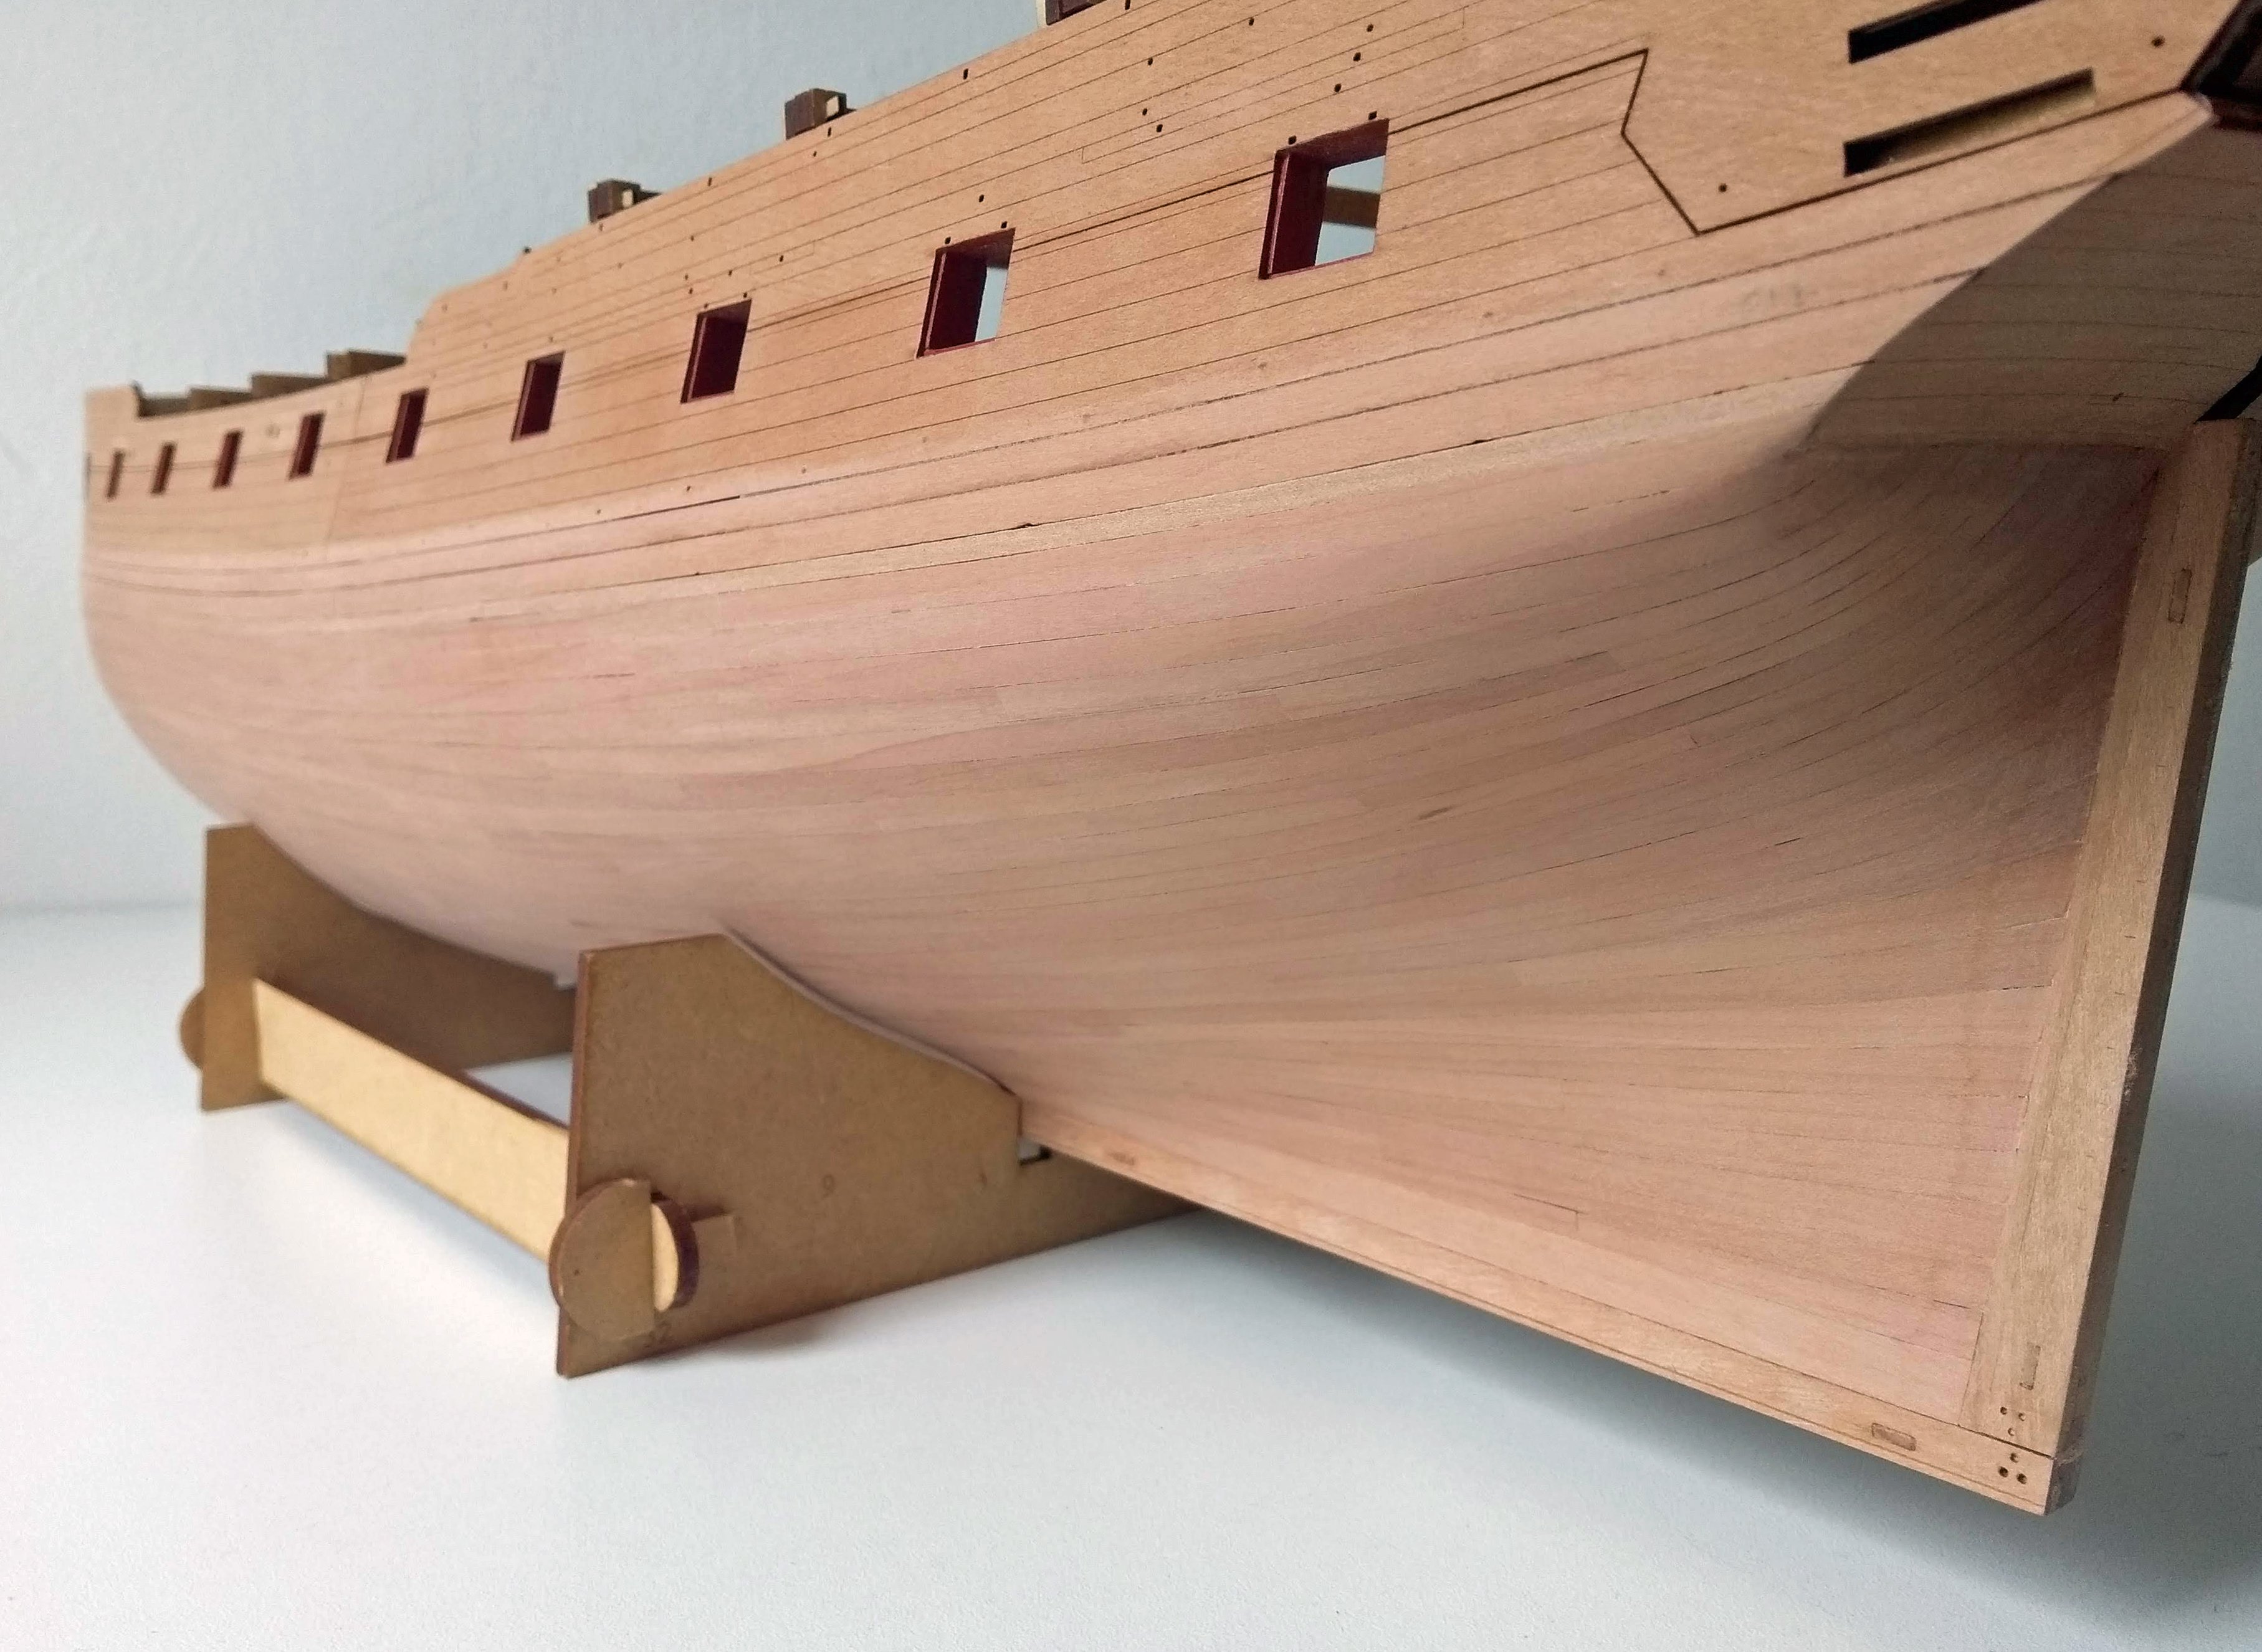
Update:
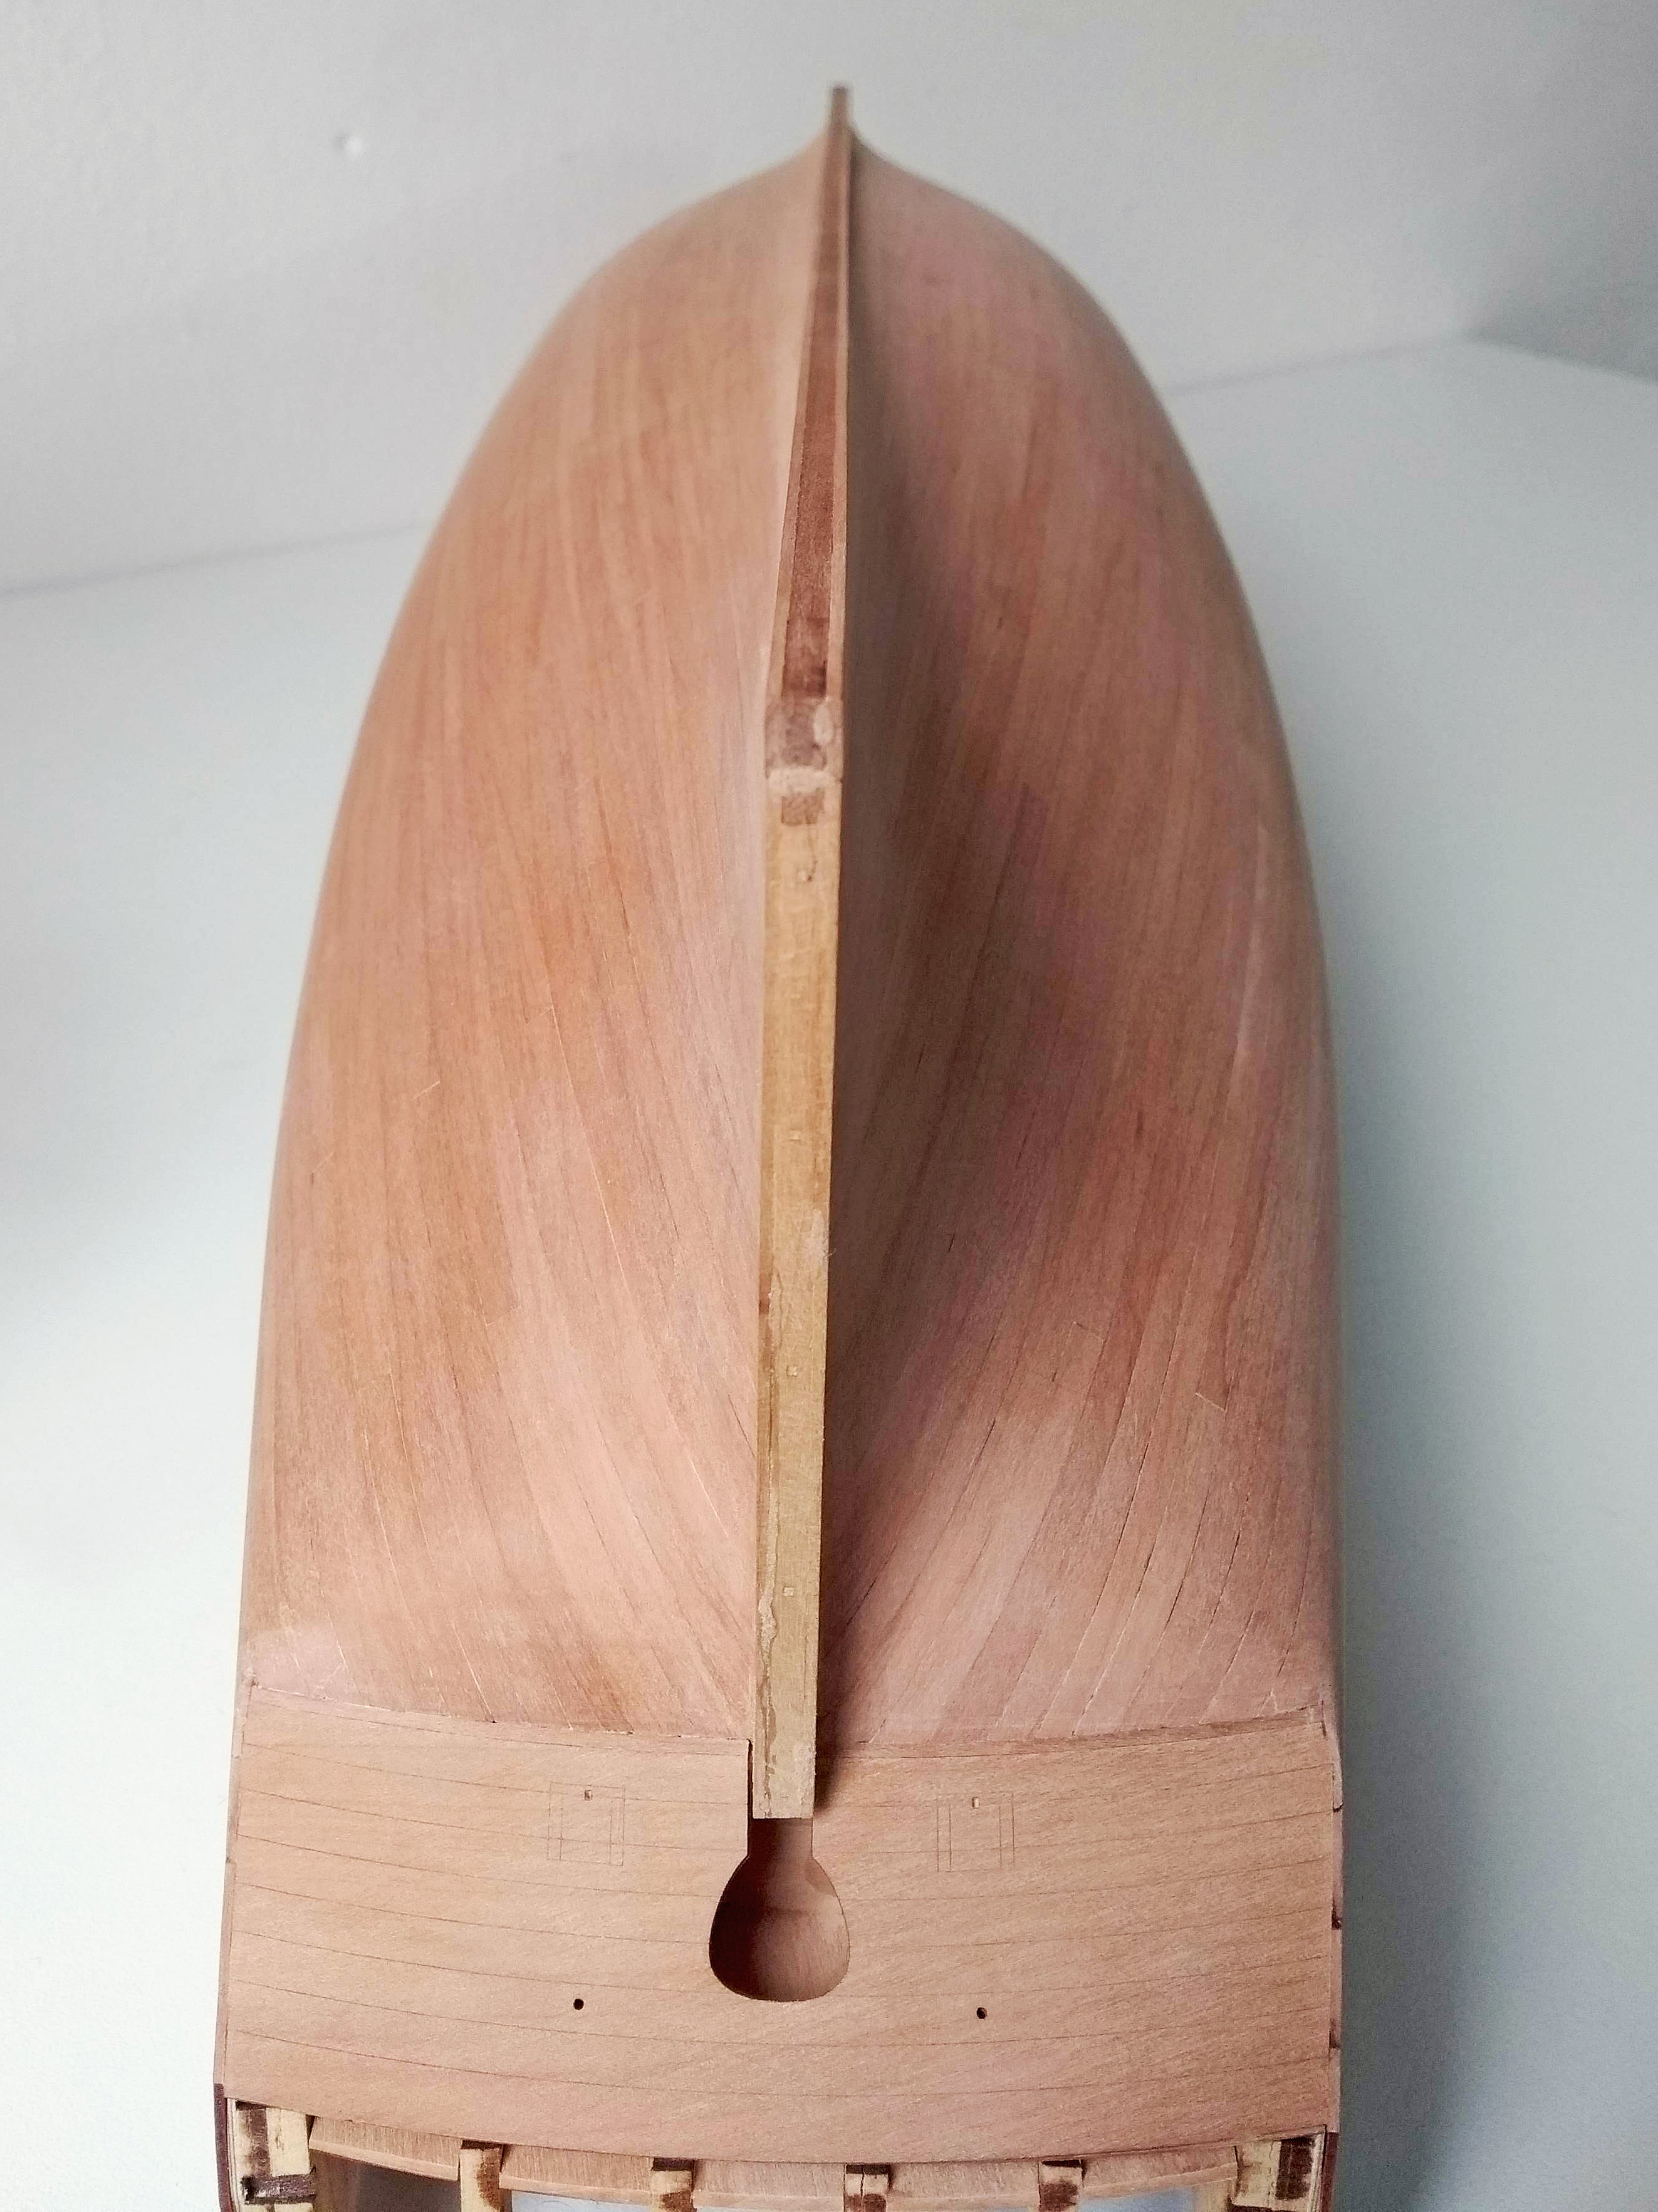
Done with sanding...first grid 120 then 240 and finished with 400. Happy with the overall result, less happy with the planking at the bow. Somehow I didn't took
enough time with that and as a result I've ended up with a small seam there.
When I was almost done with the planks I did get ideas how the planks would fit well in the rabbet, but it was actually too late. A bit disappointing, but I think that is also part of model boat building...learning to deal with your own mistakes. And that can be hard for a perfectionist like me, but a valuable lesson.
I used some diluted PVA and sanding dust to fill this gap, not super pretty, but okay. (also other small gaps at the keel etc.)
I have to check the entire hull again for glue residue, because I plan to use wipe-on poly and you don't want any glue residue. I've already been quite busy on the keel, because I was a bit messy there with the glue
. And if unexpectedly some light spots appear after the first layer of WOP, then it can still be sanded away, but ideal would be no glue residue in the first place  . And the sternpost need some sanding too as you can see, there is some filler on there.
My plan was to mount the wales after this, but when I saw in Blue Ensign's log that he had first oiled the hull and then mounted the wales, that seemed like a better order to me. Otherwise you might have problems with glue residue on the bottom of the wales and now that will be better sealed with the WOP.
Tip: With wiping white spirit over the hull you can see the glue spots lighting up, because the liquid won't penetrate the wood due to the glue. Then with some alcohol and sanding paper remove the glue...that's the theory, the real test is with the WOP ofcourse. 😬


-
-
Have fun on your new journey!
- chris watton, Knocklouder, Gabek and 2 others
-
4
-
 1
1
-
17 hours ago, N1ckel said:
Quick update for folks, I did a ton of measuring, marking tick lines etc and the first set of planks still didn’t seem to fit well. I then thought it was my cutting so I tried sanding the taper instead of cutting and it went much better
Once I have measured the taper I then use a (small) woodplane to remove most of the material and finish it off with a sanding block. Also to get a smooth transition from the tapered part to the unworked part
-
-
Great work so far! Love the soft colors you used in combination with the natural wood color. 1:100 isn't easy to work with, but you are doing great with it!
- Greg Davis and Bill Morrison
-
1
-
1
-
-
-
-
Looking great! And have a nice vacation
-
4 hours ago, Blue Ensign said:
A great planking job Ronald, well done👍
B.E.
Thanks B.E.! And also everyone else for the likes, I really appreciate that.
I made a little area wet and under all the sanding dust is some beautiful wood hidden. Curious how the end result will look. Not there yet, because after sanding I will first install the wales, and maybe also the rudder.
- AJohnson, DonSangria, FrankWouts and 10 others
-
13
-
1 hour ago, N1ckel said:
Yes that’s useful thanks. My challenge is the bow is more slanted on my model so it’s not to easy to measure the front “green line” and divide by the number of planks, but it’s useful to know this is the theory - thanks!!
Maybe this topic helps with that...also posted a photo there from my HMS Sphinx, where I let a piece of paper/card follow the curve at the bow
https://modelshipworld.com/topic/36721-how-to-measure-and-line-off-at-the-bow/
-
-
Fantastic stuff! Especially at this scale 😮
- Keith Black and GeorgeKapas
-
2
-
-
Sanding, sanding and more sanding...using 120 grit paper now and will finish with some finer grit paper. But this will take a while lol. 😵💫

-
That moulding run looks really beautiful!
-
Congratulations! It's a fine looking model
you can be proud of such a lovely build.
- AJohnson and BrochBoating
-
2
-
-


HM Armed Cutter Sherbourne 1763 by palmerit - Vanguard Models - 1:64 - First Build
in - Kit build logs for subjects built from 1751 - 1800
Posted
Smashing pieces is indeed part of this hobby 😄