BobG
-
Posts
3,109 -
Joined
-
Last visited
Content Type
Profiles
Forums
Gallery
Events
Everything posted by BobG
-
Beautiful work, juhu!
-
Bummer, Mark, I've been enjoying following your build. Will you be able to get your eyes examined and get some new glasses pretty soon?
- 505 replies
-
- 7
-

-
- vanguard models
- Sphinx
- (and 1 more)
-
Great work, Frank! This is certainly going to be a showpiece!
- 510 replies
-
- 2
-
-
- reale de france
- corel
- (and 1 more)
-
Nice to see you back in your model shipyard, Vaddoc, and congratulations on putting your health and fitness first and foremost. A lot of people have gained weight during the pandemic from what I have read. I'm looking forward to seeing you continue to make progress on this wonderful model.
-
I hope my log will be of some assistance to you although, at the rate I'm going, I may be getting assistance from your log especially figuring out the rigging. She is really is a beautiful racing yacht and I look forward to your build. Thanks for looking in.
-
Fantastic work, Ron, she looks great! I always feel like the rigging really brings the ship to life.
- 542 replies
-
- 2
-
-
- Sphinx
- Vanguard Models
- (and 3 more)
-
Good advice, Mark. I shouldn't use power tools right after I get up either. I've been known to drop stuff and bump into things before I have some coffee and fully wake up! 😂
-
Thanks, Don. I've been enjoying your Winnie build. Really fine work!
-
Spectacular, Hake!
-
Thanks for stopping by, Erik and Hake. It'll be slow going now that I'm into the "mystery rigging section."
-
I'd probably be doing a little bit of snooping around the house... 😇
- 77 replies
-
- 1
-
-
- Erycina
- Vanguard Models
- (and 1 more)
-
Thanks everyone for the comments and the likes. Encouragement is always appreciated as I plug along blindly as I attempt the deck fittings and the rigging. Thanks Glenn and Grant for your continued interest in my build and for nudging me along. Both of you are inspirational modelers! I'll do my best, Yves, and thank you for the encouragement! I love everything about the whole history of the Pen Duick and Eric Tabarly but the quality of the AL model itself leaves a lot to be desired. Unfortunately, it seems to be the only kit available. It needs to be scratch built at a larger scale to really do it justice in my opinion, but I haven't been able find any good plans to help me with this model and I even contacted the Eric Tabarly Association in France for assistance with no luck. Maybe the Pen Duick could be the first racing yacht in the Vanguard or Syren line of models!
-
I have adopted another orphaned kit
BobG replied to mtdoramike's topic in RC Kits & Scratch building
Nice work, Mike! -
Sorry, just a brain fart! 🤣 Grant is gjdale here on the forum and he does spectacular work on all kinds of modeling subjects. I enjoy following all of his projects and, like you, he does outstanding work and creates wonderful build logs as well. Check him out if you haven't already.
- 840 replies
-
- 5
-
-
- winchelsea
- Syren Ship Model Company
- (and 1 more)
-
I believe you will be painting the hull so a small piece of wood to fill the gap along with some filler should do the trick. Take you time filling and sanding, at least to 220 grit, until you have a nice, smooth surface following by a good primer before you paint and your hull will look splendid.
-
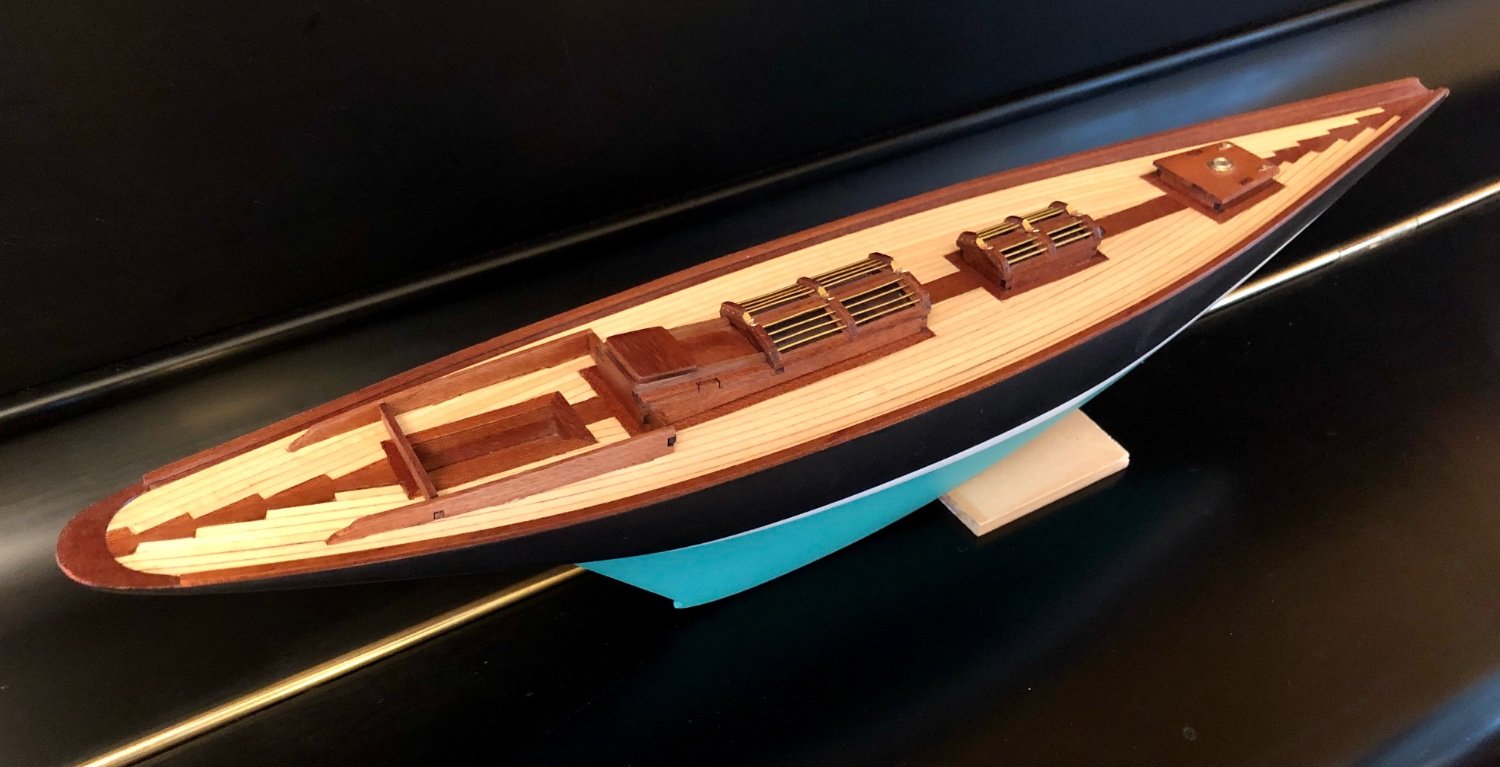
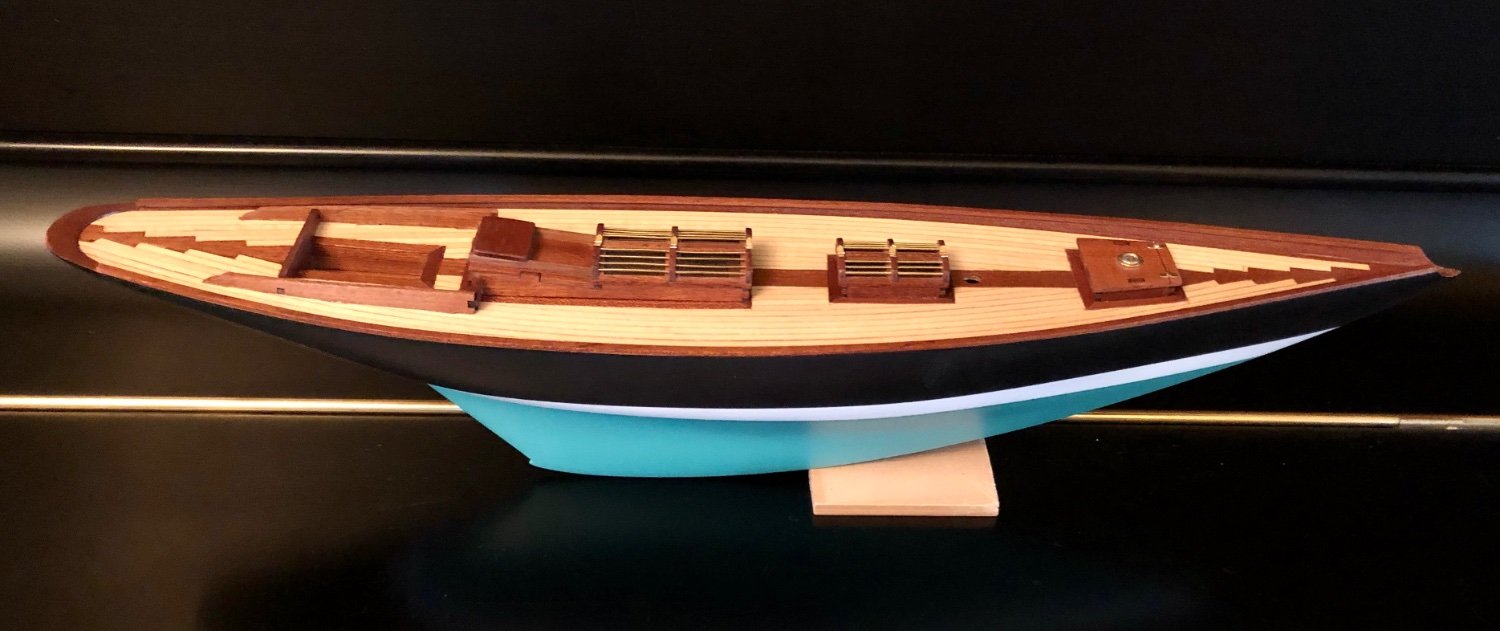
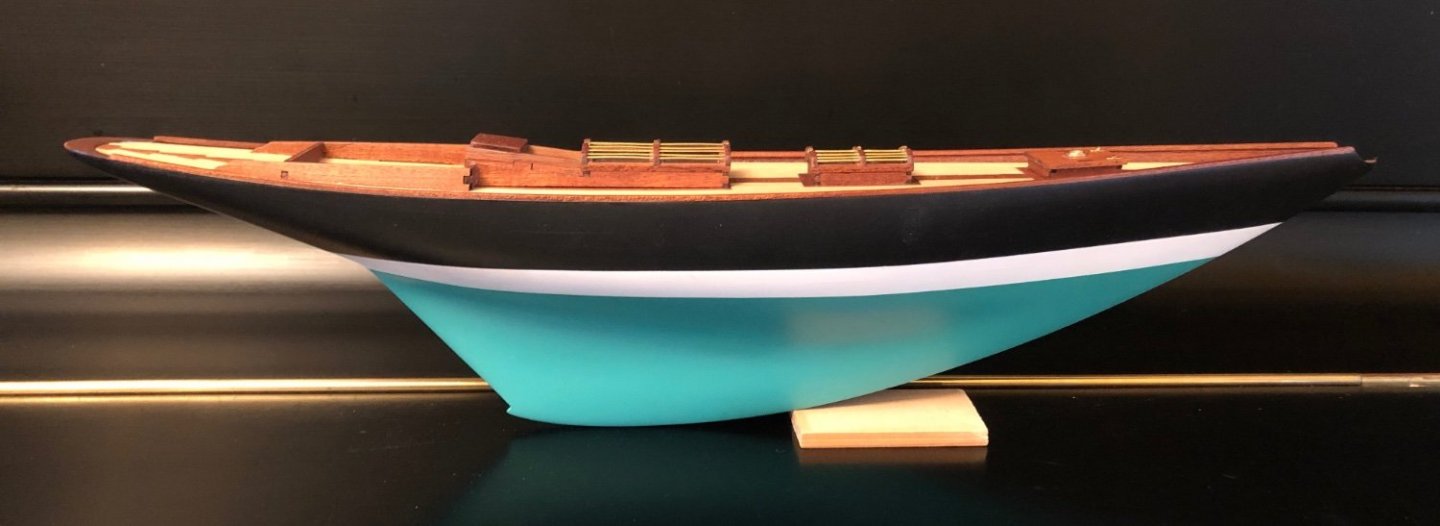
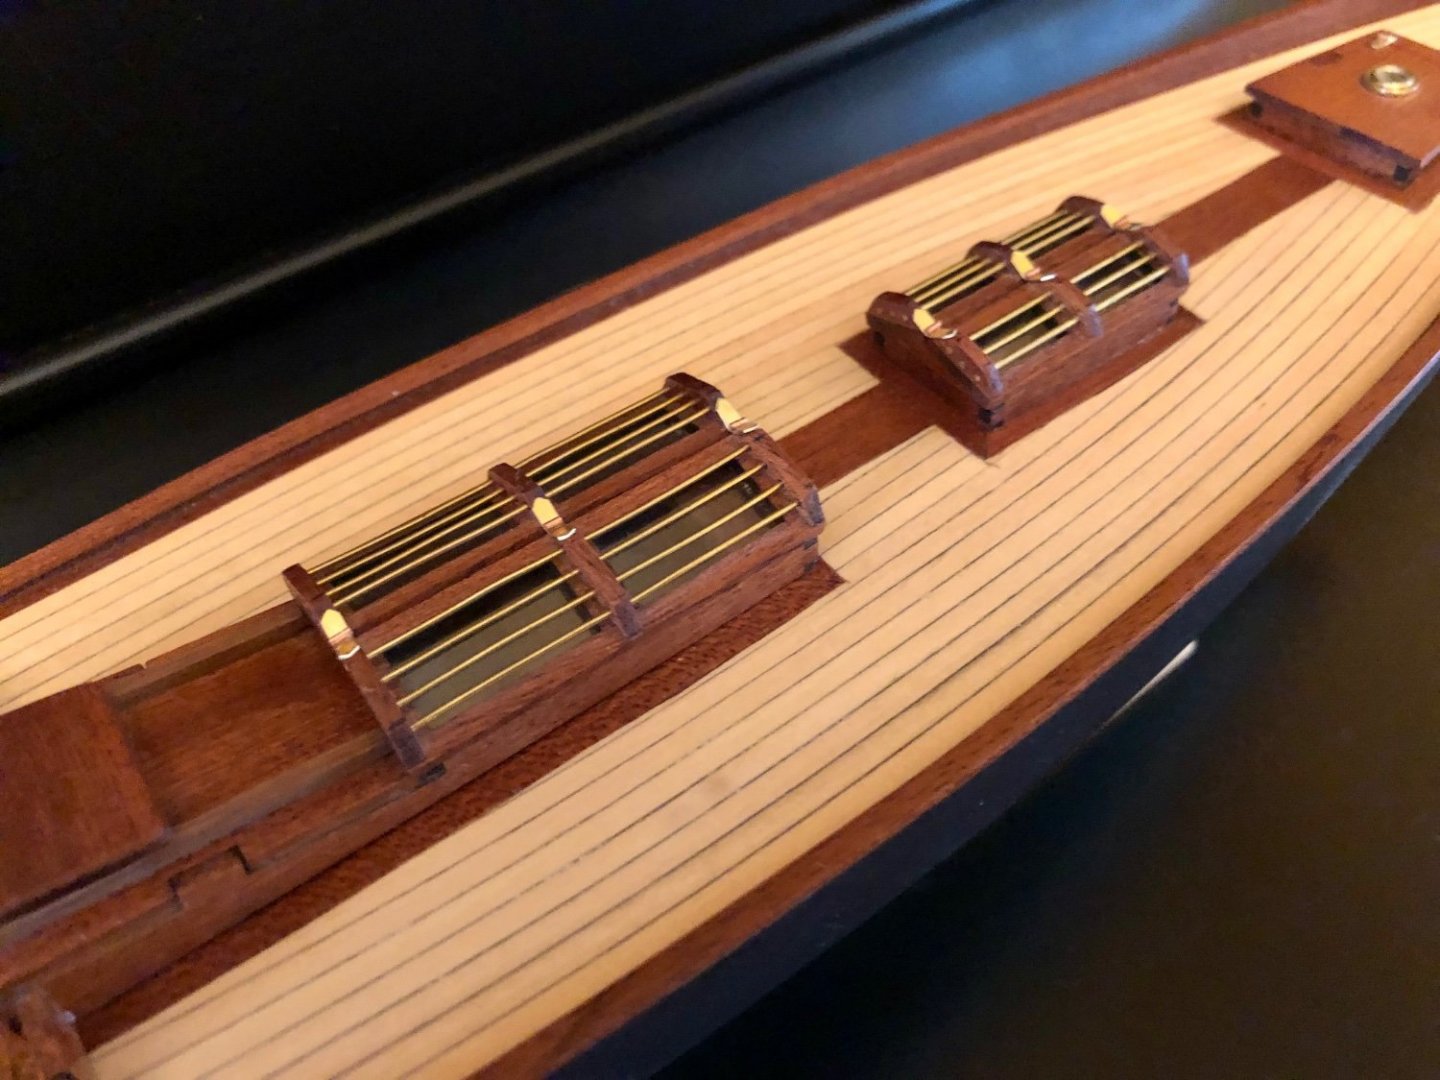
Well, they say that wonders never cease so, believe it or not, I actually sat down at my modeling table and made a little progress on the Pen Duick. The Artesania Latina plans and instructions are pretty much useless after you finish the hull and, eventually, I lost my motivation to keep at it. I'm still not sure how I will figure out the rigging but I'll give it a go. My plan is to keep chipping away at the Pen Duick and also start building the Flirt at the same time. I figure that working on the Flirt and the Pen Duick at the same time will balance things out for me when the Pen Duick gets too frustrating. I finished adding the hatches and the cockpit to the deck today. The only problem I had was that the tabs on the coamings around the cockpit did not line up well with the holes I had previously carved in the deck as per the plans. The walnut coaming is old and hard so they wouldn't flex much either. Eventually, after some careful filing, I managed to get them to sit flush on the deck without breaking them but there were some small gaps showing in the deck next to where the tabs slotted into the deck. I use Titebond Quick & Thick as my primary glue. So I made a slurried mixture of the glue with some sawdust from the deck planking strips and used a dental tool to carefully fill in the gaps. It worked great and I'm happy with the way the cockpit and hatches look on the deck.


-
Perfection, Grant, such a pleasure to follow your work!
- 840 replies
-
- 1
-
-
- winchelsea
- Syren Ship Model Company
- (and 1 more)
-
SMS Karlsruhe by Wreck1919 - 1/100
BobG replied to Wreck1919's topic in - Build logs for subjects built 1901 - Present Day
I just read over your build log, Sascha. Fantastic work on this unusual model! -
I'm sure you could get new ones easily enough from Chris if necessary, Mark.
- 505 replies
-
- 7
-
-
- vanguard models
- Sphinx
- (and 1 more)
-
Sorry to hear about this, Mark, but I predict it is just a bump in the road of your journey building this wonderful model. We've all been there more times that we'd like to admit and, more times than not, we found a way to fix it. No doubt that you will as well. Good luck!
- 505 replies
-
- 7
-
-
- vanguard models
- Sphinx
- (and 1 more)
-
Exceptional work, David! I'm learning a lot from your creative techniques.
- 91 replies
-
- 2
-
-
- Speedy
- Vanguard Models
- (and 1 more)
-
Fiat 806 Grand Prix by Tim Moore - FINISHED - Italeri - 1:12
BobG replied to Tim Moore's topic in Non-ship/categorised builds
These legendary cars certainly didn't idle or run quietly...rumbling, choking and and belching fire! I could smell the Mefistofele burning oil just watching the video! I wonder if this is just the way these engines ran even when they were new or if the car in the video was in serious need of a ring job? Thanks for posting these videos, Yves...great fun to watch! -
Great idea for making those brass rings for stropping the blocks, Paul! The creativity of modelers like you always amaze me.
- 112 replies
-
- 4
-
-
- Cheerful
- Syren Ship Model Company
- (and 1 more)