


ccoyle
-
Posts
10,173 -
Joined
-
Last visited
Content Type
Profiles
Forums
Gallery
Events
Posts posted by ccoyle
-
-
-
Welcome aboard, and good luck on your project!
-
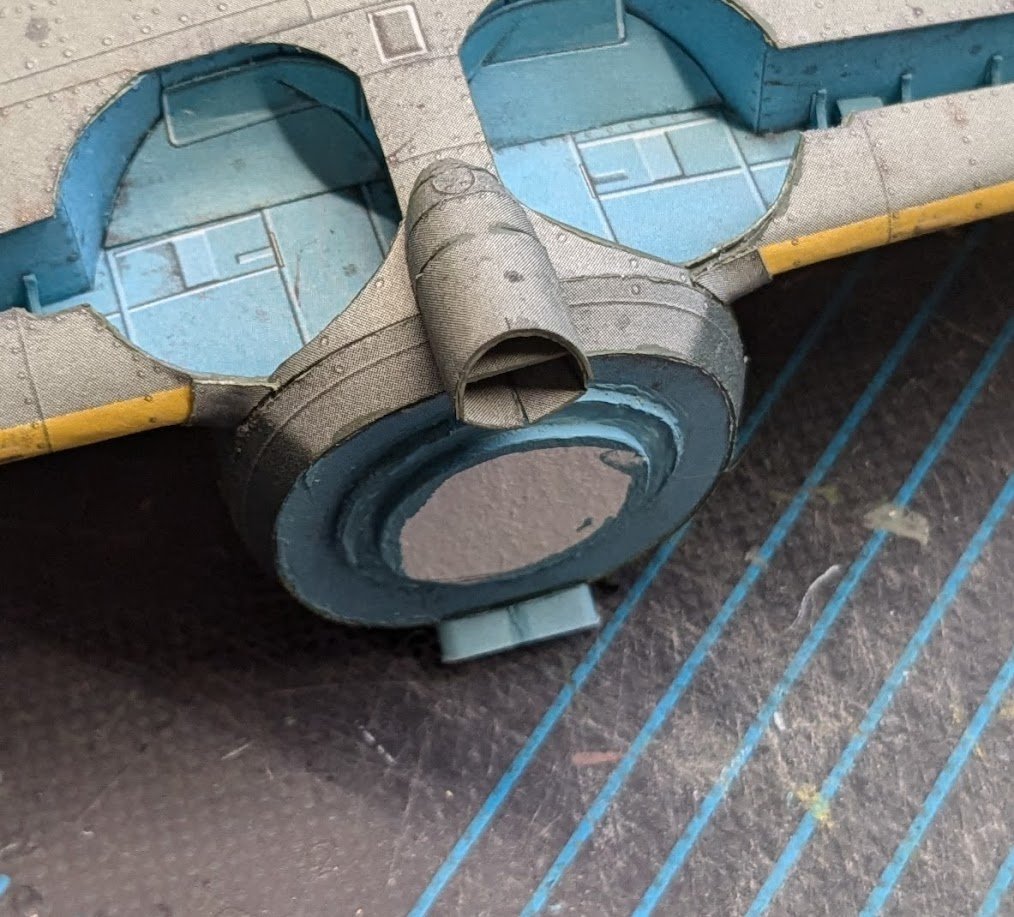
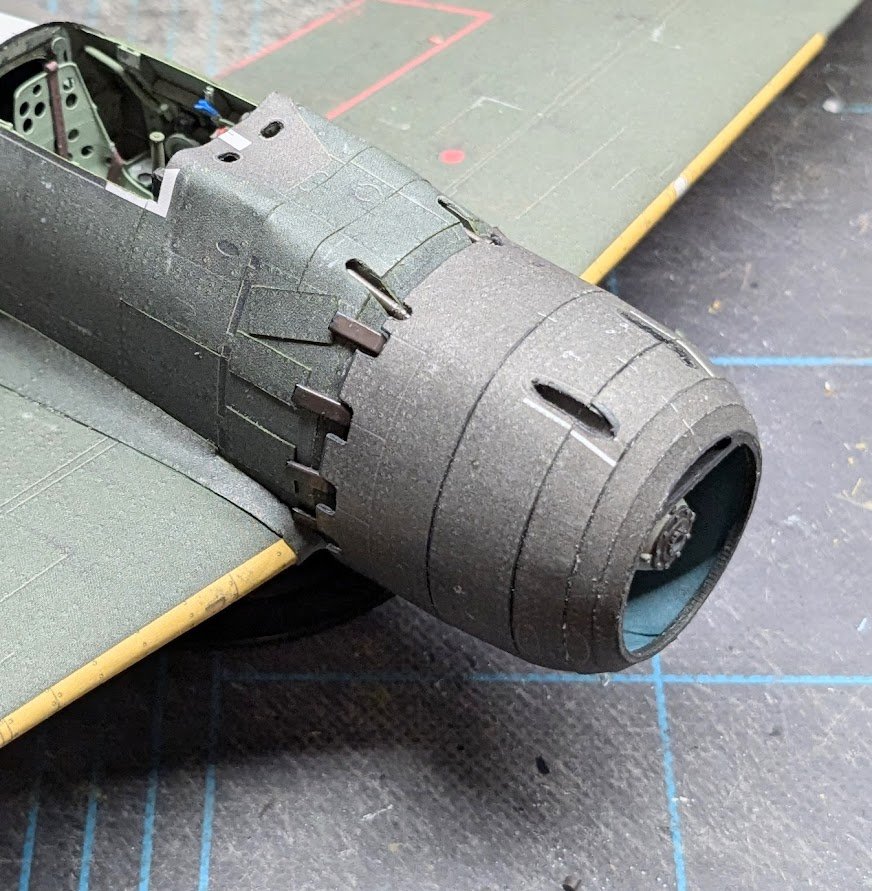
Engine mounted. I wasn't happy with the placement of the machine guns. Since they're made of paper, removing them understandably made a hash of them, so I ended up replacing them with styrene rod.
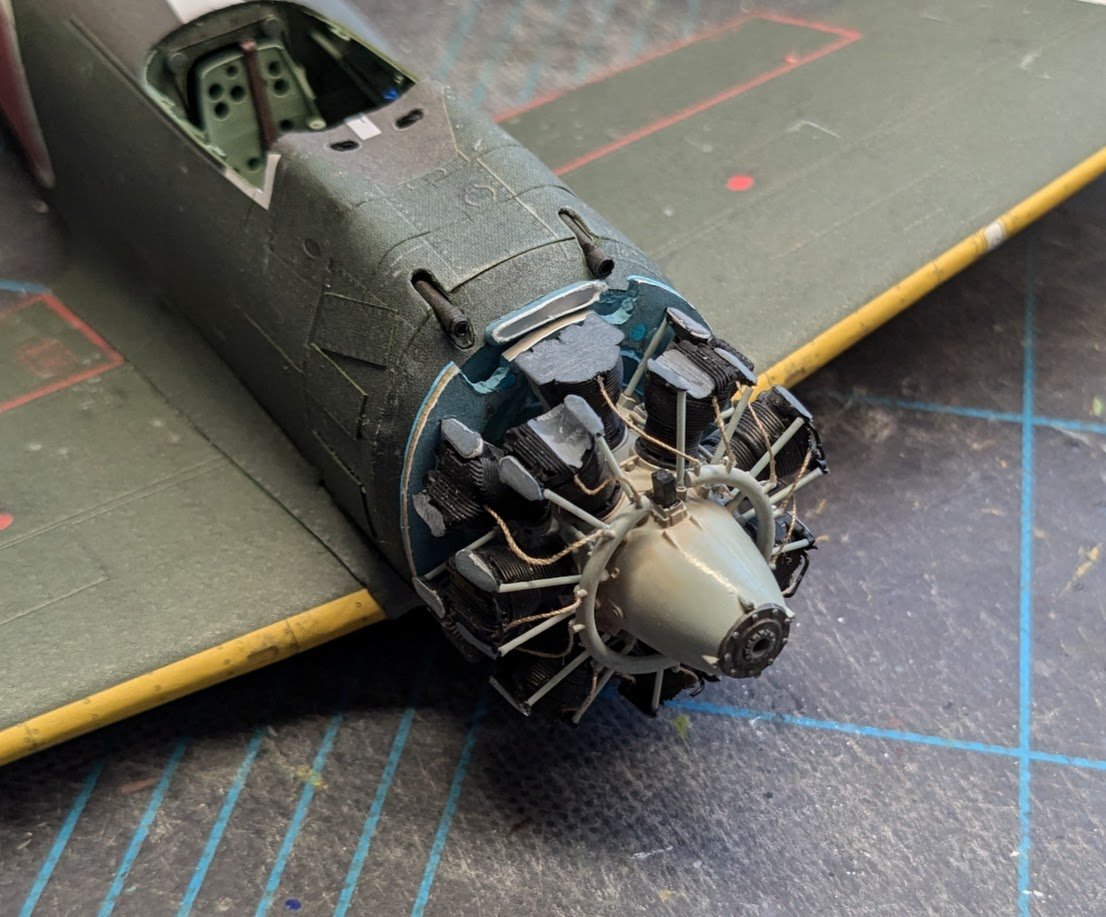
And cowling on.
I can't believe I've only been working on the engine and cowl for thirteen days -- it feels like ages. The next task will be to sort out the exhaust stubs.
-
4 hours ago, Haze Gray said:
if you like ships from the Spanish-American war period post a reply and tell me your favorite ship!
I'm a fan of the transitional sail-to-steam period, too. I have always thought that USS Petrel (PG-2) would make a very interesting model.
- Keith Black and Canute
-
 2
2
-
Welcome aboard!
At the risk of ruining any future good name you might have acquired among this august company, might I suggest you take a look at card models? They do not require lots of time, space, tools, or capital outlay (a big plus for starving students). You can check some out by clicking here.
Cheers!
- AJohnson, Keith Black and Nirvana
-
3
-
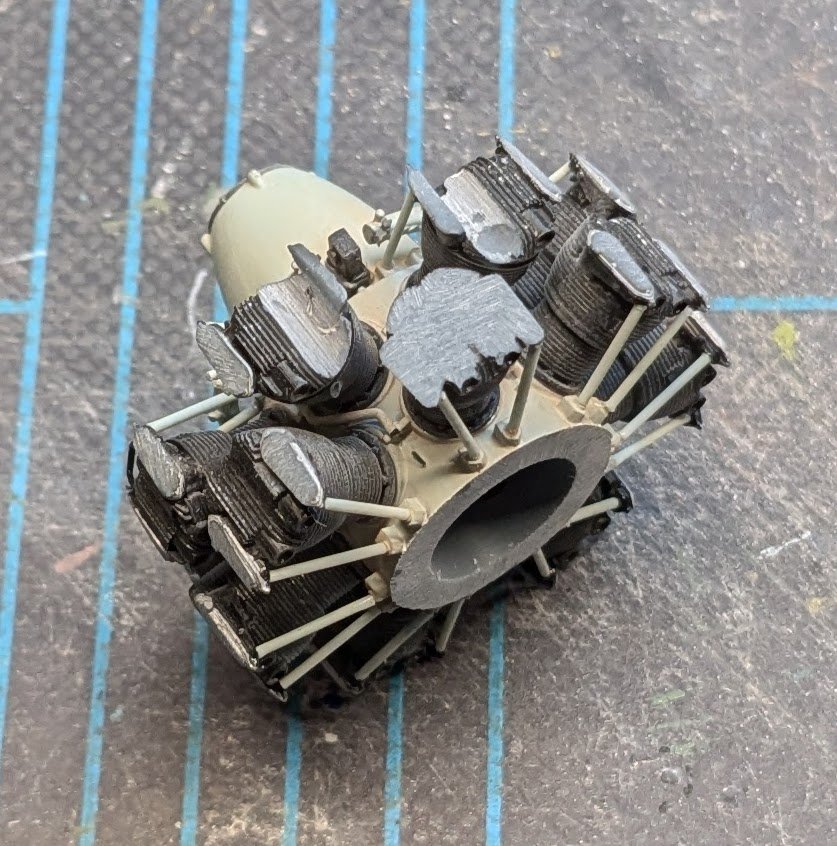
The saga continues -- probably would have been easier to just build the card engine! First we had to carefully remove the original engine mount and rebuild it to the desired thickness.
Next we wired the cylinders. I only added half of the spark plug wires -- I'm just hinting at their existence, not replicating them in all of their glorious detail.
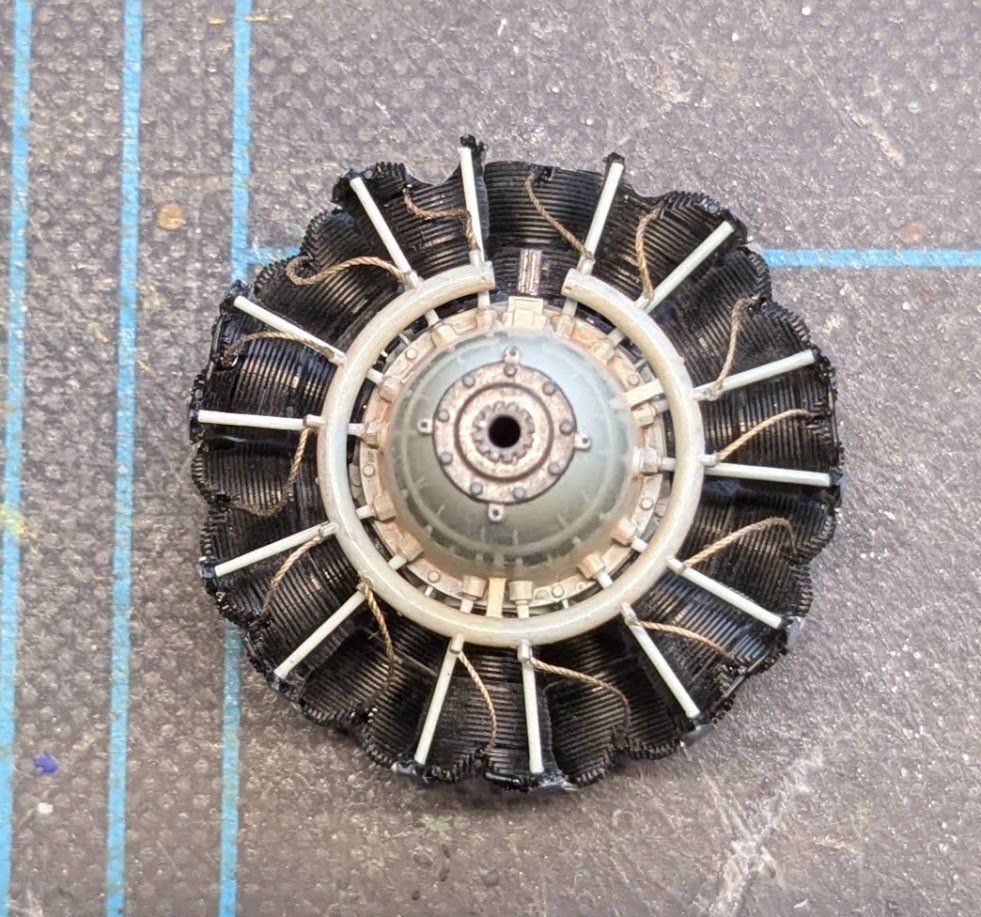
After all, little of them will actually be visible.

Fuselage guns added.
And lastly, the oil cooler intake is added -- this will help position the cowling.
I think I'm more or less ready to mount the engine now, but I need all my wits about me when I attempt the job.
-
Hi, folks.
Consider this a gentle reminder about our forum guidelines regarding signatures:

We have some members whose signatures are getting very lengthy indeed! This is not something that our small staff wishes to spend hours ruthlessly purging, so we are counting on the members to kindly self-moderate.
Thanks for your cooperation!
P.S. If a member wishes to see every topic a member has created, they can easily do so by going to the member's profile page and clicking the "see my activity" button. The results can be filtered for 'posts' (i.e., all posts) or just 'topics'.

-
-
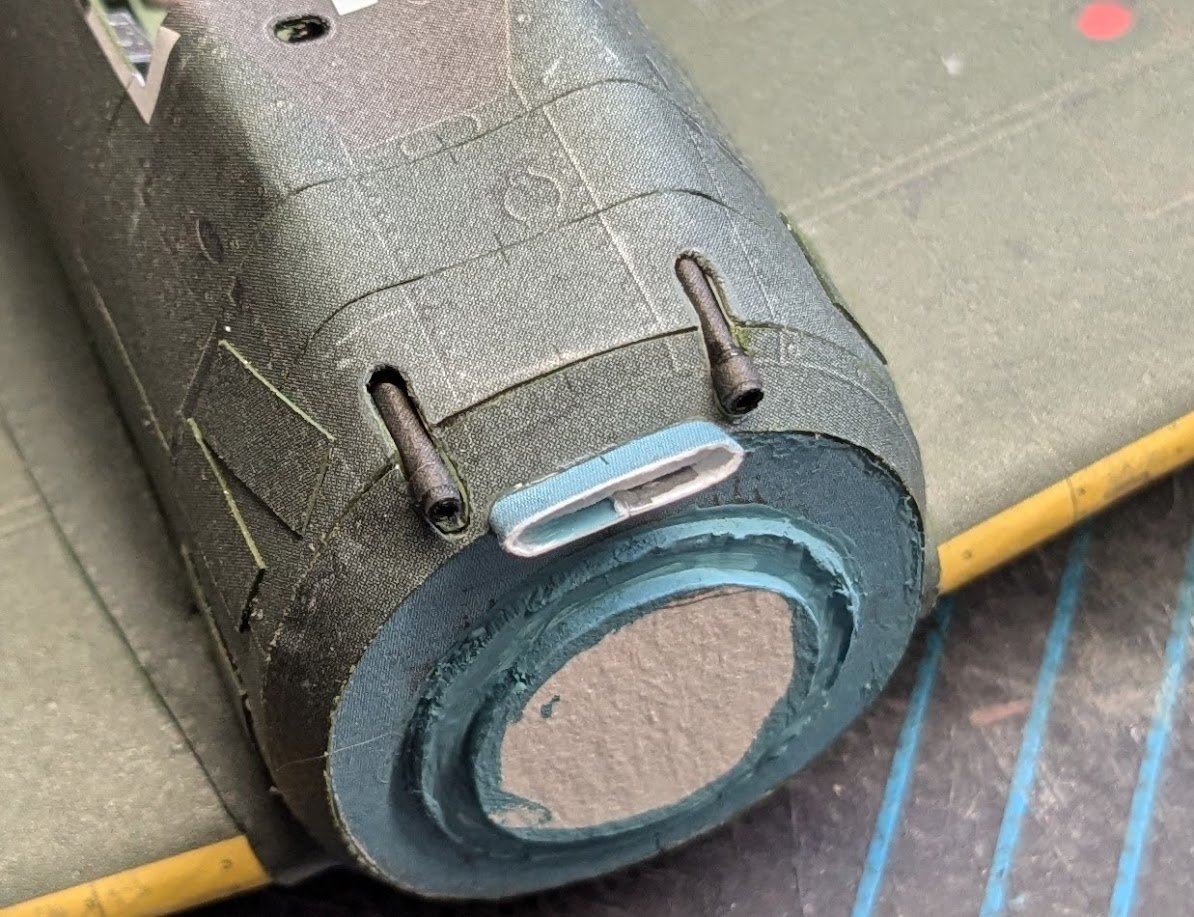
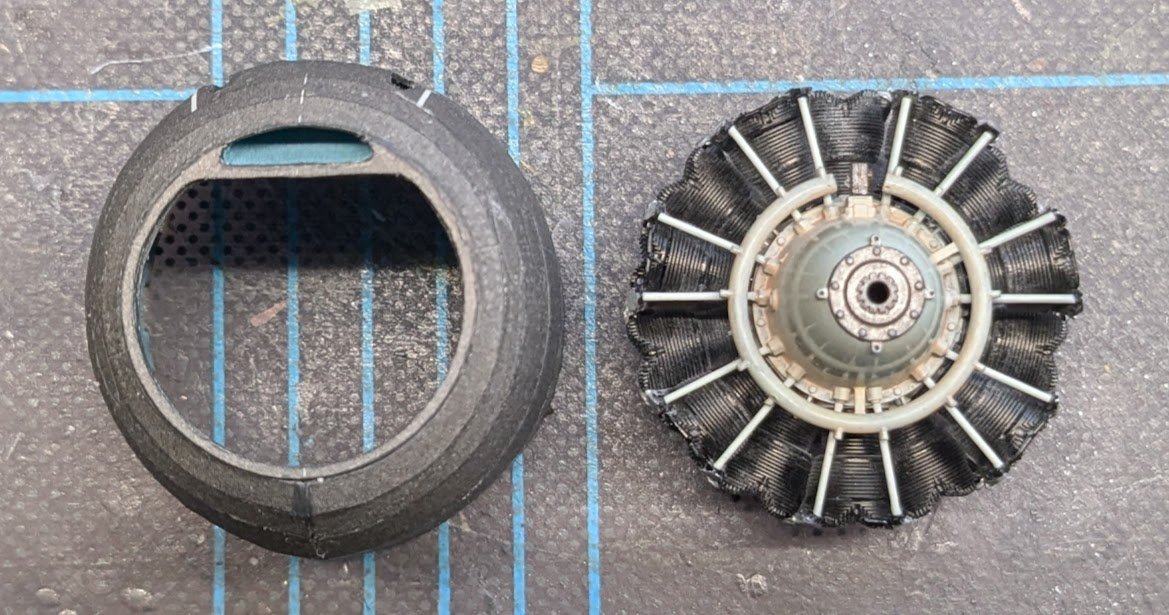
Finished the surgery on the engine. I used a cutting ball with my Dremel tool for the rough work and finished it off with files. You can see that in addition to cutting the grooves for the machine gun channels and removing the rear of the block, I also had to file the top of one rear cylinder completely flat, as well as file off the tops of all of the rear cylinder valve covers. 😩
Now, if only the engine would have fit inside the cowling after all that work! It did -- but the engine, and thus the cowl along with it, still sits too far forward when test fitted to the front fuselage. Still more work to do!
-
We can see now that this will be a POB design.
- Nirvana, catopower, Ryland Craze and 1 other
-
4
-
-
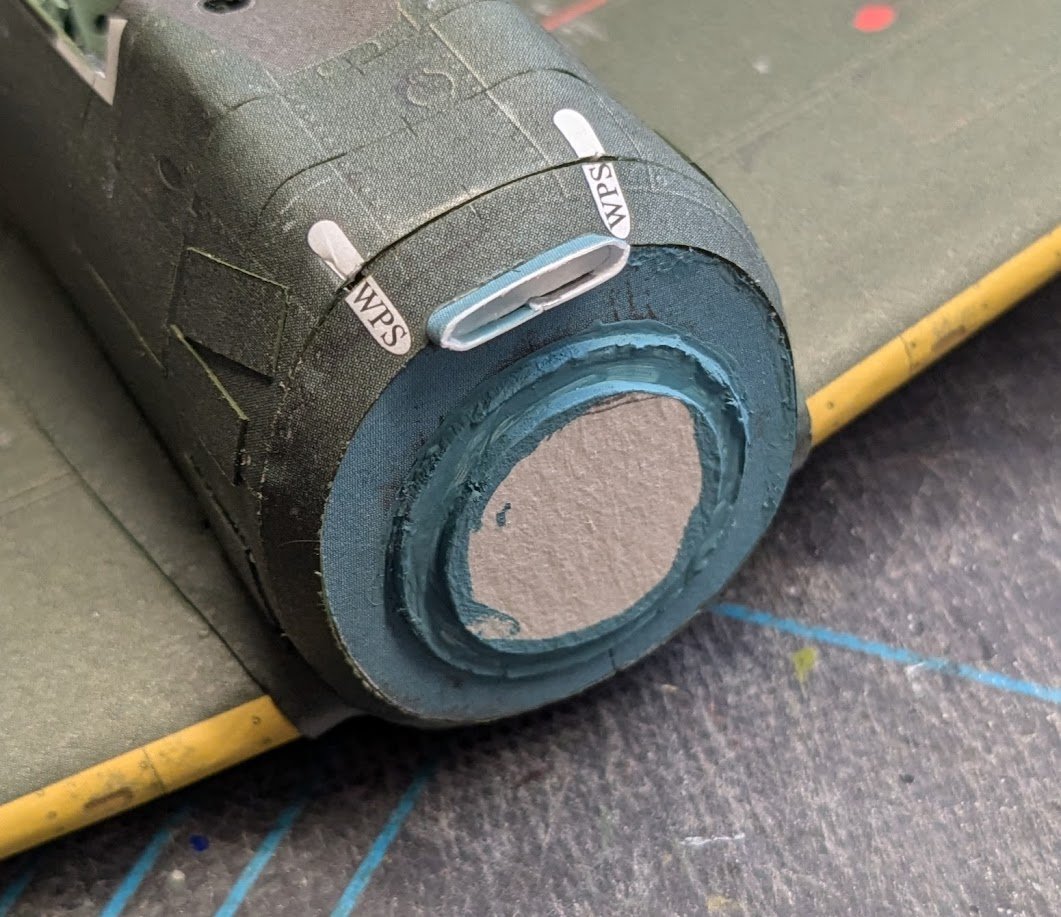
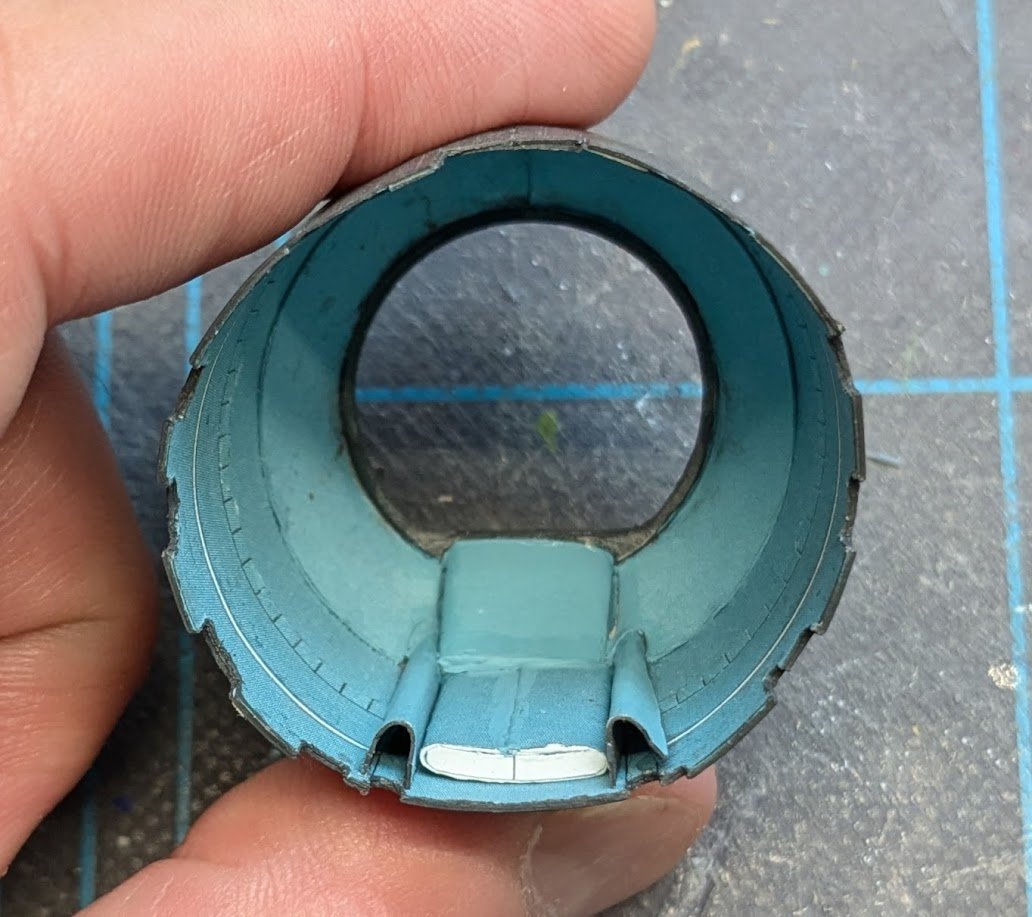
Most of the cowl interior is done now. Some sloppy fitting here and there -- my fault, since much of the work could only be done while viewing with one eye, which ruins depth perception of course. I also installed the two tiny spacers inside the middle section of duct work upside down, meaning the ugly seam shows, which shouldn't be too visible on the final assembly. Next step will be the necessary modifications to the engine cylinders to get that darn thing to fit inside the cowl.
-
-
1 hour ago, alross2 said:
Whatever you consider appropriate.
Done! I'd like to see this thread gain some traction.
- Ryland Craze, Nirvana, catopower and 1 other
-
4
-
3 hours ago, alross2 said:
The kit will include a jig to support the bulwarks while they are being built.
Al, would you mind if I re-titled this topic to make it more apparent that it's a kit development thread?
- Canute, Nirvana and Ryland Craze
-
3
-
-
Kit looks like it has a lot of detail.
- Canute, king derelict, thibaultron and 2 others
-
5
-
-
-
That is a lot of exposed timberheads! Have you hinted anywhere previously as to the identity of this new project?
- Paul Le Wol and Canute
-
2
-
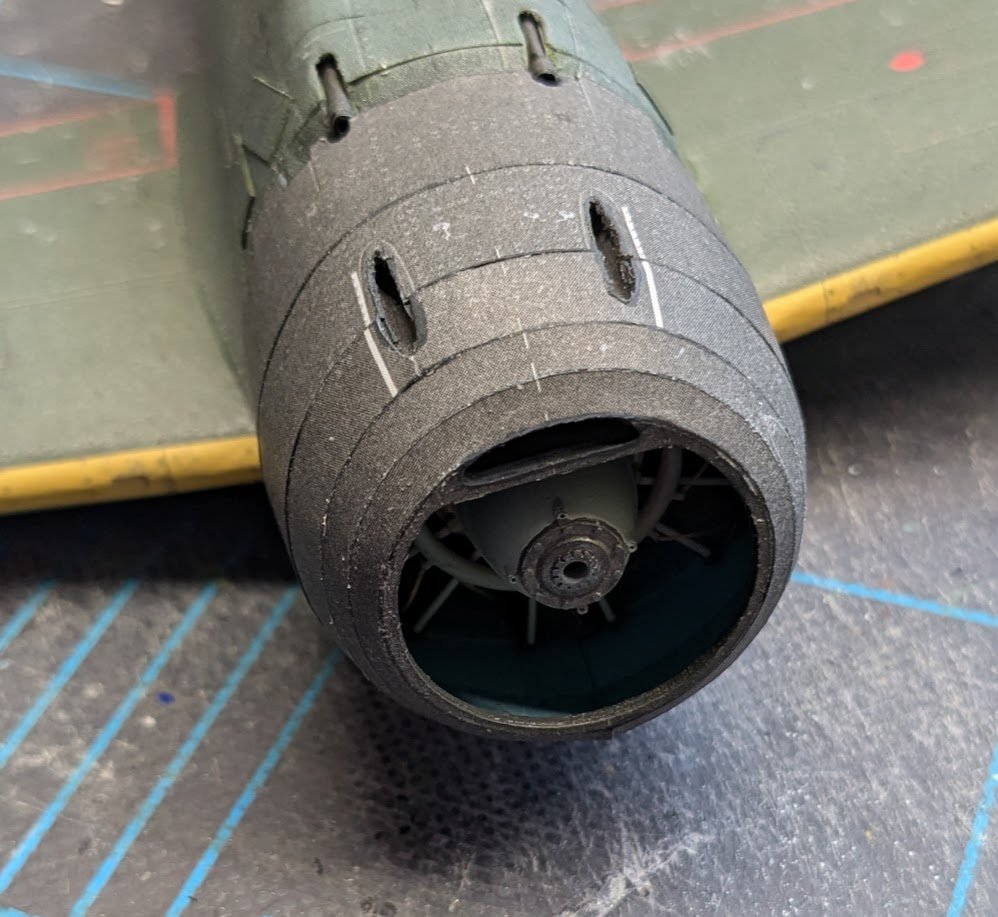
So, the outer structure of the cowl is done. The front of the crankcase should be flush with the cowl opening, so that will help me determine how to fit the rear part of the engine to the fuselage.
Speaking of which . . .
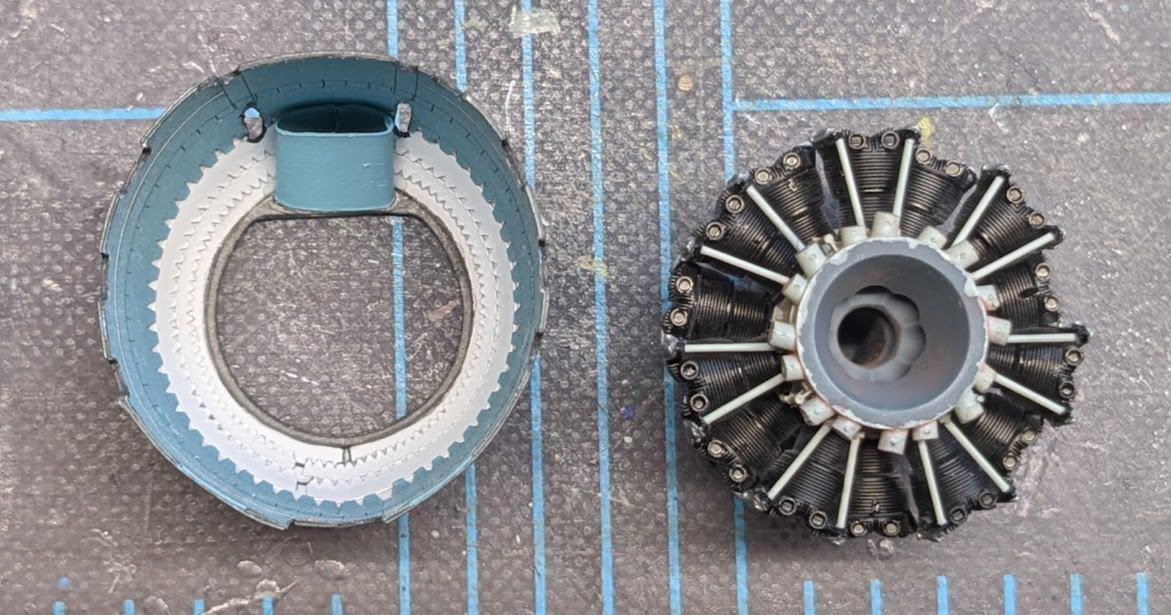
. . . it's a good thing I didn't fit any air intake pipes, because my initial measurements suggest that the entire portion of the molded block that includes the pipe stubs will need to be removed in order to allow the engine to fit properly. Fun!
-
-
11 hours ago, Old Collingwood said:
Chris could you not file a channel both sides with a round file to match and take both gun barrels
That's the plan.
- Old Collingwood, Dave_E, thibaultron and 1 other
-
4
-
27 minutes ago, KBo said:
Have you thought about showing the aftermarket engine outside the model so all of it can be seen? For the model make up the original kit parts that can be seen.
Well, the whole point of the resin engine was to make the 'joy' of building the paper engine unnecessary. Displaying the resin engine separately is no longer a viable option because I've already altered the cylinder heads. There's also a fair number of bits that the resin set doesn't include.
- Ian_Grant, Dave_E, Ryland Craze and 5 others
-
8


Free. HMS Pegasus incomplete. North Essex U.K.
in Traders, Dealers, Buying or Selling anything? - Discuss New Products and Ship Model Goodies here as well!!
Posted
I have to admit that I'm a little envious about the full-time narrowboat plan. I told my wife that we have enough equity in our home to sell it and pay cash for a narrowboat, but she wasn't keen on the idea -- my loss!