


ccoyle
-
Posts
10,173 -
Joined
-
Last visited
Content Type
Profiles
Forums
Gallery
Events
Posts posted by ccoyle
-
-
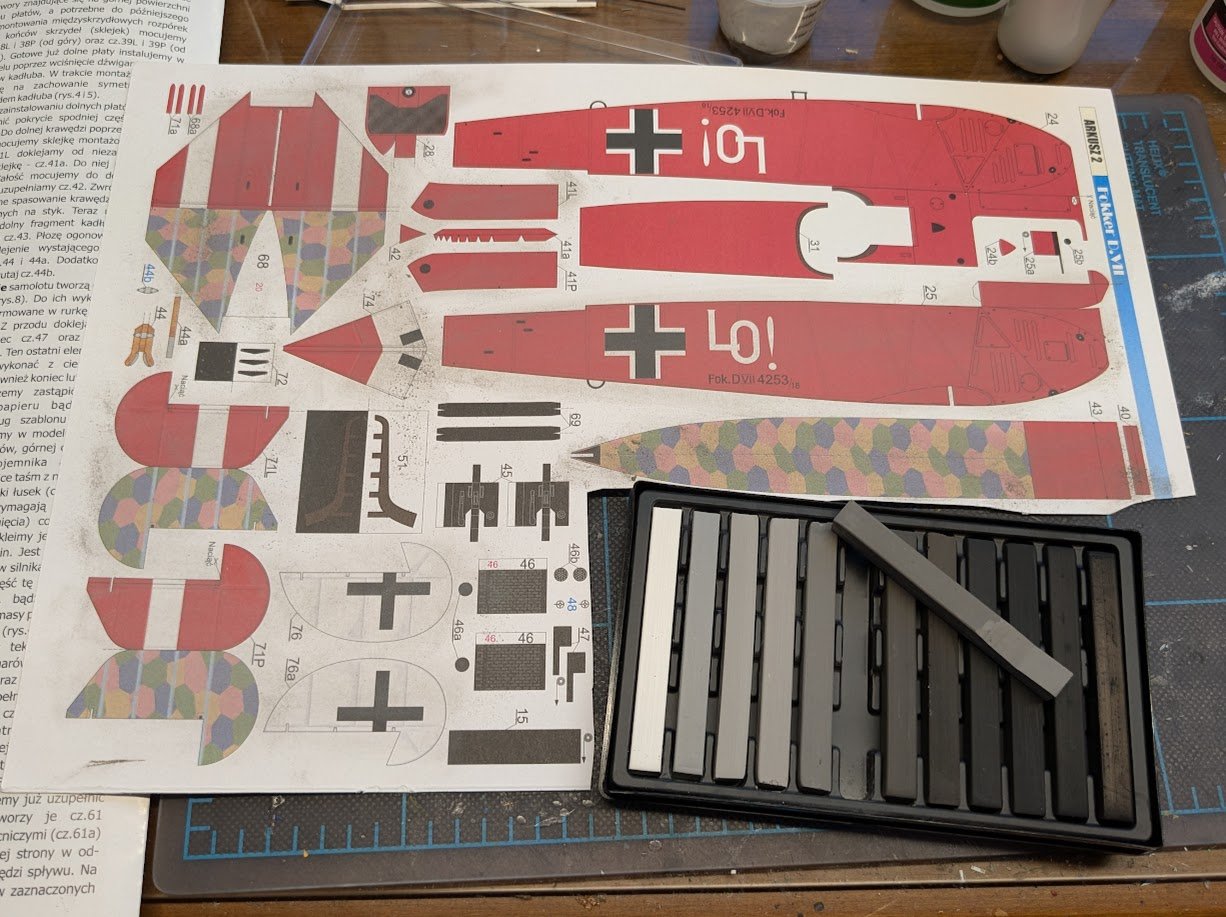
After adding a few last cockpit bits (fuel tank, instruments), work commenced on prepping the fuselage skins. The kit has no weathering, so the colors look a bit bright for the Western Front c. summer of 1918, so I decided to try grunging them up with some weathering chalk -- just enough to take the 'freshly minted' look off of them. This entire sheet as had chalk applied, except for the topmost fuselage skin, just so you can see the before-and-after.
-
Wow! That is beautiful! Congratulations on completing this challenging project!
- Ryland Craze and aydingocer
-
 2
2
-
On 7/14/2025 at 11:28 PM, thibaultron said:
Nice, though now I'm going to have to look up "Bacon Candy"!
Yeah, that got me curious, too!
- thibaultron, Canute and Old Collingwood
-
2
-
 1
1
-
Fuselage assembly continues. First we have the traditional "take a good like now while you still can" photo before the cockpit gets zipped up. The control stick and rudder pedals are supplied as 2D parts. The pedals will be the less visible of the two on the finished model, so I left them alone, but I felt compelled to replace the stick with a scratch-built replacement made from styrene rod.
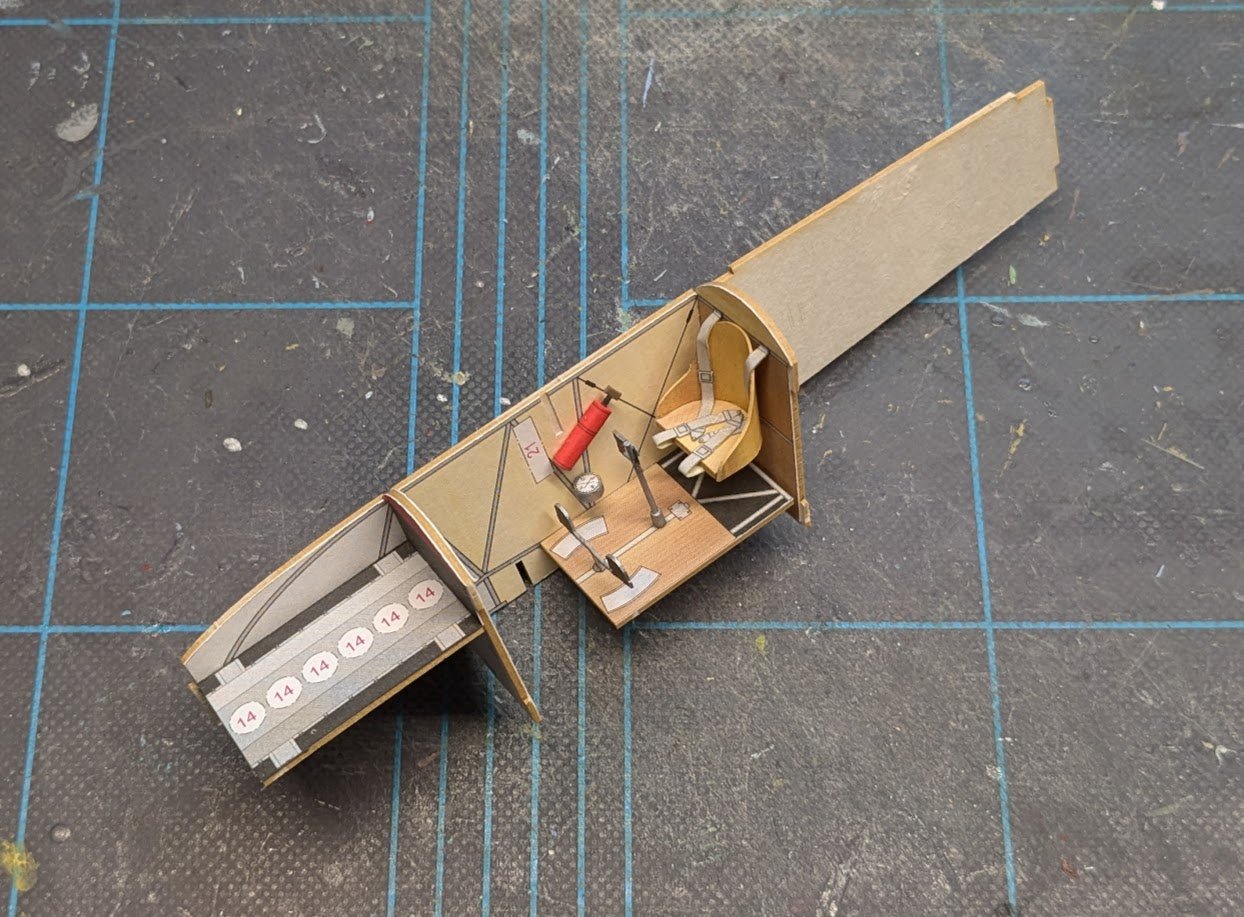
Fuselage sides added, along with the rudimentary engine cylinders.
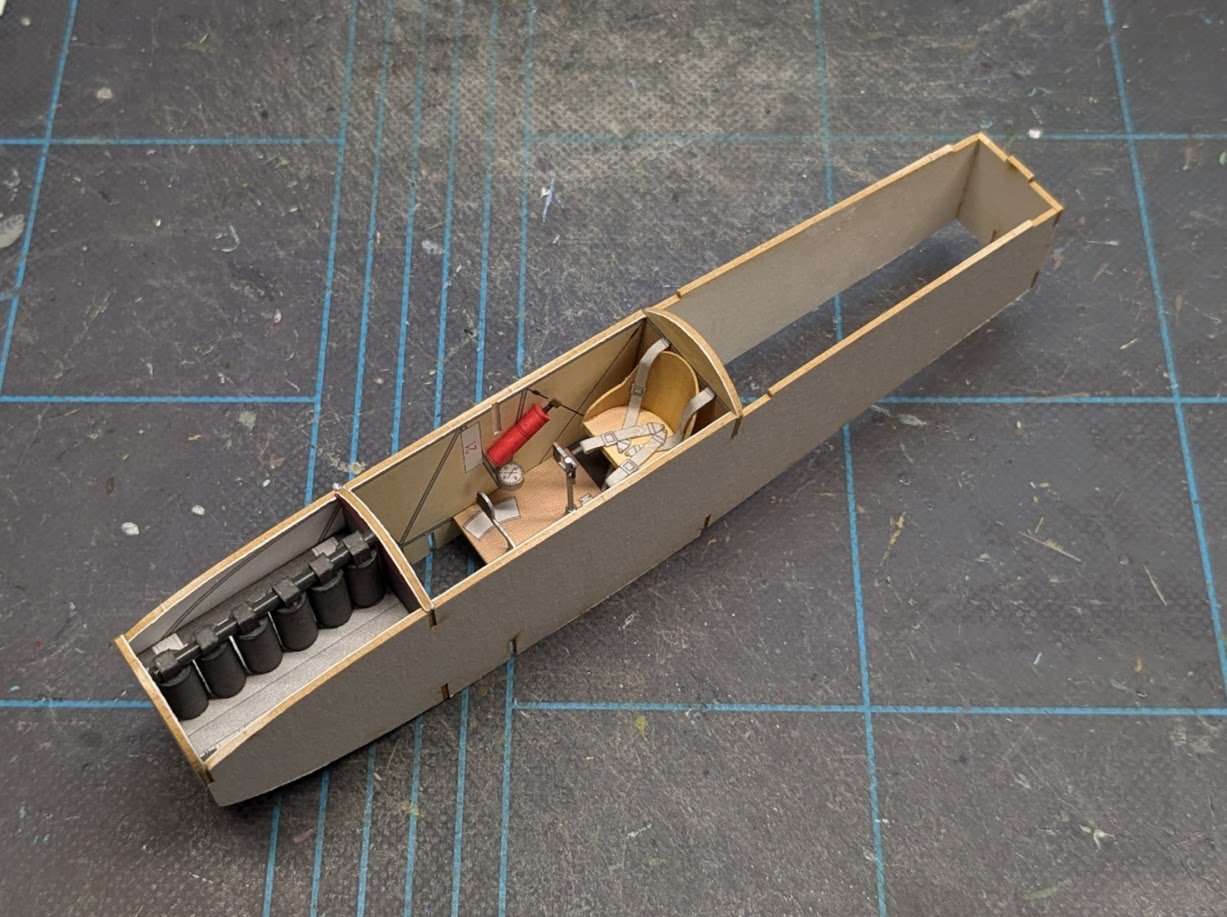
The fuselage bottom is rounded and makes no provision for proper fitting to the straight fuselage sides. I added locator strips made from scrap card.
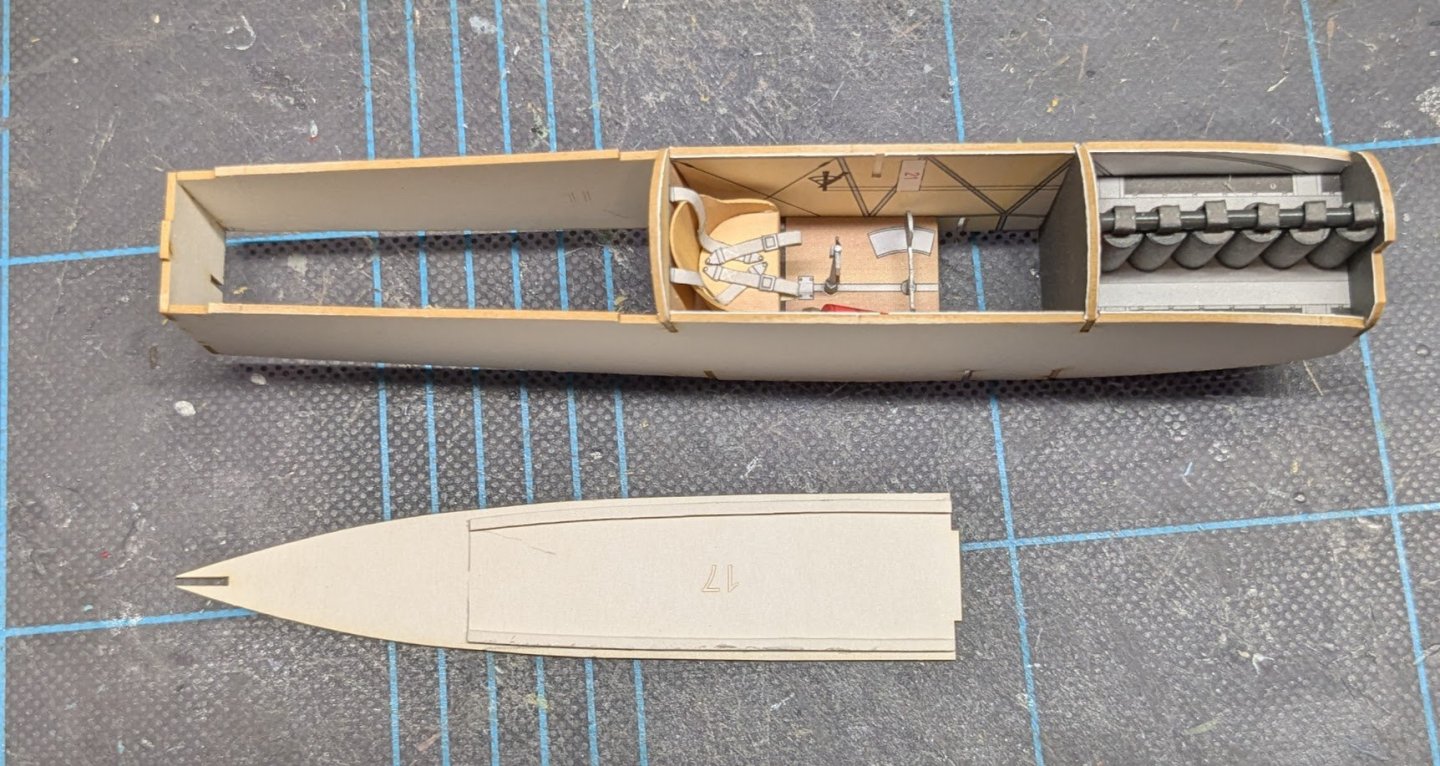

That's it for now!
-
4 hours ago, Richard44 said:
I'm about to do the wings and I notice that you added joiner strips to the trailing edge. Hard to tell from your photo but it looks like you used strips of laser fret. I have a very vague memory of you describing similar strips in one of your older build logs, but made from folded card. Which did you use here?
The laser fret would be far too thick. Regular card or even #20 bond will do.
- Canute, Jack12477, Old Collingwood and 1 other
-
4
-
Time to bump this topic again. Your gallery images must be placed in albums -- loose images are periodically deleted. This means that:
@Menne Kosian@Captain.Jack.Sparrow@John Cheevers@Jeddahbill@tony1745@Rick Abramson
You are at risk of having your beautiful images removed! Please put them into albums at your earliest convenience.
Thank you!
- catopower, Kevin and Ryland Craze
-
3
-
Just keeps looking better and better!
- tmj, Maxthebuilder and Ryland Craze
-
3
-
19 minutes ago, Jsk said:
BTW, 'Lo! was the nickname of Ernst Udet's fiance Eleonore Zink. He decorated several of his WWI fighters with her name. They married shortly after the war but soon parted. Udet was a notorious womanizer.
When I was a kid, Revell issued a series of WW1 aircraft in 1/72 scale. I had a bunch of them. I built their D.VII kit twice, one in Udet's livery and the other in Herman Goering's.
First cuts on this kit consists of a lot of prepping of structural elements. If you've followed any of my other KK builds, you may recall that the fit between panels tends to be overly snug. To alleviate this, I remove all of the locator marks on these elements, and sometimes a bit of the underlying pulp board as well.
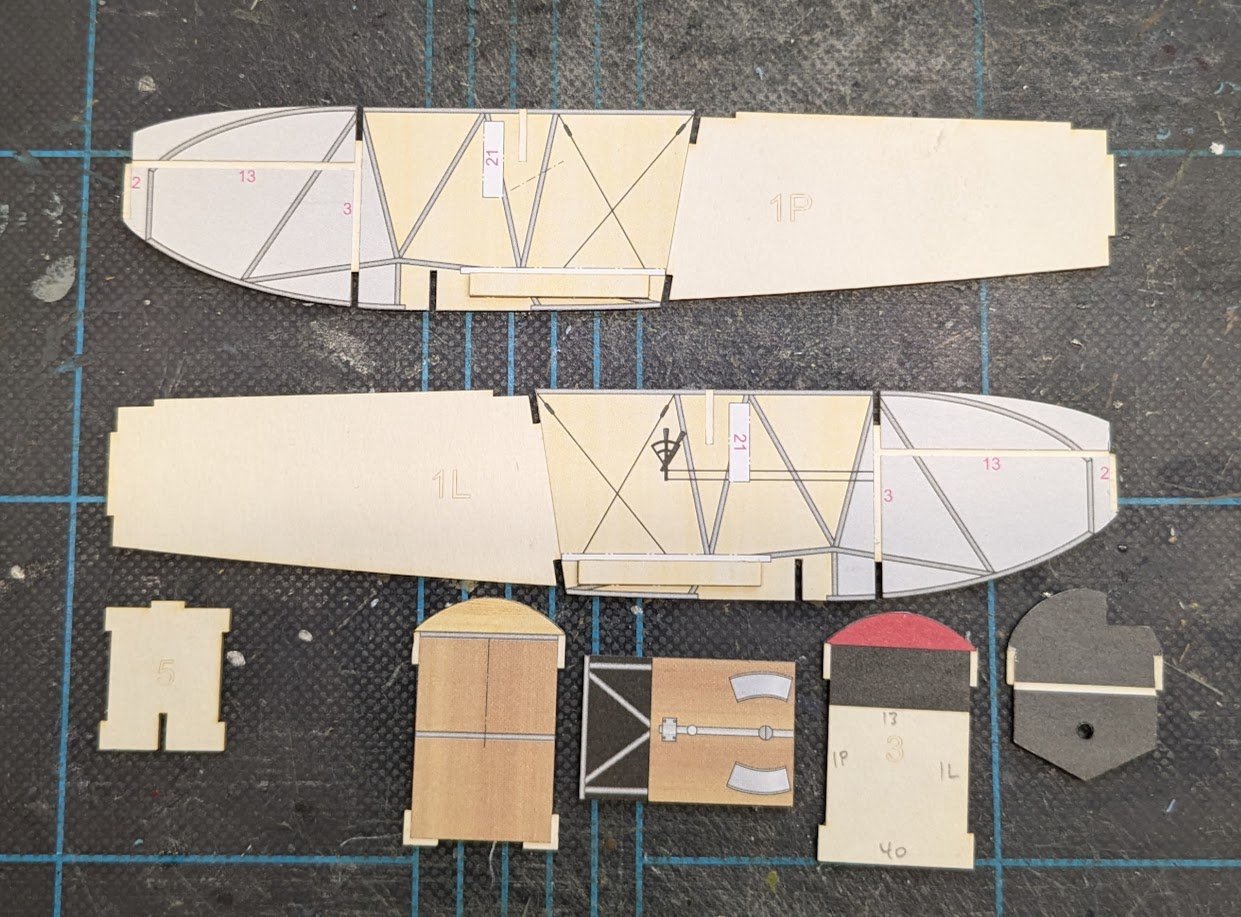
The cockpit elements are a bit rudimentary. Once those are added, the fuselage panels will go together very quickly.
- Canute, GrandpaPhil, James H and 12 others
-
15
-
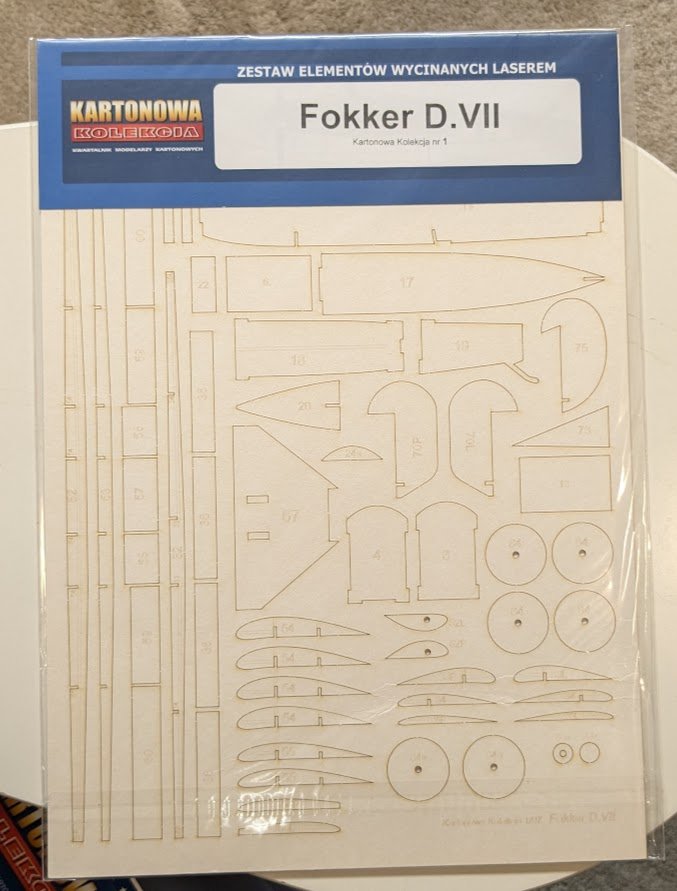
Welcome to another adventure in card modeling! I had been itching for awhile to do another card project, but it wasn't originally going to be this kit. However, in flipping through my stash earlier today, I discovered I have laser-cut frames for this kit -- I don't recall ever ordering them. Must be that age thing creeping up on me. Since I had been thinking about doing another of Pawel's designs, it seemed like this was just meant to be. If you have seen any of my other KK builds, then you know I am a big fan, and I expect this kit will move right along without too many hitches. BTW, this is KK #1 -- the very first kit that Pawel issued through his own publishing firm after having had his earlier designs published elsewhere, so it's kind of like a bit of nostalgia.
Here's the kit cover.

Some of the parts pages. Pawel's skills as a graphic artist have improved quite a bit since 2007.
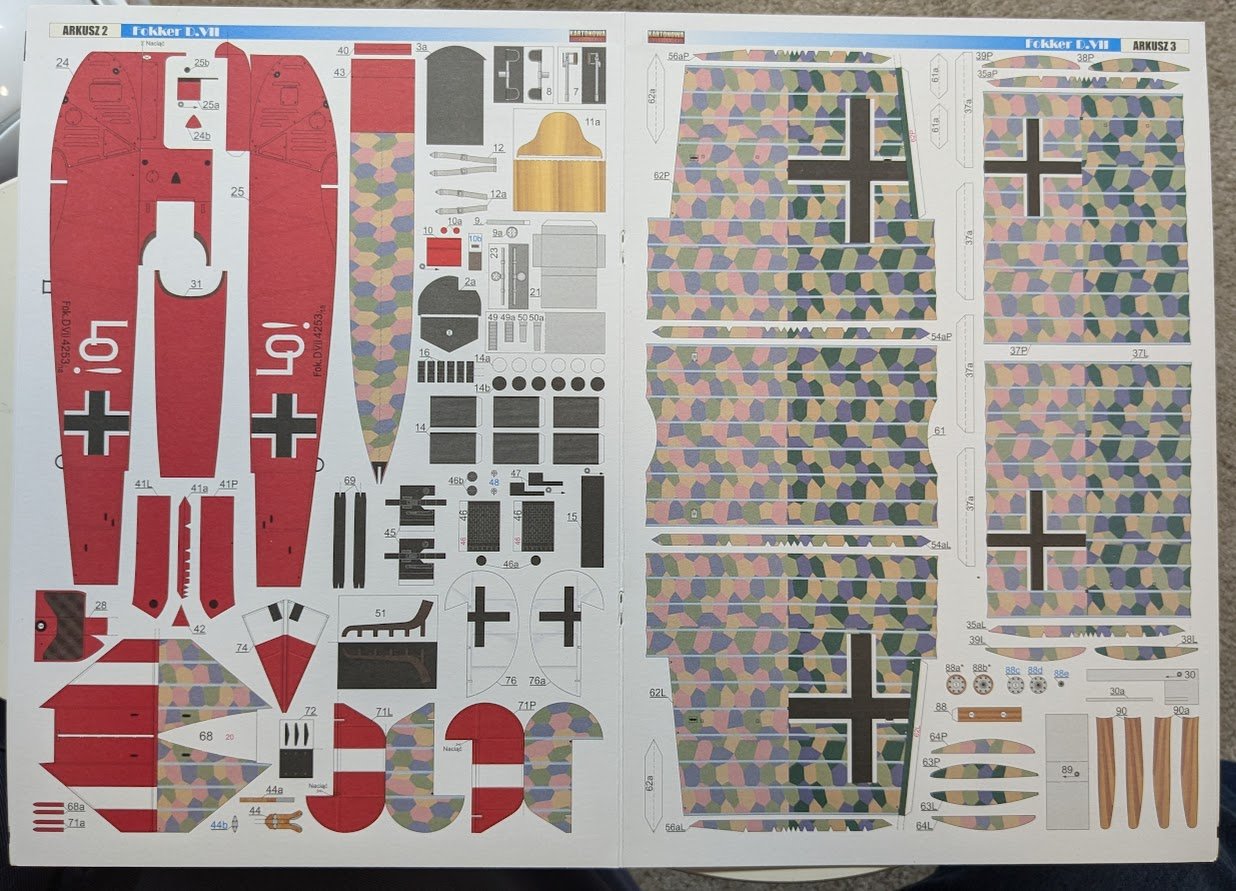
And the frames set.
No rigging to speak of on this one, and no canopy either, so I don't anticipate it will take terribly long. Look for first cuts soon!
- Old Collingwood, Javlin, AJohnson and 12 others
-
15
-
-
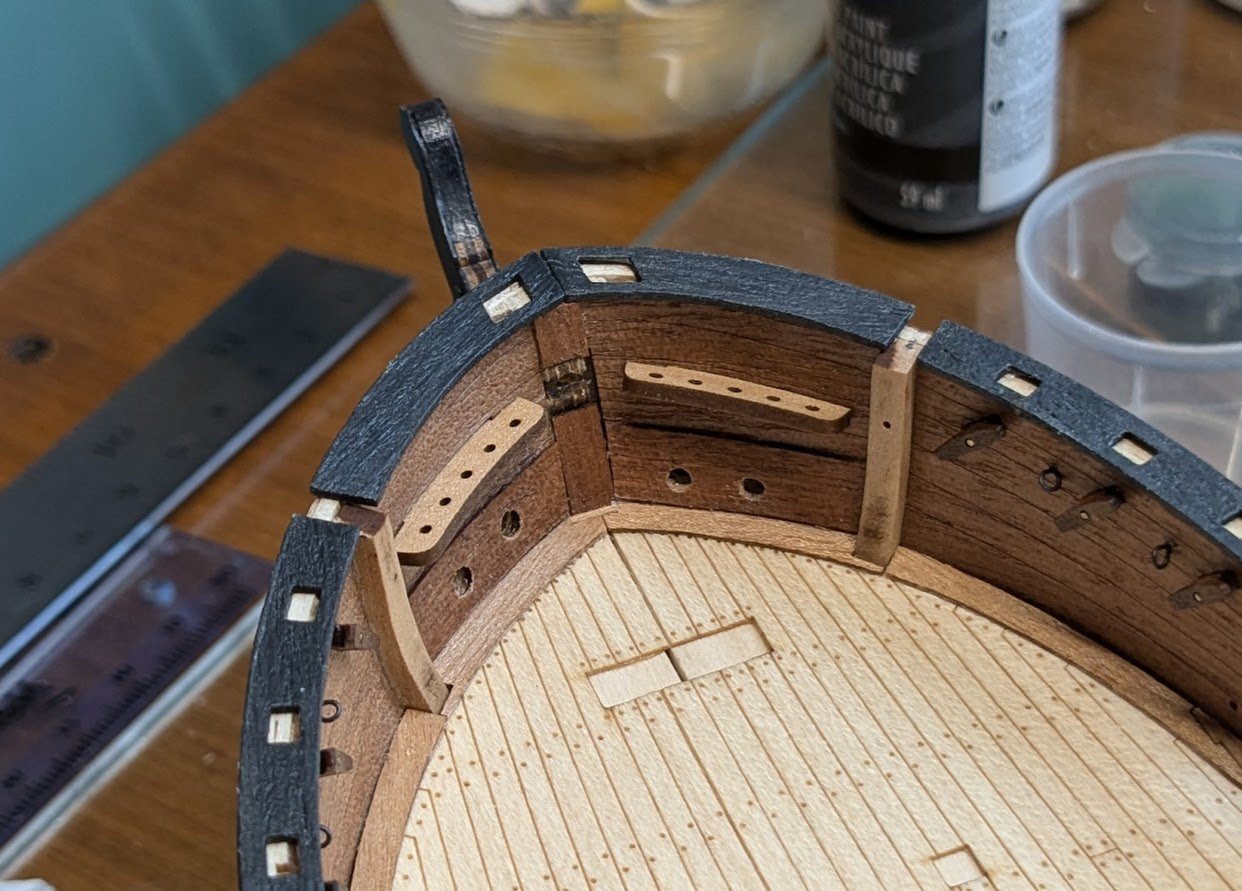
And here's the outboard hawse holes with their anchor pad. Ignore the boo-boo.
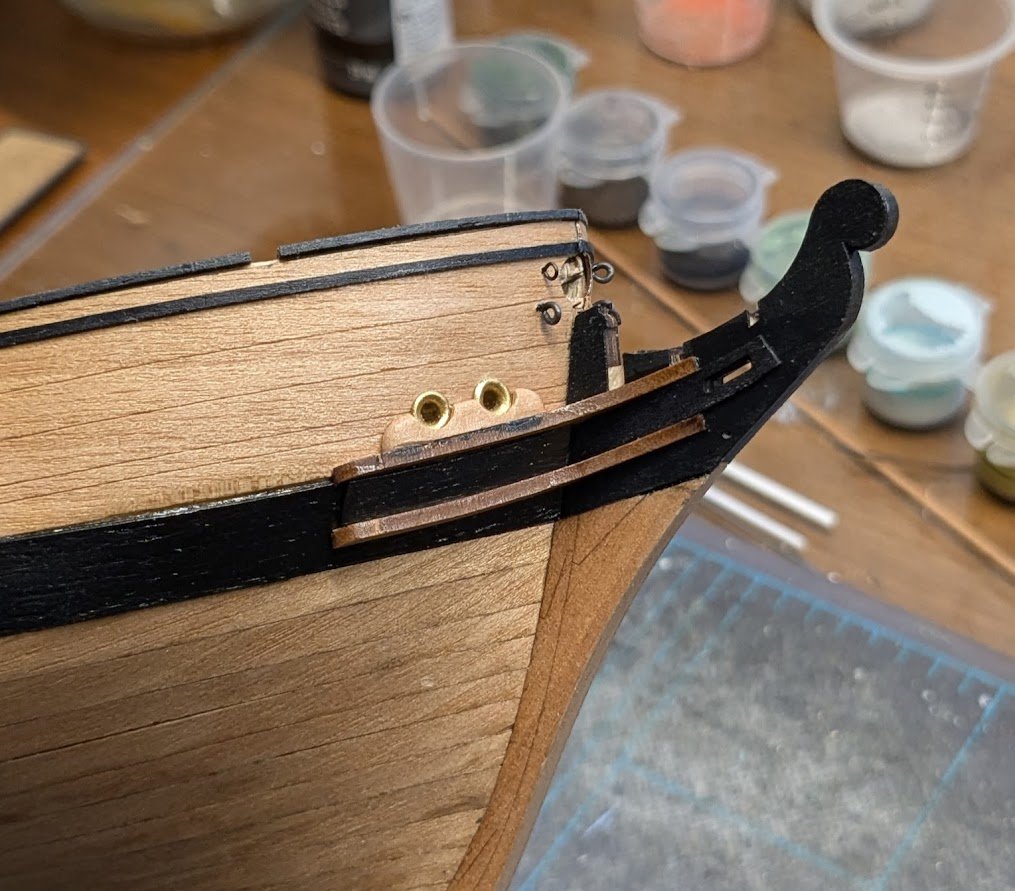
The port side looks the same, but with a different boo-boo. 😬 I hope the hawses will eventually hide things!
-
Cleaned up the inboard hawse holes.
-
Fun(?) with hawses. I got the holes drilled and installed the brass hawse pipes.
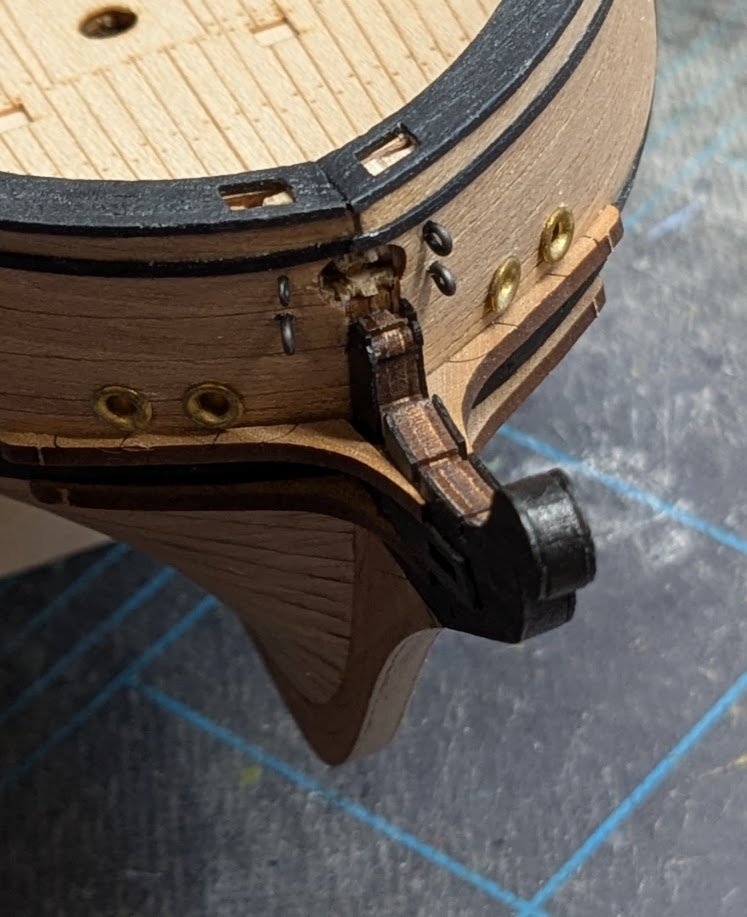
Of course, this work boogered the interior finish planking in that area -- not to mention that the pipes themselves sit proud of the bulwarks. 😑
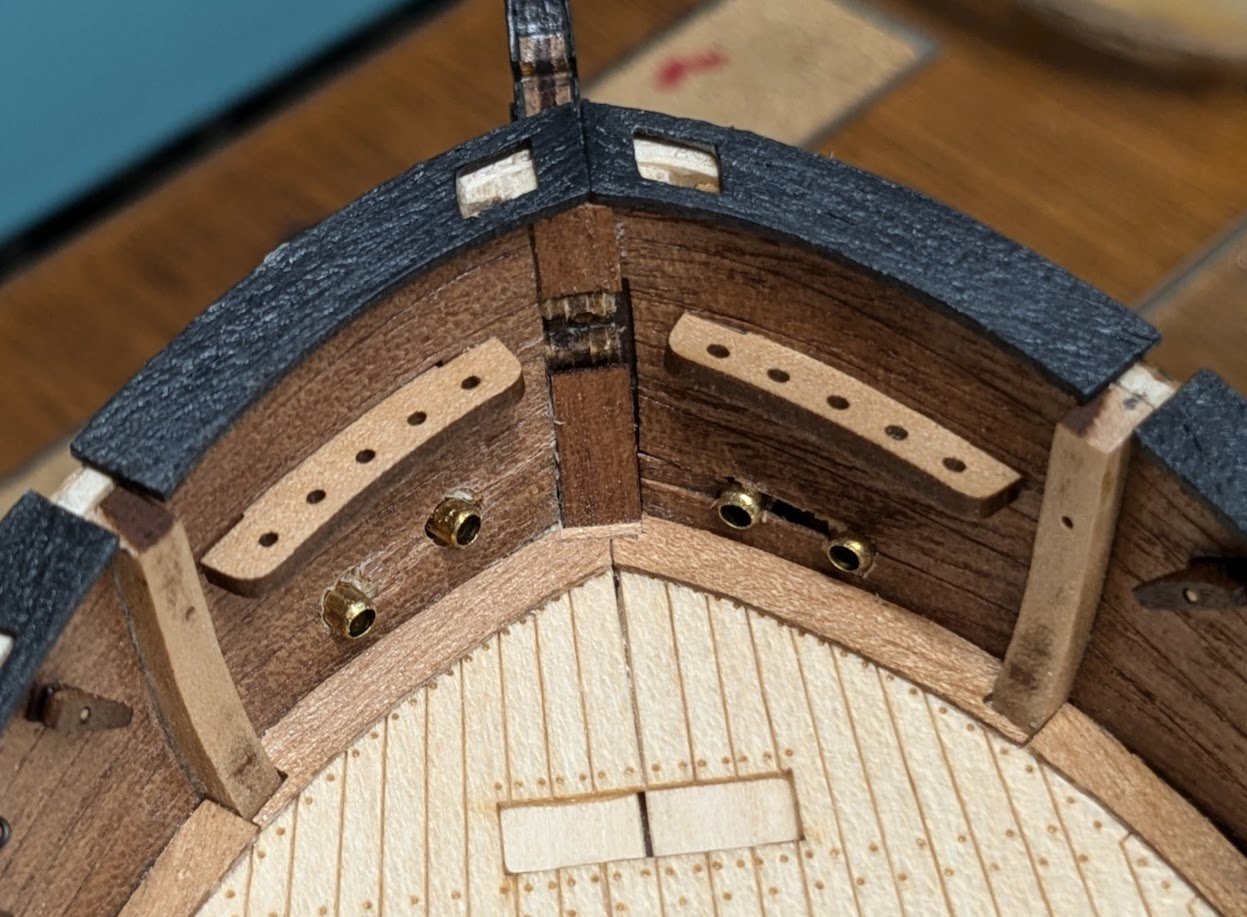
So, my "ship's carpenter" has made the executive decision to add some pads between the stem and catheads to cover the offending pipes and mangled planking. Stay tuned!
-
Looks very sharp so far!
- Canute and Old Collingwood
-
2
-
Good luck, Dave!
I fixed the title for you and moved your log to the proper area. Interestingly, both the designer and publisher seem to have gotten the designation for this P-40 variant wrong -- sort of. The C variant was designated as the Tomahawk IIB in RAF service. I haven't built a kit from this designer (Paper AircraftWerks), so it will be interesting to see how his design philosophy compares to others who I'm more familiar with. BTW, for those new to card models, a repaint is when a graphic artist takes an existing design and applies new artwork to it. It's pretty common for digital download models from eCardmodels to be available in multiple liveries.
Cheers!
-
Congratulations on finishing a rare bird -- maybe we'll see some more AJ Fisher projects around here now!
-
10 hours ago, sheepsail said:
How curious. I spent the afternoon reading through the logs using the term "solid hull" and "yellow box" given that I just ordered one from eBay recently. Mostly to get the plans.
The reason behind my comment was that the old yellow box kits are dated in their design and materials. That doesn't mean they can't be built, of course. And if someone intends to use only the carved hull and/or plans, then they can be a bargain option, as long as they have been stored properly.
-
-
Hmm, looking more and more like the "ship that shall not be named"!
- Paul Le Wol, catopower and Canute
-
3
-
Ugly or not, still a submariner's nightmare, right?
- Old Collingwood, Canute, Jack12477 and 2 others
-
5
-
You have made it this far on a model that often stymies first-time builders, so that's a pretty big accomplishment. Here's wishing you continued success!
- Ryland Craze and rturcic72
-
2
-
Welcome aboard!
-
Welcome aboard, Rob!
-


Nave Egizia by Bryan Woods - FINISHED - Amati - 1:50
in - Kit subjects built Up to and including 1500 AD
Posted
Yeah, that's your typical machine stitching -- very ill-suited to scale modeling. I agree that making another is the right option.