ccoyle
-
Posts
10,586 -
Joined
-
Last visited
Content Type
Profiles
Forums
Gallery
Events
Everything posted by ccoyle
-
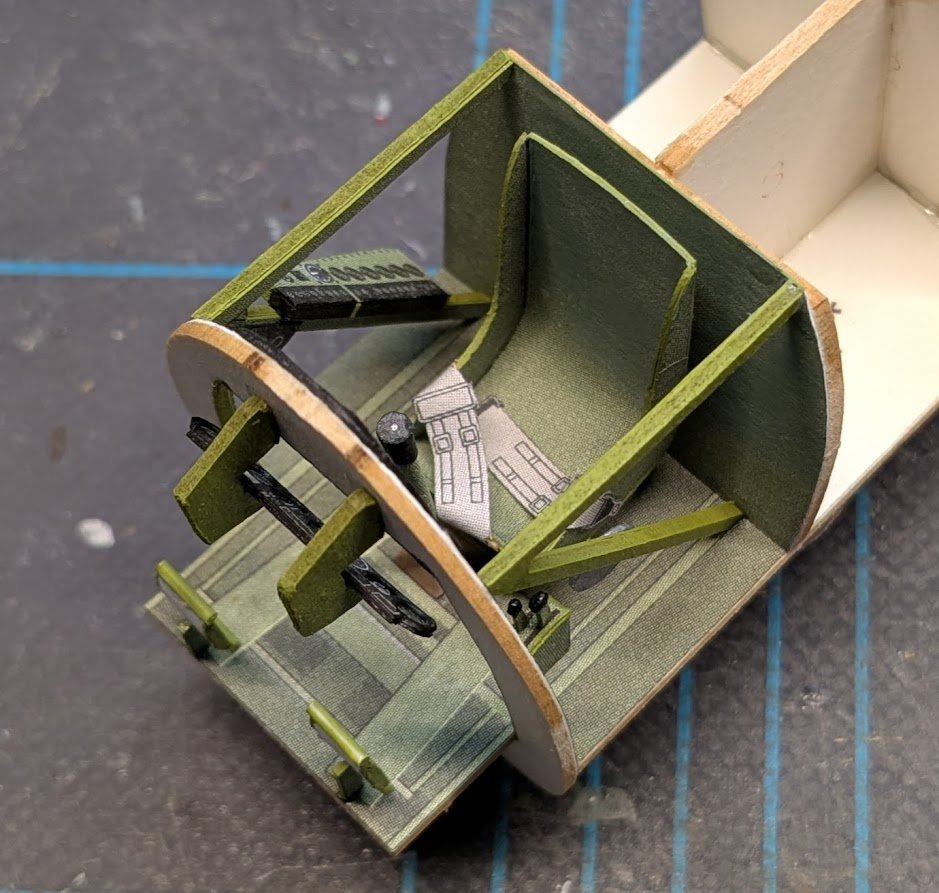
 Here are the various forward cockpit elements prior to gluing them together . . . . . . and afterwards. Instrument panels have been 'glazed' with cellophane tape and optional kit parts.

- 92 replies
-
- 18
-

-

-
Yes, brave, but not torpedo bombers. You're thinking of the various squadrons that flew the Douglas TBD Devastator. SB2Us did fight at Midway, but as land-based dive bombers flown by VMSB-241. The twelve Vindicators operated by VMSB-241 flew three strikes between 4 and 5 June, suffered six aircraft lost and five damaged, and scored no hits. Captain Richard Fleming, one of the SB2U pilots (VMSB-241 was also operating the SBD-2) earned a posthumous Medal of Honor for his actions against IJN Mikuma on 5 June; USS Fleming (DE-32) was named in his honor.
-
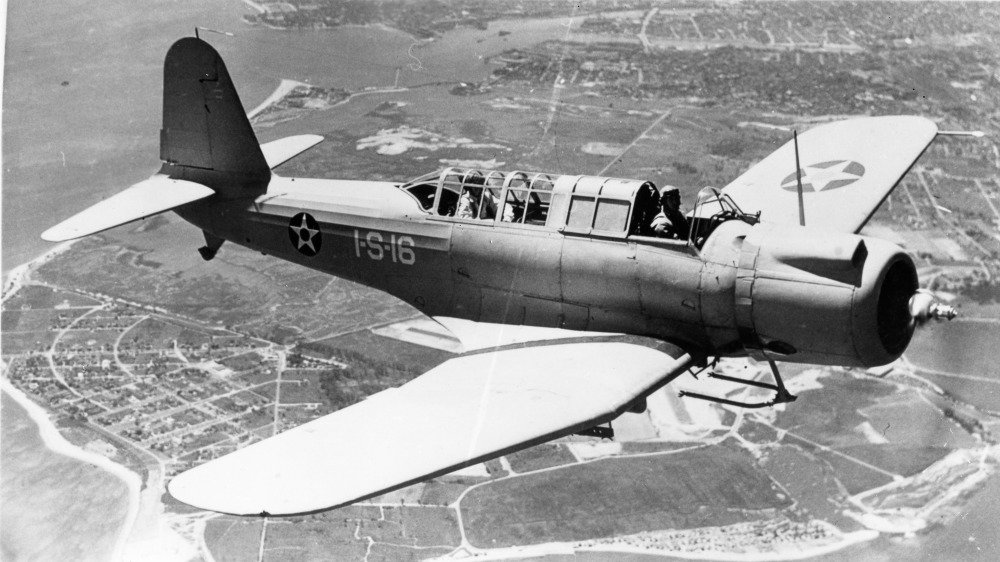
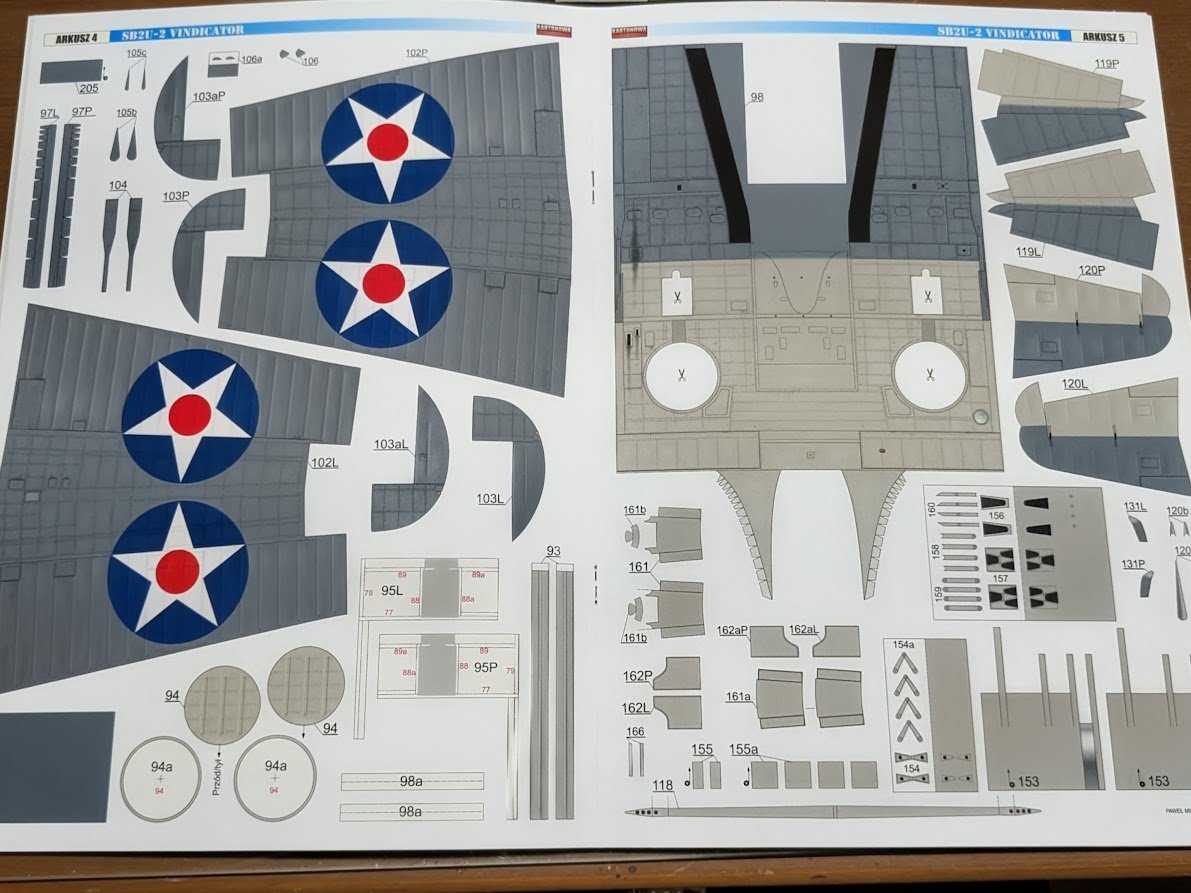
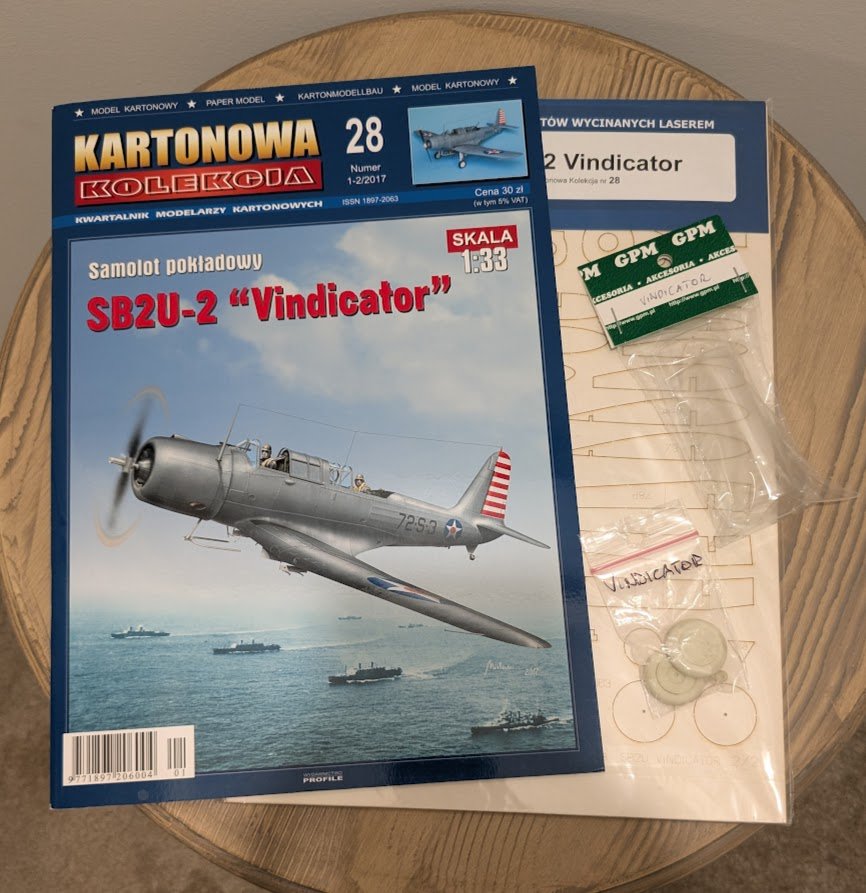
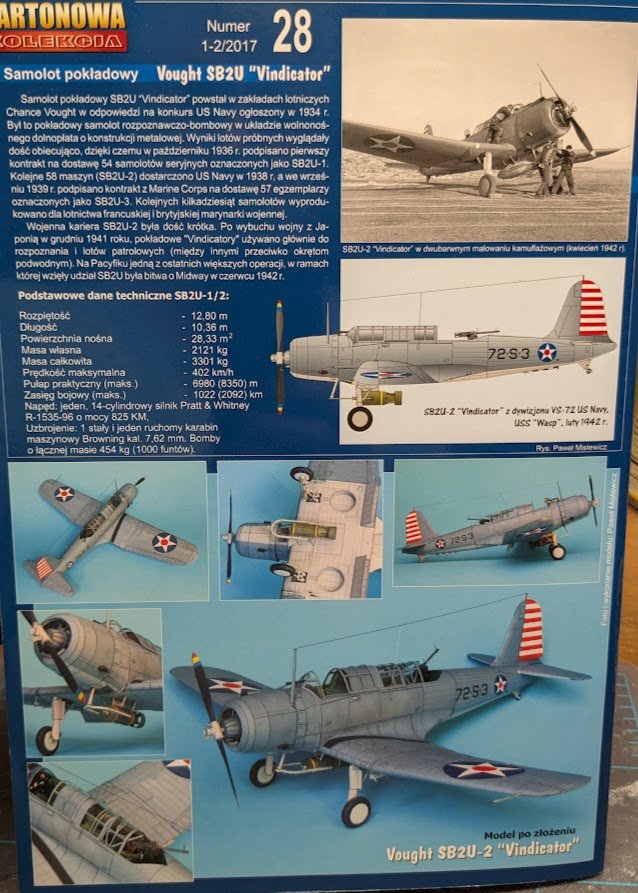
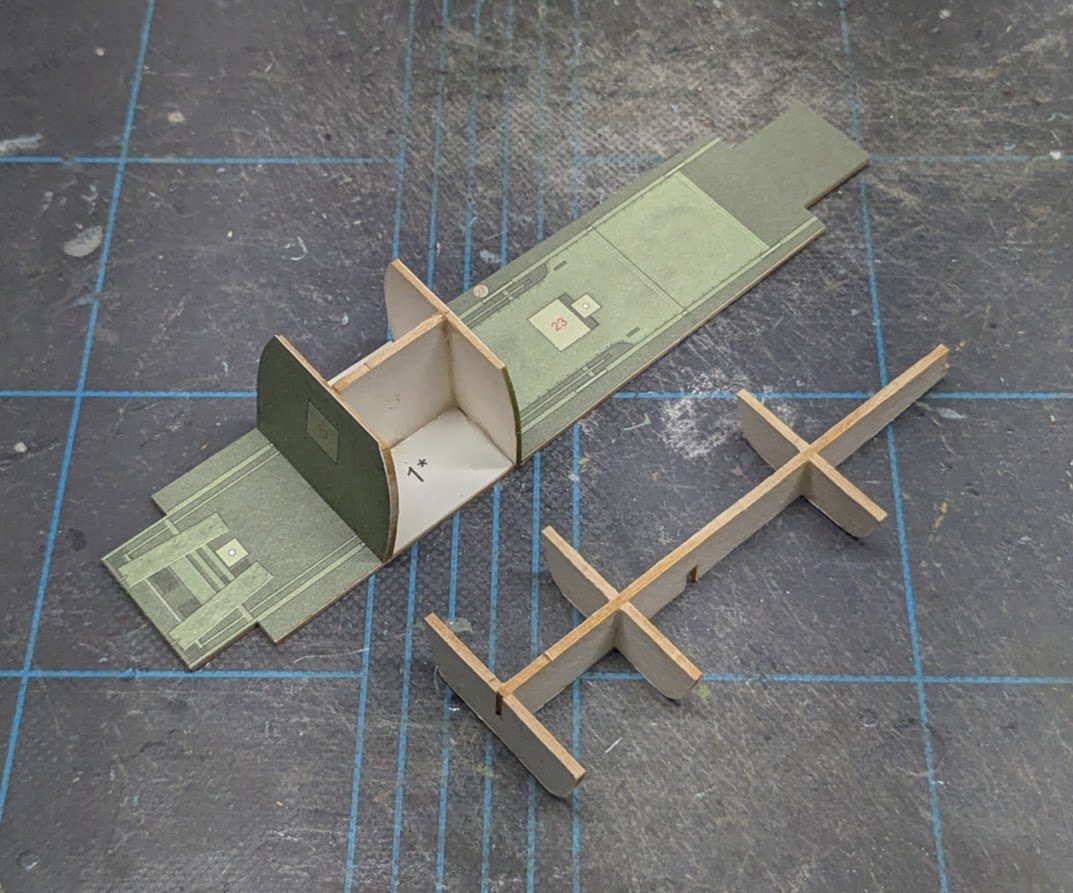
Welcome to the start of another adventure in card modeling! I had to stare at the pile for several days to decide on what to build next, but the SB2U finally won out. From Wikimedia Commons I won't bother with retelling the Vindicator's history, which most of you are probably already familiar with. Interested parties can read about its underwhelming wartime service here. Nevertheless, it was the US Navy's first monoplane, carrier-based dive bomber, and it wasn't a bad-looking airplane, either. It will pair up nicely for display with my completed F4F-4 Wildcat. Plus, it's even kind of ship related, so it deviates less from our forum's task and purpose than some other choices might have. The kit is another Pawel Mistewicz design from Kartonowa Kolekcja, and looks to be every bit as good as Pawel's other excellent designs. Pawel had seriously upped his artwork skills by the time he got around to designing this kit, which depicts an aircraft from Scouting Seventy-Two aboard USS Wasp in February, 1942, operating in the North Atlantic. The squadron flew the Vindicator until June of that year before transitioning onto the Douglas SBD-3. Lots of excellent diagrams, as usual. The back cover has some great photos of the prototype model. First cuts have already commenced. Now that I've started in on this project, I feel quite good about the selection and am looking forward to hopefully doing this kit justice. As per usual, I have the optional laser-cut frames, molded canopy, and resin wheels. Hope you enjoy following along!

- 92 replies
-
- 15
-
-
Congratulations on finishing your model, Jared! And I can say "yes and amen" to your wisdom shared in post #412!
-
I wouldn't worry about it just yet. As long as you have some material to attach planks to, you're okay, and the nice thing about wood is you can always add some filler pieces and sand/file them down to the desired shape.
- 5 replies
-
- 1
-
-
- Bluenose
- Billing Boats
- (and 1 more)
-
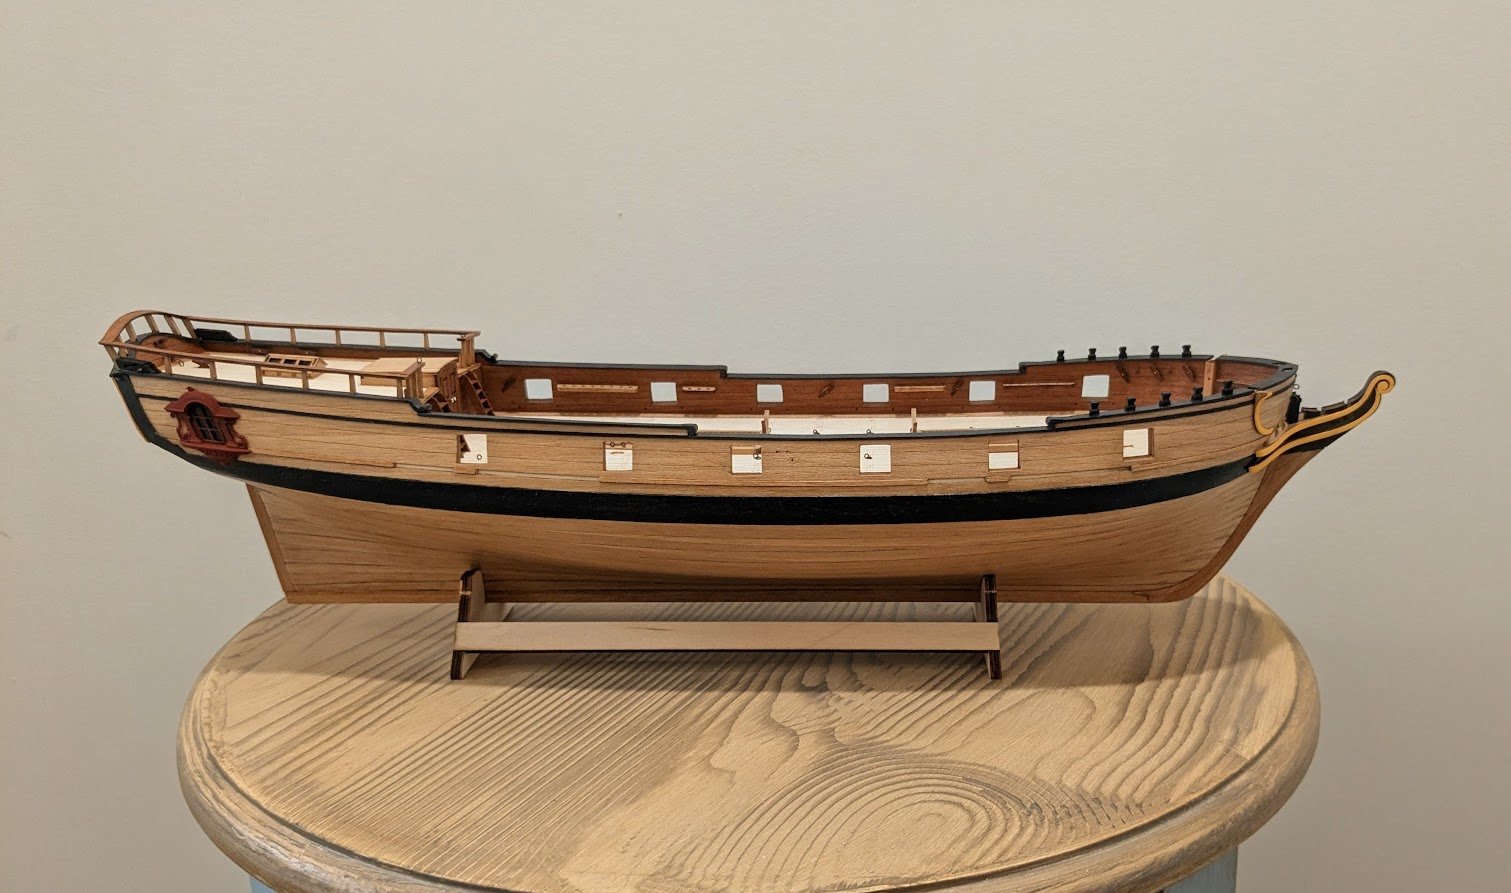
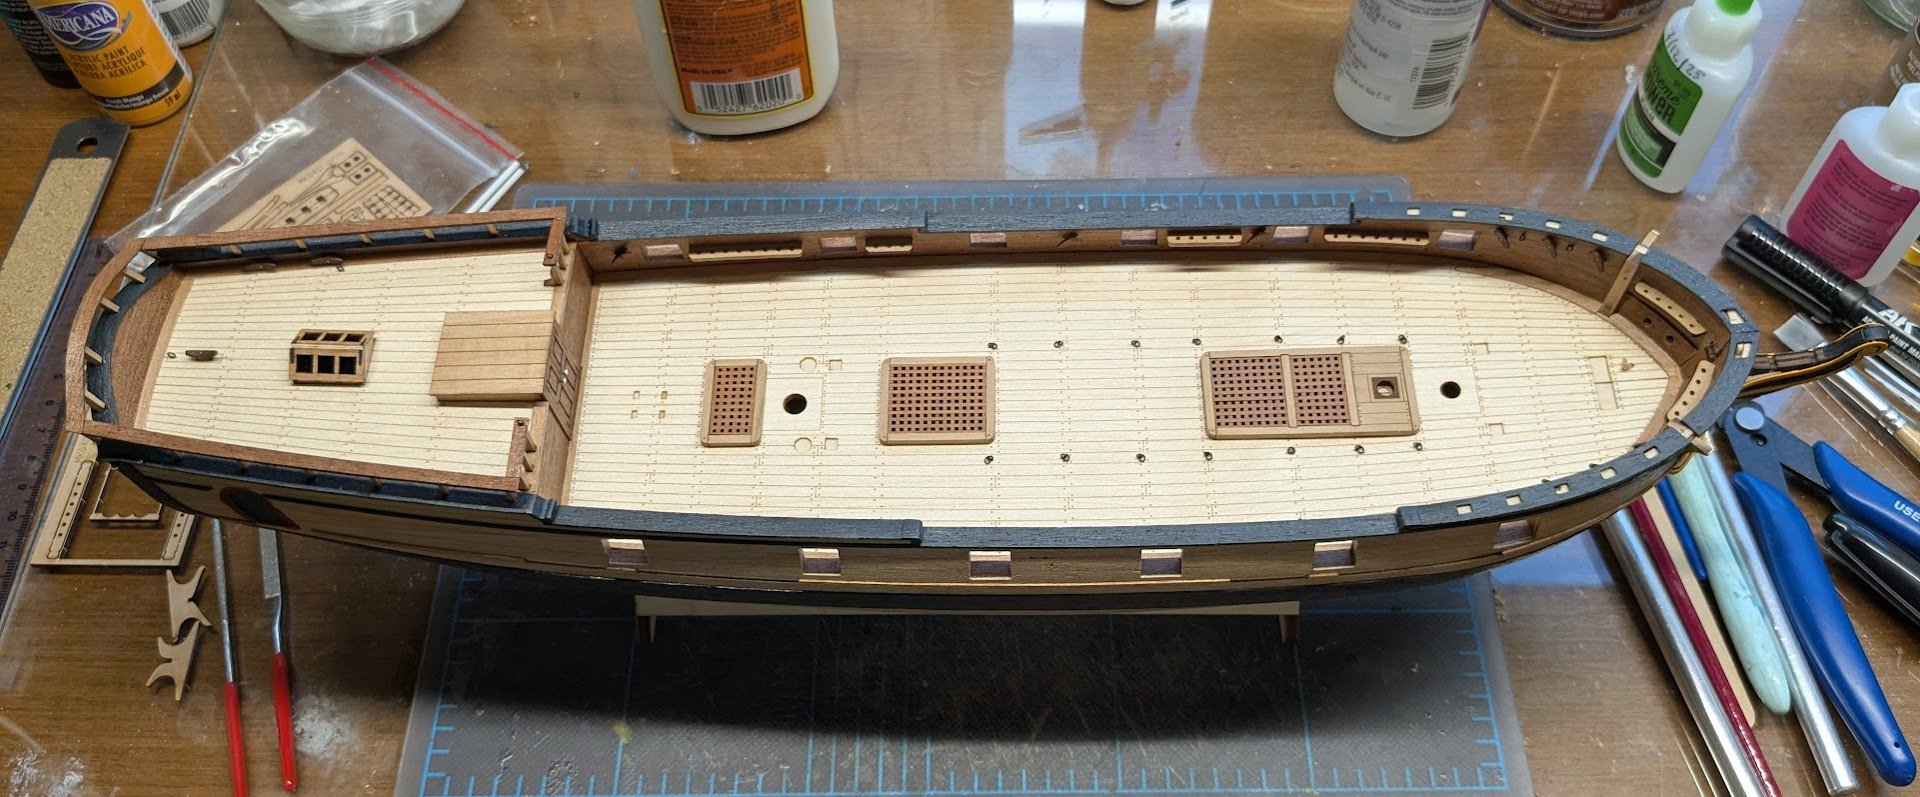
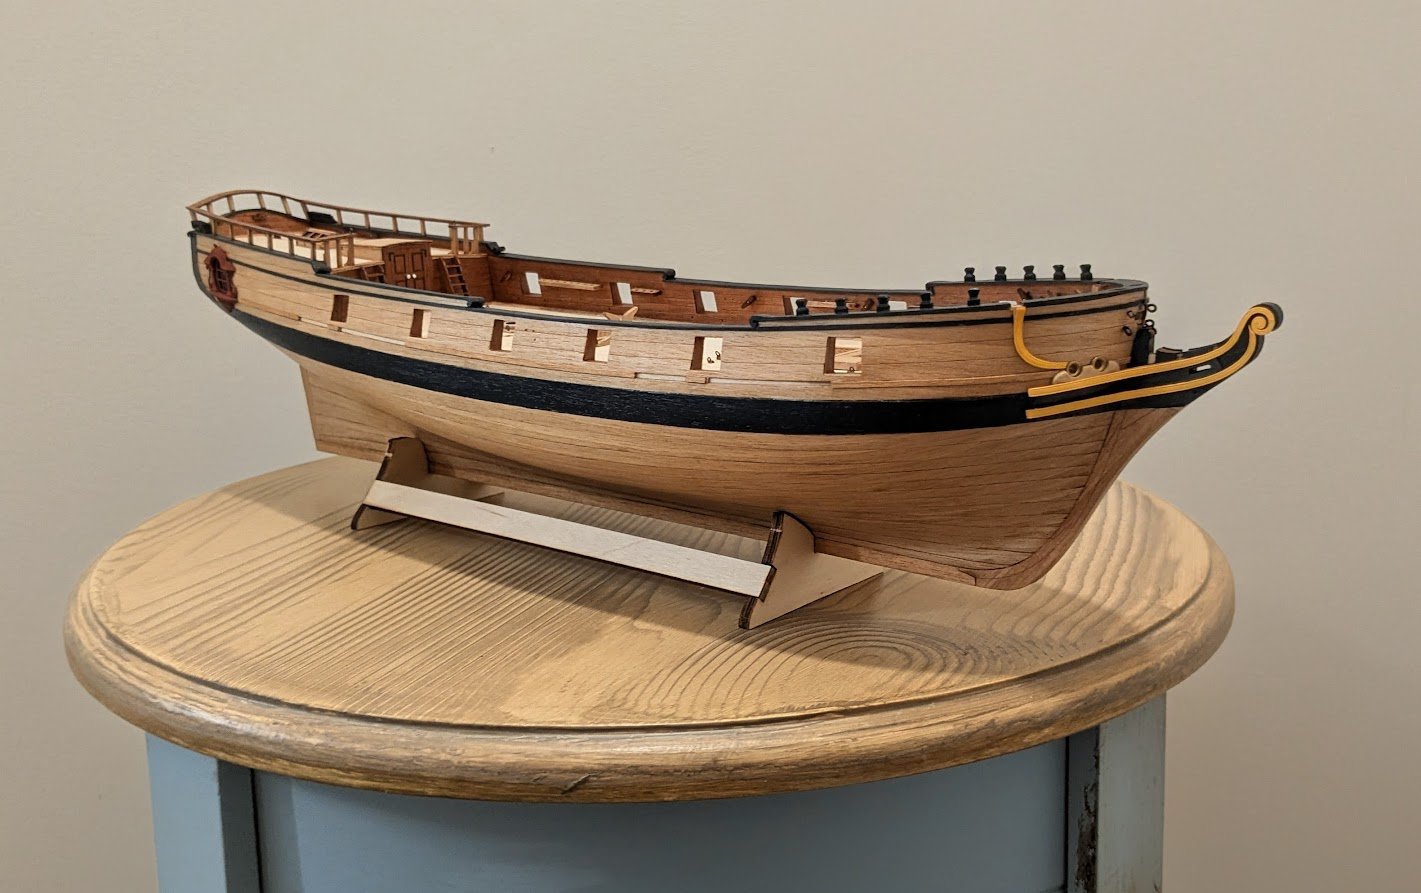
Today I did the eyebolts for the mast partners and finished up the bow bitts. Next up in the instructions are a bunch of sub-assemblies that all say "do this or do that but don't install it yet!" This I interpreted as a kind of code meaning "time to take a break and build a card model!" Ah, don't be sad -- this is how I said this build would go down! Before we press the pause button, though, here's a couple of photos to show how far Phoenix has progressed since January of this year. She's gone from this: to this: The next round of construction should make some similarly dramatic changes. See you in a few(?) weeks!


-
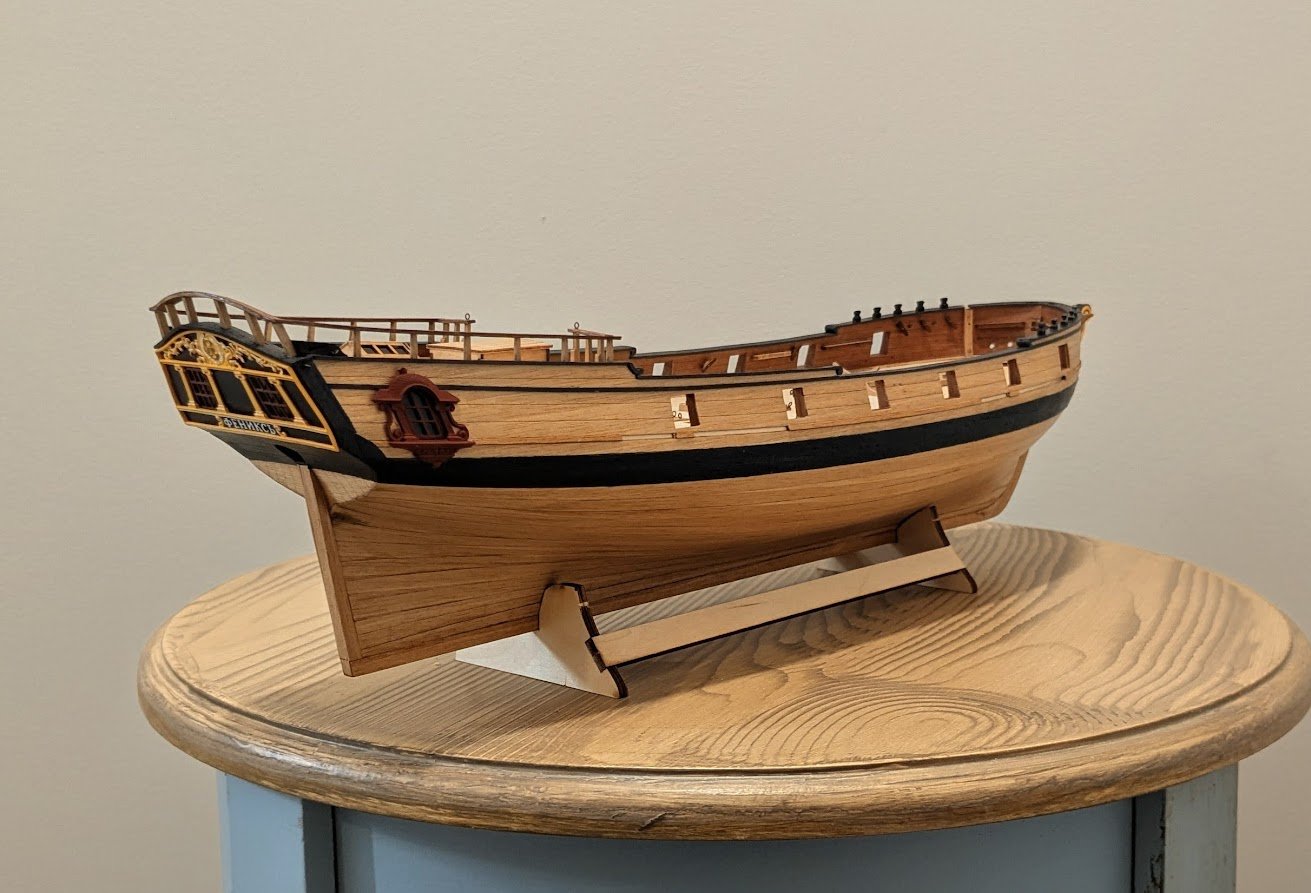
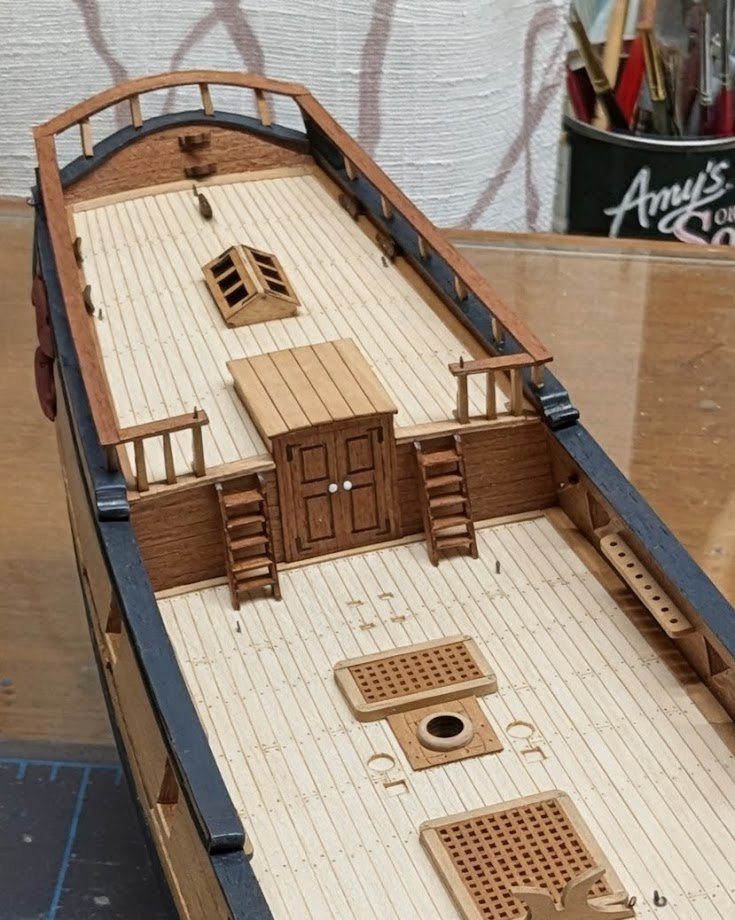
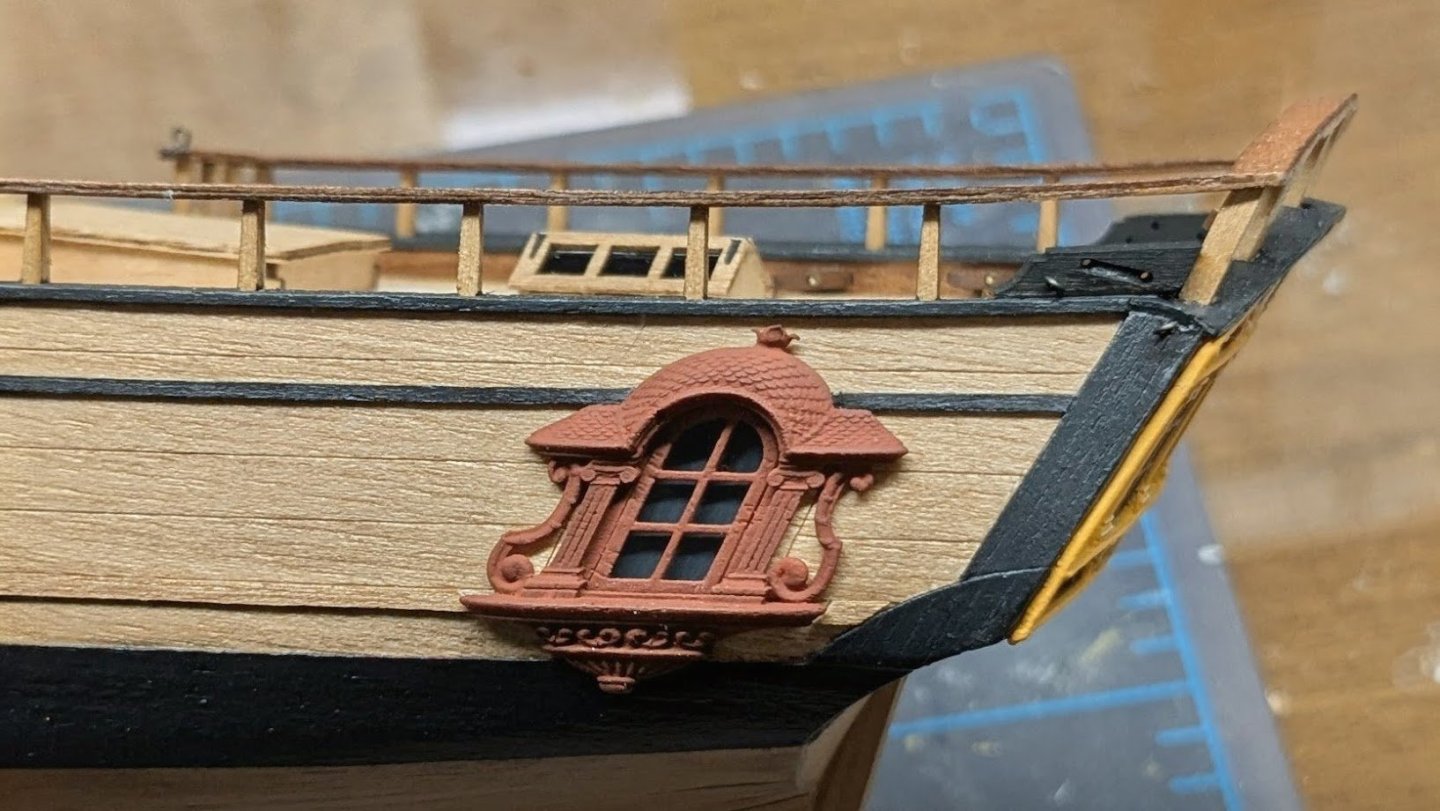
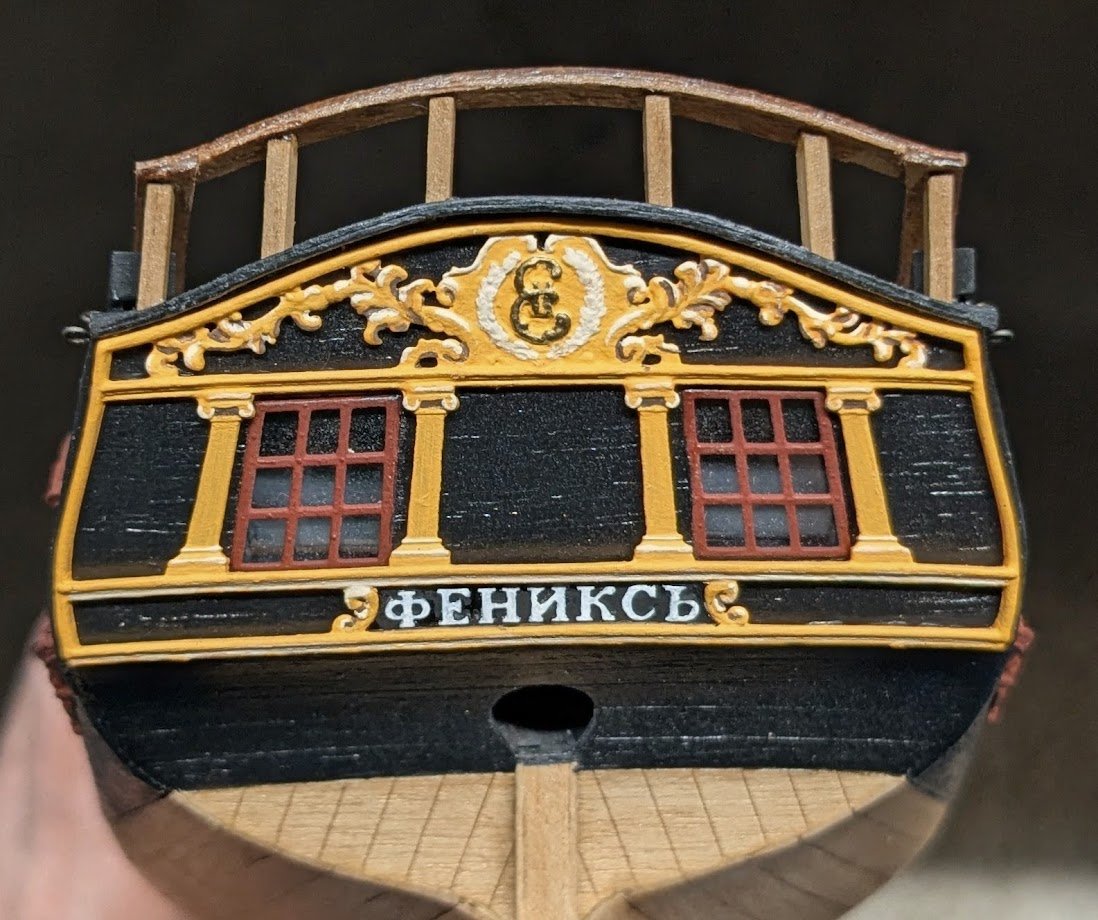
Got on a little bit of a roll today. Added the boat chocks, mast partners, and mast coats. Also the quarterdeck ladders. And since I'm past the point of being able to damage them too much through rough handling, I gave in to the urge to add the quarter badges . . . and stern carvings. The ship's name is a piece of etched brass with raised lettering. I attempted to do the letters in ochre, but the paint dried too quickly -- the tiny amounts needed to do the job dried on the brush tip by the time I got the brush from the paint supply to the piece. So I went with white instead -- and I think I like the white better. That's it for now!
-
Wow!
-
Welcome aboard!
-
My goodness, we are having a rash of homely WW1 tanks around here! Interesting models, nonetheless, but definitely not winning any beauty contests -- if there were such a thing for tanks. 😉
-
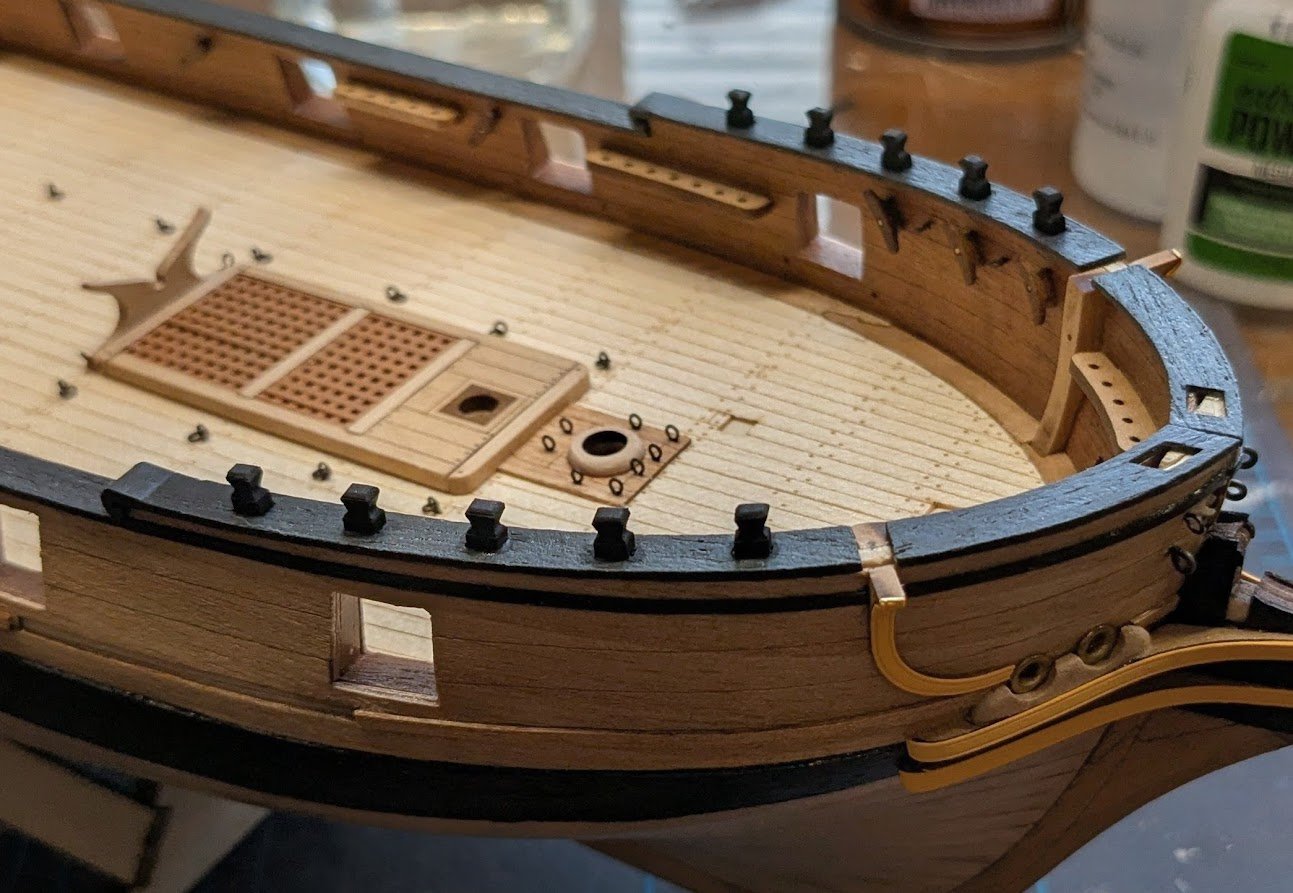
It's been less than a week since I stumbled across the combs issue, but the solution feels like it has taken much longer than that. In the end, I was able to get three gratings out of the MK supply of combs, and I made the fourth out of some leftover Amati combs. Of course, the Amati combs were a different color, so the resulting grating had to be painted. I found a suitable color in my wife's furniture refinishing supplies. Ultimately I gave all of the gratings a coat of paint, just so they'd match better. And here they are on the model: Miscellaneous deck stuff is next -- kind of like "killing white spots" on a card model!

-
They're both Bendixsen ships, so it's a win-win for us Humboldt County folk (whether native or part of the diaspora).
-
My favorite card model vendor made an announcement on social media that they would suspend shipments to the US. I managed to sneak in an order before the deadline. Fortunately, I have a lifetime supply of models waiting to be built. That could be a good thing or bad thing, of course, depending on how life plays out. 😬
-
Welcome aboard!
-
Welcome aboard!
-
Welcome aboard!
-
My condolences, Lyle. I hope you will find getting back to your project to be suitably therapeutic.
-
Hello! New to the forum, happy to be here :)
ccoyle replied to BuckyBoo's topic in New member Introductions
Welcome aboard! -
Well done!
-
My goodness, you put this whole log together today? 😮 You've been holding out on us, friend! 😉
-
Hopefully this will not all turn out "verrrry dumb!" as Arte also used to say! Great pop culture references like these remind me of just how young some of my coworkers are -- these would sail right over their heads!
-
It is becoming increasingly evident, Mark, that "No Idea" no longer suits you as a username, as you clearly have at least some idea!
-
I think he was saying that there is no comparison.
-
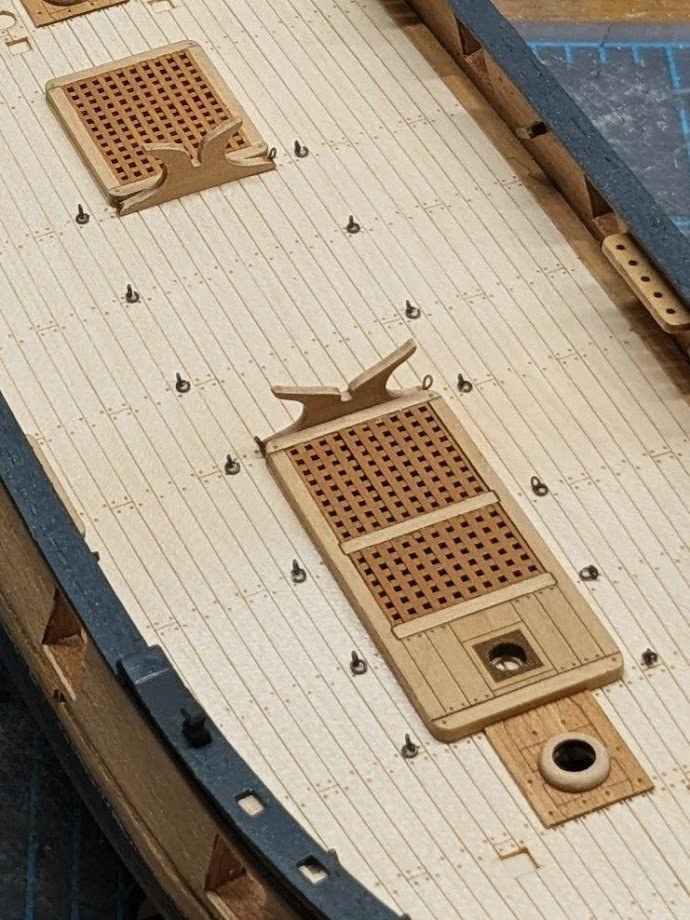
"Curiouser and curiouser!" I found the MS combs in my stash. The MK combs have 1mm slots, while the MS combs have 1.5mm slots. And here's where it gets whacky -- gratings made from the MS combs will fit perfectly inside the kit's coamings, but gratings made from the MK combs will not. 🤔 Seems like maybe somebody pulled the wrong combs from the shelf when they packed the kit? Stay tuned!