


ccoyle
-
Posts
10,173 -
Joined
-
Last visited
Content Type
Profiles
Forums
Gallery
Events
Posts posted by ccoyle
-
-
-
-
I have actually crossed the River Lerma numerous times on the way in and out of Temascalcingo.
-
-
2 hours ago, Der Alte Rentner said:
So, may I ask? What techniques and products did you use on the FLY?
To be honest, it's been so long since I did that part of the project that I can't remember exactly what I used. I probably used a water-based stain, and I'm fairly certain, but not 100%, that I used an off-white from Model Shipways, also water-based, for below the waterline.
BTW, I hope my next project doesn't take me 17 years, too!
- mtaylor, AJohnson and Keith Black
-
 3
3
-
Finished
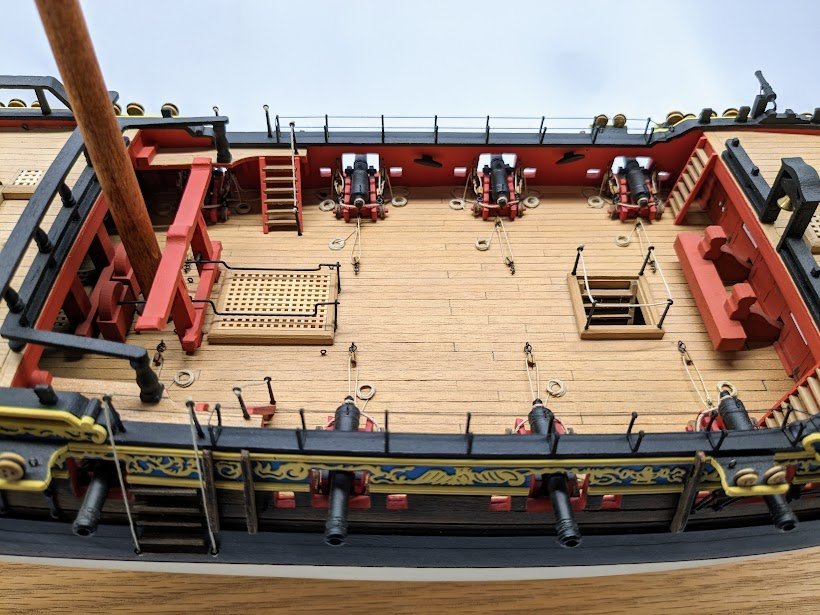
So, first of all, if anyone is interested in why this model is finished without having any masts or rigging, allow me to refer you back to post #25.
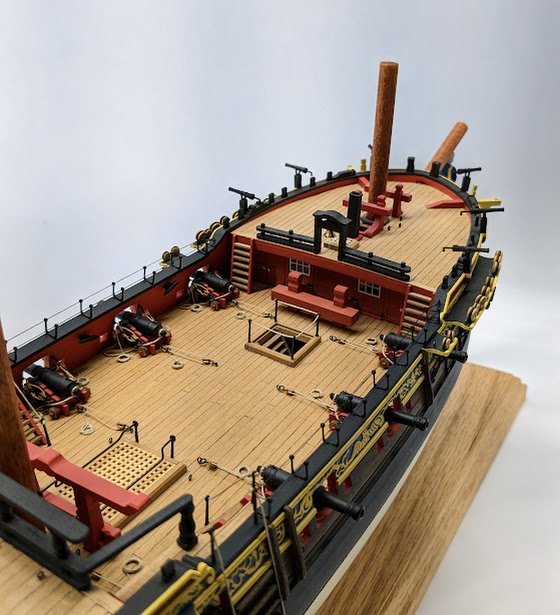
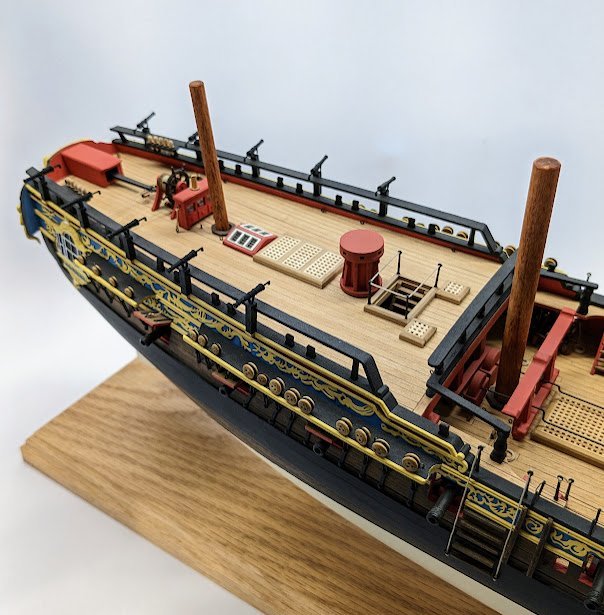
I ordered resin swivel guns from Chris at Vanguard Models. These are very nicely done and far superior to the off-the-shelf metal ones from Amati. I was surprised, though, to discover that the guns did not come with any mounts. I don't blame Chris for this at all -- I never asked about the mounts and he never said anything about whether they were included. The lesson here is it pays to ask! I tried several methods to create mounts: wire (fail), cobbling something together from leftover PE parts (fail), and finally hit upon yokes made from scrap black construction paper. These look fine as long as one doesn't view them from head-on, otherwise they look impossibly thin.
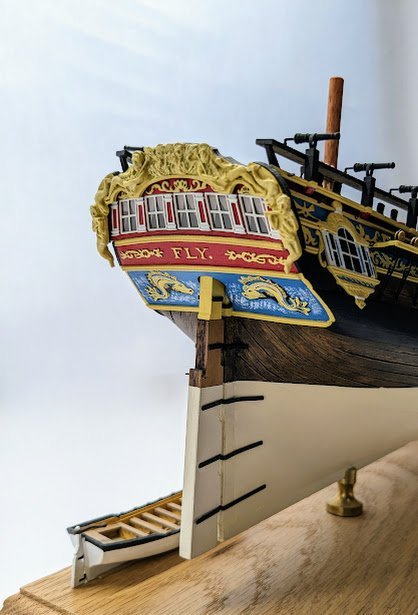
The final shots:
.jpg.d1036546530fe9509527a91eaeef9036.jpg)
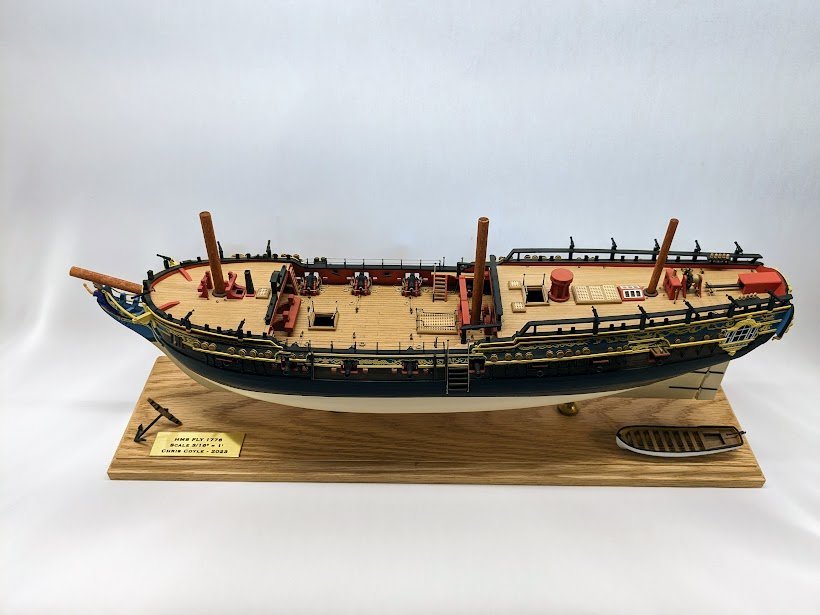
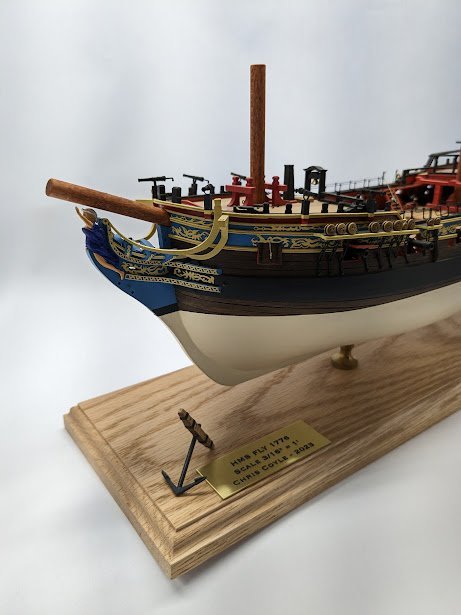
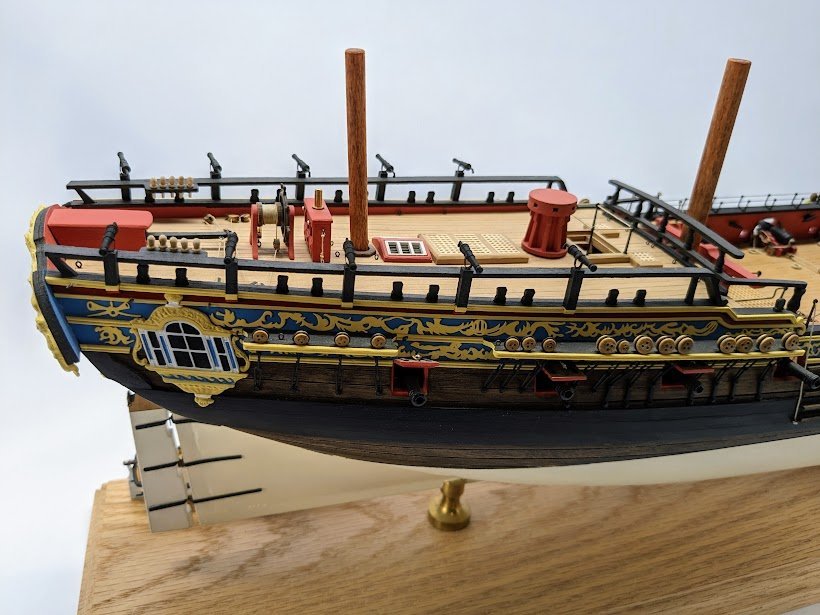
So, that brings this seventeen-year-long, on-again off-again journey to a close. I do have another wooden subject waiting in the wings, but I'll divulge that project at the proper time.
Cheers!
-
-
2 hours ago, Papa said:
I just started fitting the keel.
You are aware the kit is designed to be planked first before installing the keel? It's not a deal-breaker if you don't (I did mine that way by accident), but that was the designers' intent.
-
I missed the finish of this, but wow what a great diorama! It really invites the viewer in to explore all the little details. Very fine job!
-
-
-
5 hours ago, Buckstrong said:
(I'm guessing in the Finished section).
That'd be the gallery. Welcome aboard!
- Keith Black, mtaylor and JeffT
-
3
-
-
Once again making only very slow progress on the cylinders. I can only do a few parts at a time before the monotony shuts down my will to live. 😑 So far I have finished three cylinders and started the cylinder heads on the remaining eleven. Anyways, while I'm at it I thought I'd try adding some extra detail to the basic engine, using the accompanying Wikipedia image as a reference:

I will only be adding a few extra bits, but I might take a crack at the spark plug wires, since they are one feature that is rather obvious in the photo. The coloring of the kit engine also differs from the real thing on a number of points, e.g., the valve covers being brown in the kit but silver in the image. I think the colors seen here are much more visually interesting, although I'm fully aware that this is a bright and shiny display engine and not a tired and weathered service engine.
One thing I need to determine before installing the engine (eventually), and I'm certain that at least one person in my audience will know the answer to this question, is which cylinder goes in the 12 o'clock position. The kit diagram shows a front row cylinder in the 12 o'clock position, but the image above, as well as others I have seen online, appear to show a back row cylinder in that position. What can you guys tell me about this?
Cheers!
- GrandpaPhil, Jack12477, mtaylor and 9 others
-
12
-
-
-
Gotta say it -- "form follows function", but darned if I can figure out the function of that rig! 🤔
But regardless, your model is looking great!
- modeller_masa and thibaultron
-
 1
1
-
 1
1
-
-
Dad gummit! This happened last time. Stupid Google Photos! 🤬 Fixed now.
It was showing up on my computer at work. Go figure.
- mtaylor, Keith Black and Canute
-
2
-
1
-
Hey, I forgot to add a shot of the name plate, also added back in December.
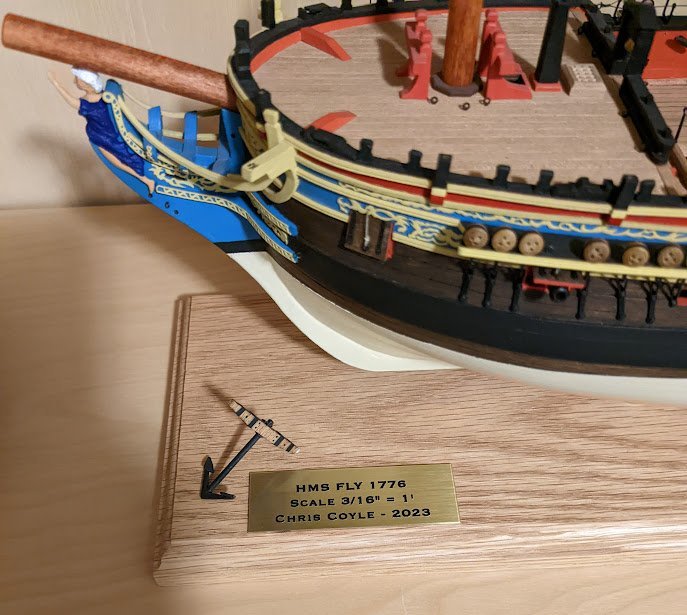
Swivel guns should (hopefully) be on the way soon, after which I will post a set of final photos.
Cheers!
- Canute, westwood, Knocklouder and 14 others
-
17
-
Welcome aboard! That is some fine workmanship on display.
Cheers!
- mtaylor, Keith Black, Knocklouder and 1 other
-
4
-
-
Niels, a couple of issues:
1. It's not necessary to create a separate post for each photo. You may add multiple photos to a single post.
2. Your photos are not displaying. We don't recommend using third-party image hosting sites. We regularly have problems with such sites when they go out of business or members don't renew their subscriptions. We strongly advise members to upload their photos to the site first and then add them to their posts.
-
Nice to see the 'fragile' label stuck right on the ginormous crease. Hopefully everything inside was packed correctly.

Grumman F4F-4 Wildcat by ccoyle - FINISHED - WAK - 1/33 - CARD
in Non-ship/categorised builds
Posted
More engine progress. I have added the rear bank of cylinders to the crankcase (BTW, I'm not a mechanic nor mechanically inclined, so my engine terminology is limited). To see what extra detailing I have added so far, you can compare the detailed cylinders to the basic kit cylinder on the left. The front cover on the crankcase and all of the bolt heads are extras, as is the little blue daub of paint, which represents the Pratt & Whitney badge (no, I'm not gonna super-detail the badge -- don't be insane!!). Next step will be adding the push rods to the rear cylinders.