


ccoyle
-
Posts
10,173 -
Joined
-
Last visited
Content Type
Profiles
Forums
Gallery
Events
Posts posted by ccoyle
-
-
Welcome! Your Albatros looks quite nice! So, what is the "Eureka" connection -- something to do with the city in Northern California (or the one in Idaho . . . or Missouri . . . or Illinois . . .)?
- mtaylor and Keith Black
-
 2
2
-
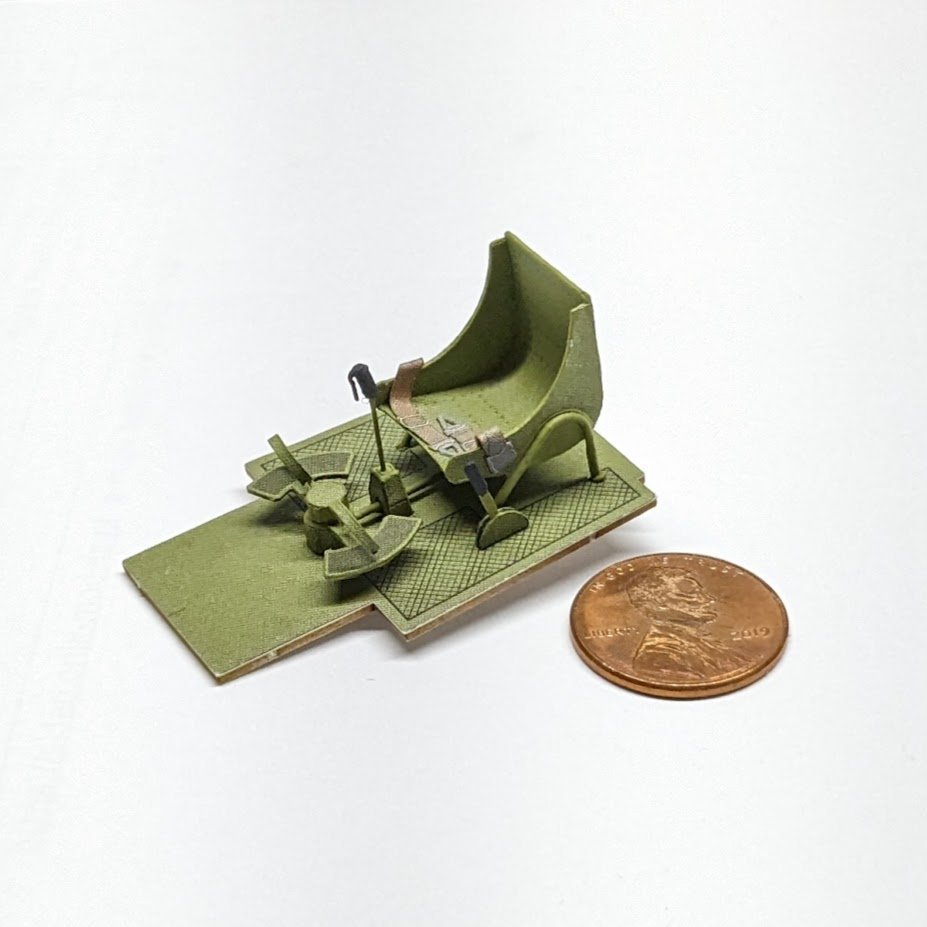
More cockpit progress.
-
-
This is basically just a photo to prove that I am working on this model -- I didn't just start a log and then not start building! I actually have a little more done that what is shown here, but I don't yet have additional photos.
One nice thing and one hiccup so far: The hiccup is that the two pieces that form the column for the rudder pedals were too large. The cylinders they formed were substantially larger than the locator marks for them. Some doctoring was required -- a bit of an auspicious start, considering that was only the second assembly of the project! The nice bit is that I found a bottle of paint at Hobby Lobby that was a near-perfect match for the printed interior green of the kit, which spared me some mixing-and-matching for the proper edge color.
-
On 9/9/2023 at 1:13 AM, Dr PR said:
The dye in the block wicked up the rope, leaving a nasty brown stain.
Fortunately, it's not overly noticeable, and will be even less so at stand-off viewing distances.
-
-
You forgot TT (1/120, 12 mm). 😉
- mtaylor, Canute, thibaultron and 4 others
-
7
-
-
Yes, aviation fans, I know why radial engines were used in WW2 combat planes. Sarcasm doesn't always come across clearly in written posts. 😉
Dan, I knew that about the canopy, too -- don't know how I got locked on to hinged instead of sliding. Must've been a brain fart. 😅
-
1 hour ago, realworkingsailor said:
Another radial engined bird? You are a glutton for punishment (even if you only make the single bank version) 😜
The designers of WW2 military aircraft seem to have had an unhealthy fixation on radial engines. I don't think they gave much thought to the anguish they would be causing for card modelers years down the road. 🤔
- Canute, Helge Hafstad, GrandpaPhil and 12 others
-
9
-
 6
6
-
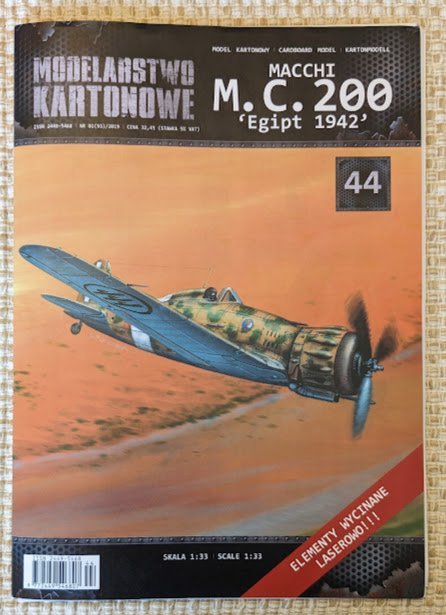
Okay, I finally decided what to work on next, and @Egilman is ever so slightly responsible for helping with the final decision. He suggested I build a Lightning next -- except he didn't specify which Lightning to build! 😉 Saetta is, of course, Italian for 'lightning'. The Macchi C.200 was the second of Italy's monoplane fighters to take to the air, following the Fiat G.50 Freccia (which I also have in my stash). Both aircraft first flew in 1937. The Saetta ended up flying more sorties than any other WW2 Italian fighter.
Once upon a time, I wasn't all that enamored with Italian aircraft, but as I learned more about the exploits of the Regia Aeronautica, its aircraft kind of grew on me, even its decidedly hunchbacked first-generation monoplanes. The hump was a deliberate design feature, intended to improve the pilot's field of view. In addition to looking a little homely, the Saetta reportedly also had exceptional maneuverability. Sadly (or fortunately, depending on which side you were rooting for), like Italy's other first-gen monoplanes, the Saetta was also under-powered and under-armed. While roughly equal in speed to the Hawker Hurricane, it was considerably slower than the other Allied fighters it would engage in the Mediterranean theater, such as the Spitfire and Kittyhawk.
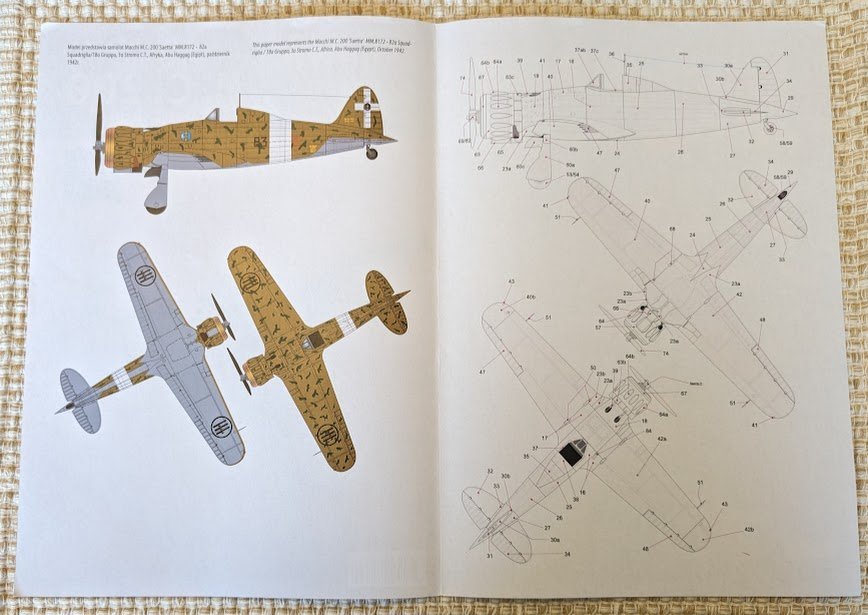
The publisher of this kit, Modelarstwo Kartonowe, is new to me, but not the designer -- Marek Pacynski. Marek has had his models issued by many different publishers. I have previously completed one of his models, a PZL-50, but I have also had two of them wind up in the bin. Some folks have told me that his newer designs are much better than his older ones (makes sense), so hopefully this 2019 issue will go together well. I really like the colors -- Italian desert camo schemes were always visually interesting. The graphics on this kit are done by proArte.
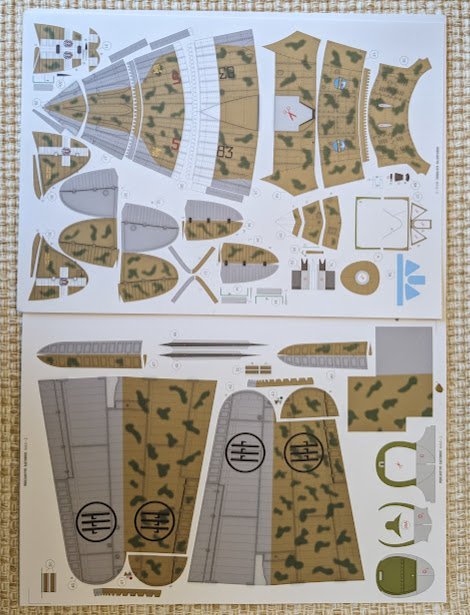
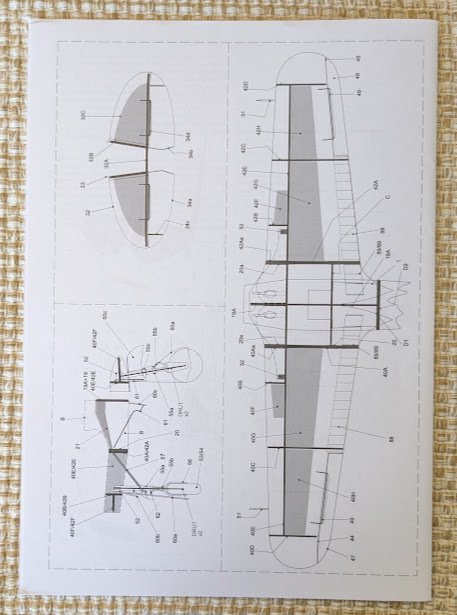
Not a lot of diagrams compared to some kits, but hopefully enough to get the job done.
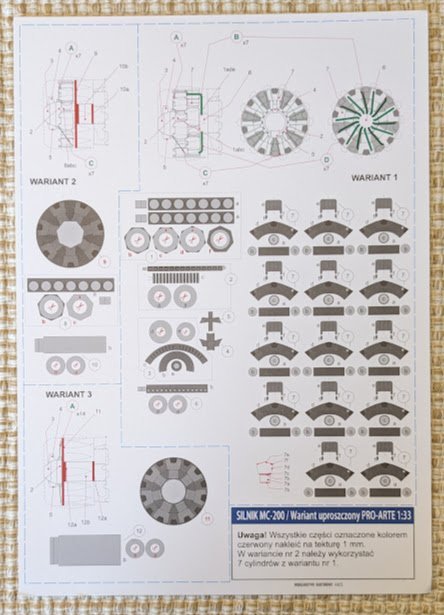
An interesting feature in this kit is that there are three options for building the engine: an option for a single piece with the engine elements printed on it, an option that includes only one bank of 3D cylinders, and an option for a complete engine. I'm thinking seriously about the second option, since so little of the rear bank of cylinders is actually visible on twin-row radials.
A couple of great three-views -- you can see that apart from the fuselage hump the Saetta actually had quite pleasing lines.
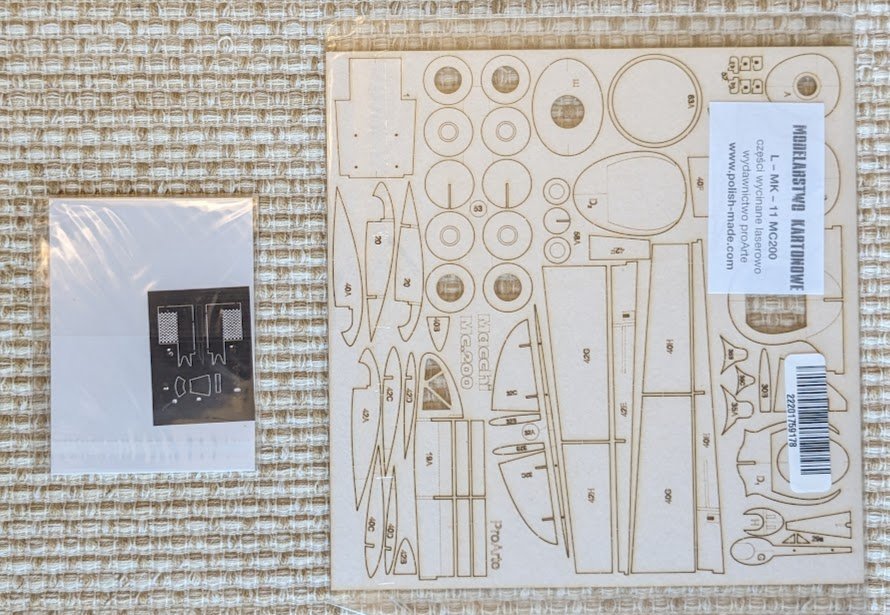
And of course the laser-cut frames set, which includes laser-cut cooling jackets for the machine guns. In this instance, the frames were included with the kit, as is loudly proclaimed by the red banner on the kit cover.
There is no canopy available for this kit. Like most Italian fighters in the Med, this one had its hinged canopy removed and retained only the windscreen, which had only four plexiglass elements, which shouldn't be too hard to make.
Look for first cuts soon!
- Nirvana, Old Collingwood, hof00 and 20 others
-
23
-
8 hours ago, One-Oh-Four said:
They called it the Honderdvier
In Germany they called it "Strauss' Folly".
Welcome aboard!
- mtaylor, One-Oh-Four and Keith Black
-
1
-
2
-
16 minutes ago, Egilman said:
As far as the next one? Isn't that Lightning speaking to you? {chuckle}
Nope. 😅
But I did manage to pare down the list to three frontrunners . . . at least for this evening.
- Keith Black, Egilman, Canute and 2 others
-
5
-
-
Very nice! Love the miniature golf course -- or would that more correctly be termed a miniature miniature golf course?
Cheers!
-
-
-
Welcome!
Yes, boats were typically covered, but modelers often omit the covers simply because open boats are more visually interesting -- same reason why guns on sailing men-of-war are nearly always shown run out for action, even if the model is bare-poled or wears a full suit of sails instead of greatly reduced battle sail.
Cheers!
- GrandpaPhil, mtaylor and Keith Black
-
3
-
17 minutes ago, AJohnson said:
I’m sure if Chris did that Ancestry DNA test that by my Admiral is so into, we would see a whole linage of Coyles from Gdańsk!
Sorry. The closest I come to having any Polish ancestry is a 3rd-great-grandfather who was born in Pommern, which is the German word for Pomerania, now in present-day Poland.
Except my ancestor wasn't born in that Pommern -- he was born in a tiny village of the same name located in Rhineland-Palatinate. So, close but no cigar. Actually, not really that close at all and still no cigar. 😂
- mtaylor, Keith Black, GrandpaPhil and 6 others
-
7
-
2
-
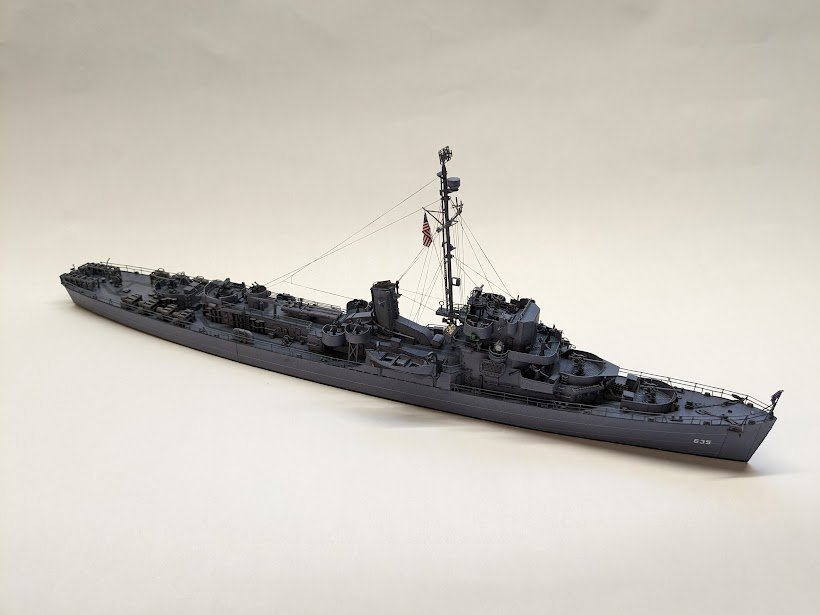
All Done!
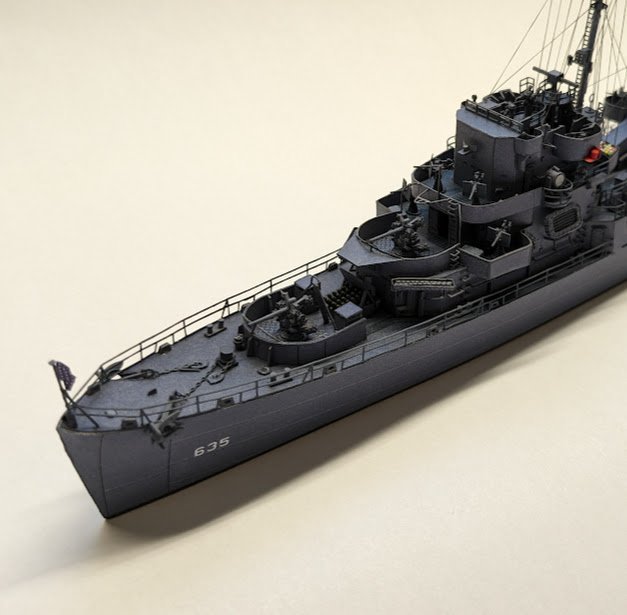
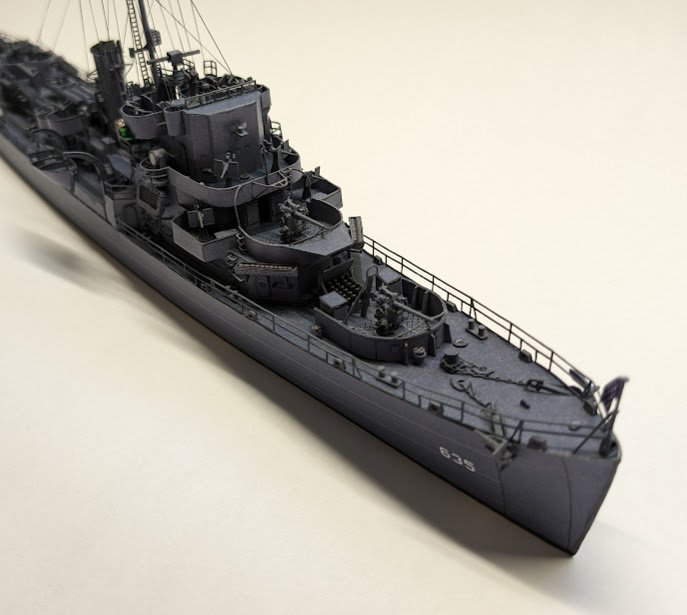
The last few bits to install were the:
- main deck railings
- anchors (with chain from the laser-cut detail set -- I bought some chain from Hobby Lobby, but even the smallest I could fine was too large)
- chain stopper (not included in the kit, but shown on a diagram; it's pretty tiny -- if I didn't tell you about it, you'd be unlikely to notice it)
- jackstaff
- flags.
A tip for draping paper flags: they are much easier to fold if one scrapes most of the paper fibers from the back before gluing them.
Speaking of glue, I have come up with what I'm calling Coyle's Law of Gluing: "The amount of time it takes for glue to set between two parts is inversely proportional to the amount of time it takes to align the two parts correctly after applying the glue." I have found this law to apply regardless of the type of glue used. And along with Coyle's Law goes Corollary #1: "If a part must be glued at two ends, one end will bond perfectly on the first try, while the other end will take four to six attempts to get it to stick."
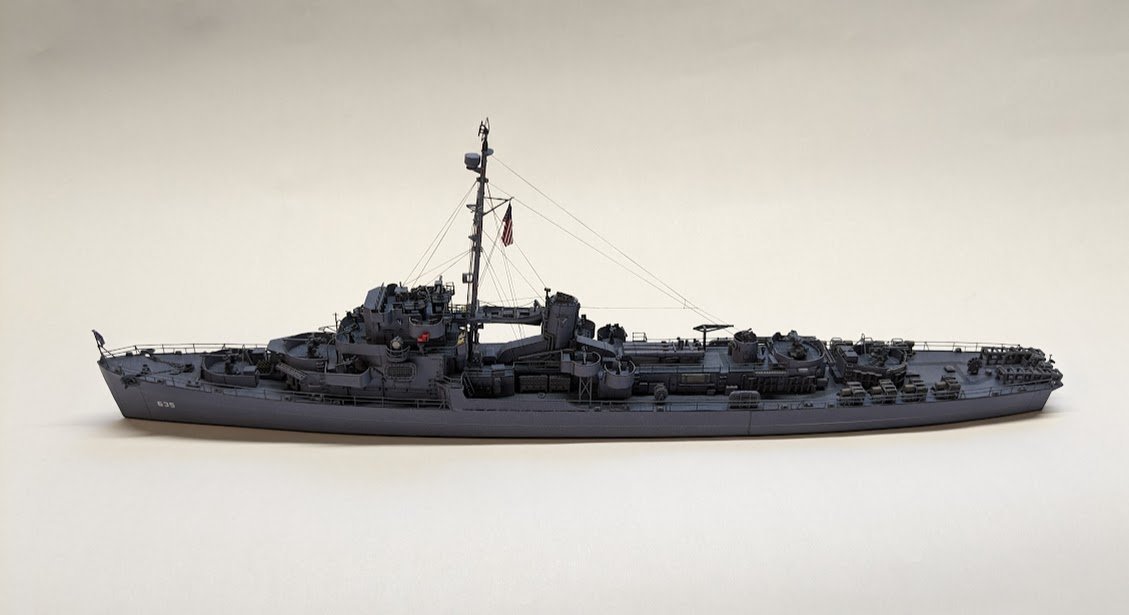
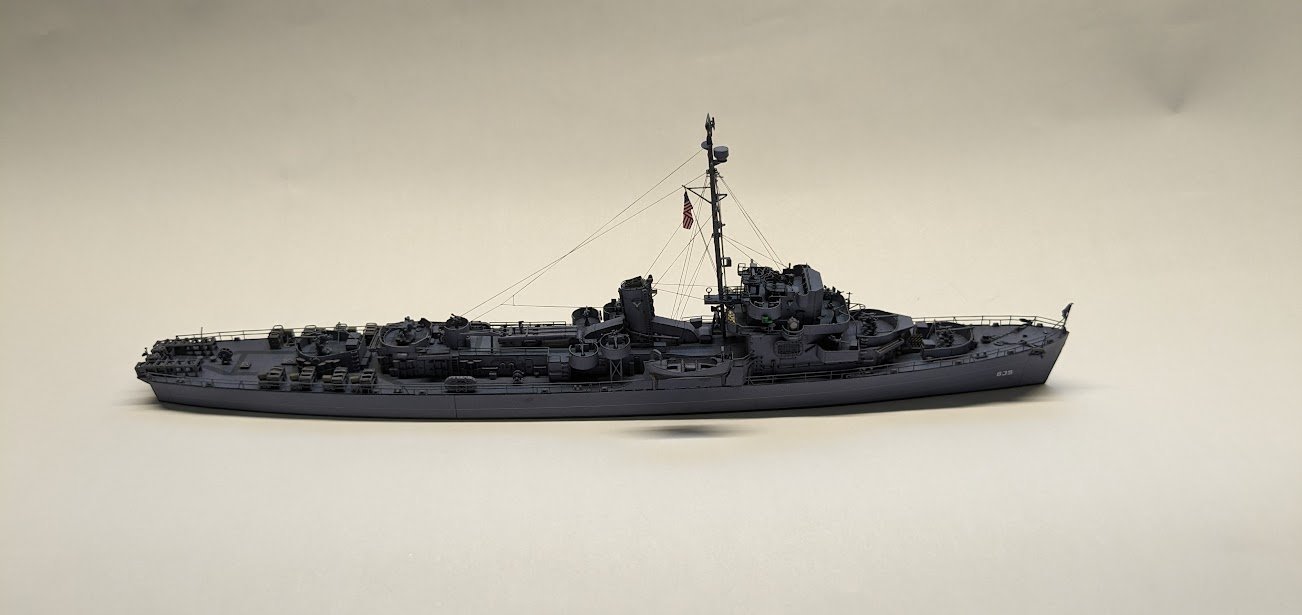
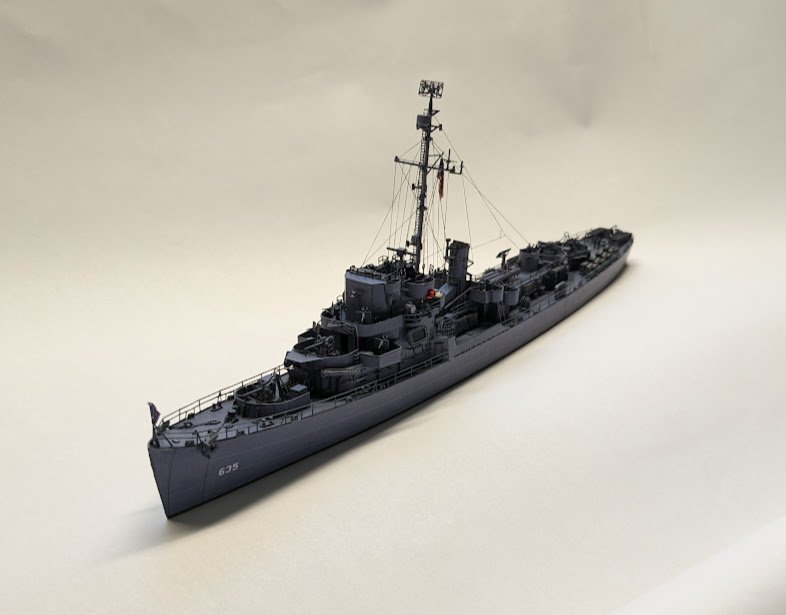
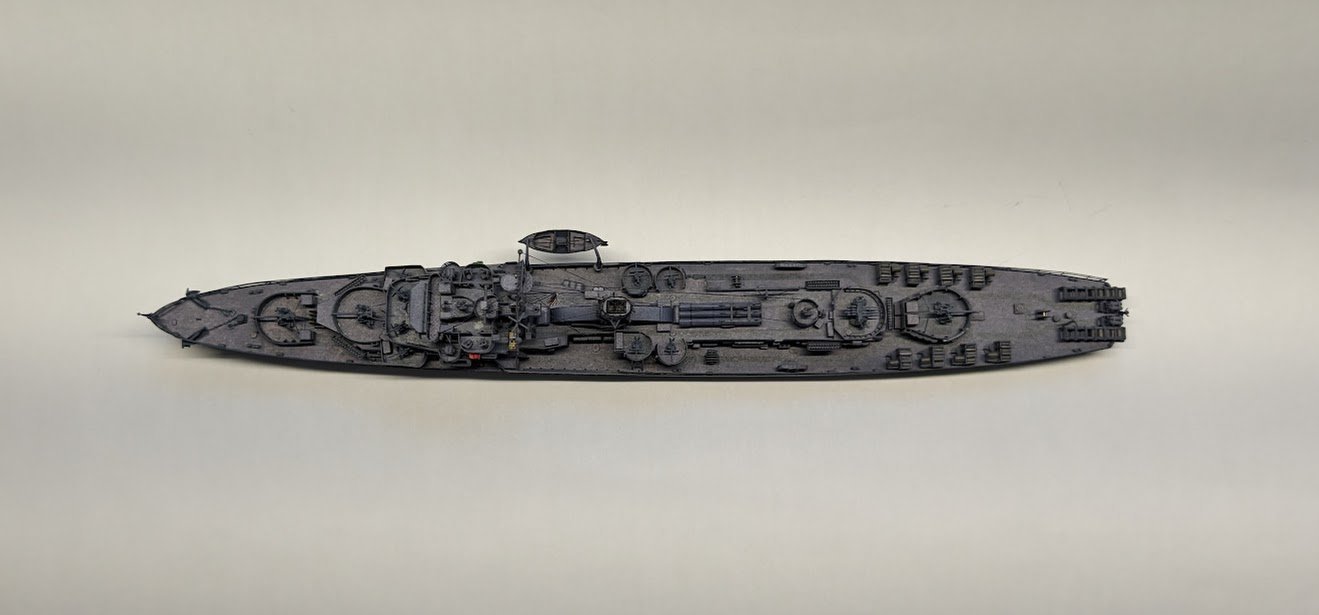
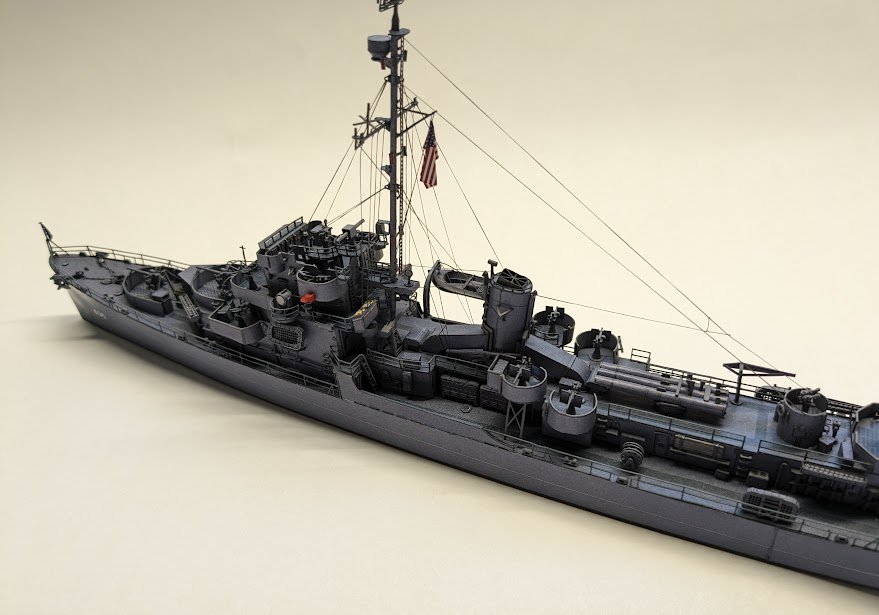
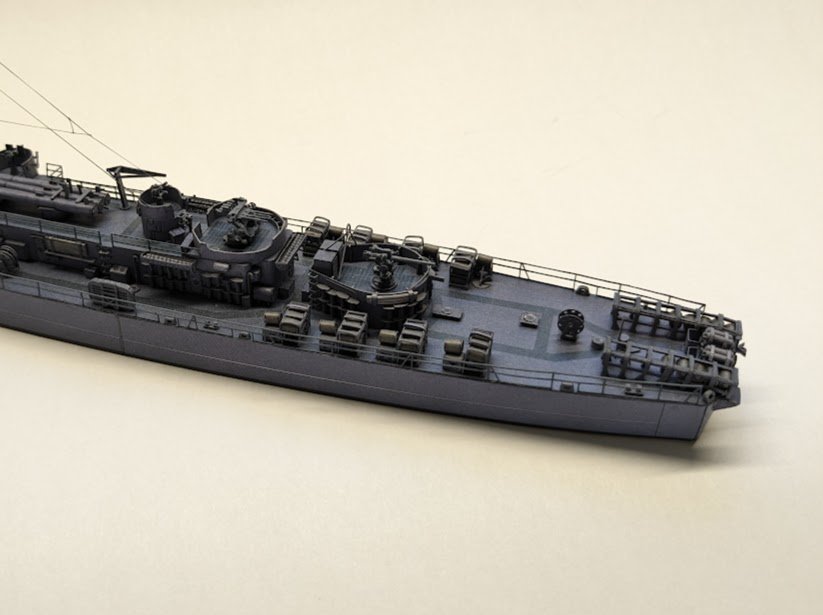
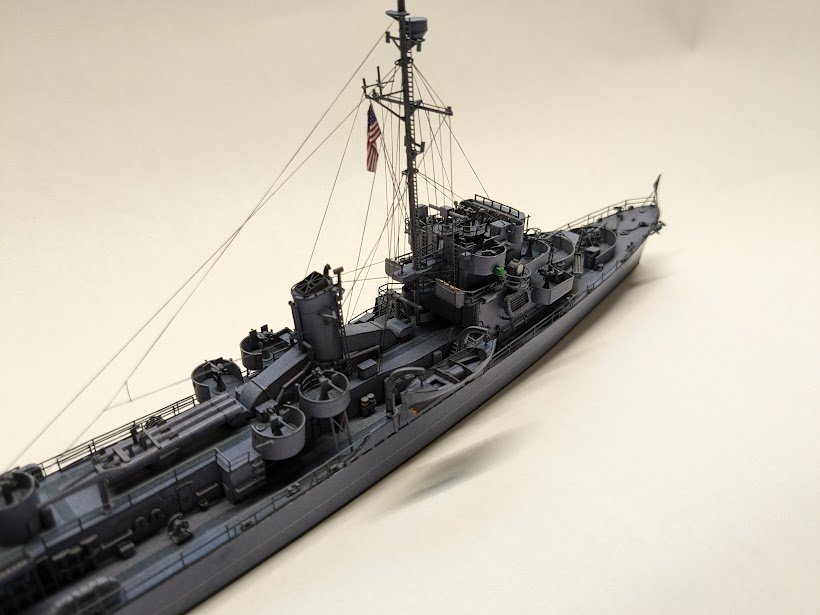
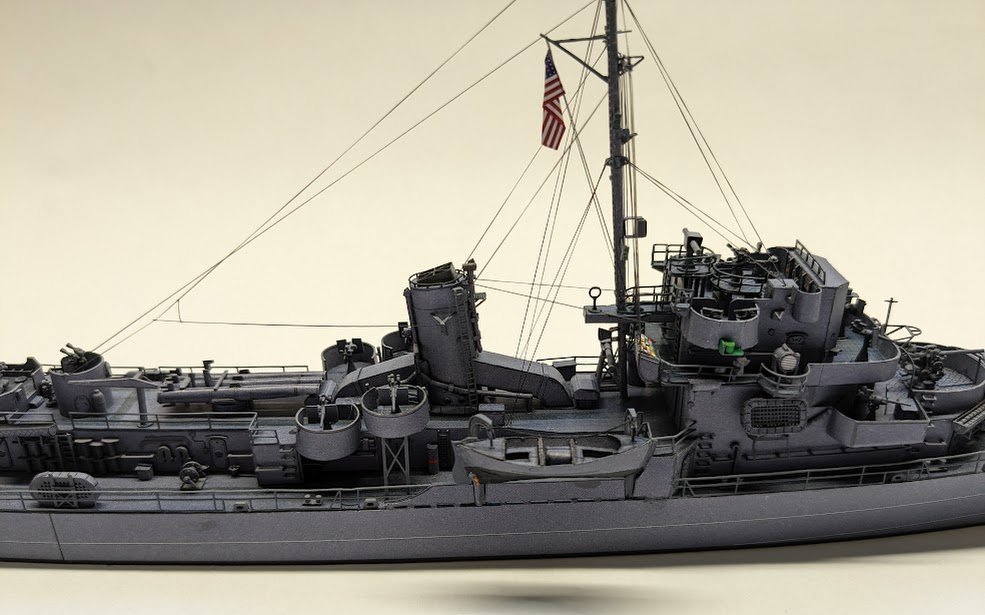
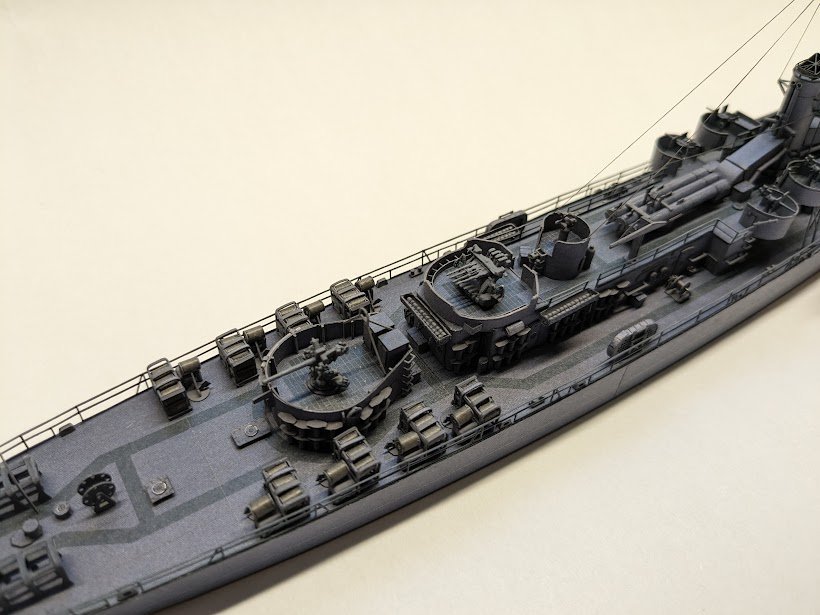
Enjoy the pictures!
-
So, I decided to stow the boat outboard, as Egilman suggested. I like the effect. The kit did not include any blocks; in real life, the falls included rather massive blocks-and-tackle. I imitated these with some punched paper disks. Interestingly, the ship did not have railings on the starboard side of the superstructure where the boat was stowed -- I gather that the boat itself acted as a kind of railing when stowed inboard, and the railing would have been in the way when the boat was being swung outboard.
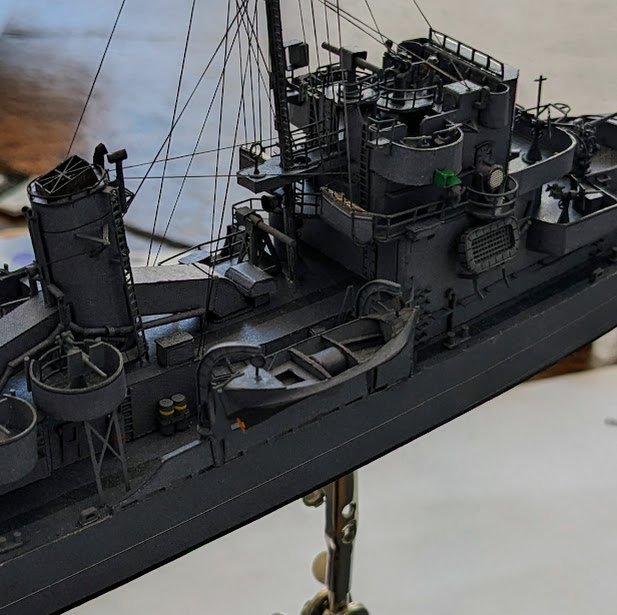
There is now only a single white spot left on the entire model, where the jackstaff goes. 😮 We are getting closer!
-
11 hours ago, Egilman said:
One more thing Chris, the boat would be secured inboard when in port, outboard when at sea.... I know that sounds backwards, but it was standard navy practice... Essentially making the boat easier and faster to launch in case of emergency at sea....
That makes sense. Surfing the internet sources, there are photos of ships with their boats stowed in that fashion, but many others have them stowed inboard -- maybe their commanders weren't up to snuff on naval practice. It's an option to think about, and would definitely make mounting the boat easier.
- AJohnson, Dave_E, Keith Black and 2 others
-
5
-
-

Macchi C.200 Saetta by ccoyle - FINISHED - Modelarstwo Kartonowe - 1/33 - CARD
in Non-ship/categorised builds
Posted
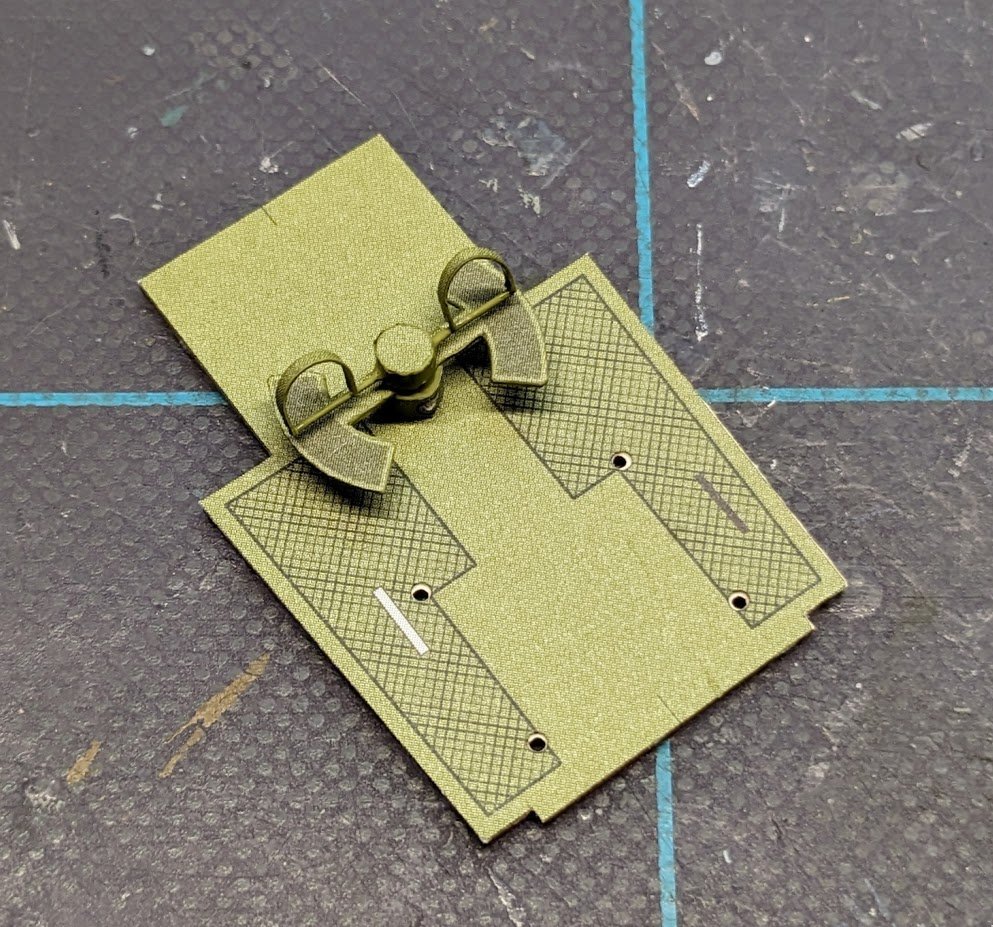
My CR.42 has those chains. For the most part, I tend to avoid super-detailing cockpits -- it's a lot of work that will rarely be seen. As an aside, if you look at the seat, you'll see that it has one straight edge and one scalloped edge. The diagrams didn't indicate which edge was the top (and online photos usually show a rounded top, probably armor). After thinking about it for awhile, I chose to put the scalloped edge at the bottom, thinking that such an arrangement would allow the pilot to pull further back on the stick. Is it correct? I dunno, but other than the viewers of this thread, no one is likely to ever notice! 😋