


ccoyle
-
Posts
10,173 -
Joined
-
Last visited
Content Type
Profiles
Forums
Gallery
Events
Posts posted by ccoyle
-
-
1 hour ago, Jörgen said:
I have never tried a card model. How is that compared to plastic or wood kits?
Much cheaper to acquire than either plastic or wood, but far less water-resistant. 😏
Like most modeling media, card has a learning curve, and the masters of it are very, very good. I am not a master.
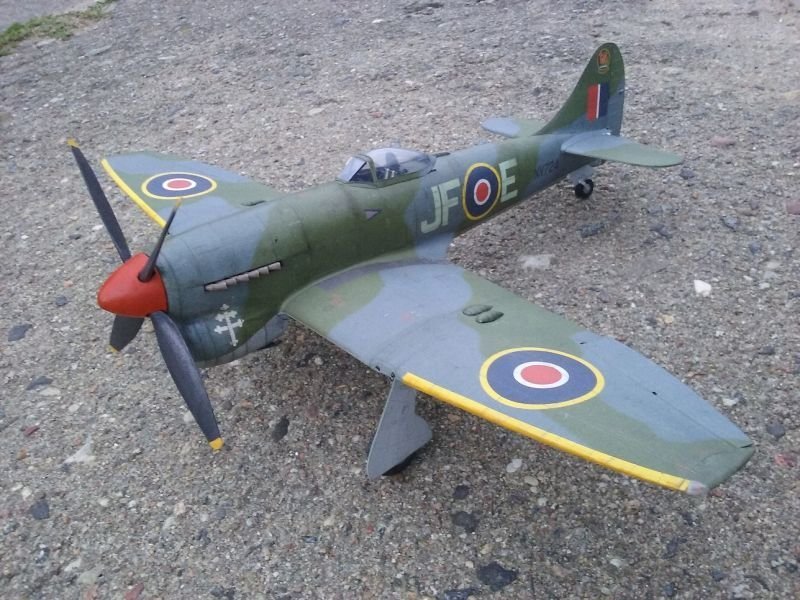
Here's Halinski's Mk.V kit built by someone who knew what they were doing:
-
Very nice work! Great improvements to the basic kit, too.
-
-
-
A small amount of progress today. Further work on the gear:
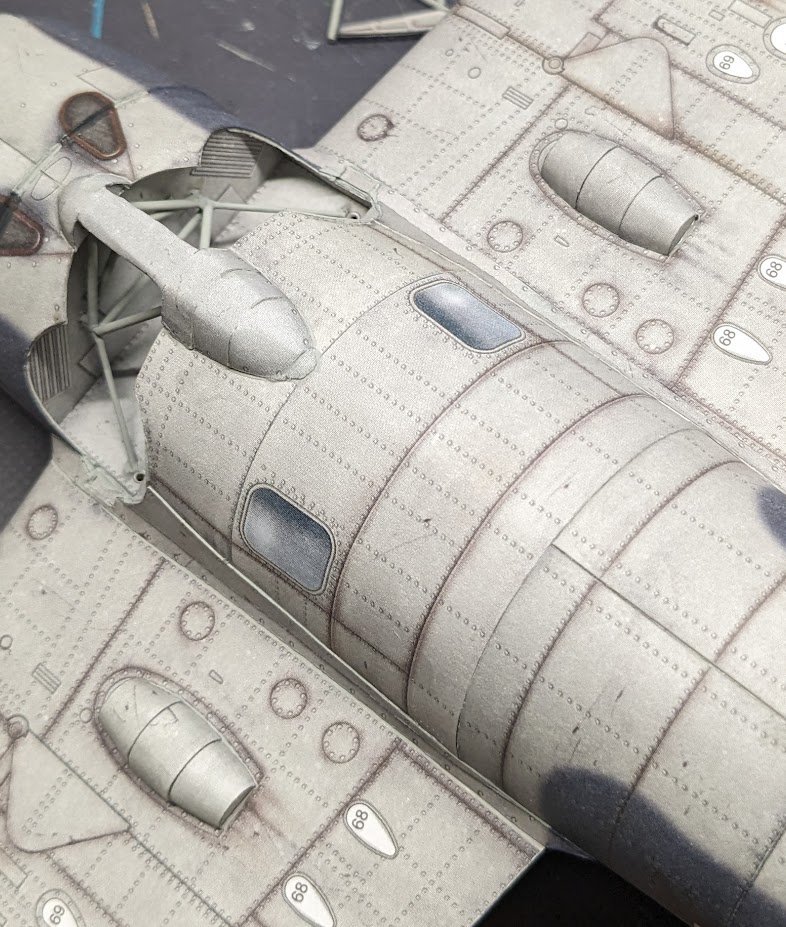
While waiting for these to dry, I decided to work on the numerous fairings and other bits on the lower wing surfaces, starting with two large intakes. IMO, these are over-engineered and result in no significant gain in either sturdiness or ease of construction. The Halinski Wildcat uses a mere three parts to make each of these structures; the WAK kit uses SEVEN -- three separate outer skins plus four internal frames. Despite their apparent simplicity, these were no cakewalk to make, and I'm not completely happy with how they turned out.
Cheers!
-
-
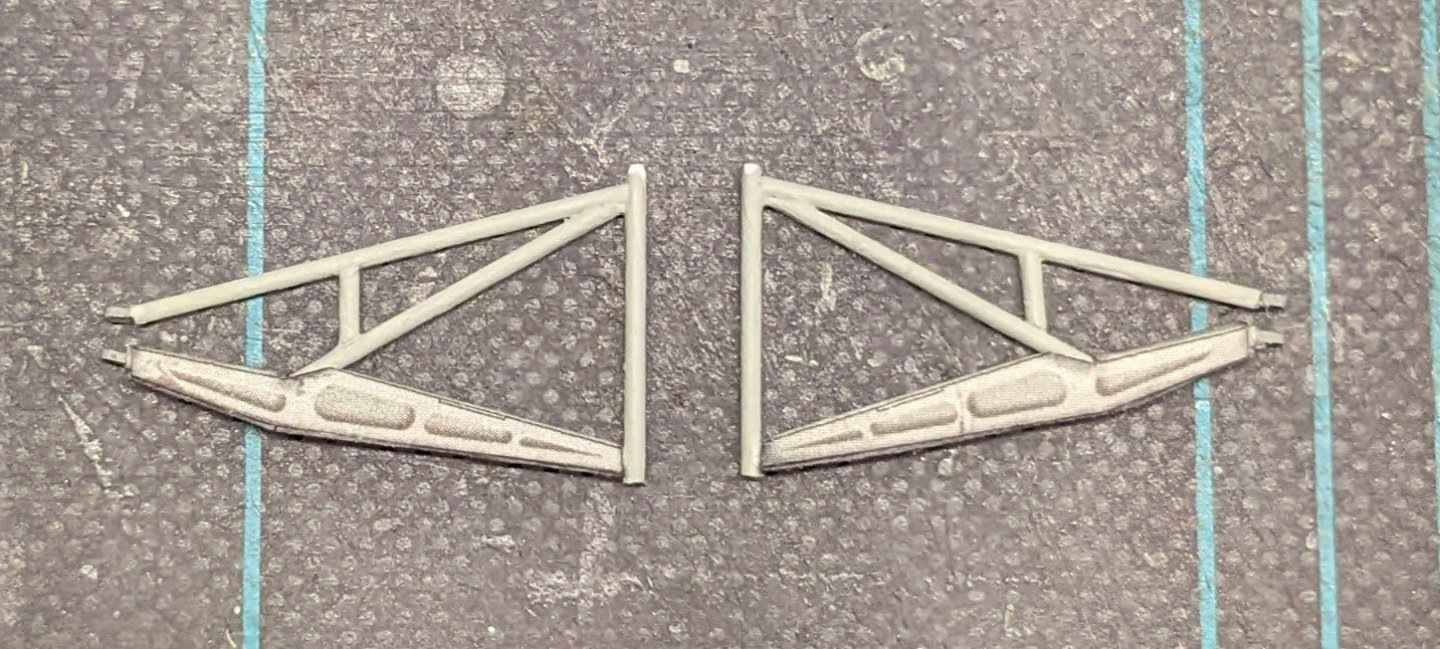
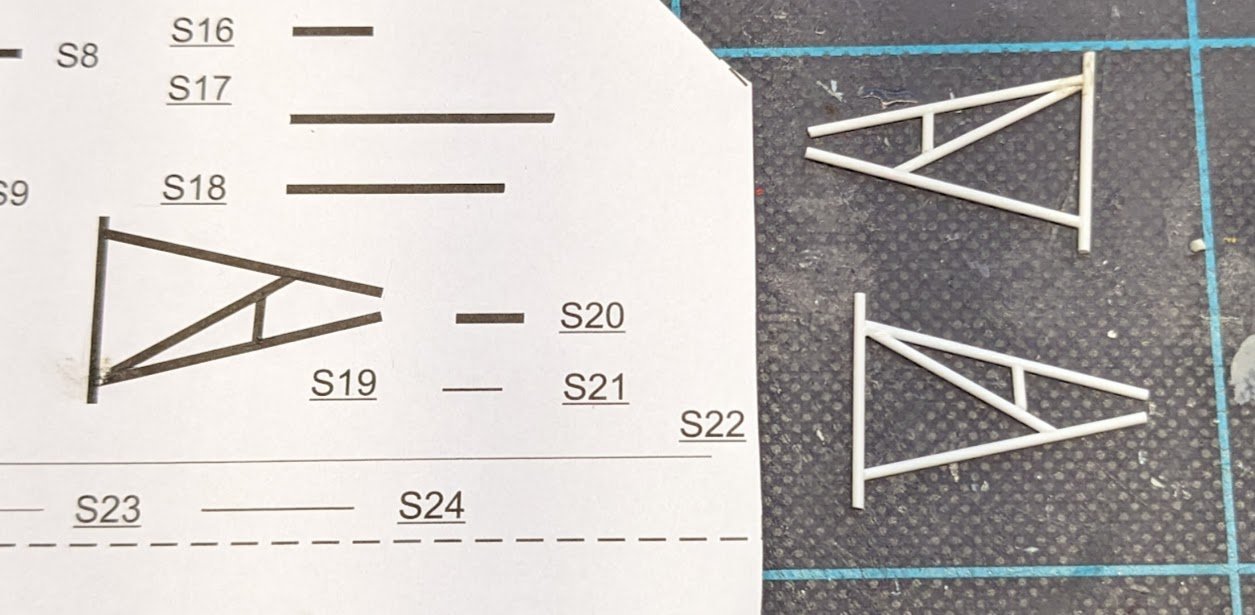
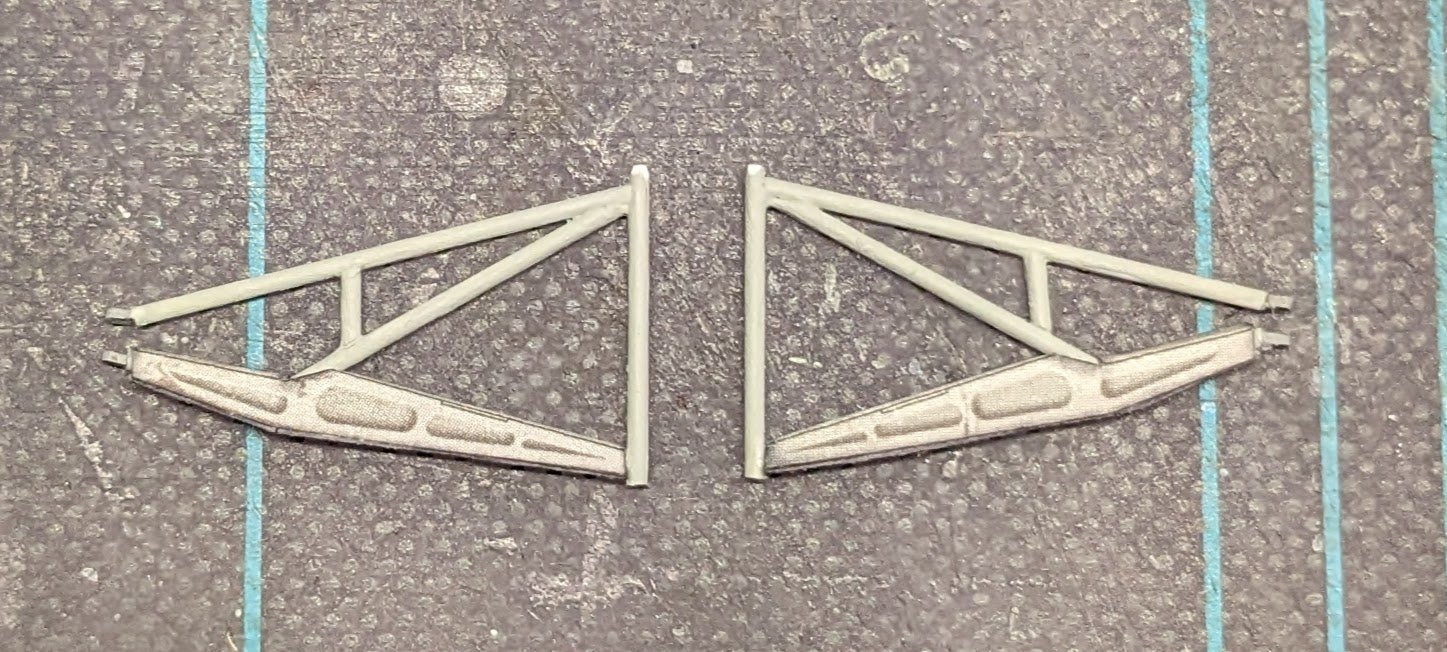
So, if you remember your F4Fs well, then you'll recall that the Wildcat had a shockingly complicated (and manually retractable!) landing gear. Here's where we get to see that a 'card' model typically includes media other than card -- wire and styrene rod in this case. First we have the bits that go inside the gear bay, twelve pieces in all.
And then we have to start building the complex struts themselves. Like most all card kits, this one includes templates for making the various wire or styrene pieces -- they're just not usually this labor-intensive. So far I'm pleased with how these are turning out.
BTW, I'm not showing you the finished cowling scoop. The poor Wildcat's nose really is a weakness in this kit. 😑
-
3 hours ago, chris watton said:
I am wondering if there's be any interest in the colonial merchantman Susan Constant?
I don't wish to derail this topic and turn it into another endless "everybody's VM wish list" discussion, but I will make the following general observations: (1) While there may not be a kit of Susan Constant available, there is already a decent number of kits for small galleons (or similar) on the market. (2) If you do ever decide to go non-UK, bear in mind that US East Coast types are already well-represented by Model Shipways, BlueJacket, and Wye River Models. (3) On the other hand, there is nearly a complete lack of US West Coast types on the market.
- Canute, thibaultron, AJohnson and 2 others
-
 5
5
-
-
-
17 minutes ago, realworkingsailor said:
I tried to find images to compare, all I found were some ones from an Australian hobby shop:
Super-Hobby is actually an internet store with its home base in Poland.
18 minutes ago, realworkingsailor said:Although it’s a different paint scheme
It's the same kit (see post #1 in this topic).
18 minutes ago, realworkingsailor said:I’d say you’re doing very well (amazingly well) with what you’ve got.
Well, thank you, I'm flattered! But I'm also realistic -- I'm no match for the kit's beta builder. I'd like to get there someday, but I don't know that I ever will. It's difficult to learn the secrets of the masters when all of them live in Poland and are mainly active on the various Polish-language forums.
Cheers!
-
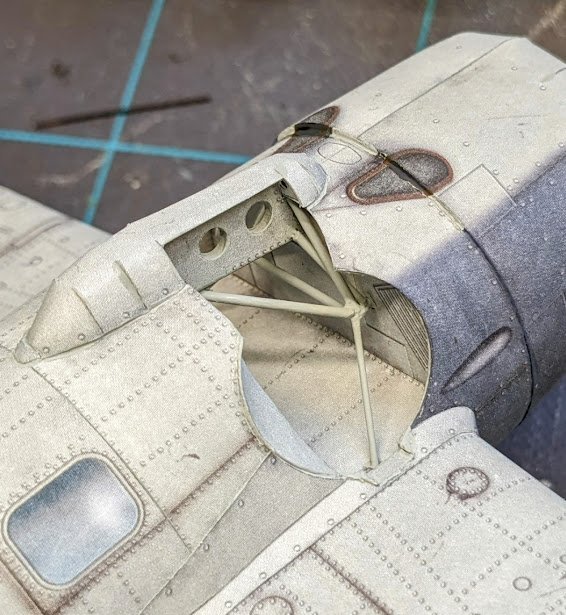
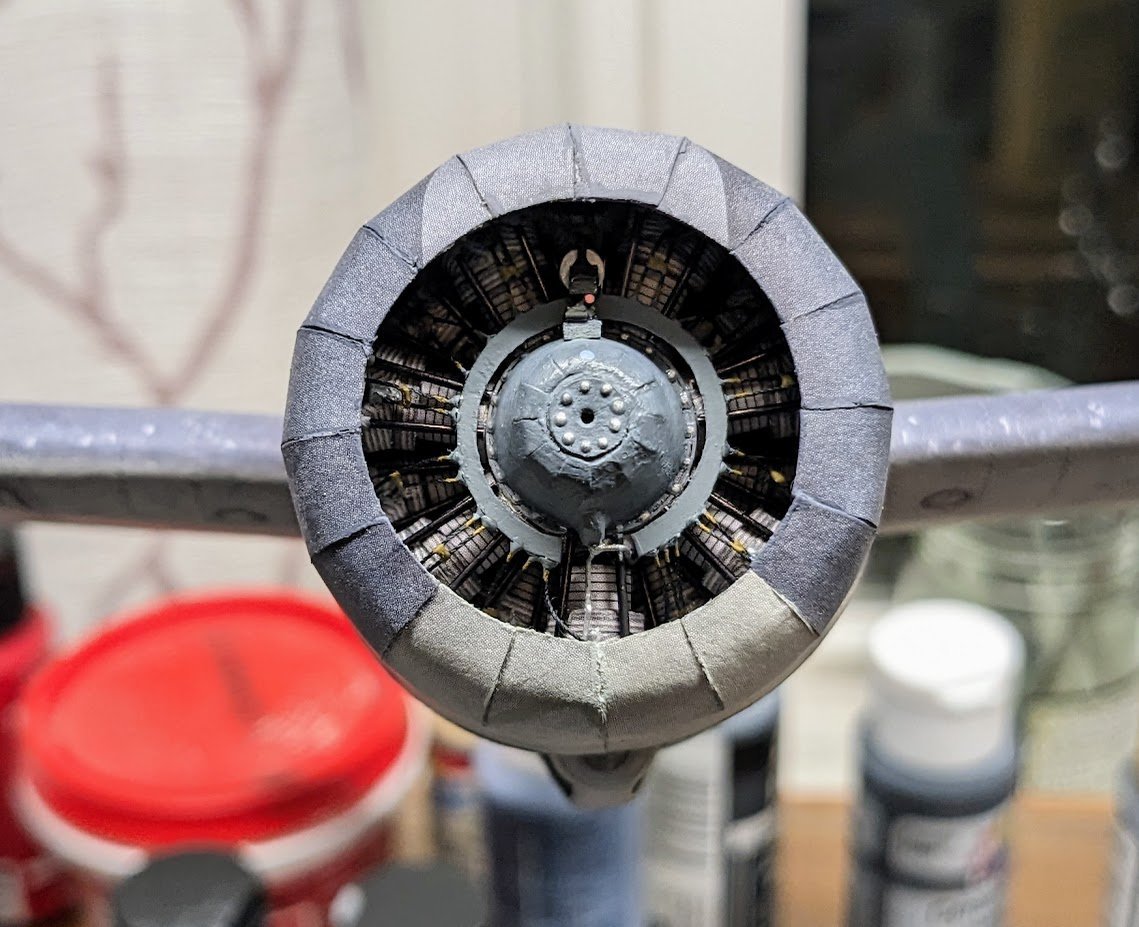
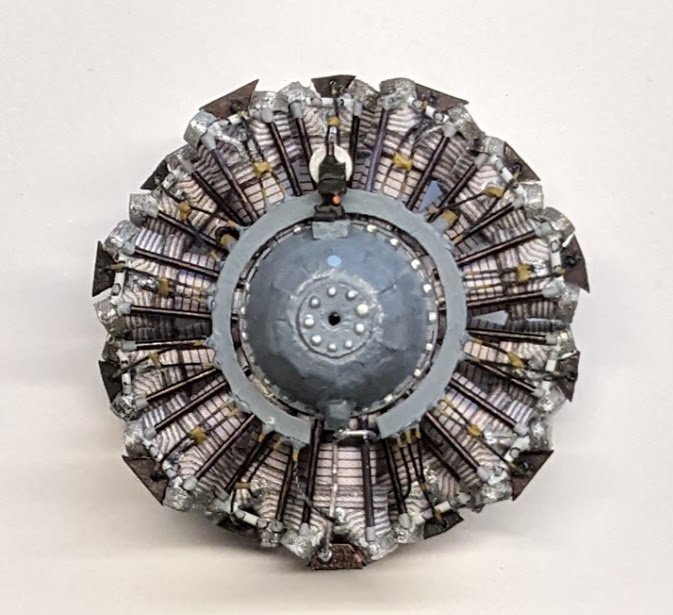
Last night I finished the cowling and mounted both it and the engine to the fuselage. When it comes to cowlings, card model designers have two options. By far the more common option is to make the cowling from a series of rings, like those seen here for my earlier F6F build:
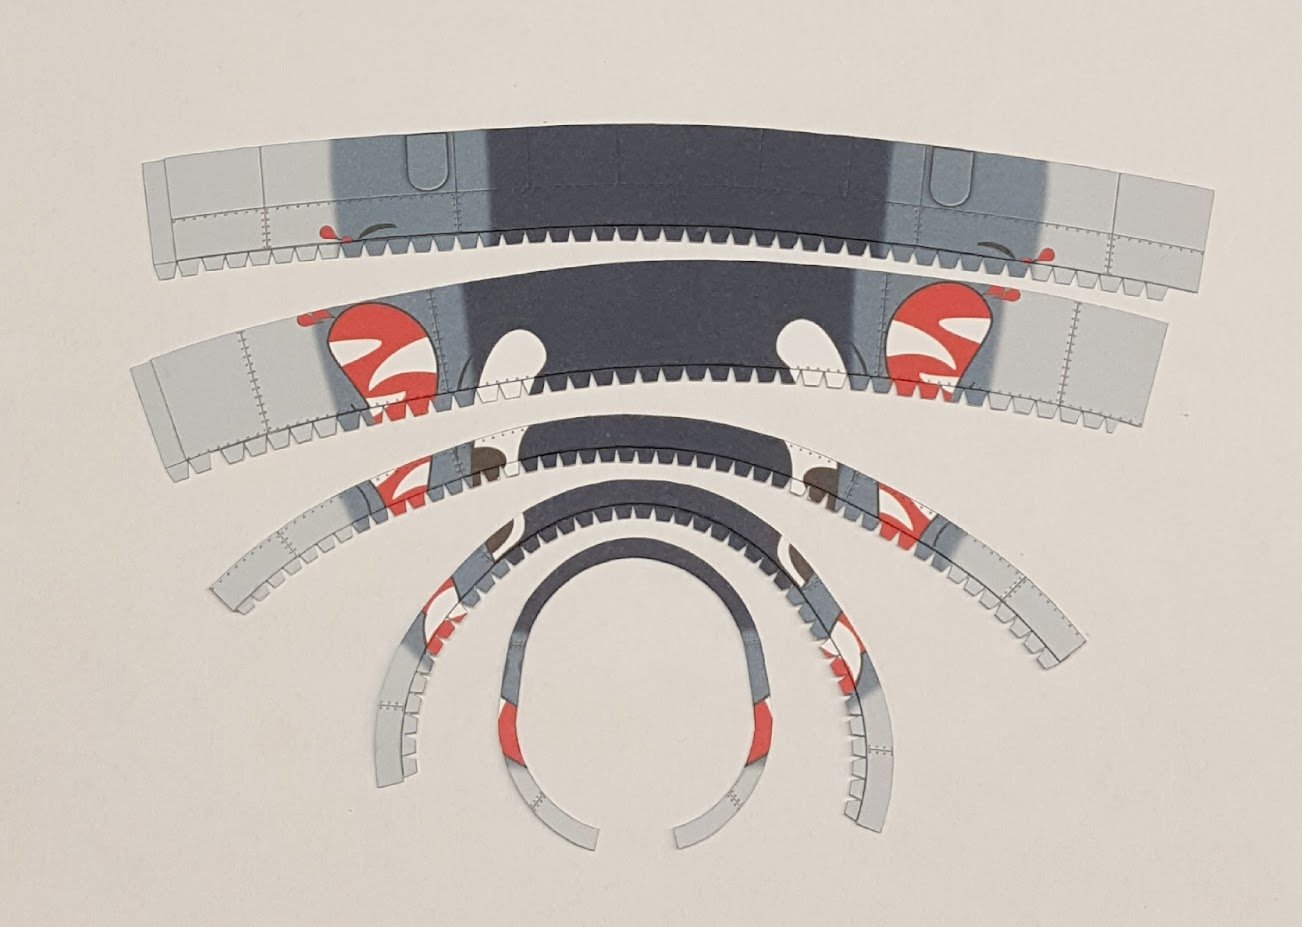
The other and thankfully less common option is to design the cowling as what's called a "petal structure" in the hobby, i.e., the cowling is a single strip (or two strips in this case -- an inner one plus an outer one) from which a series of tapered darts is removed, creating a row of 'petals'. The petals are then rolled to bring their tips together, creating the rounded cowling.
I absolutely, positively despise petal structures. In the first place, they are an absolute nightmare to shape properly. I don't know how the Poles do it, but I'm far from mastering the technique. In addition, and for obvious reasons, a petal structure has a large number of seams -- sixteen in this instance. Lastly, it is very difficult, for me at least, to judge whether I have achieved the correct amount of 'roll'. The roll is largely determined by the petal shape -- you simply roll them until the edges come together -- but there's still a certain amount of leeway between getting it just right and almost right. Happily, the whole thing does not look as bad in real life as this unflattering close-up makes it appear.
Still to be added is the air scoop that sits atop the cowling. The dash-four had two additional scoops inside the cowling at roughly the four and eight o'clock positions, as you can see in this photo:
.jpg.3b2dac5598d5921dd1220fc4cf72f754.jpg)
The kit makes no provision for the inside scoops, so I'll have to give some thought to whether to add them. Anyways, that's where we're at for now.
-
-
Welcome aboard, Blaine. Marine Models has been out of business for quite some time, so it's little wonder that they don't turn up on the forum very often. In fact, we have only six build logs that have been tagged with that company name -- you can see them here. Your Dapper Tom model may be nearly as old if it is one of the old 'yellow box' kits.
Cheers!
- Baker, thibaultron, mtdoramike and 3 others
-
6
-
7 hours ago, MTC said:
it is summer here in the PNW
Sometimes, when I dying in the sweltering heat and humidity of the Deep South, I look up the weather data for my hometown in Humboldt County and dream longingly of summertime highs in the upper 60s. 🥵
-
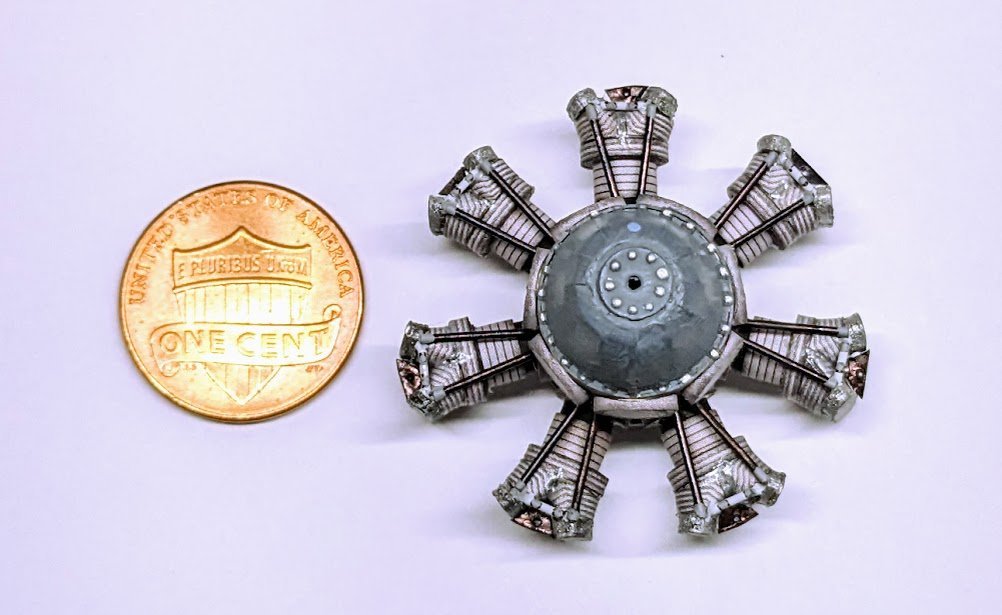
All done! I'd tell you what all the extra added doohickeys are, but I don't know what they are myself -- I just followed the reference photo. As a matter of curiosity, there are, of course, multiple variants of the Twin Wasp. I didn't find any sources that could tell me which variant(s) was(were) used in the dash-four, so if you know, don't tell me now, cuz it's too late! 😅
-
-
Congratulations, David, on a grand achievement!
- drobinson02199 and Mr Whippy
-
2
-
Congratulations! She looks great on the water!
- king derelict, NavyShooter, mtaylor and 1 other
-
4
-
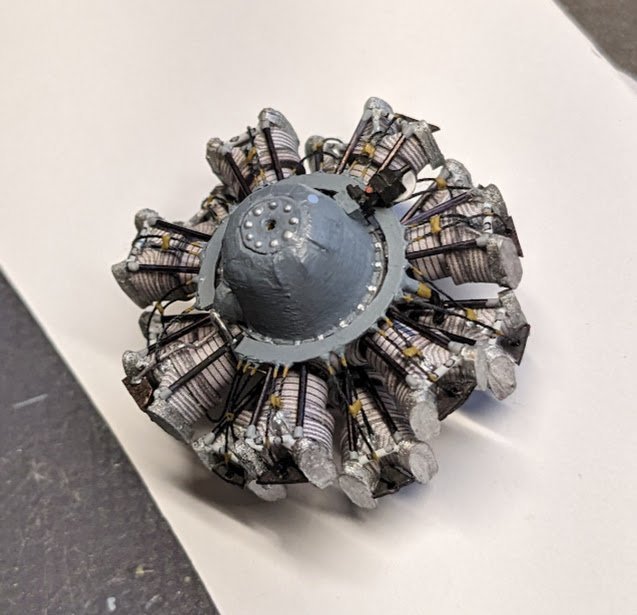
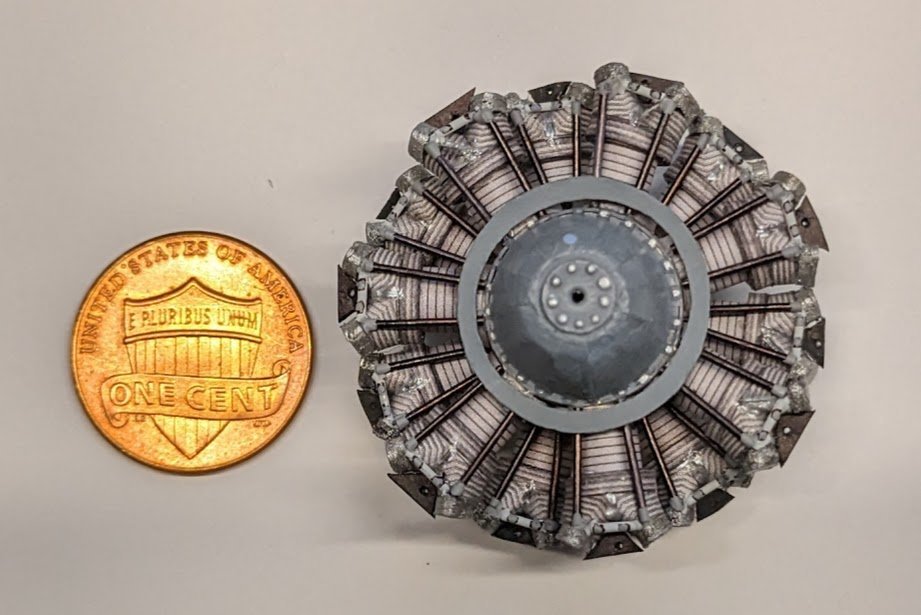
Now we're getting down to details that are difficult for a cellphone camera to capture. Cylinders #3 and #13 have hoses that connect to the distribution ring. In addition to these, I did a test run of the spark plug 'wires', which are simply black thread. The hoses and wires have couplings that I believe were probably brass on the original or some other brown-toned metal; these I have simulated with dark tan paint. Overall, I like the effect and think we're good to go for the remaining thirteen sets of wires.
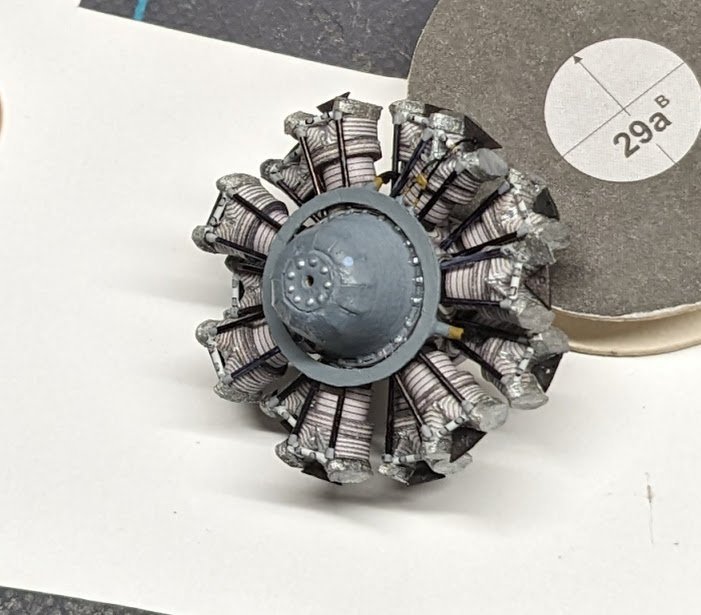
BTW, the kit provided a template for making the distribution ring from wire, but since the original is rectangular in cross-section, not round, I chose to make one from scratch from scrap 'beer mat'. This was a good move, because it is infinitely easier to glue the thread ends to card rather than to metal.
-
-
10 hours ago, realworkingsailor said:
So…. For your next card airplane build you’ll be doing something with an in-line engine? 😜
They do seem to follow one of these radial-engined birds for some reason. 🤔
- Ryland Craze, FriedClams, Egilman and 9 others
-
12
-
-
Our friend, Tomek @0Seahorse , has published a new kit. This charming US revenue cutter -- including all of its accessories -- can be had for under US$40 at WAK (the kit by itself is only US$7.16). Tempting!


HMS Winchelsea 1764 by CaptMorgan (Steve) - FINISHED - 1:48
in Member Build logs for the HMS Winchelsea
Posted
Fabulous!