Supplies of the Ship Modeler's Handbook are running out. Get your copy NOW before they are gone! Click here to order
×
MORE HANDBOOKS ARE ON THEIR WAY! We will let you know when they get here.
×


ccoyle
-
Posts
10,209 -
Joined
-
Last visited
Content Type
Profiles
Forums
Gallery
Events
Everything posted by ccoyle
-
 Just don't get becalmed anywhere! Congratulations on your finished model - she looks great!
- 72 replies
-
- 5
-

-
- Norwegian Sailing Pram
- Model Shipways
- (and 1 more)
-
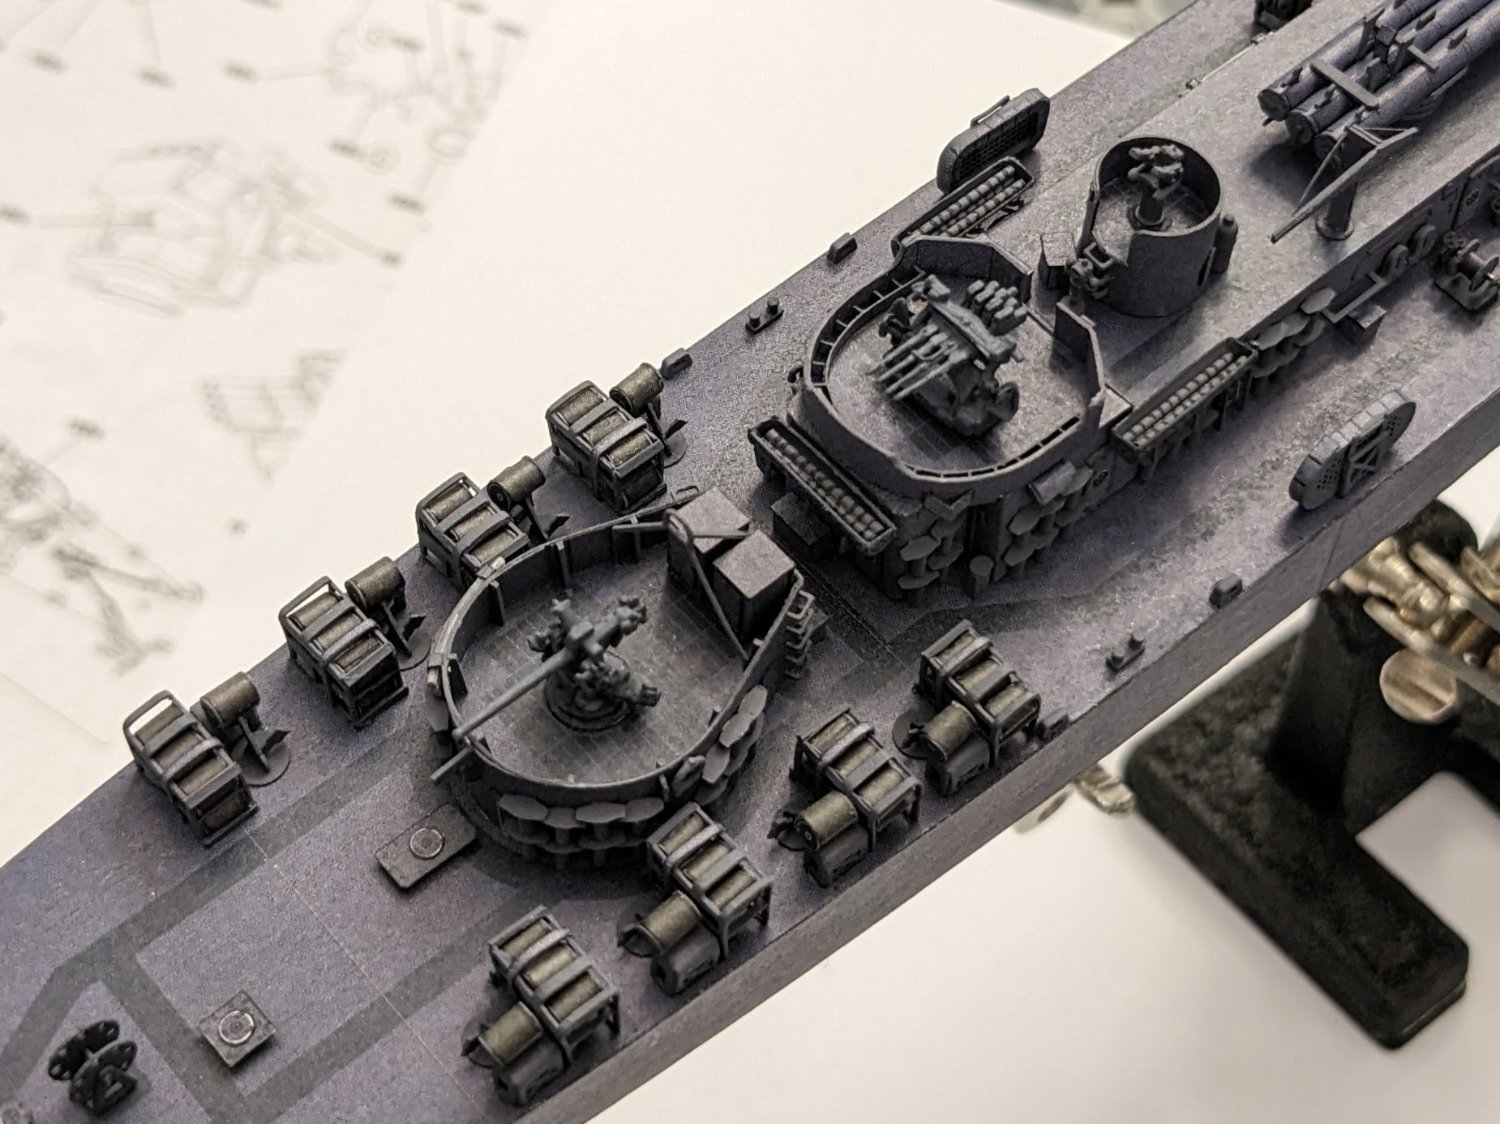
Okay, so I have made a tiny amount of progress on this build. As you know, I have a now five-month-old puppy on my hands, which is like having a toddler in the house. To make matters worse, my wife had to travel to California for a month, so I've been taking care of the toddler, er, puppy all by myself during that time. Needless to say, modeling time has been precious scarce. Regarding the 3D parts we last spoke about, my initial impressions have been more or less borne out. The 3"/50s are indeed nice. Do they look like the real thing or even like the kit guns? I can't say for certain -- they're just too small for me to tell easily. At the very least, they are satisfyingly lumpy and bumpy, and I think anyone will be hard pressed to notice if they are faithful reproductions or not at stand-off viewing distances. The 1.1" mount, despite the poor barrel shapes, does have some astonishingly fine details molded into it, although at the small scale a viewer may wonder whether they're details or imperfections in the print. I ran into a couple of difficulties with the mount. First, it proved impossible to replace the unsatisfactory barrels with the much better barrels that came with the earlier set of parts I received from Darius. The good barrels won't fit into the mount. So my choices were either use the bad barrels or build the mount from kit parts to use with the good barrels. I chose the first option. The 3D mount had separate parts for the trainers' seats. One seat had a footrest, but the other's footrest had broken off and was nowhere to be found. No problem there, though -- while trying to glue the bits together, the first seat's footrest likewise broke off (the plastic is very brittle), and my tweezers subsequently flung the tiny, tiny footrest off into that Dimension of Lost Parts. So now neither seat has footrests. I went ahead and glued the aft 3"/50 and 1.1" mounts into their tubs. There's no rigging in that vicinity, so they should be safe from getting knocked around. Cheers!

- 331 replies
-
- 22
-
-

-
Hi, Andrew. You created a duplicate build log for this project; I have merged the two for you. You can continue to add updates to this topic. Cheers!
-
Welcome back, Dave! But as a diehard Everton fan, I think I'm sworn to dislike you? 🤔 Hope not -- being from the other side of the pond, I'm not sure how seriously EPL fans take these sorts of things. Cheers!
-
Welcome aboard from a southern neighbor!
-
Welcome! I used to love 1/700 scale ships as a kid, but nowadays my eyeballs require that I only work in 1/250 or larger, and even then I have to use magnification. Cheers!
-
Don't fret over your first layer. It's just an underlayment and will be invisible when your model is finished. Second layer is where you get marks for proper technique. Cheers!
-
If you were to couch your frustrations in the form of a question, the designer of this kit might be able to assist you past the tricky parts. He has, in fact, been following along on your build. 😉
- 72 replies
-
- 2
-
-
-
- Norwegian Sailing Pram
- Model Shipways
- (and 1 more)
-
I believe your father was correct on the ship's identity. If no box came with the kit (and it is indeed a kit), it's possible the model is a Hachette parts work kit, which is still in production. Parts work kits are sold as subscriptions consisting of a series of sub-assemblies, rather like chapters in a book. If you can deduce where your father left off with the construction sequence, you can still get the missing chapters from Hachette.
-
I have used Birchwood Casey's cold bluing agent with excellent results, so I would expect their blackening agent to perform similarly.
-
Help on build of USS Constitution Wood Model.
ccoyle replied to Lee Jr's topic in Wood ship model kits
Hi, Lee. I think some additional information would be useful: What kit is this? Can you provide pictures of the area in question? (I suspect you may be referring to filler blocks.) Where are you located? If this is the Model Shipways kit, and you simply misreported the scale, you might have a two-fold problem. The first is that Model Shipways kit instructions often assume a certain amount of prior experience on the part of the builder, i.e. they will say "do this" but not tell you how to do it. The second potential problem is one you've already hinted at, namely that wooden models are not like plastic models. It's quite possible that you have simply bitten off more model than you can chew, in which case taking a break to build a less demanding model might be a wise option. Cheers! -
Welcome, MJ, and good luck on your build! Whitehalls are lovely boats. I hope that you will not mind that I have marked your log as a 'first build' -- we do this for two reasons: first, to identify newcomers to the hobby who might appreciate the occasional extra shot of encouragement, and secondly because the term "first build" is a very common search string used by folks who are looking for suitable first projects. Cheers!
- 23 replies
-
- 3
-
-
- boston whitehall tender
- rowboat
- (and 3 more)
-
Model Shipways is now producing the Midwest kits. Check their website to see which ones are currently available.
-
Done!
-
Welcome aboard! Your Mars project is looking pretty darn good so far. Happily for you, with the exception of Unicorn, all of the kits you mentioned were designed by the same man, Chris Watton, who is an active member of our forum. Being the innovator that he is, Chris' kit designs have become increasingly 'user friendly' over the years. He produces his own kits now under the name Vanguard Models, and if you click here you'll see that they have become very popular, and for good reason -- they are among the best kits in the hobby. Hope to see more of your work soon. Cheers!
-
Such an unusual and visually striking model -- congratulations!
- 16 replies
-
- 1
-

-
- Higaki Kaisen
- Woody Joe
- (and 1 more)
-
Yes. I might have purchased this kit -- and a P-47D-11, Curtiss SB2C, and Fw-190 Sturmbock. Maybe. Possibly. 😬
- 115 replies
-
- 12
-

-
-
I may have caved in to temptation on this kit -- plus a few others. 🤫
-
https://modelexpo-online.com/Midwest-Kits_c_1135.html
-
Depends on how you define "really cheap." Kits by Midwest Products, currently made and sold by Model Expo, are excellent beginner kits and can be had for under $50. If you can scratch together $100-150, then there are a significant number of other great kits available. Since building in wood can require a considerable time investment, it's wise to choose a kit that will really grab and hold your interest. BTW, if you have a very limited budget and a dearth of tools, you might try considering card models -- they are tailor-made for people strapped for cash, tools, and/or space.