russ
-
Posts
3,086 -
Joined
-
Last visited
Content Type
Profiles
Forums
Gallery
Events
Everything posted by russ
-
Thanks guys. Hopefully I can get a little more done soon. Russ
-
John: Thanks. Actually, I cannot wait to get the deck planking in and begin cluttering. Russ
-
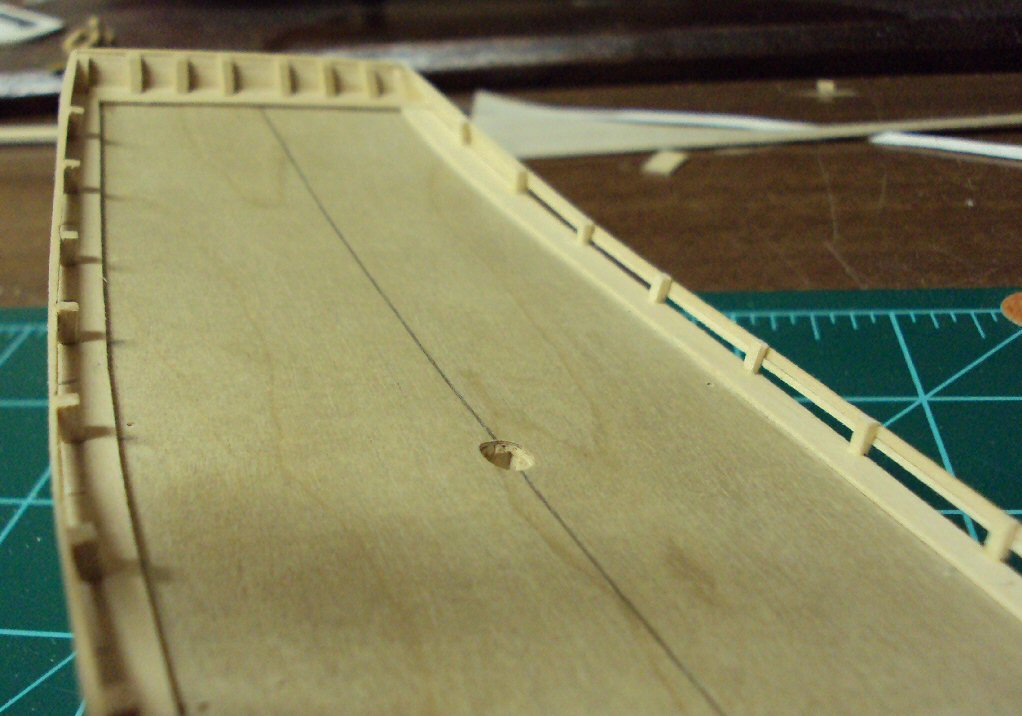
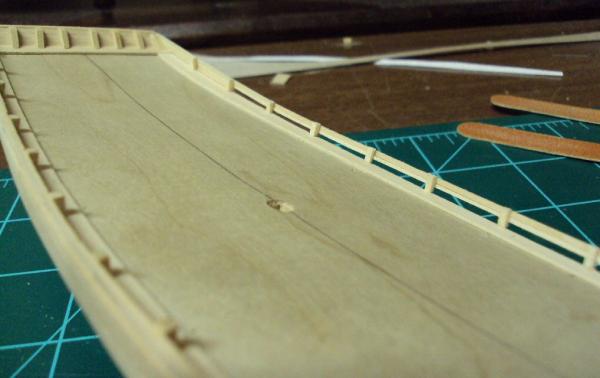
I managed to get a little work done this weekend. I managed to finish installing the port side bulwarks stanchions. The large cleats on the stanchions are next. Russ

-
What you show for the breeching is probably not what it used back in its early career. That is what they have now, but I would not think that sort of arrangement was used in the 1812 era. In that period it was more likely to see a ringbolt on each side of the gunport to take the breeching. Then further out from the gunport there would be another ringbolt on each side to take the side tackles. The rider bitt loks very good. Nice work there. Russ
-
Hooks
russ replied to popeye2sea's topic in Discussion for a Ship's Deck Furniture, Guns, boats and other Fittings
I make mine from brass wire. That said, I do not put any strain on them. There is never enough weight being applied to cause strain that would bend the hooks. Russ -
Bob: The treenails look very good. It is a nice effect on the lower hull. Not too obvious. Nice work. Russ
-
Dave: I would think that the flying backstay would be black and the tackle would be tan. That is how you would see shifting backstays. Since the standing part of the backstay is mostly structural, it would be black along with the shrouds and stays. Russ
-
I would advise putting the lower deck hanging knees in as well. The framing looks okay. As Grant said, live and learn. We have all been there. I am usually there on weekdays. Russ
-
Be careful of using tea since it is acidic. I have used fabric dye with good results. I have also used stain, but even that probably has some issues. Russ
-
Floyd: I think you meant "rot" instead of "rats". Tar was a preservative for the rope. It needed protection from the elements. Dave, the rigging looks very good. One thing I would ask is was the standing rigging on this vessel wire or rope? Russ
-
The gun carriages look very good as does your camboose. Very nice work. The ringbolts in the side for the tackles will not be seen so you can work around them if you like. If you choose to rig the breechings, you will need two ringbolts per gun, one on either side of each gun. Russ
-
The Model Shipways Mayflower would be a good choice. This kit was designed by Chuck Passaro. I am sure it has really good instructions and plans. Plus, Chuck is here on MSW and can help with any questions you might have in the build. I am sure the AVS kit is also good, but with such resources, I would go for the Mayflower. Russ
-
The guns look good. That was a good call using the smaller blocks. The 6 inch blocks look great. Russ
-
Aldo: Thanks for the kind words. I am hoping to be able to get more done on this model in the neat future. Russ
-
I agree that the rigging looks great. That it took longer than you thought it would is not as important though. What really matters is that you have made a great achievement. Russ
-
Brass Pedestals Installation
russ replied to BareHook's topic in Metal Work, Soldering and Metal Fittings
Nick: You stll have to screw them into the keel because the screw has to go up through the baseboard to hold the pedestals in place. The only way for the screws to do their job to hold the pedestals is to screw into the keel. Otherwise, there is no point in using the pedestals. Russ -
So long as they will fit on the changing thickness of the ceiling planking, they should be okay. That was a lot of work. Nicely done. Russ
-
I think the finish on the hull looks very good. It has an antique look to it. Very pleasing. I think scratching the pintles and gudgeons is a good idea. Make some that fit your hull, not what they thought would fit. I think you can pad out the sternpost with a thin strip of wood to make up that thickness right under the gudgeon. If it is the same width as the gudgeon and the same color as the sternpost, no one will notice unless you point it out. Russ
-
Thanks. I am still trying to carve out time to work on the model. It may be a while though. It is a very busy time. Russ
-
The rake of the masts will tell you a lot about the postion of the channels. Most times the forward end of the channels will be at or slightly abaft the mast. The channels will have slots cut into the outer edge into which the neck of the deadeye strops will fit. Then a separate cap will be fastened onto the outer edge of the channels to hold the strops and chainplates in place. Russ
-
Sam: Those chainplates are not appropriate for an early 19th century navy schooner. They would have had the metal strop on the deadeye, along with the U shaped links, and a backing link. What they have in your kit is really closer to what you would see on a late 19th or early 20th century working schooner. The holes in the plate are for fastening into the ship's hull. If you look at the illustration that Tom posted, that is how your chainplates should appear. And yes, they should follow the angle of the shroud that they support. So, the chainplates are at different angles along the hull. Russ
-
That looks very good. Nice work. Russ
-
colour of waterway
russ replied to hamilton's topic in Building, Framing, Planking and plating a ships hull and deck
Hamilton: The waterway is part of the bulwarks so it should be painted. Russ -
Blackie: I do not think there will be any hard and fast rules for mast rakes on Baltimore clippers. I think each captain probably had a favorite rake for each mast that had worked well for him and that is what he used. You can use what you found on the Pride of Baltimore if that looks good to you. Russ
-
Henry: I am familar with the flexible rope rammer. I have used that on models before. However, he was talking about the breeching and how to deal with installing it and the guns. Russ