


KeithAug
-
Posts
3,373 -
Joined
-
Last visited
Content Type
Profiles
Forums
Gallery
Events
Posts posted by KeithAug
-
-
Thank you all for your continuing interest and kind words.
I did a bit of a work assessment this week and decided that i should comfortably get this project completed by Christmas, at least that is the target.
I am still working on the mainsail.
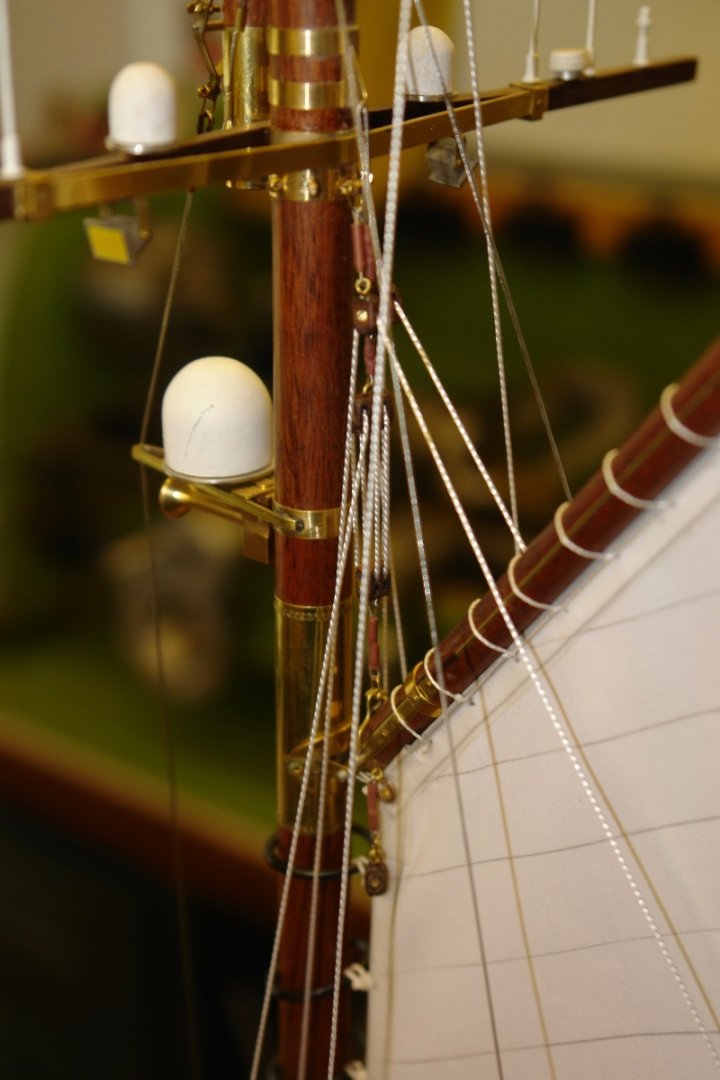
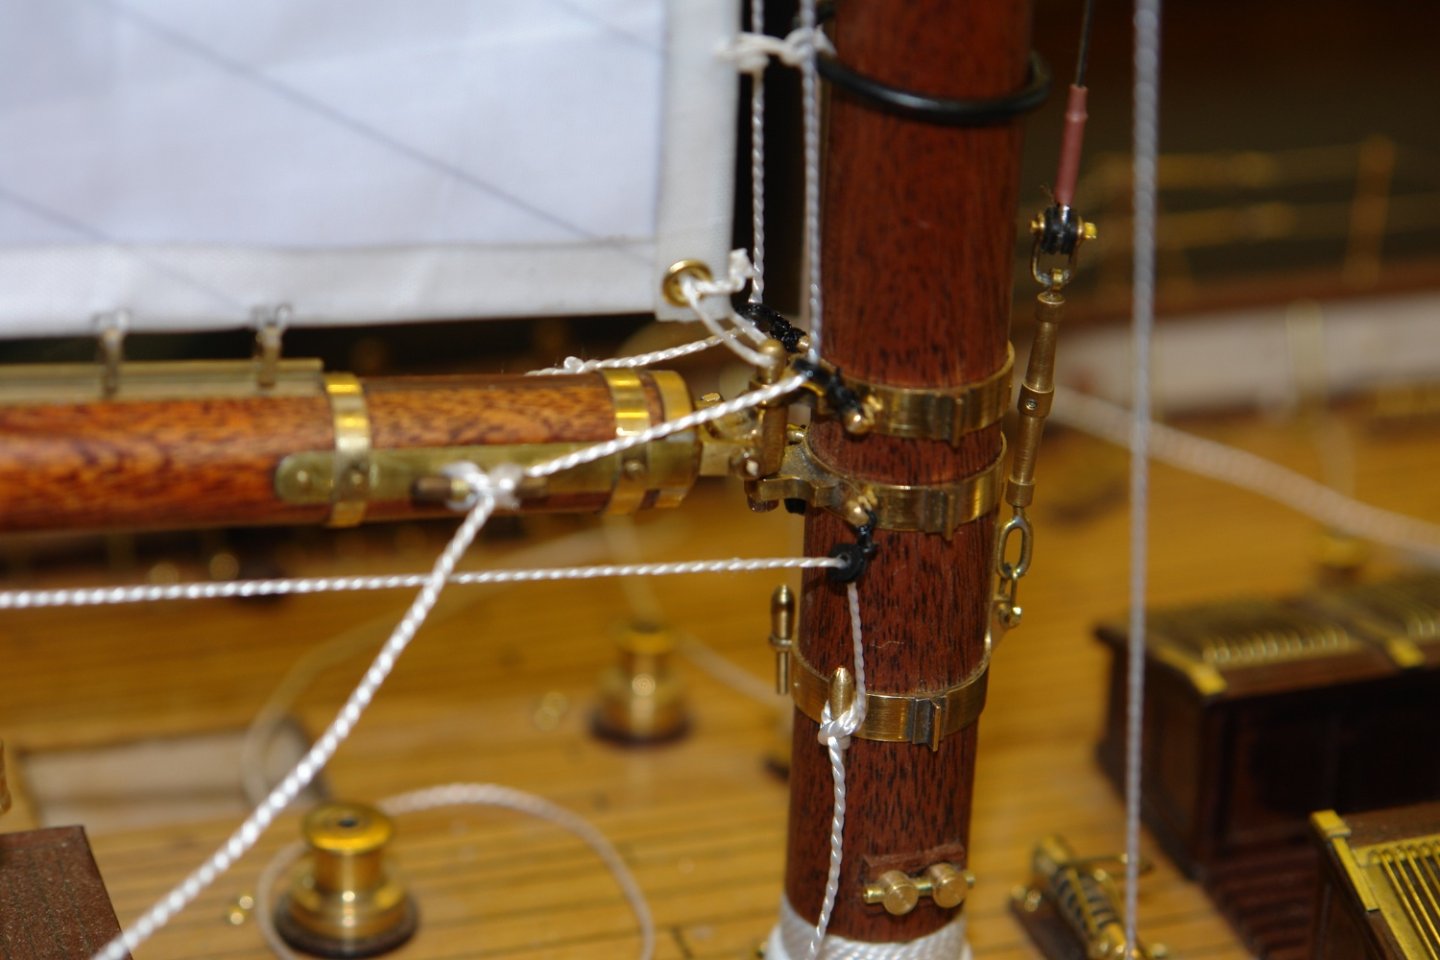
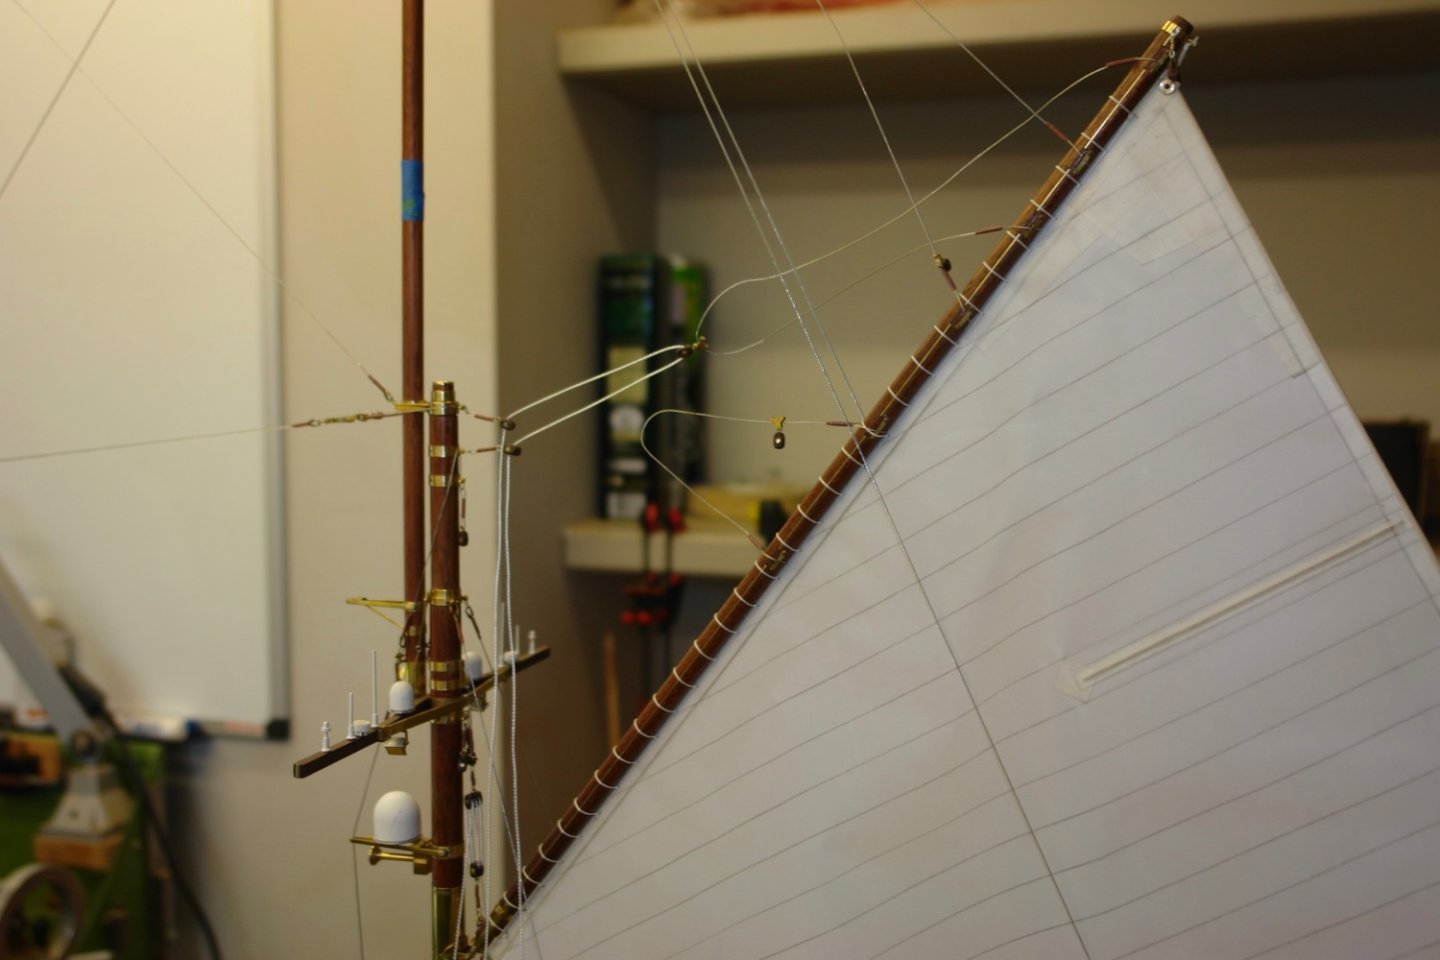
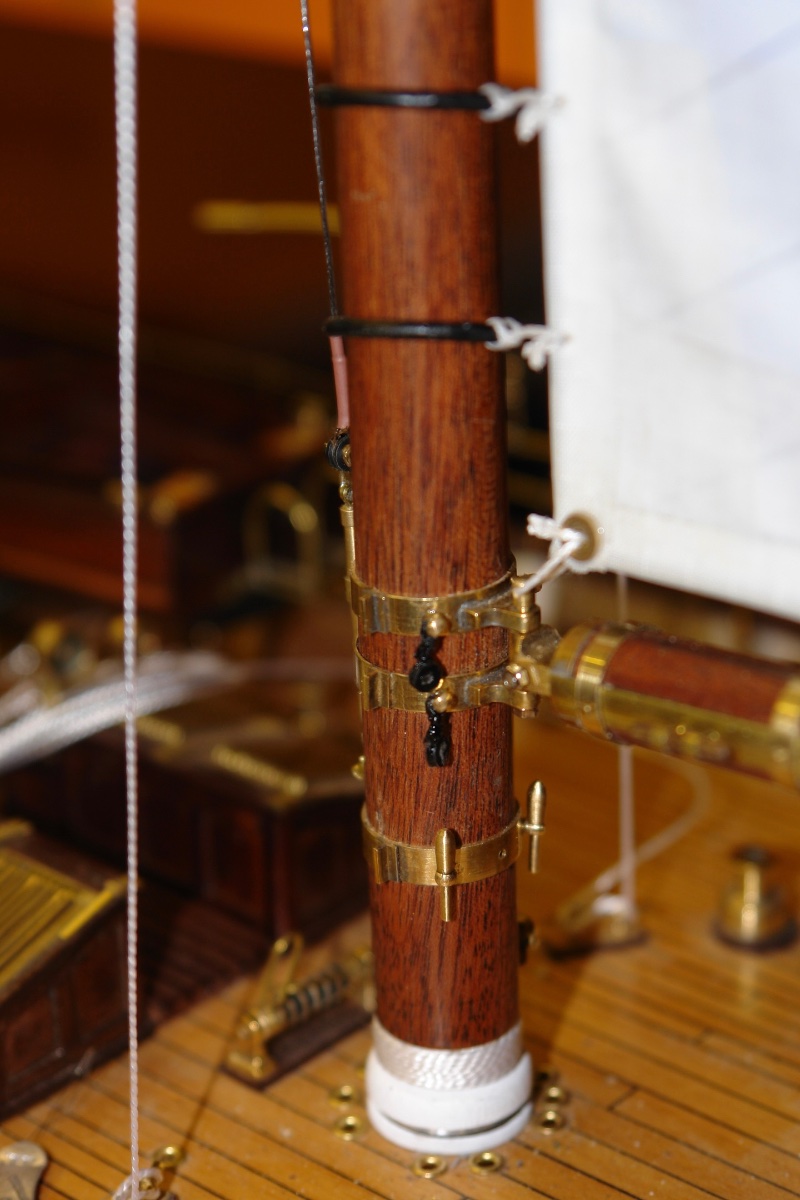
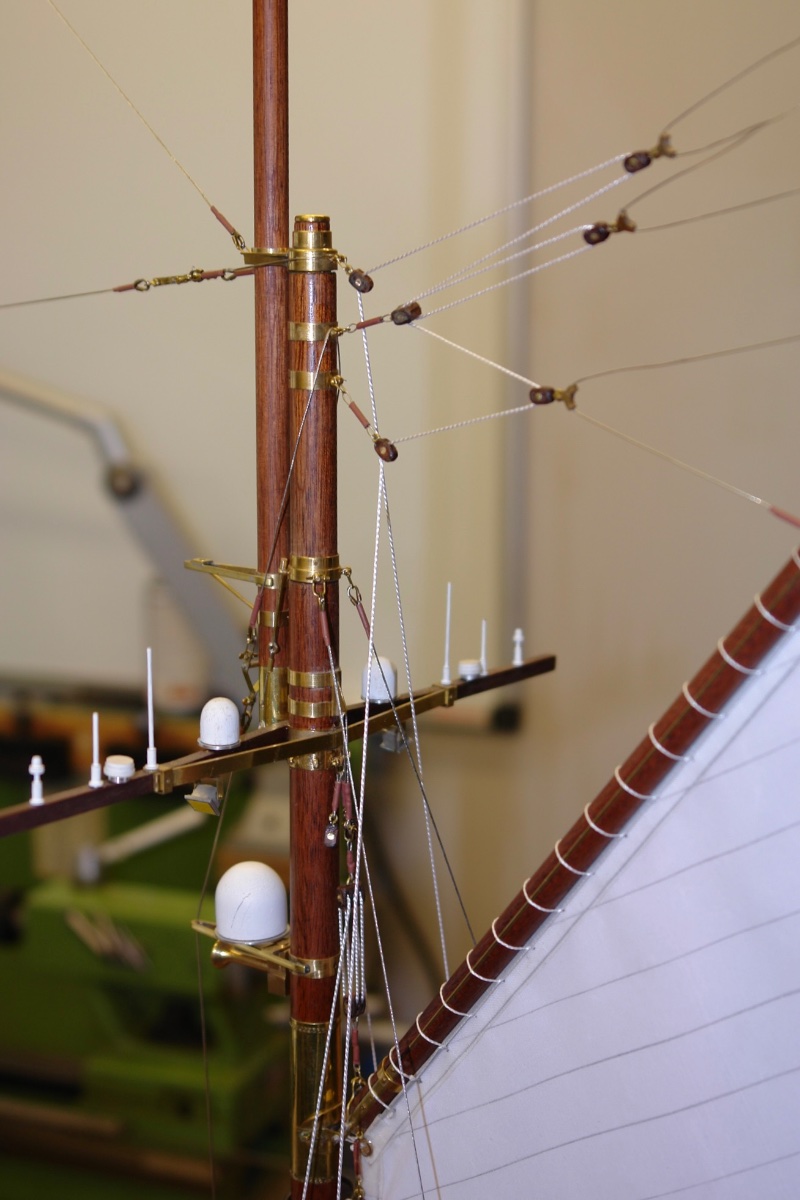
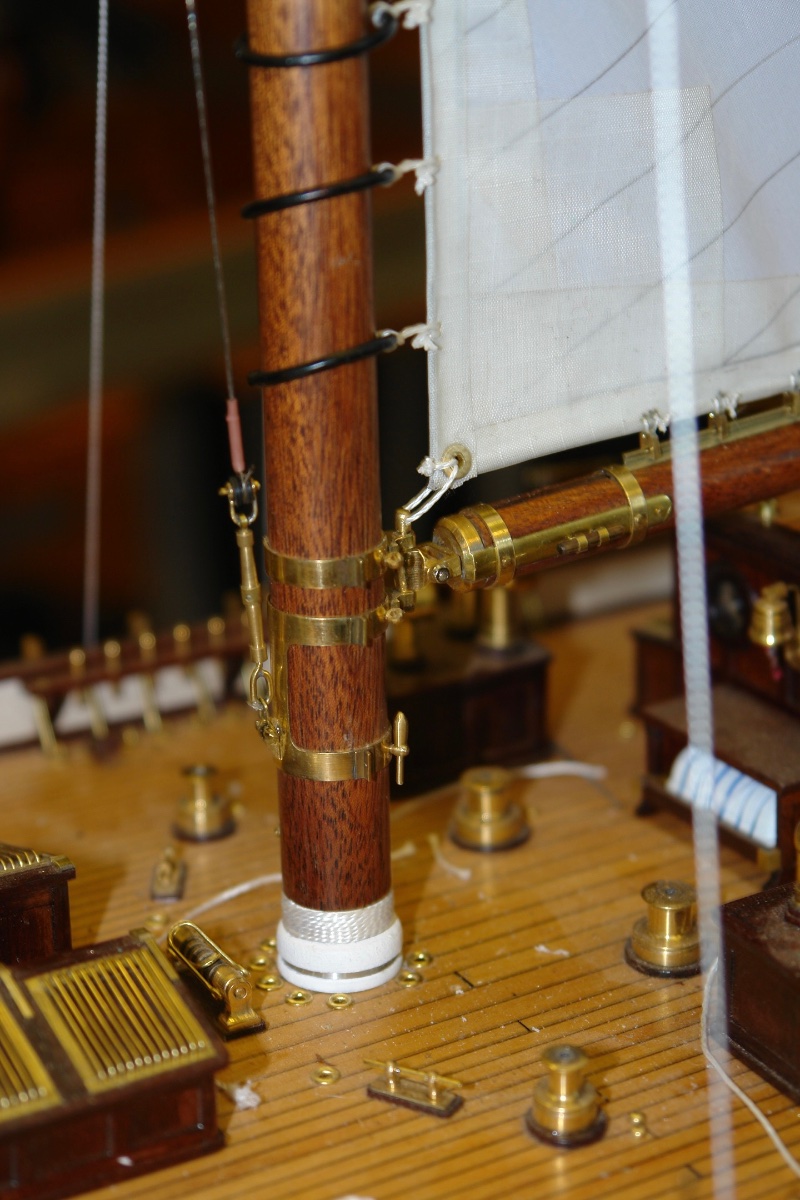
I made the boom fixing for the tipping lift on a template - to get both sides identical.
I then released I had missed off the forward hoop for the topping lift attachment point. A bit annoying as it was more difficult to install with the boom mounted. The strap was made form thin brass sheet and then then bent into a ring.
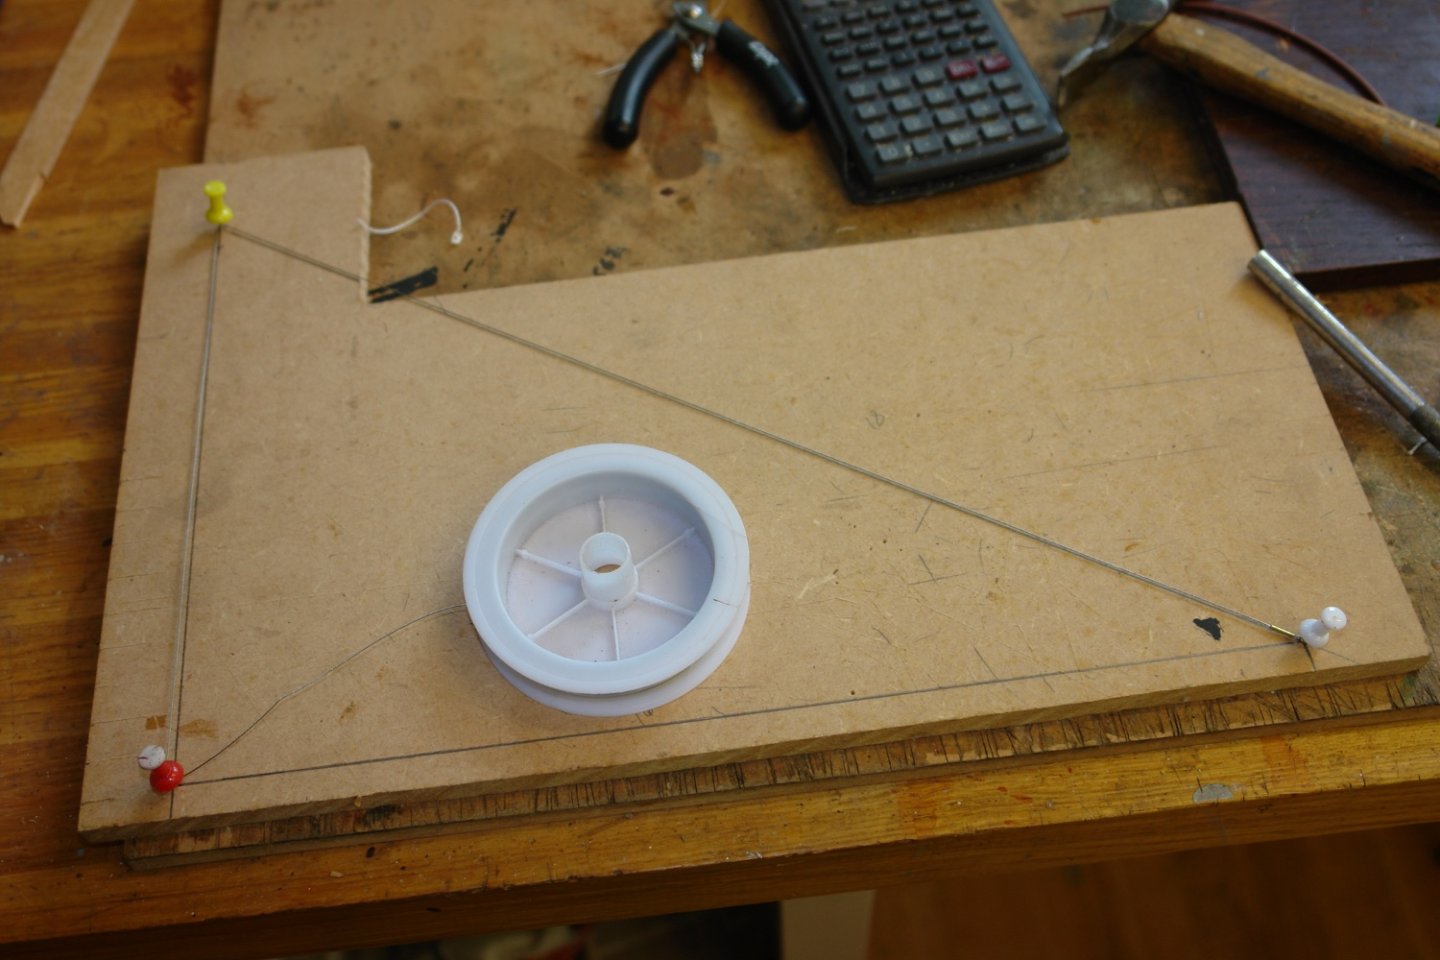
Before rigging the topping lift I needed to temporarily secure the boom in position with a length of string.
With this done I attached the "triangular" wire and rigged the topping lift.

The topping lifts are fed throughout 2 blocks that attach just below the cross tree.
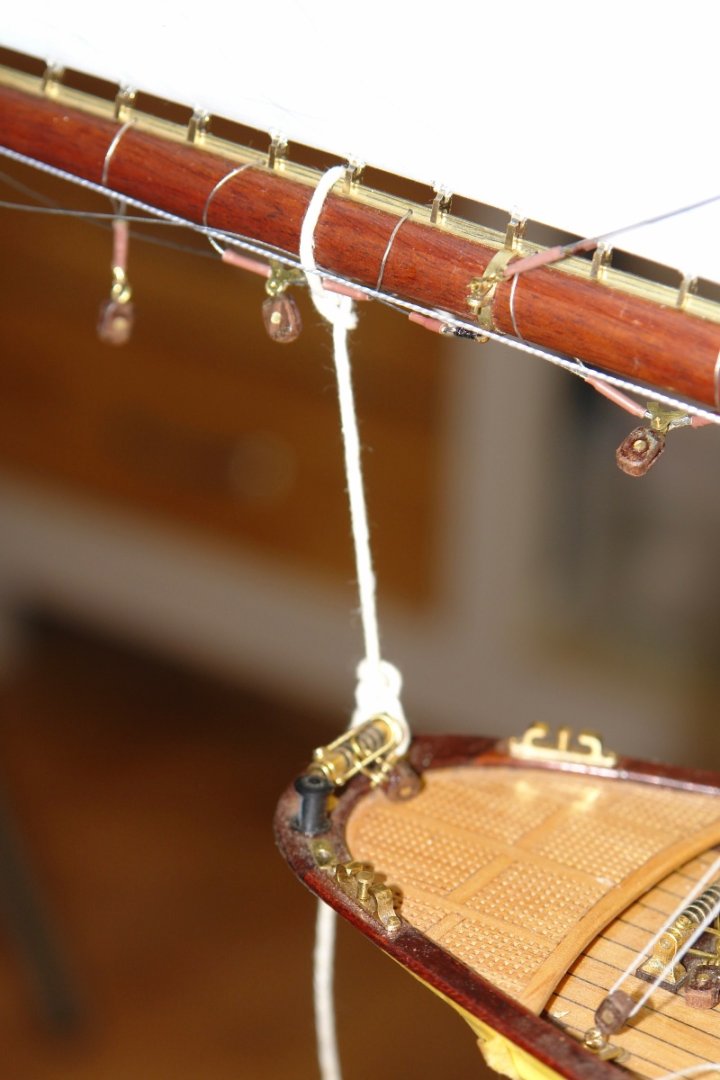
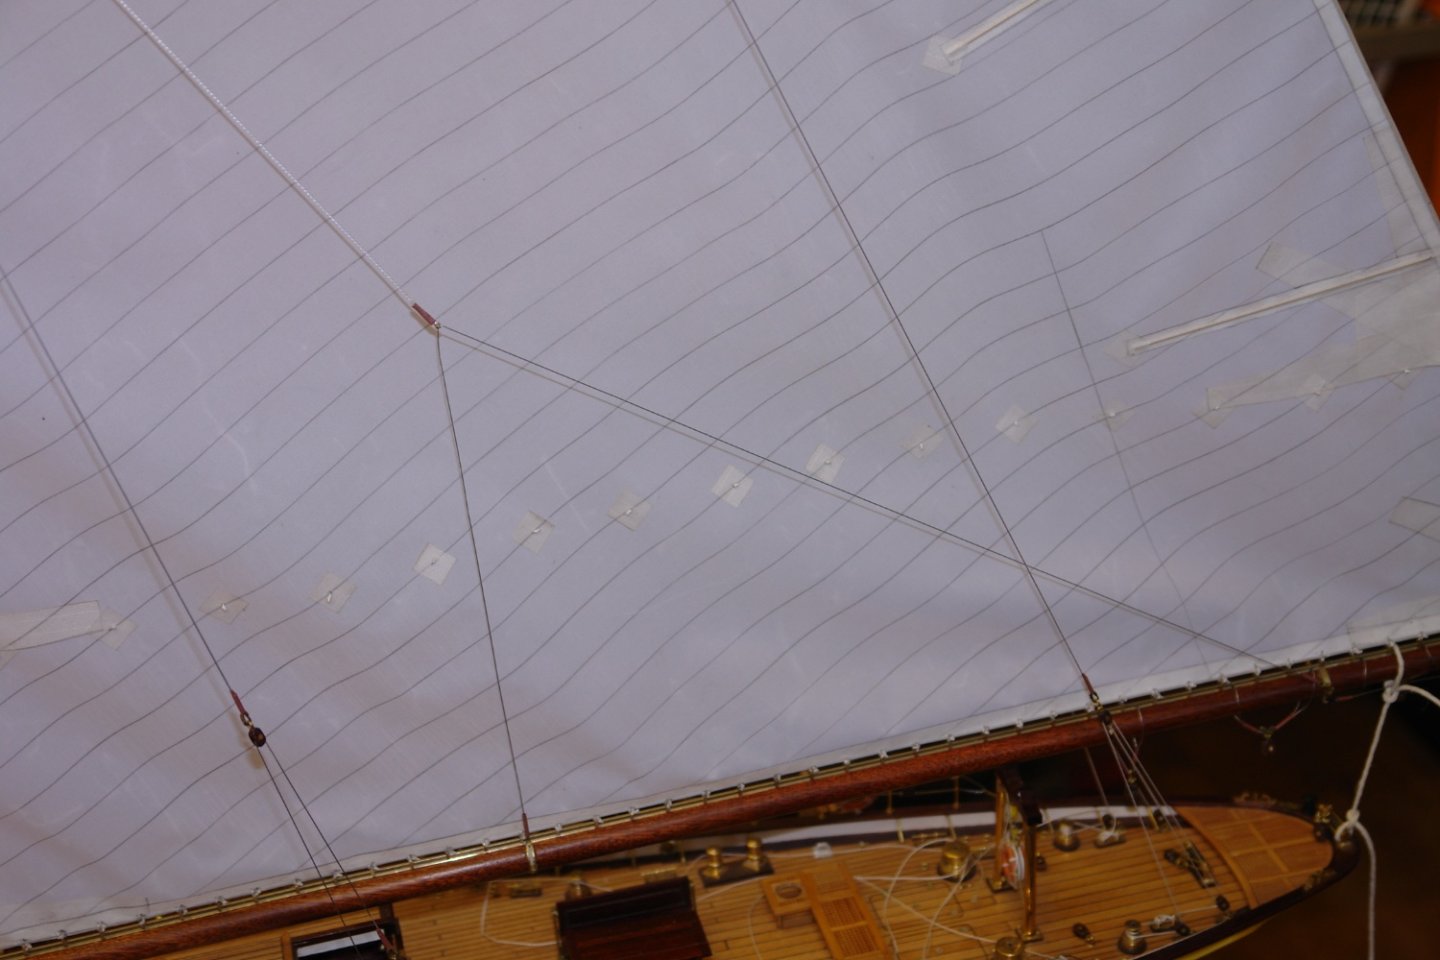
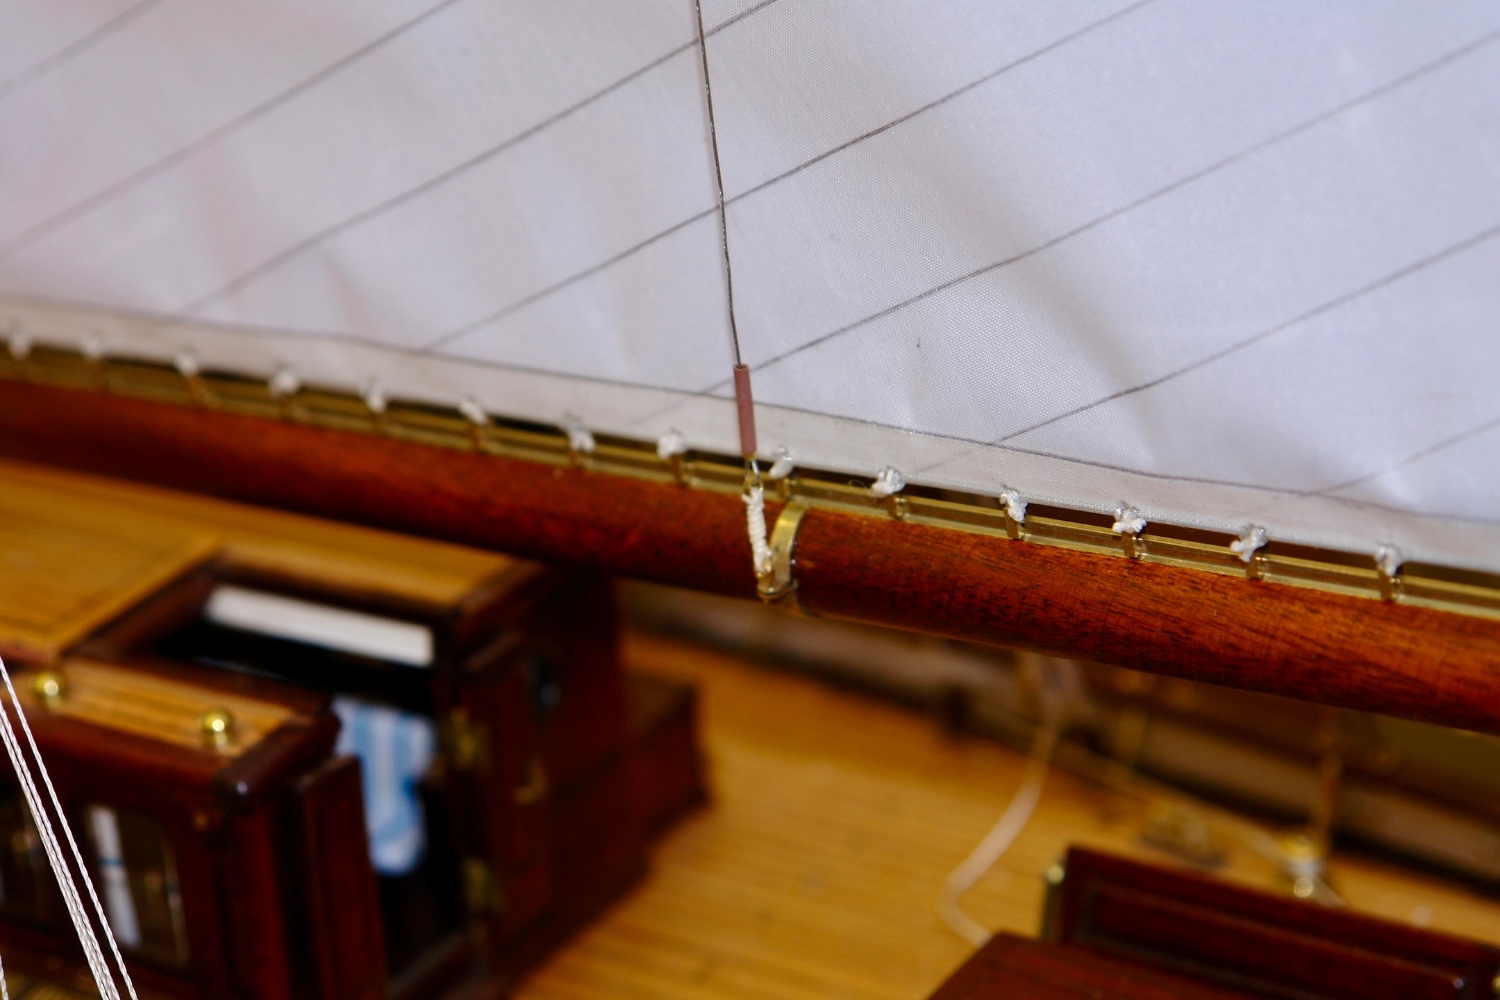
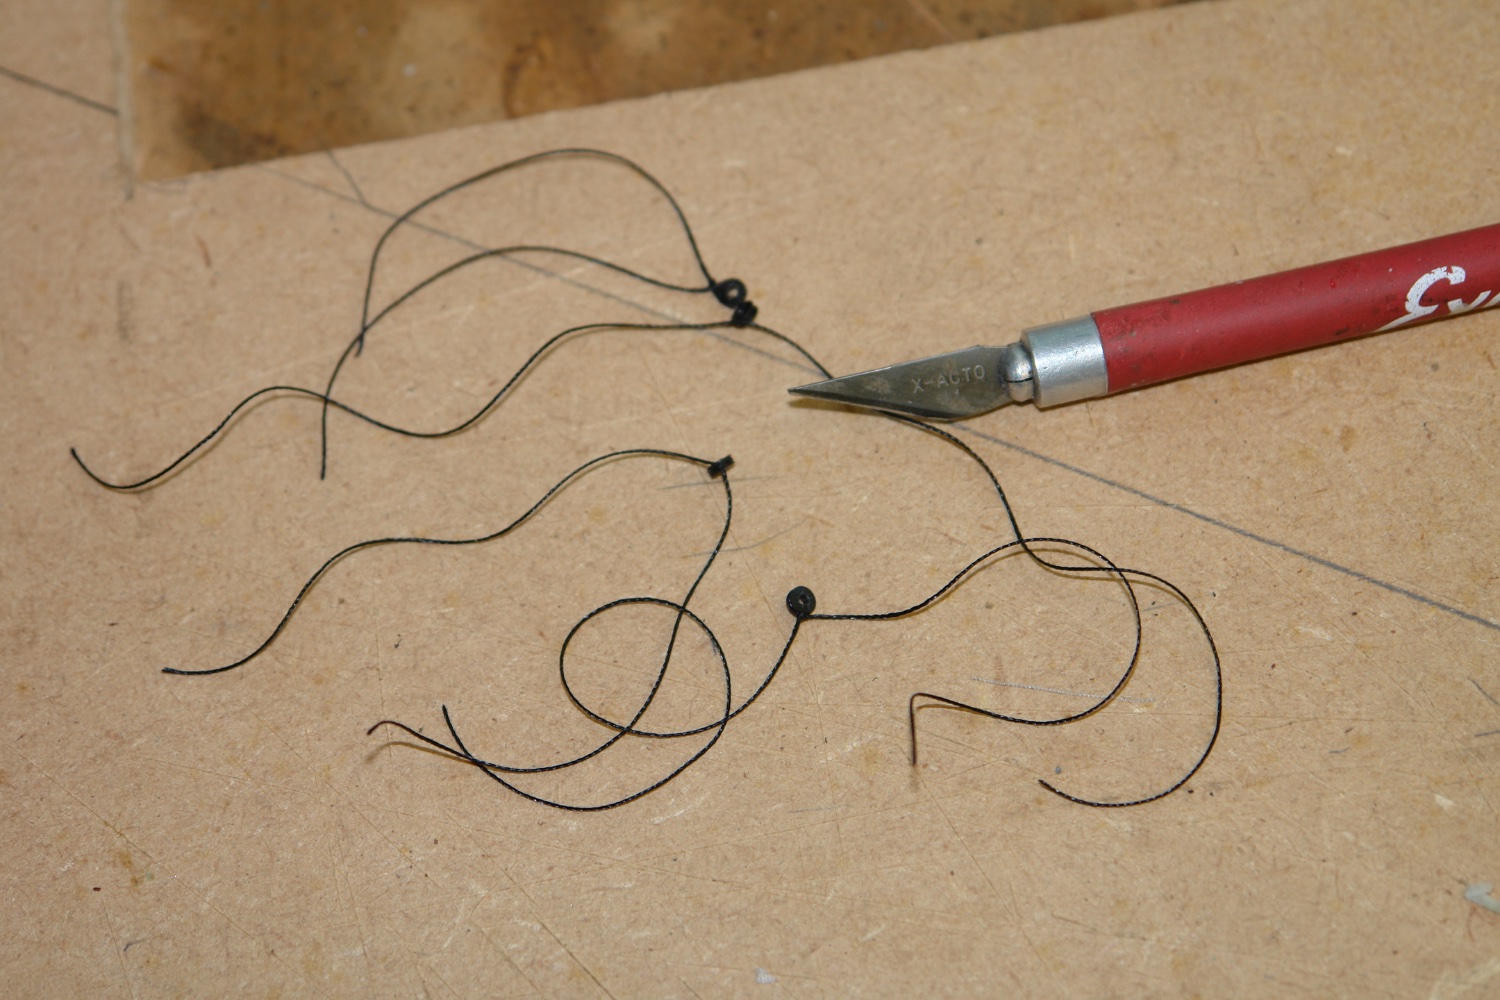
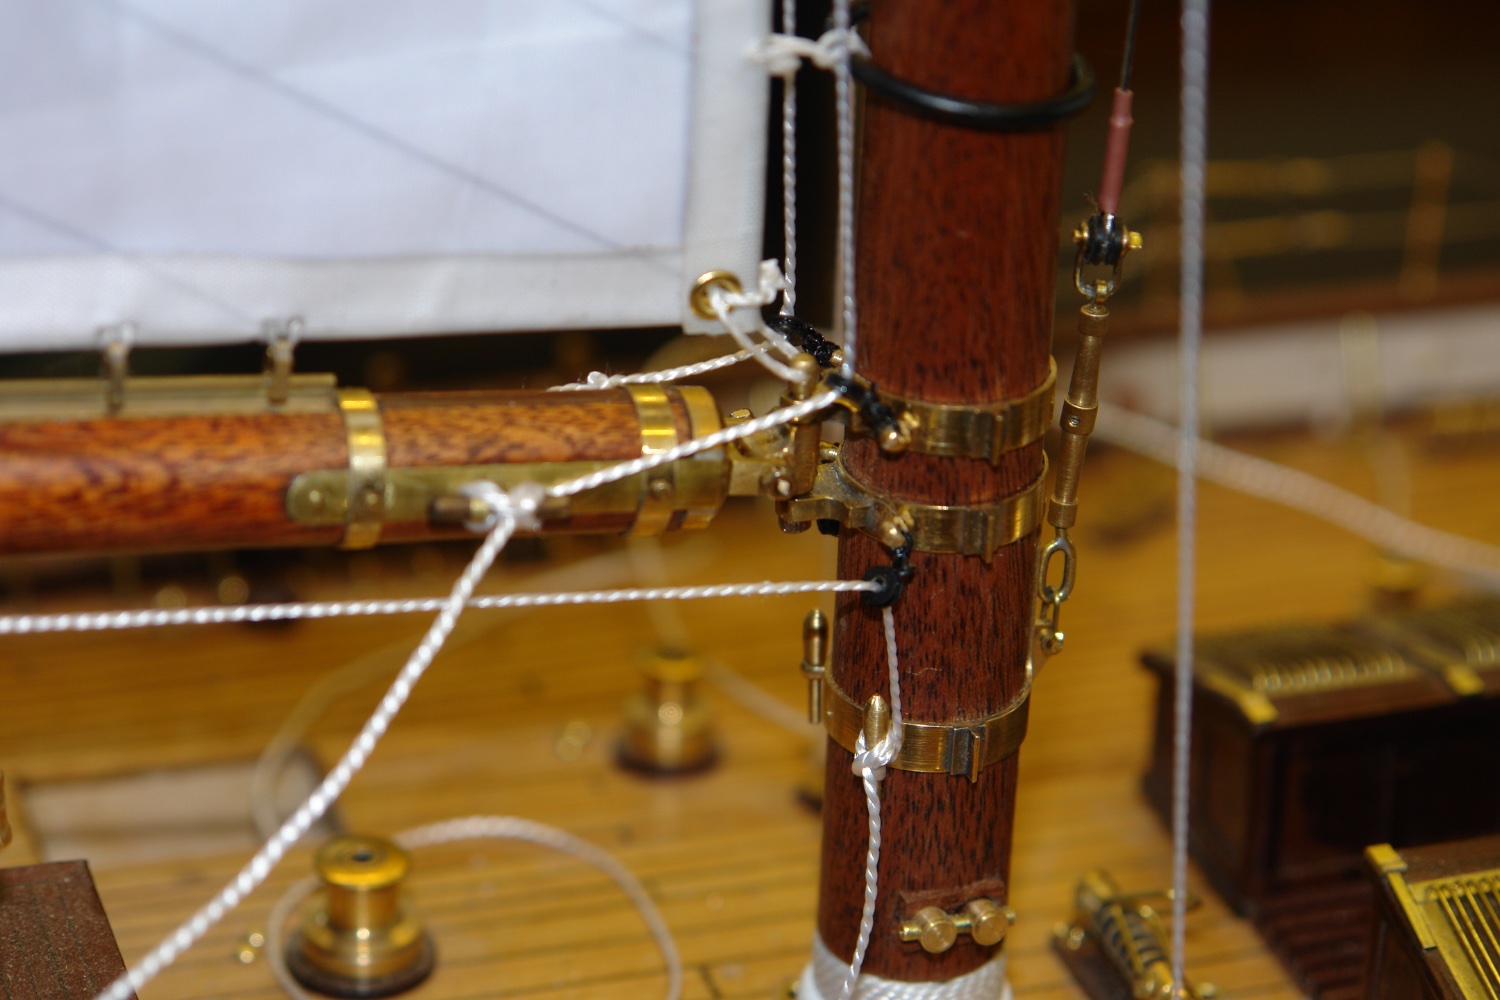
The next job was to attach the reefing lines. The leach reefing line attaches at the boom, then goes up to the reefing cringle before descending back to a pulley on the boom. From here it is led forward to the mast. At the mast it feeds through a bobbin before being tied off to a belaying pin. The next photo shows the reefing line passing through the bobbin.
I turned the bobbins from black plastic and added the attachment lashings.

The bobbins were then lashed to eyes on the mast.

I didn't have any photos of the luff reefing line so I had to improvise. I rigged the line both sides, through bobbins and on to the cleats on the forward end of the boom.
With this done I then moved to rigging the boom sheet. The sheet runs between the two largest winches on the boat taking a wondering path through numerous deck and boom mounted blocks, all very complicated.
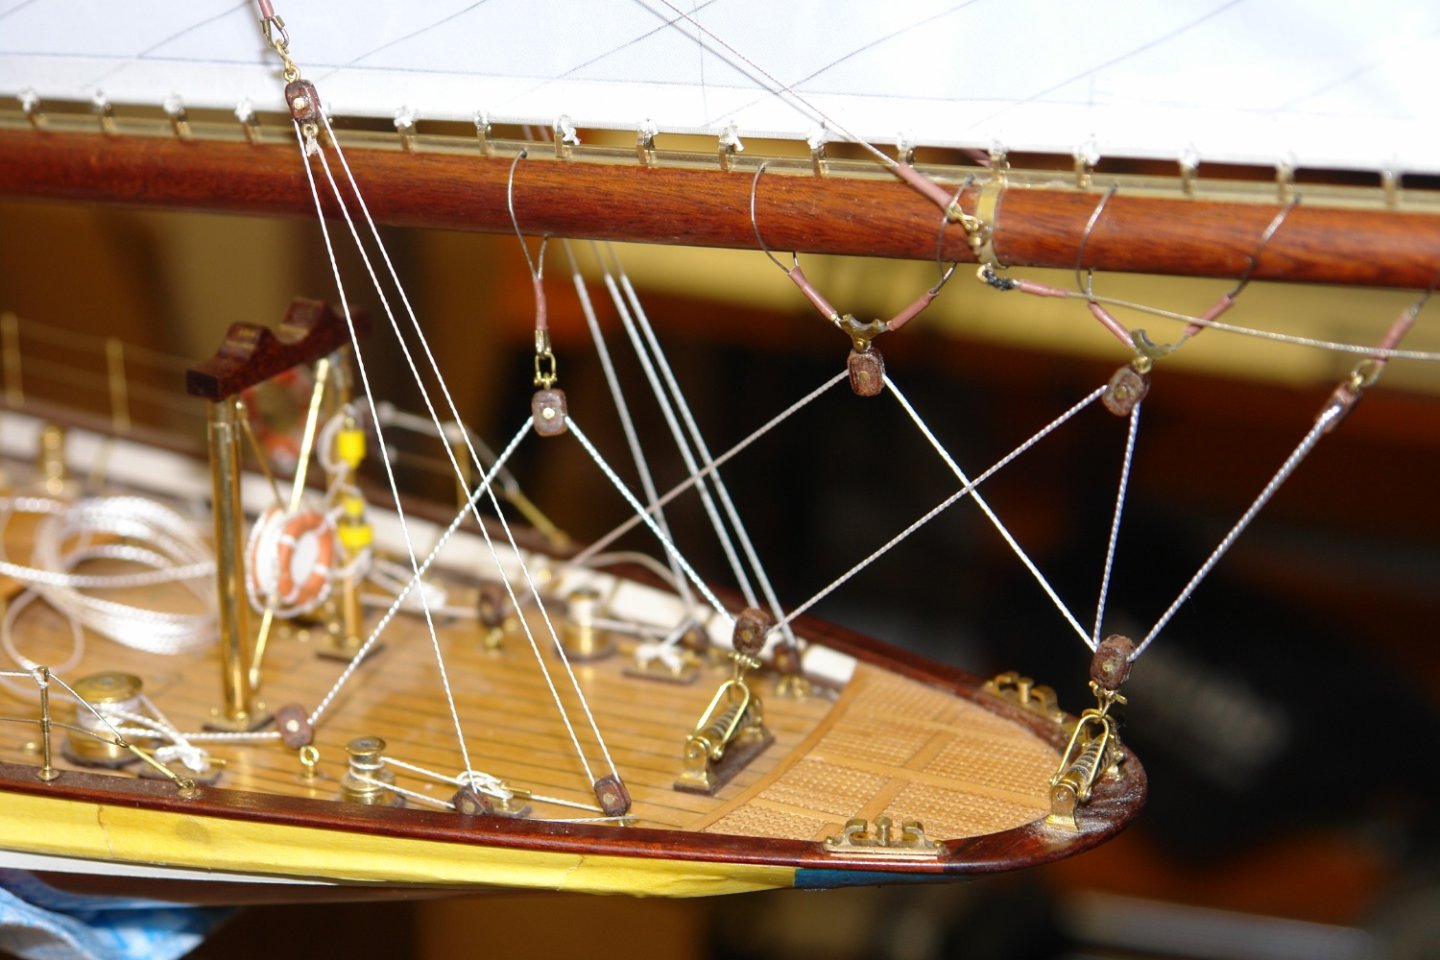
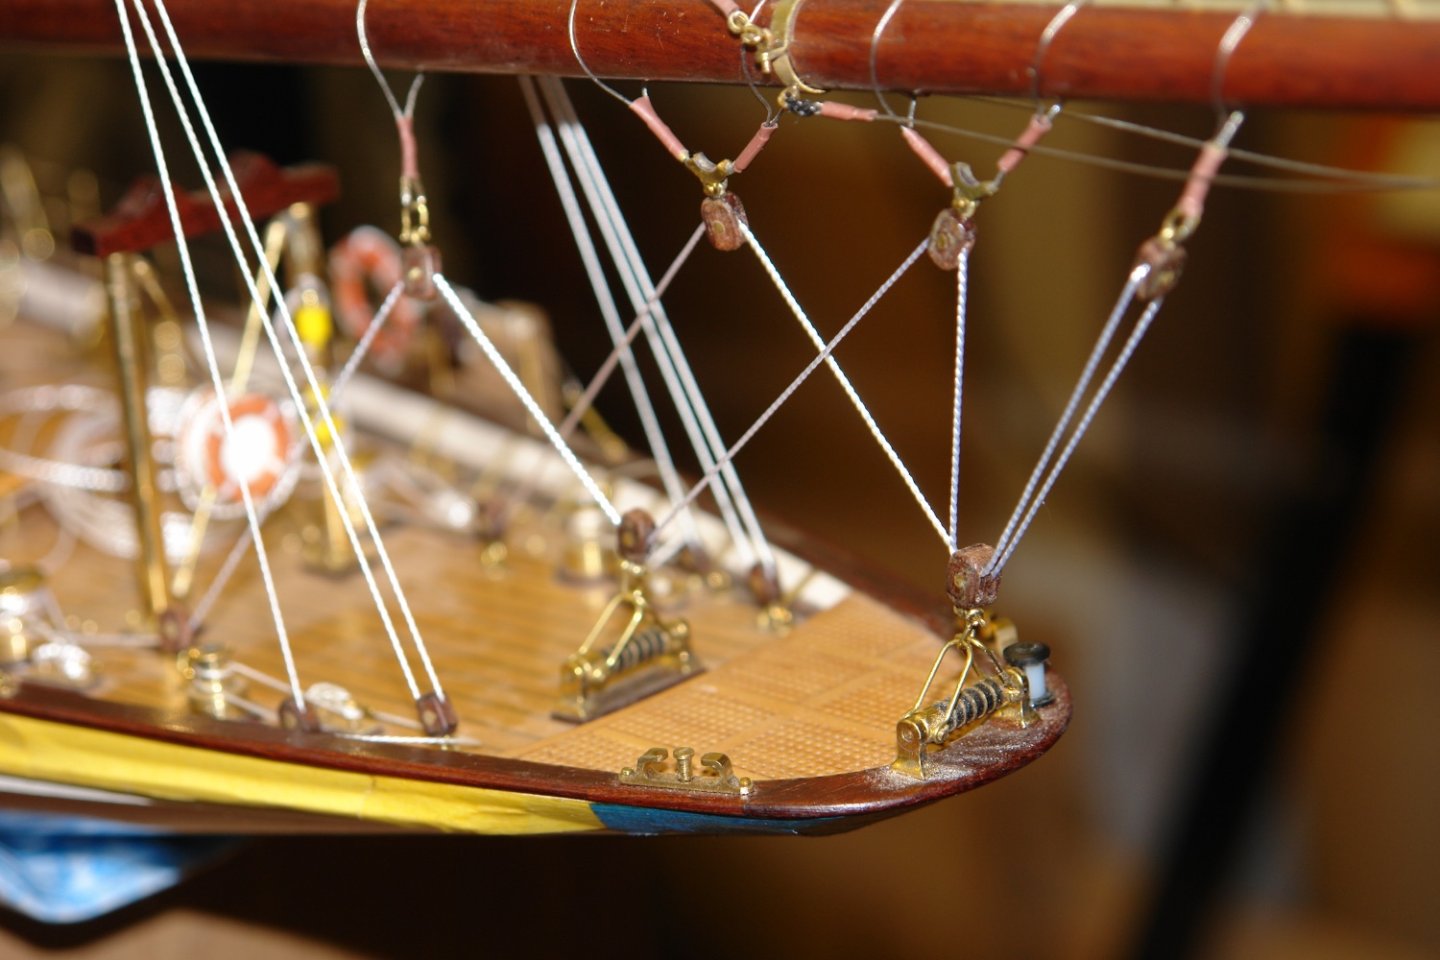
I have only roughly tensioned the sheet in the above photos. Iwill need to do final adjustments when i rig the boat on a port tack.
And finally an overall shot.
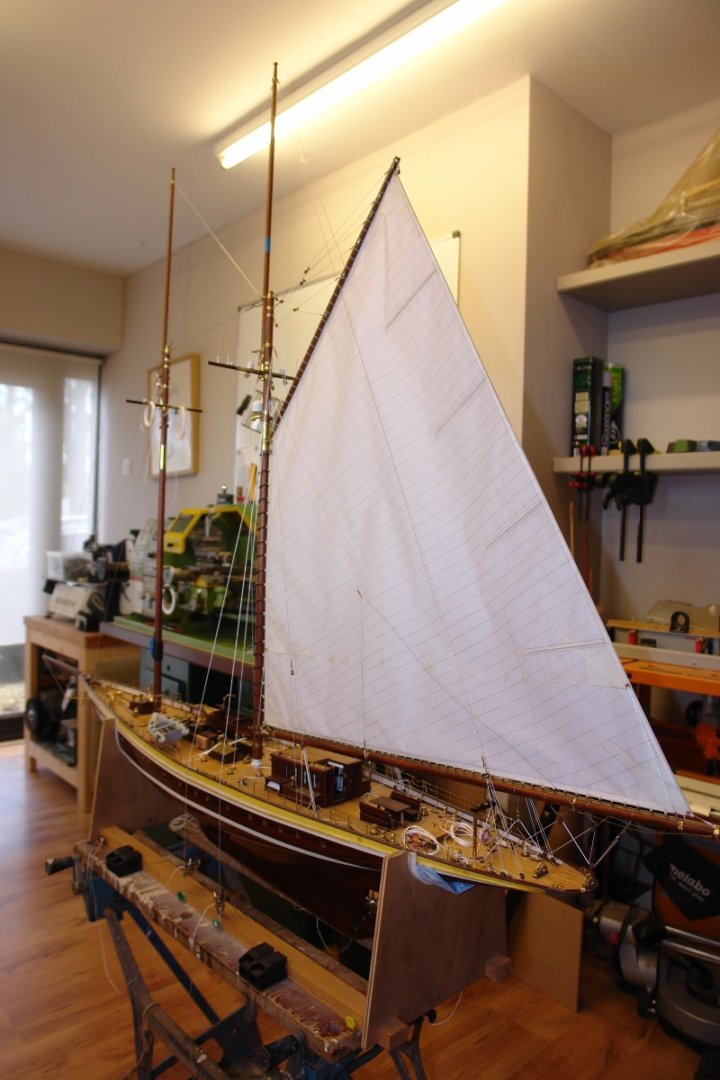
I now need to do a bit of measuring up for the topsail.
-
On 9/15/2022 at 11:32 PM, rwiederrich said:
Oh well…….I couldn’t wait…….so I had to fix the martingale.
It is really annoying when you discover something that looks wrong and have to get it fixed "immediately". I think it is the perfectionistic gene taking control. A common problem among MSW builders I observe.
- druxey and Keith Black
-
 2
2
-
-
-
4 hours ago, shipmodel said:
To get a sense of the sizes involved, the nameboard is just over 1/16" tall.
A very telling comment Dan. It caused me to review the deck house much more closely and marvel at the detail.
- Canute, Keith Black, druxey and 1 other
-
4
-
-
As always the internal detail is enchanting.
- Keith Black, Mirabell61, FriedClams and 1 other
-
4
-
Beautiful little coach Michael, glad to see you are in fine form.
- mtaylor, Keith Black, FriedClams and 2 others
-
5
-
-
-
Wonderful Valeriy. What sort of paint do you use on your painted brainwork?
- mtaylor, Valeriy V and Keith Black
-
3
-
Nils, Druxey, Chris, Keith, Michael, Dan, Eberhard, Brian, Richard, Pat, Tom, Valeriy, Andy. Thank you all for your generous comments they are much appreciated.
- Keith Black, FlyingFish, FriedClams and 4 others
-
7
-
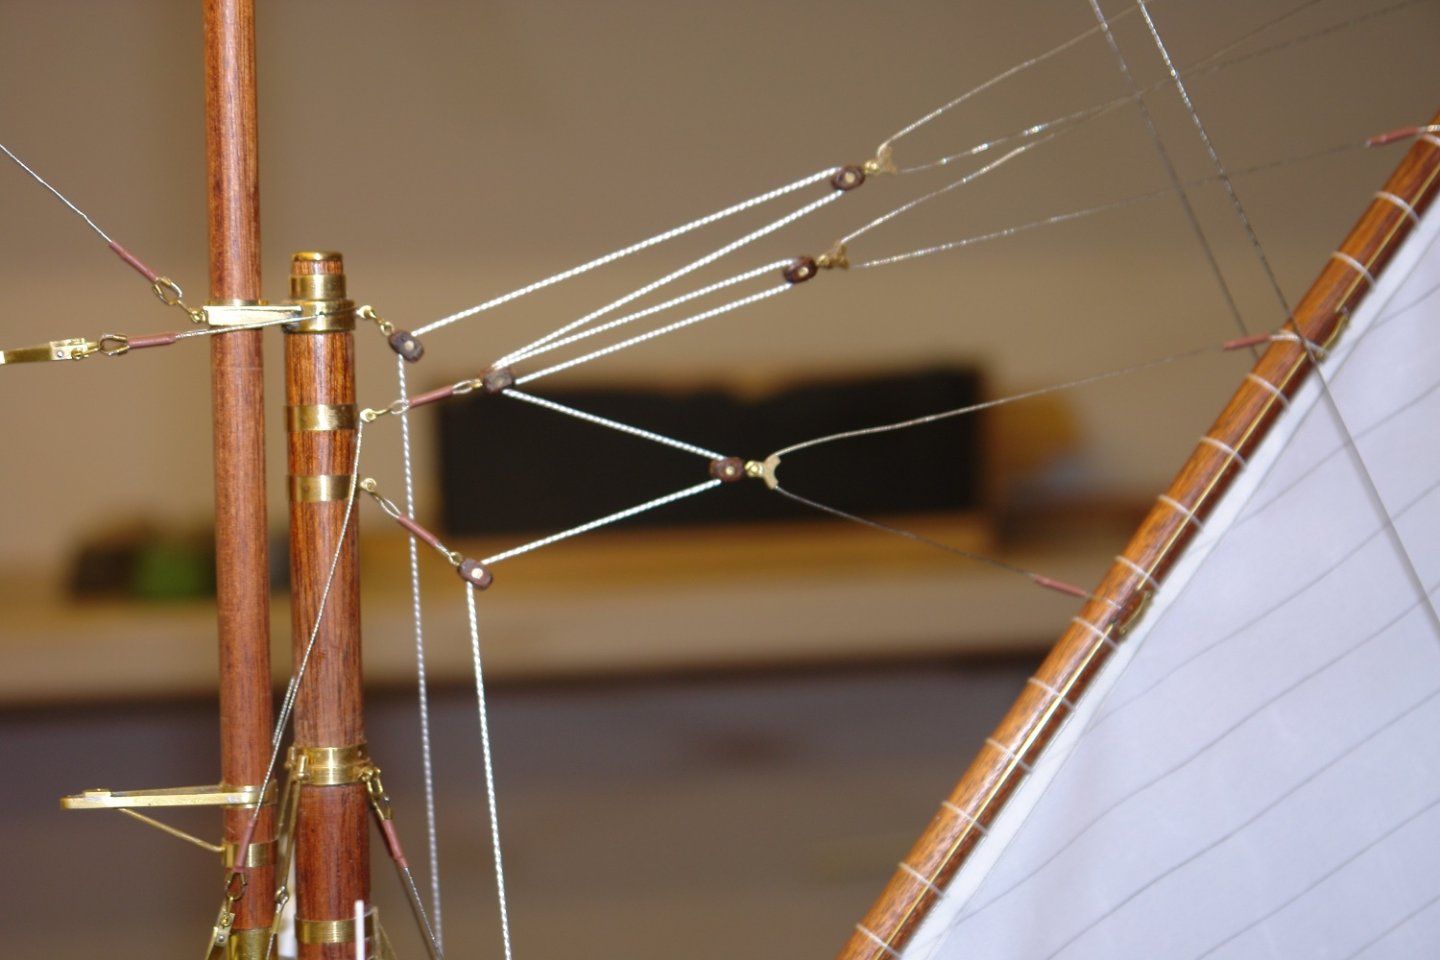
On 9/14/2022 at 6:28 PM, wefalck said:
Didn’t realise before how complex the peak-halliard is. Haven’t seen anything like that before.
23 hours ago, TBlack said:That peak halyard(s) is quite elaborate!
Eberhard / Tom.
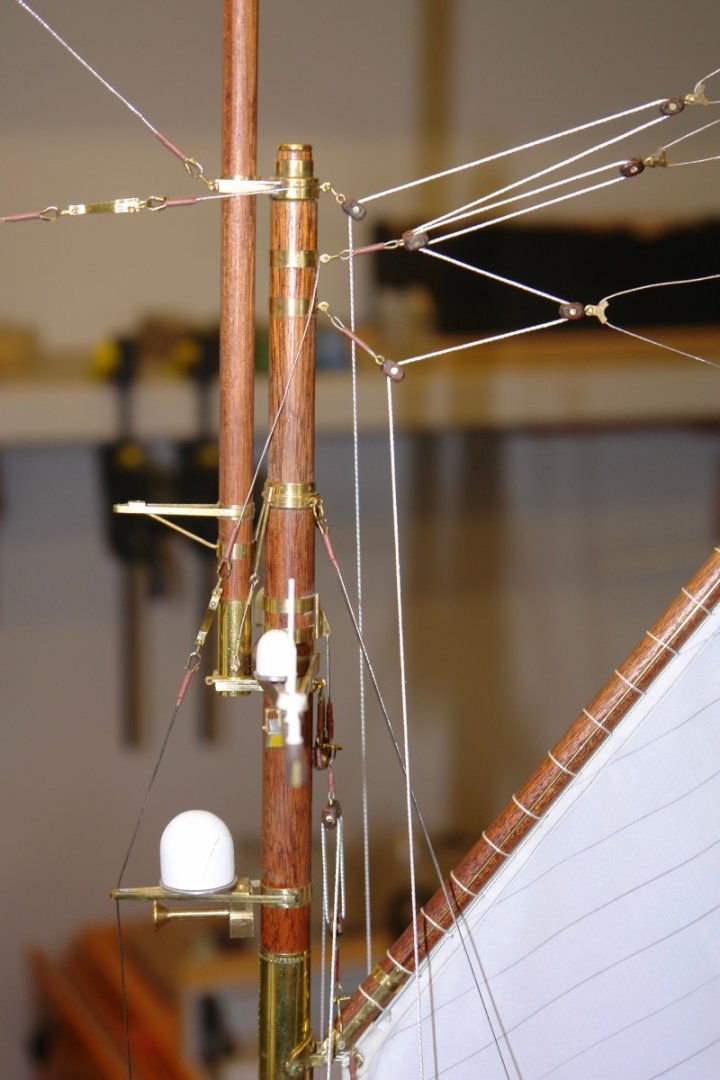
Yes it is complicated - the gaff is huge so I suspect they need the mechanical advantage. They aren't very consistent on how they rig the peak halyard. Sometimes the top bock is the double and sometimes the double is the middle block.
- mtaylor, FriedClams and Keith Black
-
3
-
On 9/14/2022 at 3:37 PM, druxey said:
Perhaps I missed this; but how did you replicate the color-coded synthetic line?
On 9/14/2022 at 4:18 PM, ccoyle said:I was wondering the same thing.
Druxey / Chris - I'm not that clever. The string is shiny and I think the reflection is giving the impression.
- druxey, Keith Black, mtaylor and 1 other
-
4
-
On 9/8/2022 at 4:56 PM, Roger Pellett said:
I have fond memories of riding in one around Omantu Bay in Northern Japan during a 1964 summer Midshipman Cruise.
Showing your age Roger!
- mtaylor, Roger Pellett and Canute
-
 3
3
-
On 9/9/2022 at 10:12 PM, Ras Ambrioso said:
Most of these will not be visible once the cabin roof is in place but, I thought that the engine would not be complete without them
Ras - In a few years time camera bearing nanobots will be crawling all over her, stick with the hidden detail it will soon be visible.
- mtaylor, Ras Ambrioso and wefalck
-
3
-
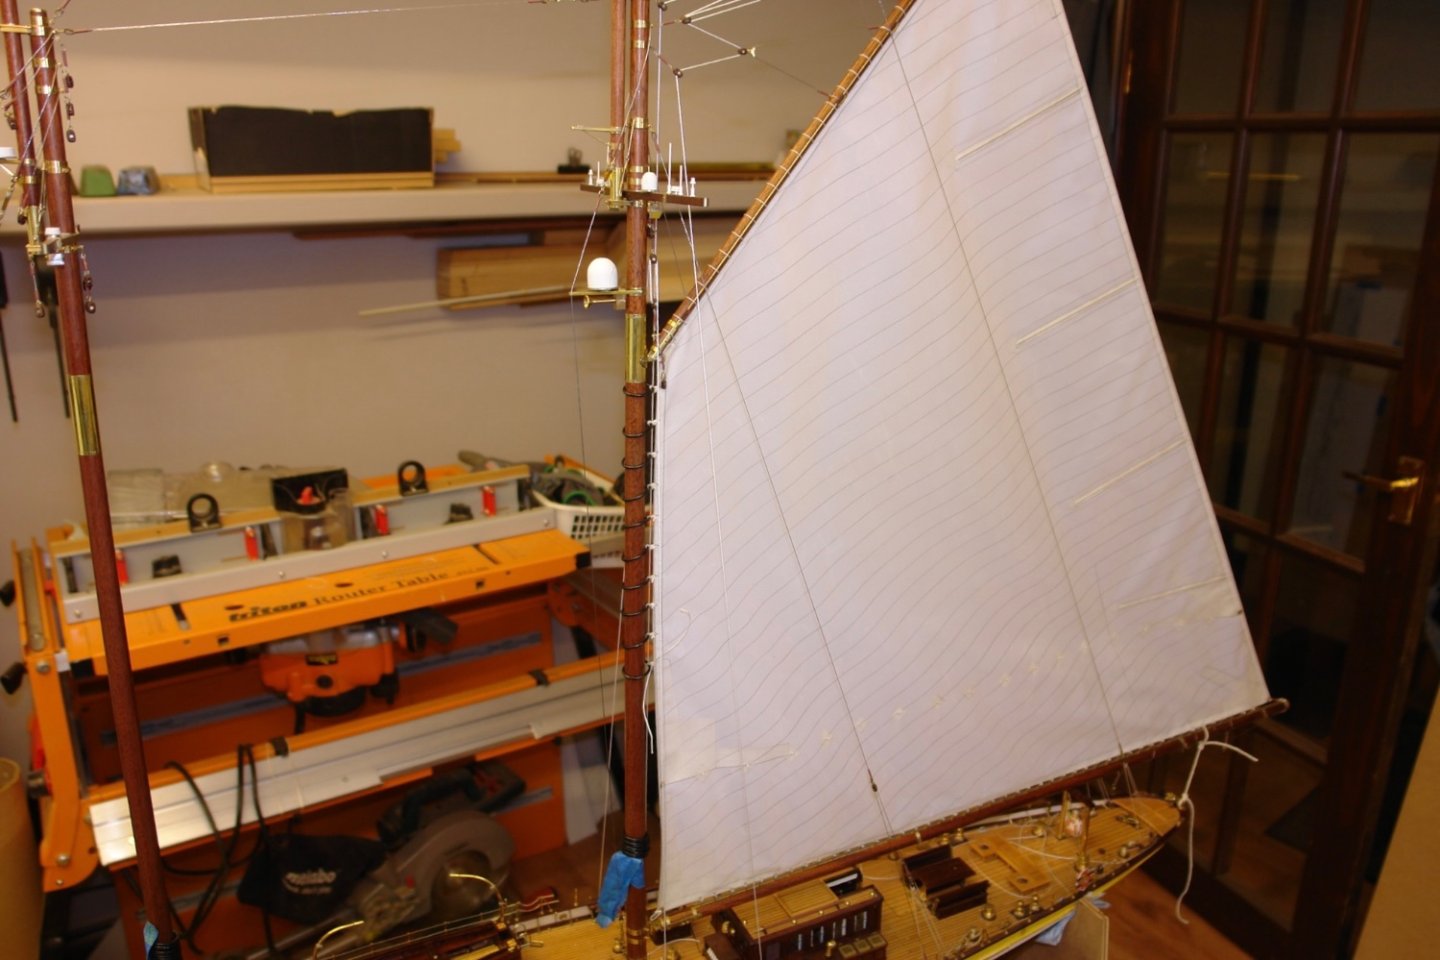
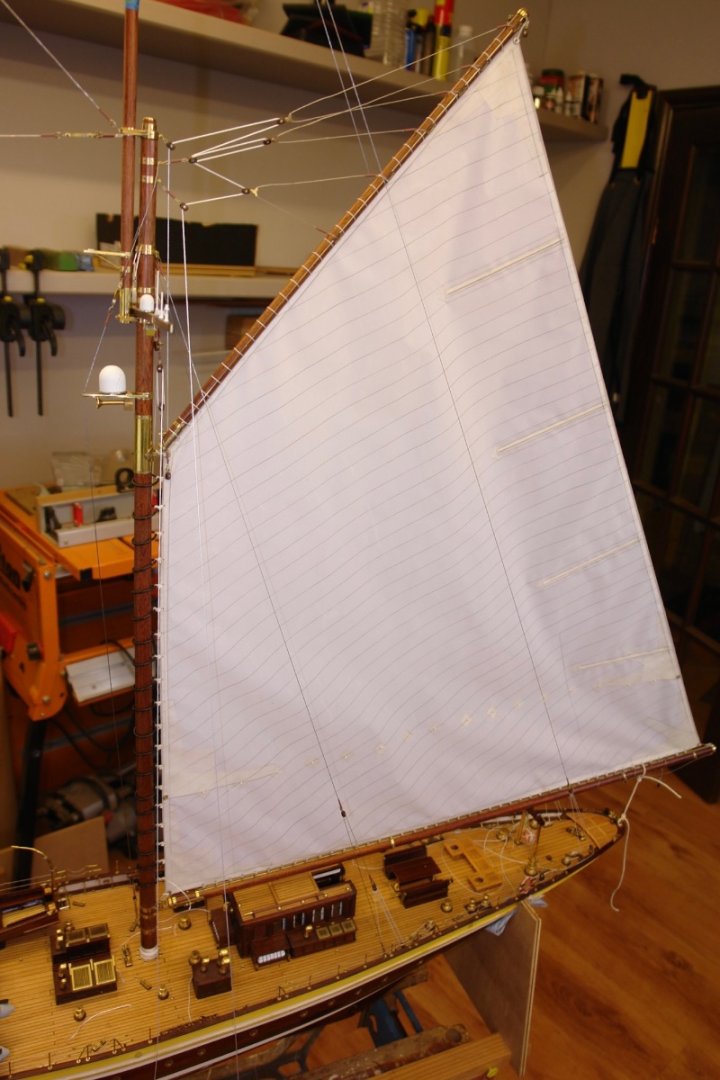
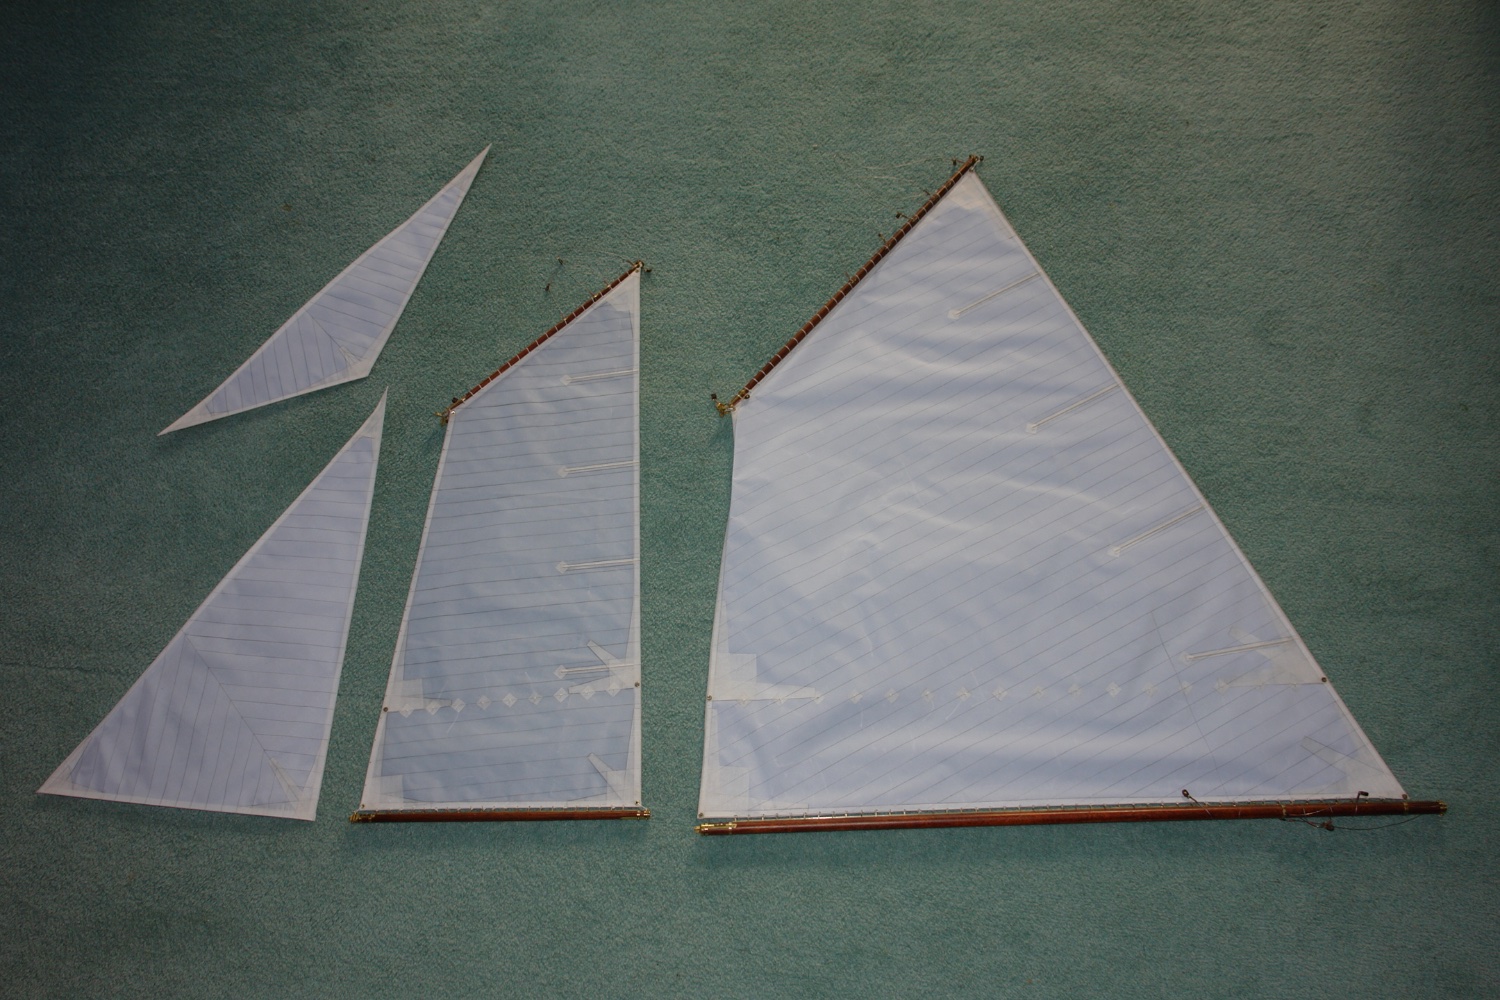
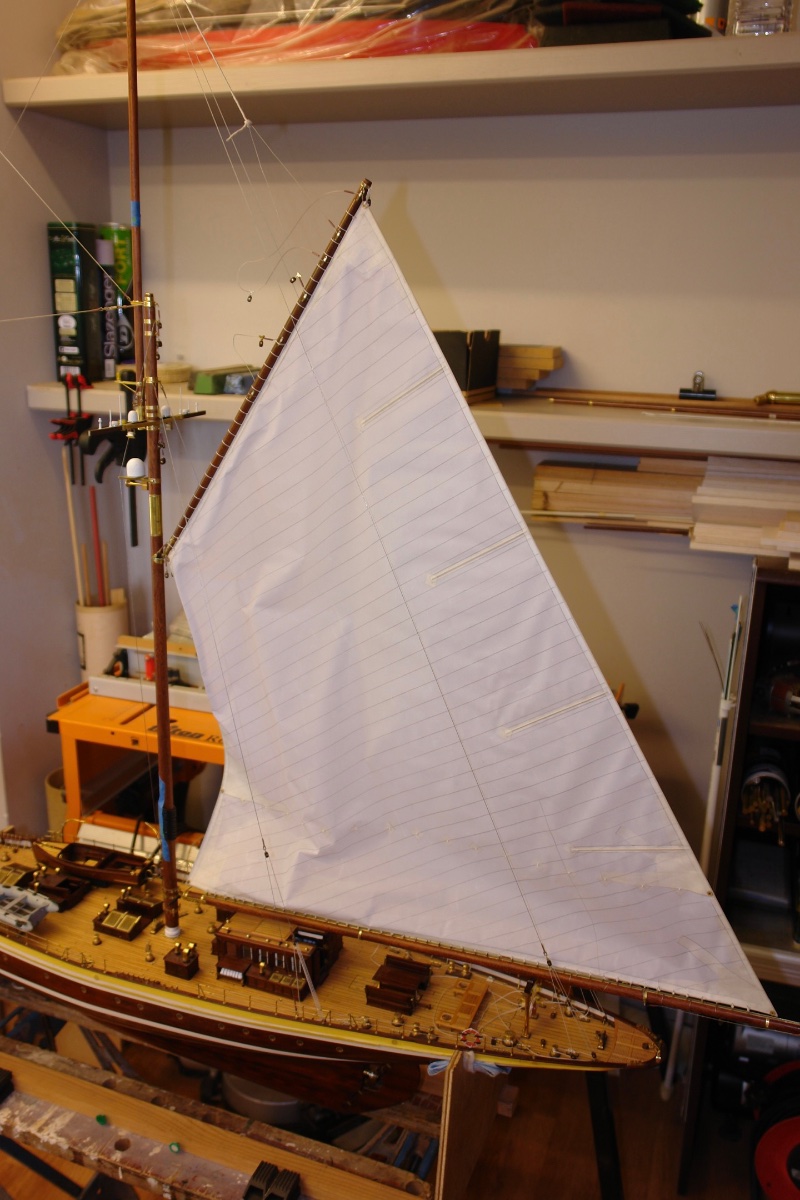
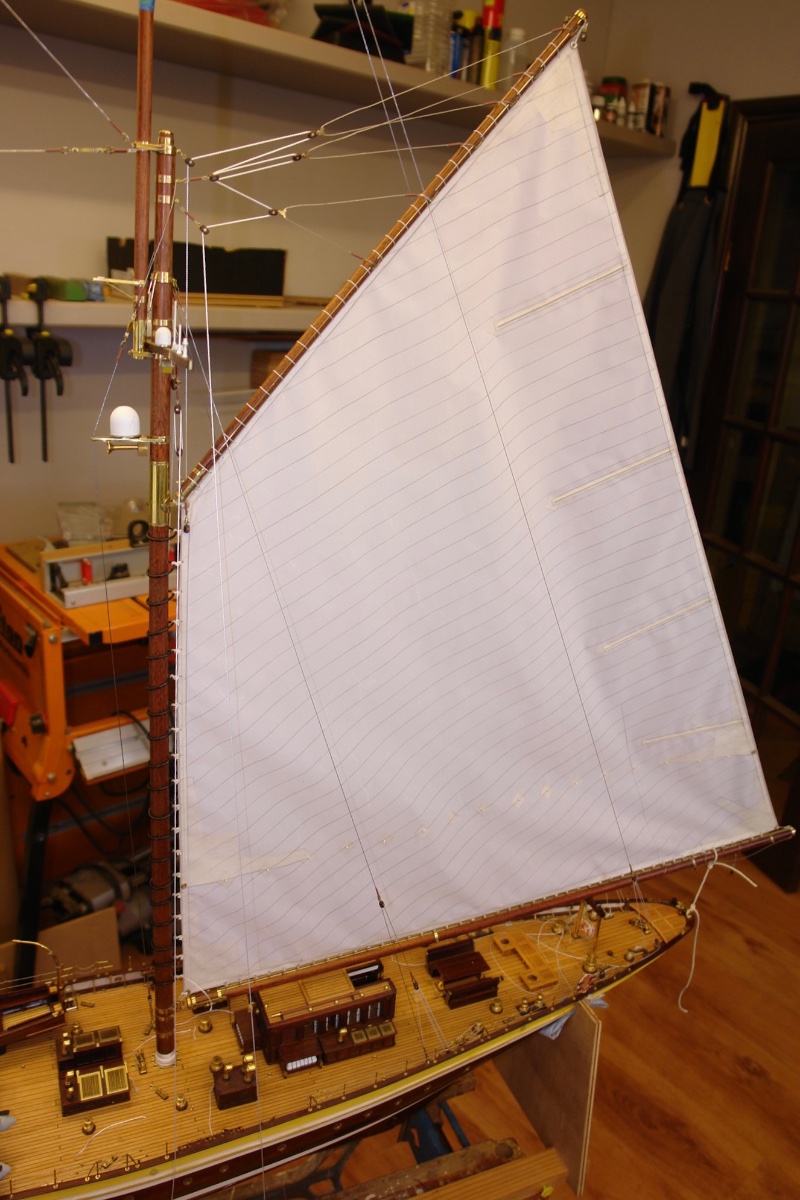
Onwards and upwards -------- it is time to start hoisting the mainsail.
I have 5 sails prepared with only the two topsails to do. Here are 4 of them, I'm not sure why I didn't photo the 5, I blame the onset of senility.

Because of the size of the mainsail it took a bit of working out how to support it while I did the rigging. What I really needed was that elusive 3rd arm. You would thunk that by now evolution would have sorted the problem.
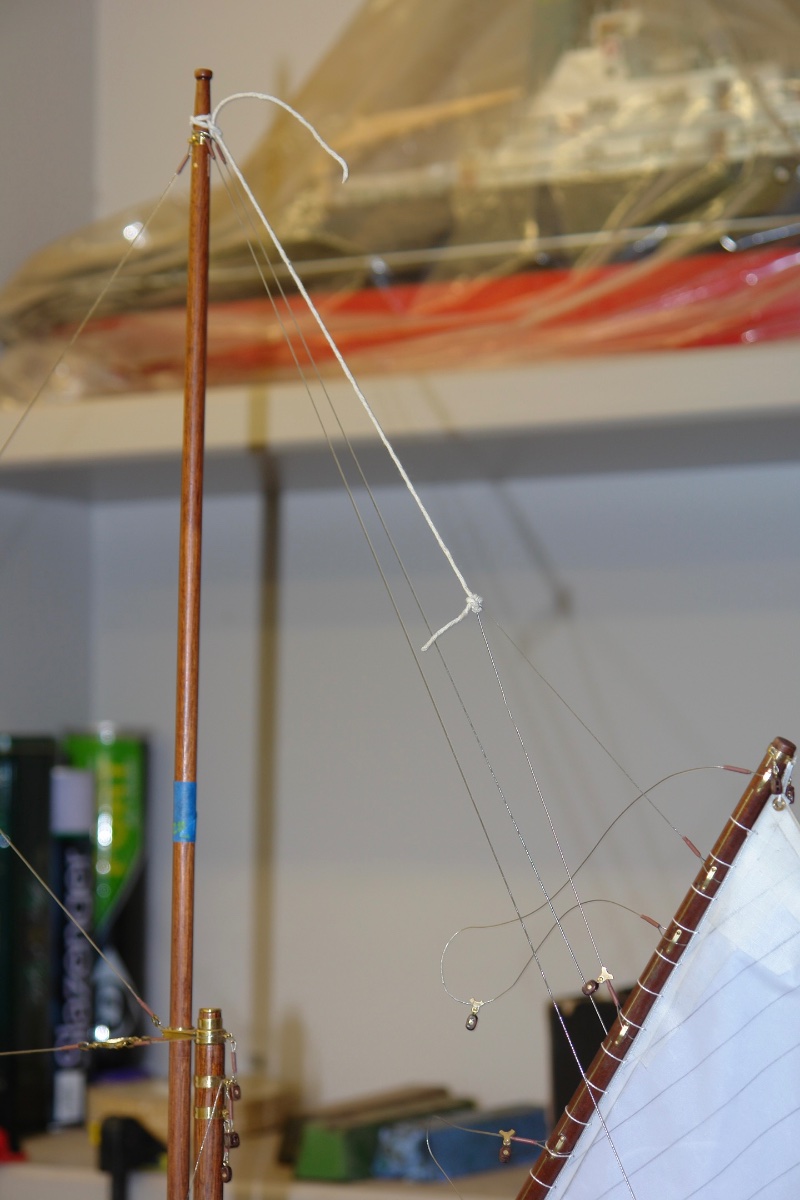
Here is the start of the hoisting process.
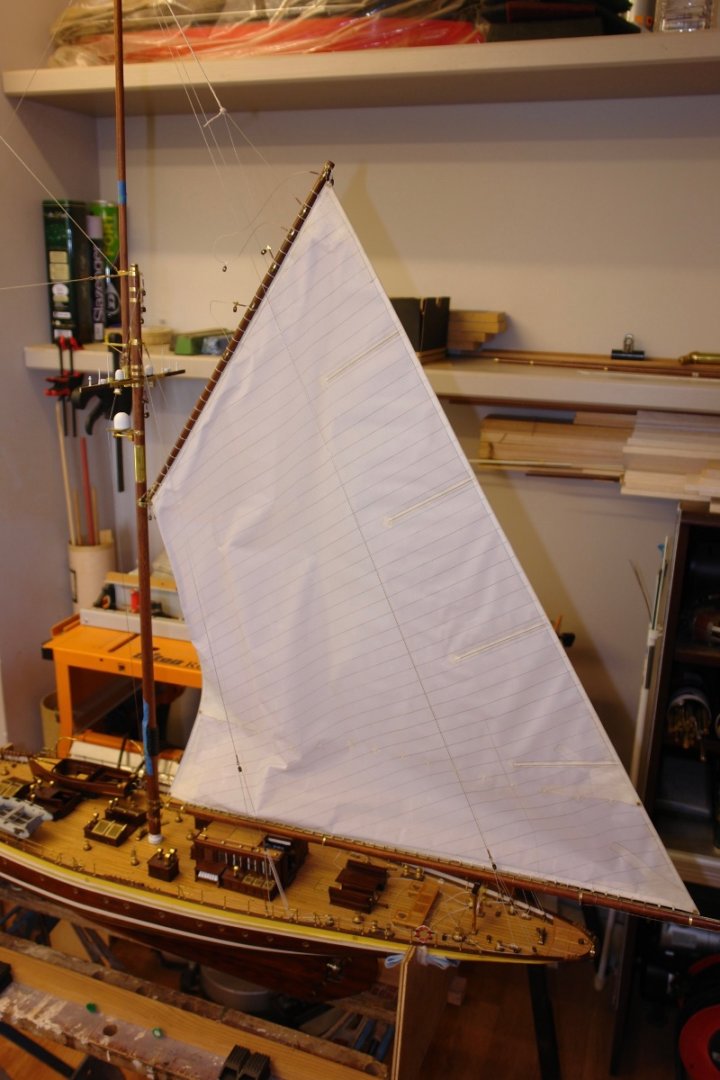
One of the gaff bridles is attached temporarily to the mast head with a bit of string.

With this improvised support the throat halyard was rigged.


The next step was to rig the peak halyard.
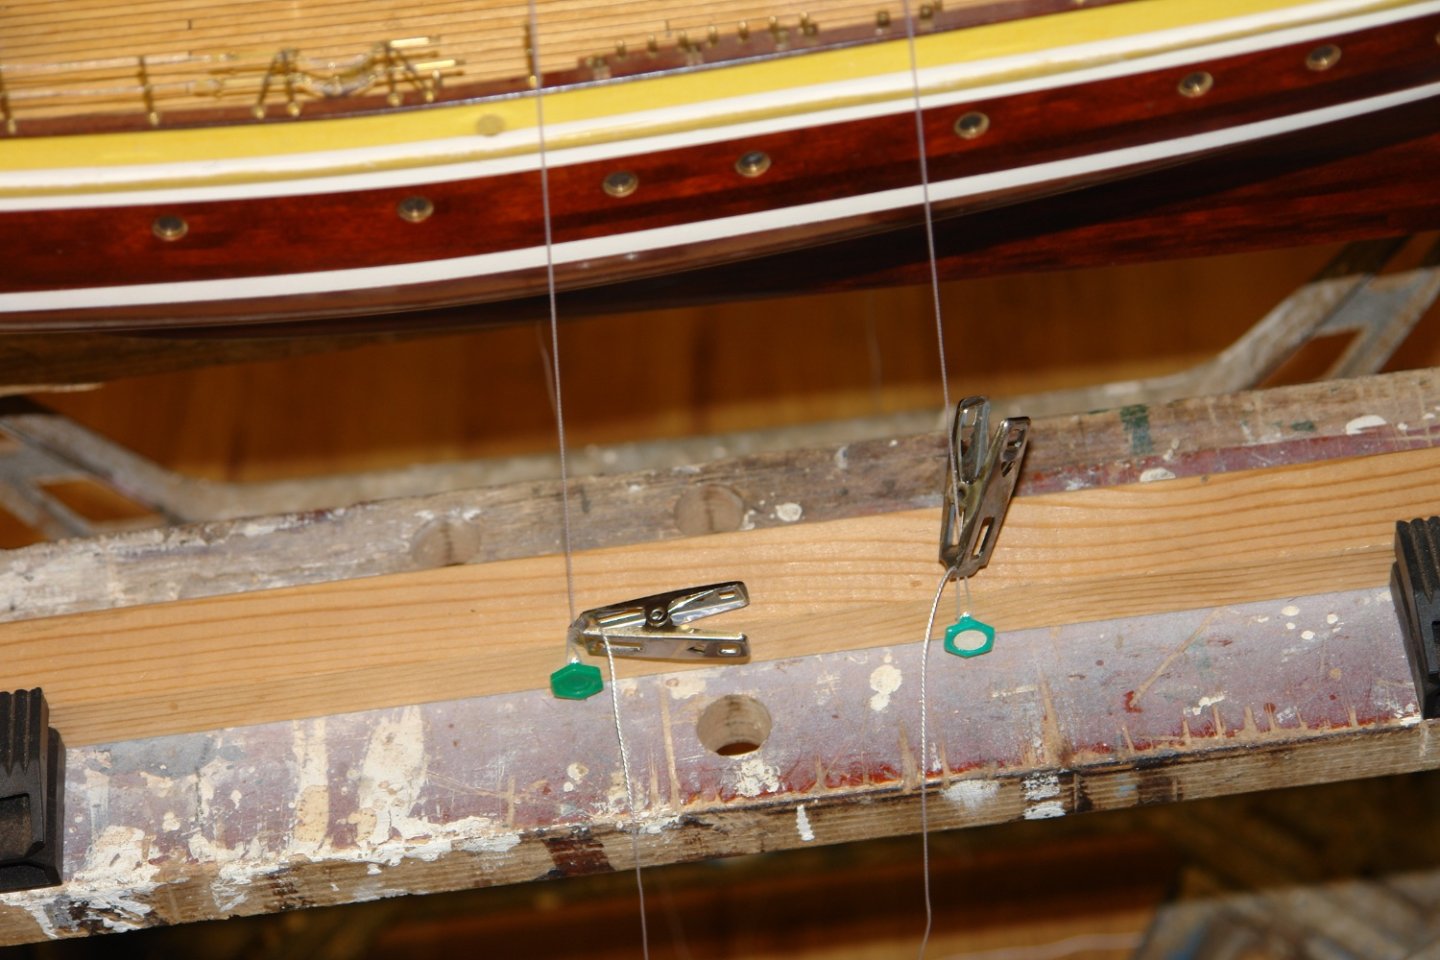
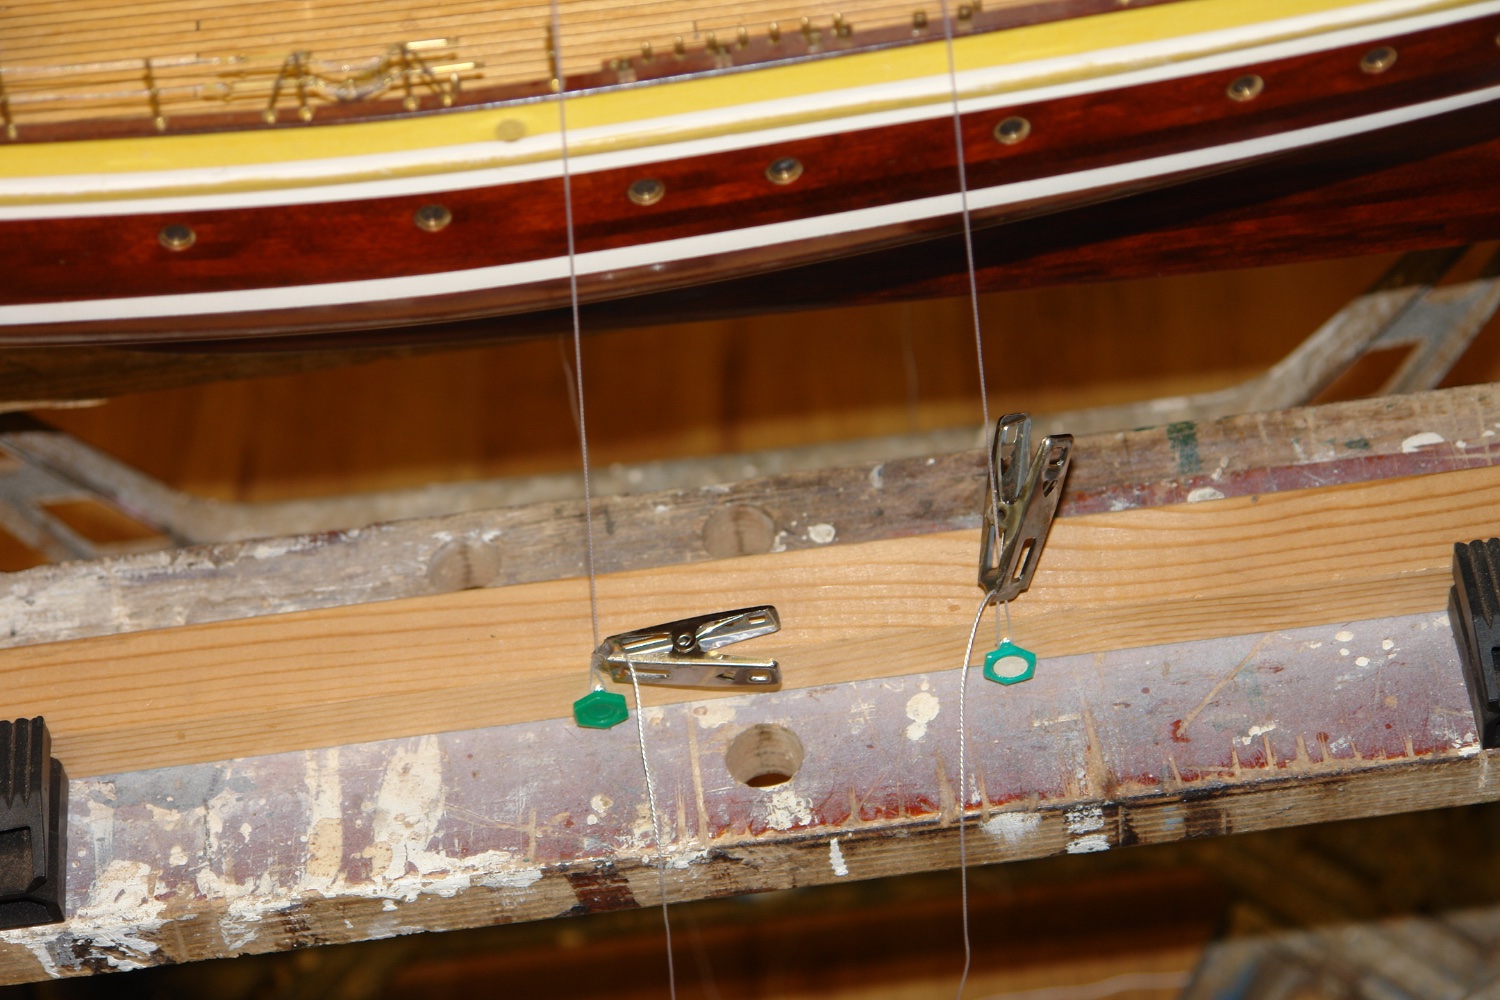
The building frame proved very useful for temporarily holding the halyard tails.
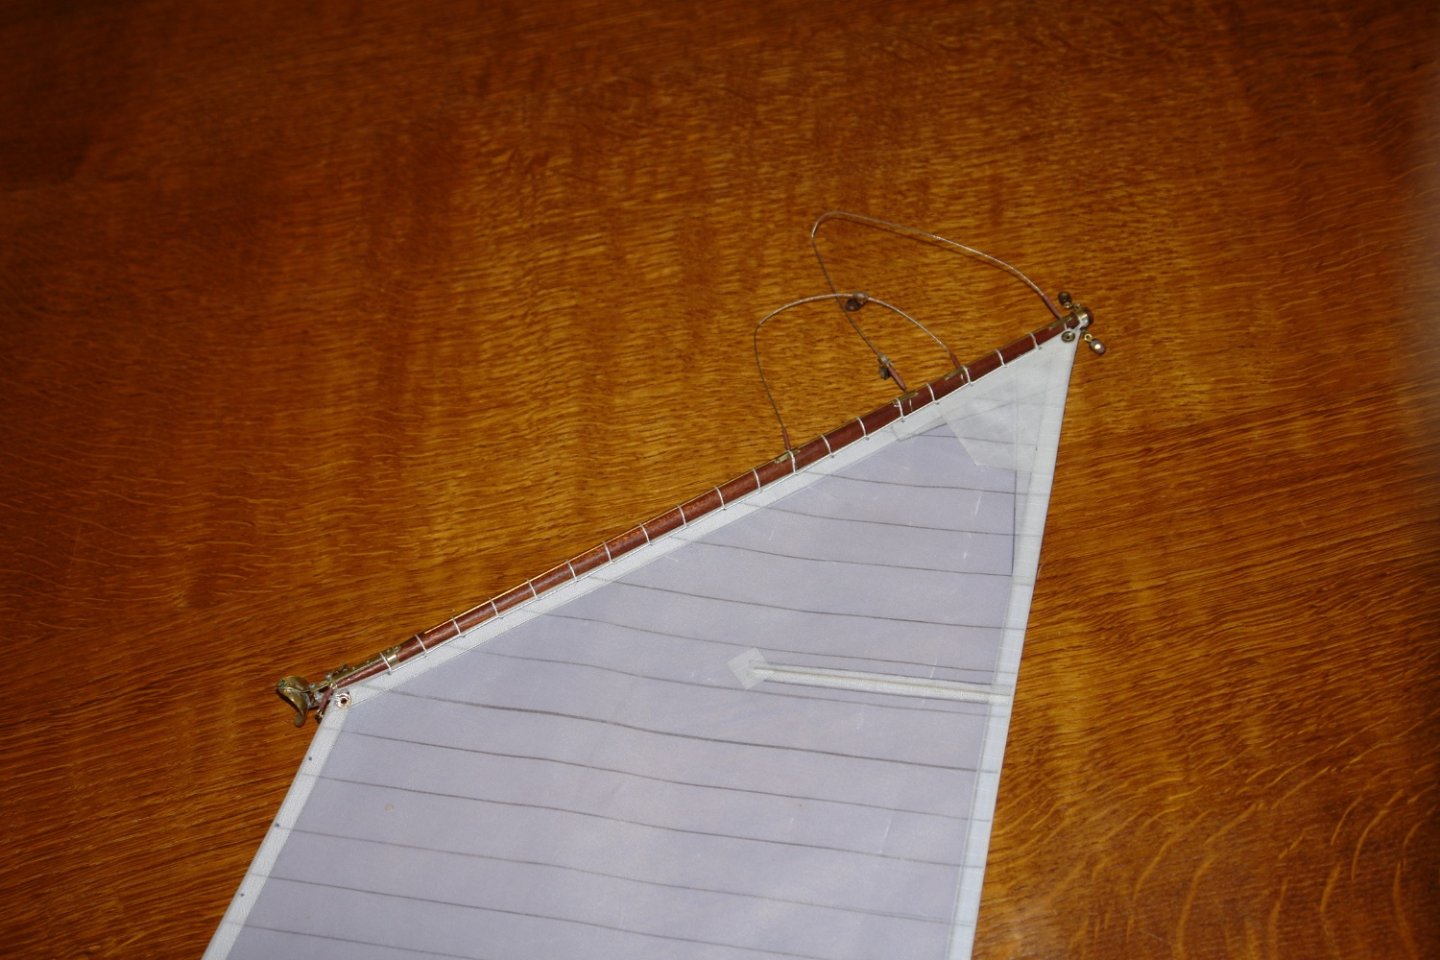
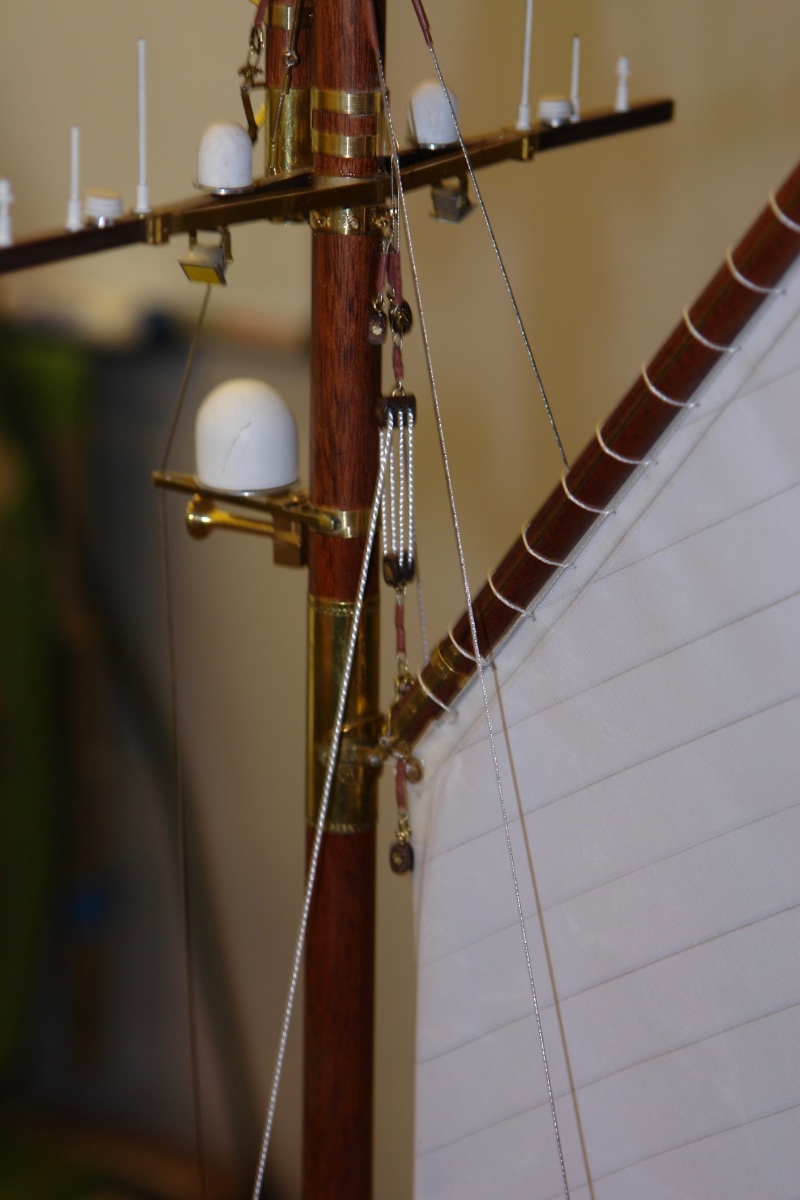
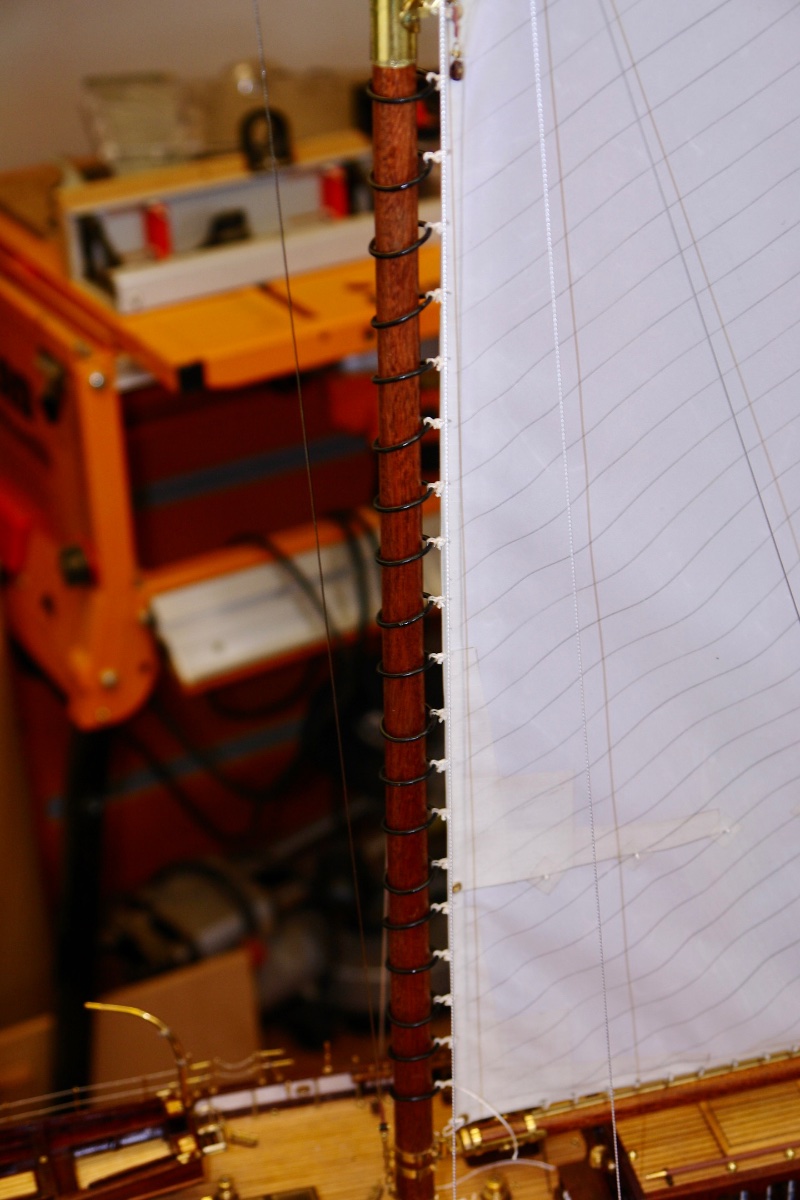
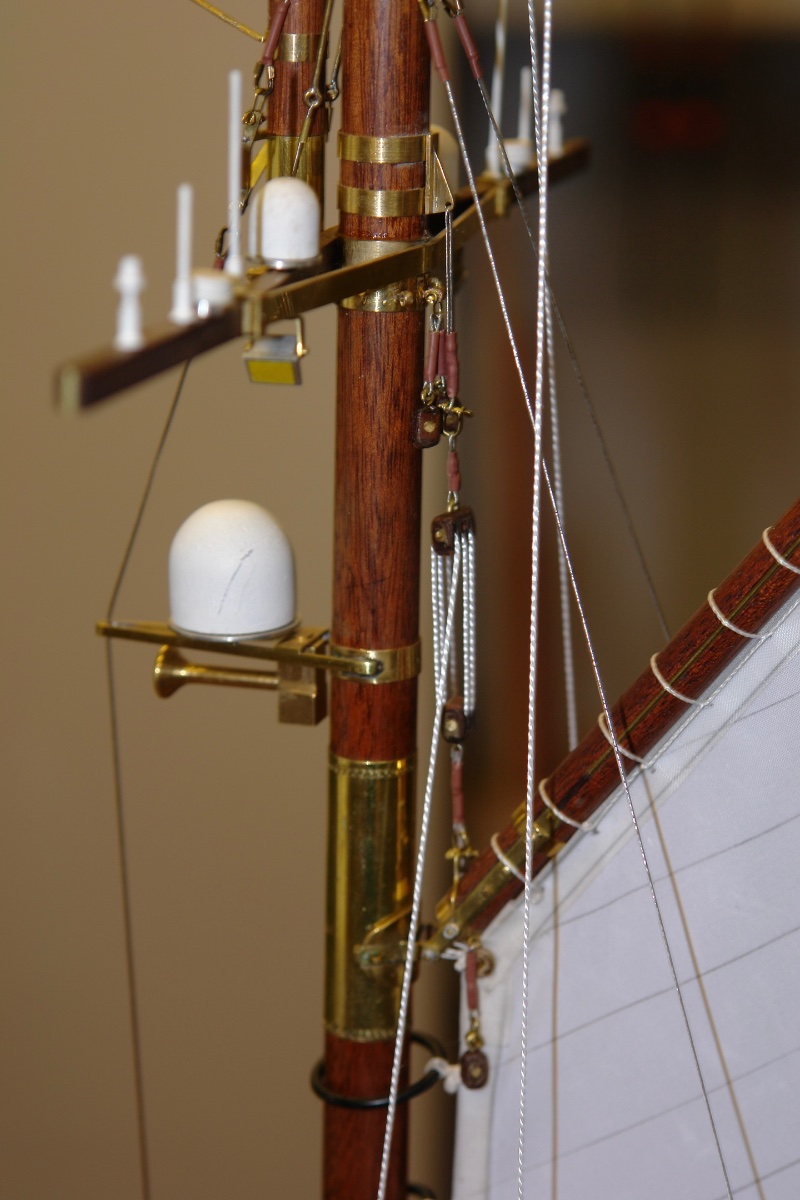
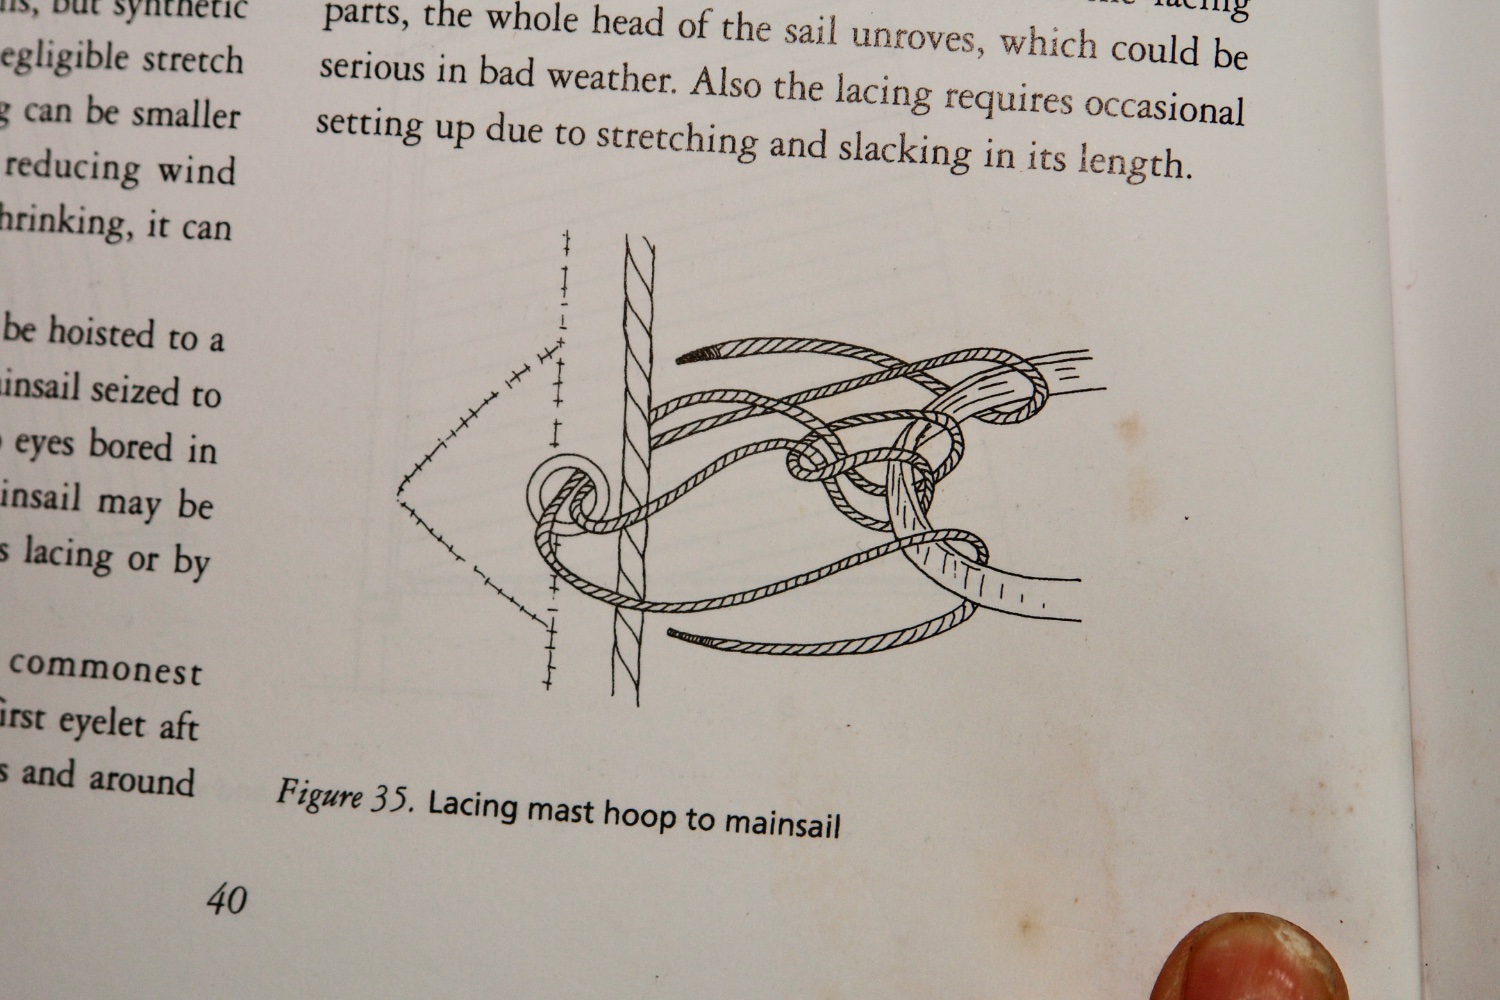
Next I went on to rigging the mast hoops using the "Leacher" method. I improvised the knotting of the free ends. My decision to delay the installation of the main and fore mast shrouds proved to be very beneficial for access.
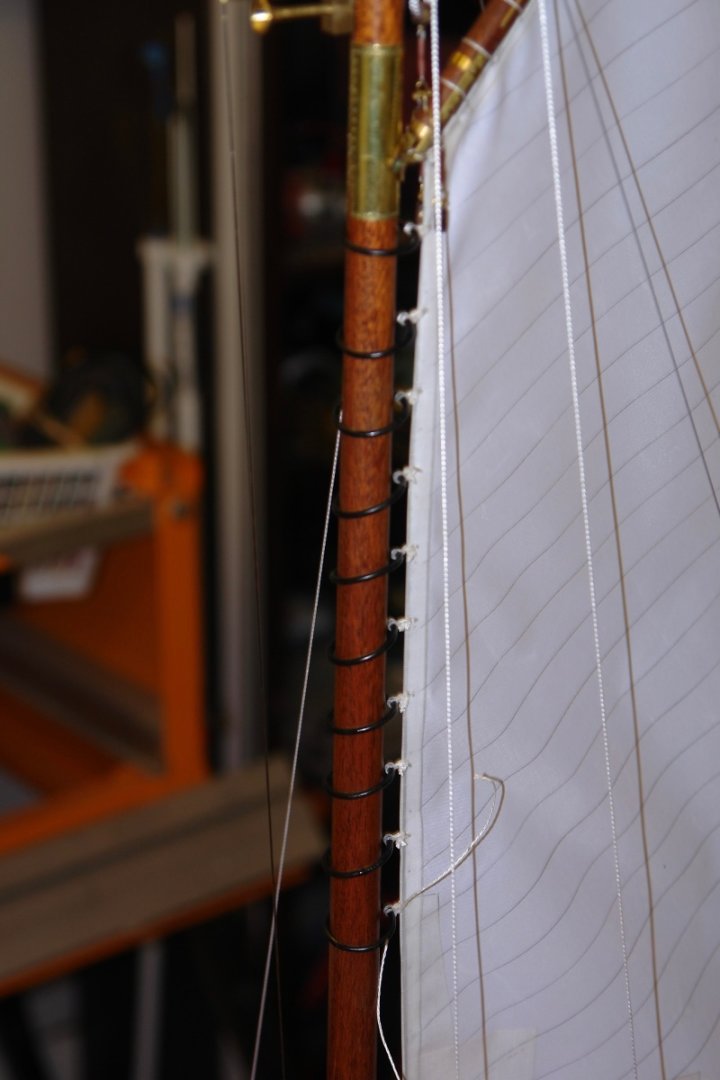
It took a while but eventually all the hoops were attached.
My knotting of the ends isn't very apparent so hopefully no one will notice my creativity!

Then I took a few shots to celebrate.


-
Dan, I marvel at your image interpretation skills.
- Canute, mtaylor and Keith Black
-
3
-
-
-
Hi Michael
Sorry but I missed the post about your hand problem. I hope you got the surgery and are now on the mend?
- FriedClams, mtaylor and Keith Black
-
3
-
3 minutes ago, mbp521 said:
Did you fabricate the eyelets as well?
Thank you Brian - the answer is I bought them.
- Keith Black, mtaylor, mbp521 and 3 others
-
6
-
Thank you Eberhard and Keith.
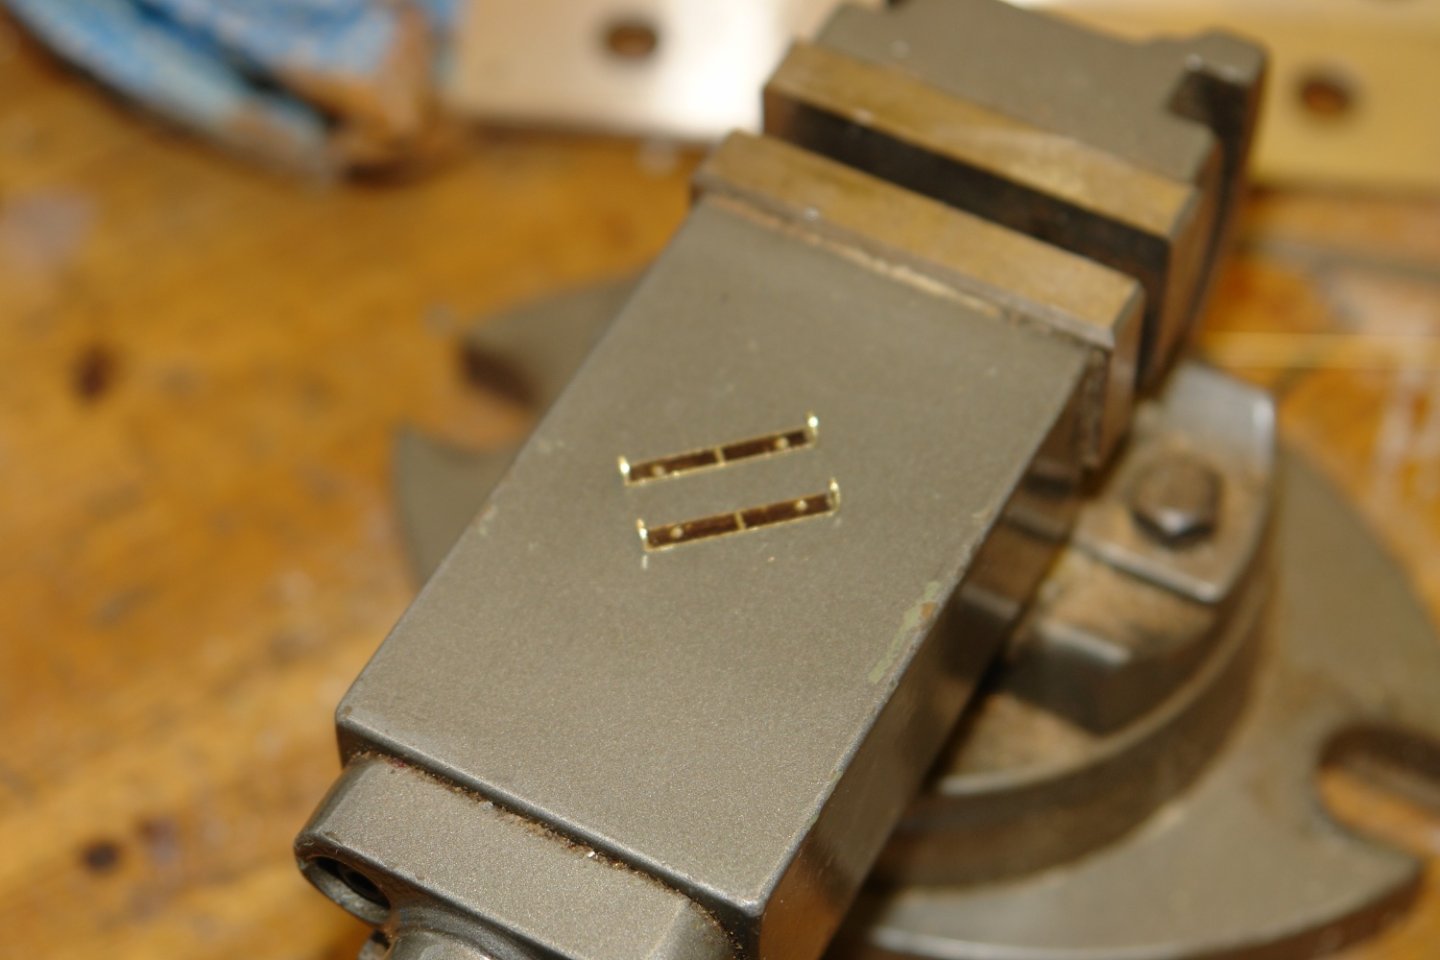
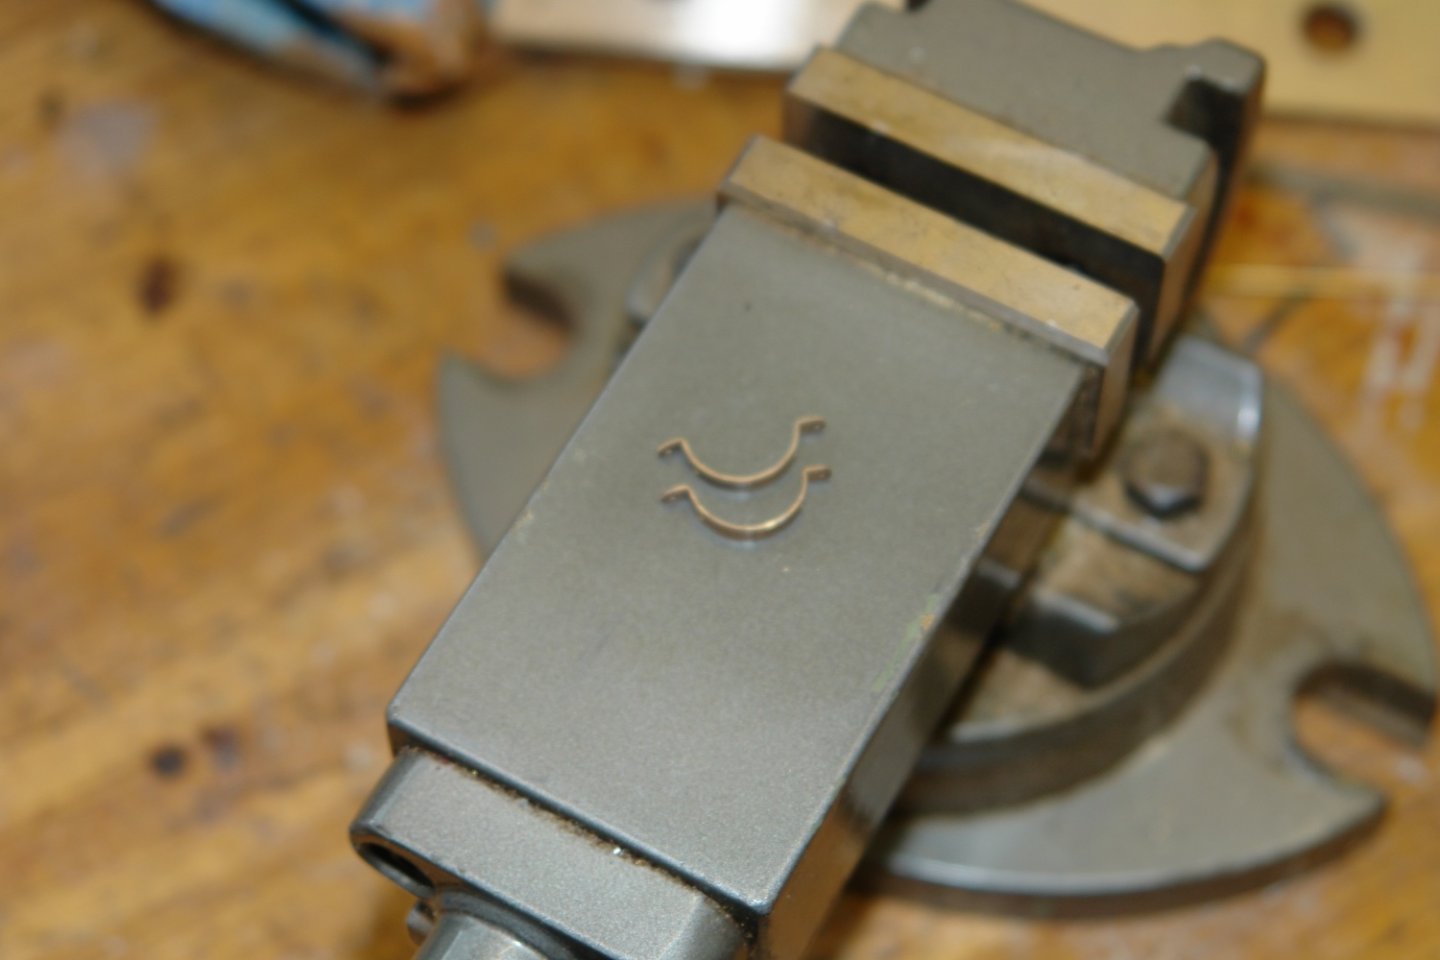
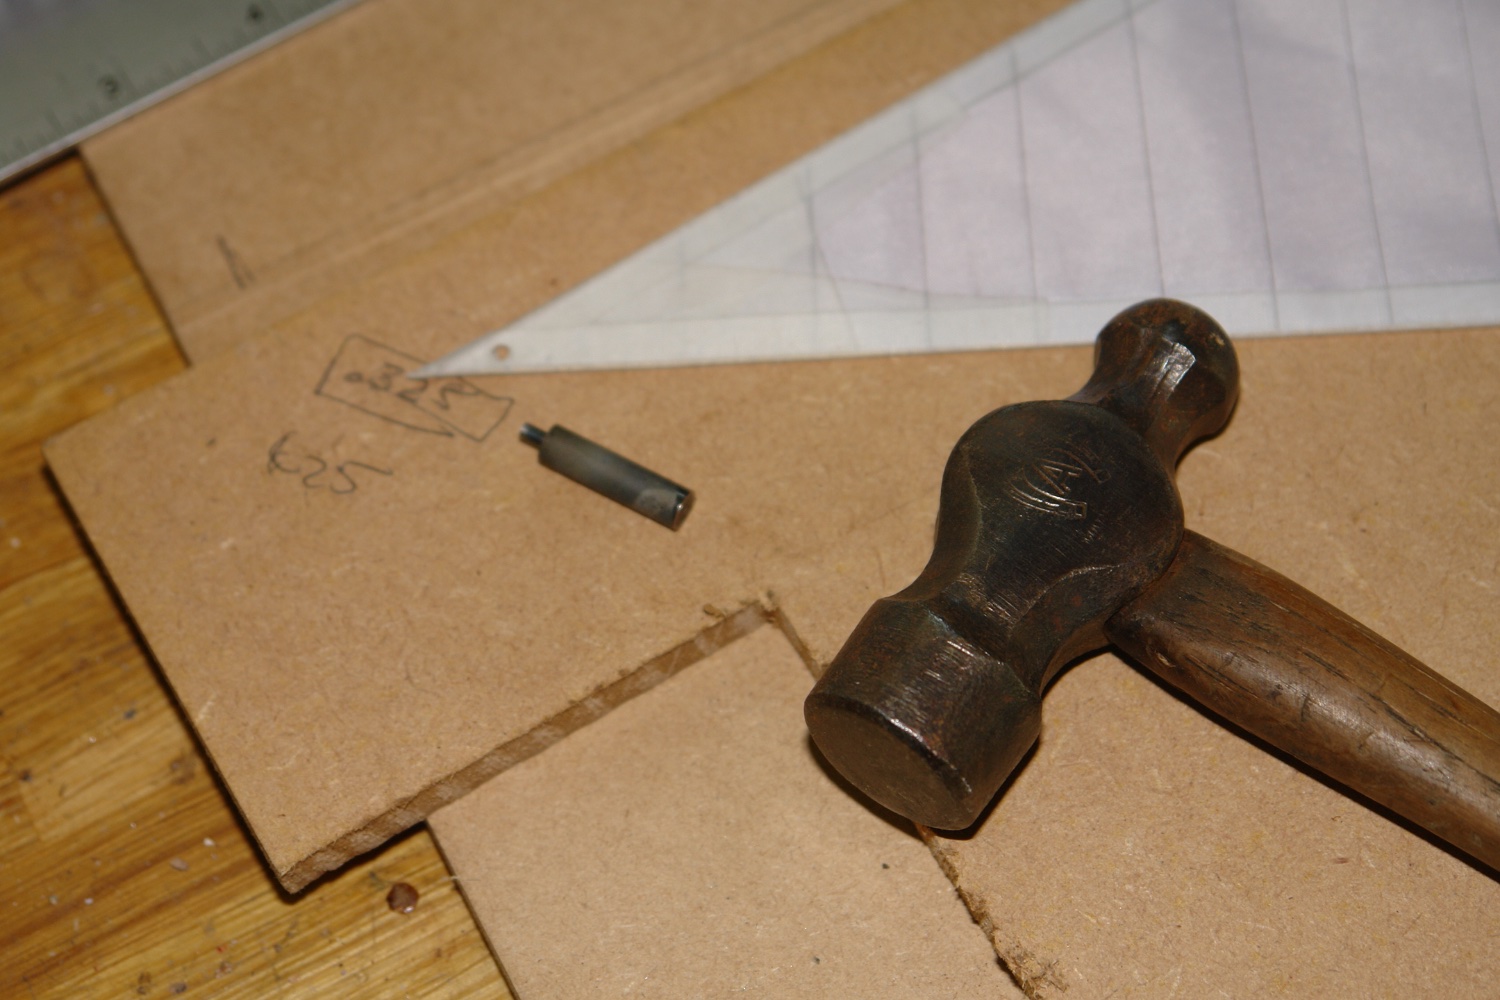
I have been getting on with the sails. I needed to cut the clew holes and cutting through the rip stop was proving difficult so I made a cutter out of a piece of silver steel that was then hardened. The inner surface of the cutter was formed with a small centre drill and the outer profile was turned on the lathe - leaving a sharp edge.
 The holes were punched and small eyelets were pushed through the holes and backed by small brass washers that were glued in place.
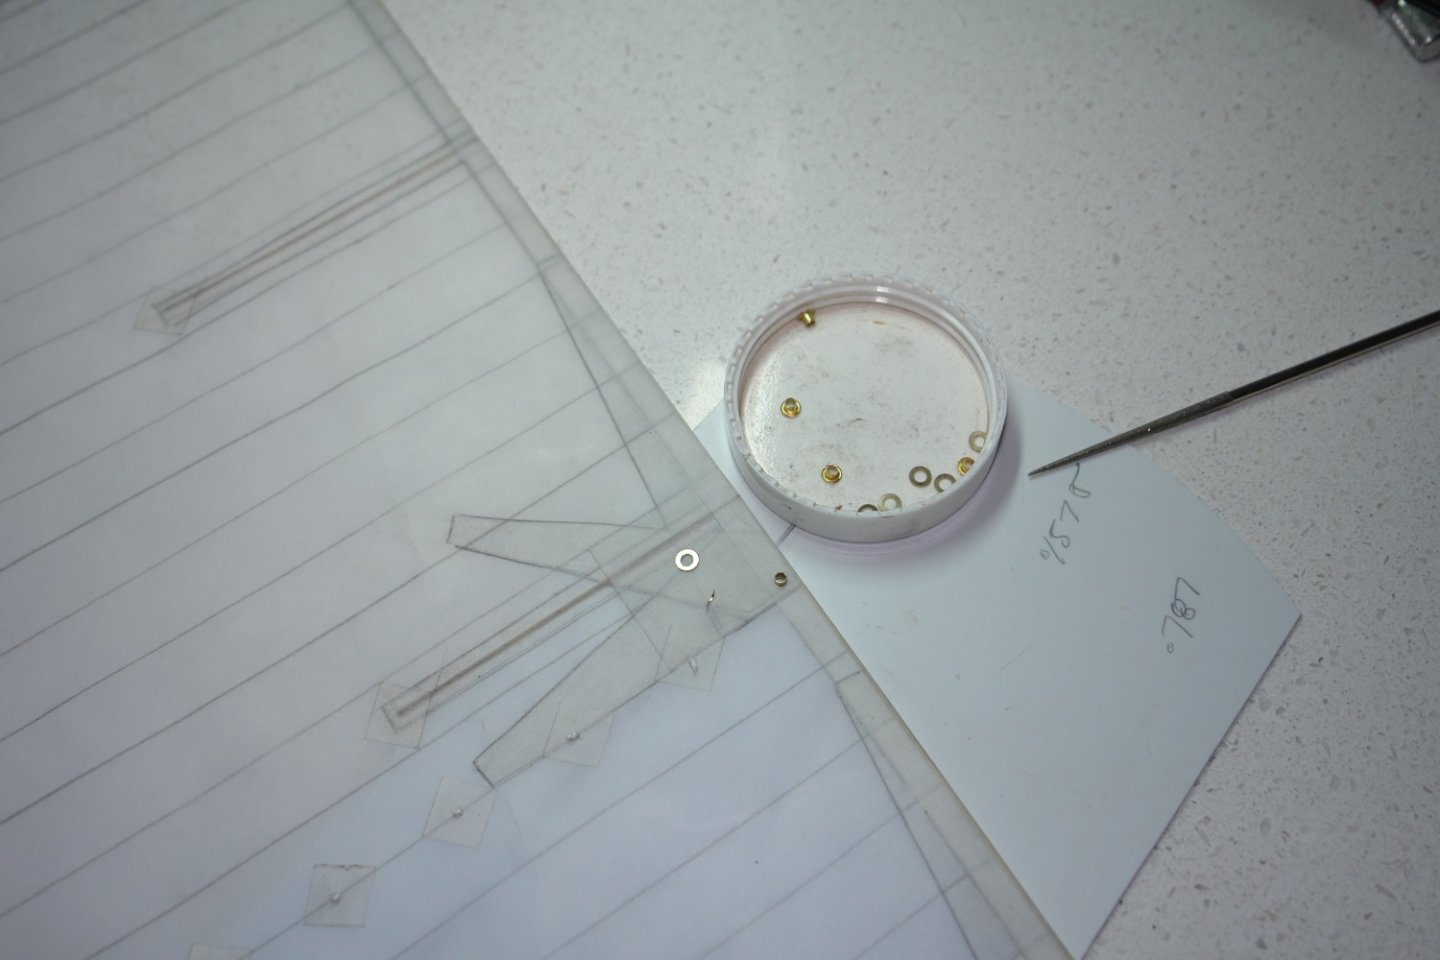
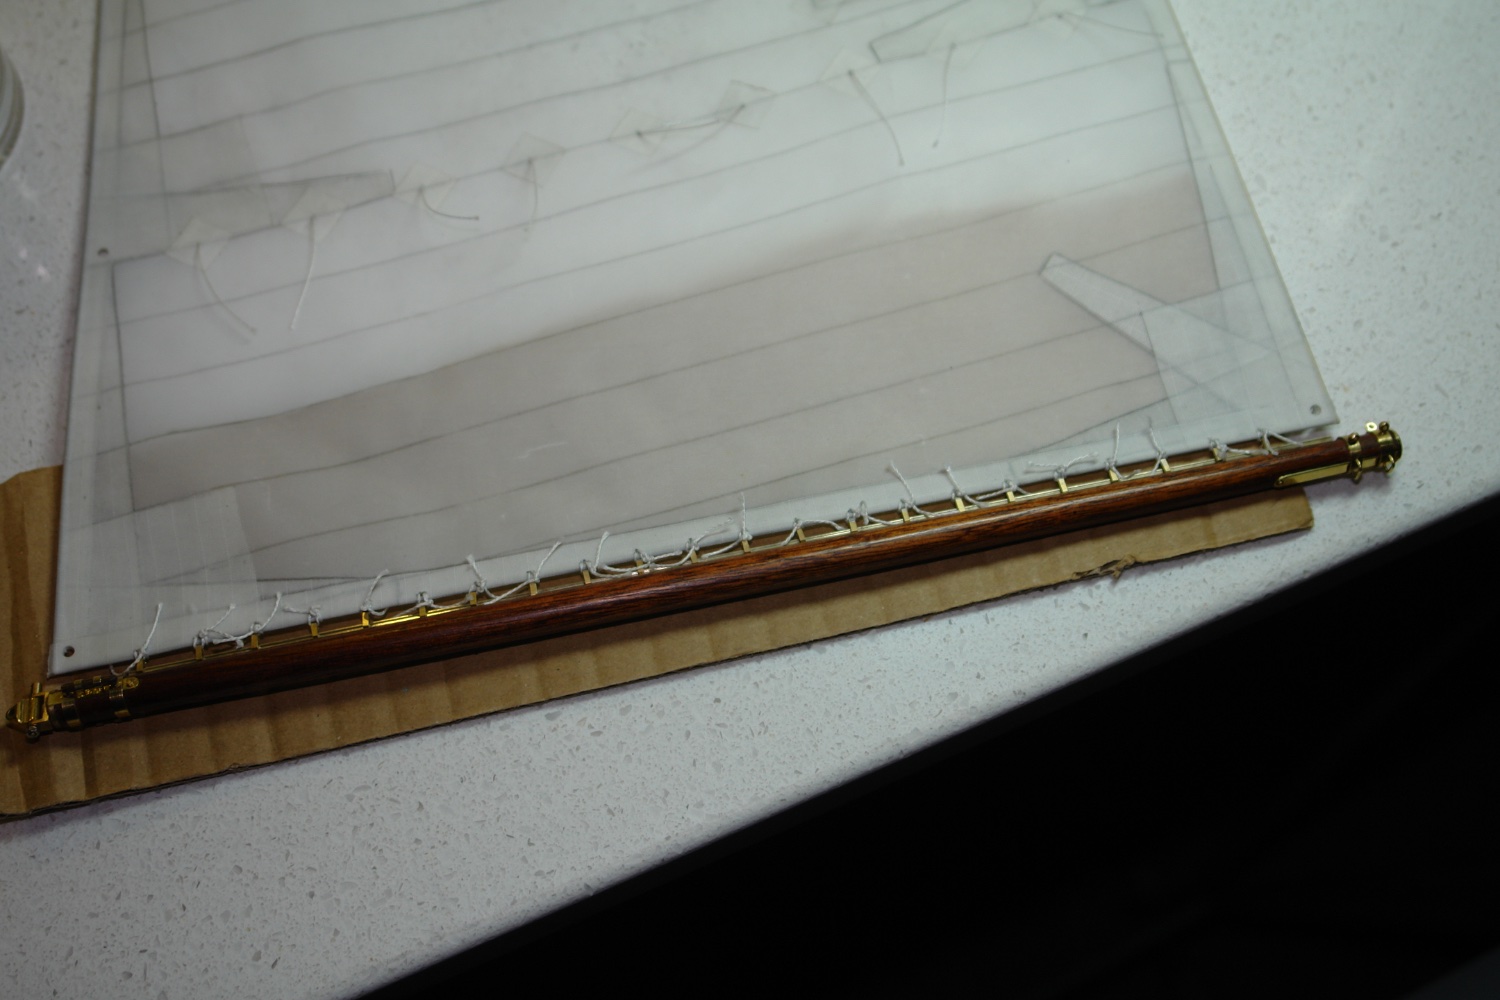
I then went on to attach the sliders on to the foot of the sail.

This done the loose ends were tidied up.

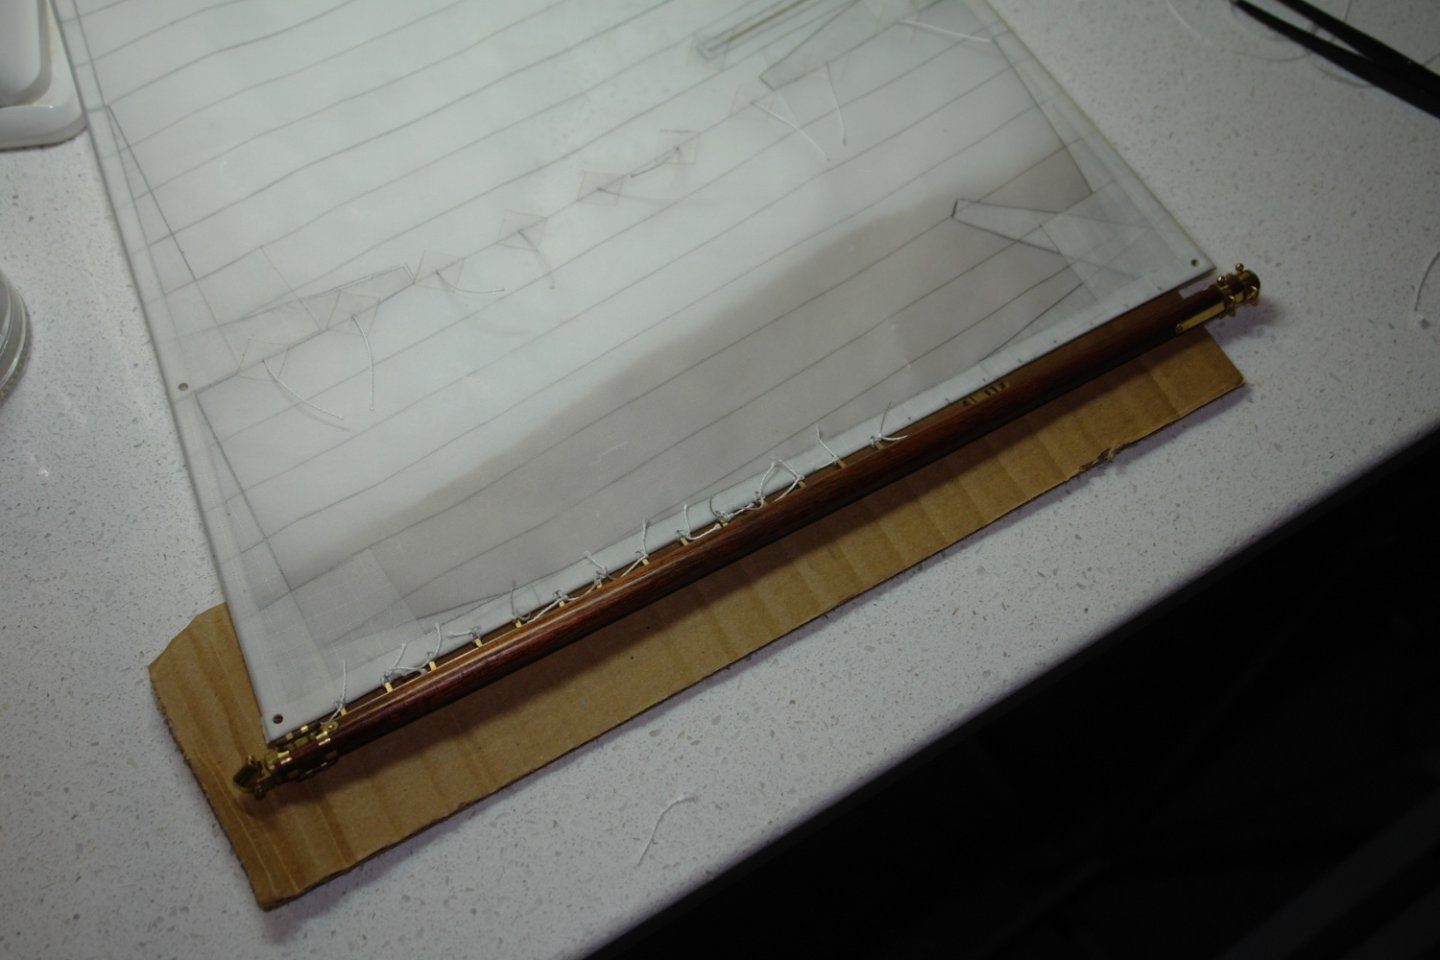
With this complete the gaff was laced on to the head of the sail.
- Wintergreen, G.L., Mirabell61 and 22 others
-
23
-
 2
2
-


HMS MIMI 1915 by Ras Ambrioso - FINISHED - Scale 1:24 - Fast Motor Launch
in - Build logs for subjects built 1901 - Present Day
Posted
Was that because of the great story line or was it more related to Samantha's hull lines?😆