


KeithAug
-
Posts
3,867 -
Joined
-
Last visited
Content Type
Profiles
Forums
Gallery
Events
Posts posted by KeithAug
-
-
3 hours ago, Rick310 said:
Looks great!!
Rick - I have been meaning to ask - can you remember what colour she is? She sometimes looks very green and sometimes very blue.


- Tony Hunt, mtaylor, FriedClams and 7 others
-
 10
10
-
2 hours ago, FlyingFish said:
I've found a washing-up sponge (scotchbright side) damped with soapy warm water works
Andy -
I didn't try water as I was a bit worried about distorting the frames. I was probably being a bit over cautious.
47 minutes ago, Richard Dunn said:I use clean up with isopropyl Alcohol, I just spray it on leave it for 5 mins and it peels away, the rest wipes off with some on a paper towel.
Richard - I tried alcohol but probably didn't leave it long enough. Never mind there is always a next time.
Rick / John / Tom - thank you.
- Retired guy, Keith Black, FriedClams and 1 other
-
4
-
57 minutes ago, Roger Pellett said:
A feature of scratch building is the time that must be spent figuring how to make things, particularly if one chooses to build a variety of models and to work at different scales.
Roger - Too true. I constantly think I would be much more productive if i just spent my time building the same model over and over again. On the other hand the most interesting bit is the problem solving.
The hatch cover removal process seems like a nightmare. I assume they don't do it that way anymore.
I'm not quite sure how the jig is working. Is the taper peg just a holding (tensioning) feature?
- FriedClams, mbp521, mtaylor and 3 others
-
6
-
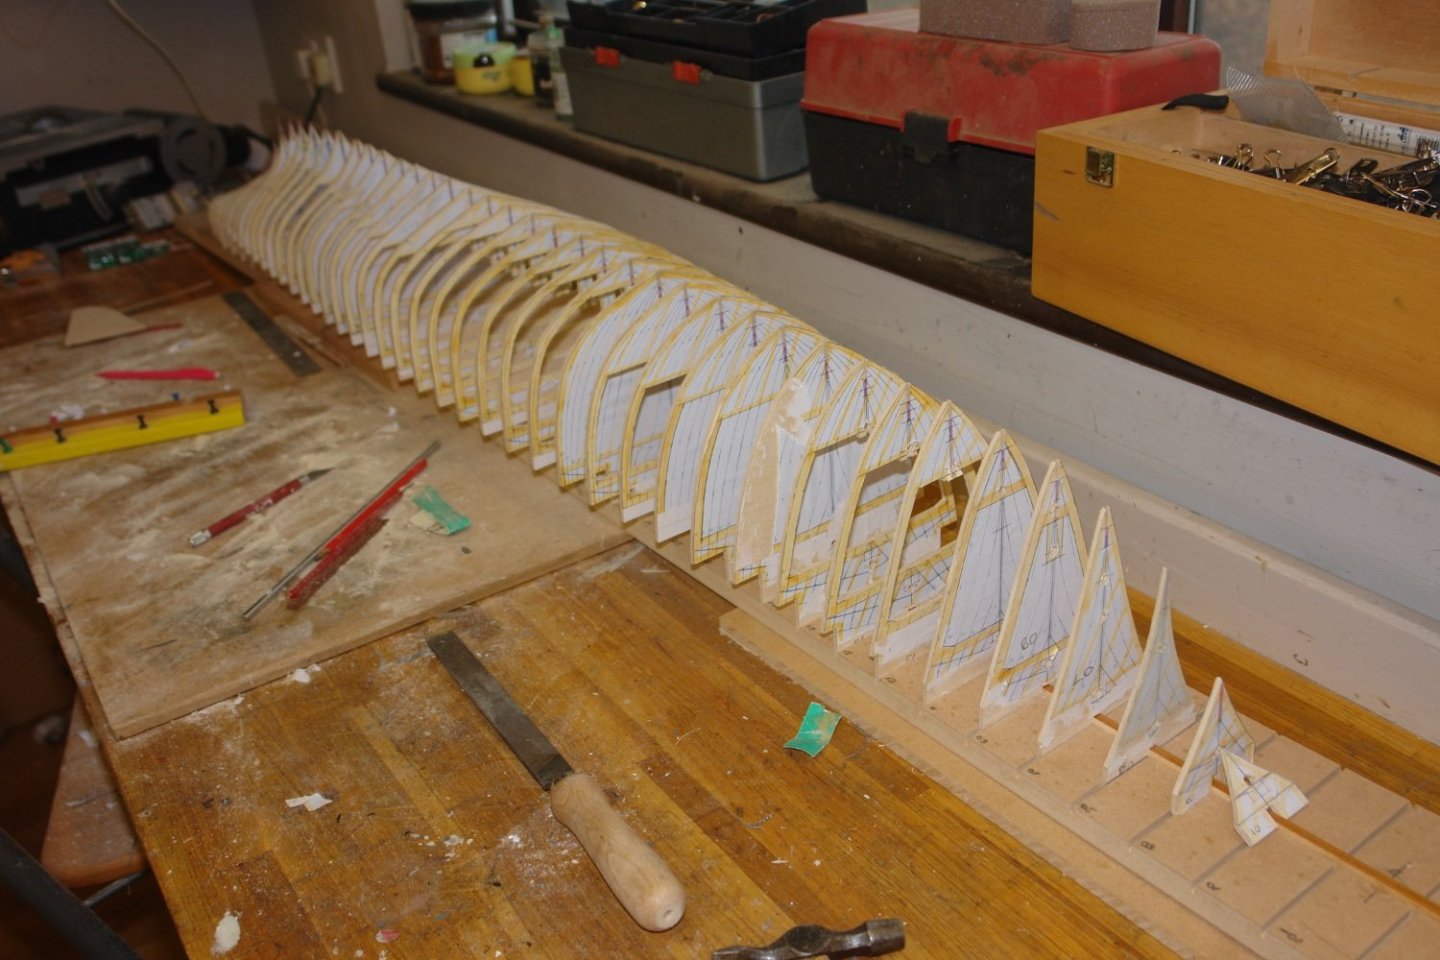
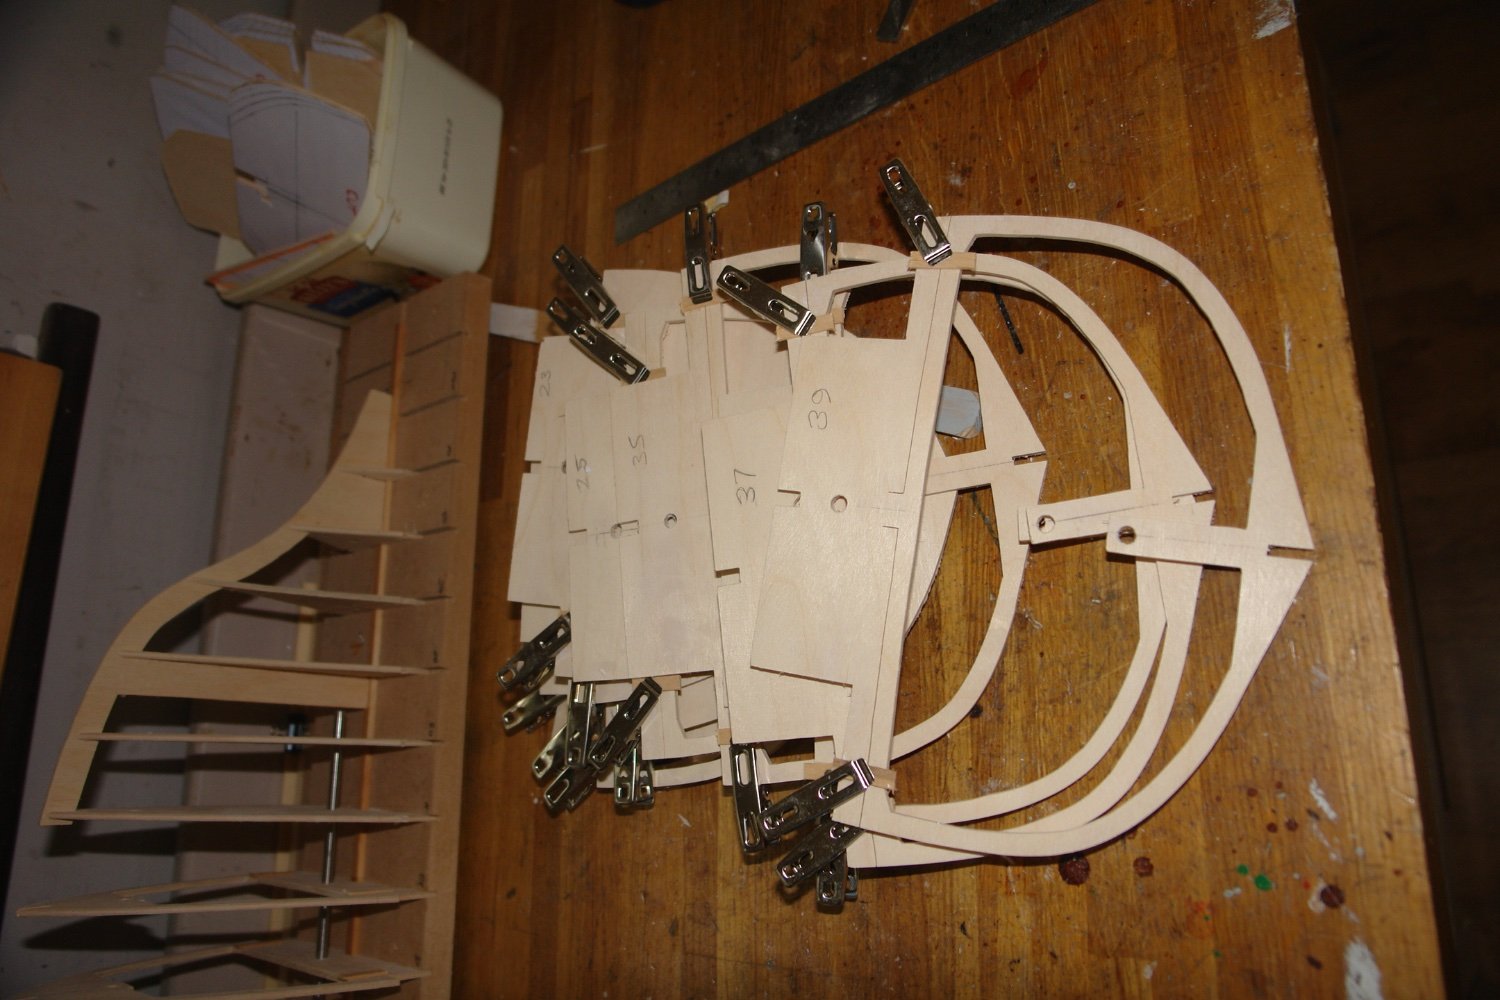
I am taking my time preparing stuff before I commit to the glue.
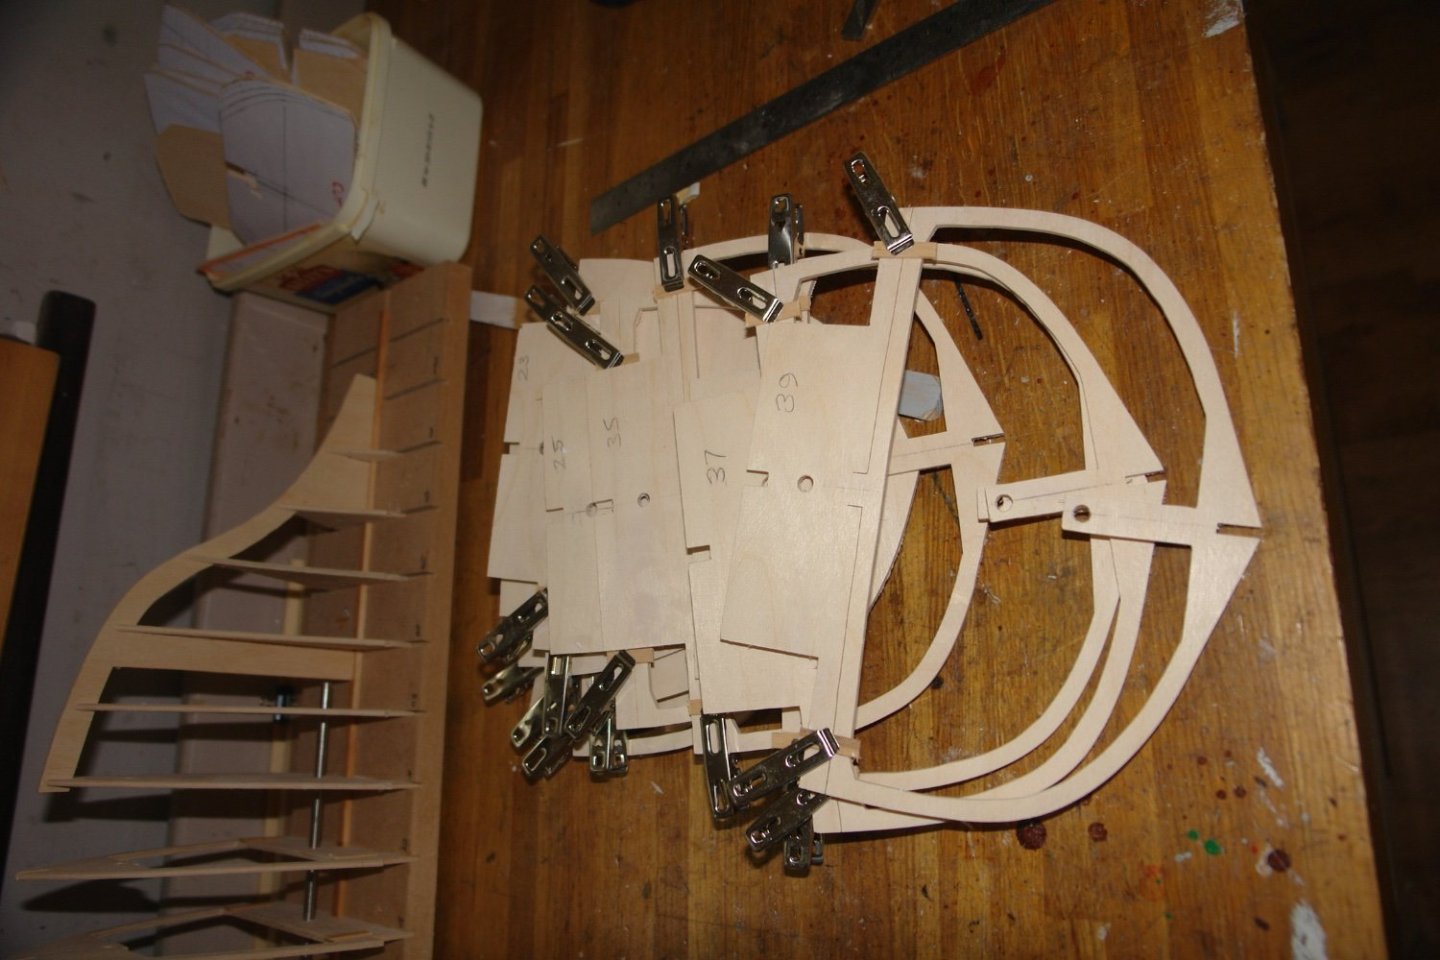
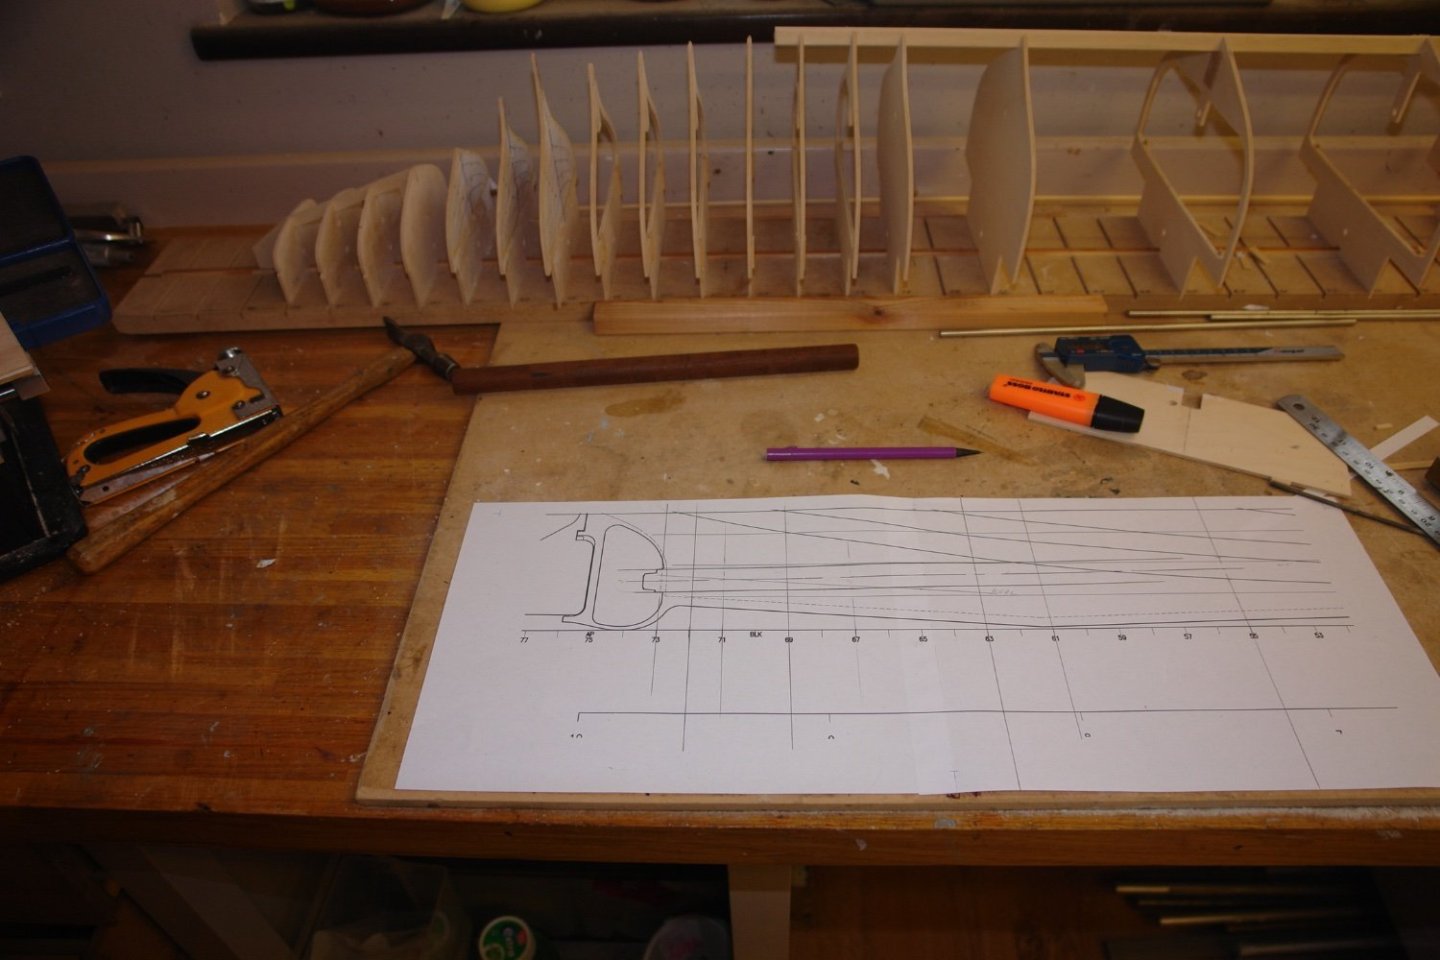
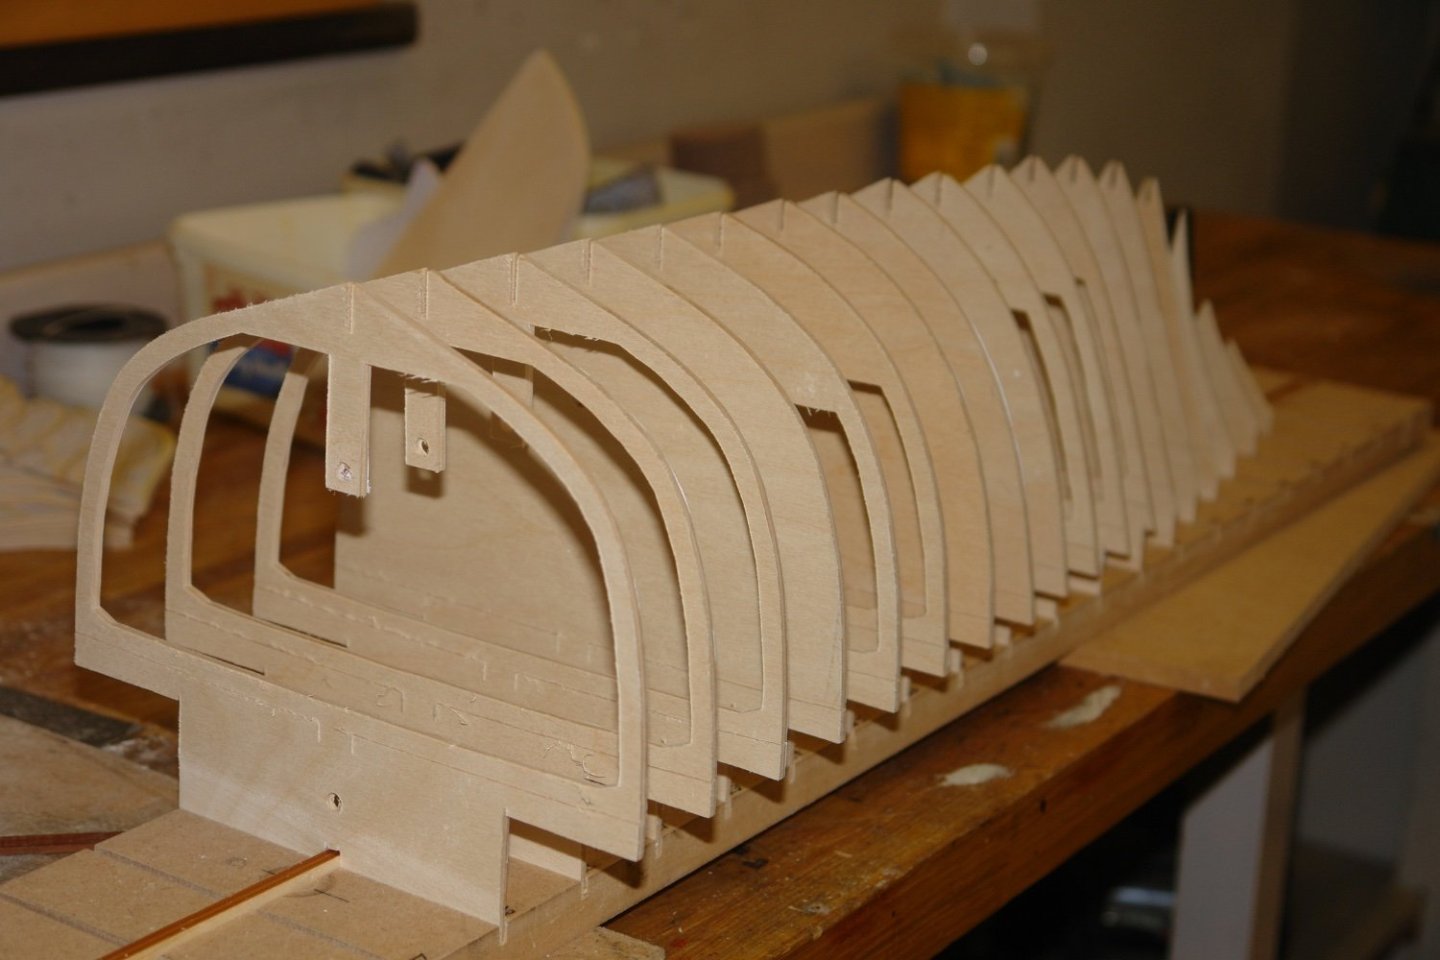
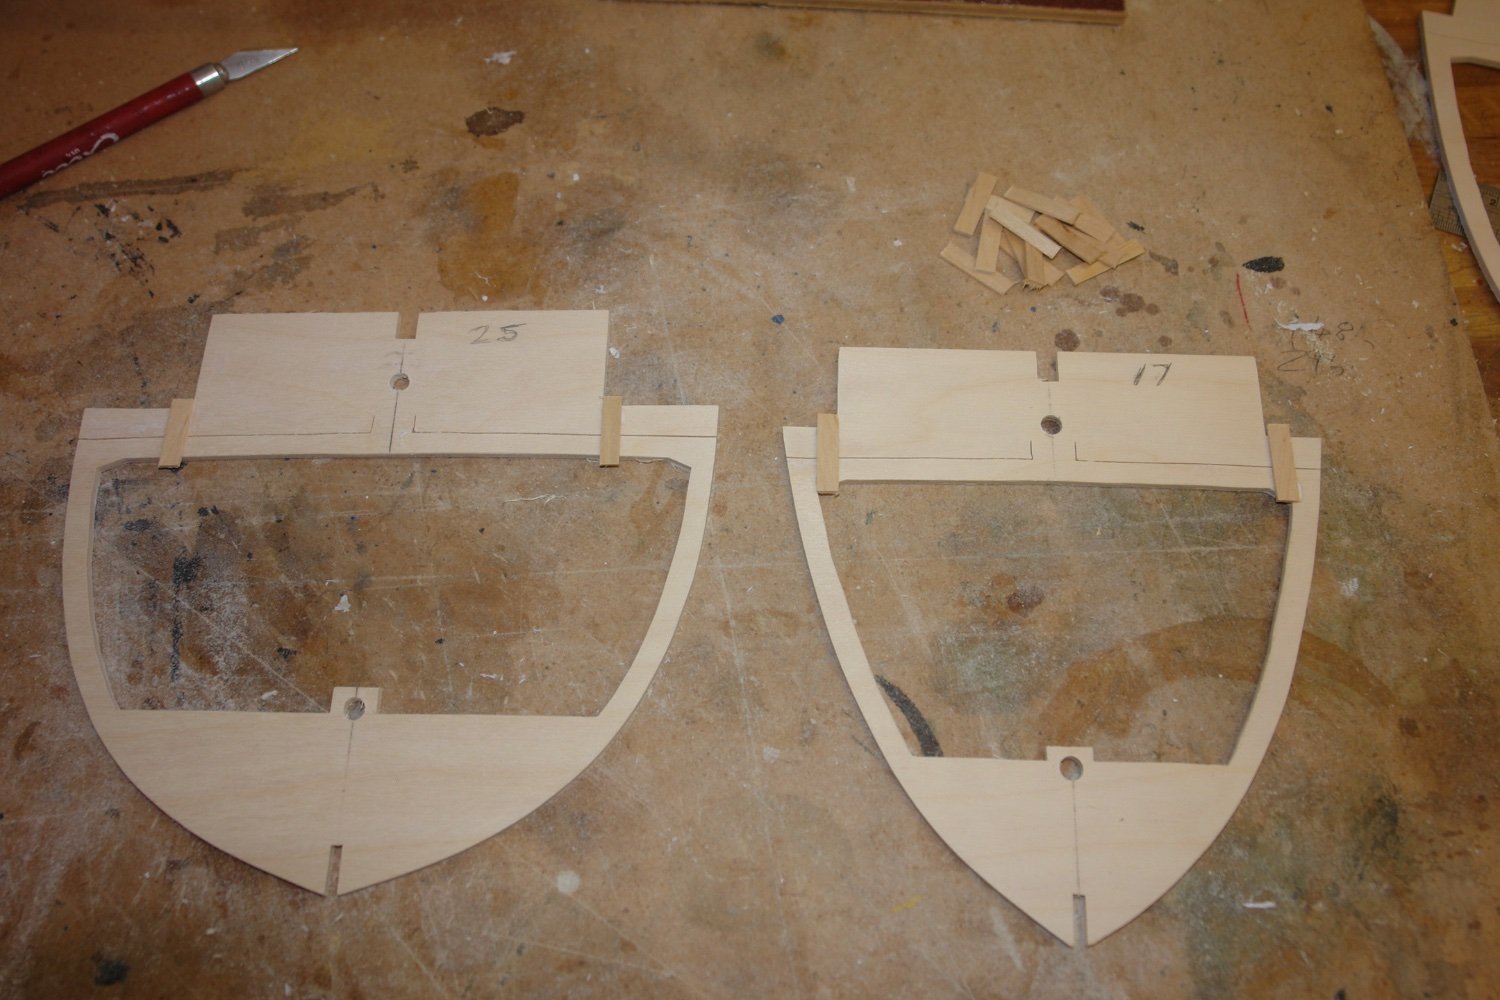
I sorted out the small frames at the bow and stern.

I spent a happy day stripping the cutting templates from the frames. I didn't find any of the usual solvents worked particularly well on pritt stick adhesive but peeling / sanding worked ok.
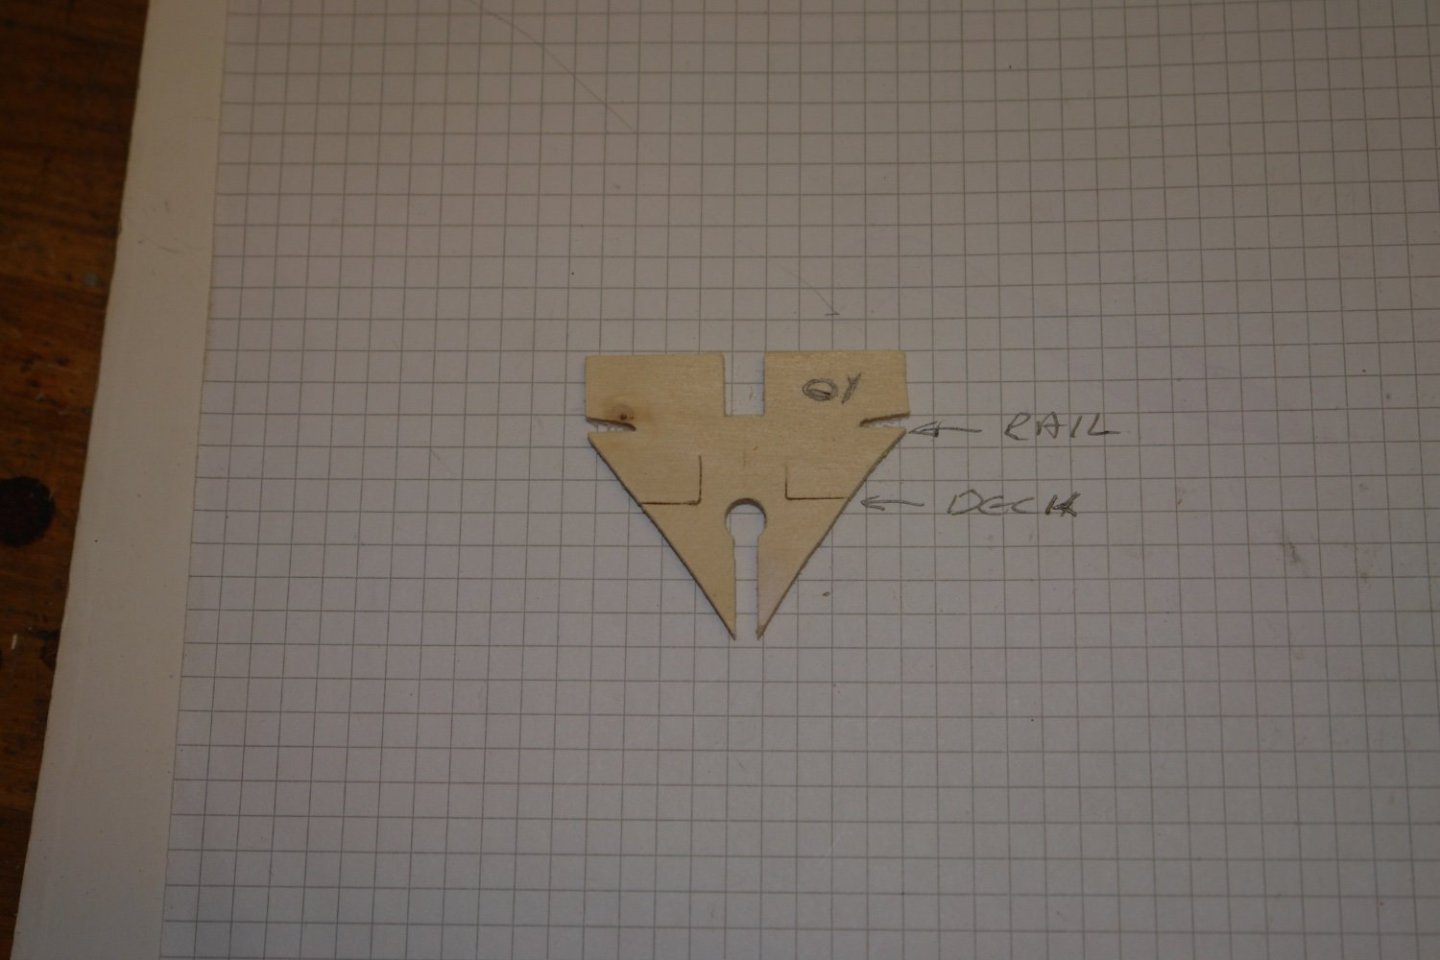
The cut line for the deck made the frames very flexible and I wanted them to be a little stiffer for the future hull sanding process. I therefore temporarily glued small strips of wood across the deck cut line to increase the stiffness.

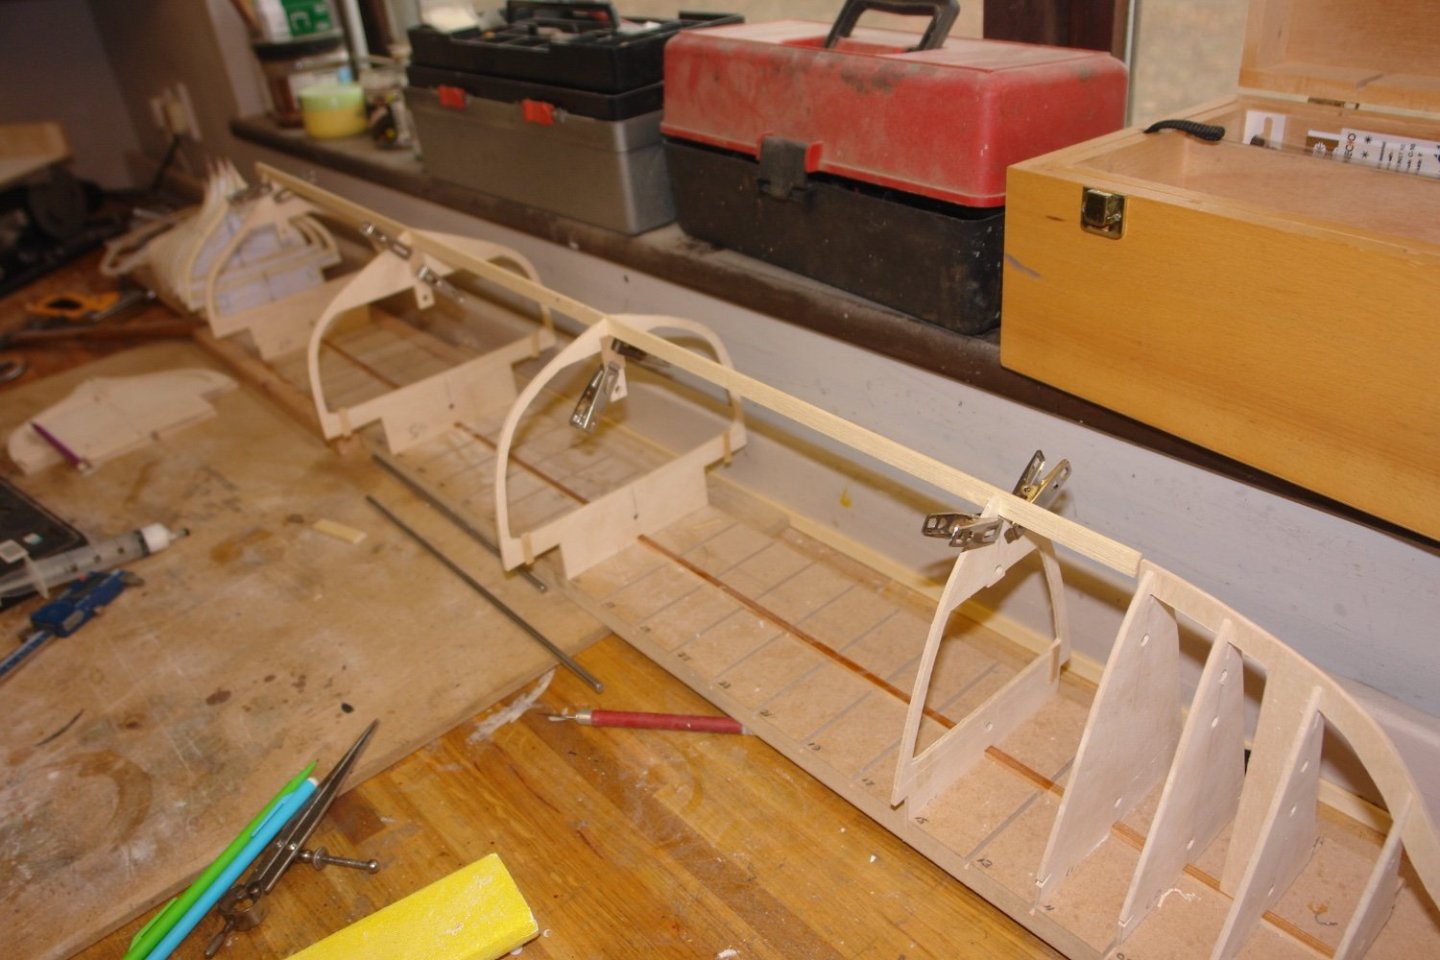
I also sorted out the correct vertical position of the keel. The keel slots were cut deeper than needed so I cut the keel strip and then assembled it into a few of the frames before setting it to the correct heights fore and aft. With friction holding the keel in place I glued tabs to the frames to fix the keel position.
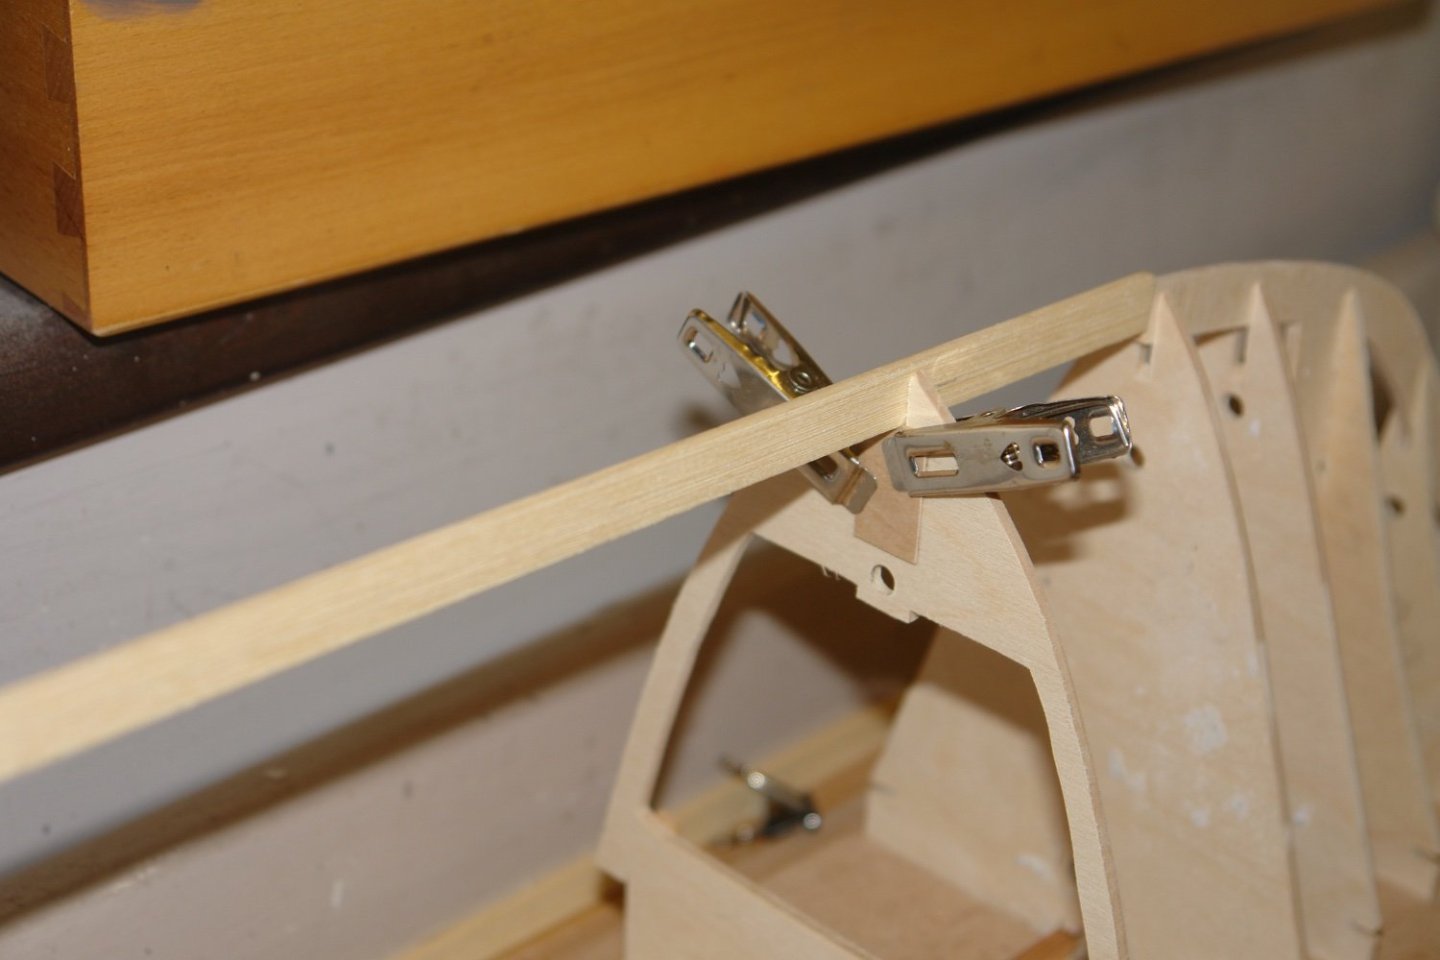
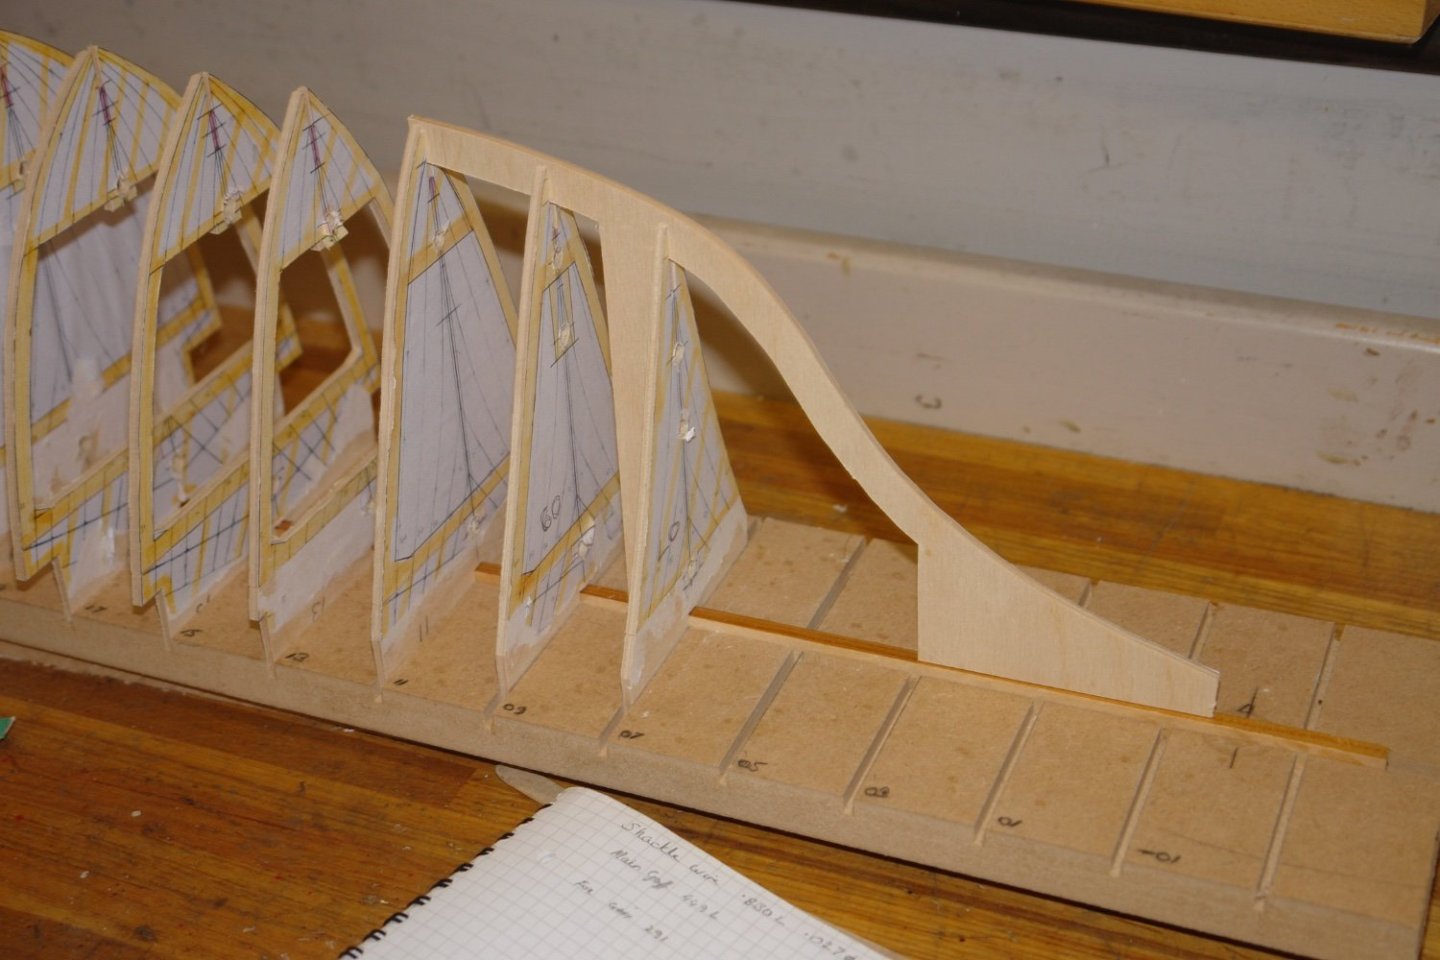
The line of the keel is broken at frame 61 and the next job is to sort out the position of the aft section of the keel.
Not very exciting but progress is progress.
-
4 hours ago, Jaager said:
For ripping - a thin blade with lots of teeth seems like a good idea, but it is not.
I agree. I tend to use the thinnest blade I can get away with to reduce waste. In practice I never find anything less than a 1/32" (0.8mm) slitting blade is stiff enough to prevent it flexing and wandering off line. If the wood is difficult (pronounced grain, hard, high moisture) I tend to use a .040" (1.0mm) blade. I always go for a slitting saw with large teeth.
- Roger Pellett, No Idea and Canute
-
3
-
On 12/31/2023 at 5:43 PM, No Idea said:
1. The edge of the wood that is on the fence is not straight and true. This will need correcting.
2. You are not keeping the wood tight up against the fence as you cut?
3. The blade is too thin and is deflecting - what size blade and with how many teeth are you using?
Bigcreekdad - One other possible cause is the grain direction on the wood you are cutting. If you are using a narrow blade and the grain tapers away from the fence then the blade tends to follow the grain and the resulting planks can have a taper. If this is the case try flipping the wood over lengthways so the grain taper is towards the fence. This usually improves the accuracy of the cut plank.
-
On 12/31/2023 at 7:44 PM, FlyingFish said:
I also have a piece of the original timber from Vigilance
Andy - It would make a nice lamp base. That is the sort of thing I say to my wife when I am in need of a tongue lashing. I like the thinness sander.
- FriedClams and Keith Black
-
1
-
 1
1
-
7 hours ago, GrandpaPhil said:
I was able to finish so quickly because the plans were from one of Amati’s beginners kits.
Nice little model Phil. It seems like the rule is "the older you get the quicker you get". I'm looking forward to my imminent speed increase!
- Canute and GrandpaPhil
-
1
-
 1
1
-
She has elegant lines - excellent work.
- Keith Black and Ian_Grant
-
2
-
23 hours ago, Cathead said:
And one final update from a quiet New Year's Eve.
Eric - I find the older I get the quieter they get! Nice progress and a great way to see the old year out.
- Jack12477, leclaire, Keith Black and 5 others
-
8
-
6 hours ago, Keith Black said:
I was hoping to post photos this evening but unfortunately that didn't happen,
The story of my life.😐
- Glen McGuire, Keith Black, Dave_E and 3 others
-
4
-
2
-
Thank you Keith, Richard and Andy.
Happy new year to everyone, as now hopefully we have all made it safely into 2024.
- Keith Black, mtaylor and Retired guy
-
3
-
20 hours ago, Roger Pellett said:
In my opinion belt sanders are way to aggressive for fine work and have little direct application to model making.
I have a combined belt and disc sander. I don't think I have ever used the belt sander for model making. The disc sander is single speed and I constantly find myself wishing that I could turn the speed down. I am thinking of buying a variable speed disc sander and relegating the combined machine to non modelling work.
- Bob Cleek, mtaylor and Roger Pellett
-
3
-
-
-
8 hours ago, Valeriy V said:
My brass stash was collected 10-15 years ago.
Valeriy - That is the same for me, but i really am running quite short of sheet. Hopefully I will run out before it does.
- FriedClams, Canute, Roger Pellett and 2 others
-
5
-
Melissa,
You can pick up some very cheap airbrushes 20 to 30 dollars - they don't last well but will get you through a model or two. The next step up would be something like this https://www.amazon.co.uk/NEO-Gravity-Feed-Action-Airbrush/dp/B004INERK4/ref=asc_df_B004INERK4/?tag=googshopuk-21&linkCode=df0&hvadid=309819440071&hvpos=&hvnetw=g&hvrand=16945460784911821528&hvpone=&hvptwo=&hvqmt=&hvdev=c&hvdvcmdl=&hvlocint=&hvlocphy=9045827&hvtargid=pla-383095371970&psc=1&mcid=5eee78d457ec3559a64ef69cd18c4973&th=1&psc=1.
It will suffice for most straightforward jobs particularly if you are not going for anything too sophisticated in terms of techniques. My advice would be to stick with the more basic models until you decide you want to move up a gear. Best wishes for the new year.
- Canute, mtaylor, Roger Pellett and 1 other
-
4
-
25 minutes ago, Jim Lad said:
Have a great new Year, mate (ours happens in just over 17 hours)!
Thats not fair. Ours is over a day away. Happy new year.
- mtaylor, Jim Lad and Keith Black
-
3
-
1 hour ago, Wintergreen said:
ike Jake states in Blues Brothers: "I can see the light!"
I think it looks pretty good Hakan but if you are dissatisfied you can always convert it into a lamp shade😃.
- Wintergreen, mtaylor and Keith Black
-
3
-
I enjoyed catching up. The alignment frame is pretty neat.
- mtaylor and JacquesCousteau
-
1
-
1
-
-
Valeriy, you seem to have a never ending supply of brass. In the UK there are only a few specialist suppliers of thin sheet brass and they are rather expensive. Is the supply situation in Ukraine much better?
- Canute, mtaylor, Keith Black and 2 others
-
5
-
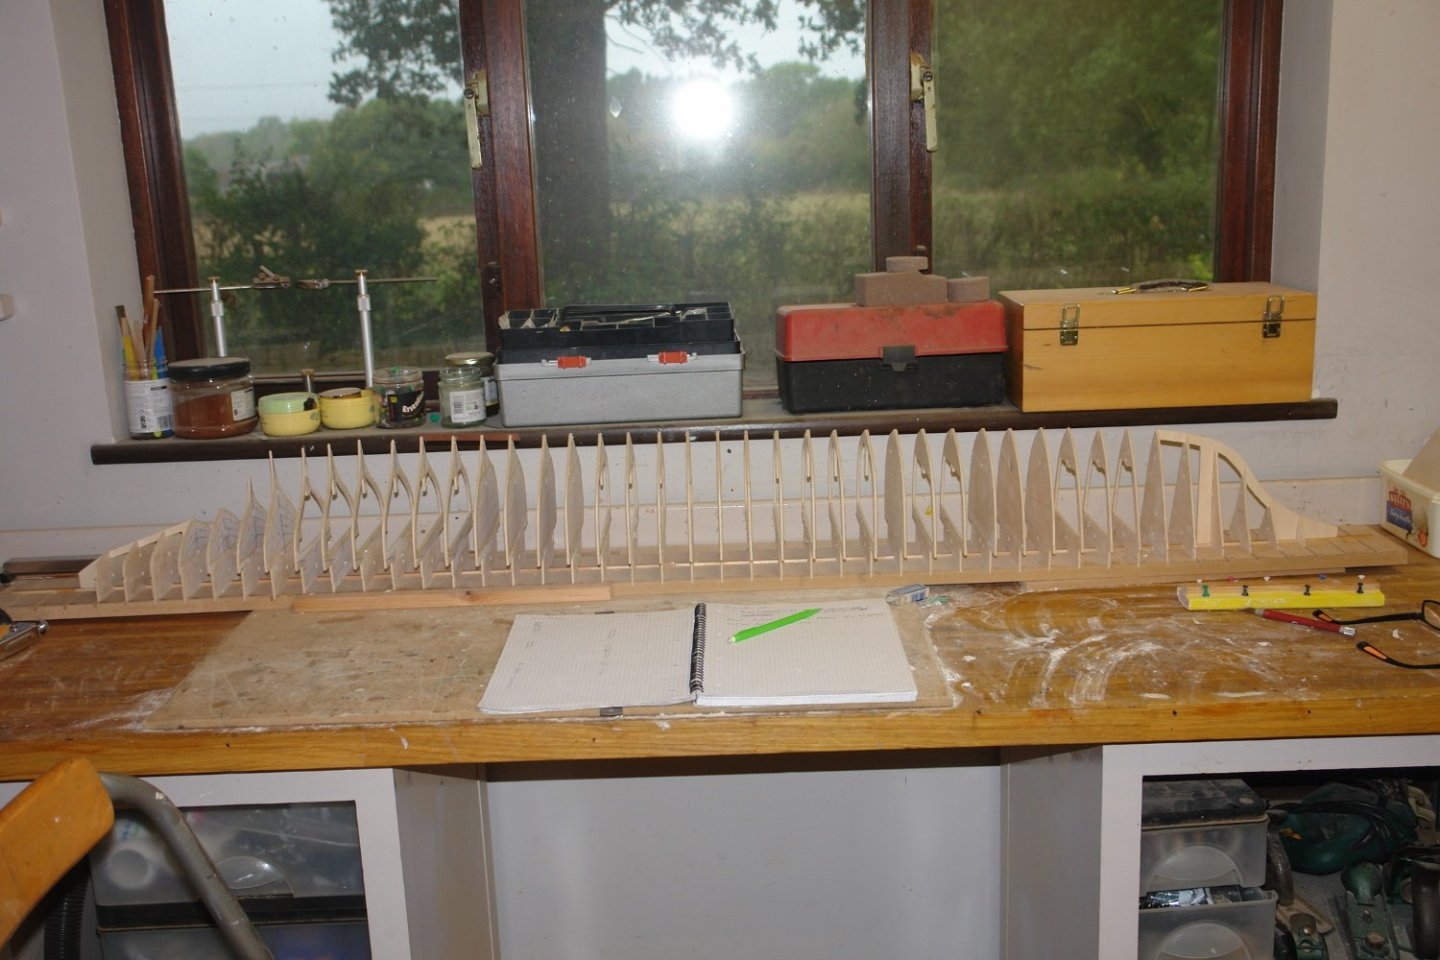
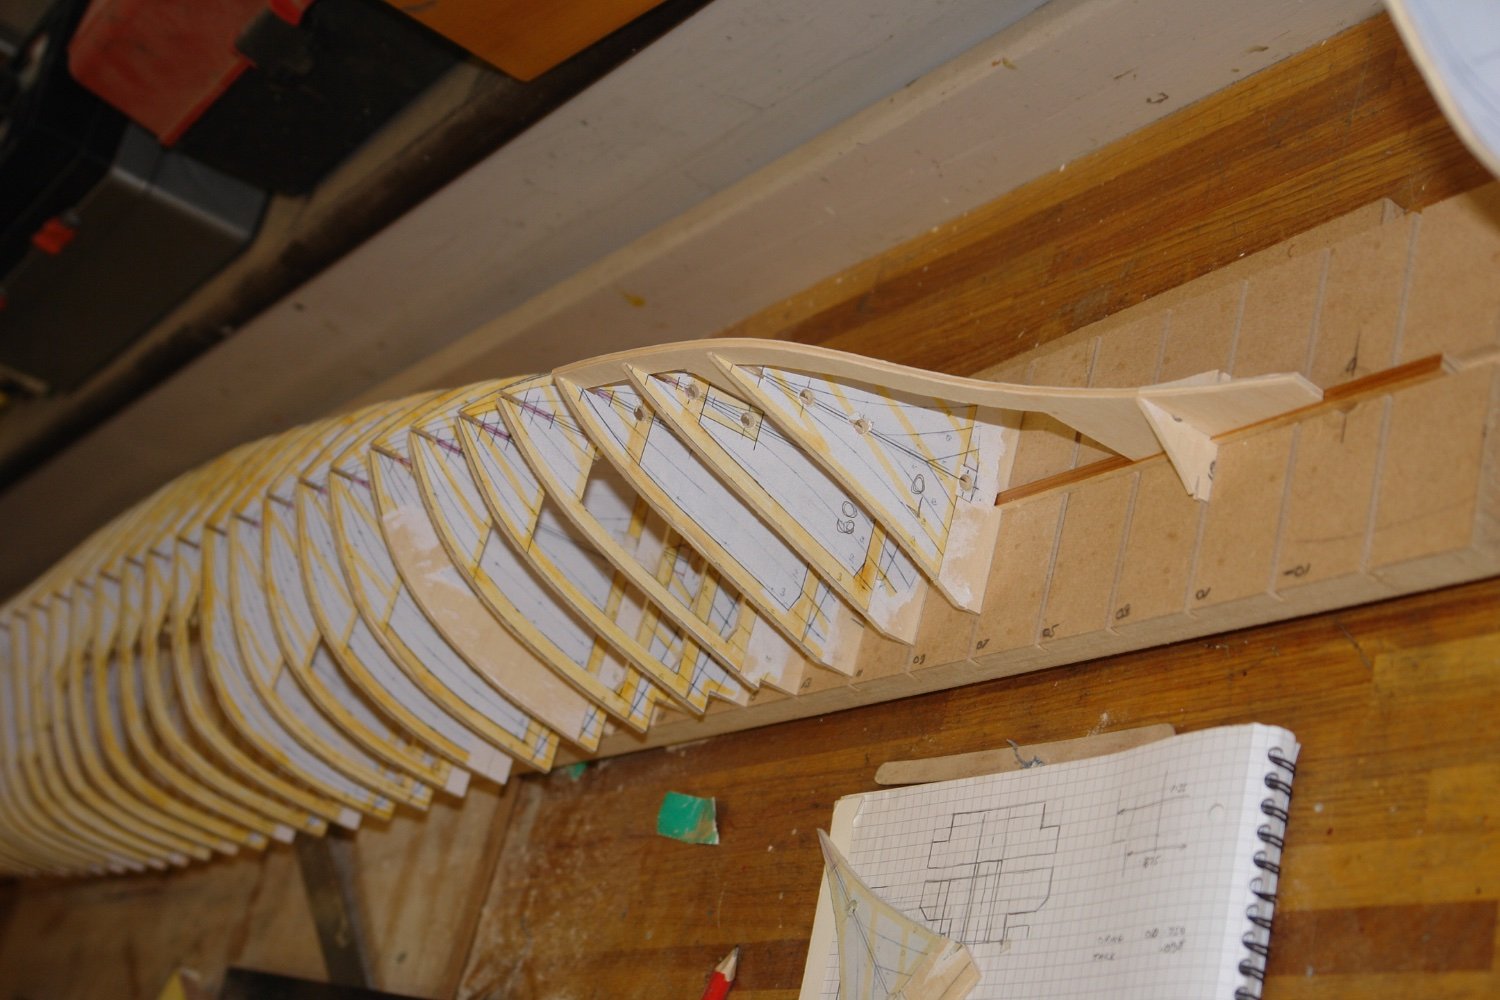
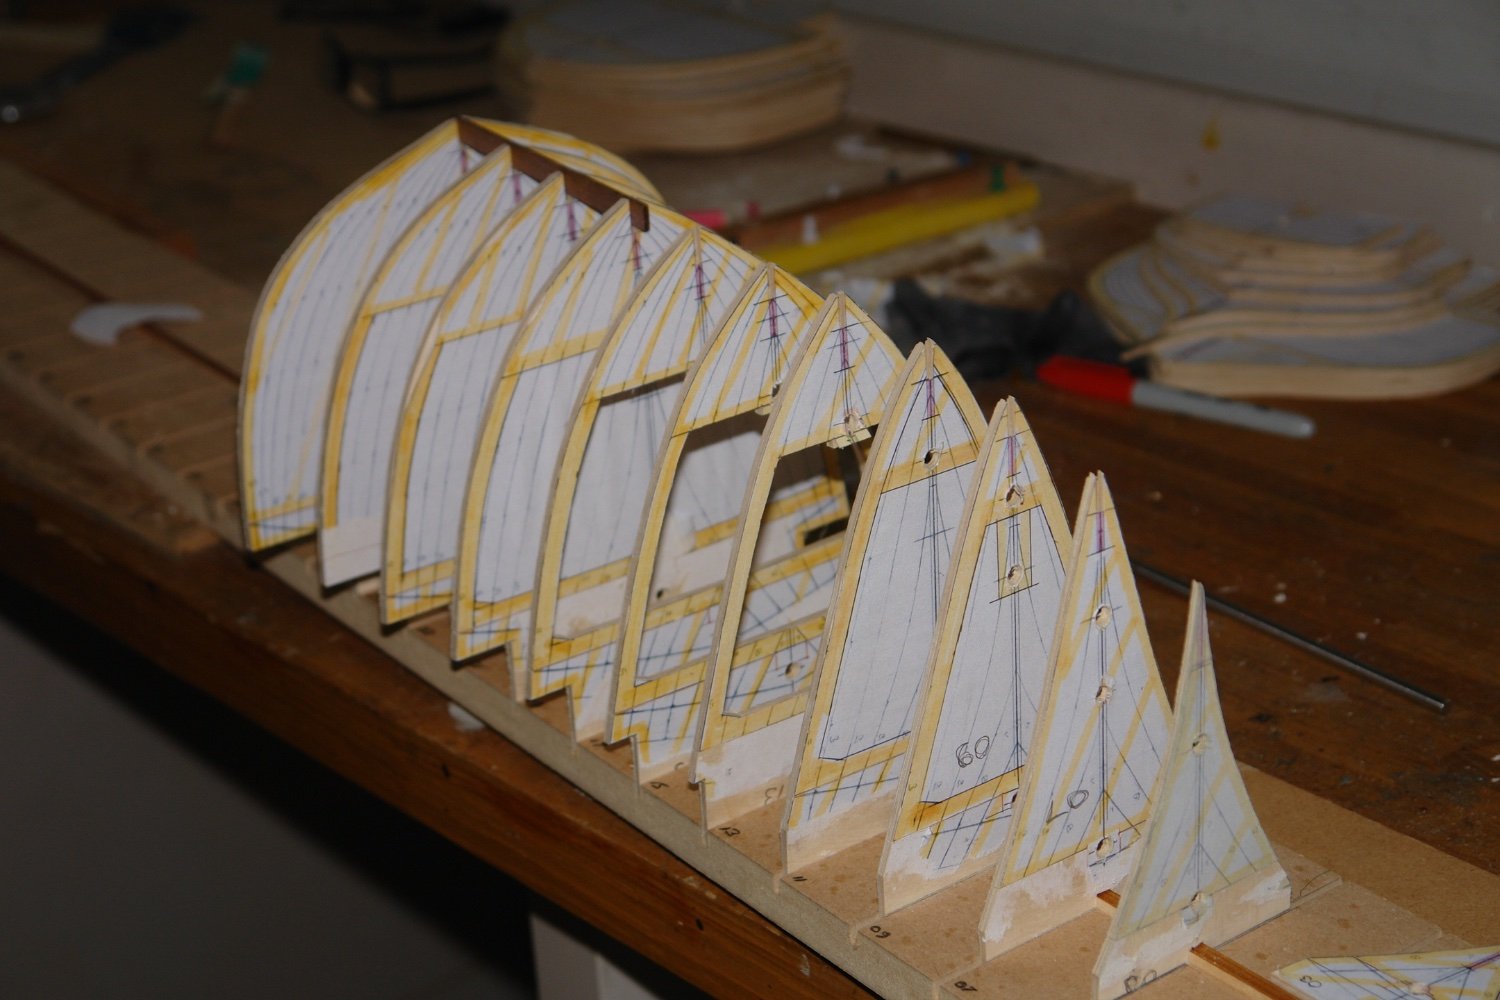
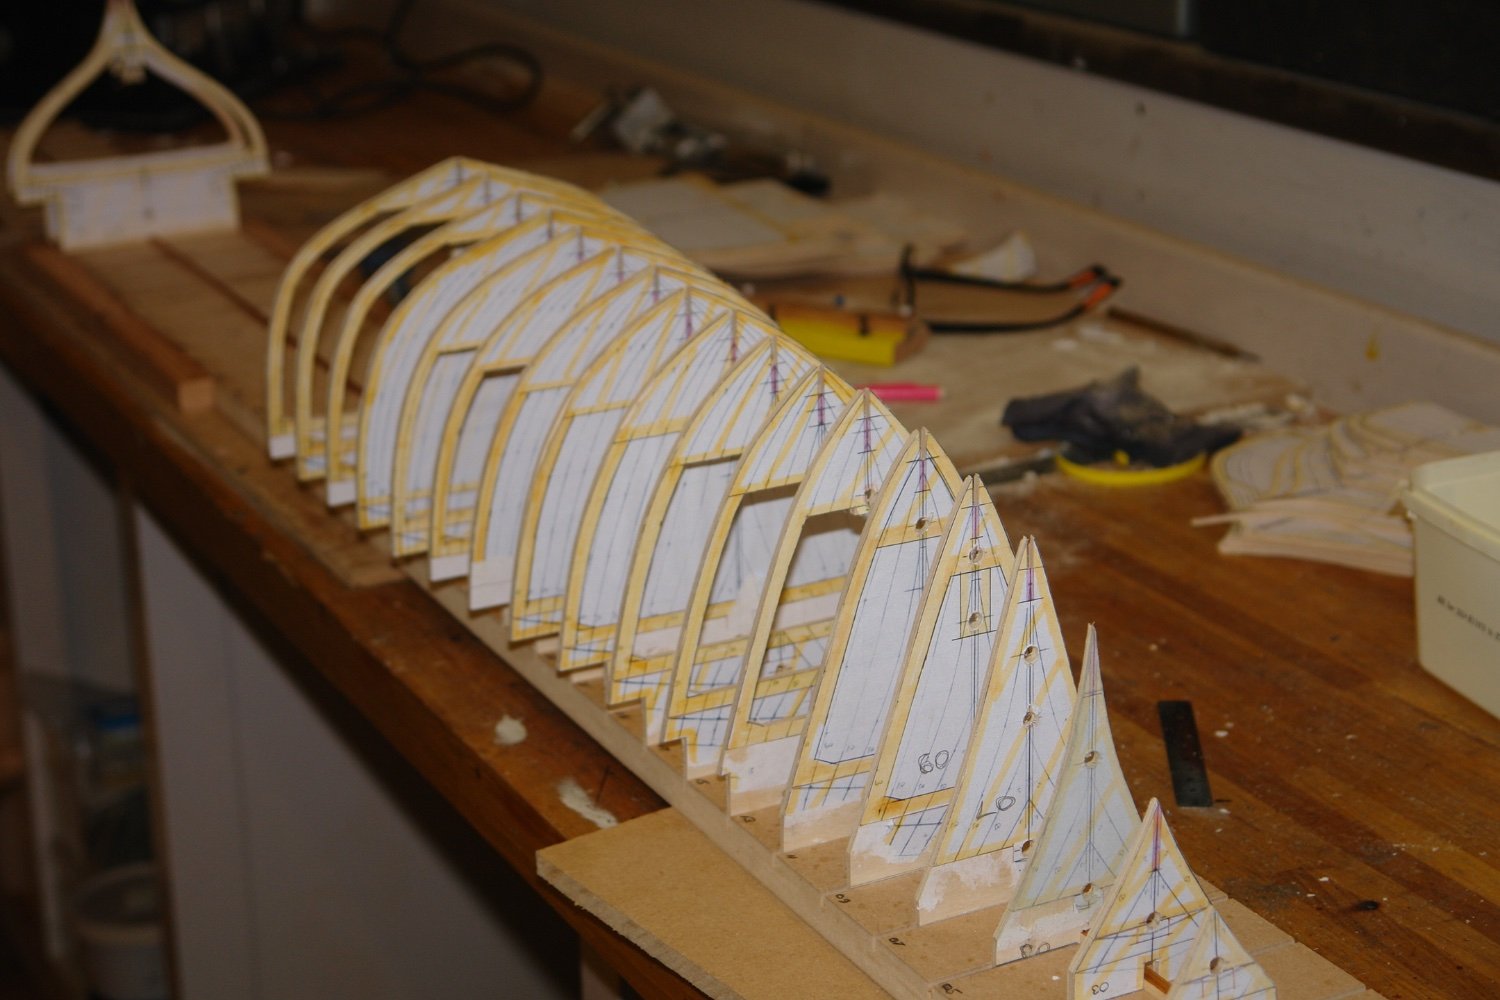
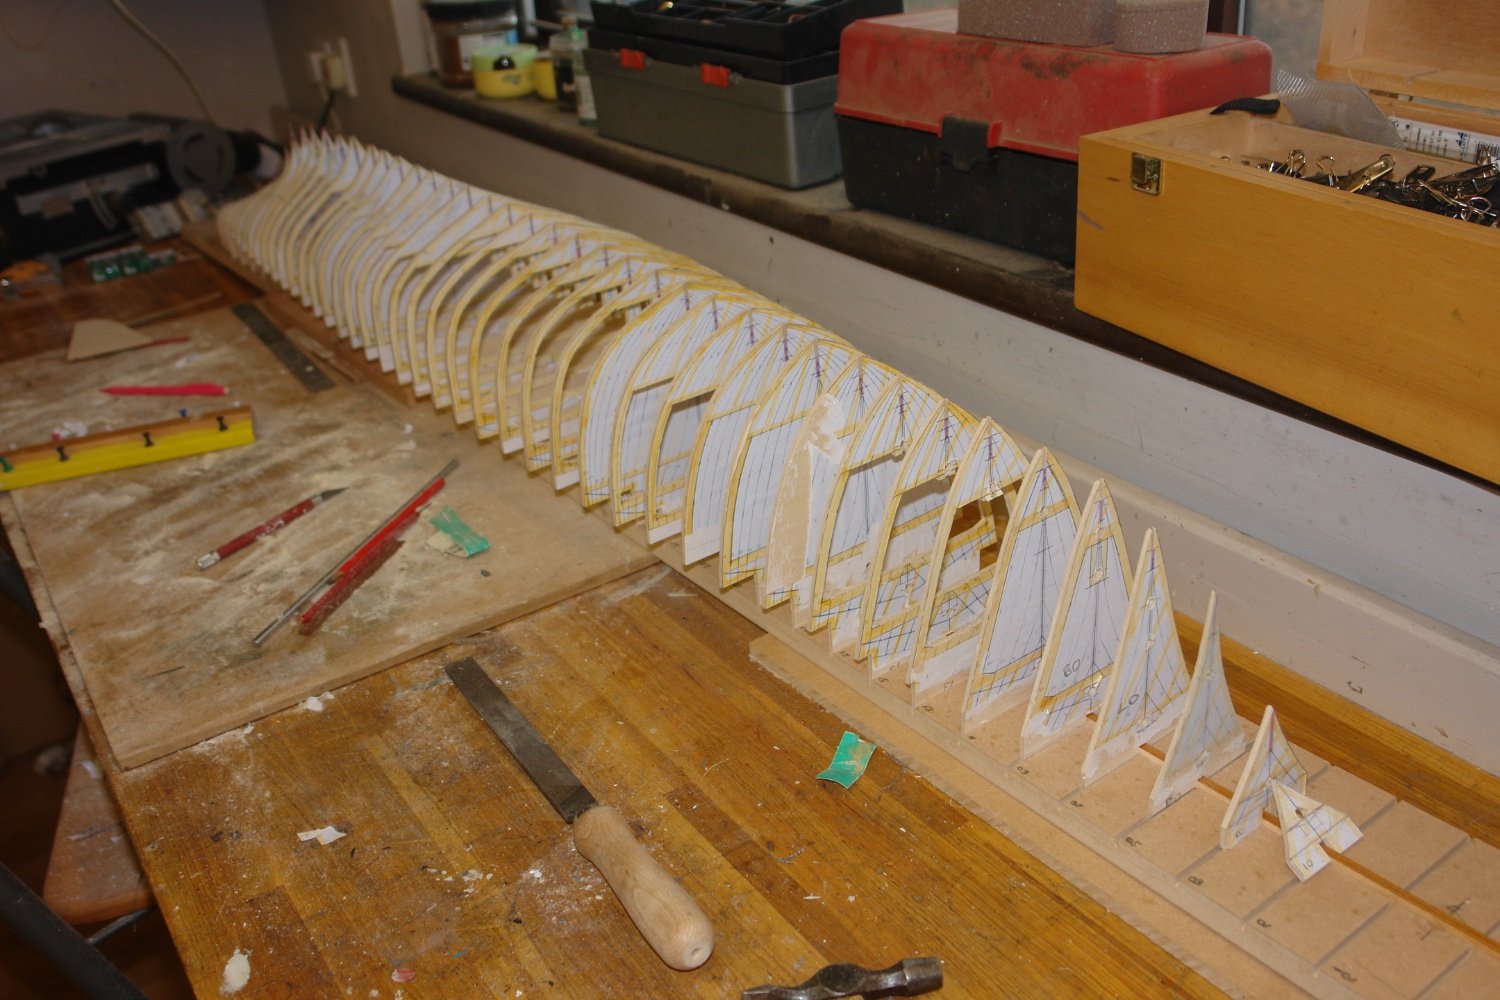
Well the family are all gone and it's back to some workshop therapy. I continued cutting out the inside of the frames and test fitting them on the base board. I am at that interesting stage where she is starting th look like she will become a ship at some point.


Many hours later.
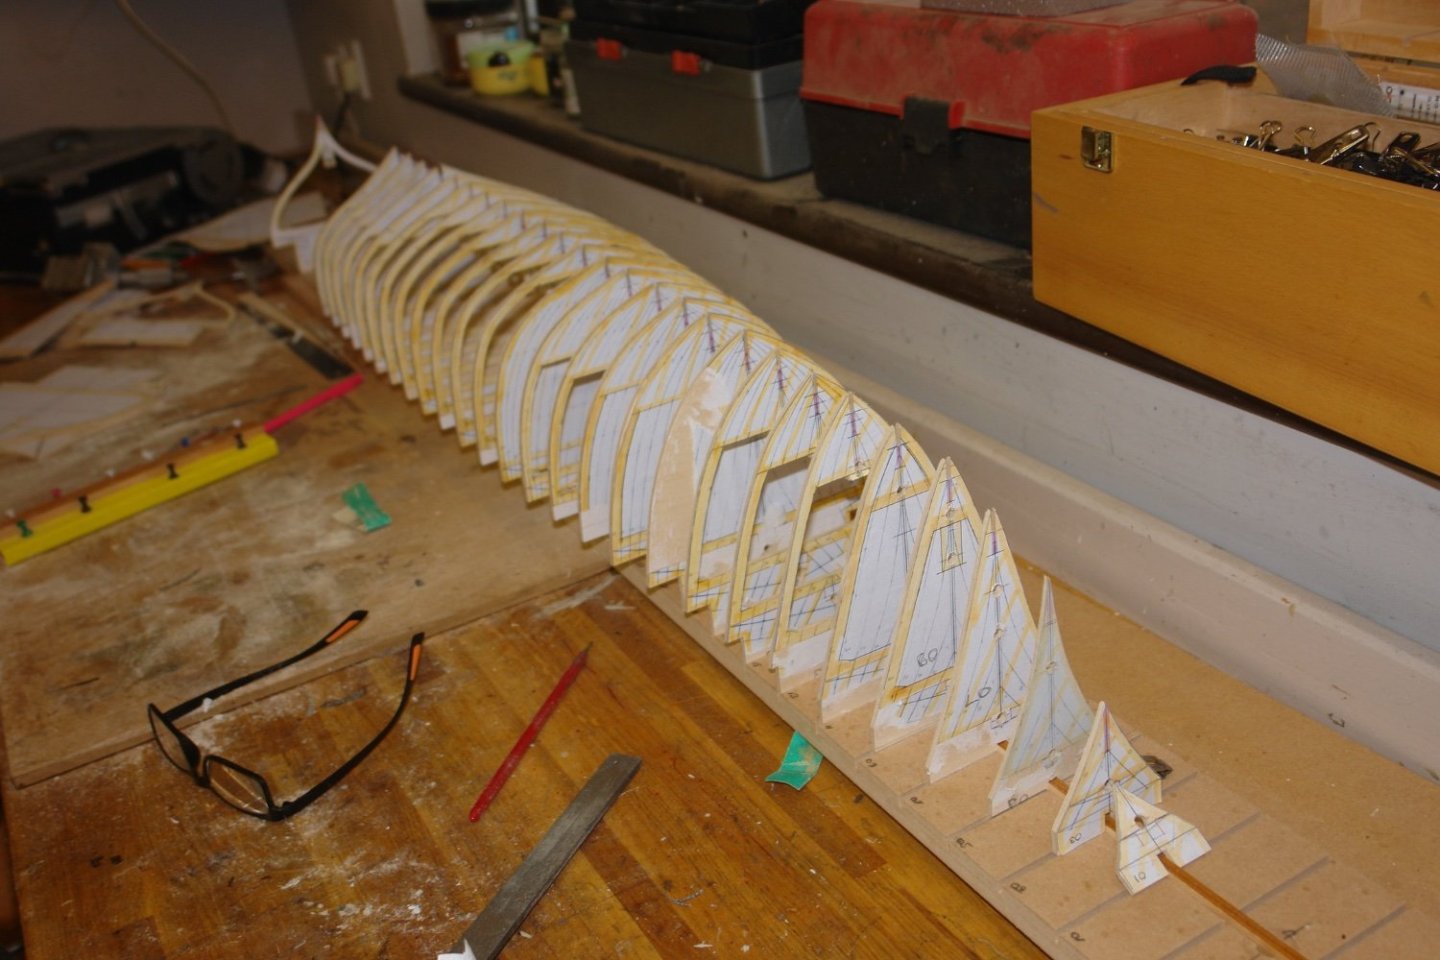
I also started to sort out the bow.
-
Excellent work.
- Keith Black, Canute and mtaylor
-
3


Cangarda 1901 by KeithAug - Scale 1:24 - Steam Yacht
in - Build logs for subjects built 1901 - Present Day
Posted
Thank you Rick