


KeithAug
-
Posts
3,867 -
Joined
-
Last visited
Content Type
Profiles
Forums
Gallery
Events
Posts posted by KeithAug
-
-
On 2/27/2024 at 7:28 PM, FlyingFish said:
caused by self-inflicted sillyiness with the No. 11.
Yep - I did the same thing aged 9. Still got the scar to prove it. Great looking frames Andy. They look just like the real thing.
P.S. Blood seeping through the bandage would have looked more manly.🙂
- mtaylor, FriedClams, Keith Black and 2 others
-
 1
1
-
 4
4
-
12 hours ago, TBlack said:
I’m looking at the third photo of the interior and can’t wait to see how you are going to replicate that!
Tom - much of it can't be seen through the skylight so I can cheat.
Thank you for your comments Andy and Pat. Also thank you to all my previous contributors and visitors.
- Keith Black and mtaylor
-
2
-
The lego sorting is finished and the eye is Ok for some low dust workshop activities (I wore a pair of goggles just to be sure). Yesterday and today I recommenced work on the hull.
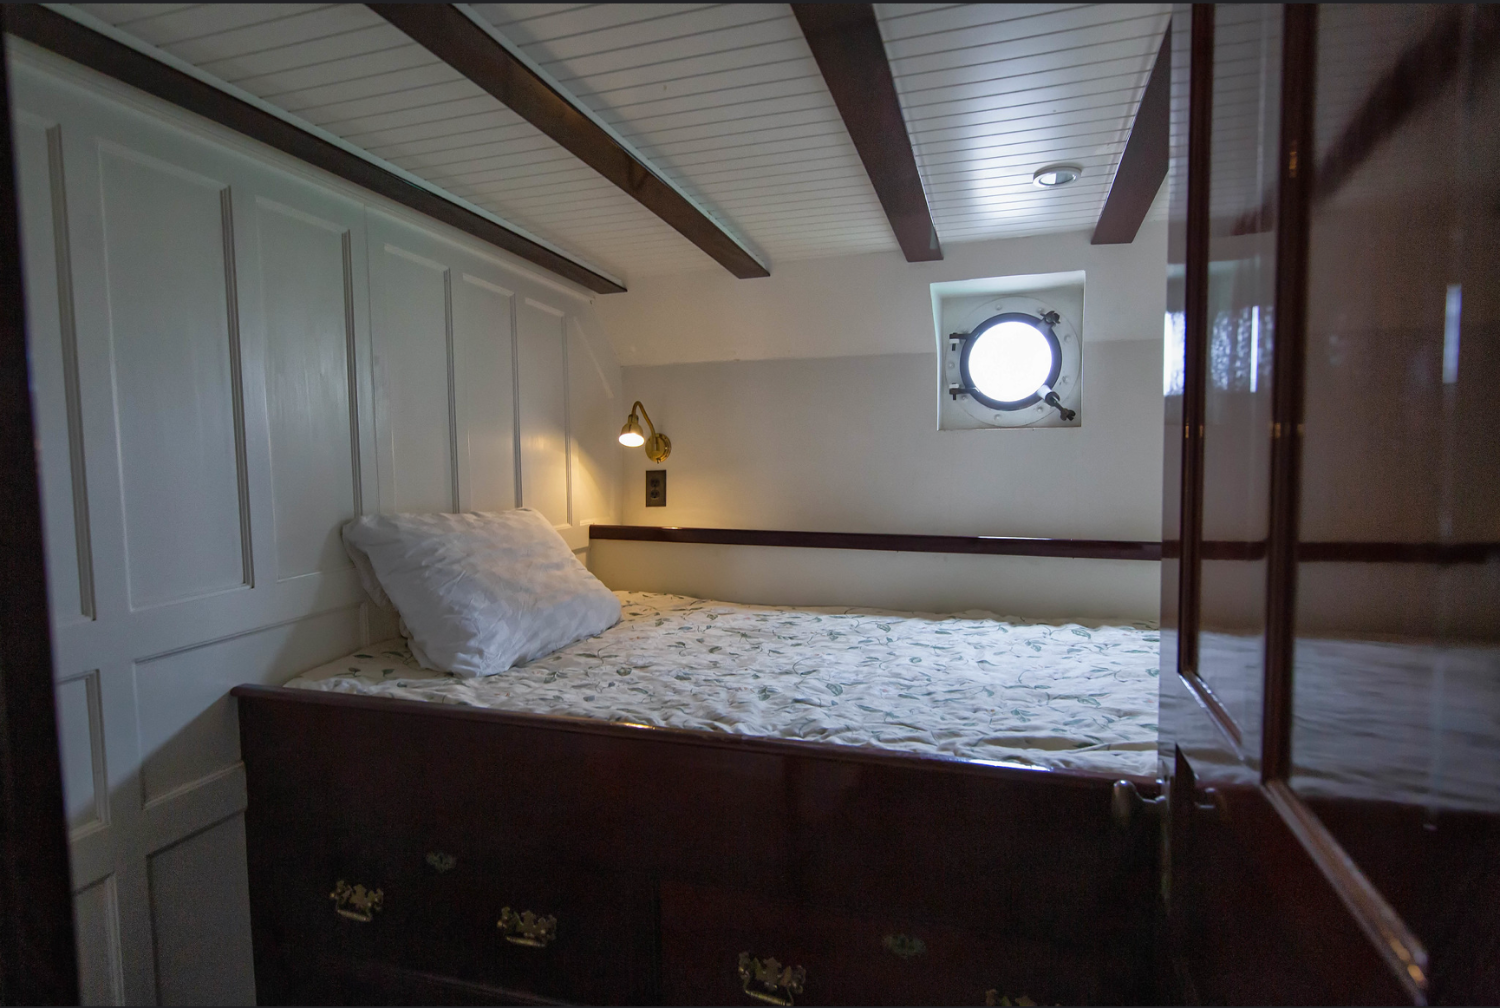
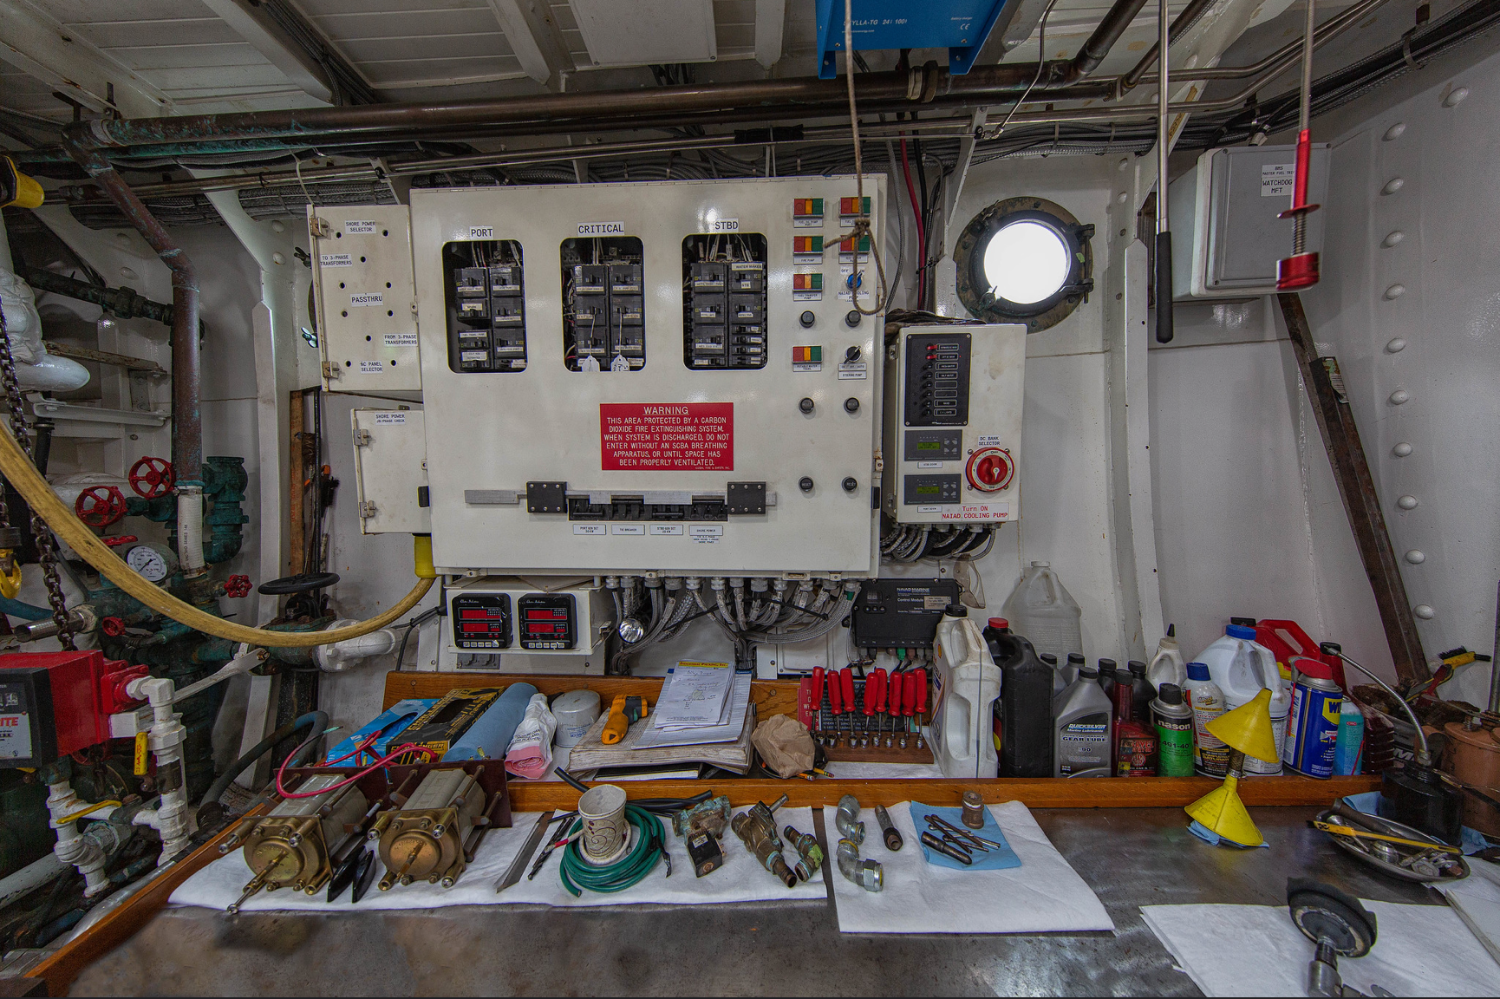
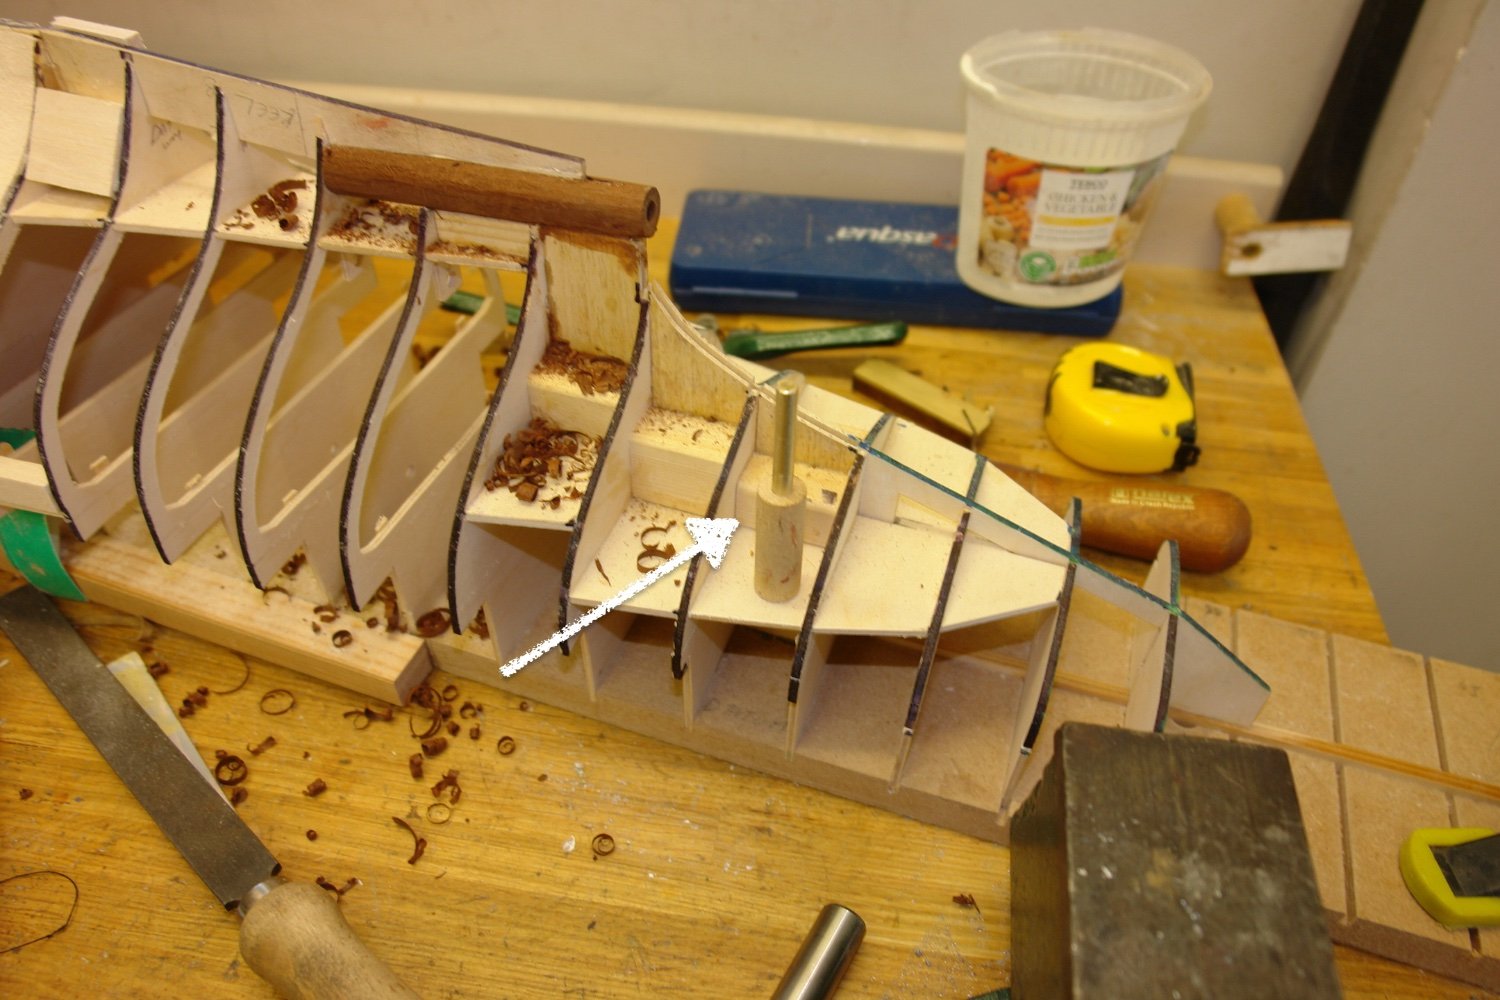
The following three pictures show internal views of Cangarda.
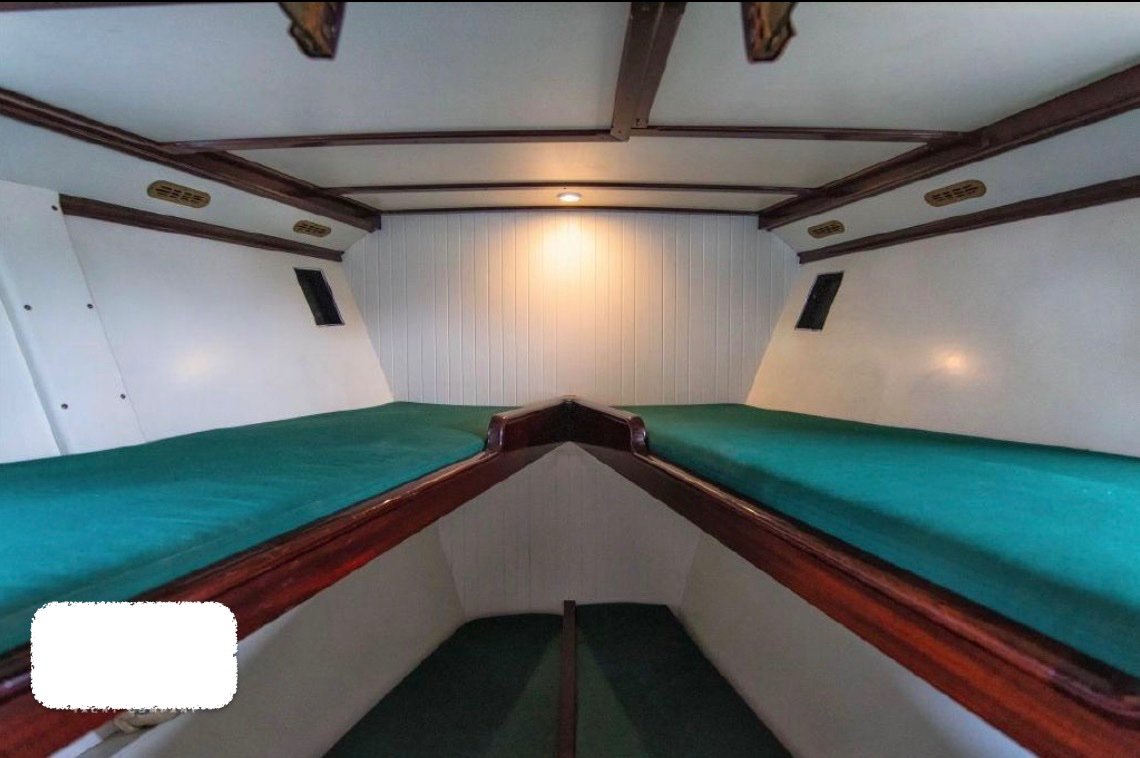

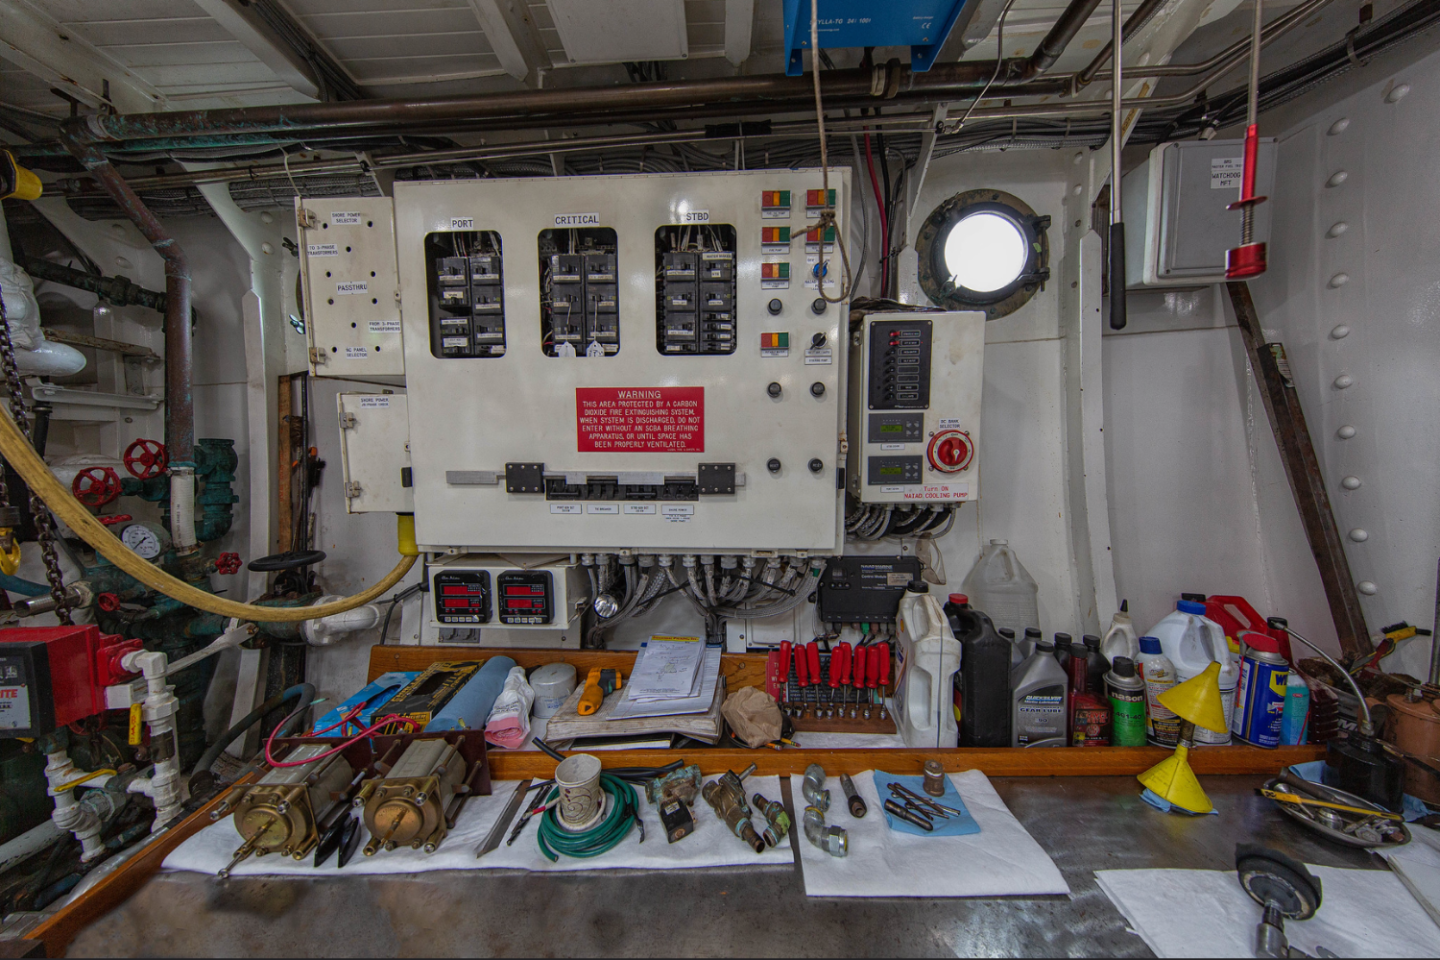
In the accommodation spaces the hull frames are hidden behind the internal cladding. I assume that space between the cladding and hull is full of insulation. The only space where the framing is left exposed is in the engine room.
In the accommodation spaces I decided to use balsa to create the walls.
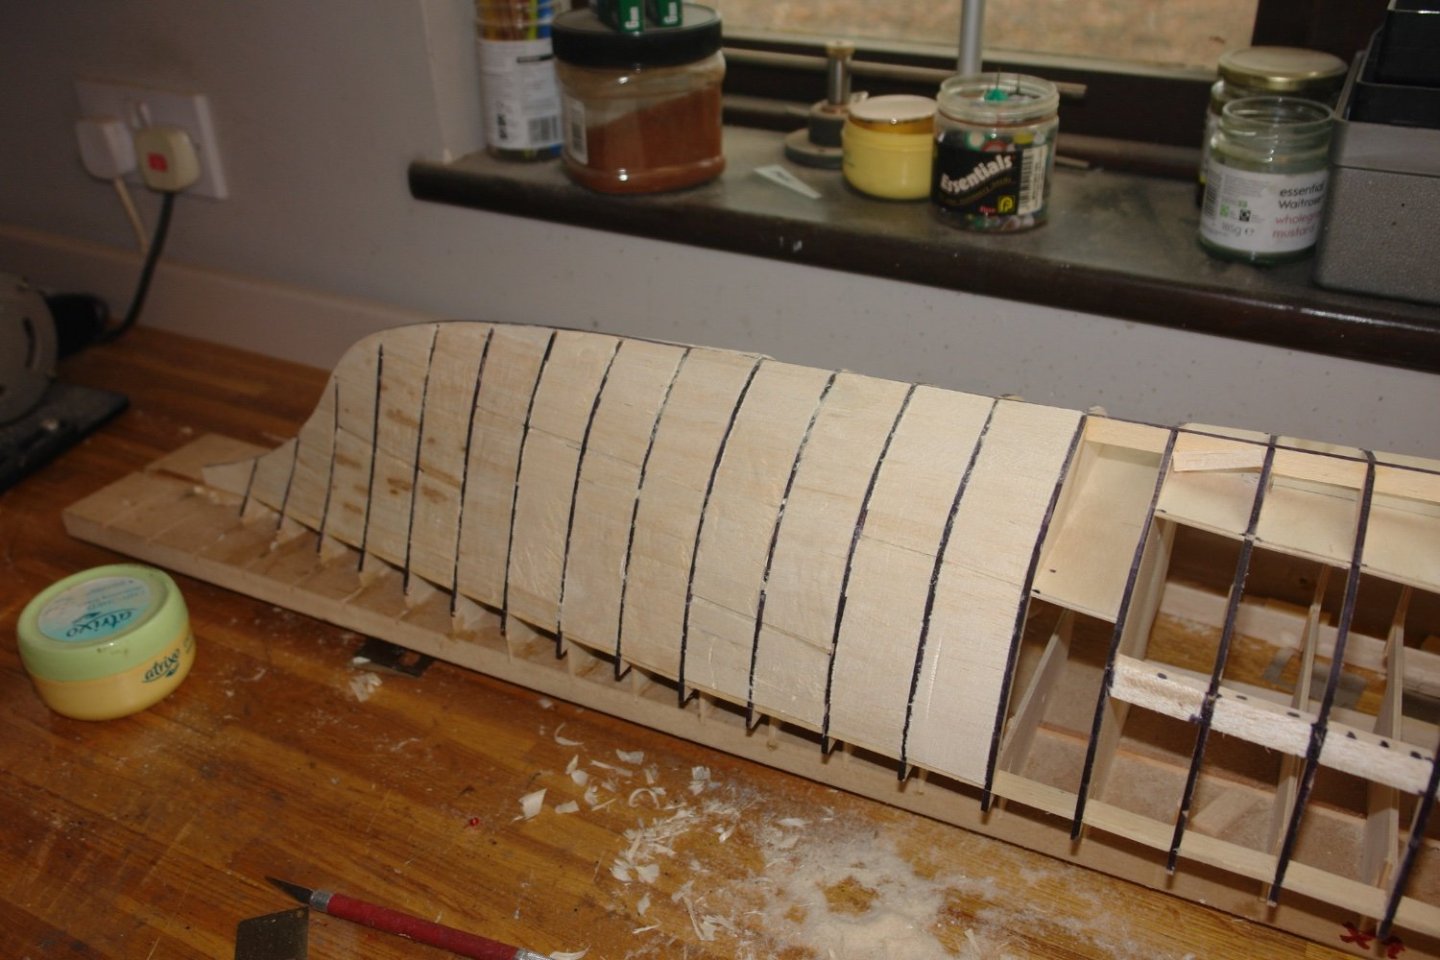
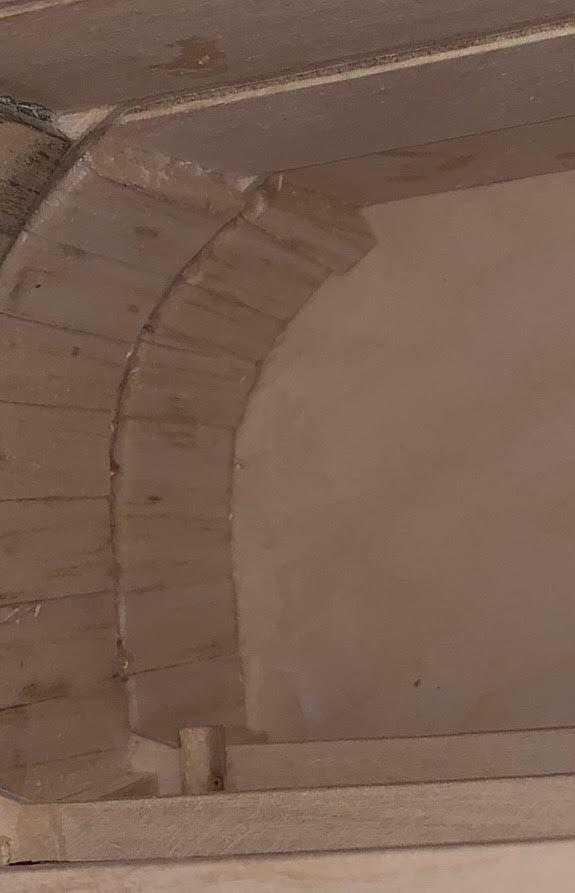
This was installed in the fashion of barrel making - the balsa only being slightly thicker than the depth off the webs on the frames. An internal view might make this confusing remark clearer. The internal surfaces will be sanded flat and clad internally when Cangarda is removed from the building board.
With the circular saw being out of action the cutting of the balsa was done with a razor saw.
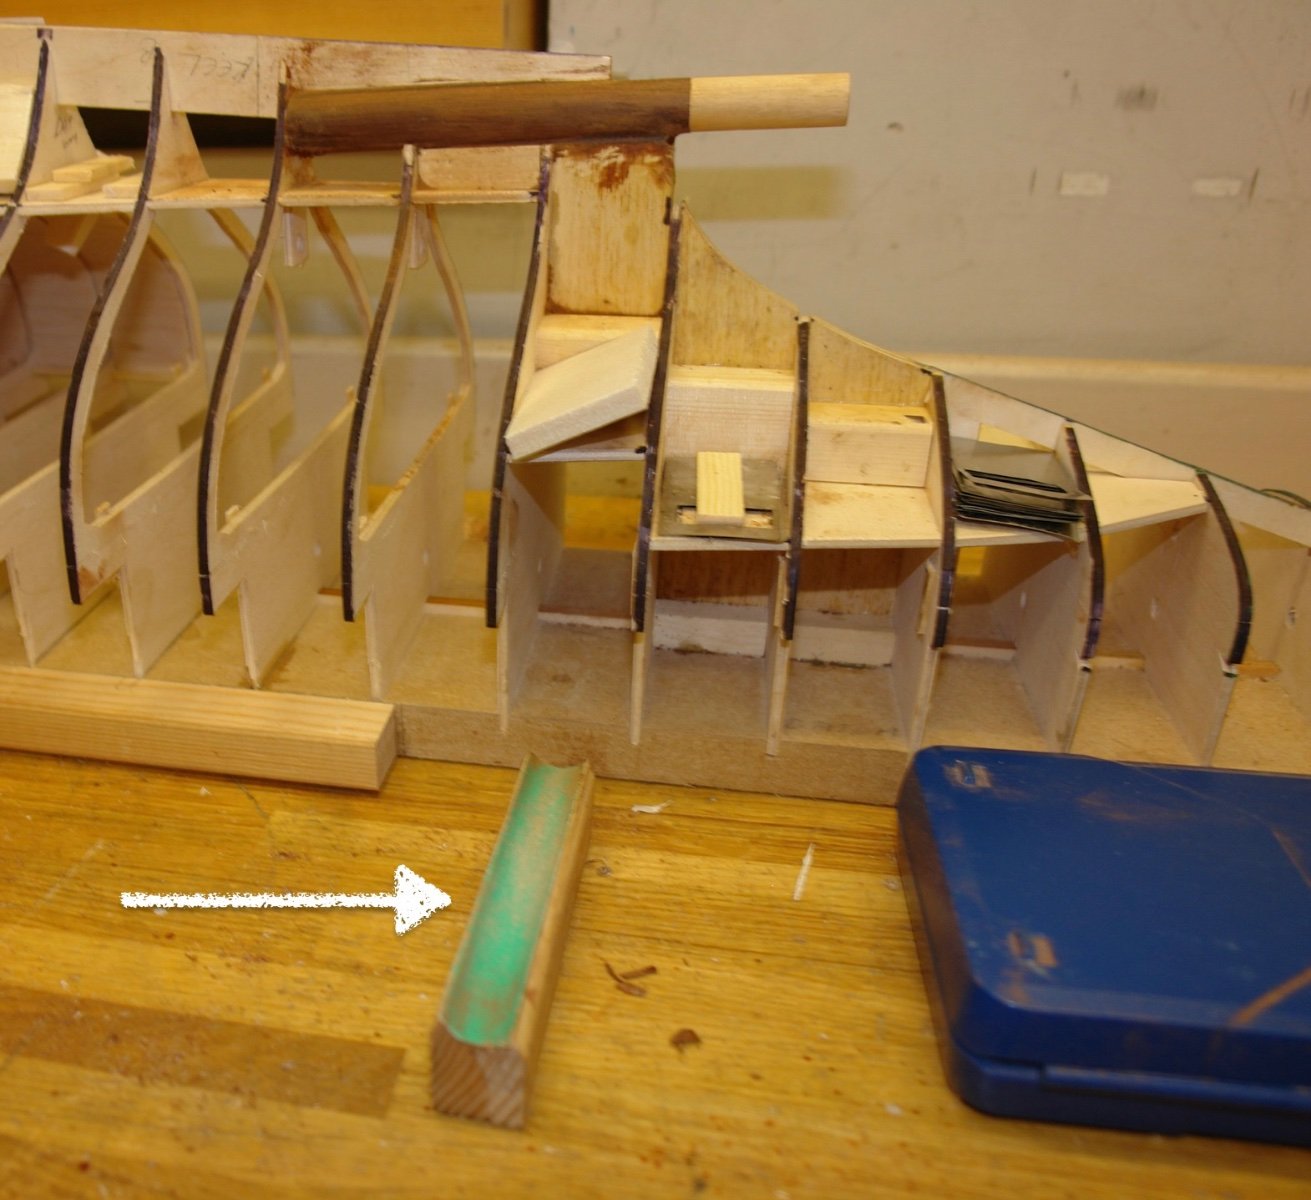
I was distracted from the balsa work when I realised I had mistakenly made the prop shaft casing 18mm diameter when it should have been 14mm. I started carving it back but decided I needed a guide, so I turned up the guide indicated by the white arrow.

Positioning the guide in the casing allowed me to roughly carve the casing to approximately the correct size.
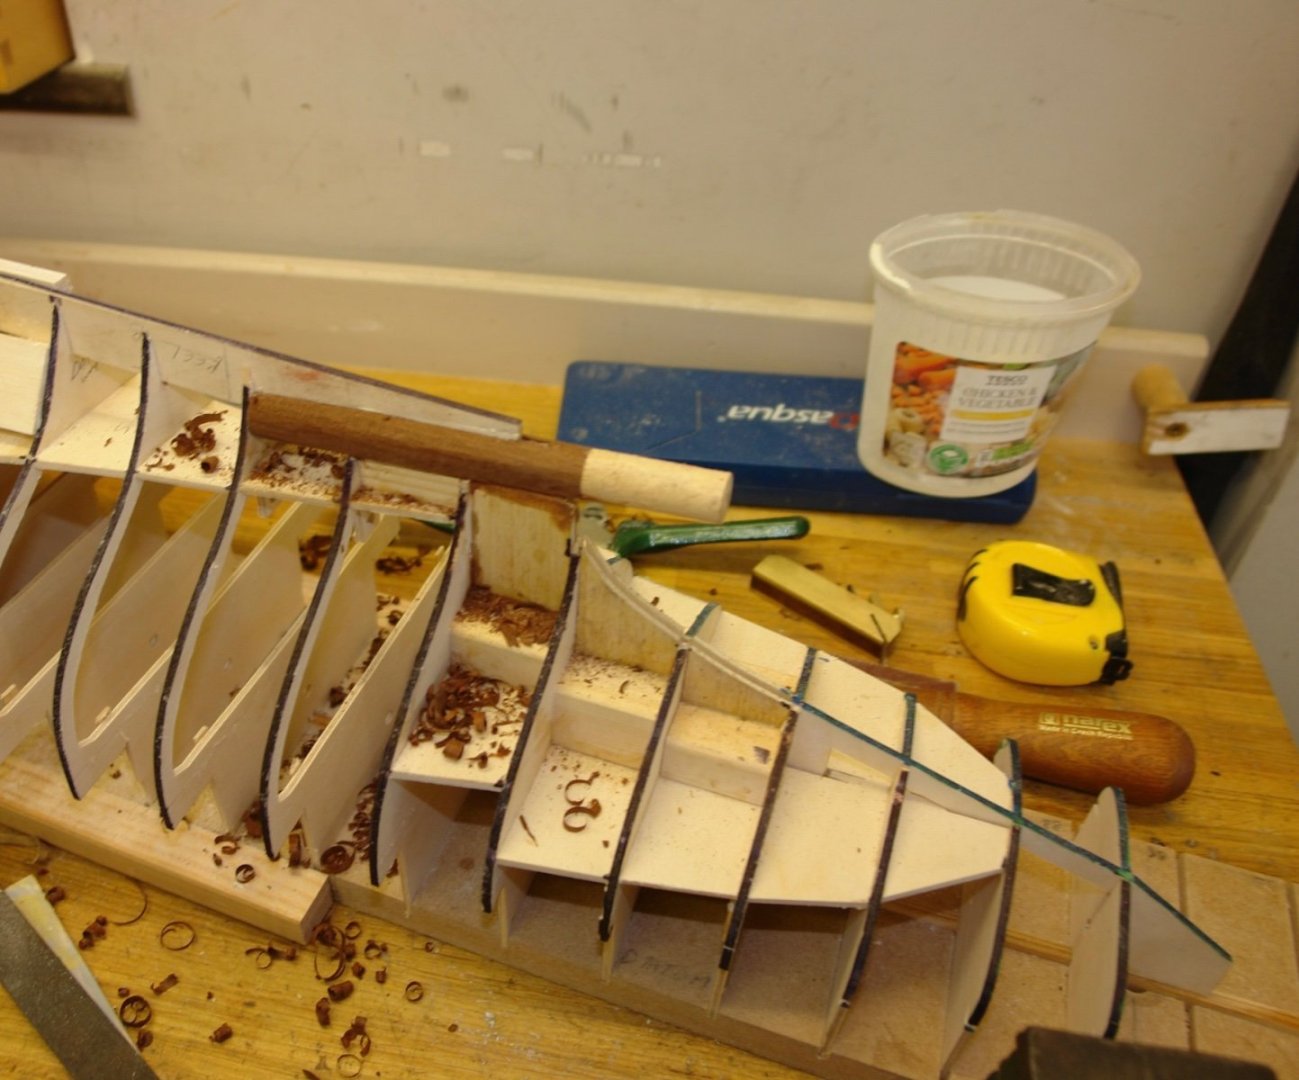
I then shaped a sanding block to the correct external diameter and finished the resizing by sanding.

It will probably take another week or so to finish the balsa work. The walls of the engine room will be devoid of the balsa filling.
-
3 hours ago, wefalck said:
That's the problem with those sets - when we were kids, there were only blocks.
Eberhard - Too true. There are now apparently 3764 different parts . I also remember in my day Lego came in red, white, green and black, today it comes in over 180 colours. I think more is perhaps less in terms of child creativity. It must be a nightmare for the kids to find the parts they need.
- FriedClams, mtaylor, druxey and 1 other
-
4
-
12 hours ago, FlyingFish said:
How the saw repair going Keith?
Andy - I am still awaiting the CAP delivery from Amazon. It is not a problem because I had my second eye done a few days ago so I am banned from all dust making opportunities at the moment. I am busying myself sorting a huge pile of my kids lego back into its original sets for the benefit of my grandchildren. Presumably this is an exercise that will be repeated until the end of time. Chaos, order, chaos, order etc. etc.
-
Another interesting subject. I will happily follow along.
-
Keith
What a difficult time you are both having. However I am thankful Maggie has passed the first critical hurdle. The medics do wonderful things these days so hopefully recovery will go well. My thoughts are with you both.
- Dave_E, Ryland Craze, Keith Black and 2 others
-
4
-
 1
1
-
Just spent a pleasant time catching up Richard. All looking incredibly crisp. Great work.
- Retired guy and FriedClams
-
1
-
1
-
Brian - prompted by the above I should have been more explicit about the soldering. I solder with a variable temperature iron (typically set to its default setting of 320c) - although in the past I have used a fairly basic Weller single temperature soldering iron. I have never set fire to the jig - just some light charing at worst. I have never tried a torch for soldering brass wire of circa .050" or less diameter because I have found it unnecessary. I tend to solder with lead free solder wire of about 1/32" diameter. It is pre fluxed but just to be sure I always add a dab of plumbers soldering flux. This tends to work well for making guard rails.
- FriedClams, mtaylor, Canute and 3 others
-
6
-
Interesting jig Andy. I haven't seen its like before.
- Keith Black, mtaylor and FlyingFish
-
3
-
1 hour ago, mbp521 said:
the only table saw that I have is a 10” industrial that wouldn’t allow me to cut a narrow enough kerf
Yes I thought that might be the case. I'll be interested to see how the laser test turns out. I have another option for making the jig if all else fails.
-
-
1 hour ago, mbp521 said:
As for your offer to show me how to go with the brass method,
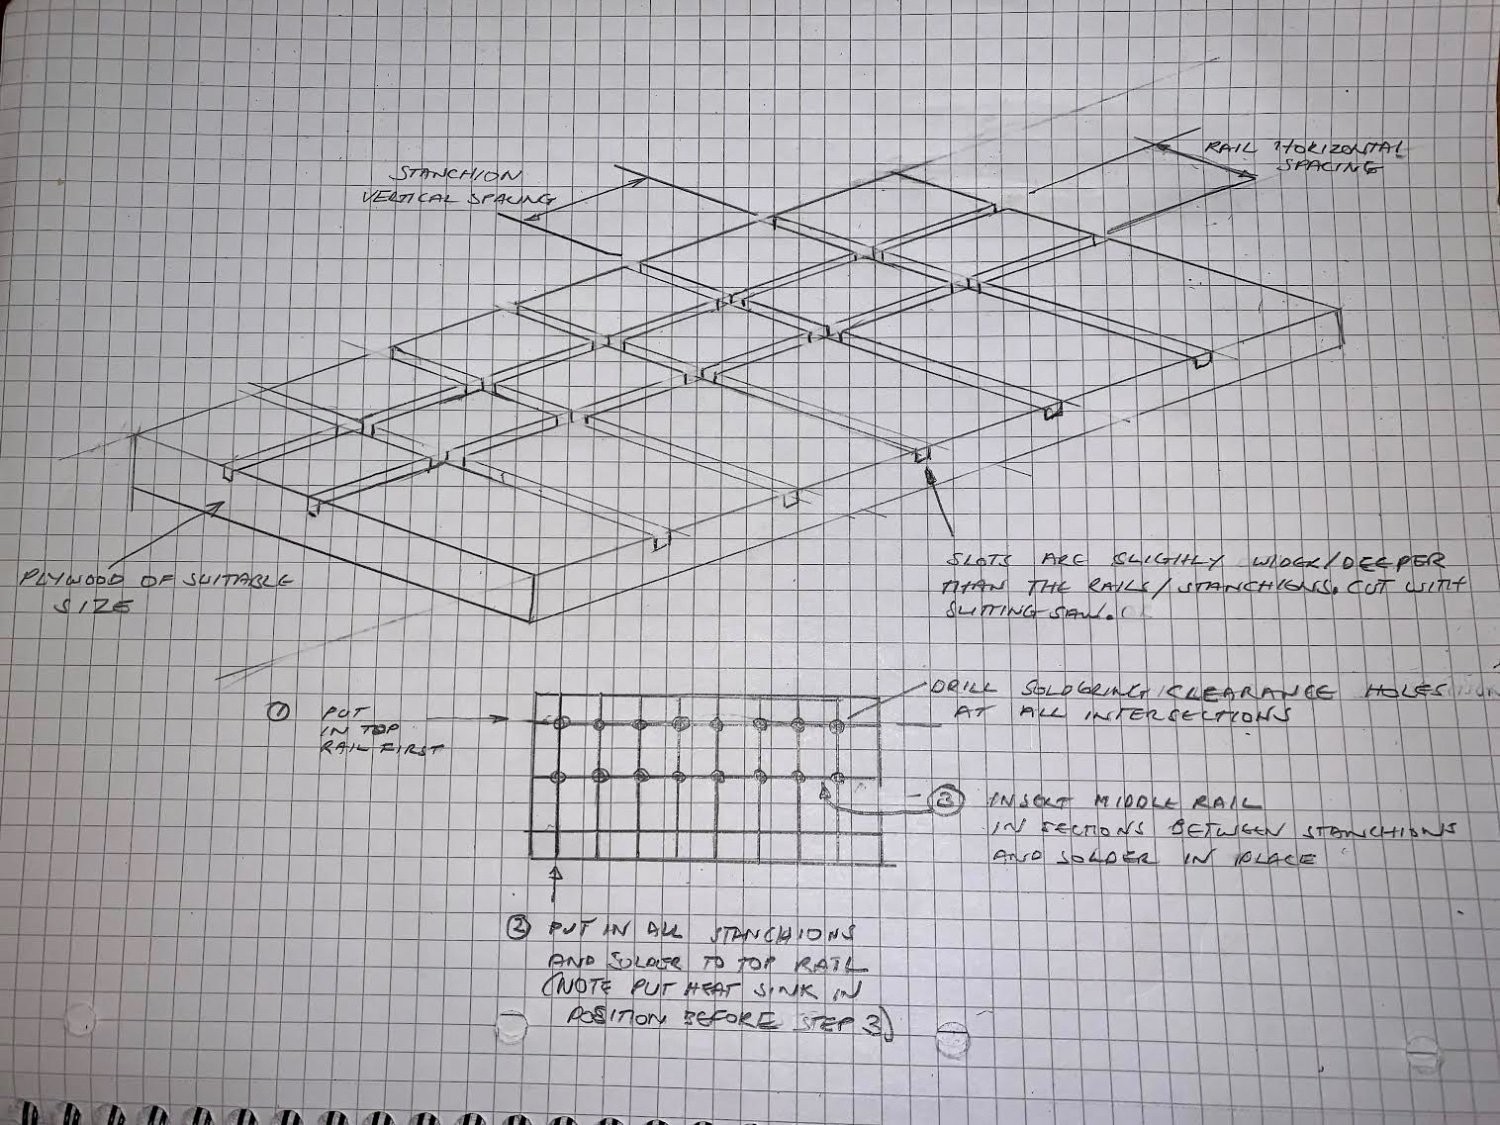
Brian - I would tend to make a simple plywood jig for this type of operation as follows:-
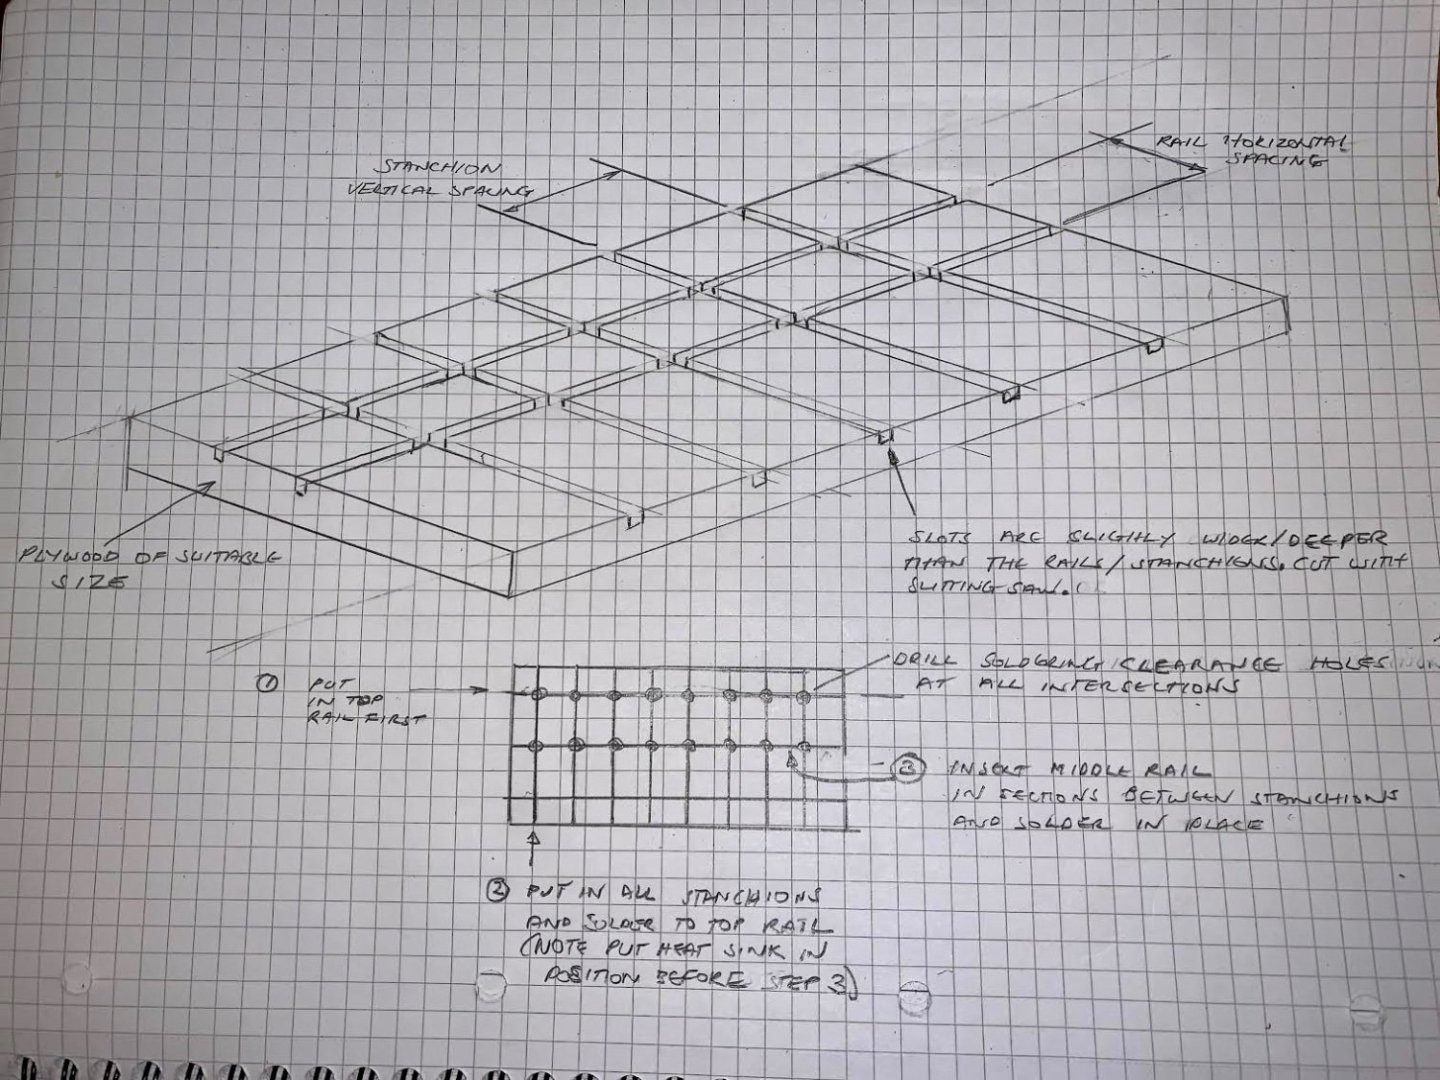
The slots in the plywood are most easily made with a slitting saw on a small table saw - e.g. Byrnes. If the top / middle rails and stanchions are of different diameters use different slot widths.
Drilling holes at all the intersections provides clearance for access by the soldering iron tip.
The 1, 2, 3 sequence probably makes most sense as continuous runs of the top rail and stanchions will give the best visual effect.
The grid of slots accurately controls the position (uniformity) of the finished guard rail.
I hope this makes sense? Let me know if it doesn't. Feel free to ignore it if you find a better solution.
-
-
That is hell of an extensive update Brian - and all those laser cut pieces are making me jealous. As for the rails, is styrene going to be durable enough? Presumably if she is going into a case it will be OK. The dusting could be problematic if it is not being cased. I have a way of getting the brass option very regular if you are not wedded to the styrene option. Let me know if you are interested.
-
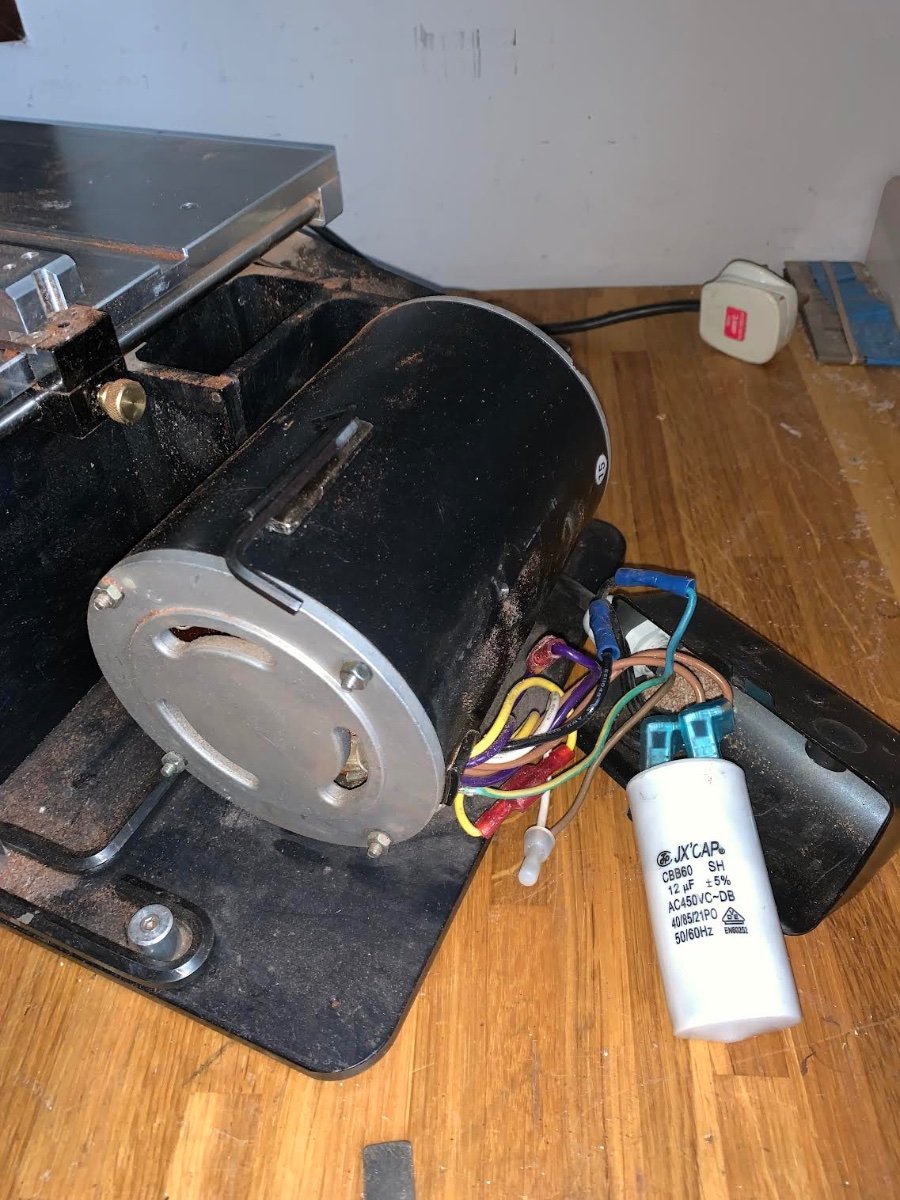
1 hour ago, FriedClams said:
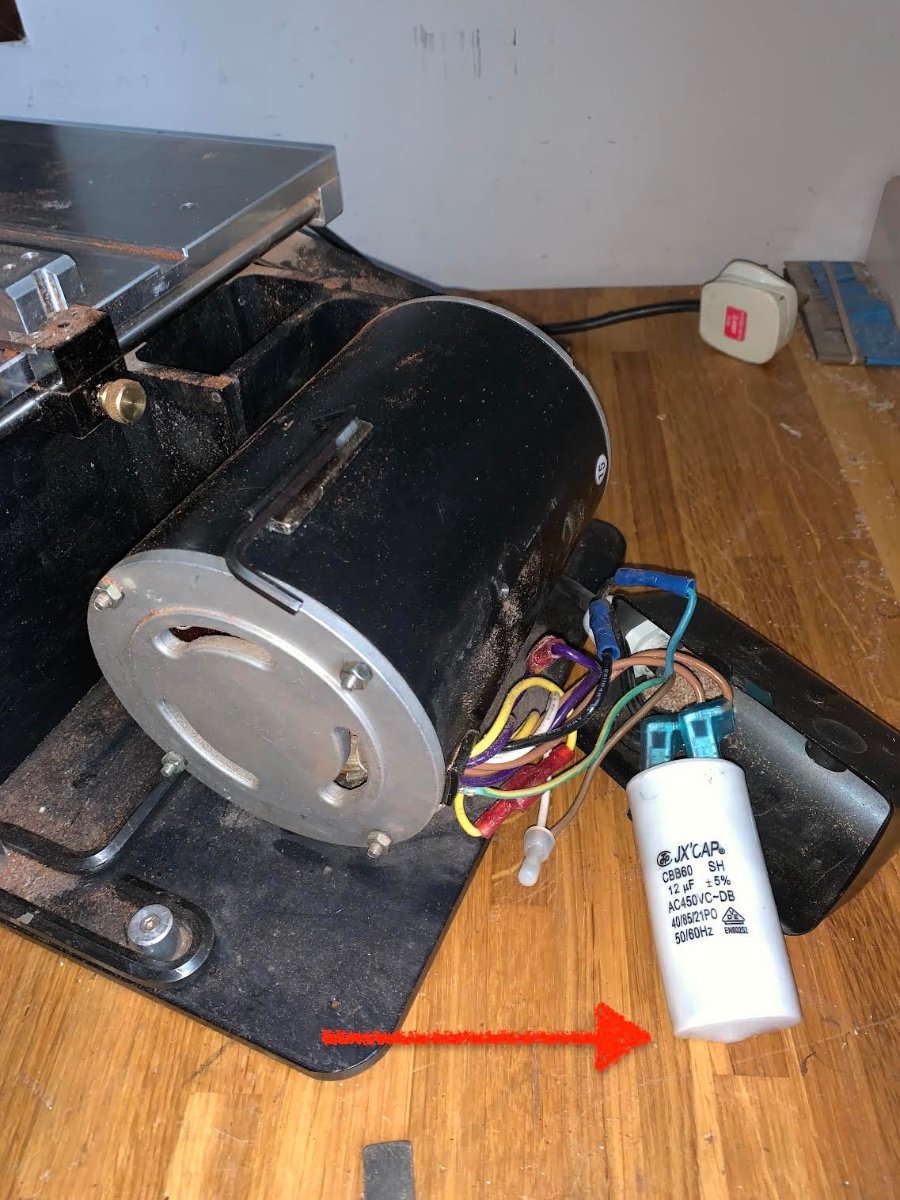
But if the capacitor doesn't fix it, check behind the rear bearing end plate for the presence of a switch.
Thank you Gary. I think you are correct re the motor type because there are no obvious bush access points.
- Keith Black, mtaylor and FriedClams
-
3
-
-
Thank you Keith and Gary.
I was going to have a productive day in the workshop but it was not to be. My somewhat recently neglected Byrnes saw decided I didn't love it any more so it threw a sulk and after a few hesitant attempts at starting it threw in the towel. If I manually kick over the blade it angrily bursts into life and bites my prodding stick. Ooch!

I think I need to buy a new CAP (maybe a bowler).
At least I have learned summat (Yorkshire dialect). the 40/85/21 means that its operational range is -40c to 85c and it will withstand 21 days at 95% relative humidity at - 40c.
P.S. Note to self - remember not to lick the terminals - it may be less dead than it is pretending to be.
- Keith Black, wefalck, Retired guy and 3 others
-
2
-
 4
4
-
-
Gary
Like the others I welcome the shipyards reopening. Your skills don't seem to have suffered from your layoff. The hull planking looks just the job.
- Retired guy, Canute, Keith Black and 3 others
-
5
-
1
-
15 hours ago, FlyingFish said:
Presumably you use a dovetail bit and clamp the timber in the tool holder.
In principle yes Andy.
- Keith Black and mtaylor
-
2
-
Wonderful overhead shots Eberhard. She looks magnificent - that is apart from the crews dereliction of duties on the rope work. Have they been on the schnapps?
-
She looks wonderful in her case Nils. Must watch the film again.
- Mirabell61, Canute, mtaylor and 2 others
-
5
-
1 hour ago, gak1965 said:
Started fairing the bulkheads. Need to remind myself that putty covers a multitude of sins.
George - it will turn out fine in the end, just keep at it and you will be surprised how many people are impressed by the result. Putty is fine once painted - only you and your readers will know.
- gak1965, mtaylor and Keith Black
-
3


HrMs O-13 by FreekS - 1:50 - RADIO - 1931-1940 - Last Dutch Sub “on eternal patrol”
in - Build logs for subjects built 1901 - Present Day
Posted
Great progress although I winced when you got to the hull separation stage.