KeithAug
-
Posts
3,986 -
Joined
-
Last visited
Content Type
Profiles
Forums
Gallery
Events
Everything posted by KeithAug
-
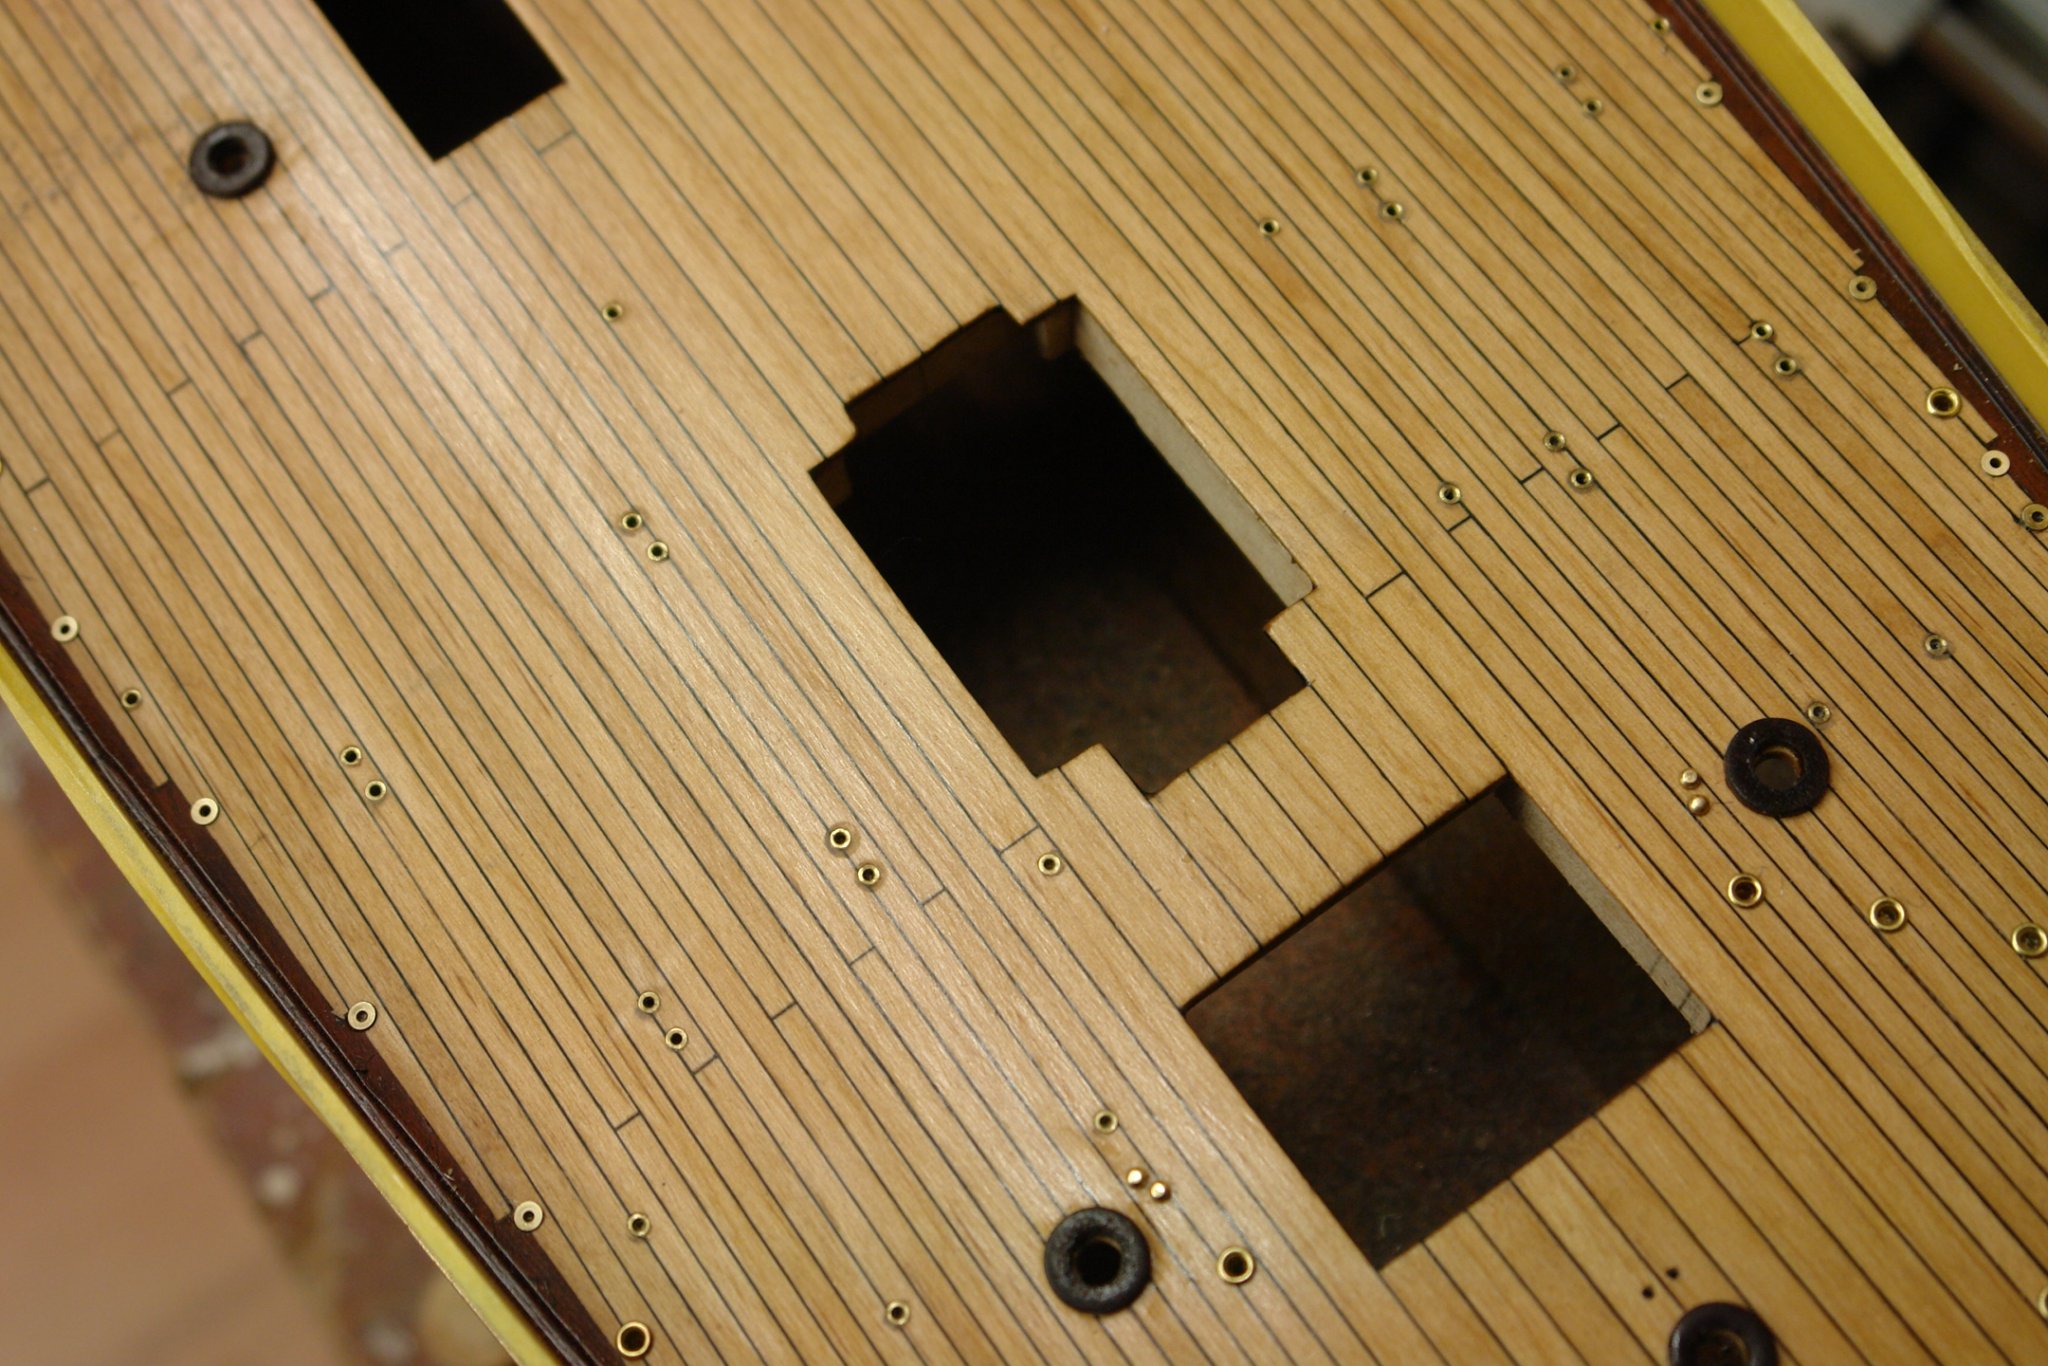
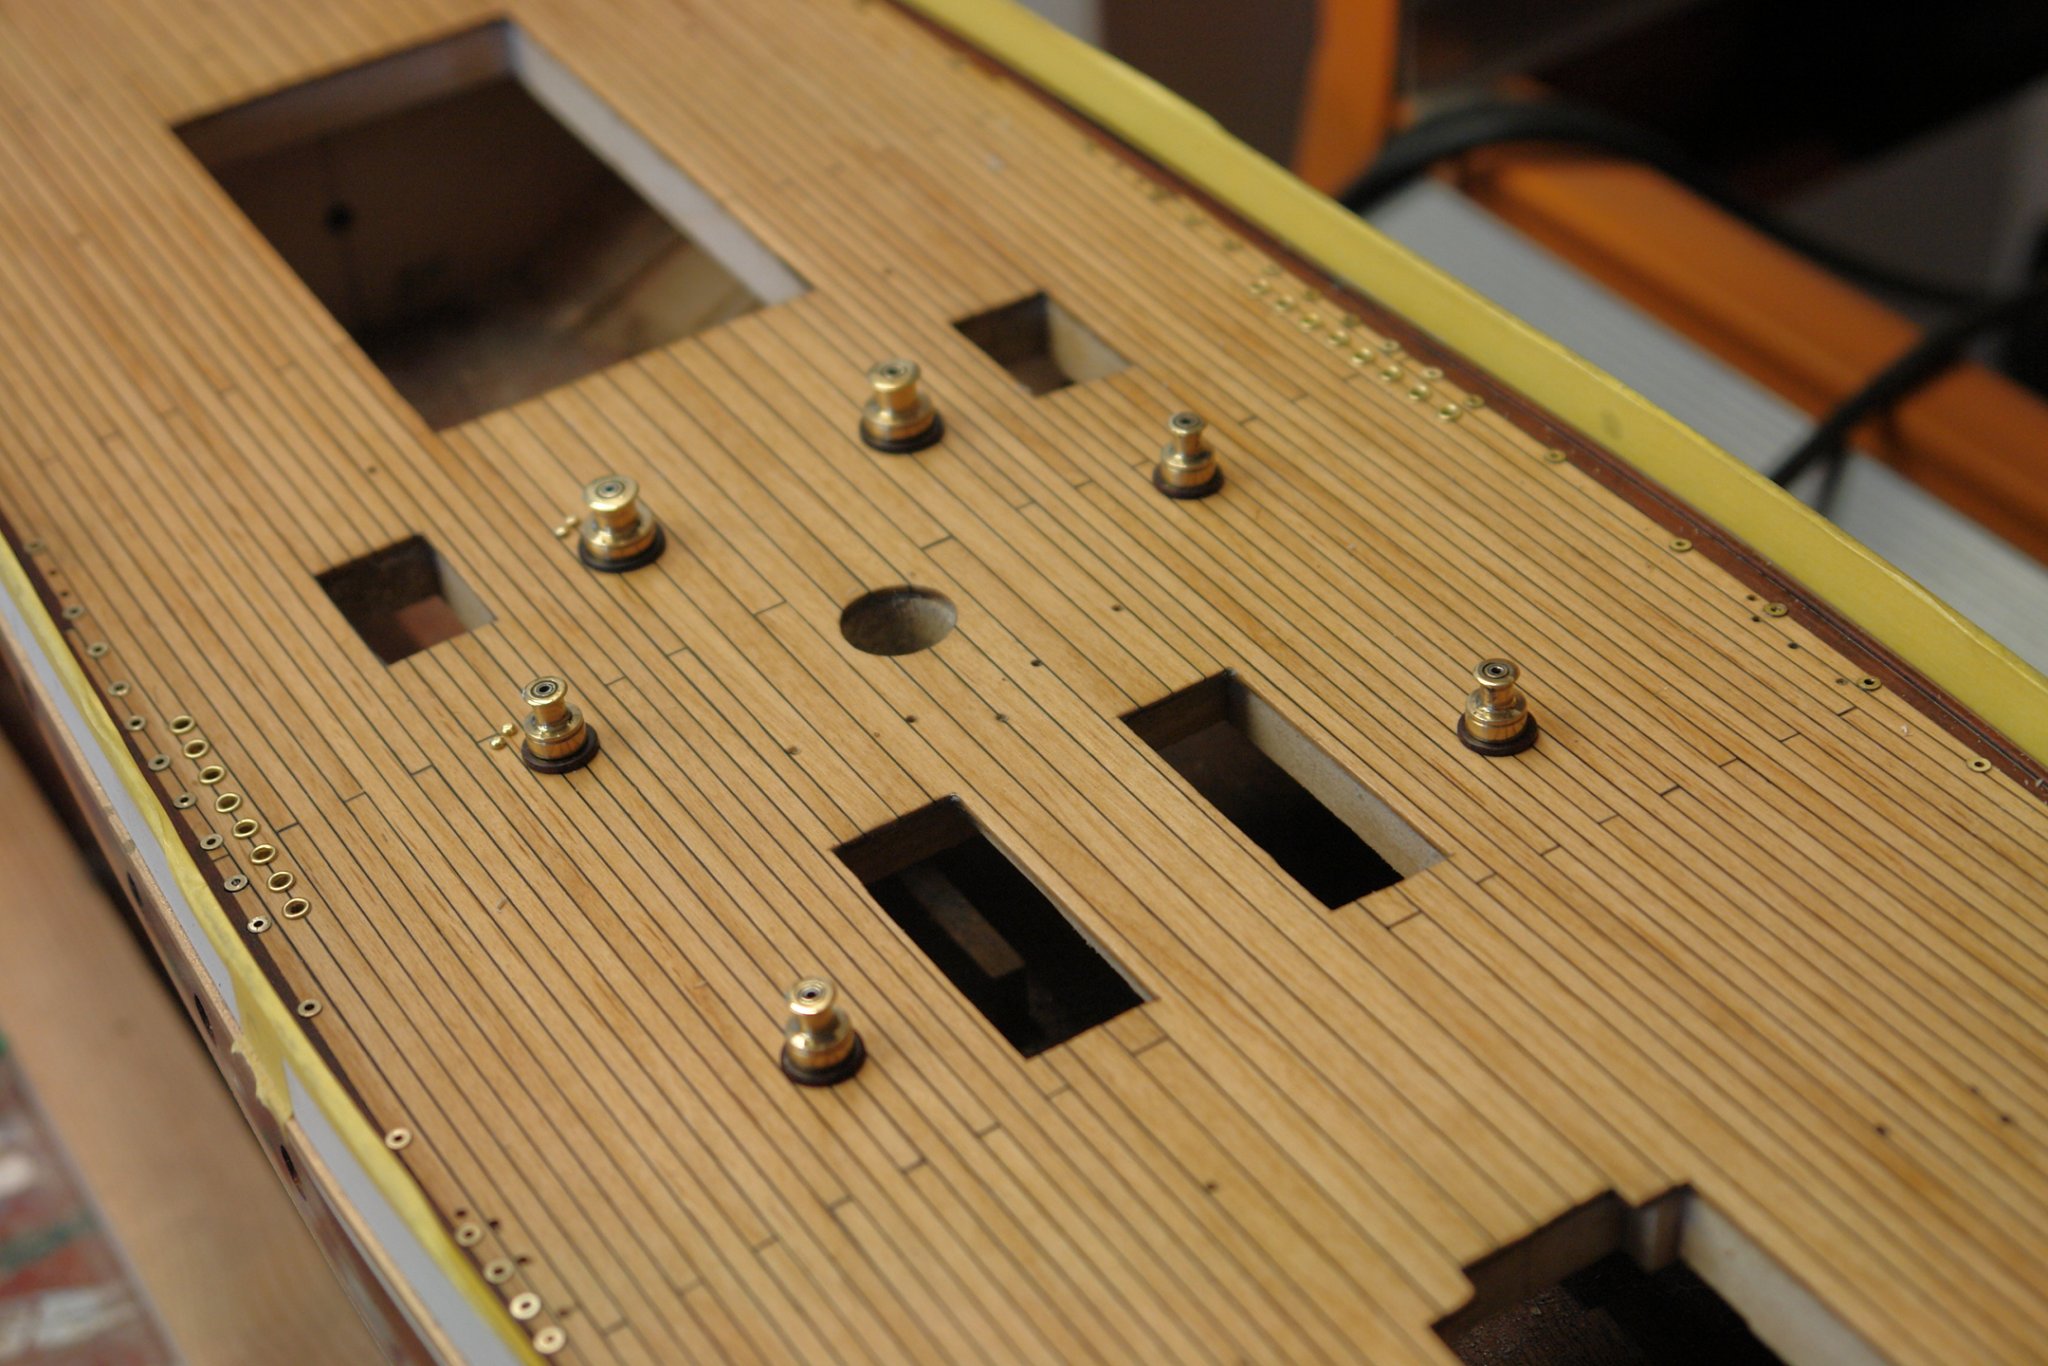
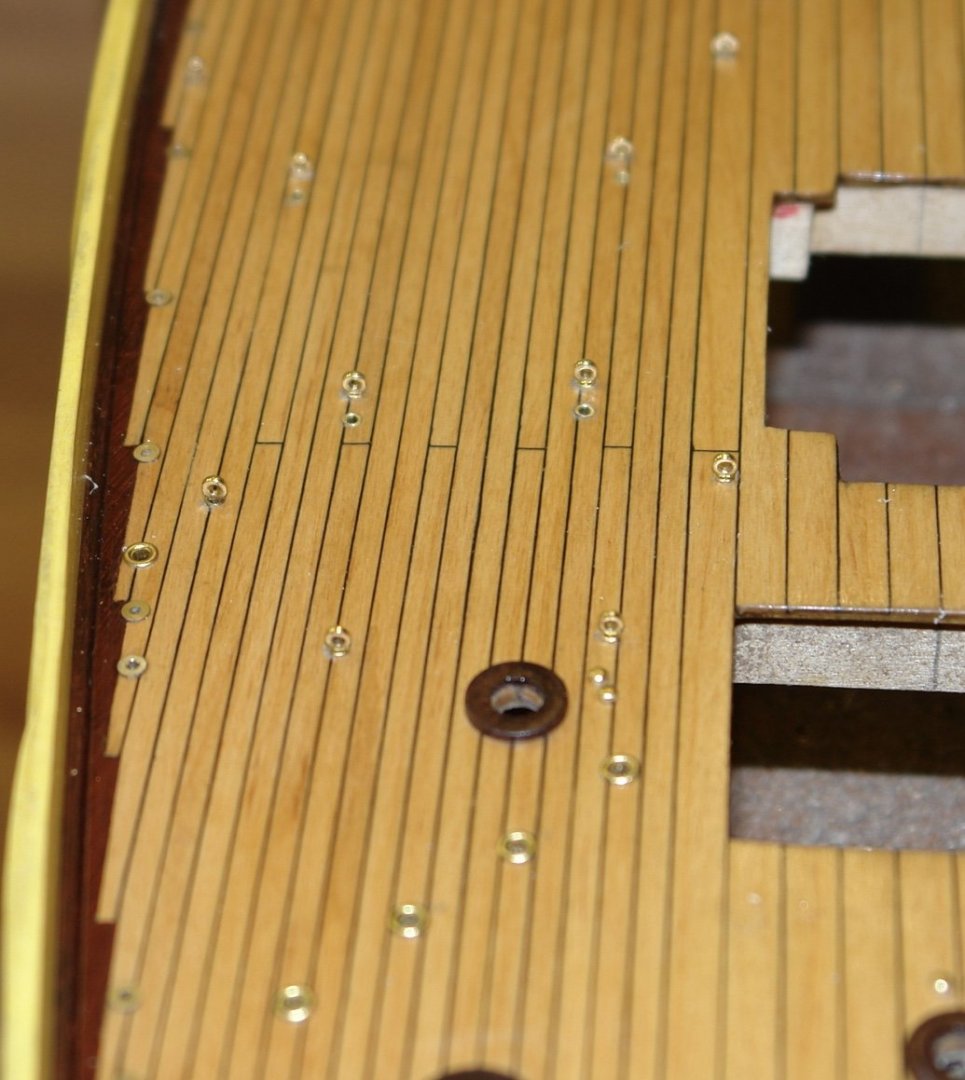
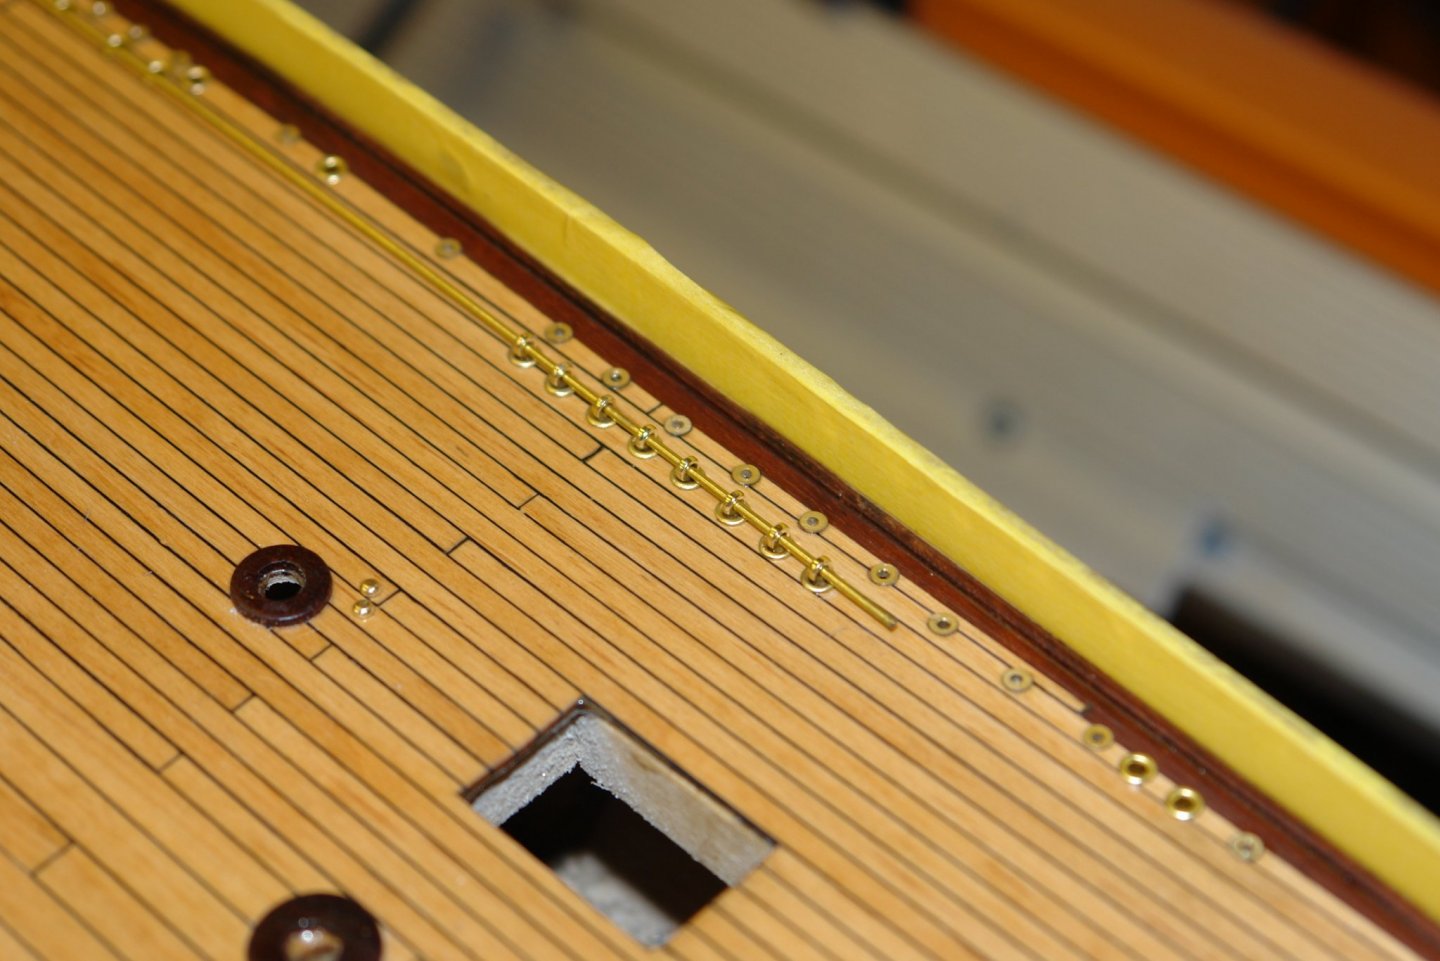
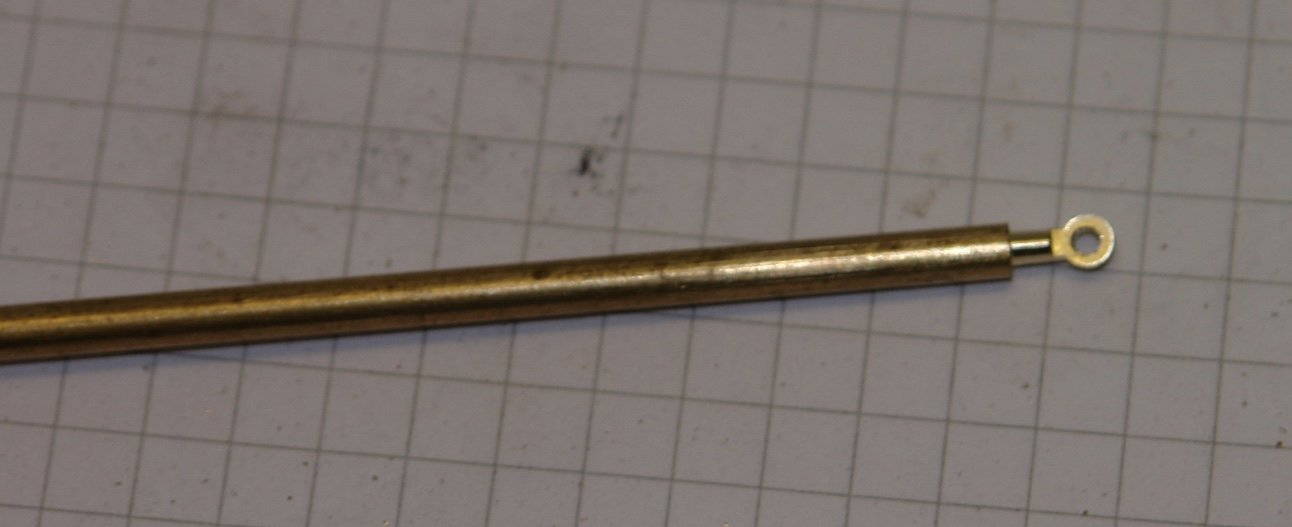
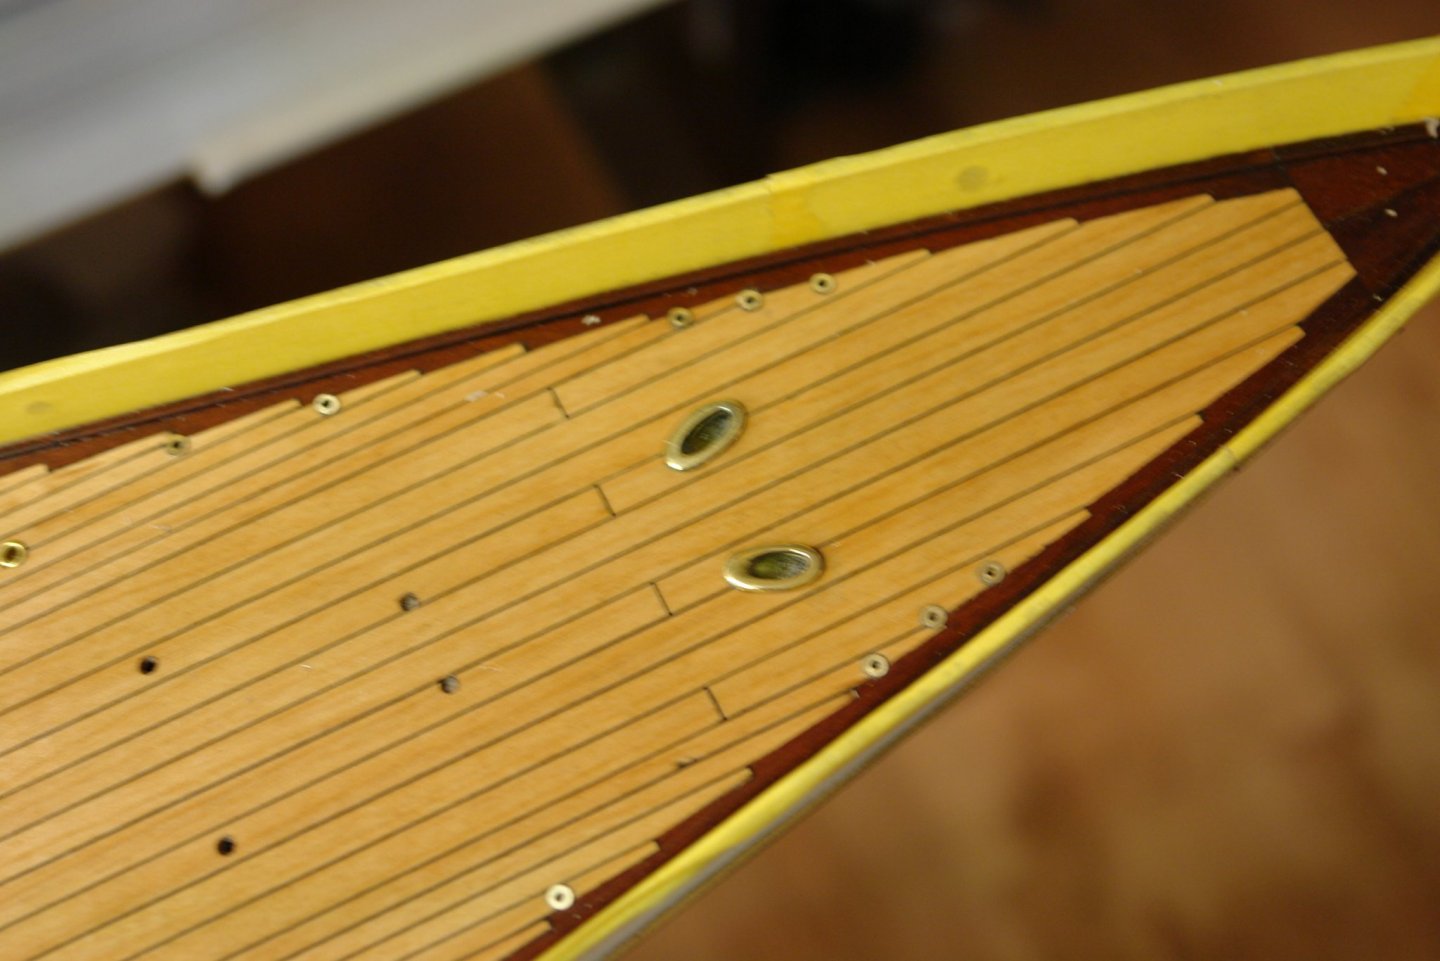
 Druxey, Gary, Pat, John, Mark, GL, Paul. Thank you all for your comments, and many thanks to all those that have liked my build. I have had an unproductive few days - so only a little progress to report. The tender sits on the deck on protective metal strips. At the end of each strip is an eyebolt and a number of additional eyebolts form the anchor points for the boat lashings. The deck bosses for the boat lashing points are smaller than those for the rigging eyebolts. Narrow necked eyebolts are required for these lashing points. The metal strips were cut from .015" brass sheet. They needed to be .080" wide. They could have easily been cut with tin snips (or even a craft knife) but I decided cutting them on the mill would produce a better result. I cut strips of the required width using a slitting saw with the brass sheet mounted vertically in the vice and supported by a piece of scrap wood. The strips were then cut to length, the ends profiled and holes drilled to match the deck holes. Finally the strips were polished and mounted on the deck.


-
Gary - have a look at https://www.jclassyachts.com/yachts. The official site of the J Class Association. You can see Endeavour is JK4. Although I accept that this isn't proof that it had the same number in 1934.
-
Julie - this one is Germania. You can find it in the scratch build section. I have described the deck build in some detail.
-
Julie - the card version for comparison - sanded but not sealed And sealed with 7 coats of matt poly.

-
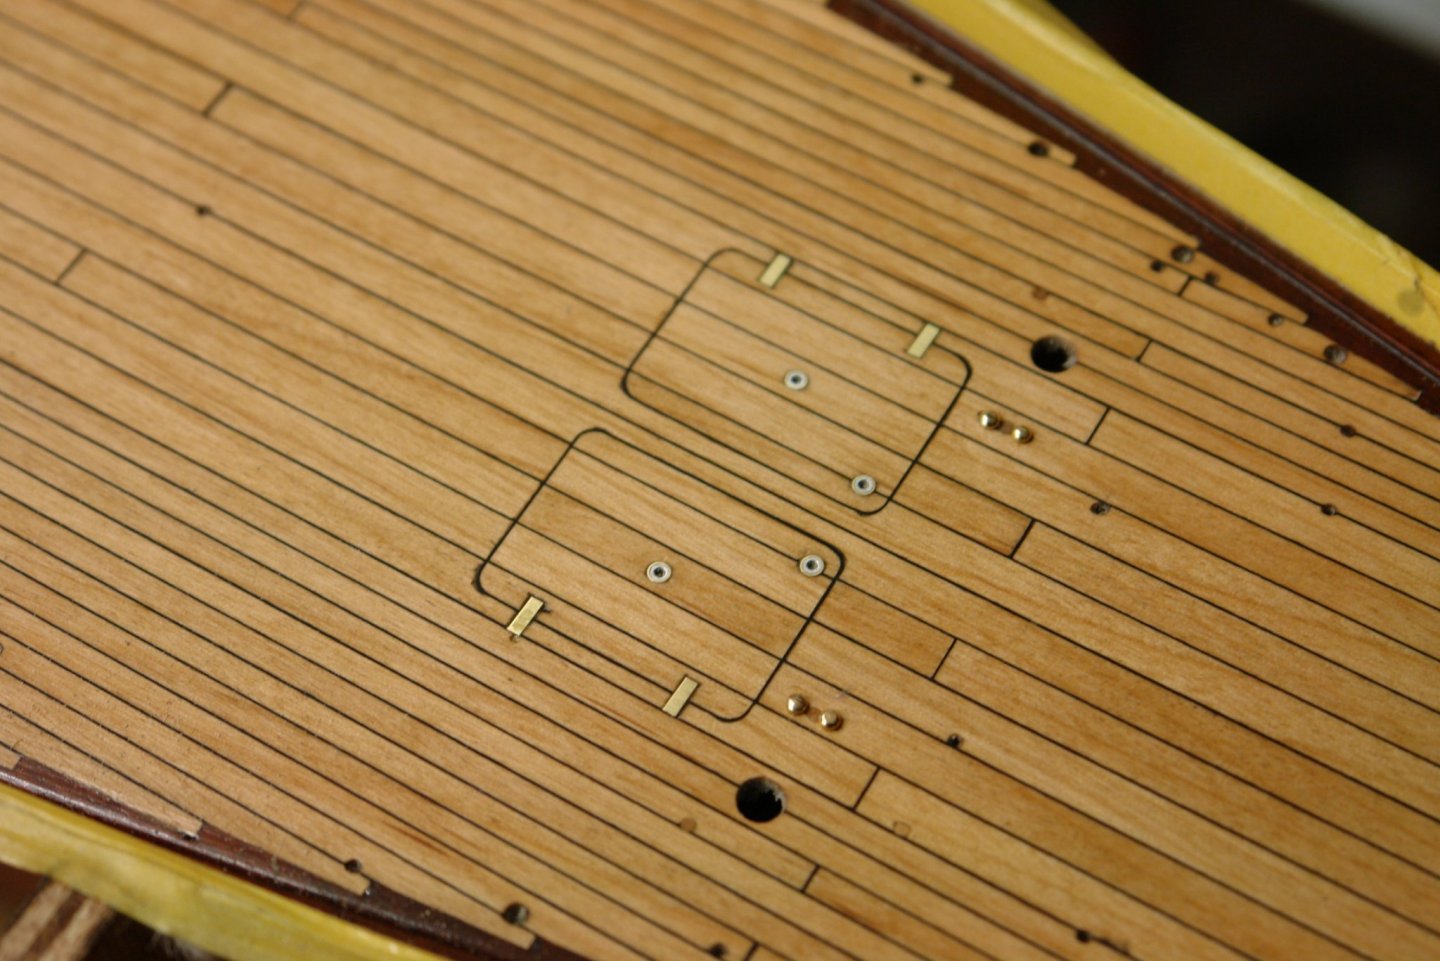
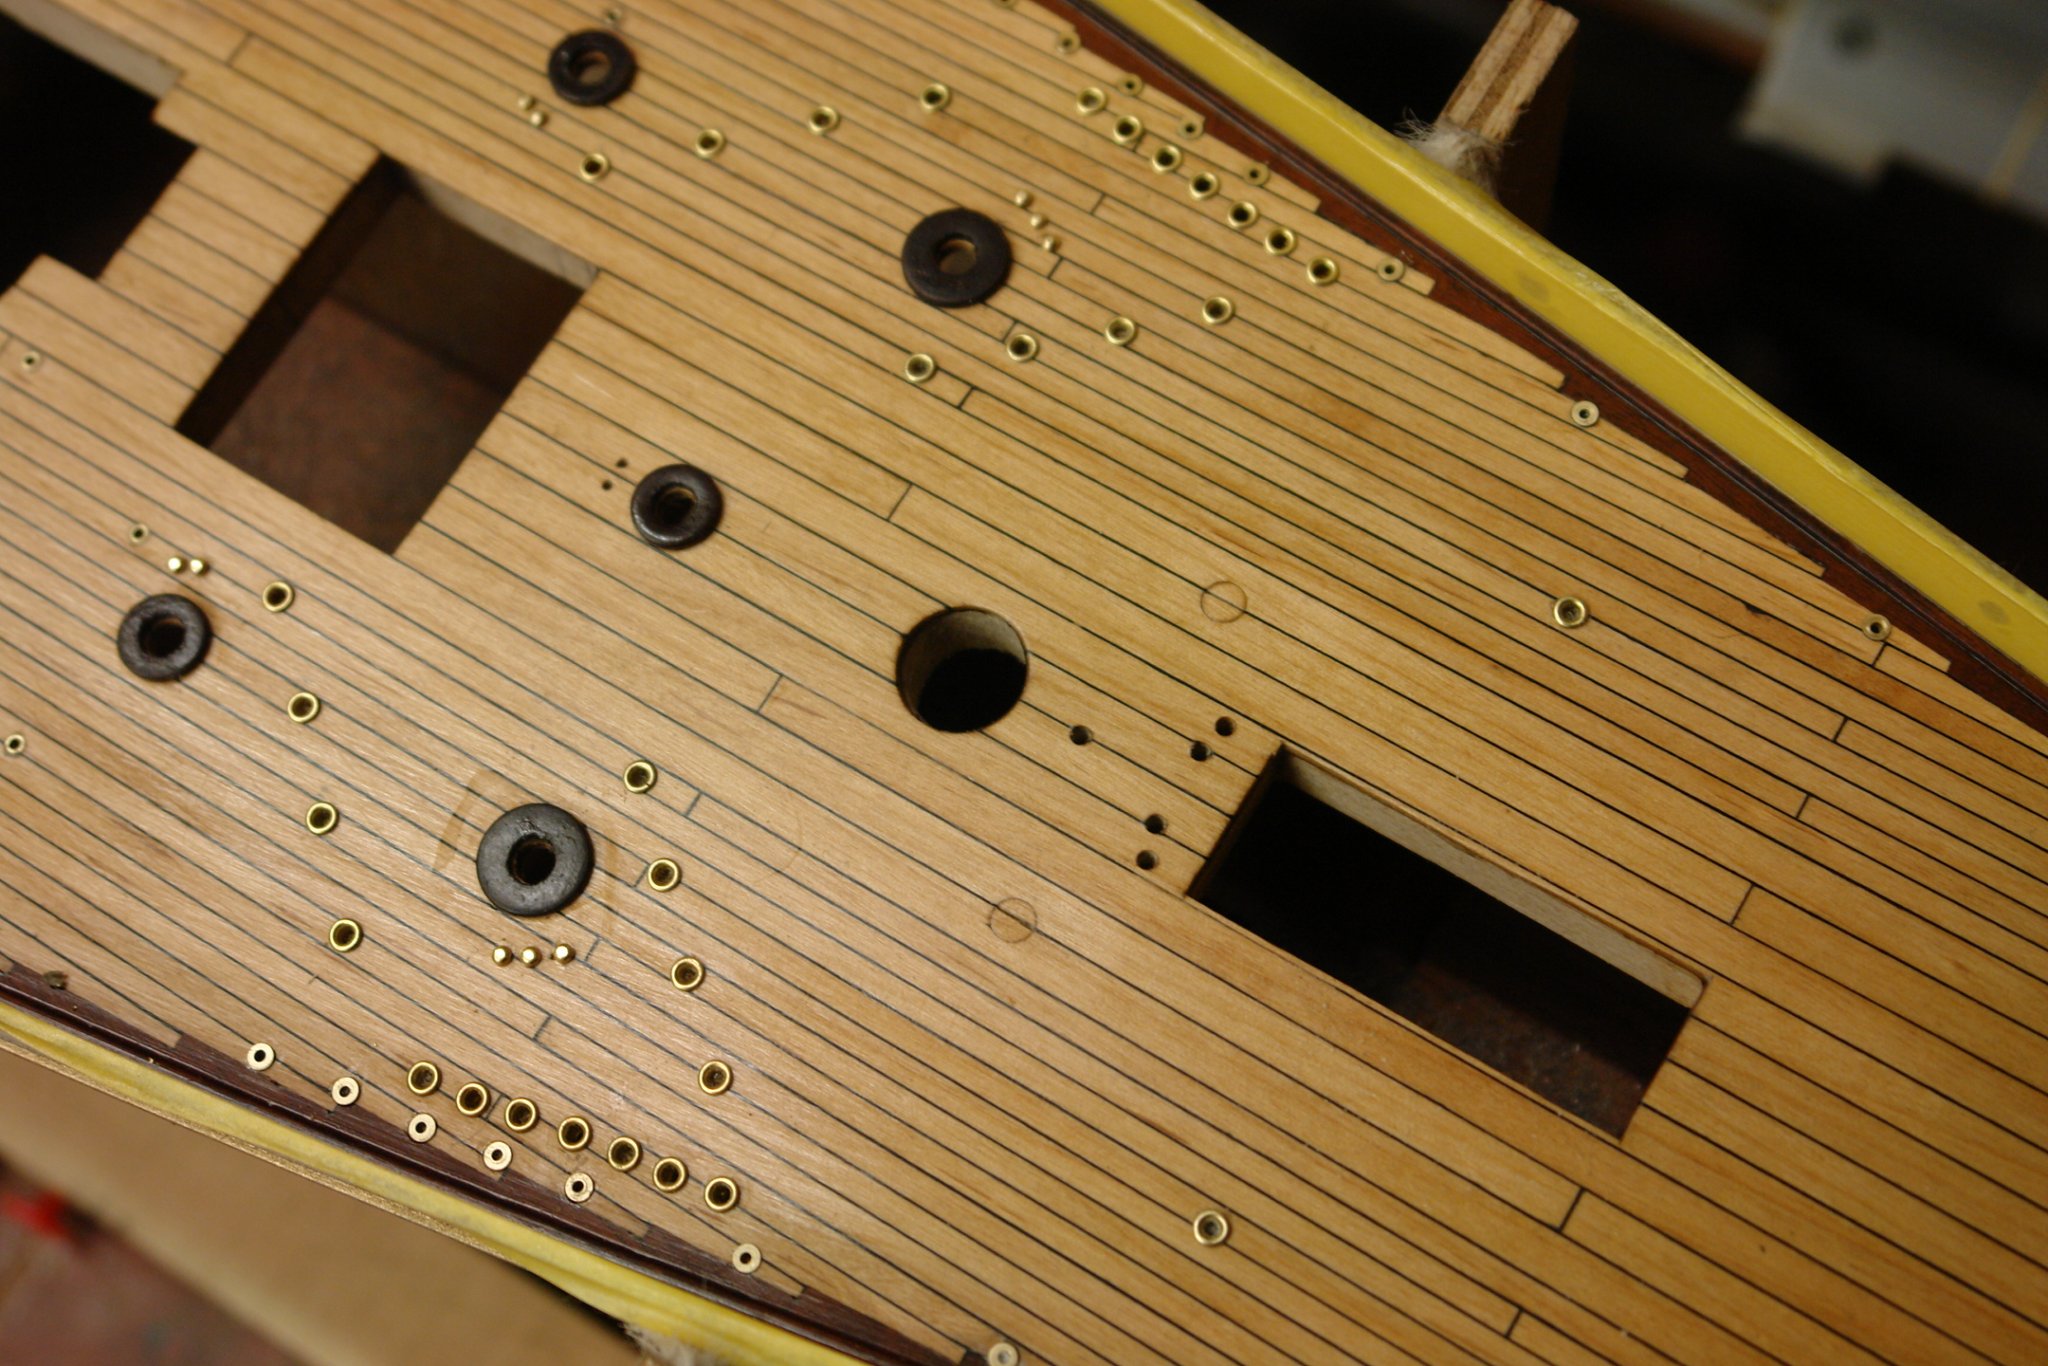
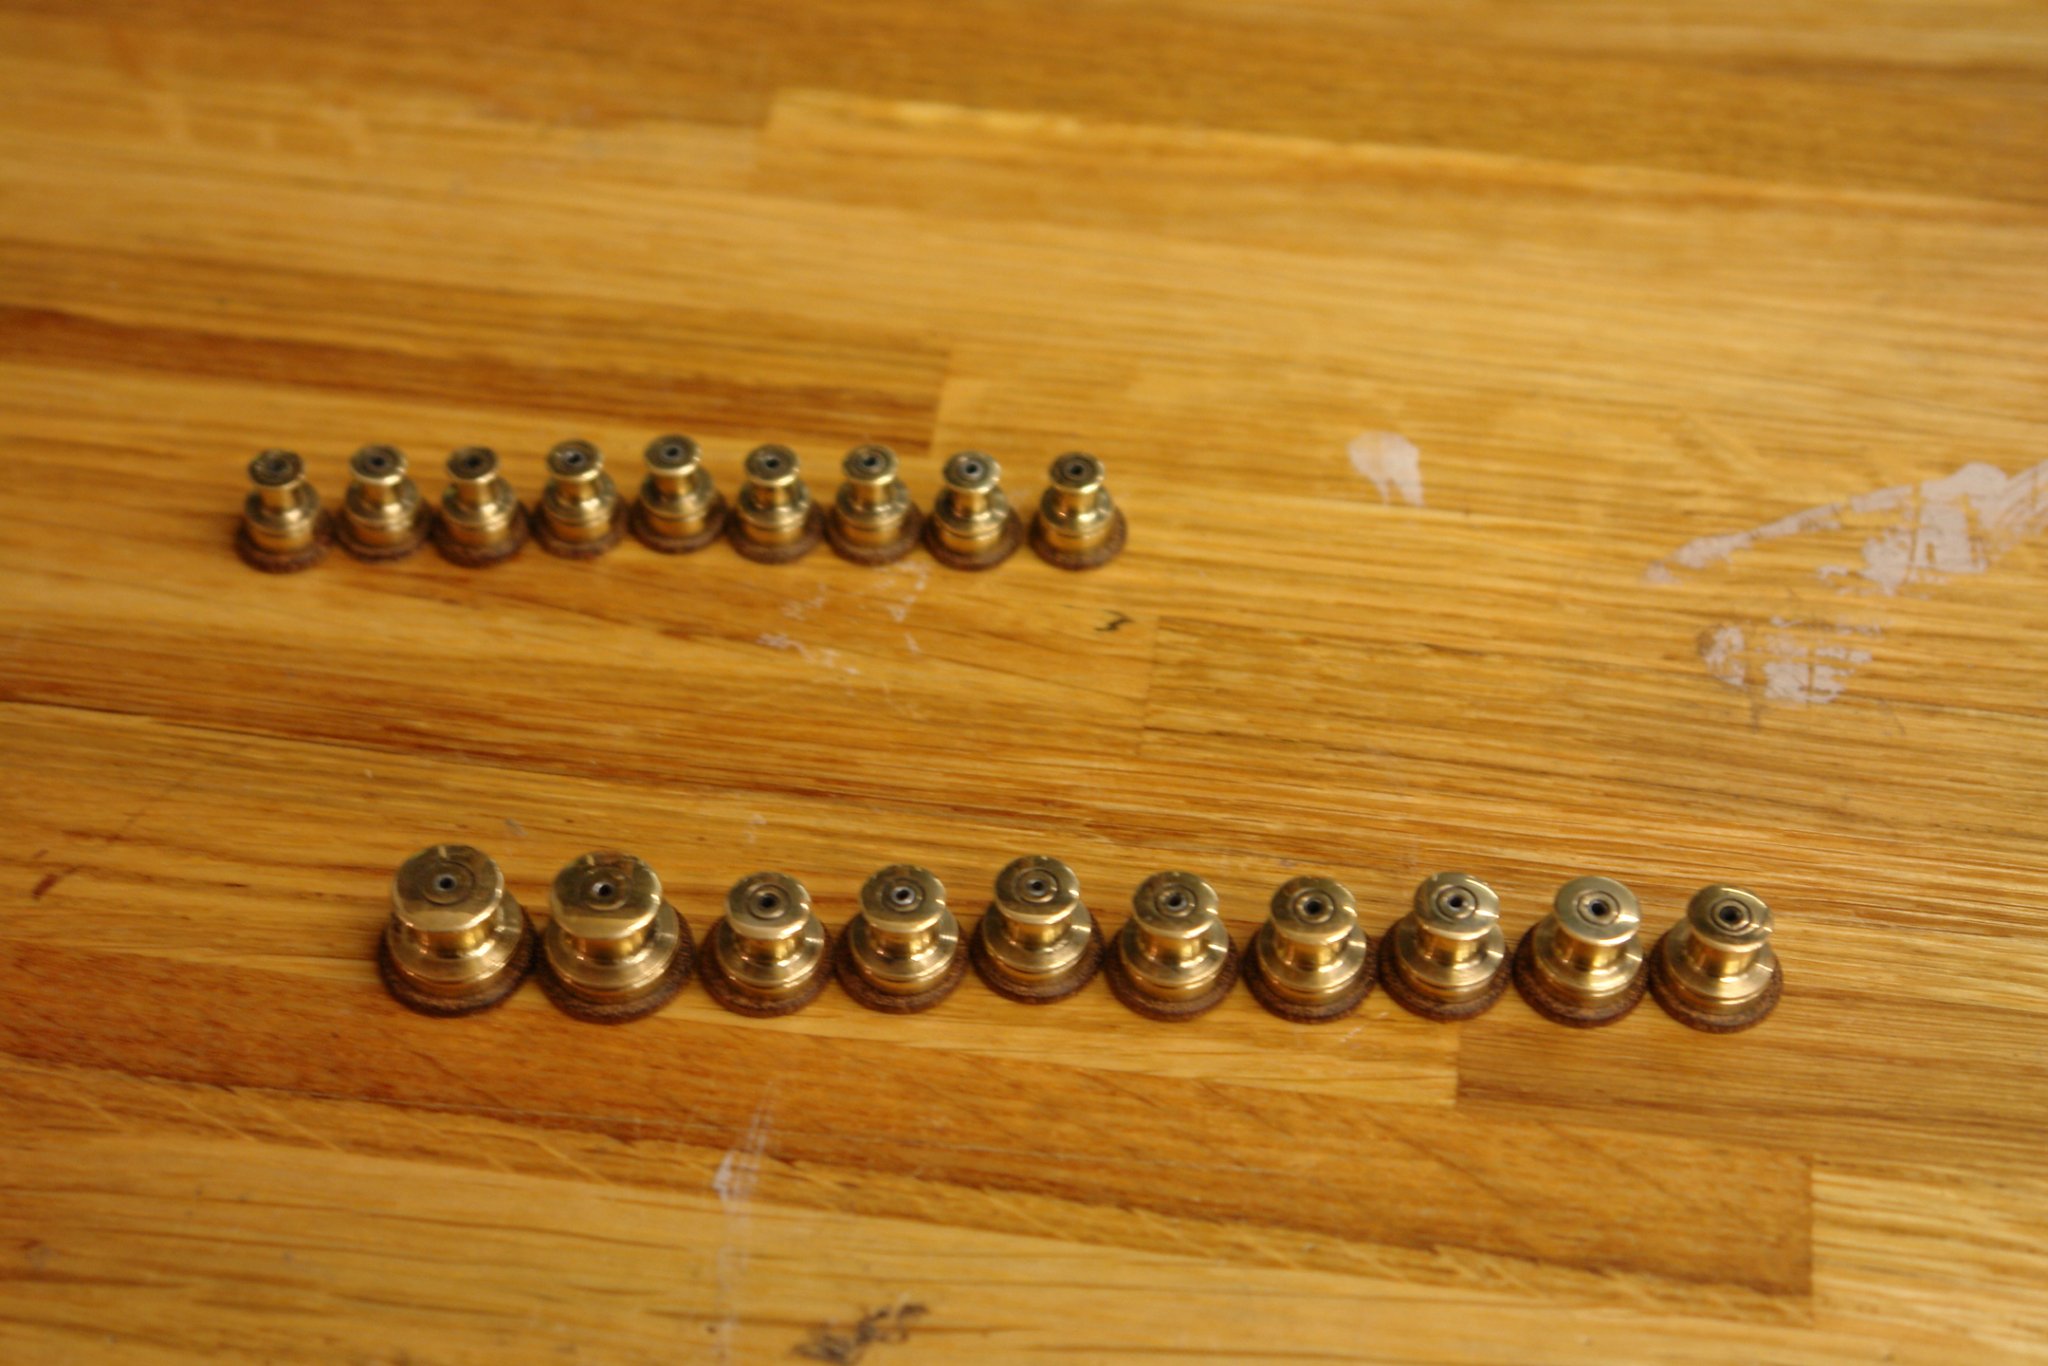
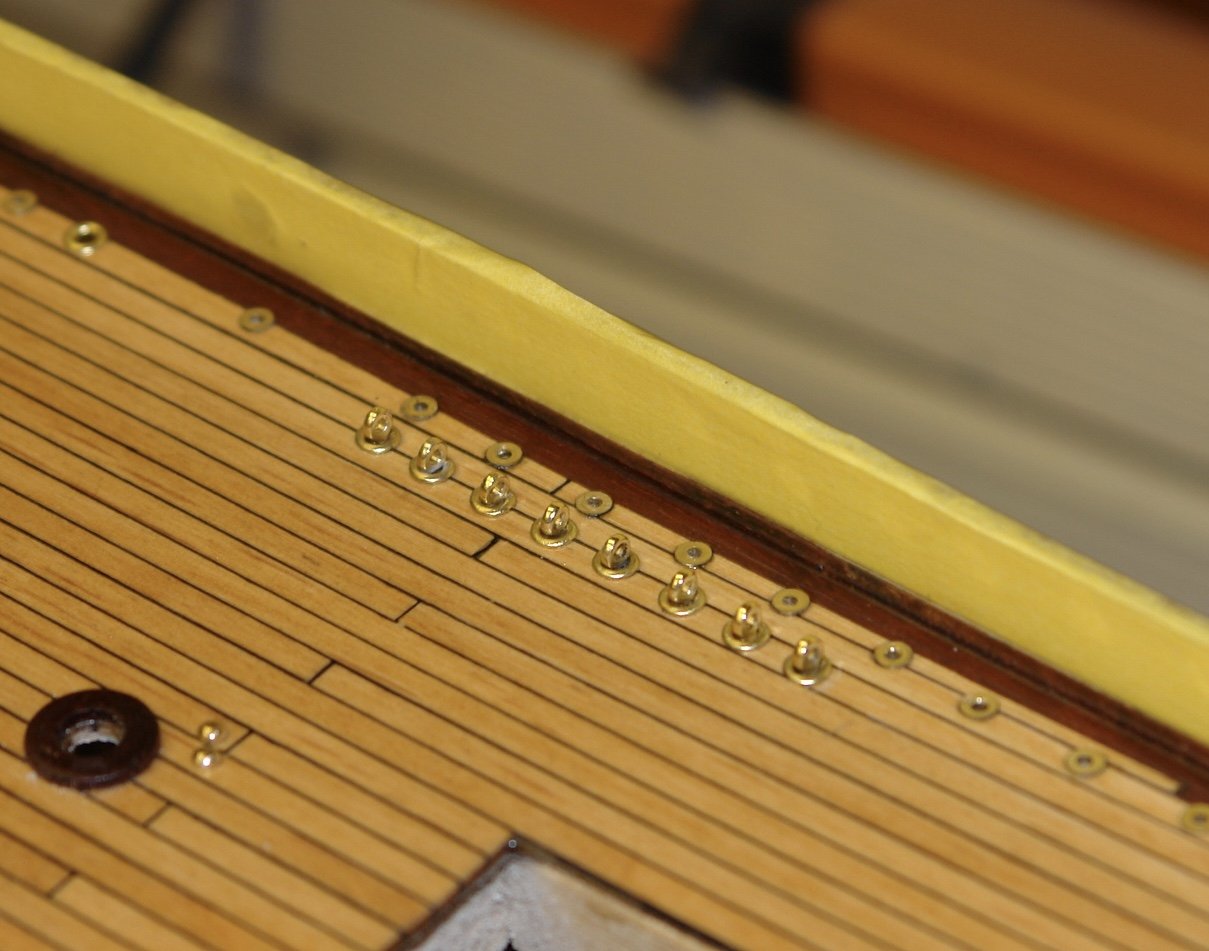
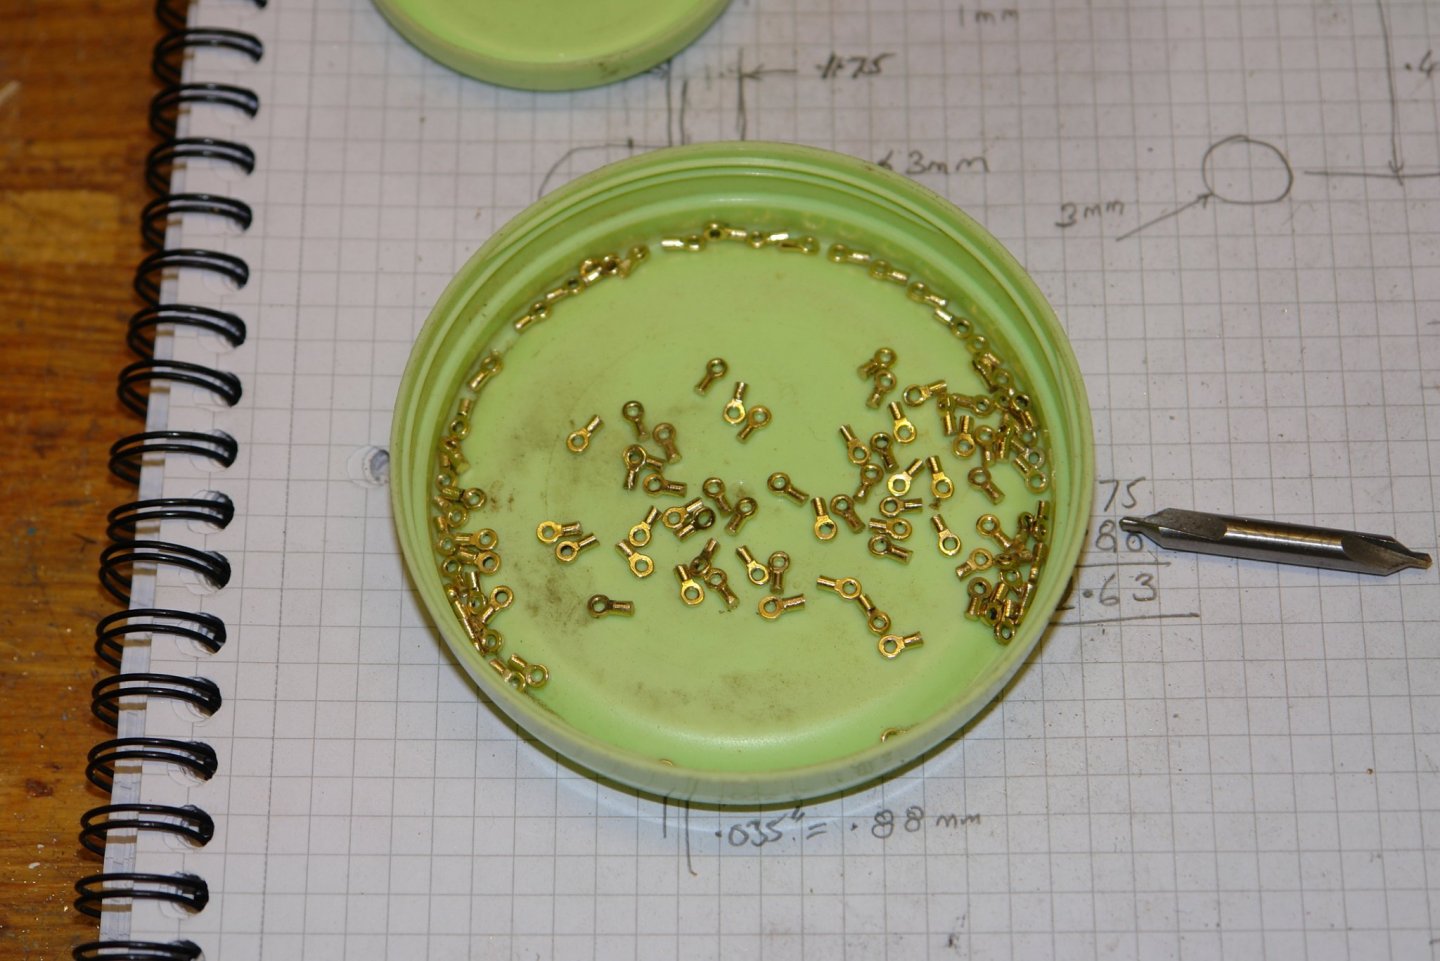
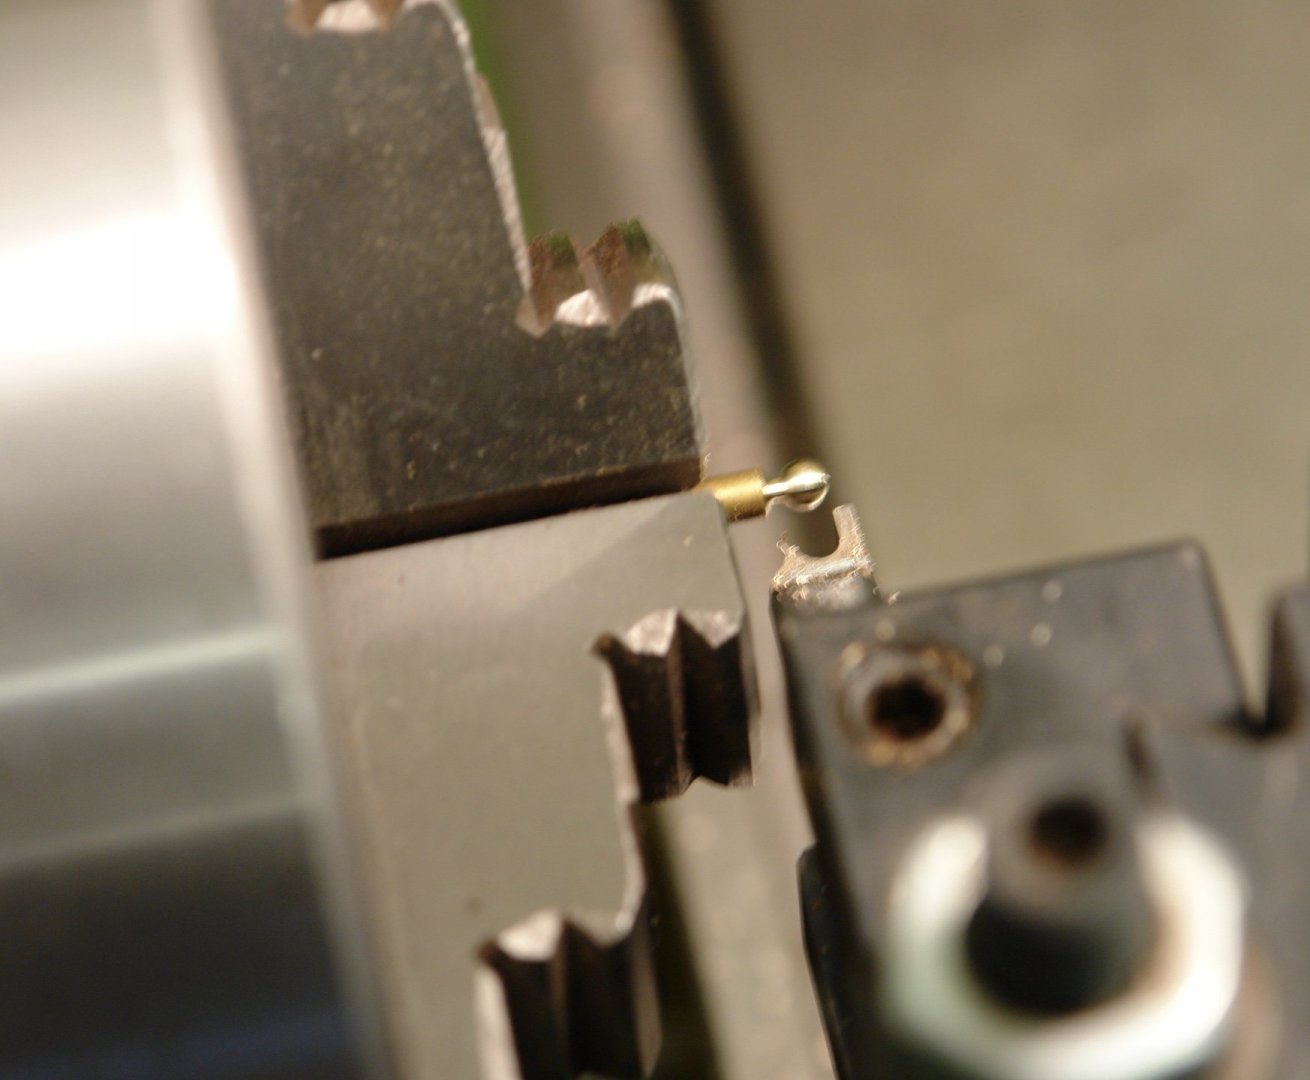
I am desperate not to make a business out of them Pat. Yes good point Mark - and I'm not sure how I could test that out. Three mind numbing days later and I had produced 100 of the standard sized eyebolts. I also produced about 30 with a narrower neck. To answer Pauls earlier question about bending them out of wire - my thought was that I would struggle to get them exactly identical and as many were mounted in close proximity I was concerned that differences would be too noticeable. Here is an example where a run of 8 eyebolts are close together and orientated in the same direction. I have installed them with an alignment rod in place to get the orientation and height correct. Shims were used under the bar to set the height. The eyes were glued in place with CA. Here is the same group with the alignment bar removed.
-
That sounds like a plan Julie. Experimentation is a great way of finding a good solution. In my Altair and Germania builds I used good quality .007" back card which worked well.
-
Thats how I did it on the last build Paul - I was trying to improve. Yep Druxey - should be burnt at the stake.
-
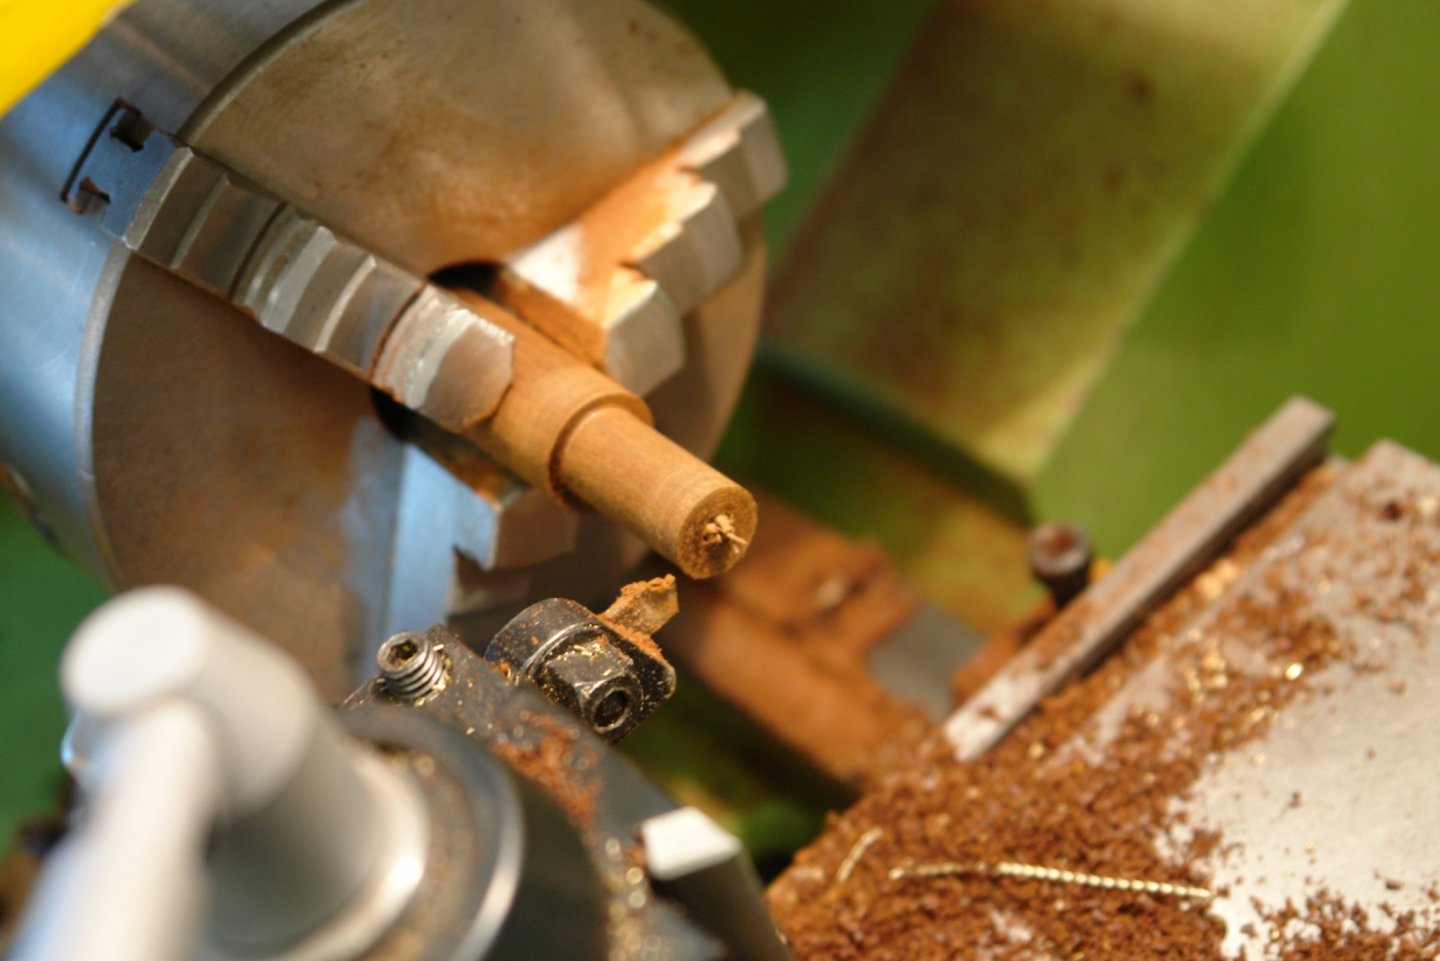
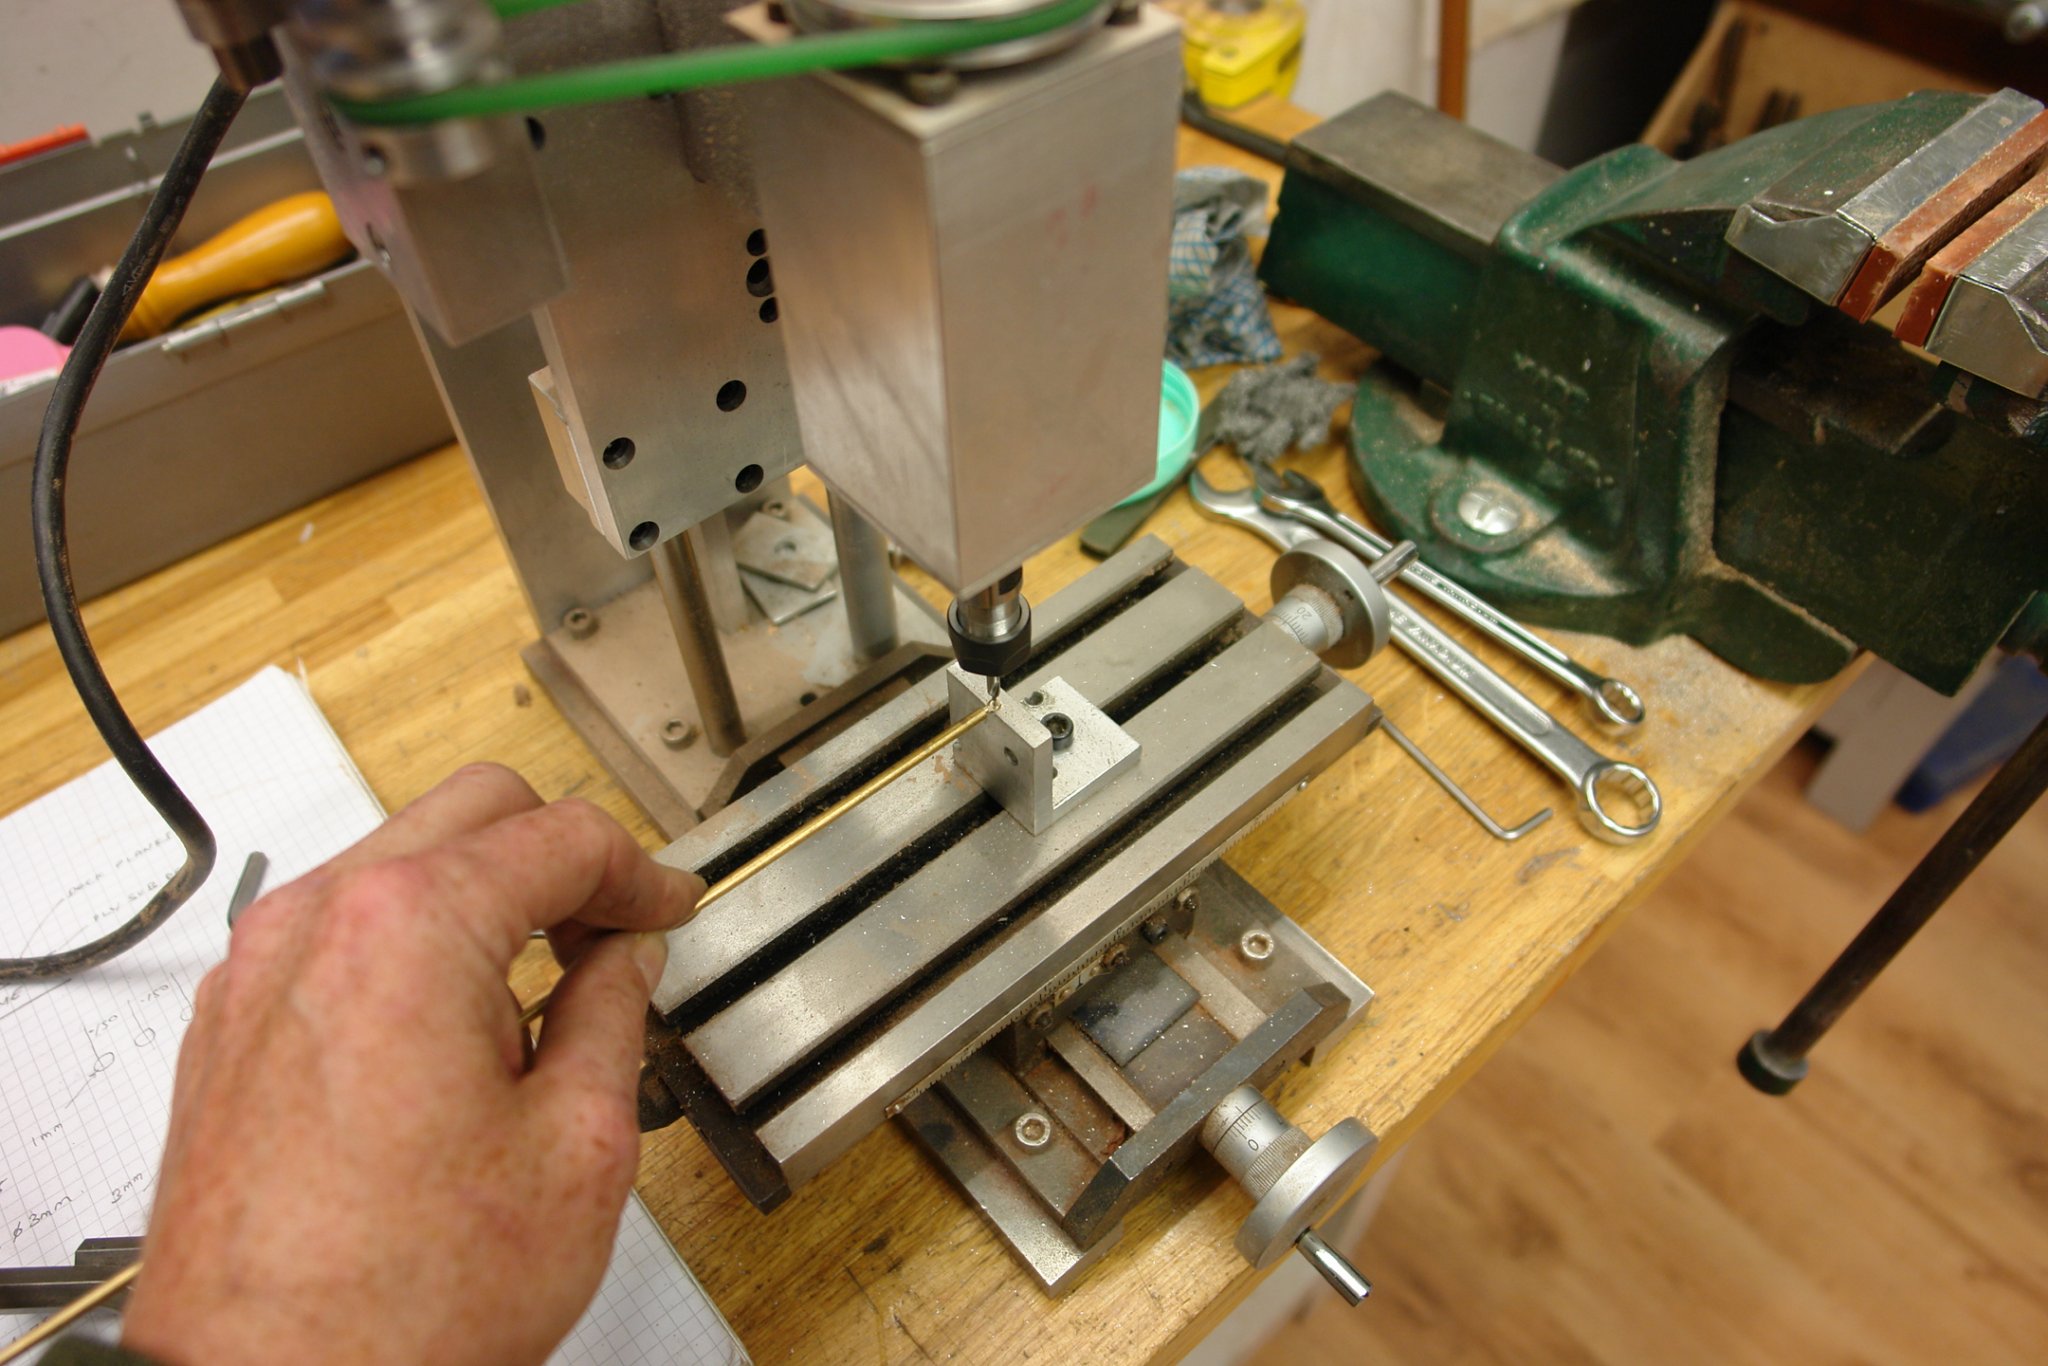
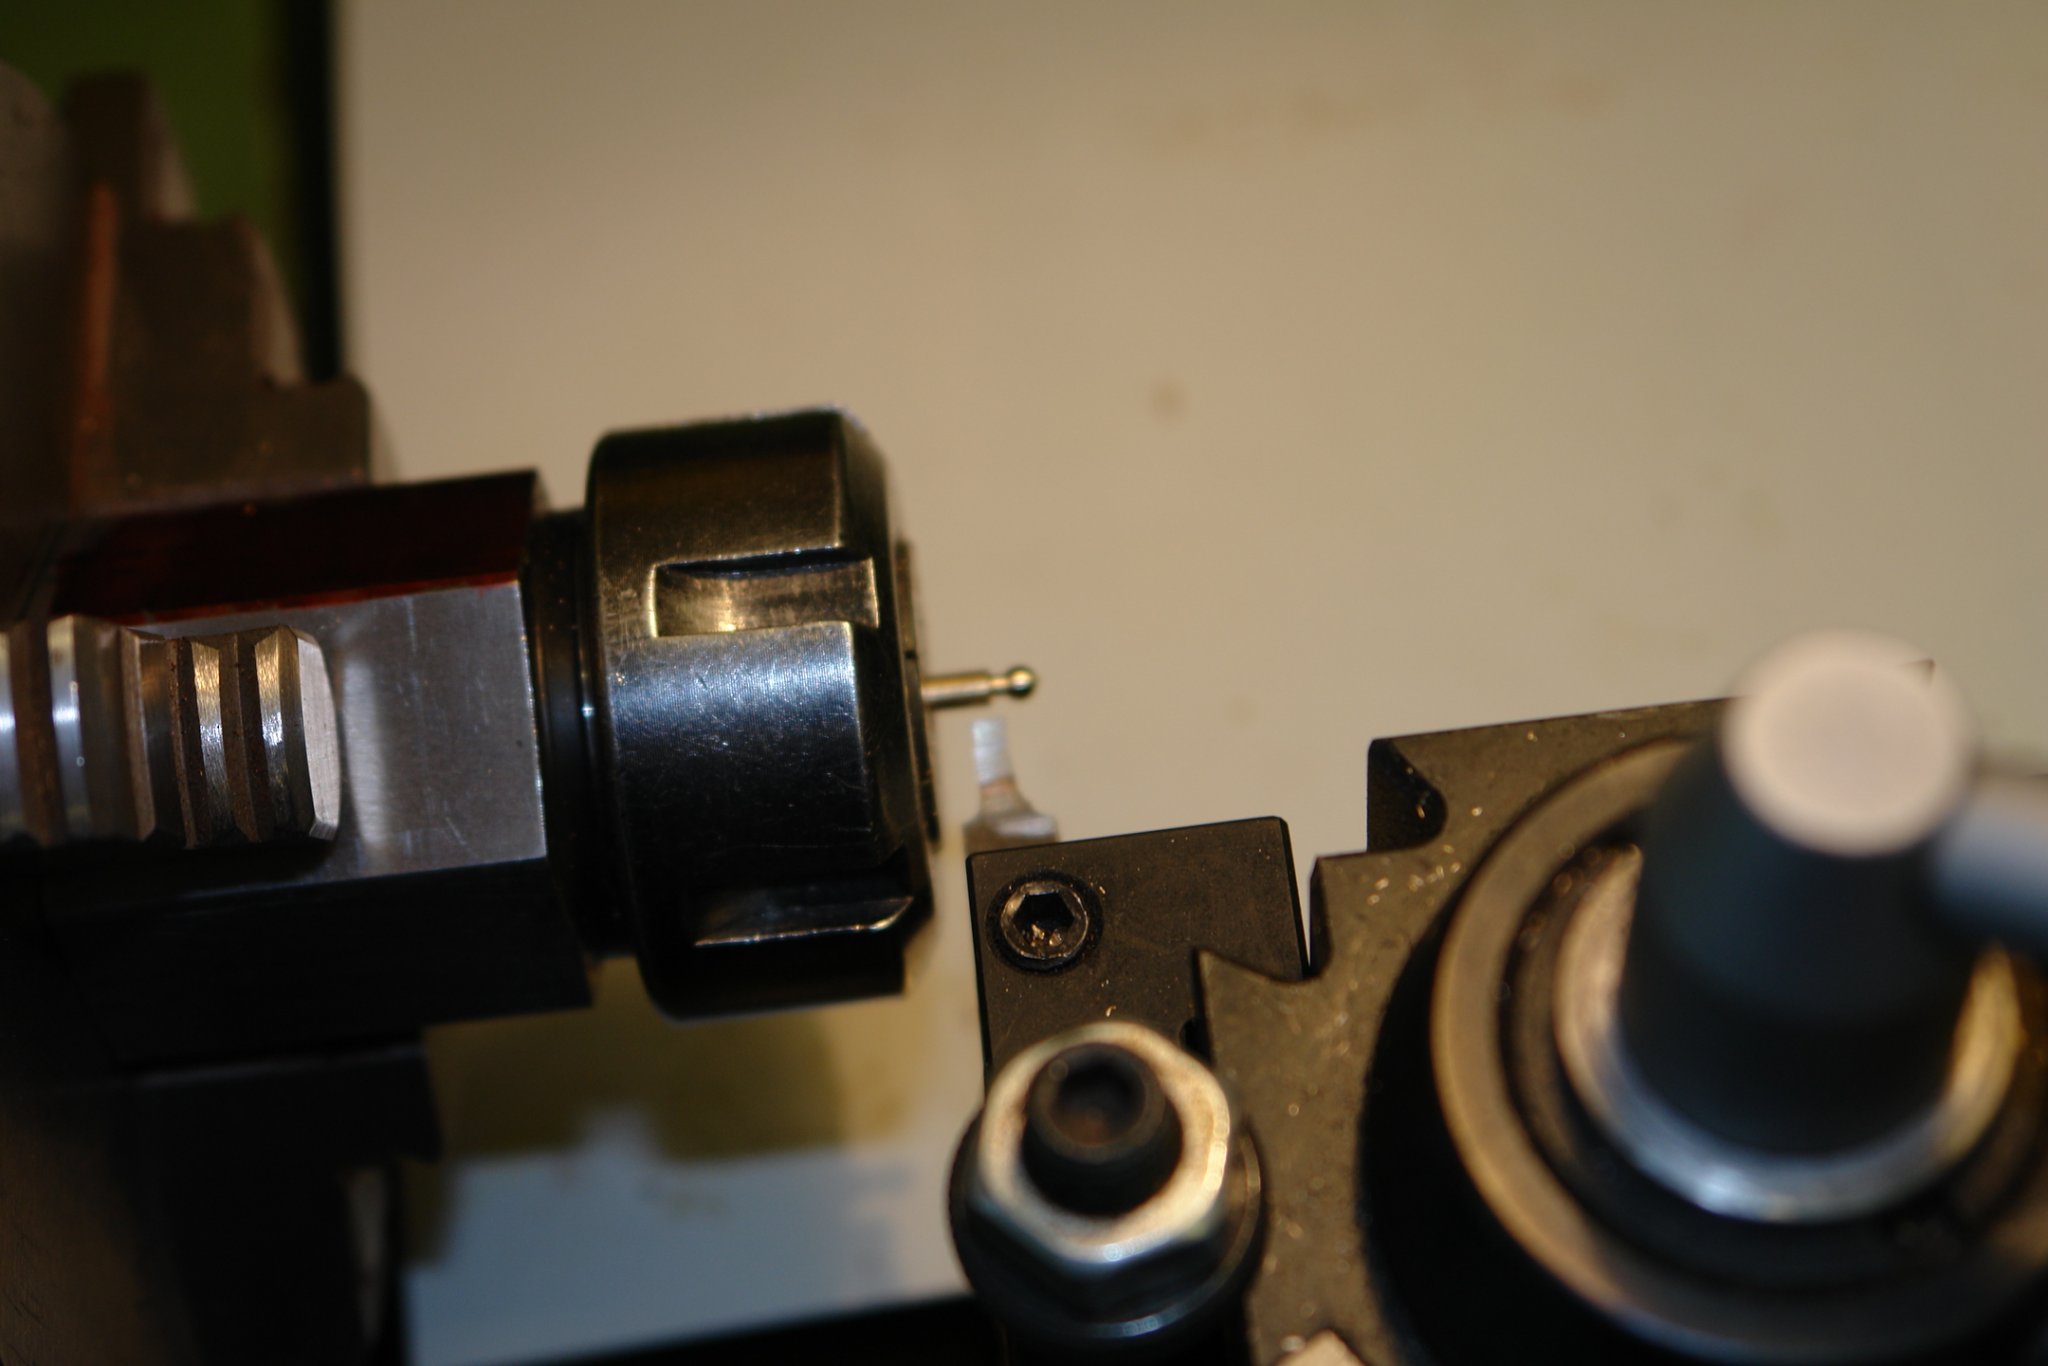
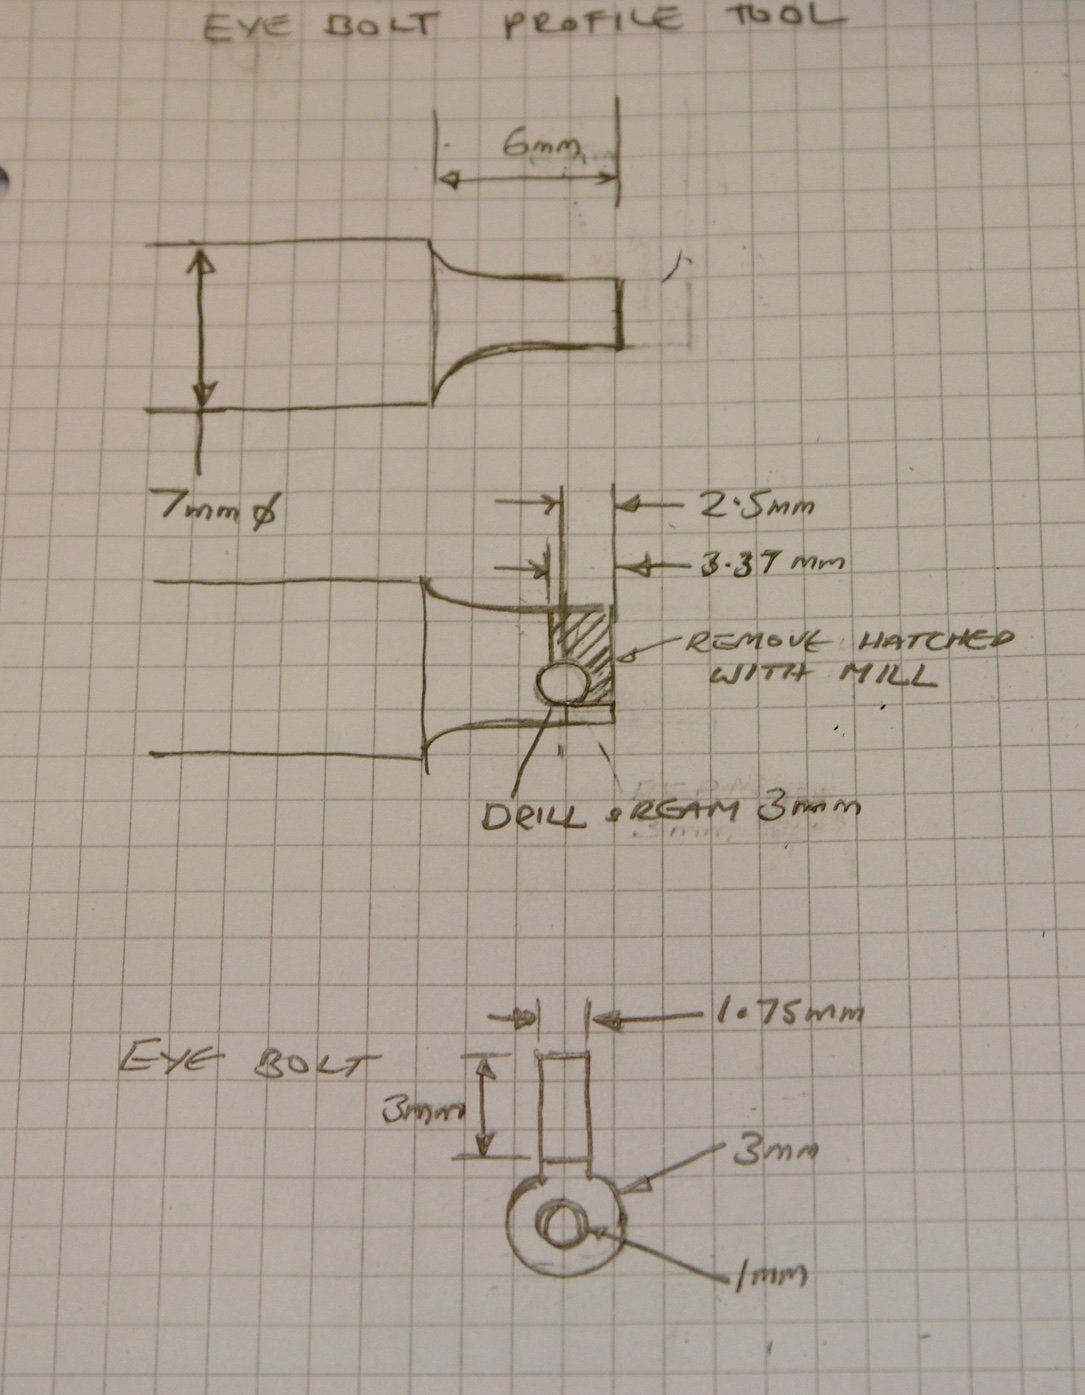
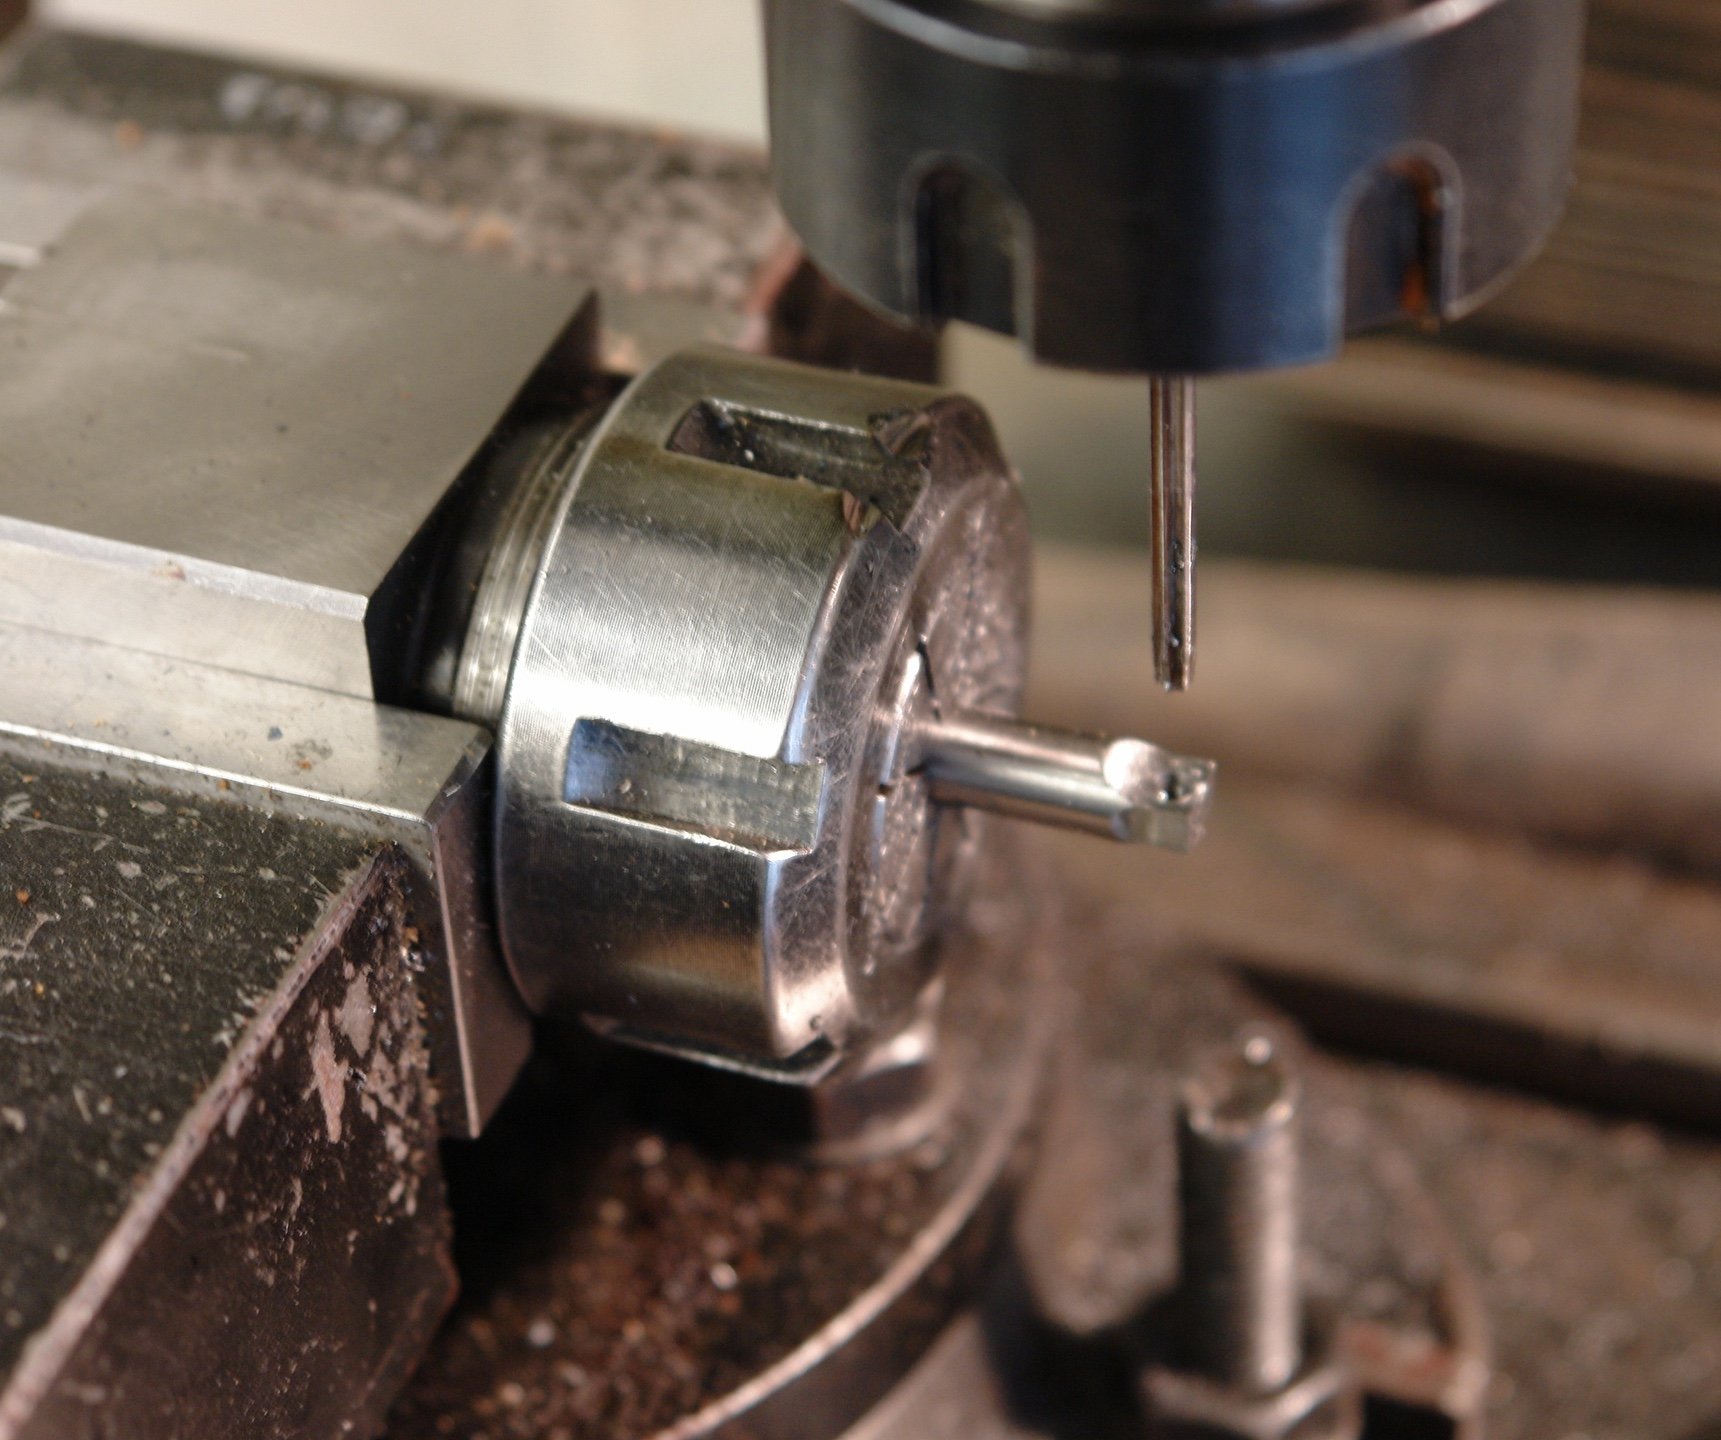
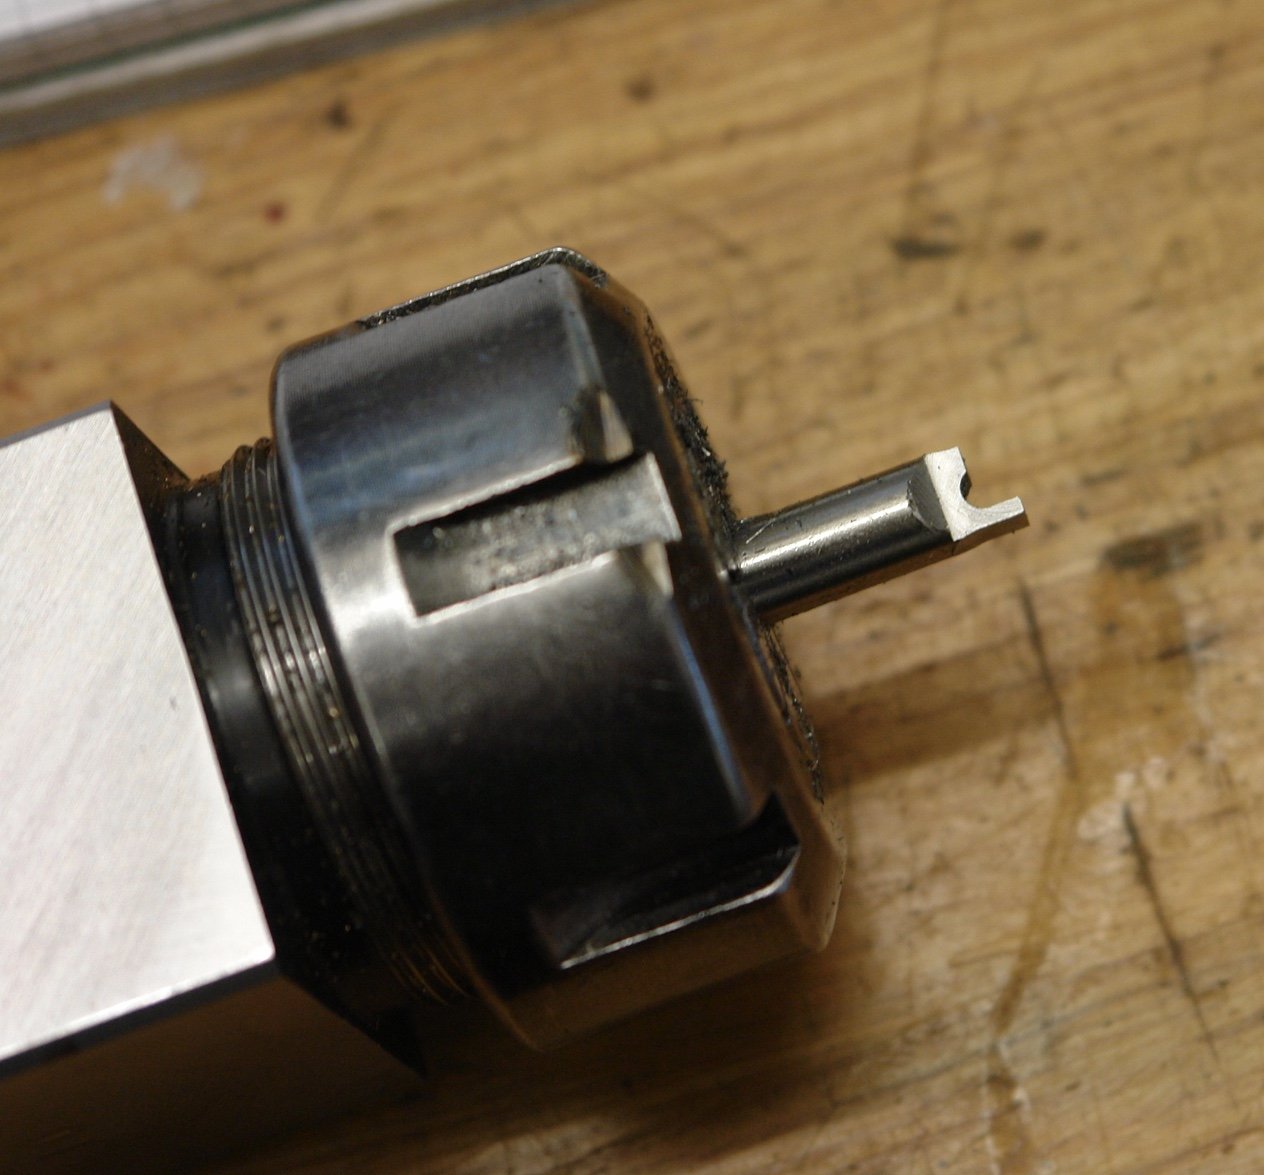
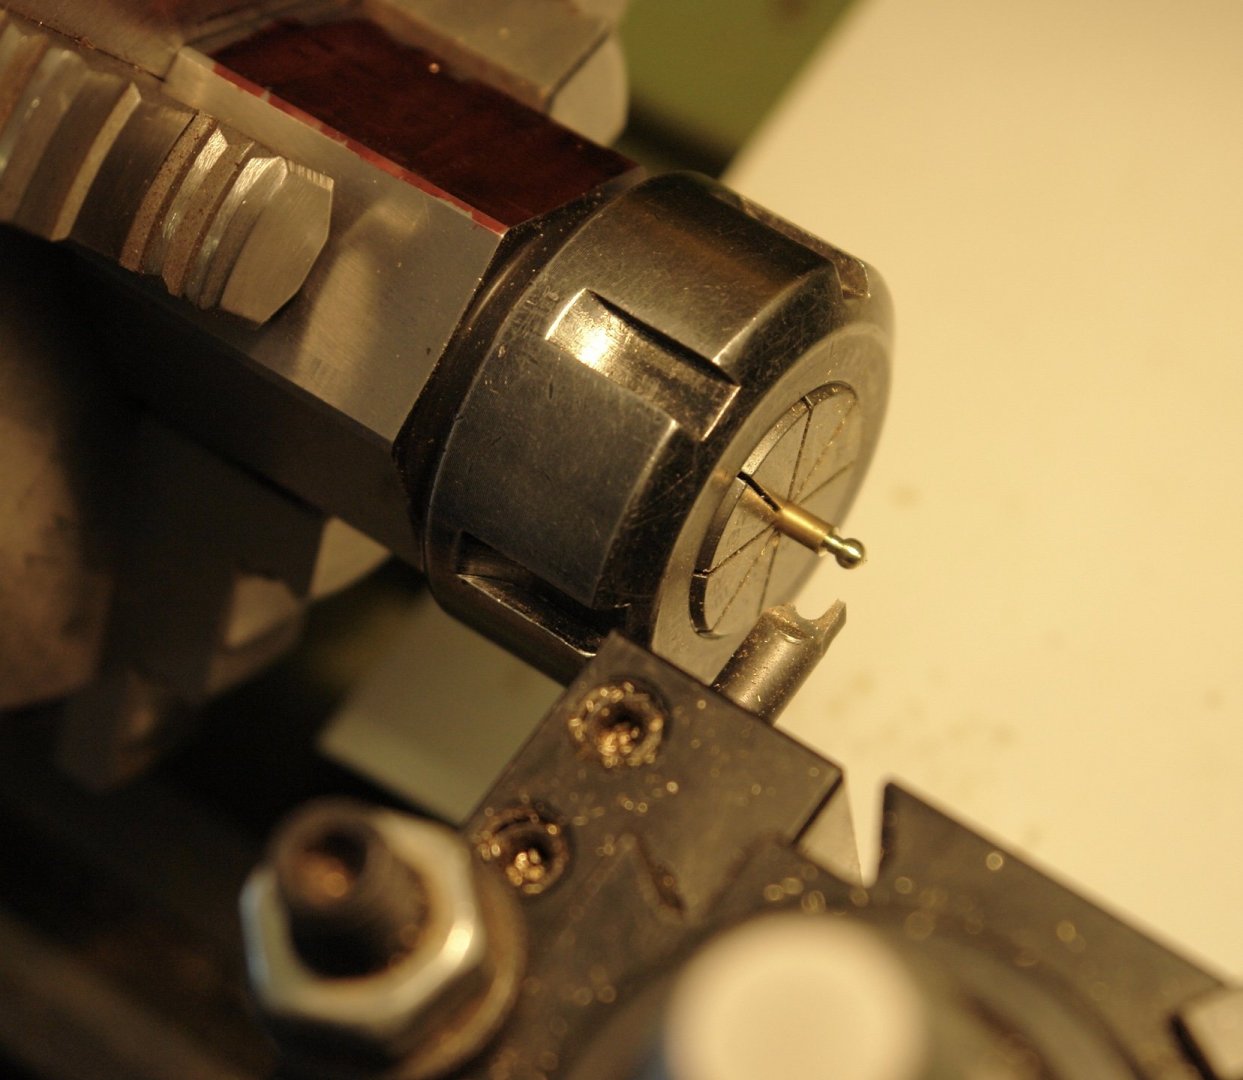
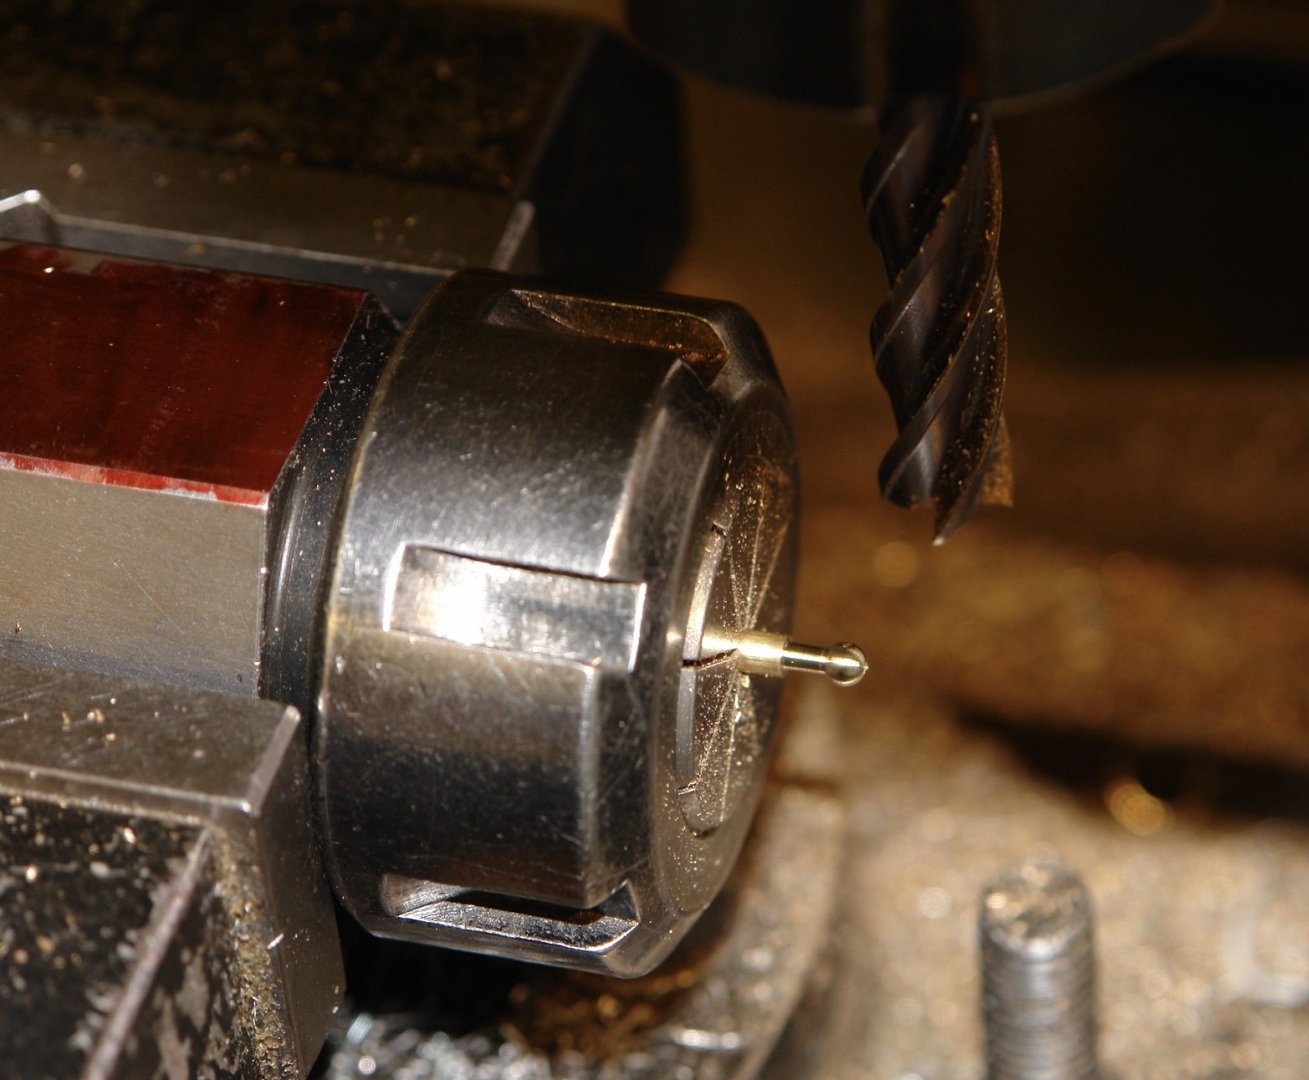
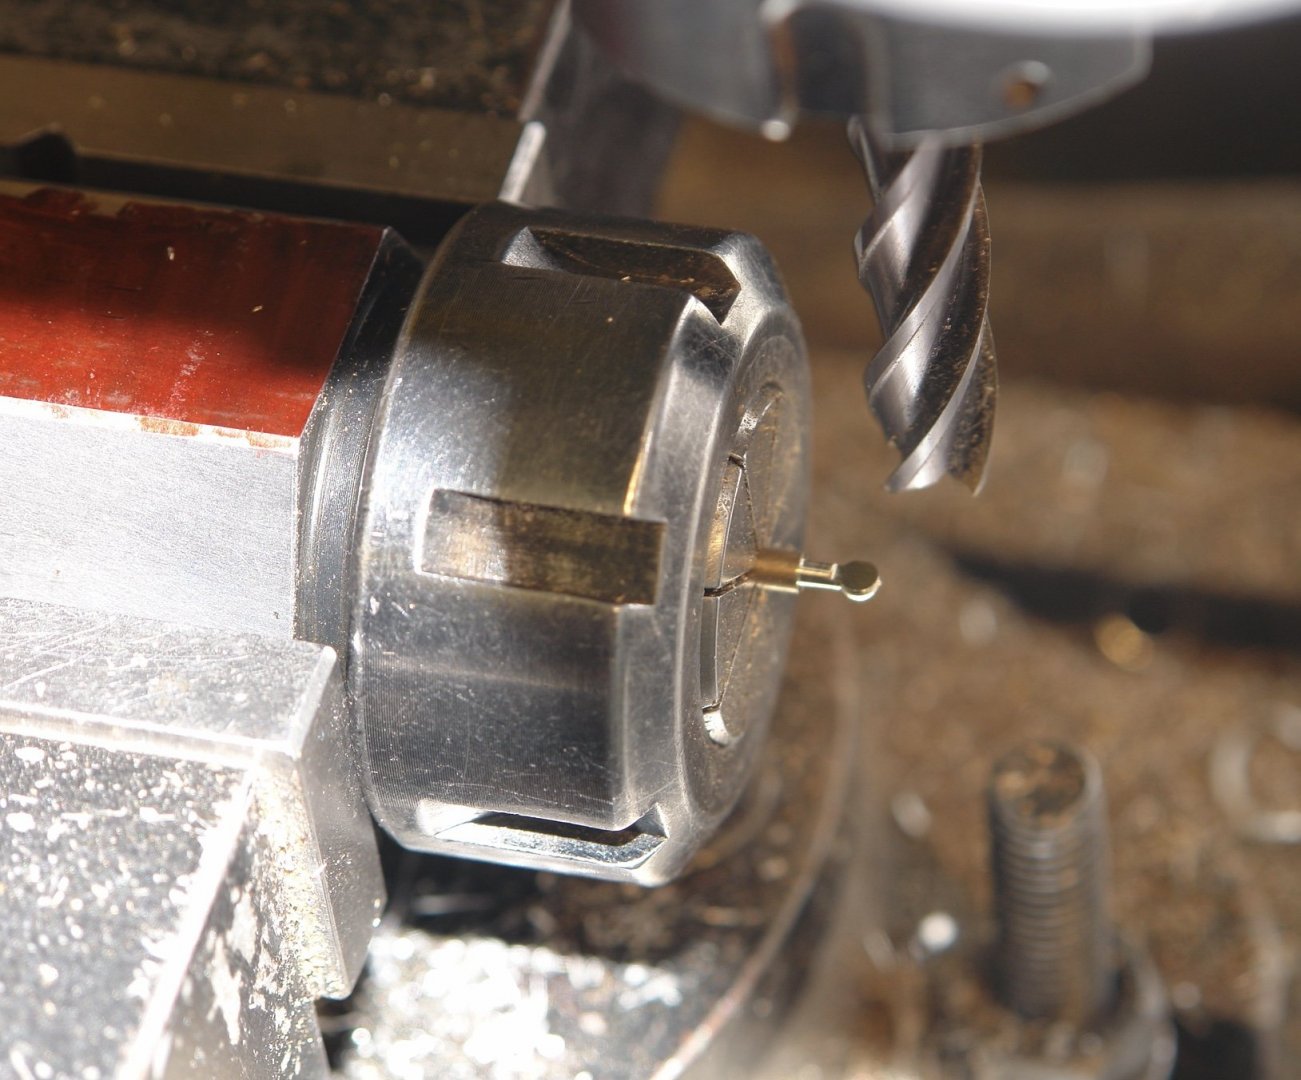
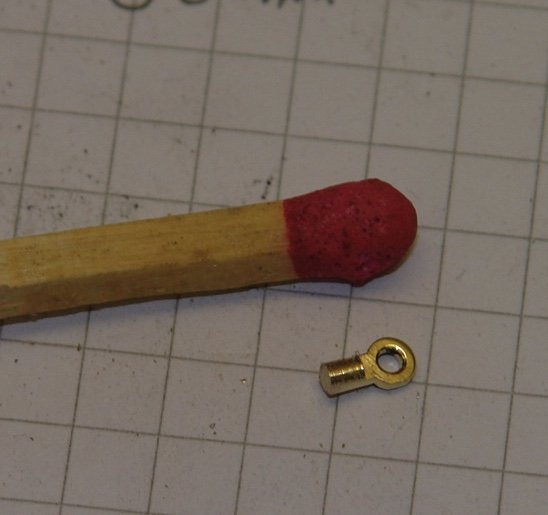
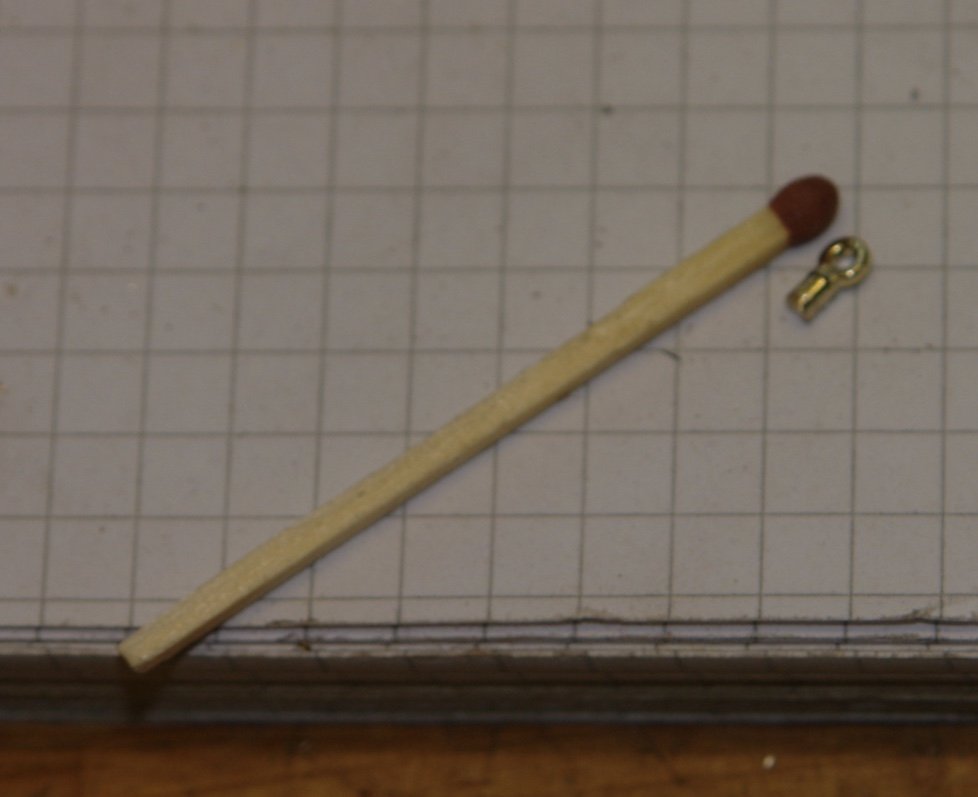
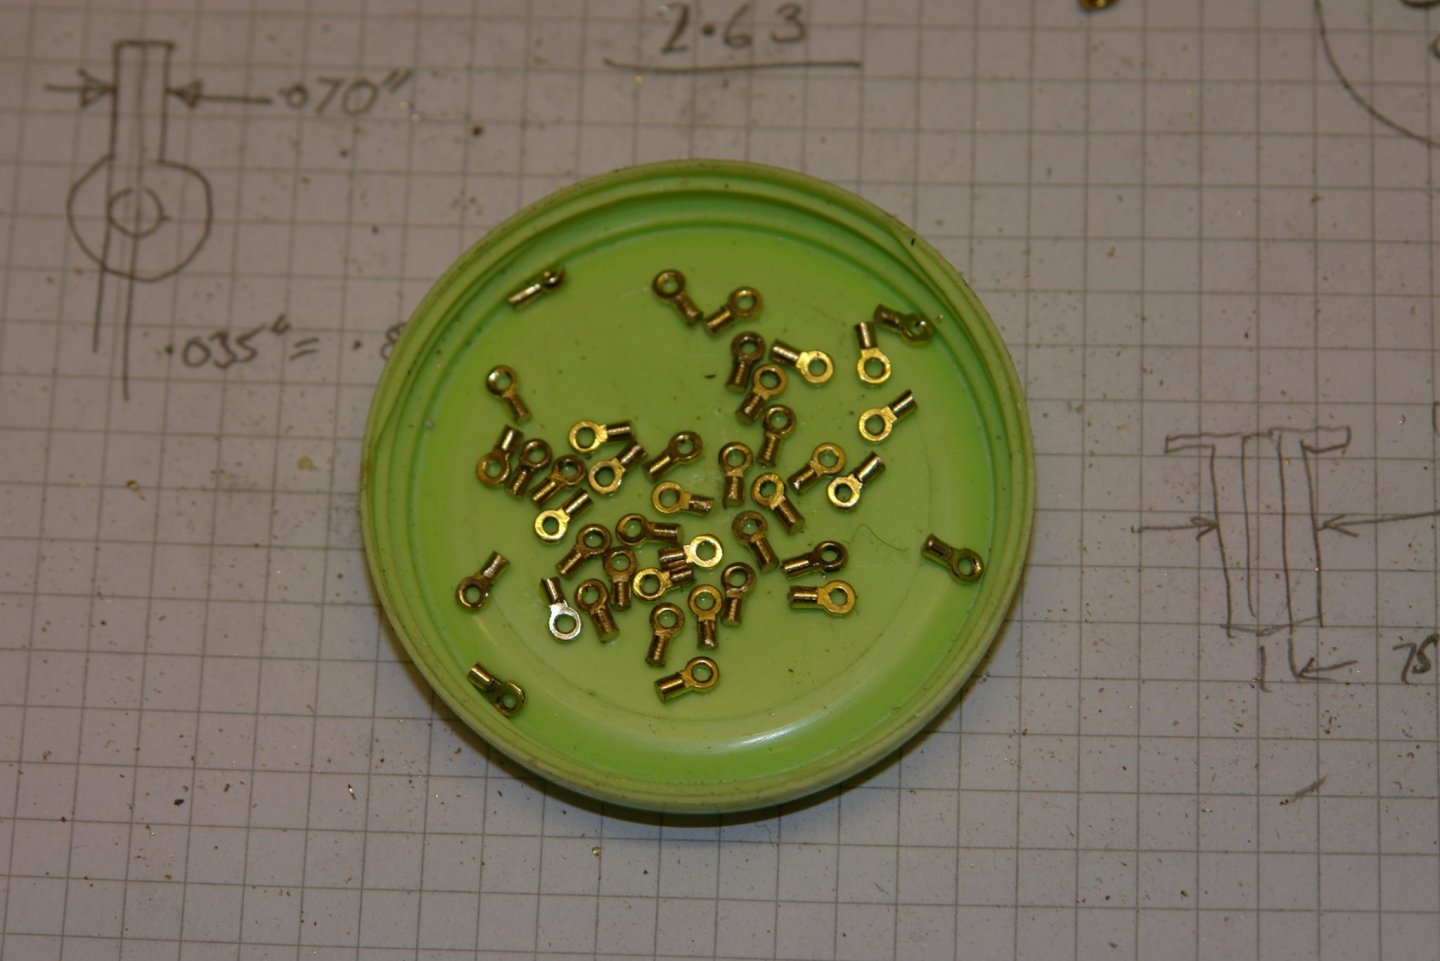
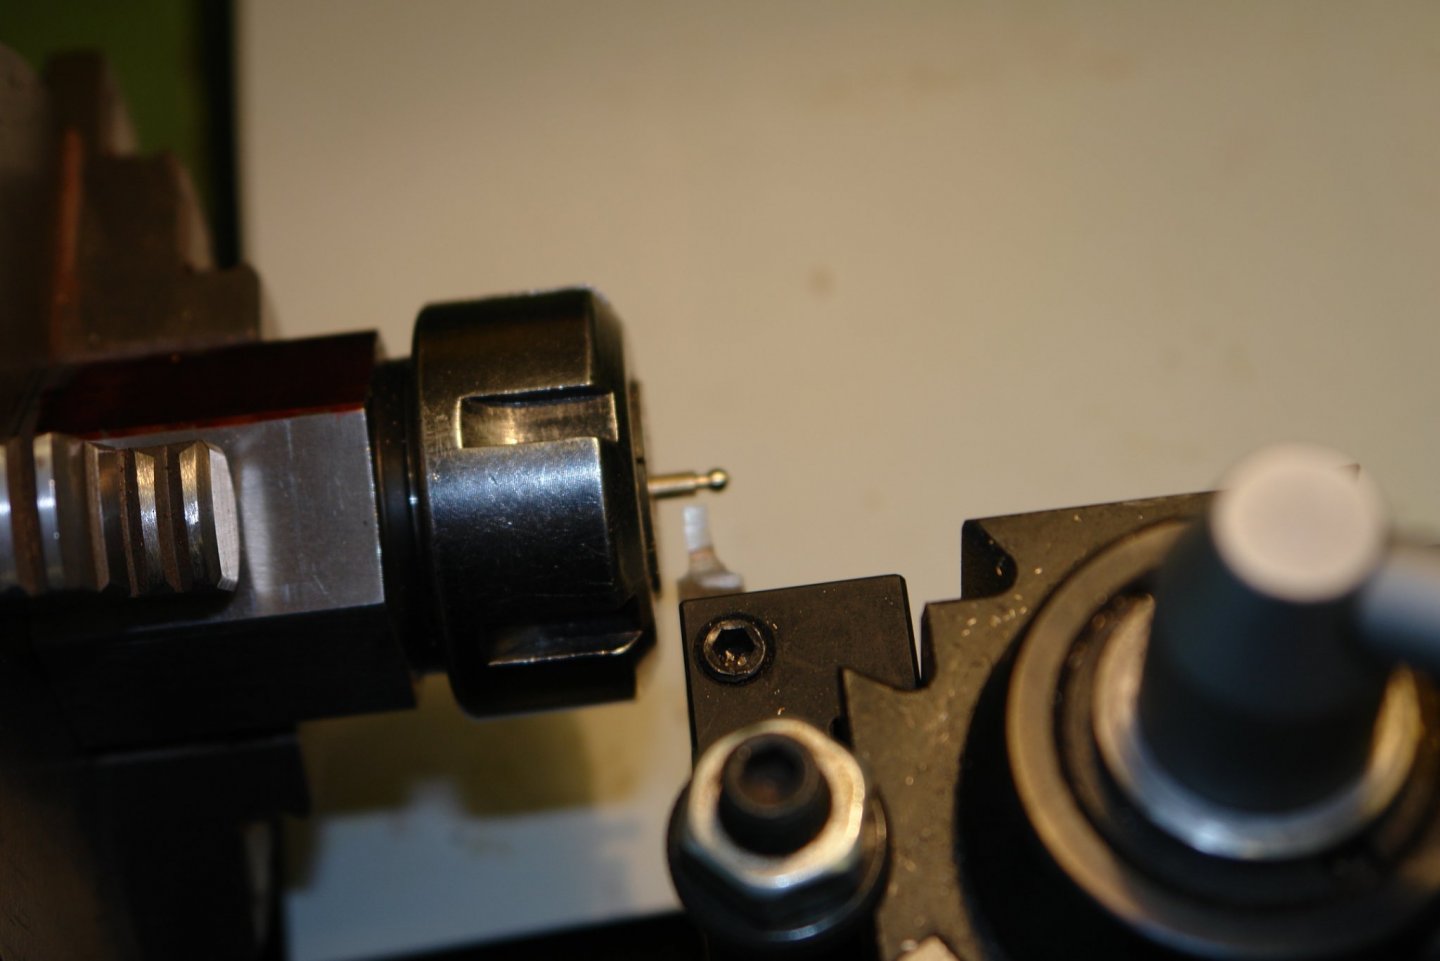
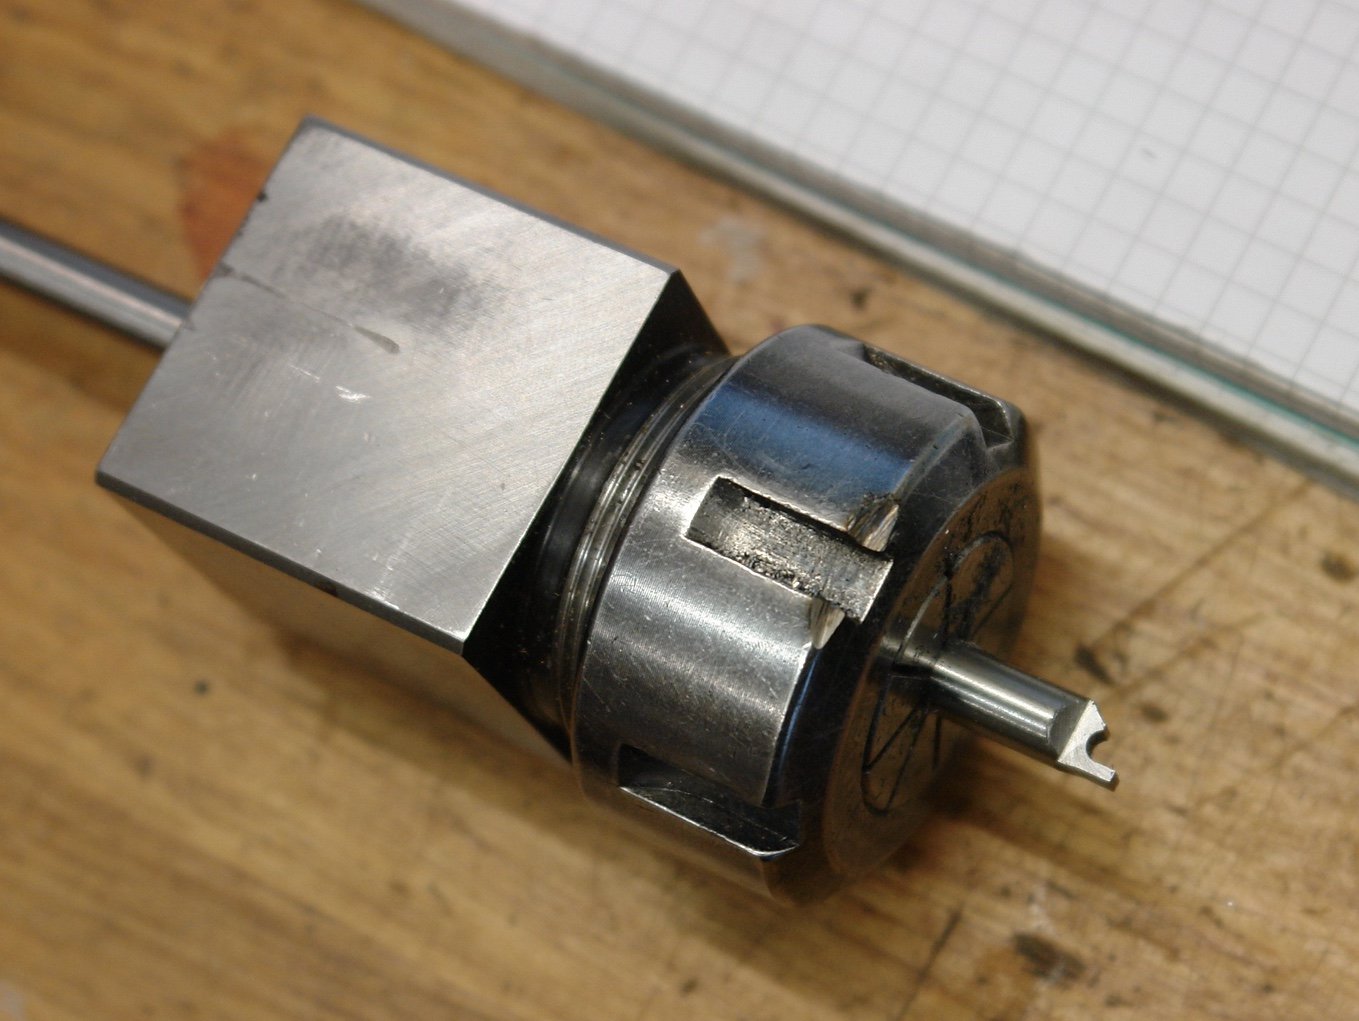
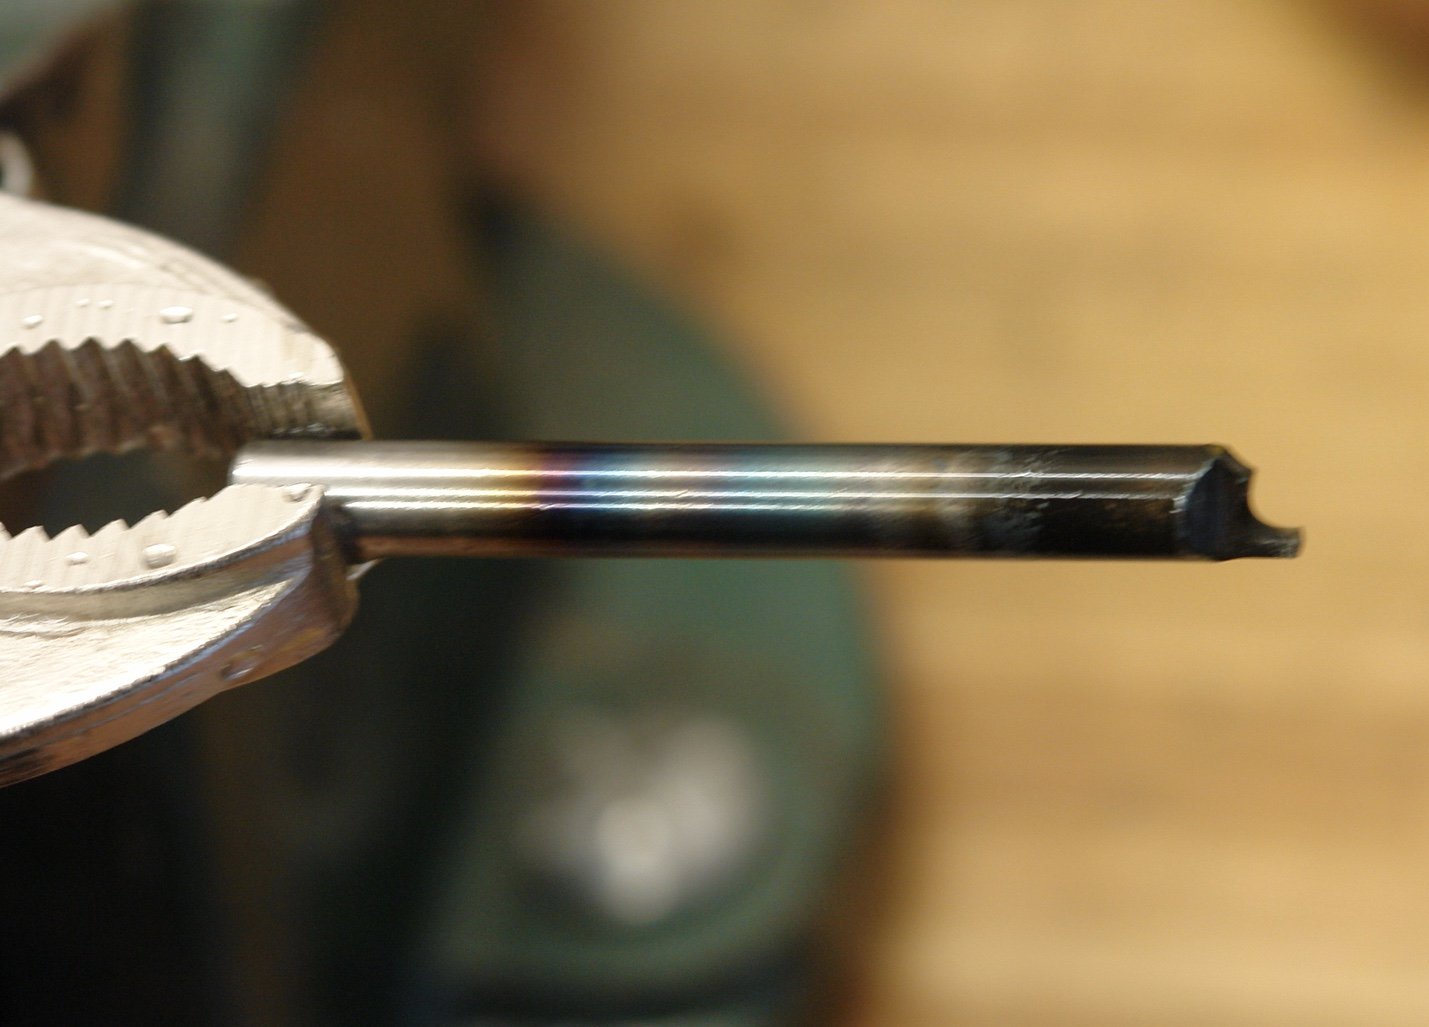
I made a start on the production of the 100+ eye bolts - I will describe my production method in a bit of detail. Step 1. I mounted 1/8" rod in a hexagonal ER32 collet chuck and placed this in the 3 jaw chuck of the lathe. I locked the saddle to the lathe bed and locked the compound slide, leaving only the cross traverse operable. I then plunged the profile tool to create the ball and part off the rod to length. I noted the cross slide position on the hand wheel once the ball was formed this setting would be repeated for all subsequent balls. I then replaced the profile tool with a parting off tool in the quick change tool post. The parting off tools axial position had been pre set. I then plunged the parting off too to create the neck. I noted the cross slide position on the hand wheel once the neck was formed this setting would be repeated for all subsequent necks. I then took the collet chuck out of the lathe and moved it to the mill. The collet was mounted with the back of the collet nut hard up against the jaws of the machine vice. The cutter had been pre set to the correct depth and the spindle locked. The x axis had also been set and locked - leaving only the z axis free to move. With the collet nut hard against the vice and the protrusion of the workpiece cut by the profile tool this setup was repeatable for all subsequent operations. I then wound the z axis handle and sliced off the top of the ball - flipped the collet through 180 degrees and sliced off the bottom of the ball. The workpiece was then removed from the collet and moved to the mini mill (a pedestal drill would have done). I had pre machined a 3mm U shaped groove in a piece of angle clamped to the bed of the mini mill. This would locate the workpiece for drilling the hole. The workpiece was held in the U by hand and the hole drilled. This gave me the eyebolt shape. I polished the eye and parted it off with a piercing saw. Only joking I have a good supply of extra large matches. The next one is the normal match. I then started a timed production run. Over the course of an hour I made 15, each one therefore took 4 minutes. The biggest problem I now face is enthusiasm - or to be more accurate, the lack of it.


-
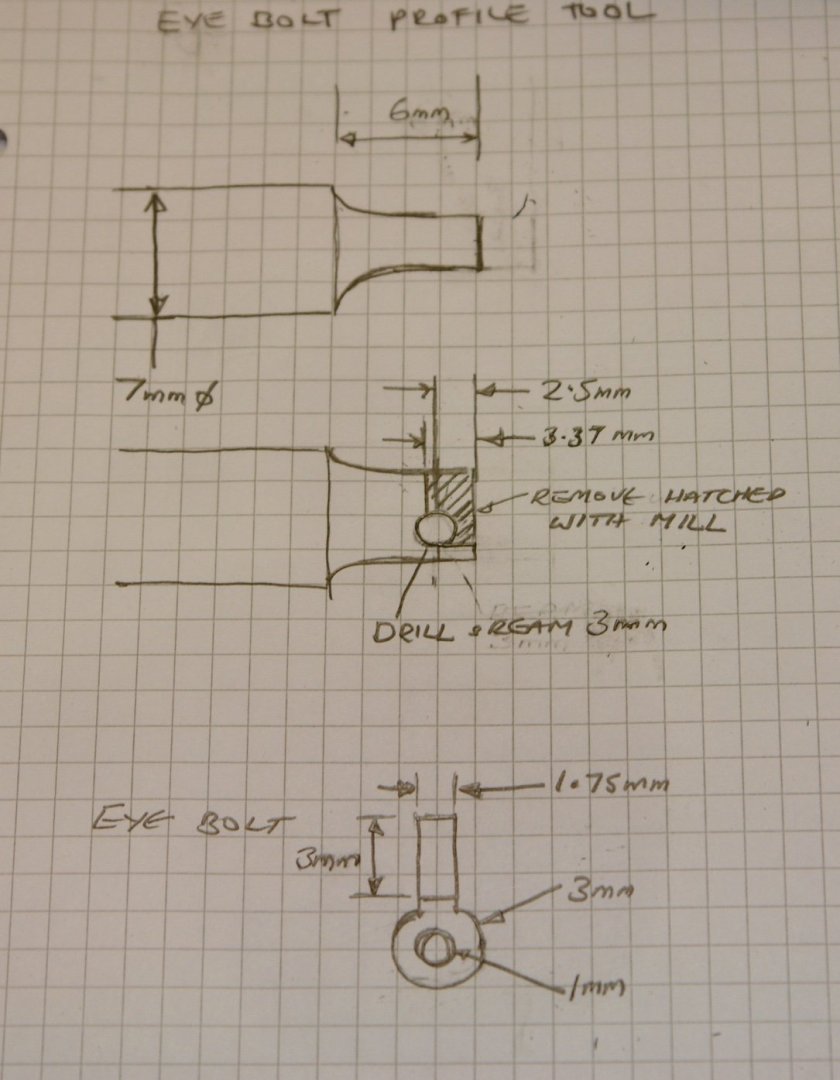
Thank you Druxey. Zbip - you make a good point. I decided to move on and start the epic production of eyebolts - over 100 required. With so many to make I need to create a rapid production method employing jigs to minimise and simplify cutting operations - but more of that later. I started by making a profile tool for the lathe as follows:- I started with a piece of 7mm round silver steel bar. `I mounted this in a square ER32 collet bock and squared off the end in the mill. Having squared off the end I drilled a hole and reamed this to 3mm - this will form the circular head of the eyebolt. I then machined away the hatched section to produce the following profile:- The protrusion (below the hole in the photo) is deliberately left long as this will part off the workpiece to length before the ball is formed during the plunge cut. Ideally I would have left this as the profile however I was concerned that plunging such a wide tool into 1/8" bar would destroy the workpiece. I therefore machined away the portion of the tool that would cut the neck of the eyebolt. The neck will still need to be formed and I will do this in a separate operation with a parting tool. I then carefully filed the relief angles without touching the already created profile. The next step was to harden the tool - a relatively simple job consisting of heating the bar to cherry red (with a propane torch) and then quenching in a bucket of cold water. Finally I mounted it in the lathe and did a plunge cut into 1/8" brass bar. In a few seconds a nicely formed 3mm ball (on a short stem) was produced. I now need to sort out the rest of the production steps. In passing I glued the hawse pipe rings in place.


-
All progressing very well Gary - and you productivity continues to amaze.
-
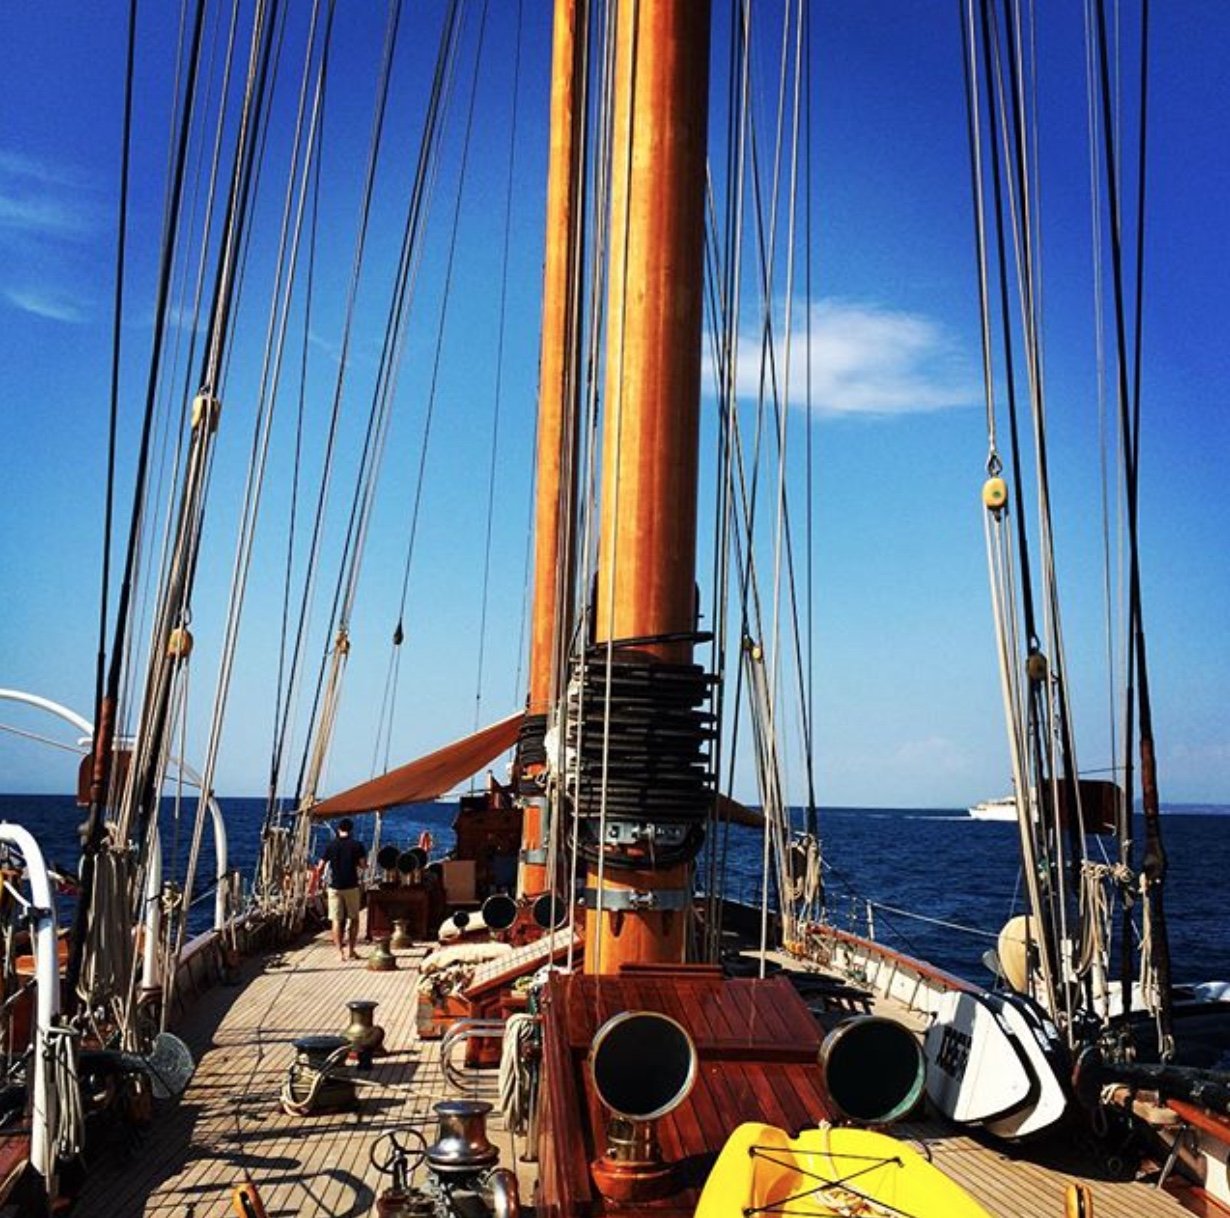
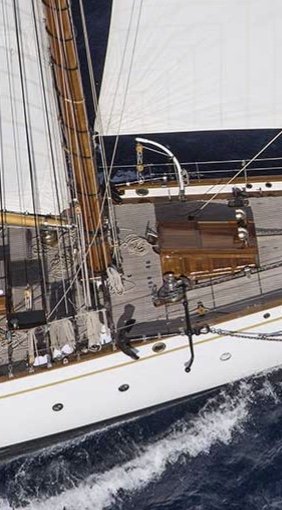
Guys - thank you all for your considered observations and suggestions. I'm not sure about carving out the planks as the danger is that I make the repair look worse than the problem. I am going to have a go at the paint solution but on a scrap piece of deck. I have never tried using paint to fix this type of problem but its worth experimenting as a learning experience. I have been pondering the problem and my current thoughts are influenced by a modification of Pats small boat suggestion. I wanted to maintain a bit of credibility for the solution which caused me to have a look through my photos for deck debris. In this respect the following image caught my imagination. Clearly the crew are keen on surfing (or wind surfing) and have stored 3 boards up against the port rail. I think they need somewhere better to store them when at sea. Maybe here would be an option (scale size 2.5" x 0.7"):- The yellow thing in front of the deckhouse is the back end of a canoe - maybe stored to starboard. Also the pair of hoops to starboard and behind the deckhouse are actually steps for hanging over Germania's side - also a possibility. Or maybe it will just be a hank of rope. Plenty of possibilities for me to consider.

-
Not really Pat as it would block access to the deck house door. However I have now got the image of a bathing mat with occupant in my head and I'm finding it difficult to move on to other options. Ropes is the more obvious solution - as per photo.

-
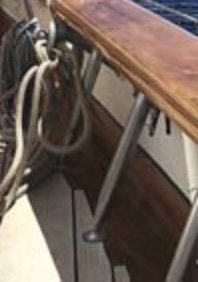
Not a bad idea Gary, but having it out of position might irritate me just as much as the deck repair. I will experiment Keith - probably on a off model piece. For the moment I am going to ponder - plenty of time to resolve. Interestingly the photo shows a coil of rope over the port hand side winch position.
-
Keith, Eberhard, Pat, Mark, Gary - Thank you for your comments and your continuing interest. Lots more brass work to come which I hope you will find interesting. BUT FIRST................ I am reminded of the saying "the best laid plans of mice and men often go awry". I have been extensively checking the plans against photographs to confirm the positions of various deck fittings. The following plan shows the disposition of 5 winches arranged around the fore mast. These I faithfully reproduced. Even remaking the broken plinth shown in the last post. I was pretty sure that the plan would be accurate with respect to major deck item such a winches. I didn't think I had any photographs of this area but in retrospect I did find one and very annoyingly it didn't show the forward pair of winches between the foremast and deckhouse. Instead there are a pair of dual purpose anchor and sheet winches on either side of the deckhouse (not on the plan). So it was time for a not so invisible repair. I will have to think of something to mask the fix - perhaps coils of rope or a couple of seagulls!!!!!!!!!!! Suggestions welcome.


-
Nicely done Bedford - which is as per normal
-
lovely job Dan - pity about the writers block - only seems to happen to professionals.
- 238 replies
-
- 4
-

-
- leviathan
- troop ship
- (and 2 more)
-
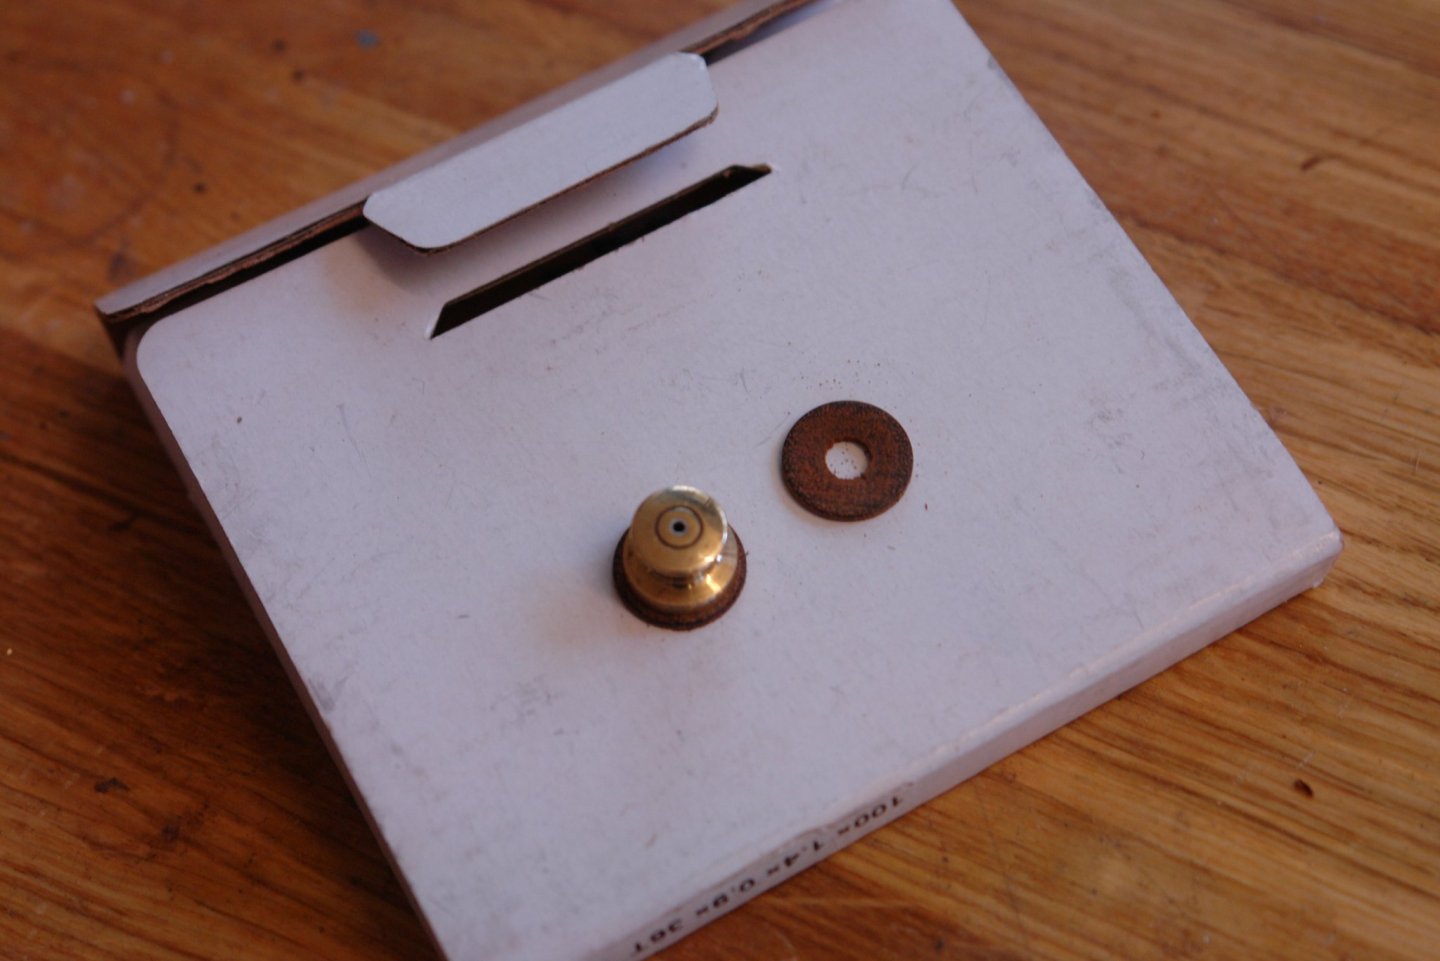
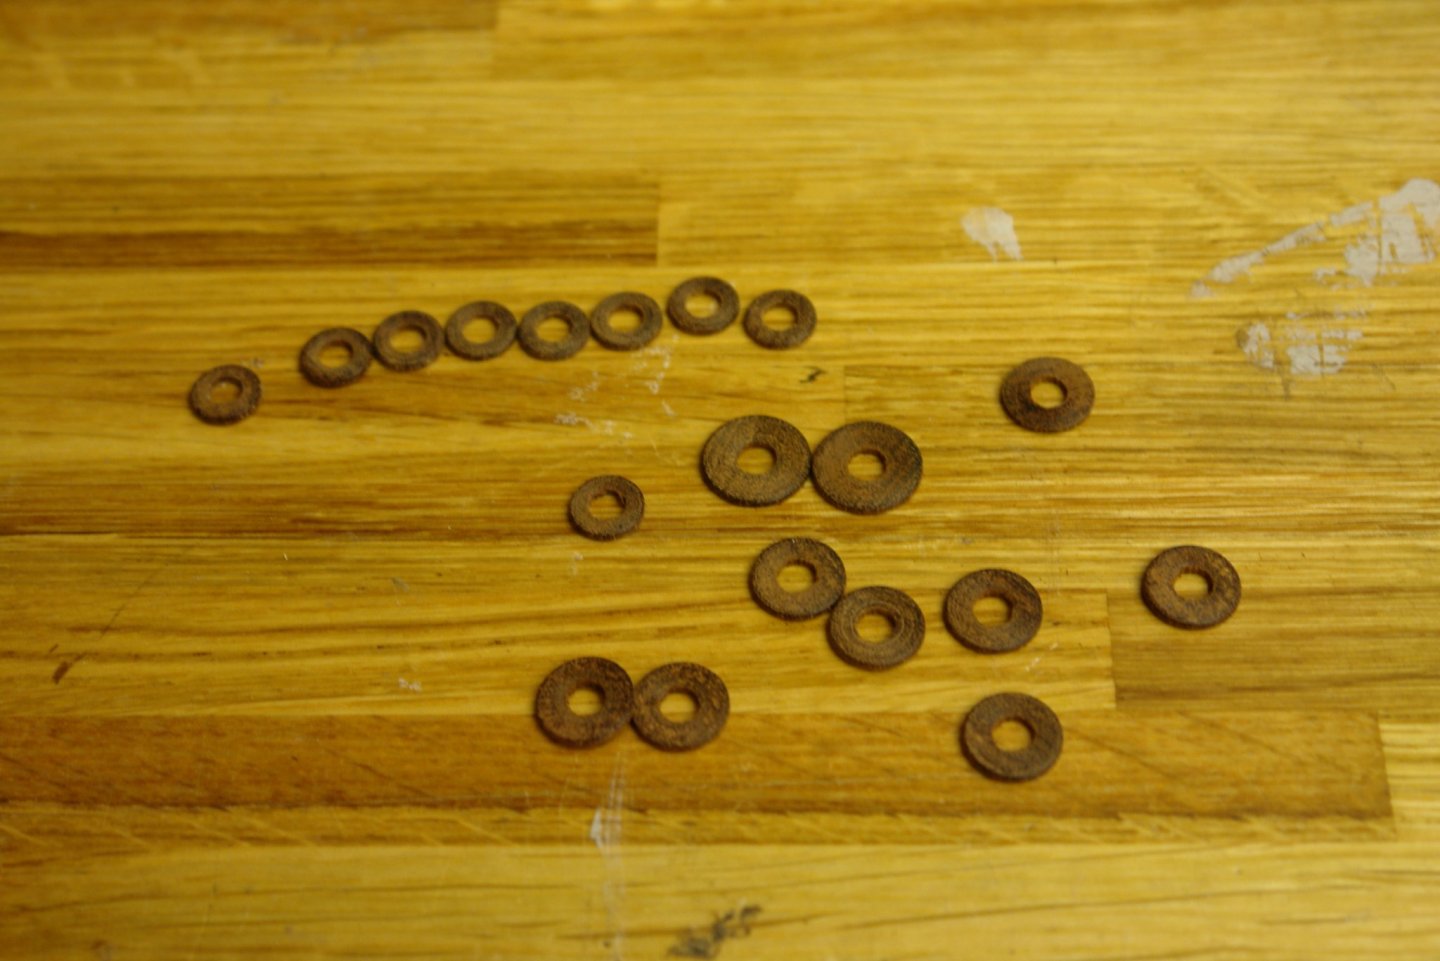
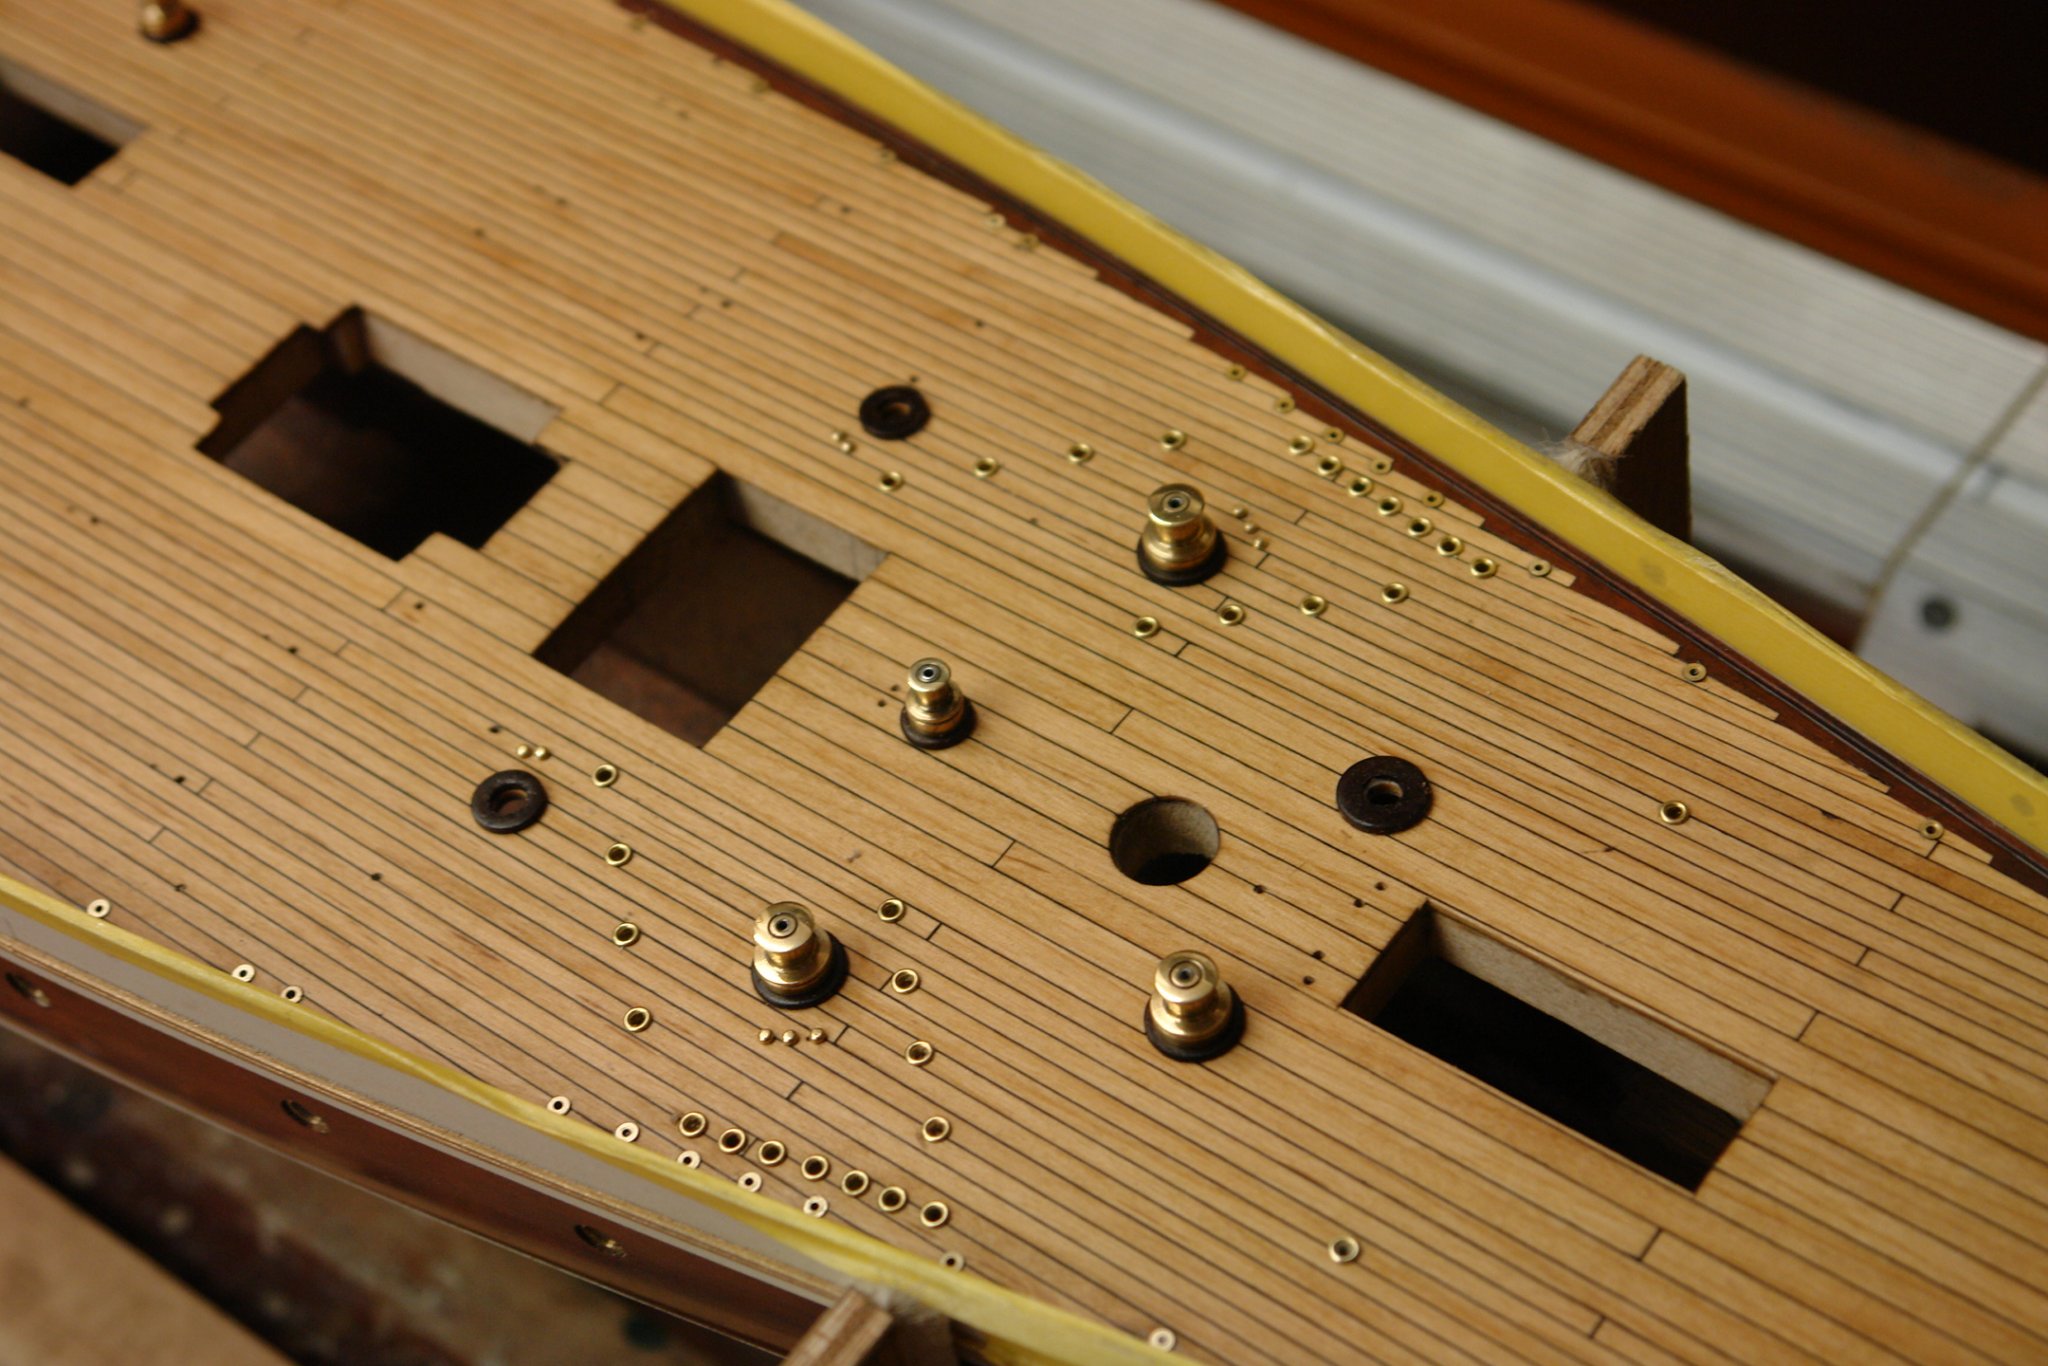
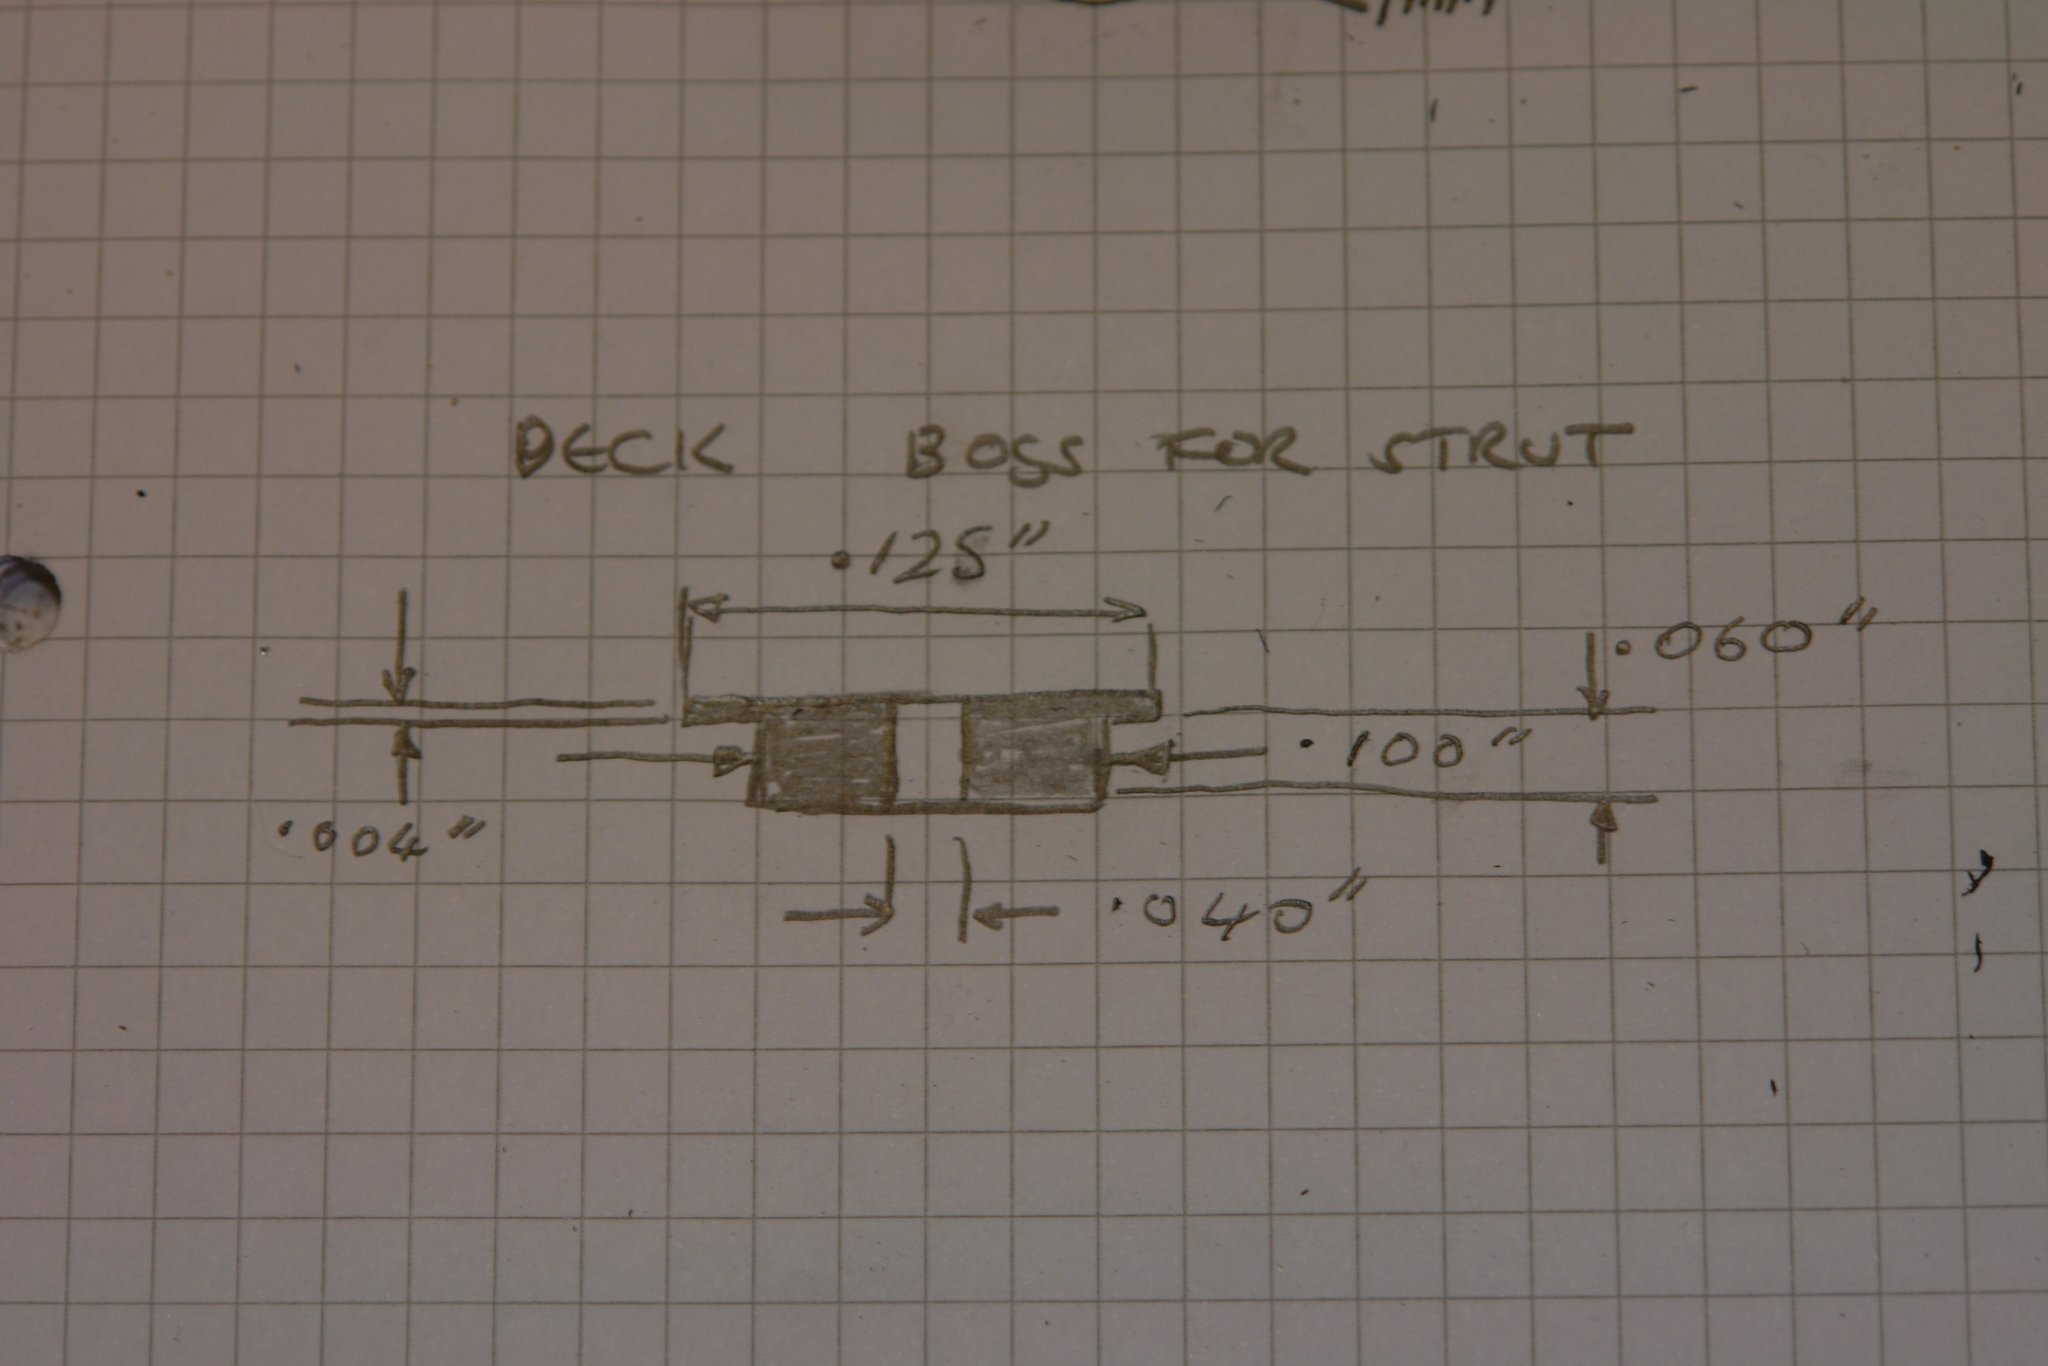
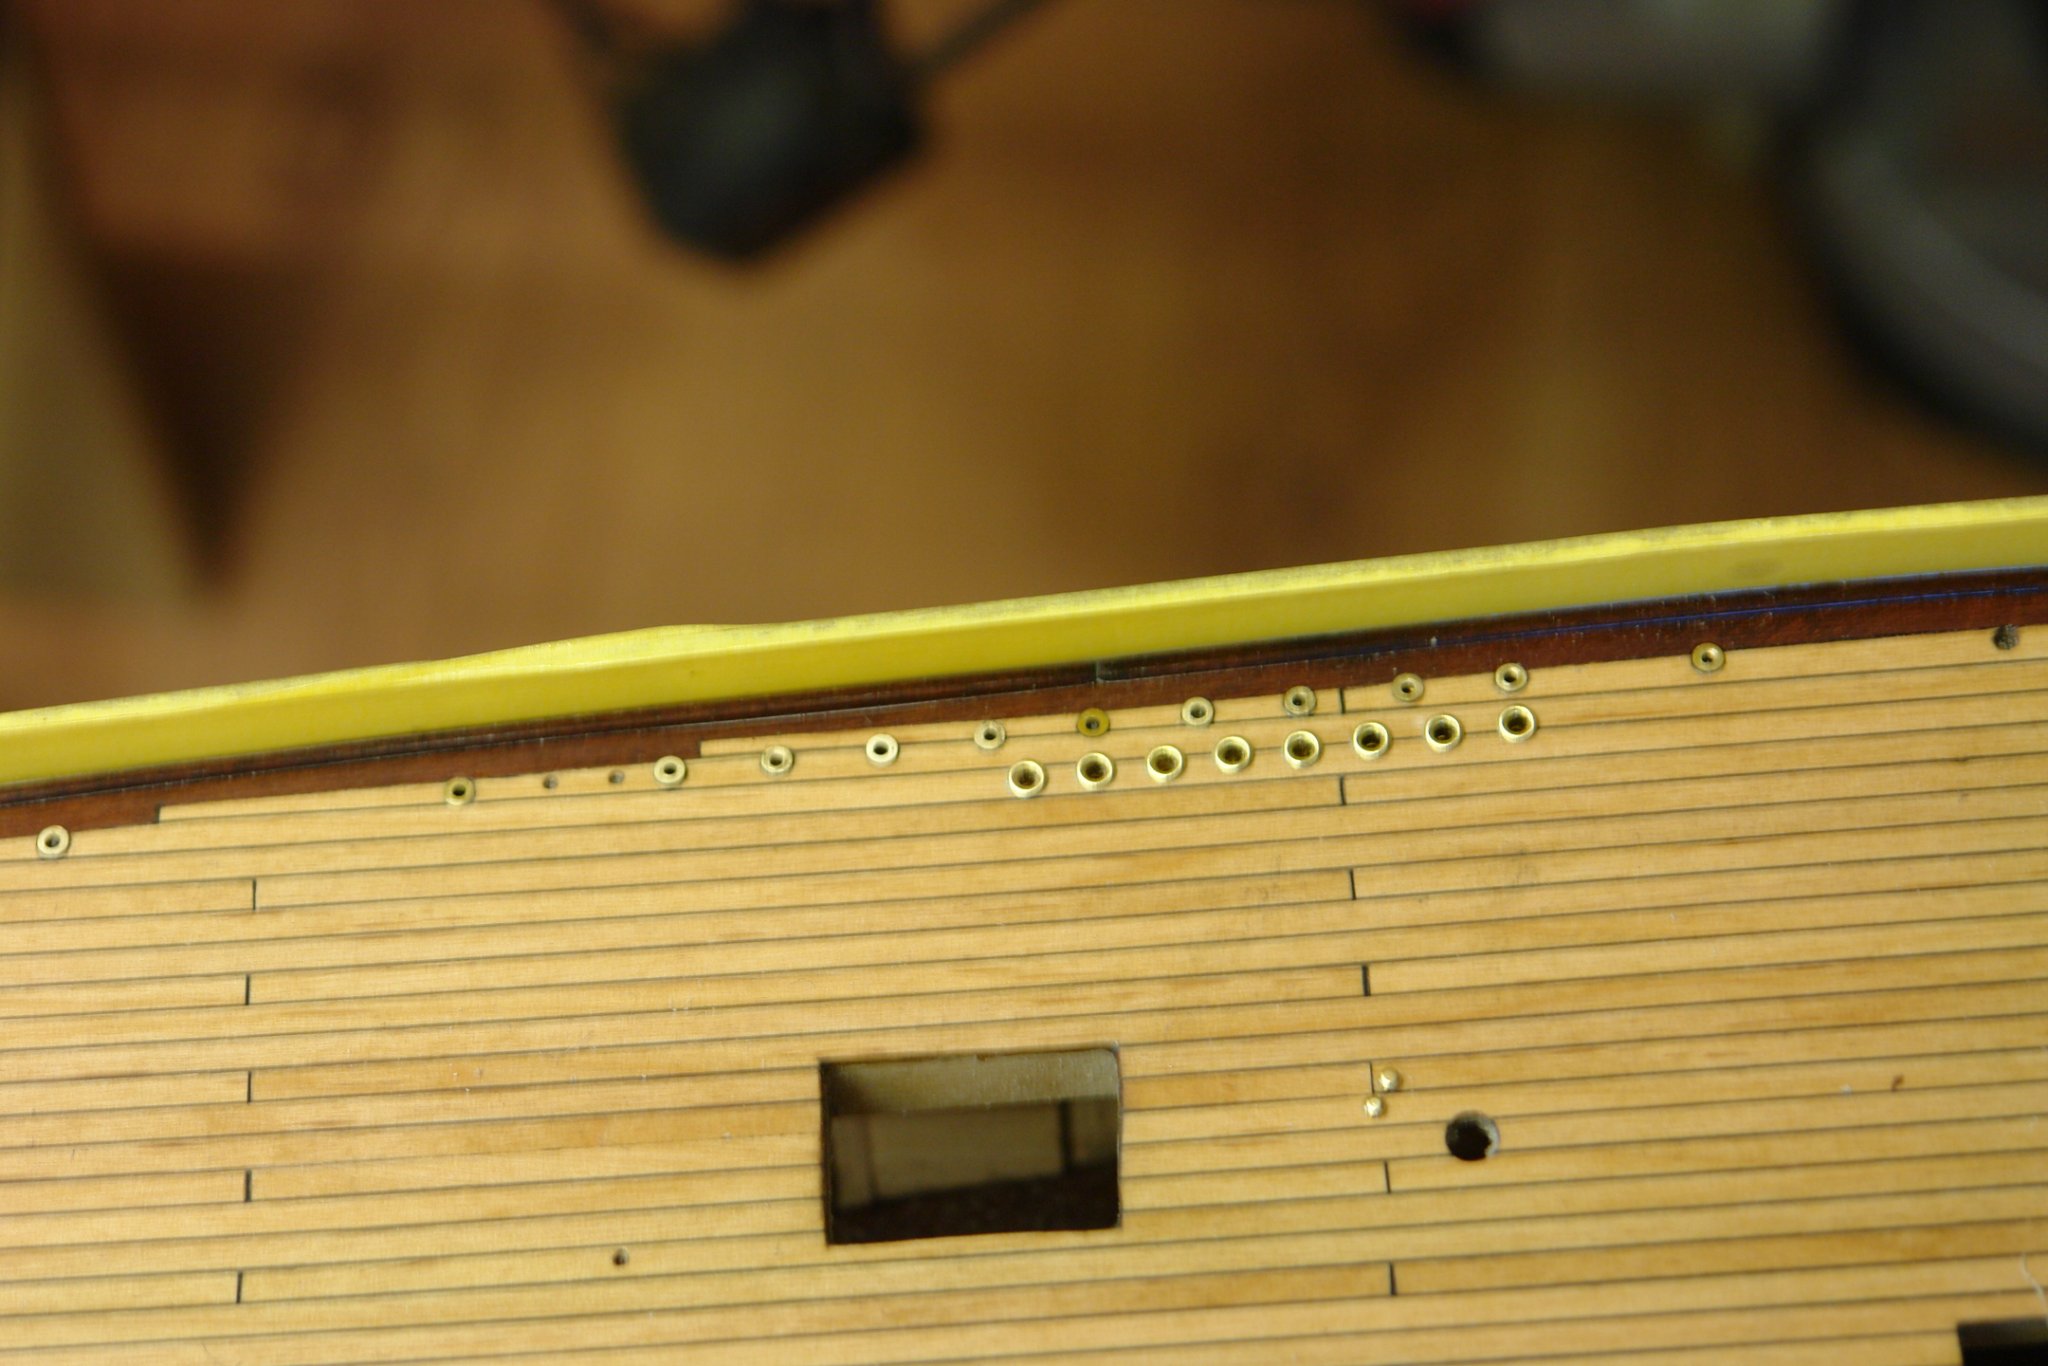
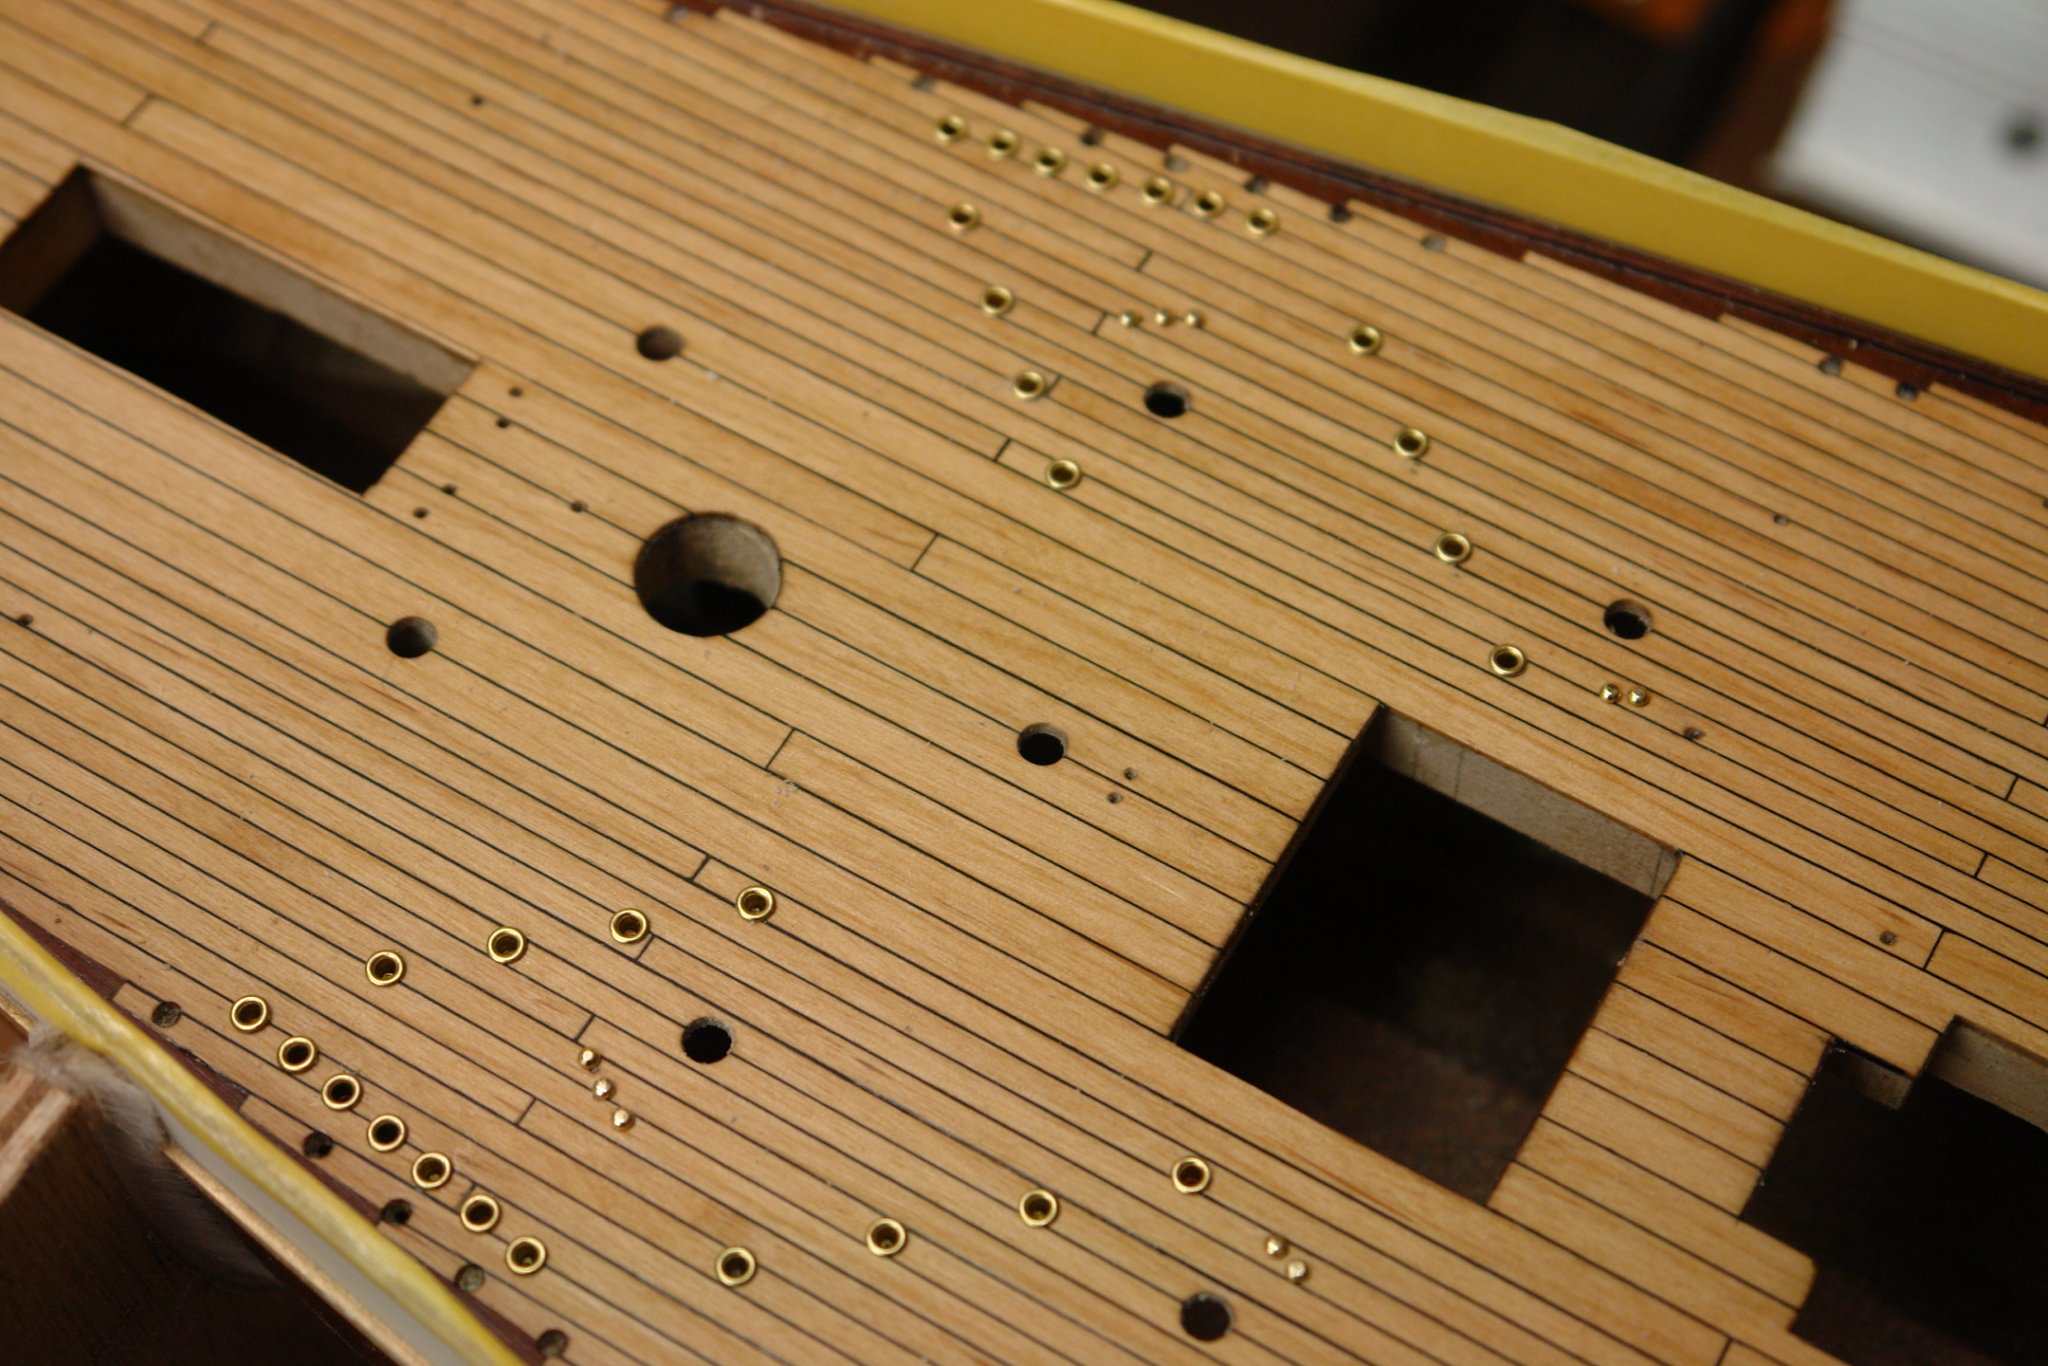
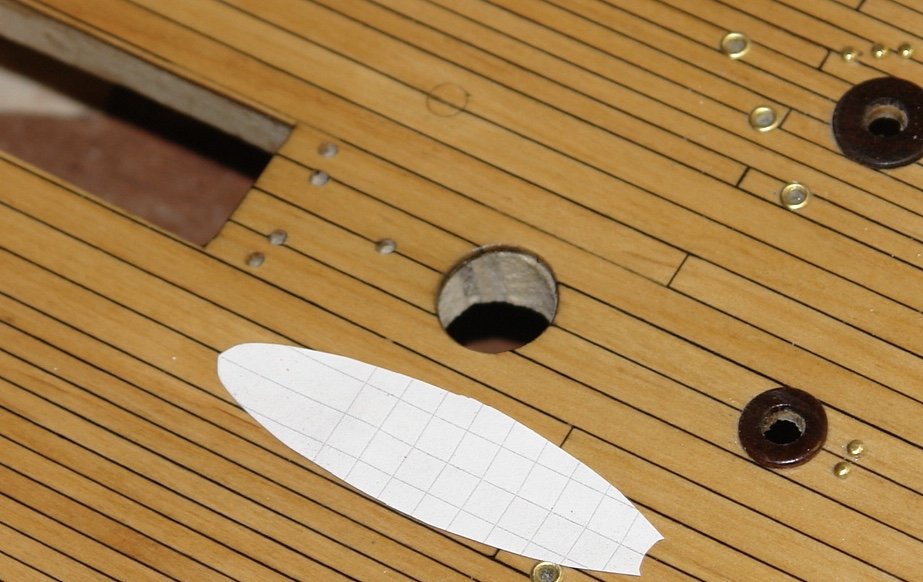
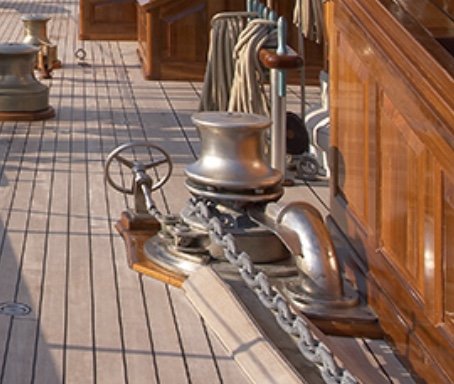
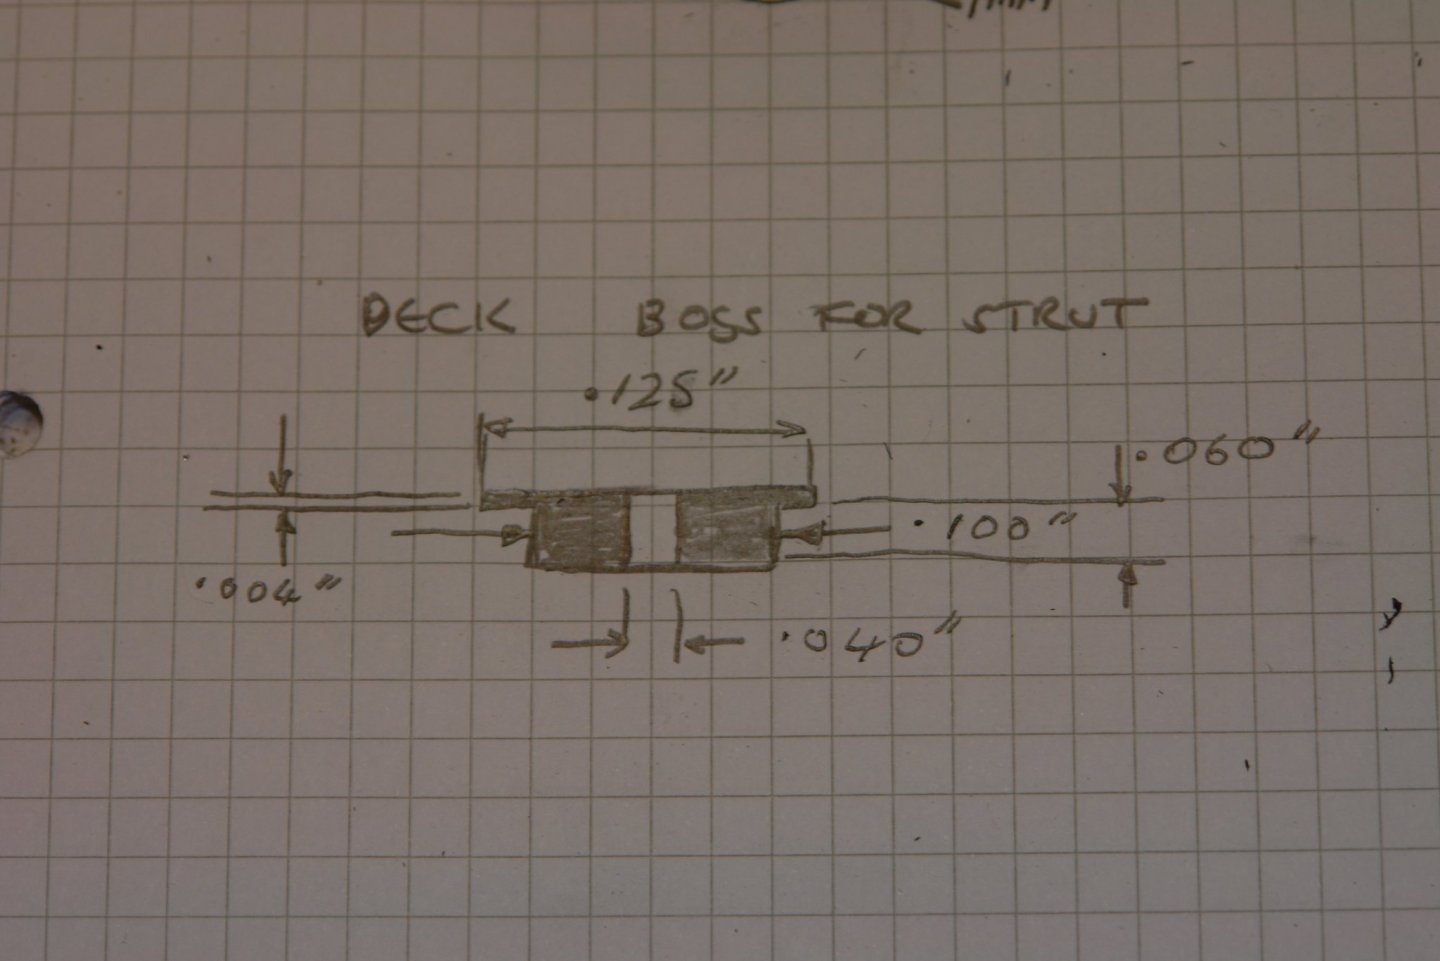
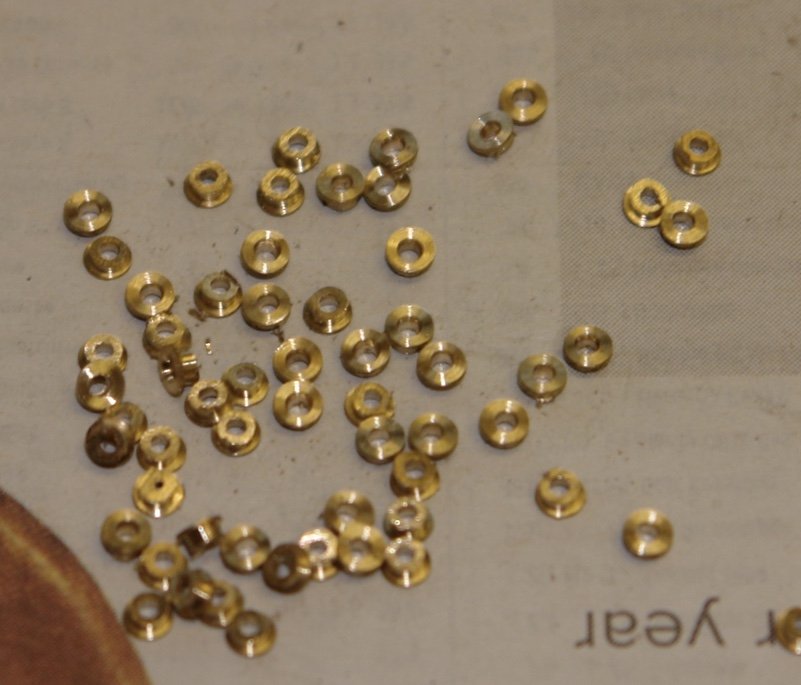
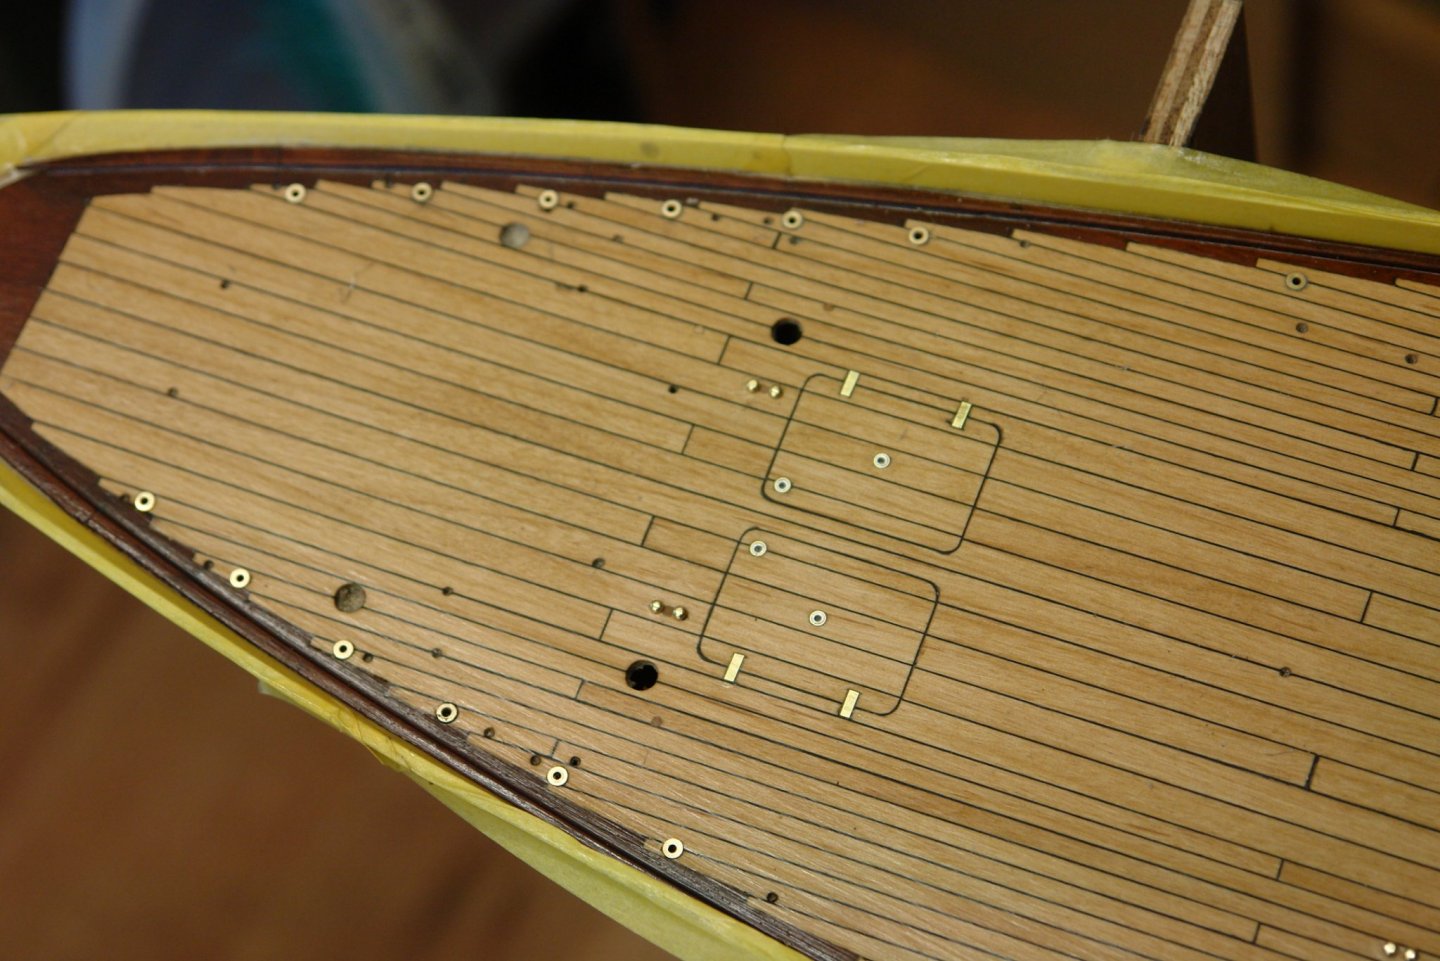
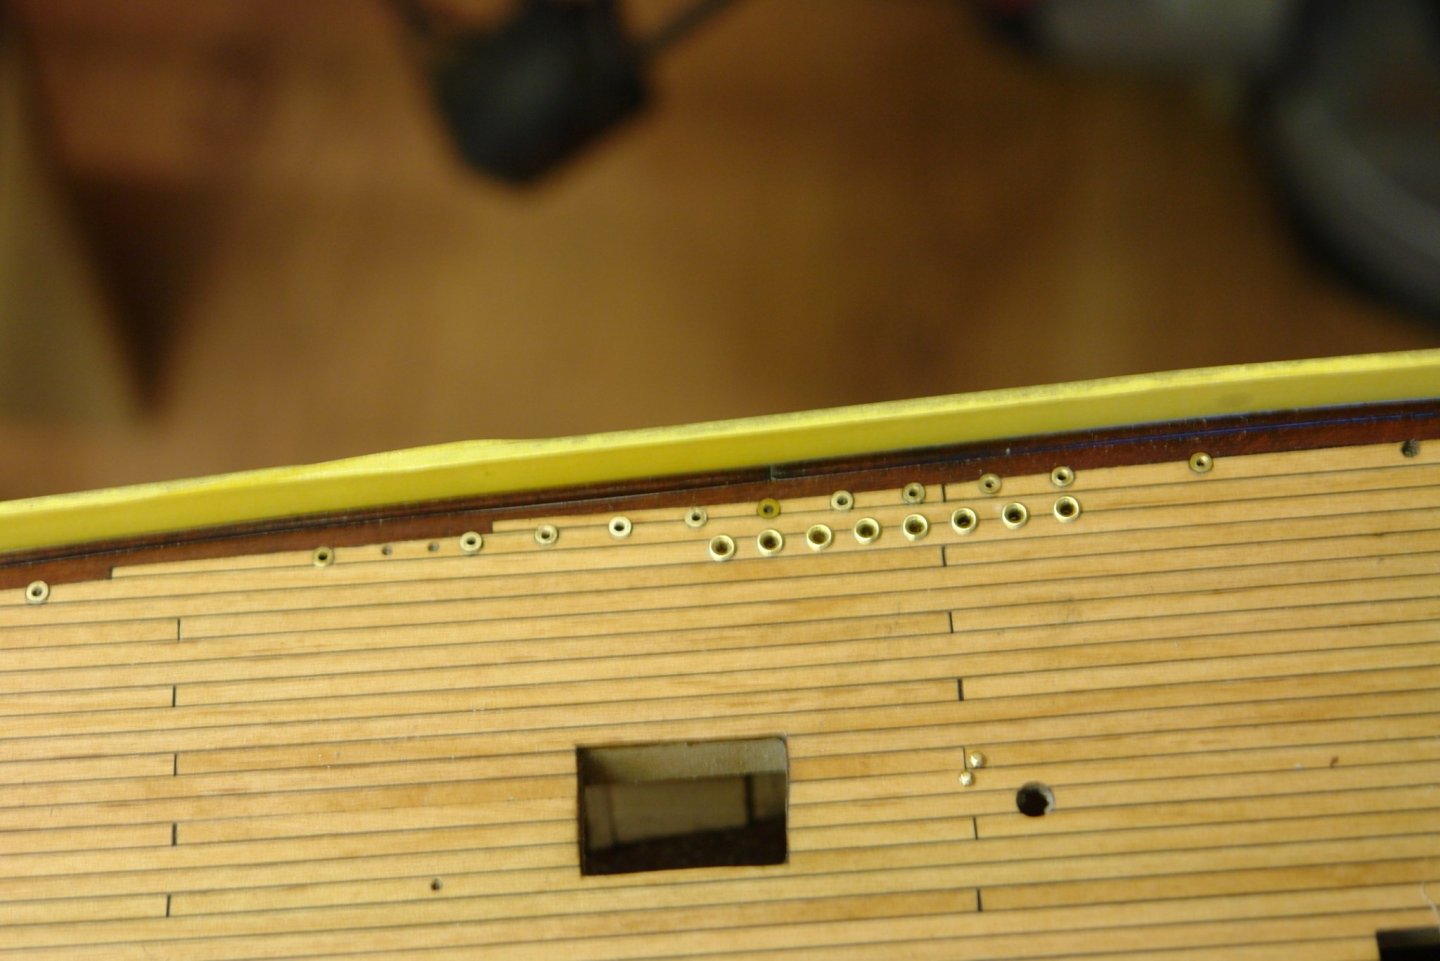
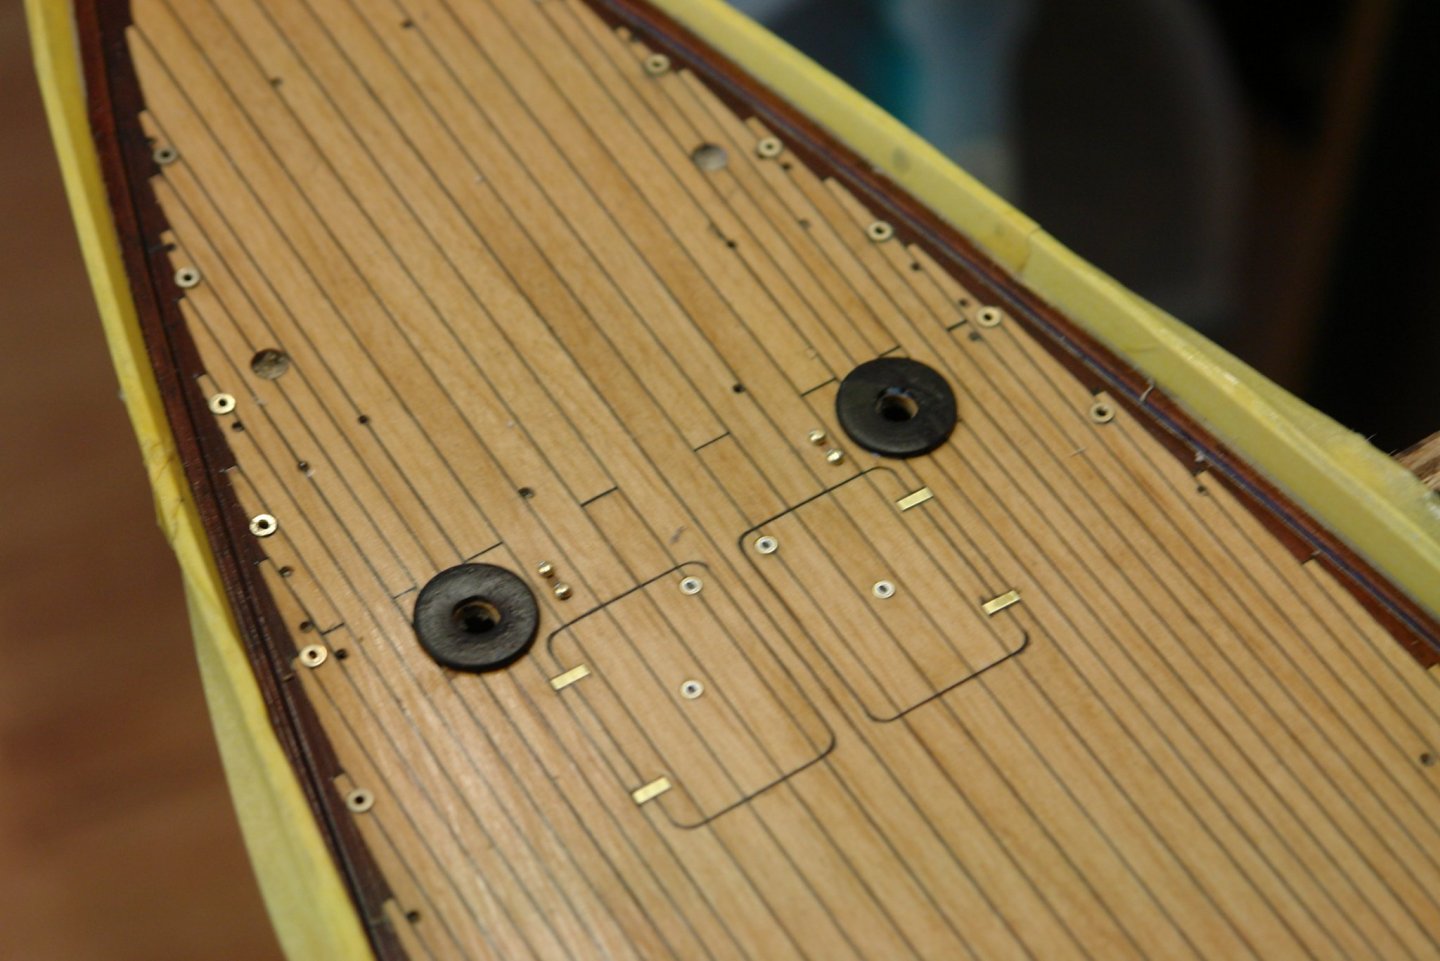
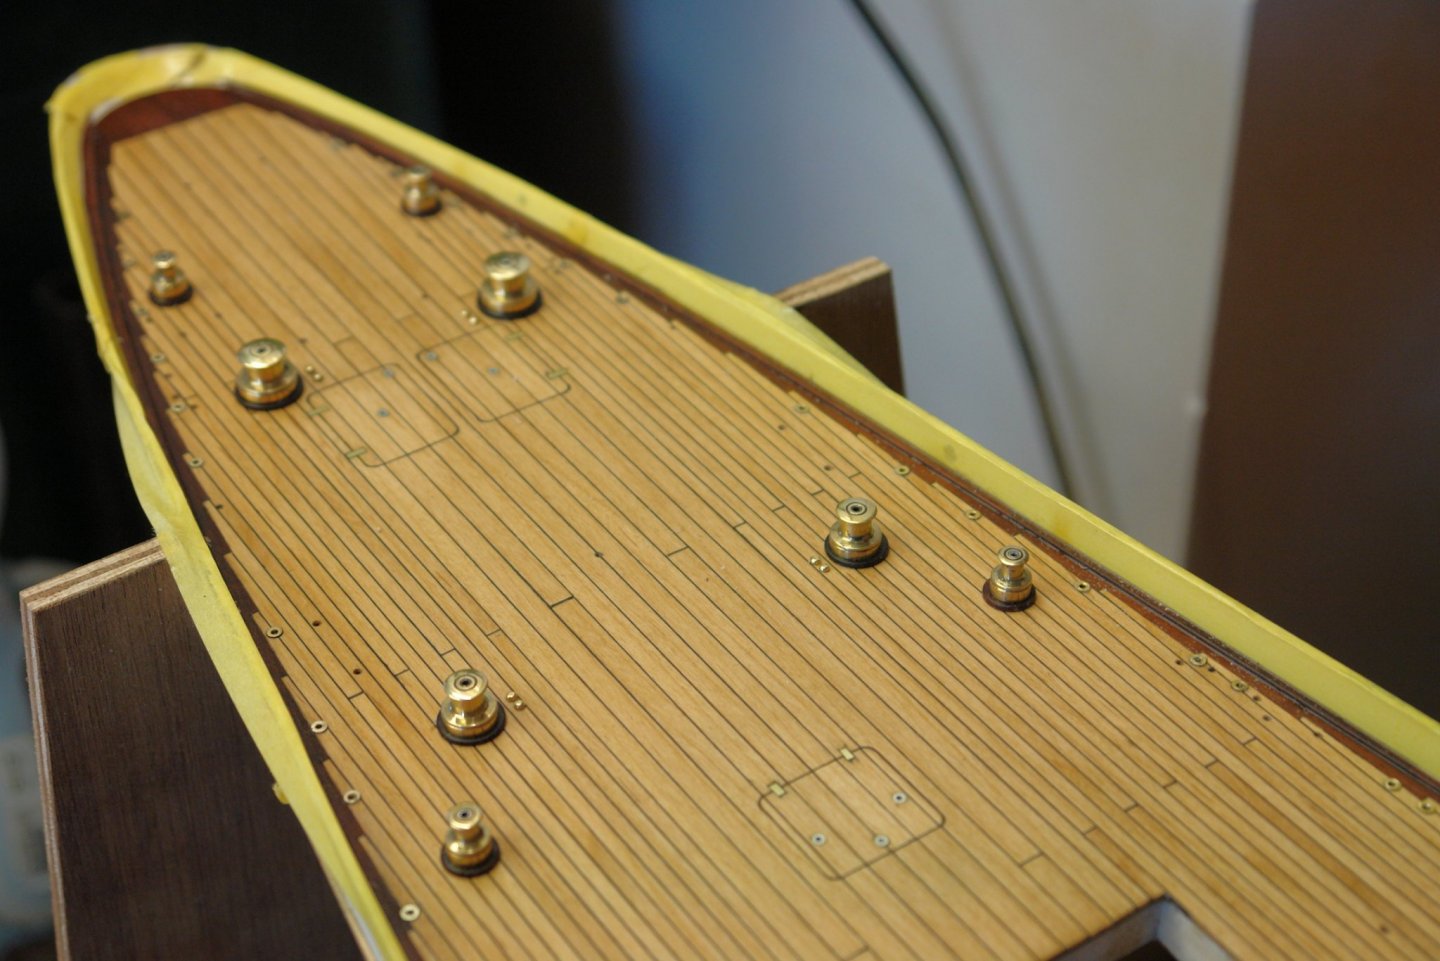
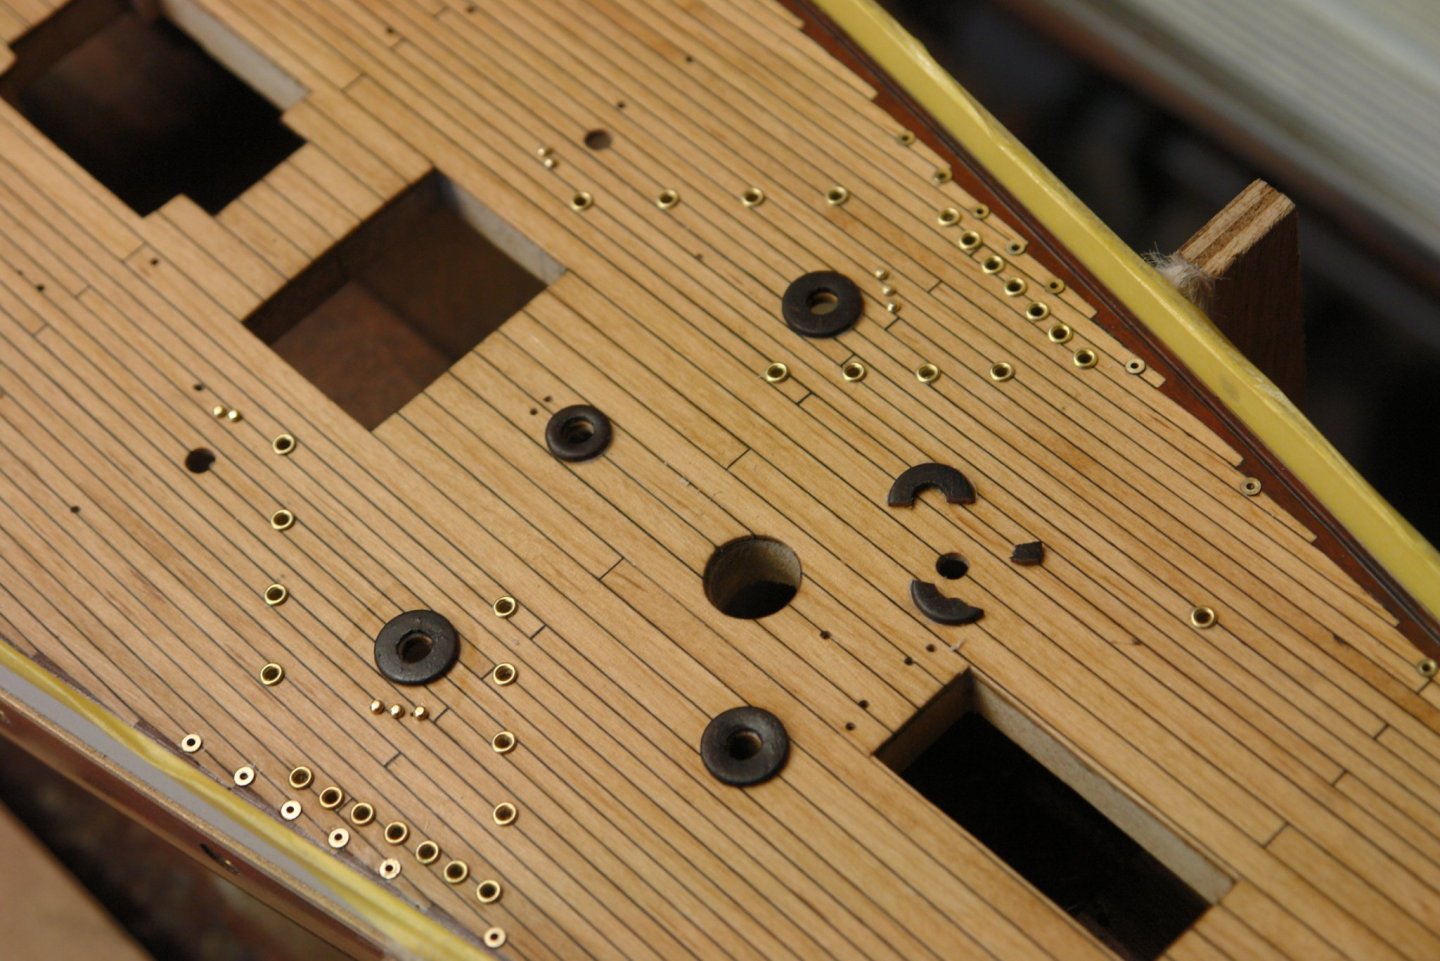
Yes Keith - Potholes. Don't worry Druxey - I have started filling them. There are 100 bulwark strengthening struts. I will make them in 2 parts - the deck boss and the strut itself. The bosses were scaled from photographs as follows:- I embarked on a long production run. A couple of days later and I had 100 - all of which I then polished with 5000 grit wet and dry paper. Dedication would have got the job done quicker but after about an hour or so's production I was brain dead. I had to do a number of sessions. I then started gluing (CA) them in the previously drilled deck holes. I also glued the winch plinths on to the deck. Then temporarily put the winches in place. Sometimes it pays to make a few more fittings than are needed. But I never seem to learn the lesson!!!!!!!!!!!! A number of eyelet positions on either beam are dedicated to lashing points for the tender / dinghy's. These have a different type of deck fitting - smaller than the others. I made them from brass tube. A lot of work for little progress --------- but that is the reason we all love the hobby.


-
Nice improvised lathe Paul. Even has 2 speeds. Tool rest securing screw look a bit basic but if it works that's fine. Tailstock almost looks over engineered.
-
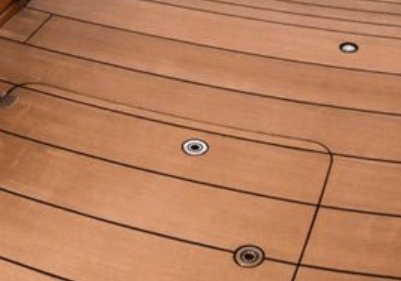
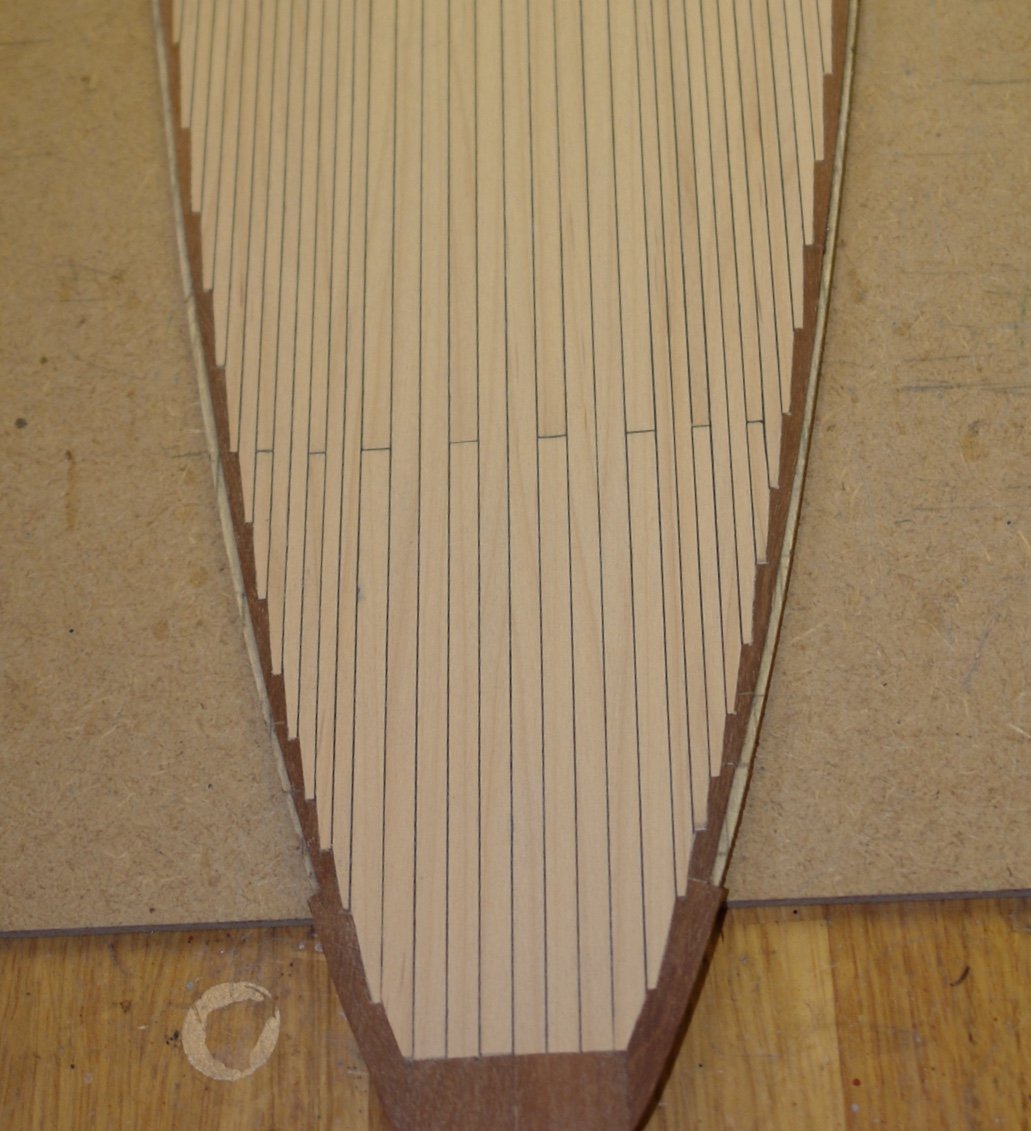
Thank you Allan. More bits of deck detail progressed today. The deck hatches appear to have recessed pull rings. I simulated them by inserting a aluminium tube in a brass tube and then parting off short lengths and gluing them in place before sanding back flush with the hatch. There are a multitude of points on the deck where eyebolts can be fitted. These take the form of a boss with a female screw into which the eyebolts or blanking plugs can be screwed. I am using small eyelets to create the boss and I will machine eyebolts to fit into these. I will need to make over a hundred eyebolts. The first step was to glue the eyelets in place with CA glue. I have done about 85% and will complete the rest later in the build. I got bored with eyelets so diverted on to the previously made winches. The winches sit on plinths - about .040" thick at scale size. I turned these from mahogany. I had been concerned that turning might be too severe an operation given that I was parting off across end grain. I sharpened the parting tool and hoped for the best - need not have worried all was well. Some time later I had a full set of "washers". I will give them a few coats of poly before gluing them in place.