


Cathead
-
Posts
3,352 -
Joined
-
Last visited
Content Type
Profiles
Forums
Gallery
Events
Everything posted by Cathead
-
 If there's one thing I've learned in modeling, it's that the final product almost always looks better than the sum of the mistakes made along the way. There's something about a finished model that draws the eye into the essence of the whole and away from any given detail. Especially for most viewers; a contest judge or expert will notice flaws, but most people will think it's pretty neat that you built anything at all, and the overall impression is often more important than the detailed nuances. Especially so for a beginner project like this. If I look closely at my earliest models, I can see all sorts of things wrong. But they still look cool on my bookshelves and any visitors find them appealing. At worst, you eventually shuffle the early ones quietly into less prominent places and thank them for their service because you now have something even cooler to feature. You should also be proud that you chose such a good simple kit as your learning experience; far too many people dive in over their head. Imagine making beginner mistakes on a $600 ship of the line!
- 85 replies
-
- 5
-

-
- Lowell Grand Banks Dory
- First Build
- (and 2 more)
-
Rob, I understand where you're coming from. I'm just trying to suggest that the only real difference between buying a $1000 kit through a payment plan and a $1000 kit by saving up for it is (a) the inevitable interest payments on the former, raising its cost even higher when money is already tight, and (b) the delayed gratification from the latter. Either way you're planning to spend $1000 that, by your own statements, is very dear. But it seems that you may have more time than money (since you don't have all the money now but you aren't starting the model any time soon). So why not try to set aside whatever you can so that if/when the time comes for the kit to be a good choice, you're already at least partway there? Unless you have reason to believe you'll have a higher income later? I mean, not to be personal, but if you've found it impossible to maintain savings for things like medical expenses and car repair (which is an all-too common situation and nothing to be ashamed of, you're doing a wonderful thing), are expensive models really in your budget? If it's simply impossible to set aside any money toward a $1000 kit that's a long way off and you don't have reason to think that will change, maybe it's not the most realistic goal? It's a lot harder to turn a half-finished model into medical payments than a half-filled future model savings account (full disclosure, I've been self-employed my whole adult life and am all too familiar with how easily health insurance and/or medical expenses can destroy personal finances). The third option being to find secondary-market kits that tend to be cheaper, as suggested by others above. My comments are directed at your original question about trying to afford a $1000 kit in your self-described situation. And I think the reason there aren't more subscription options is that it's a lot more work for the manufacturer/seller, which inherently means the price goes up if they bother at all, so you still don't really come out ahead if money is the primary restriction.
-
You all are very kind. I do agree, now that it's pointed out, that the chatter lines echo the thwarts nicely, though that's harder to see when you're not viewing from above. As with many things in modeling, individual faults (such as they are) often get subsumed into the visual appeal of the whole, and that's probably true here. My real problem is where to put the thing; this is the first model I've built that I didn't have a prepared place for.
-
I did NOT need to learn about this. Dangit.
-
You say "eventually", implying not any time soon, so why not just start saving for the model now and buy it when you're actually ready to build it? Why try to find credit for something you can't afford and aren't sure you'll even use? Way too many people buy and hoard kits they don't end up getting around to for various reasons, which is such a waste. If you save up first, you don't lose the money if the kit never happens for some reason. It'll still be available when you're ready, likely even on the secondary market from someone who bought it and never built it. If you can afford, say, $100/mo for 10 months on Paypal (plus whatever interest they charge you), why can't you afford $100/mo into a bank for the same period of time with no extra costs? The key here being "eventually" since that implies you can wait. Also, asking a retailer for a payment plan if they don't offer one is likely to just be a pain. There's a reason it's not common, having to accept and track many payments (and/or shipments) is a lot more work for the retailer, especially small ones. Maybe someone would be nice and work with you, but it's an inconvenient ask.
-
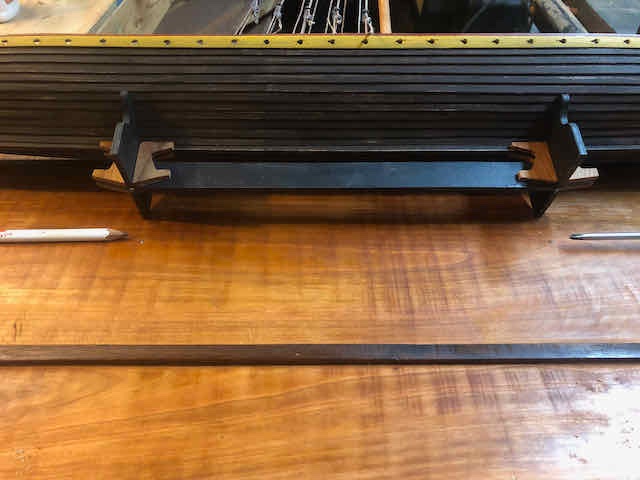
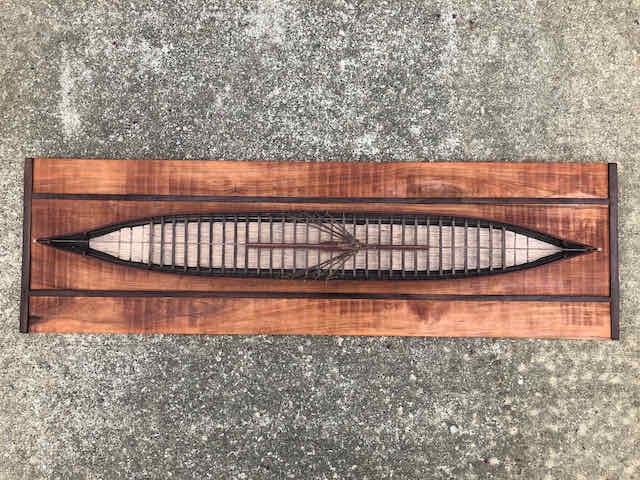
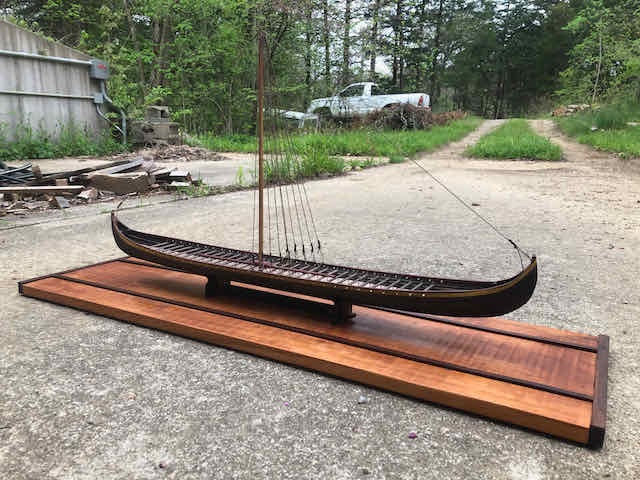
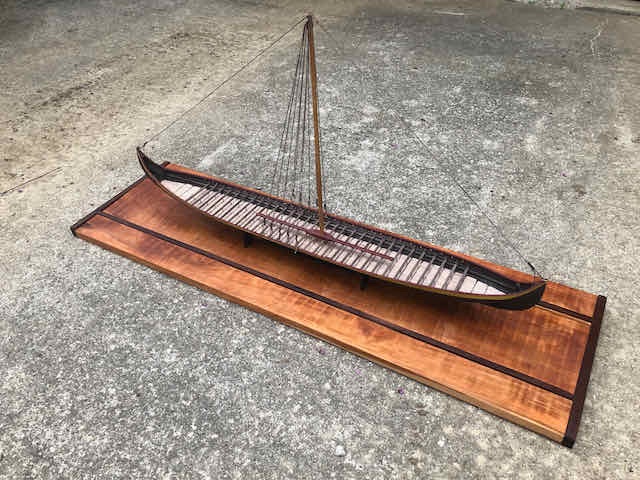
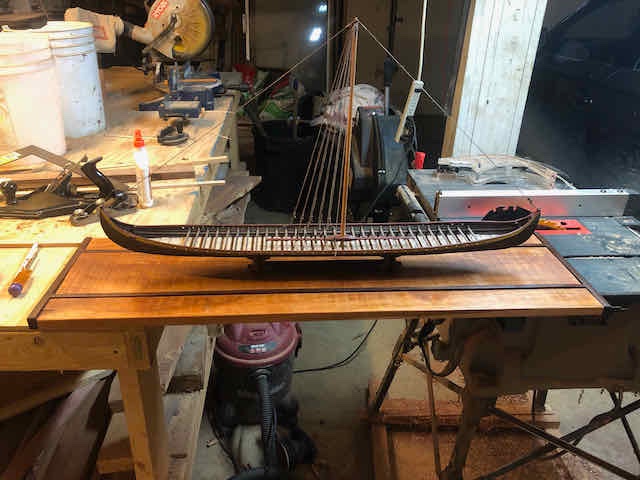
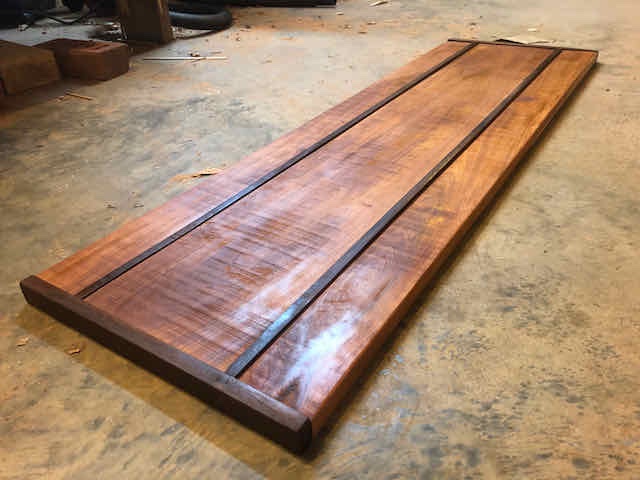
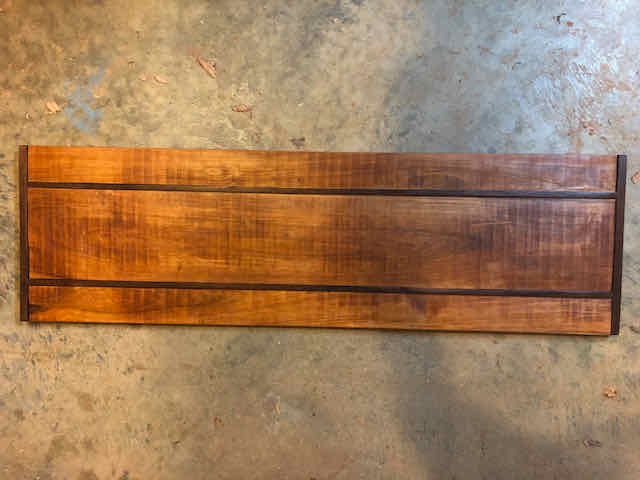
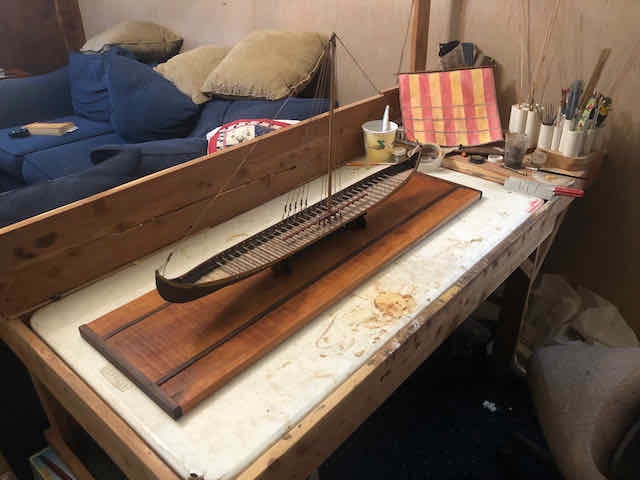
I took a break from the ship itself to build a base, as the lack of one was holding me back from various steps. For example, I don't dare install the rudder until the hull was permanently fixed in place over a base wide enough to protect it (as the rudder sticks out way below the hull), and I can't start rigging the sail properly until the hull is stable (since I can't tip the hull onto its side once the yard is fully rigged). I pulled out some cherry and walnut that I'd harvested years ago here on my farm and bandsaw-milled. The cherry was more cupped and warped than I would have liked, despite years of drying in a stickered pile, but since I don't have a planer, I made do. I used a hand planer and rotary sander to flatten and smooth the surface somewhat, but couldn't get it fully flat. So I adapted the base design to "hide" this. I had two 6" cherry boards, so ripped one of them in half lengthwise and framed the other with them, using walnut inserts to separate them. I intentionally left the walnut thicker than the cherry. This meant that I didn't have to get any of the boards lined up at the exact same thickness, as the subtle (unwanted) variations between the cherry pieces are obscured by the more obvious (and intentional) difference between the two types of wood. I then added end caps of more walnut strips to further hide the cherry's problems. I did this with the base sitting on my flat concrete garage floor (where, sure enough, it wobbled slightly since the cherry wasn't flat), but simply attached the end caps flush with the floor so the final base would be stable. Not going to win any awards for woodcraft, but it worked well enough. I didn't take any photos of the assembly process, but here's the completed base with several coats of wood oil. I definitely like how the raised walnut gives it some visual diversity and interest (also looks less like a cutting board than if it was all flush). You may notice some chatter marks on the cherry. That's from the bandsaw mill. Ideally these would be planed off, and I don't have (or really want) a planer. With enough time I could have eventually taken all of them out using a hand plane but I frankly didn't care to. The oil and photograph really brings them out, they're not as noticeable in person, and I never intended this to be art. I may make a nicer base sometime, like post-pandemic when I'm willing to go into a wood shop and have them plane some boards for me, but this is good enough for a working base for a model that itself has various problems and isn't likely to ever be displayed outside of my home. I really want to be done with this model and didn't want to spend tons of time crafting a perfect base. So then I proceeded to attach the model. For this, I carefully measured a centerline, then marked the two points directly under the thickest ends of the stand (where the cross-pieces are). I then drilled holes in these locations, both in the base and the stand. Below, the screwdriver and pencil are pointing to the holes, which you can just barely see. I then hand-drove wood screws up through the base, leaving the tips just sticking out the top. I could then fit the holes in the stand onto the screw tips (the model would only sit flush when the tips met the holes), then held it down tightly with one hand while final-tightening the screw with the other. To make this easier, I set the base spanning a gap between my table saw and garage workbench, so all I had to do was kneel underneath. And now that she's firmly attached, here's a couple broader views from the pad outside my garage: I think it's good enough. The screw attachment means I can always take it off again if I decide I want to make a nicer stand someday. Now I can move forward again, although I quickly realized I'd need to change the layout of my workspace, as this now takes the entire width of my workbench (which normally has a lot of other resources on it): There's a bunch of stuff living on the floor next to the bench now. Another reason to get this done! Thanks for sticking with me.
- 322 replies
-
- 14
-
-

-
I've developed the habit of designating a "show" side of the model early on, and always work on the opposite side first. That way, initial mistakes are concentrated on the "wall" side and I have a better chance of a higher quality "show" side.
-
I agree that wire is the most practical way to strop a block. Easier to use and easier to tighten properly.
-
Just found this and looking forward to following it. With a family history in northern Minnesota iron mining, and an upbringing along Lake Ontario, lake freighters are certainly of interest to me.
-
Steamboats and other rivercraft - general discussion
Cathead replied to Cathead's topic in Nautical/Naval History
I think we're missing the model photo?- 281 replies
-
- 1
-
-
- Steamboats
- riverboats
- (and 3 more)
-
Steamboats and other rivercraft - general discussion
Cathead replied to Cathead's topic in Nautical/Naval History
Pretty sure the darker object you indicate is actually a grasshopper spar stowed horizontally, hanging from lines coming down from its white support spar. The angle makes a good visual illusion but if you look really closely you can see the lines wrapped around it near center. I also don't think there's any reason rolled clothes would be hung like that, especially out over the bow.- 281 replies
-
- 2
-
-
- Steamboats
- riverboats
- (and 3 more)
-
Steamboats and other rivercraft - general discussion
Cathead replied to Cathead's topic in Nautical/Naval History
Randy, that's a creative suggestion. I think the reason I don't agree is that the "tube" perfectly meets every vertical support as if it runs through it. Any kind of long rolled up cloth would, one would think, have to go around or over those supports.- 281 replies
-
- 2
-
-
- Steamboats
- riverboats
- (and 3 more)
-
Steamboats and other rivercraft - general discussion
Cathead replied to Cathead's topic in Nautical/Naval History
I checked my copy of Way's packet directory, which does list this vessel but doesn't have much to say about it beyond what you already know. It mentions a documented inspection in 1881 at Valley City, IL, no idea if that's a lead toward finding some documentation? The last record it mentions is 1886. Cool project, good luck!- 281 replies
-
- 2
-
-
- Steamboats
- riverboats
- (and 3 more)
-
Whaddaya mean, "you hope you'll have more next time"? That's a huge dump of fantastic work.
-
Nice job, I agree that they really help visually tie the original knees in, accurate or not.
-
Oh, that's the dark side of scale modeling for sure. I also work on a carpet and have used nautical language to describe such events. Think of it as a chance to learn new skills in metal fabrication!
-
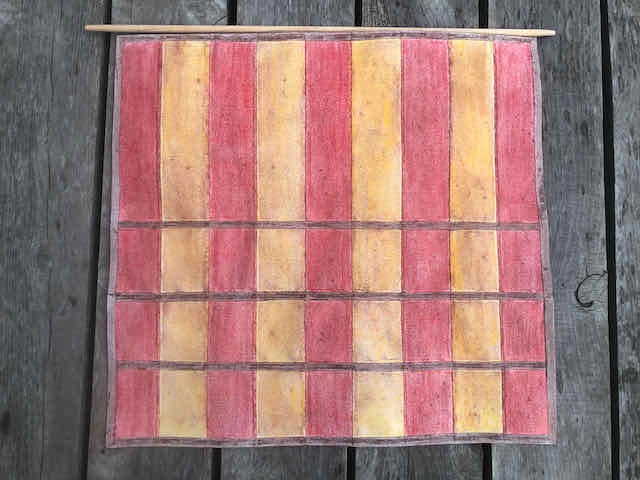
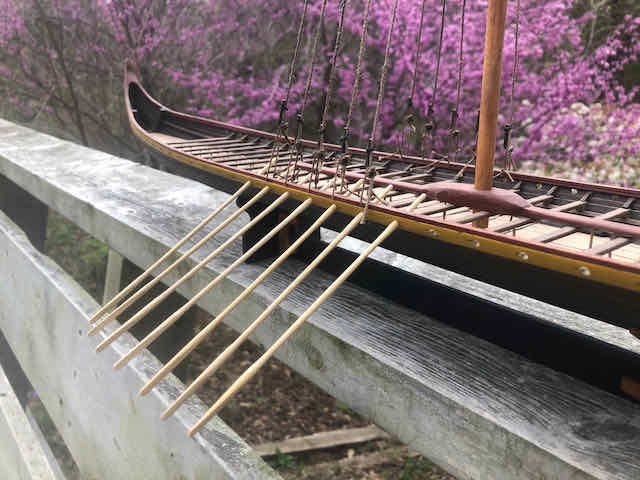
Turns out I moved forward today. I experimented with various cloth methods, after reading some more build logs, and just couldn't come up with something I liked or wanted to do. So I went back to the paper sail and applied another layer of colored pencil followed by a thick rub of brown pastel. This ended up darkening it pretty well with a better match for the model's color profile, and looks more like a weathered, heavily used sail. Before: After: So I think I'm just going to go with this. I want to keep moving. I also started shaping oars. These are hard to photograph, but I chucked dowels into my poor man's lathe (hand drill) and sanded down the shafts, then used a knife to flatten the oar blades. Here are the first seven test-fit on the vessel: I'll certainly stain and weather these, but it's fun to see them in place. And here's a shot of the sail propped up in roughly the right position: When it's installed for real, I'll bend it more so it isn't so two-dimensional. But this gets the idea across.

- 322 replies
-
- 12
-
-
-
Your excitement is justified.
-
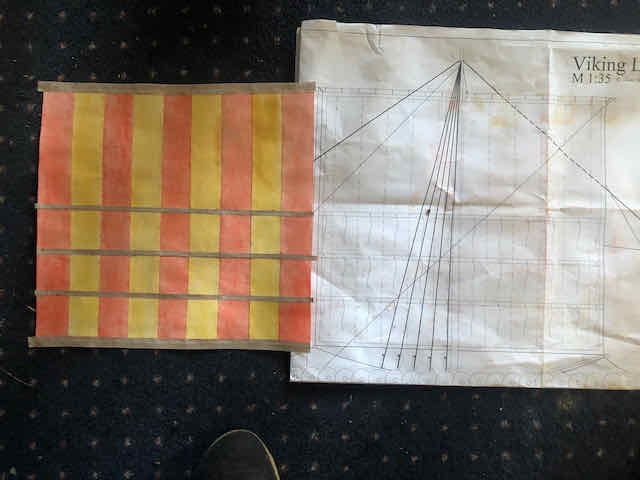
Sorry for the slow reply, kept thinking I'd wait until I had something new to show but still don't. This is the first time I've done a multicolored sail with pastel. In the past, smearing hasn't been a big deal because I've just been using the pastels to age/weather the white paper into a faded yellowish (see the sails on my revenue cutter linked in my signature). It took a lot more care not to transfer colors back and forth between the different panels this time. I find that once colors get rubbed into bond paper, they smear less. I wipe/rub the paper surface first with fingers then a cloth. After that, the loose stuff is gone and the color is worked into the paper fibers. Still have to be careful, but it's not shedding all over the place. But this is why I did each coloration on a separate workspace as described above. THe bad news is, the more I look at my sail the less I like it. I placed it on the model and it just doesn't fit. I think it's too bright and soft for the darker tone of the rest of the model, and the paper texture is too fine for this large scale. Bond paper looks great on my 1:64 revenue cutter, but less so on this 1:35 ship. So I'm not sure what to do. I may try darkening it some. I'm also realizing I'm REALLY not looking forward to the delicate application of lots of thin paper strips for the cross-hatched reinforcements. So I'm considering making a quick furled cloth sail and displaying the yard stowed, especially as I'm leaning toward wanting to display the oars in working position rather than bundled. Life's really busy right now so I don't know when I'll decide or move forward on something else while delaying this decision.
-
Another detail you might consider, look closely at the deadeyes in the drawings given previously. Deadeyes are always rigged in the same orientation, with the point of the triangle of holes facing down for the lower deadeye and up for the upper one. They should "face away" from each other in a matched pair, like two triangles pointing away from each other. This is not only "right", it will also make the rigging easier and cleaner. Not sure if this is easy for you to fix or not, but wanted to point it out. Sorry I'm just catching up now, may be too late. One other small note, it's "wale" rather than "whale" when referring to that part of the ship. Not being a nit-picker, just pointing it out since you're enjoying learning from this build and using correct terminology is part of the fun and experience. It can also make it easier for others to help you! Keep up the good work!
-
Ominous. Going back and fixing things one doesn't like is often frustrating but usually feels better afterward.
-
HMS Beagle by Krupi - OcCre - 1:60
Cathead replied to Krupi's topic in - Kit build logs for subjects built from 1801 - 1850
Personally I think I'd remove it. Even if you feel it's more accurate, from an artistic/presentation perspective it may be distracting to casual viewers. I have a "soft" rule for myself that anything that's right but I feel like I should have an interpretive card explaining "well, actually" for, maybe I should rethink. But it's certainly up to you! -
It sure looks like you're right about the chains, they should naturally have a gap for the gunport without having to be angled around it.
-
First builds are always a learning process, I cringe at some of my early attempts! You've got the right attitude, keep having fun.
- 85 replies
-
- 4
-
-
- Lowell Grand Banks Dory
- First Build
- (and 2 more)
