-
Posts
3,552 -
Joined
-
Last visited
Content Type
Profiles
Forums
Gallery
Events
Everything posted by Cathead
-
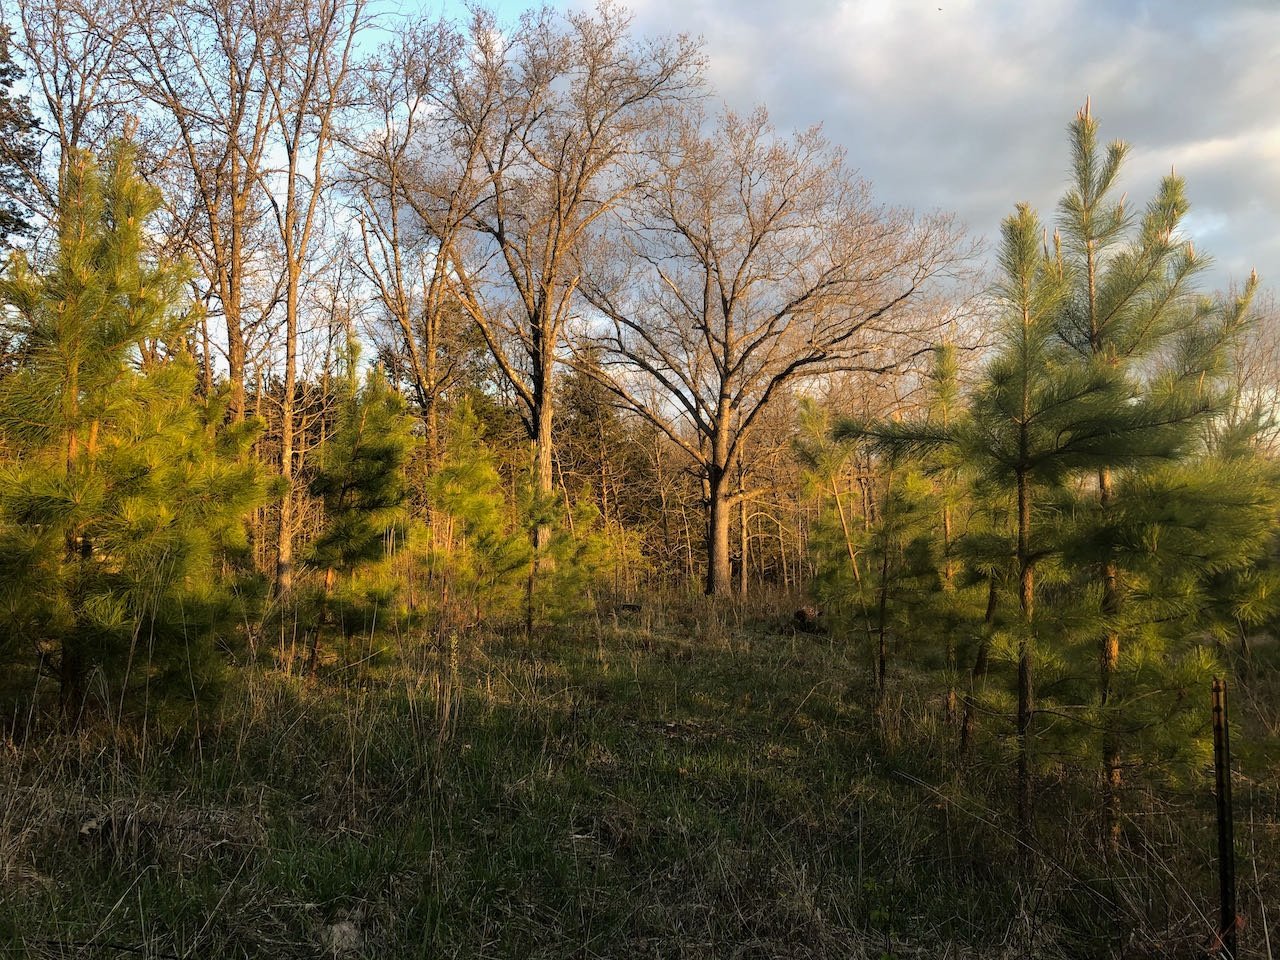
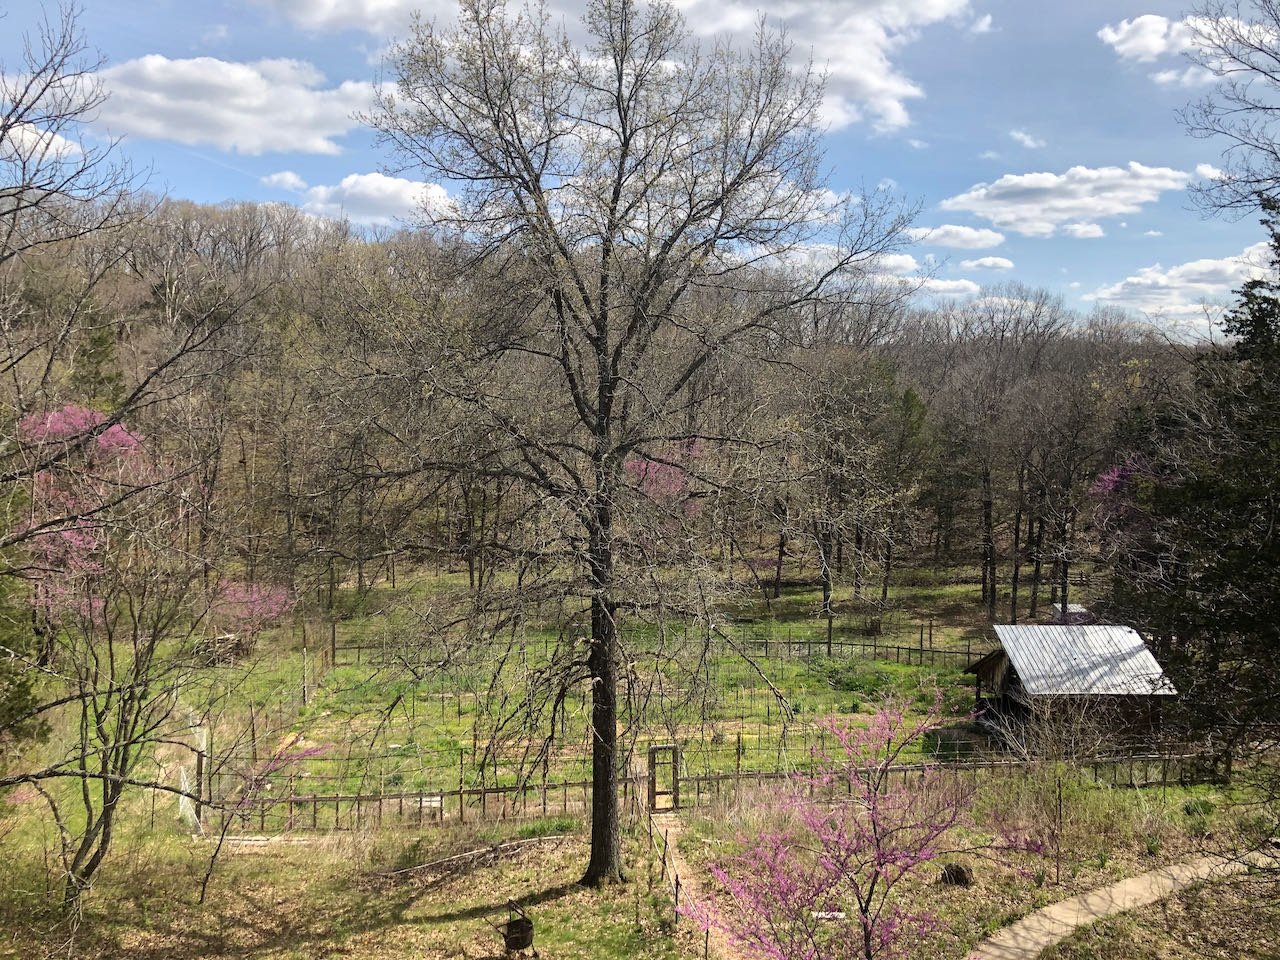
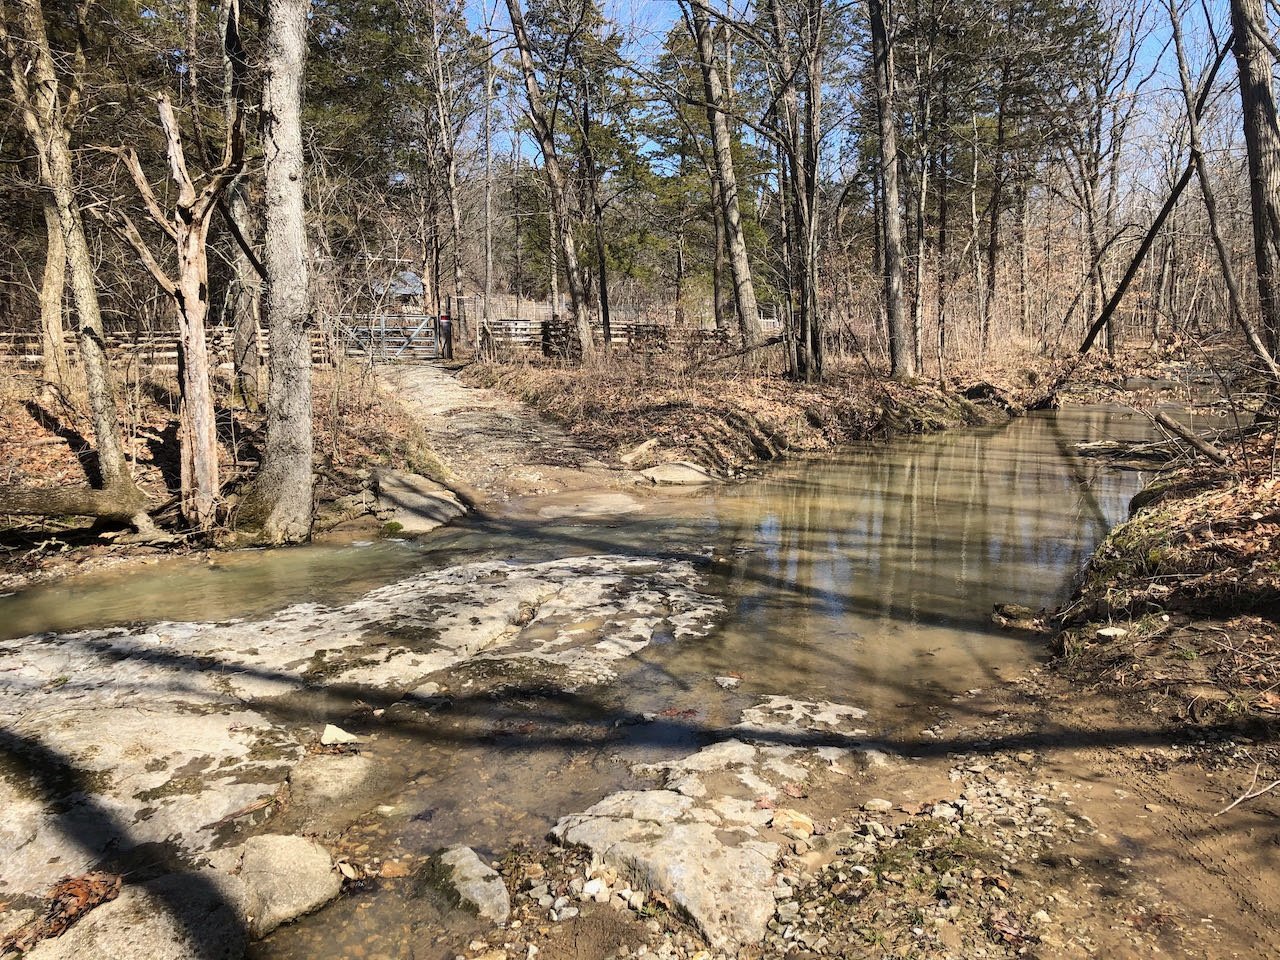
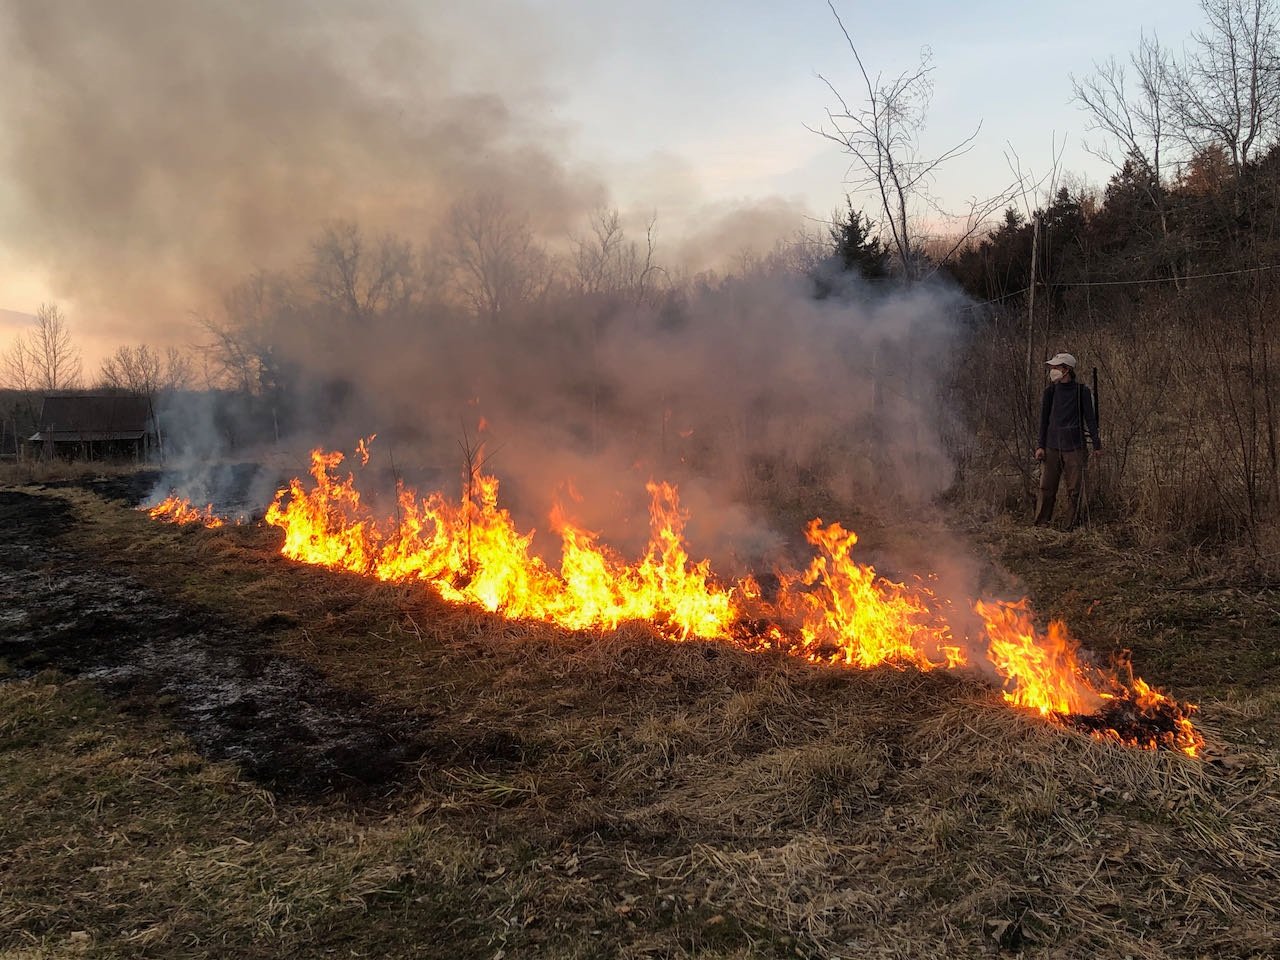
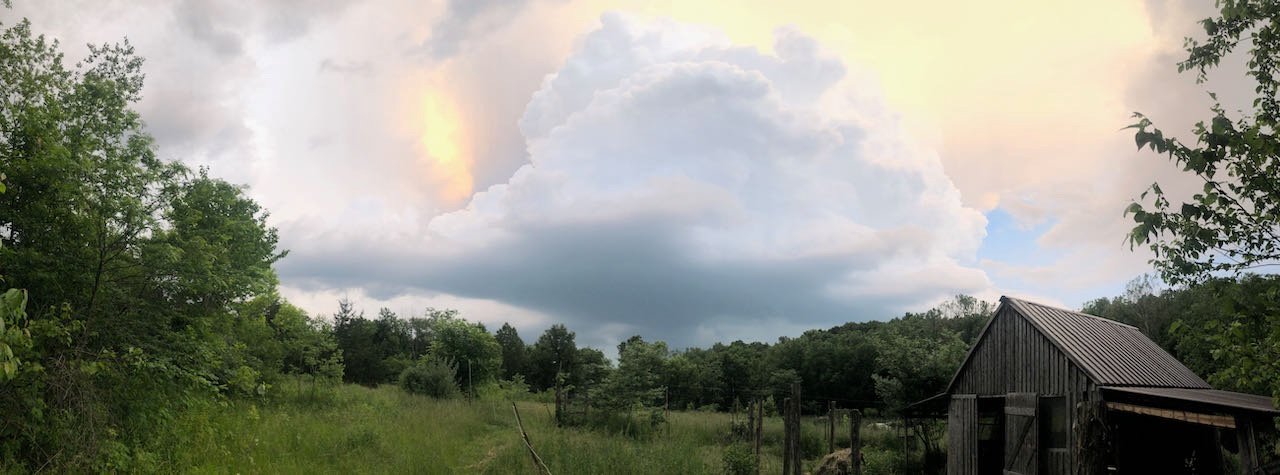
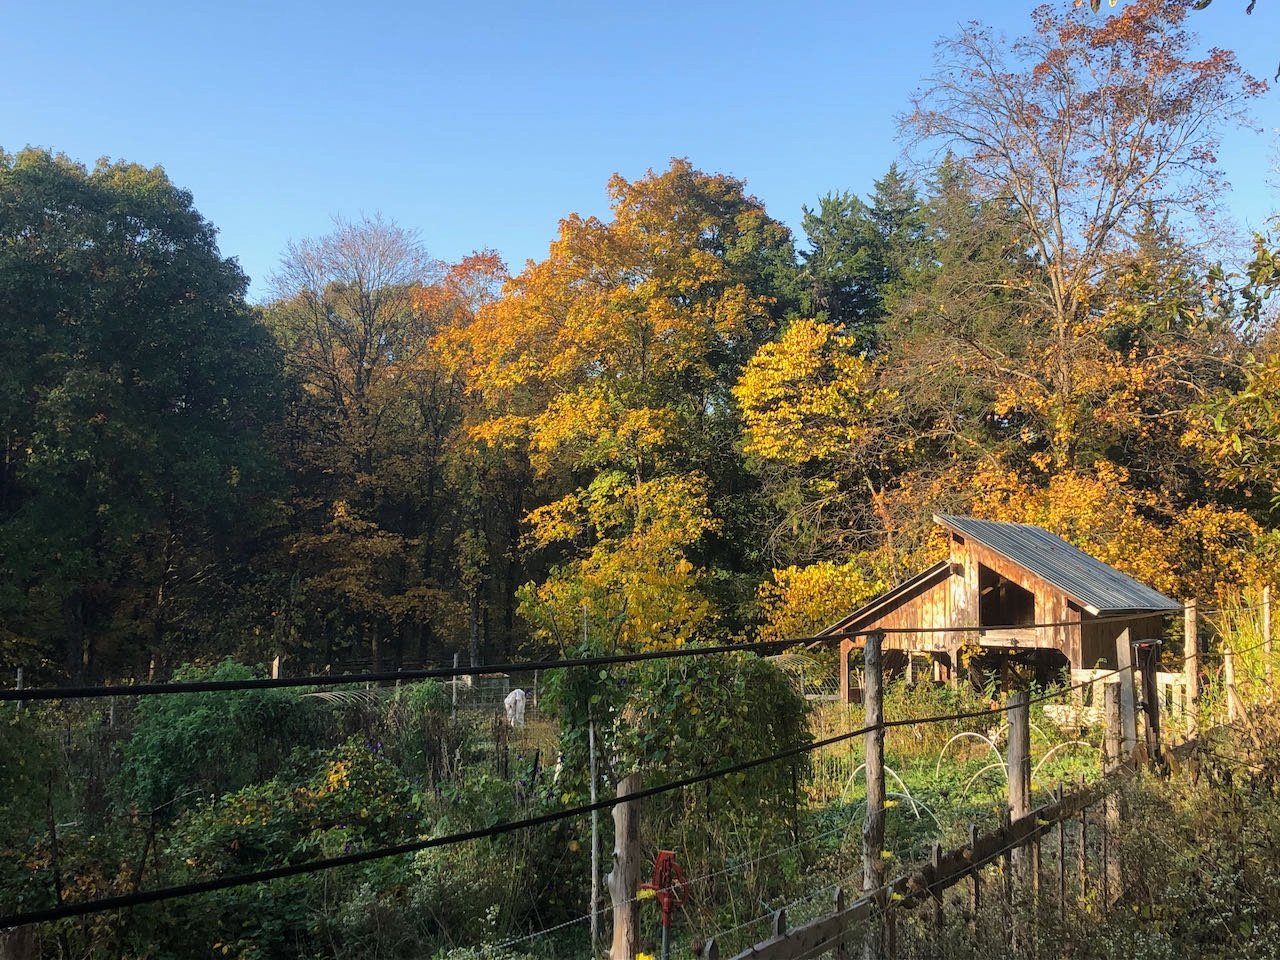
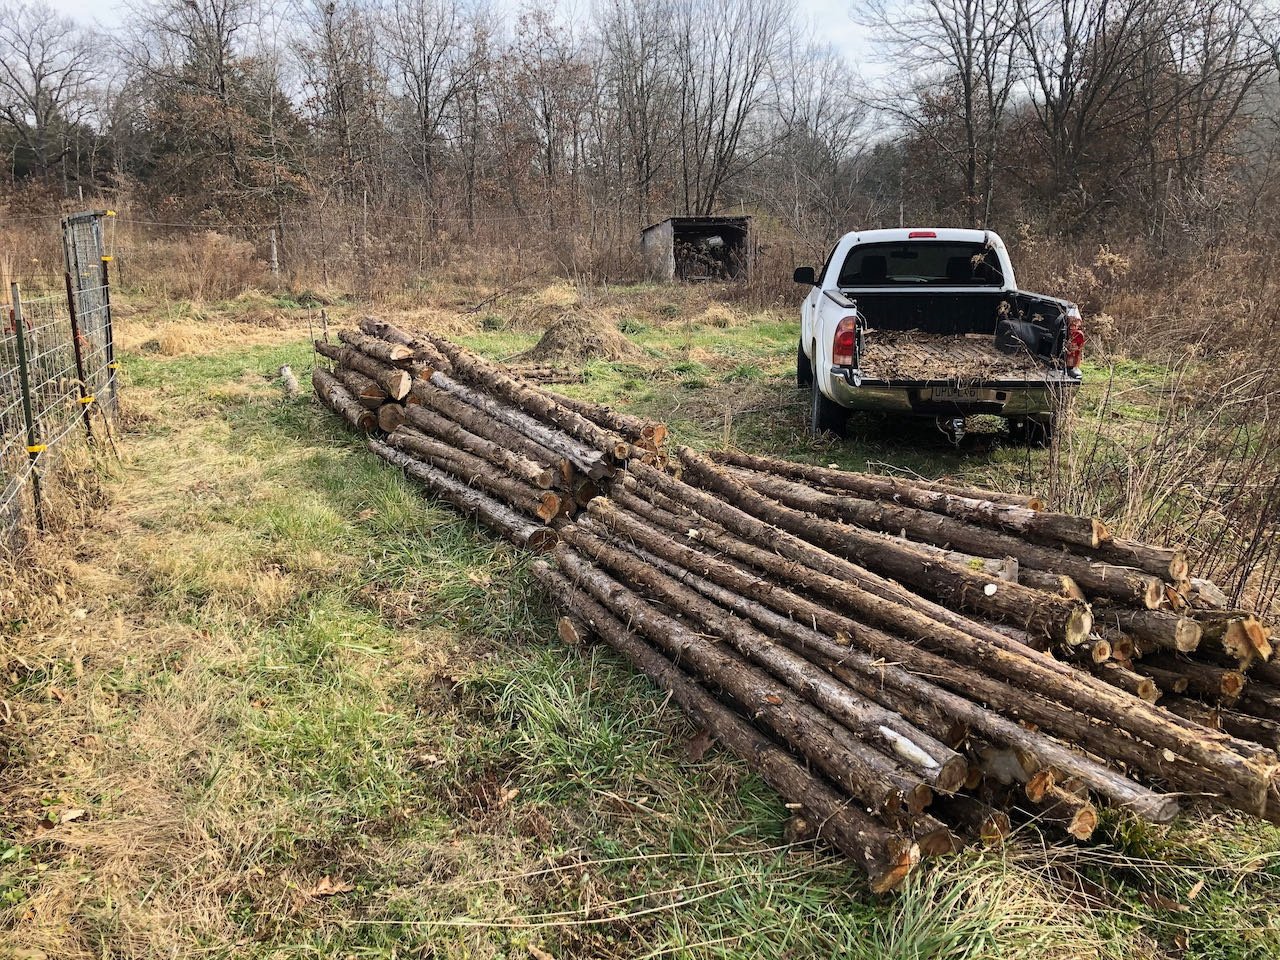
Well, Bob, you asked for it. I tried to select "a picture or two" and ended up with a photo essay. There's just a lot of diverse landscapes here and we've put a lot of work into improving the ecology here over the past 15 years. Others are welcome to skim right past this if desired, but it is relevant in the sense that landscape management here is a big part of my life and I'd like to tie my modeling into it. Spring in the creek-bottom garden below the house. I built the shed at right from wood cut and milled here; all fence wood is the same. The only way in is over a bedrock creek crossing. When the water's up, we stay home. We're surrounded in three sides by creeks, so during high water the only way out is a mile-long hike up and over a narrow drainage divide onto a neighbor's property and over to a connecting road. Another view of the garden and cedar shed. The maple trees in this bottom can give us about a gallon of syrup in a good year: A couple shots of forest in summer and winter. Our region is dominated by oak/hickory stands, with other hardwoods mixed in, and sycamores and cottonwoods common along creek bottoms. Cedars take over any open area that isn't kept mowed, grazed, or burned. An oak-hickory fencerow stand, in front of which is one of two pine plantations we've started. Thunderstorm over pasture. I build the barn at right for our small dairy goat herd, also of on-farm wood. I love being able to tie buildings together with 16' heartwood beams, you just can't buy wood like that! Controlled burning to used to manage pastures and prairie plantings: Hauling smaller cedar logs for future fencing work. Bigger logs get milled and used or sold. Overall, we put a lot of work into managing our woodland and pastures for healthier trees and ecosystem restoration. This was a pretty degraded landscape when we bought it 15 years ago, due to overfarming followed by neglect, and we've been bringing it back to life. Some upland pasture areas literally had bare soil where nothing grew, they were so degraded; now they have ground cover and an increasing mix of native wildflowers. Forests are being thinned and healthy trees selected for and given room to grow. My stock of modeling wood basically just comes from castoffs naturally resulting from timber management and firewood cutting, as we inevitably need to thin young or dying trees. I also have some more obscure stuff on hand, like redbud, and various fruitwood from our orchard, that I want to start playing with. And now back to the project at hand!
-
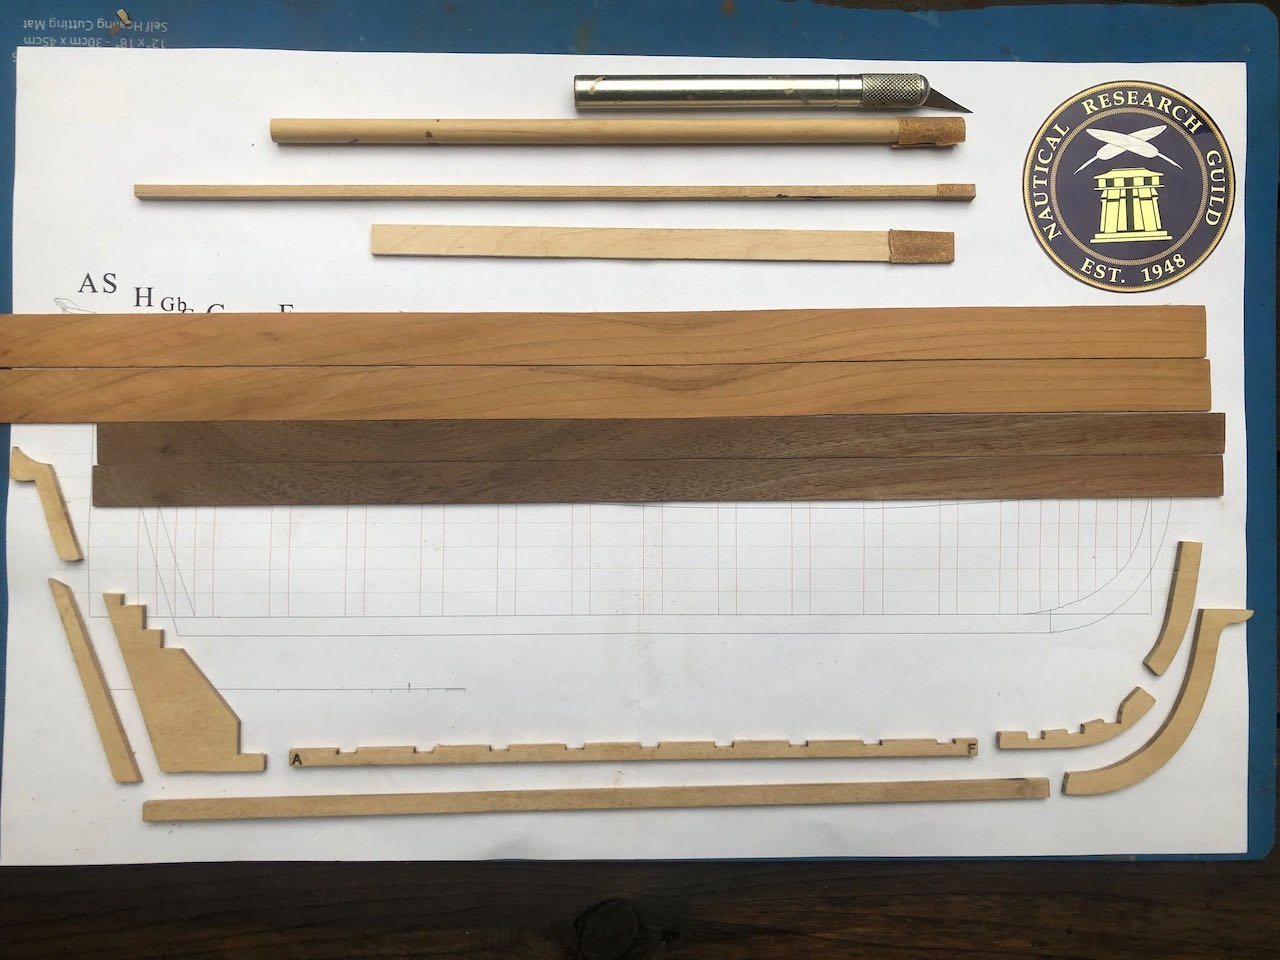
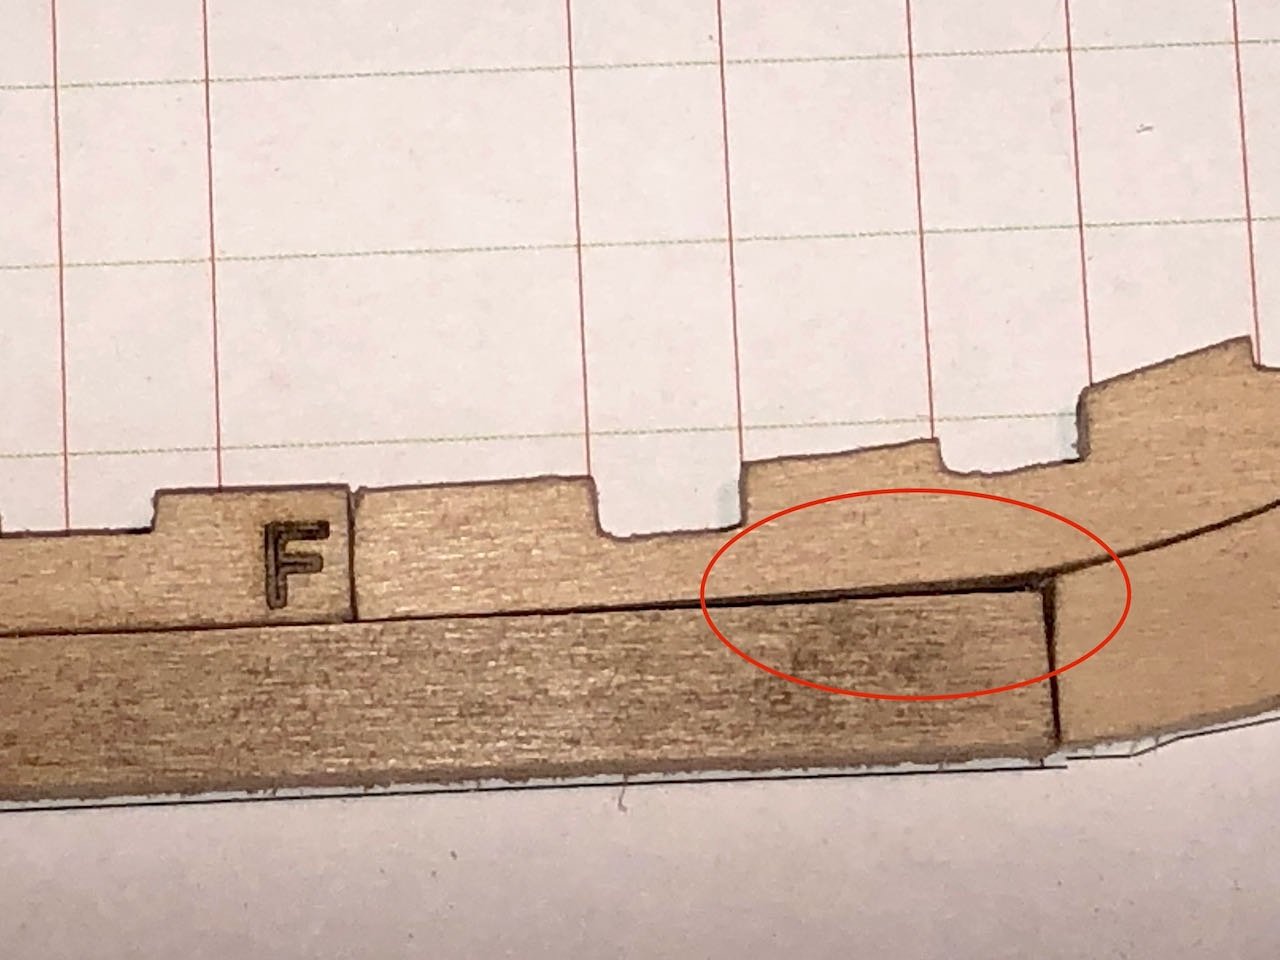
And here's the first steps. I removed all the keel parts and carefully sanded them to remove laser char, then test-fit them on the plans. I also milled a few test pieces of planking stock, intentionally wider than the actual planking to allow for spiling. The image below shows the keel pieces, basic knife and sanding sticks, and cherry/walnut strips laid out on the plans. After two very large builds, it's really nice to be working on such a compact project. I immediately made a small mistake. The fore end of the keel has a slight curve upward to fit into the beginning of the curve of the stem. I accidentally sanded this off, as it's pretty subtle and the rest of the long piece is straight and flat, so I just worked down the whole thing on a flat surface. So when all the pieces are test-fit together, there's a clear gap (circled in red below): Oops. I don't think it really matters, though, the rabbet runs through here and it'll be completely hidden. It might weaken the joint slightly, and maybe I'll use some filler when this gets glued together, but overall it doesn't seem like a major issue. A good reminder to be careful and attentive, though.
-
Thanks again to all of you. For those who might be interested, I've started my next project, the NRG 18th century merchantman half-hull planking kit. While this has been done many times, I'm adding a twist by intending to do all the planking using wood I harvested and milled here on my rural property, primarily cherry, walnut, and maple. I hope that adds to the interest, but regardless, I'm glad you came along for the ride on this longship.
-
This kit was developed by the Nautical Research Guild to teach or improve members' hull-planking skills. As a moderately skilled builder, I decided it would be a good project to force myself to learn best practices and possibly correct poor practices I may have developed. Plus, it seems simpler and more relaxing than my last few builds! Here's the NRG's vision of the final project: There are many build logs for this already, but I intend to add my own twist by doing the planking using wood I've harvested and milled myself from my rural property, where I do a lot of timber management. This is the direction I'd like to take my modeling overall, so this will be a good early test of the goal. I have well-cured cherry, walnut, and maple billets on hand and think a mix of those could look really nice on this hull. Right now my idea is to use cherry below the wale, walnut for the wale, and maple above it. We'll see what happens. Hopefully this is of interest to a few people, but regardless of attendance, I've learned that keeping a build log is a good way to keep myself engaged and organized.
-
Paul, very nice work on this little model. To answer an earlier question, I cannot figure out what the little grating at the stern is for, either. You also wondered why this model seemed unpopular. I assume you mean on this forum, as we have no way of knowing what sales figures are overall. As this is an English-language forum dominated by Americans, British, Australians, and so on, I suspect that Spanish and Mediterranean vessels are somewhat less familiar and thus less popular in this context. I would not be surprised if Spanish or Italian forums had many more of these, and fewer Constitutions, Victories, whaleboats, and so on.
-

Trireme Olympias - wonderful footage
Cathead replied to Louie da fly's topic in Nautical/Naval History
Fantastic video, thanks for sharing. I sent it to my brother, who's long been interested in ancient Greek history.- 4 replies
-
- ancient Greece
- galley
-
(and 3 more)
Tagged with:
-
I also love creating/upgrading details from kits' basic state, so very much recognized the impulse at work here!
- 33 replies
-
- Artesania Latina
- Whaleboat
-
(and 3 more)
Tagged with:
-
I think it's the right choice. The dark red provides a clear transition between the black outer shell and the bright raw wood that's visually appealing and helps the viewer instinctively recognize the difference.
-

Golden Hind by BobL - OcCre - 1:85
Cathead replied to BobL's topic in - Kit build logs for subjects built from 1501 - 1750
Any further progress? -
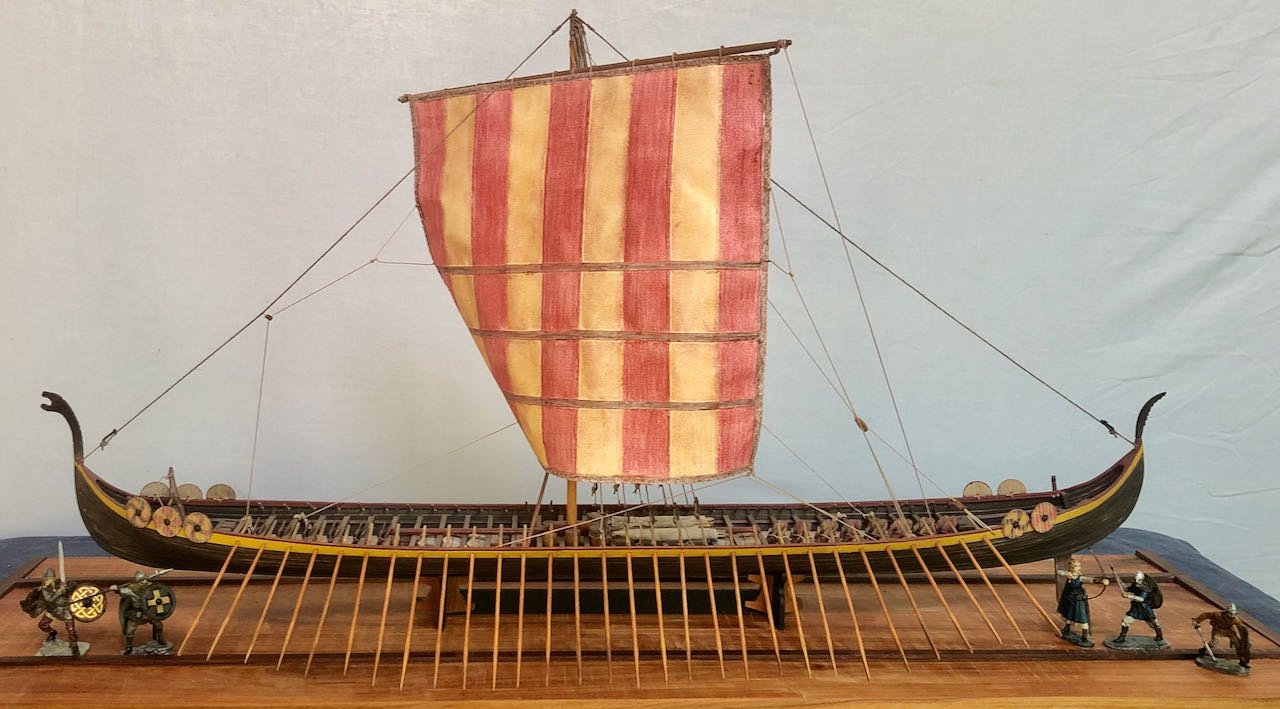
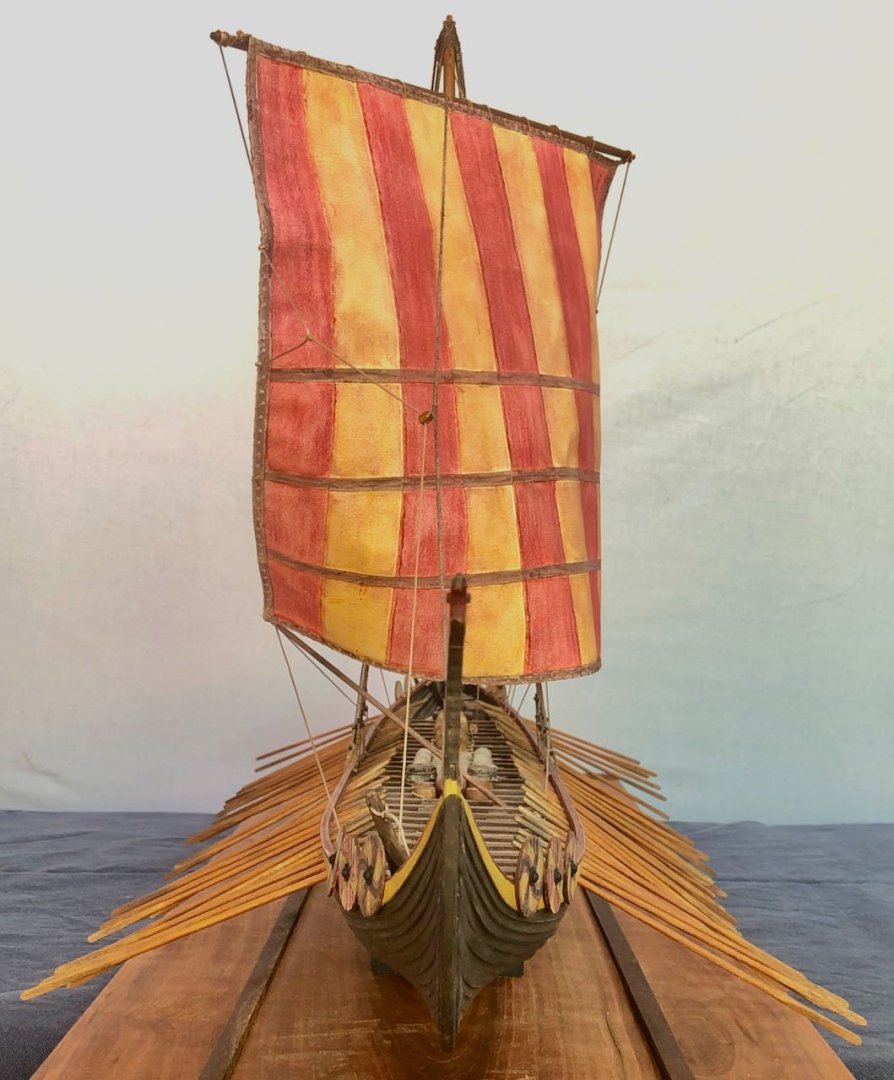
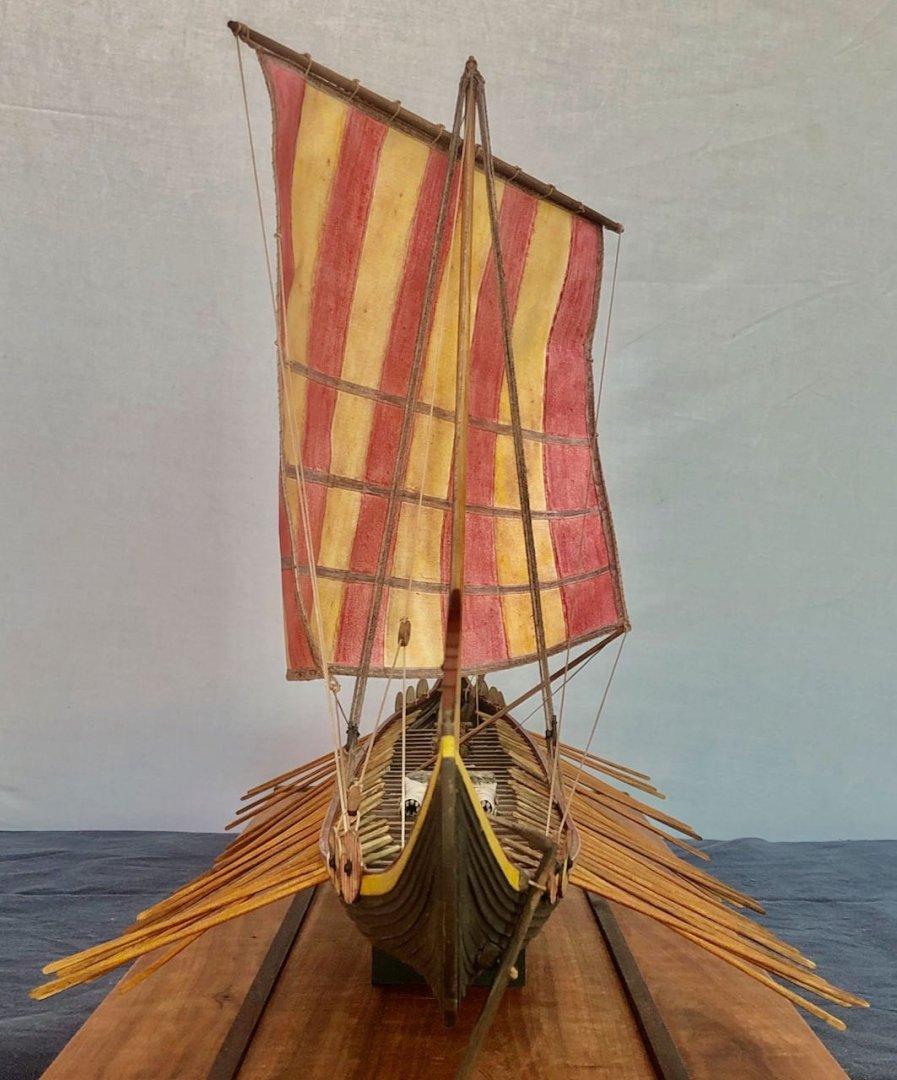
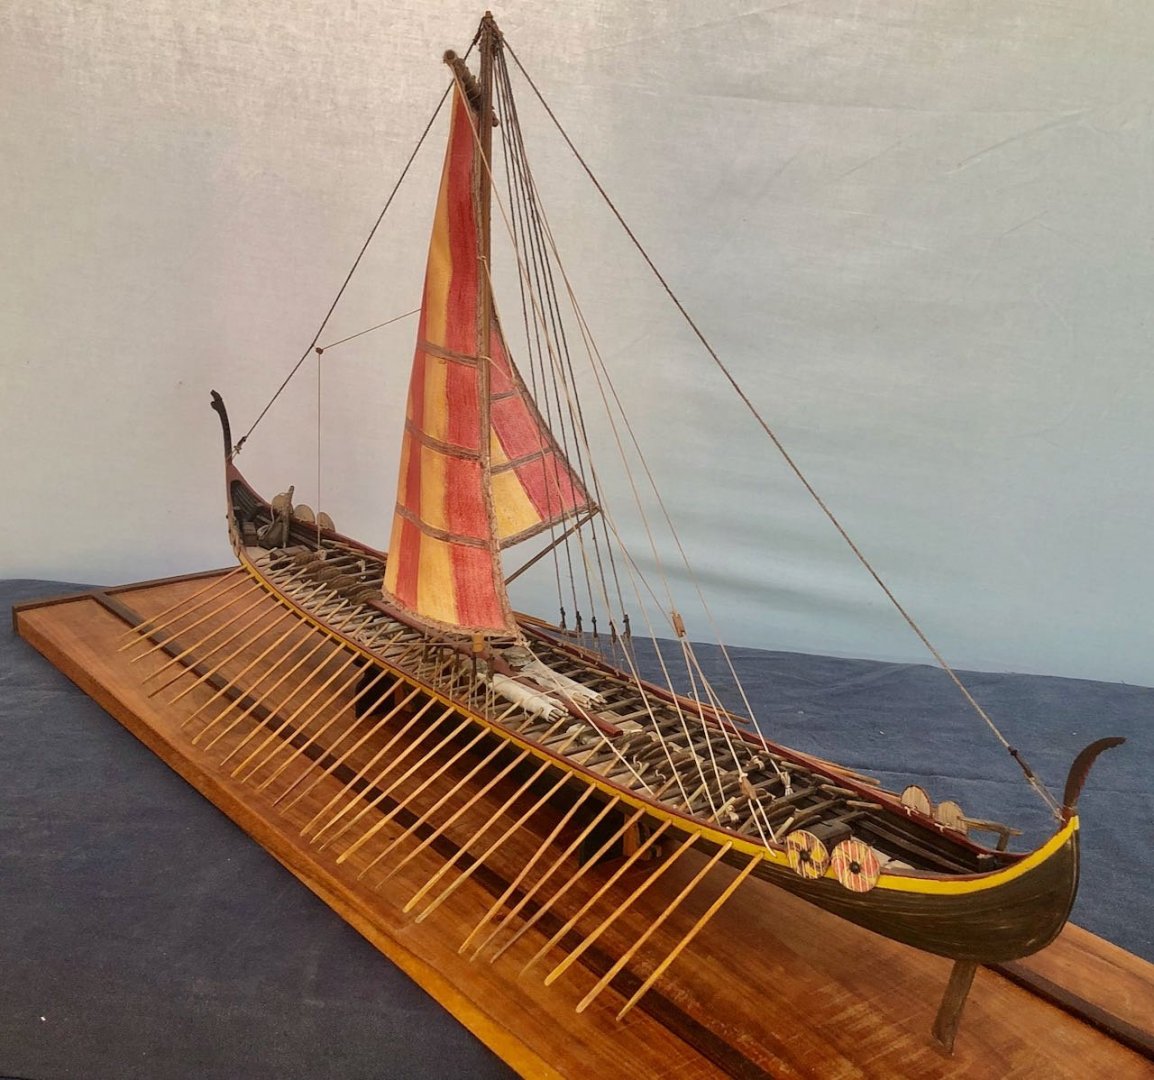
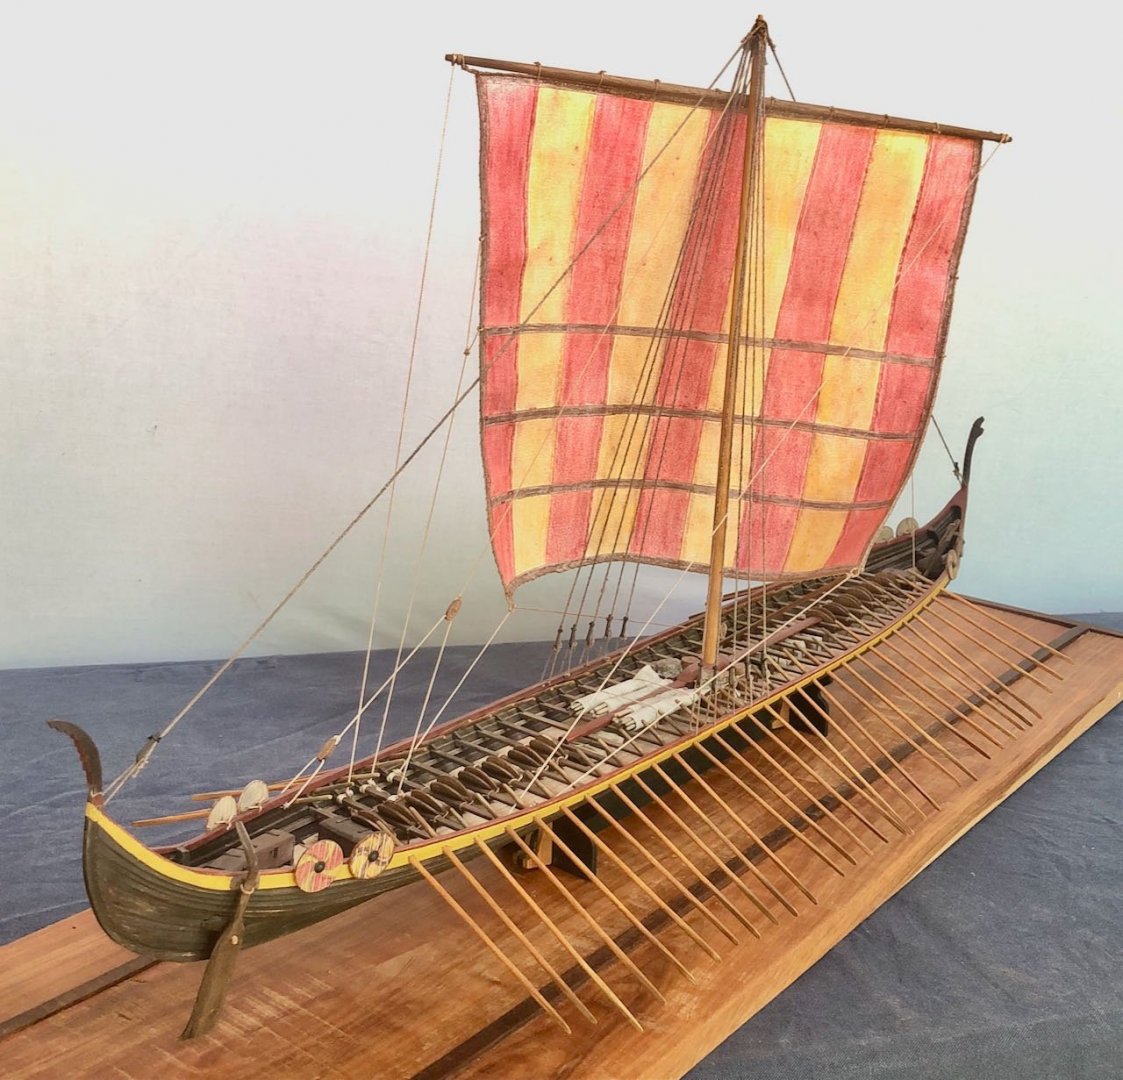
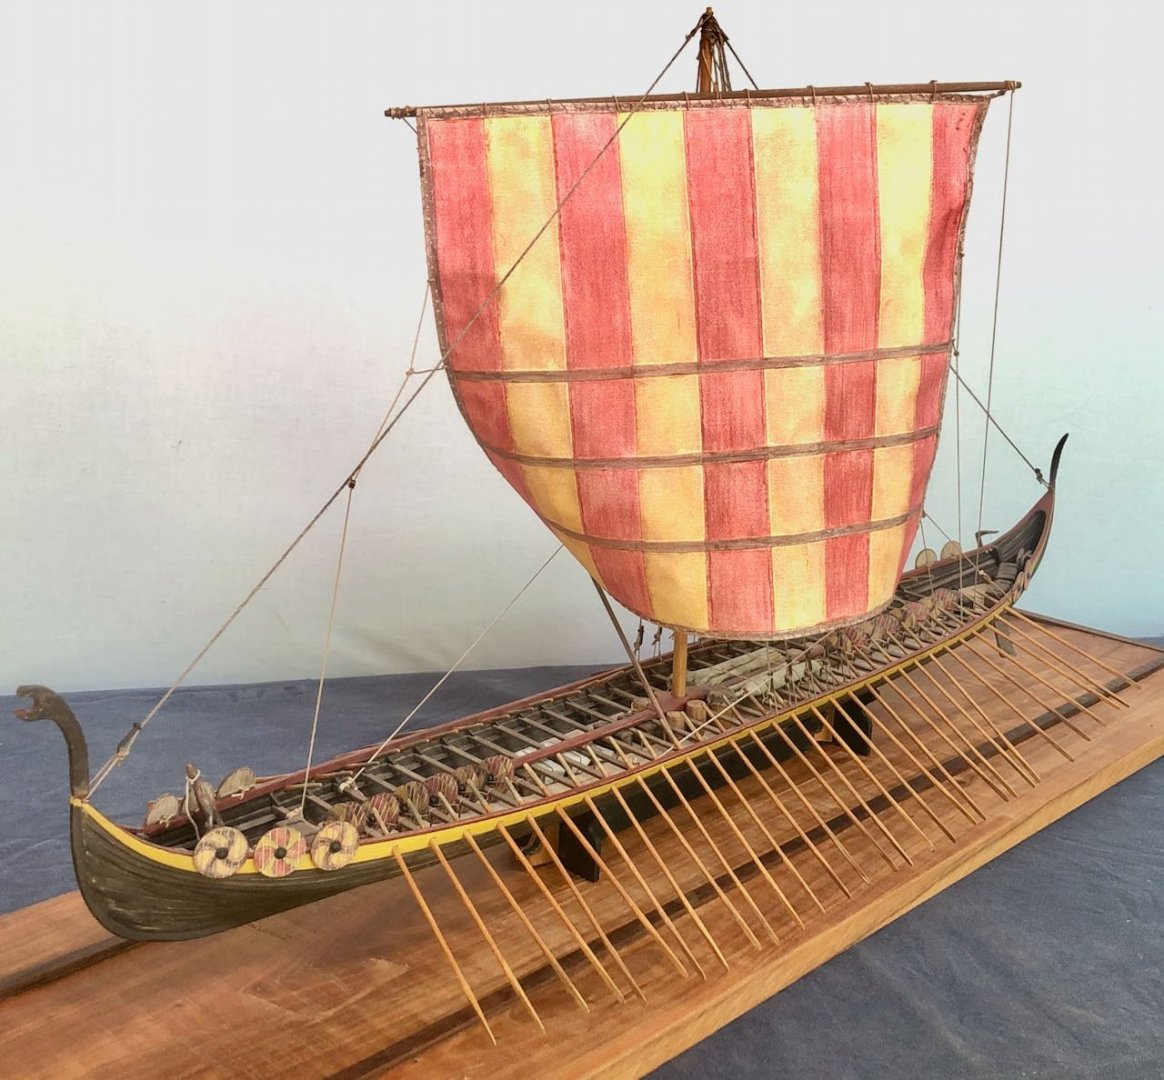
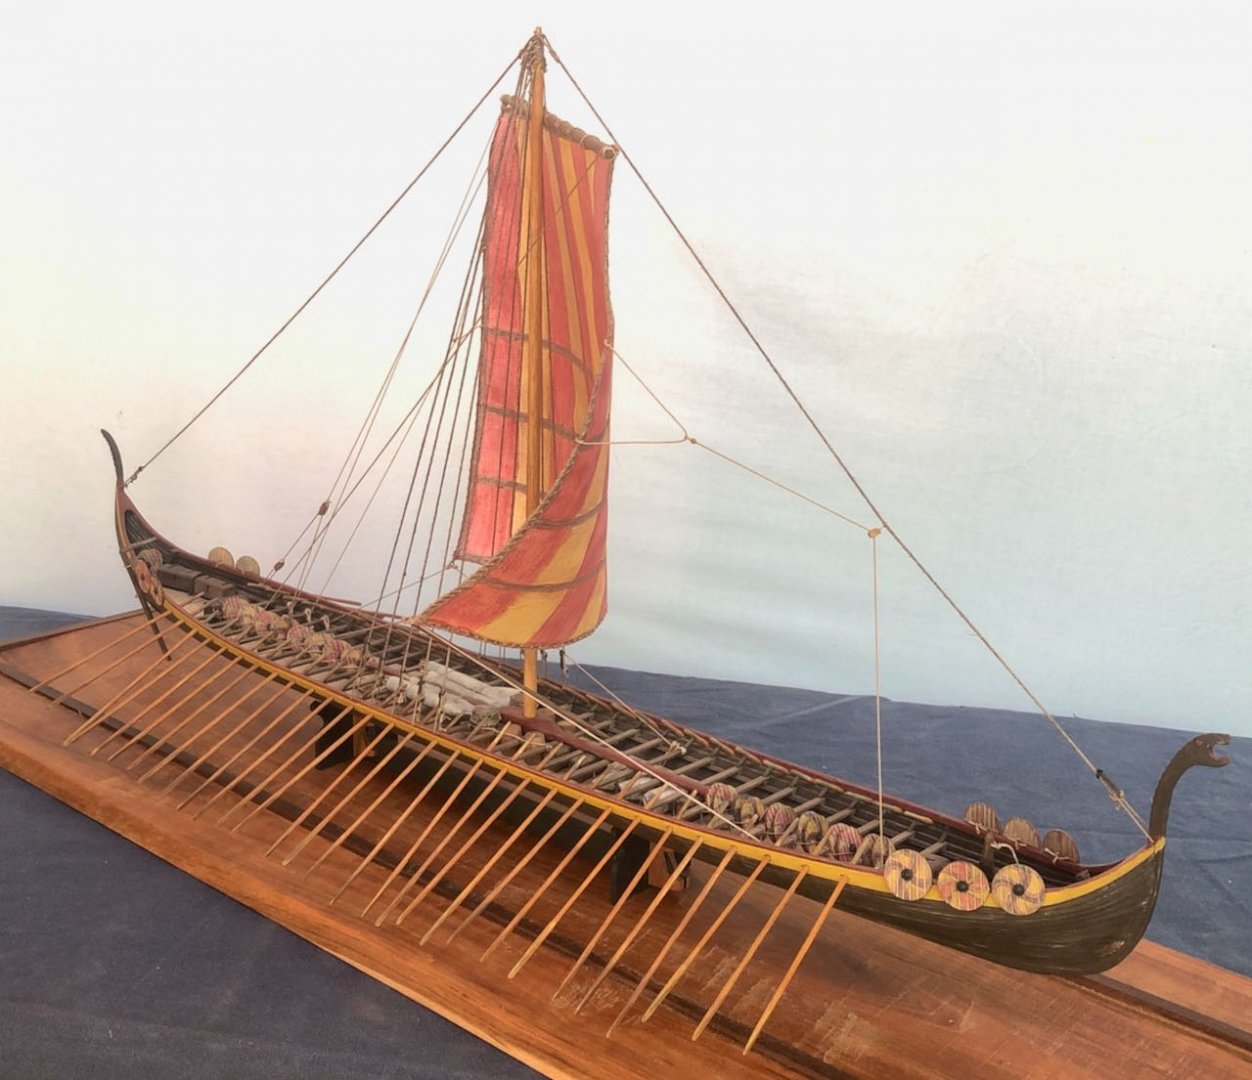
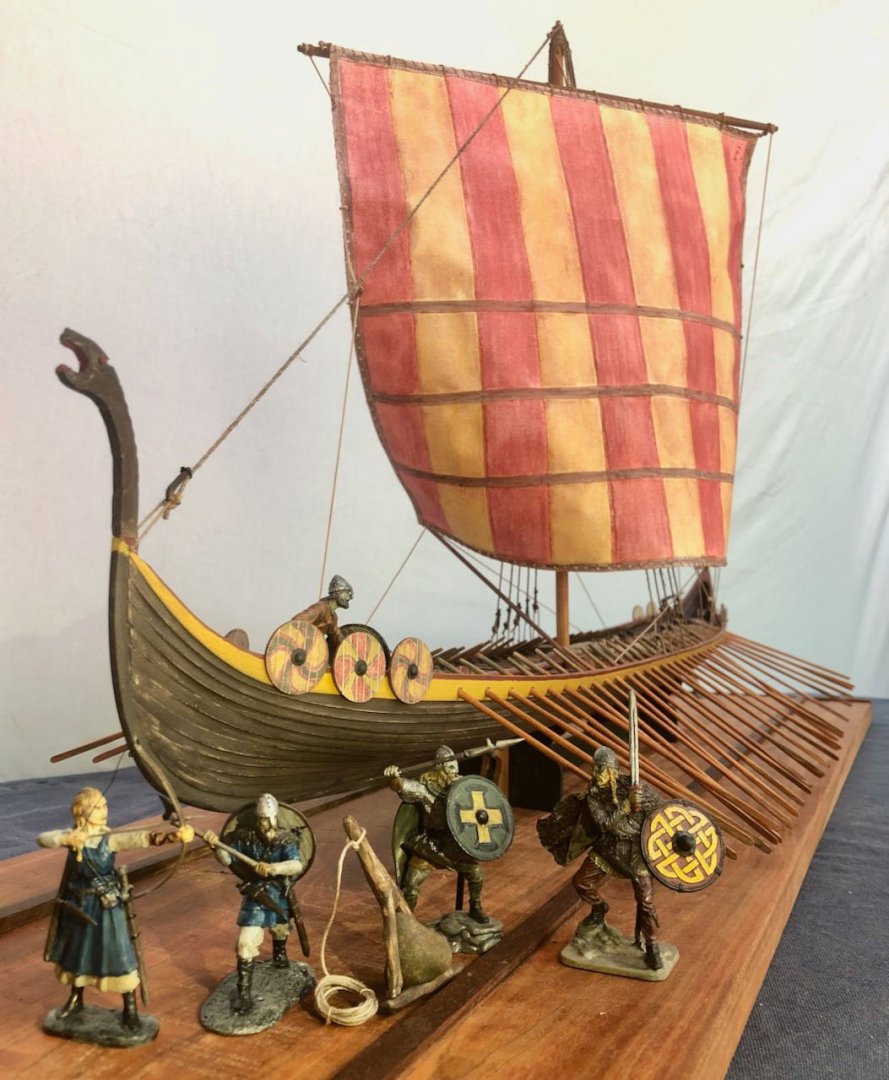
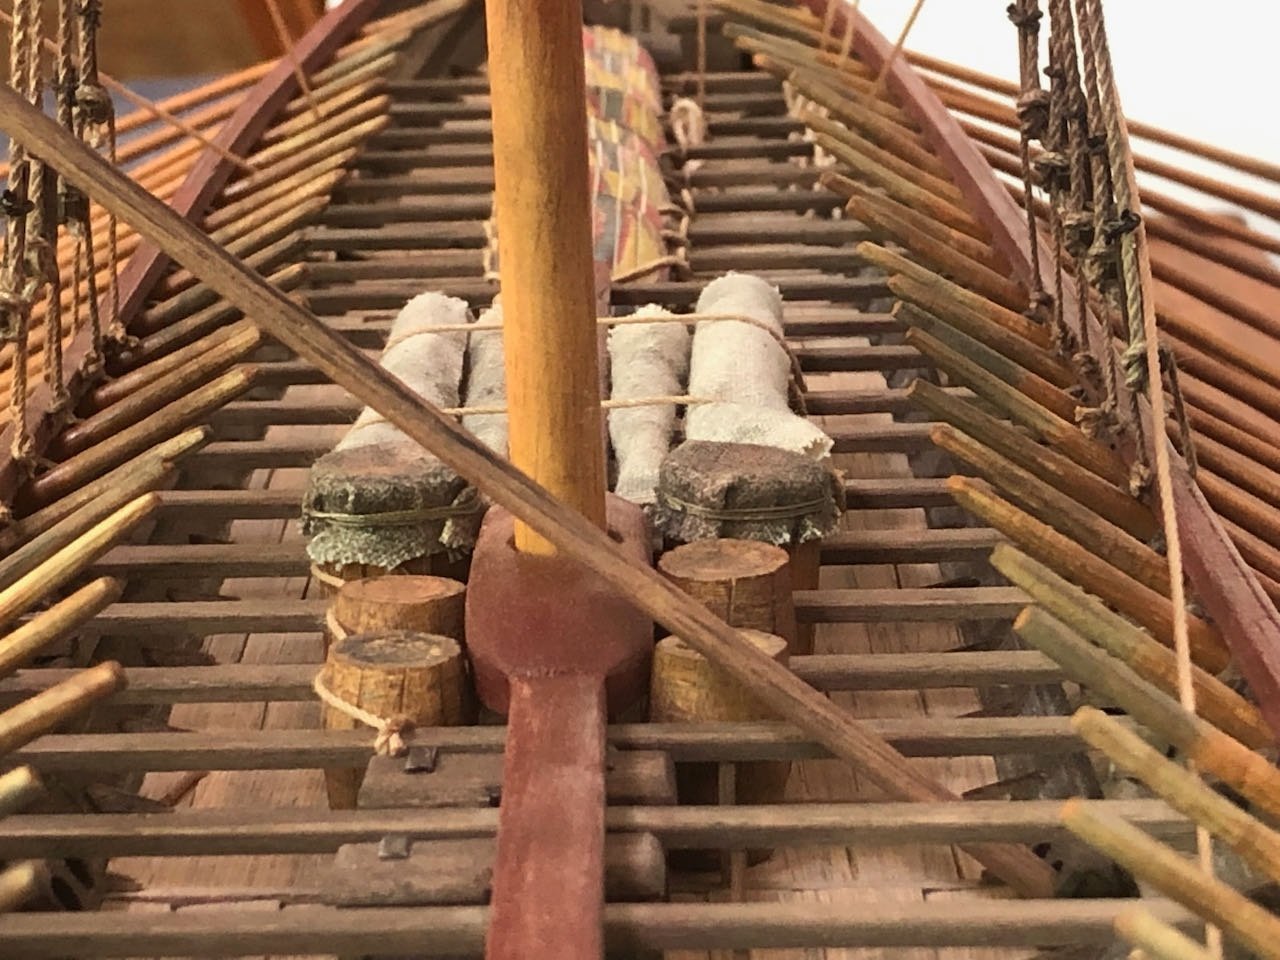
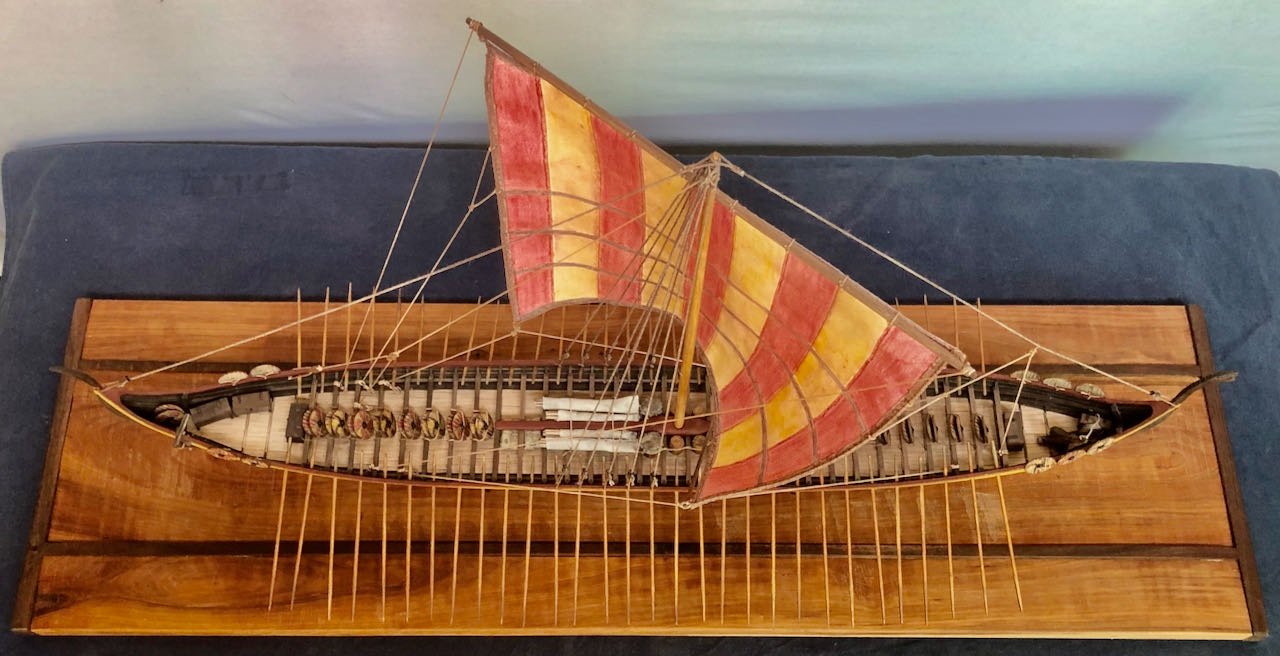
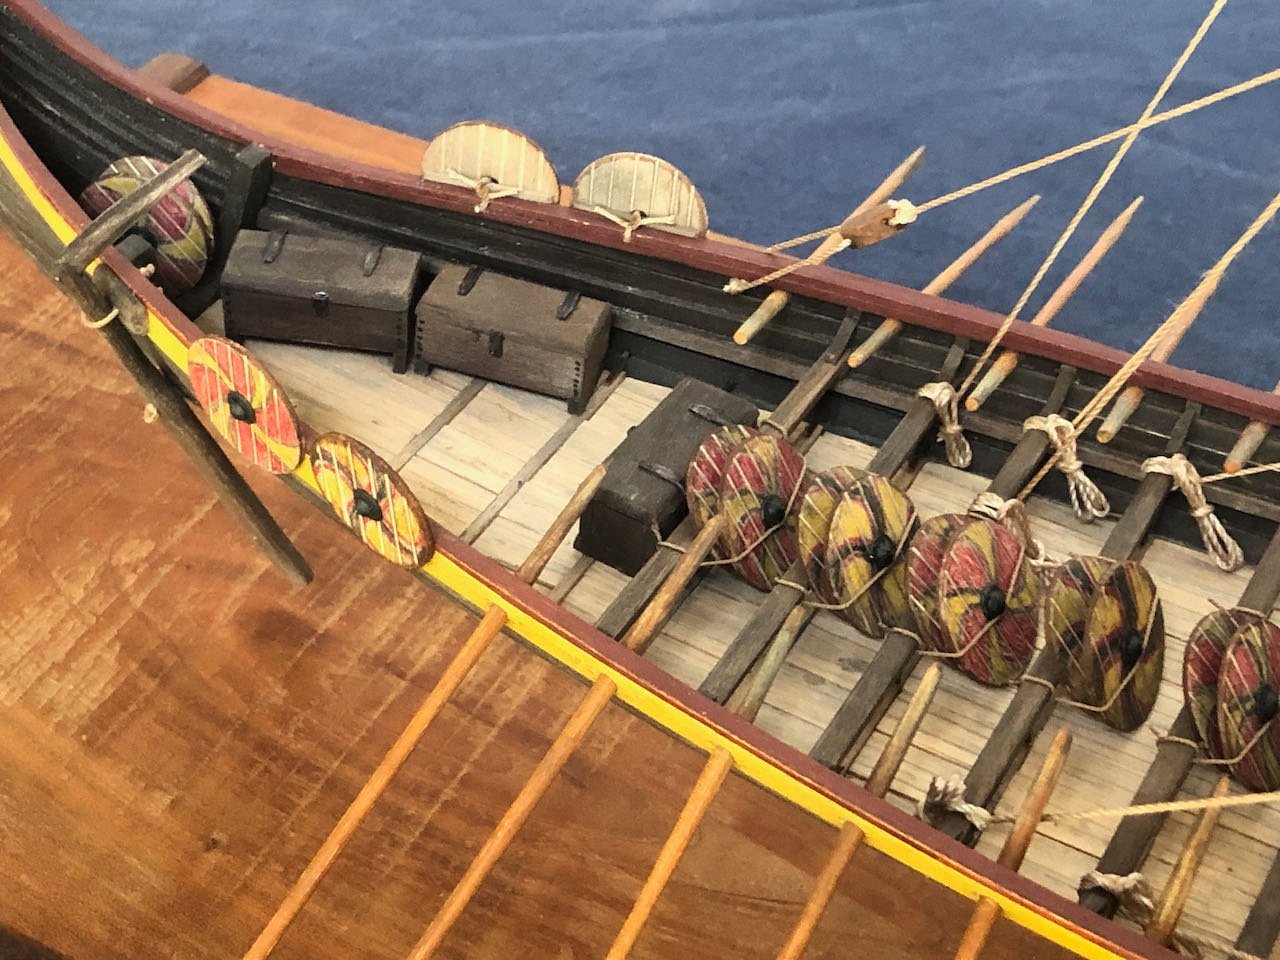
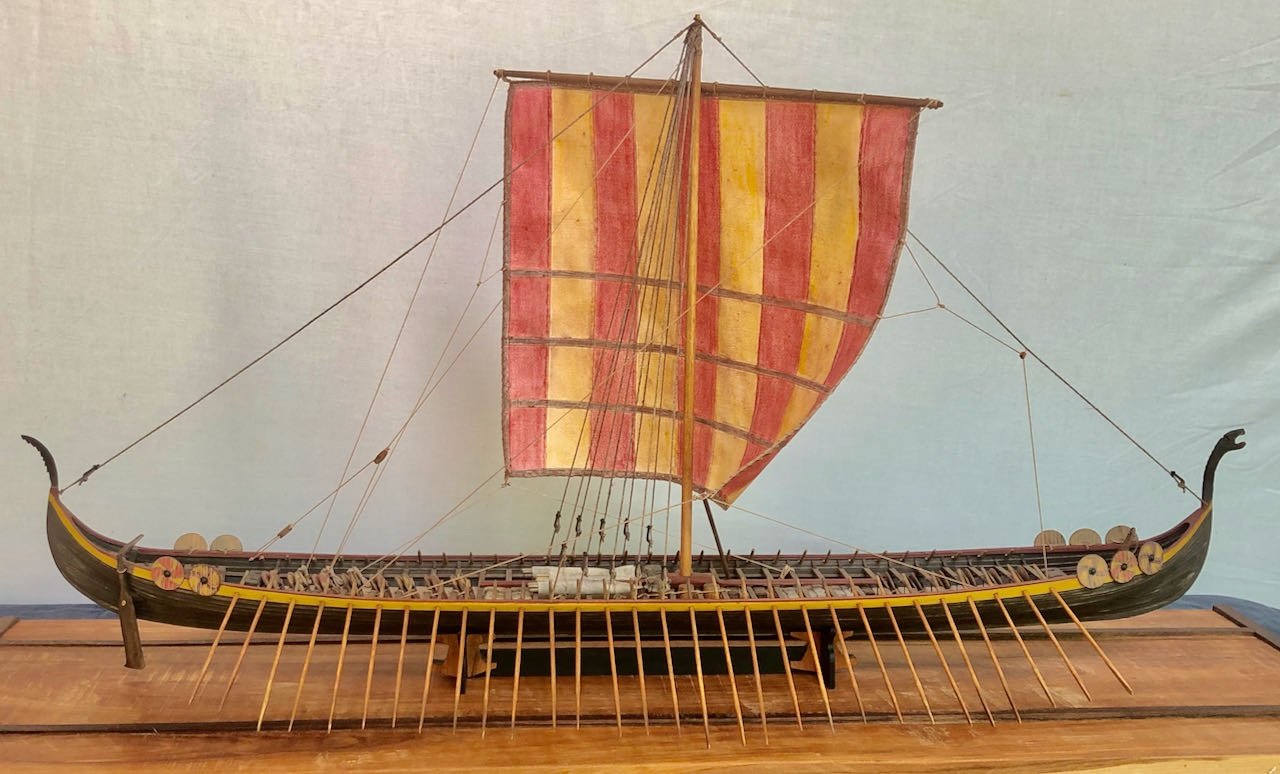
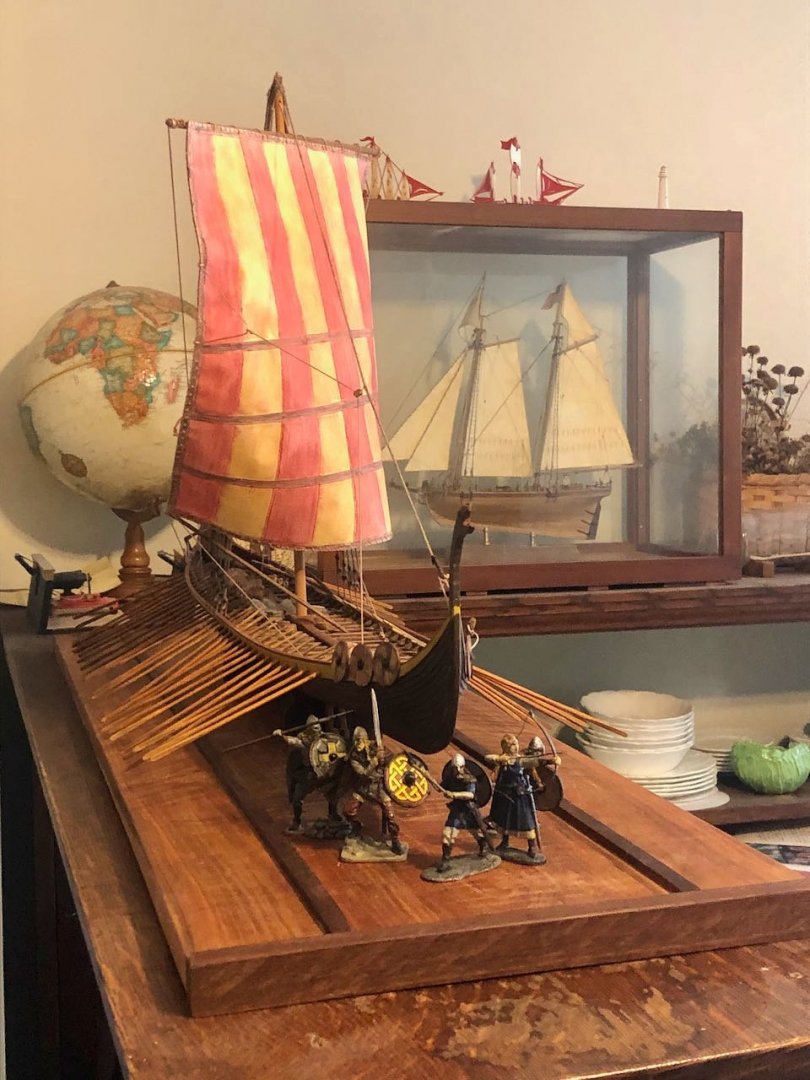
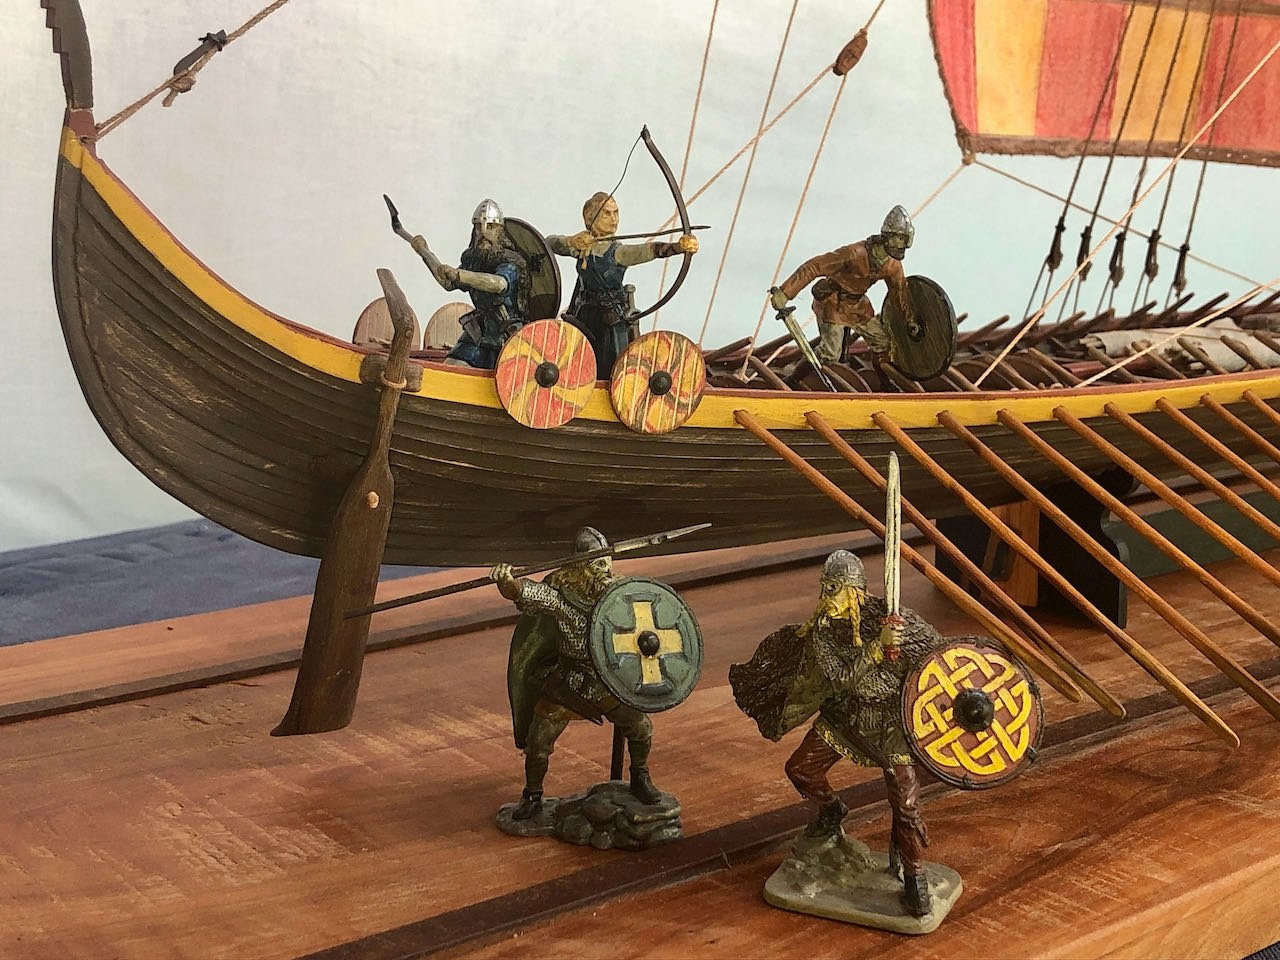
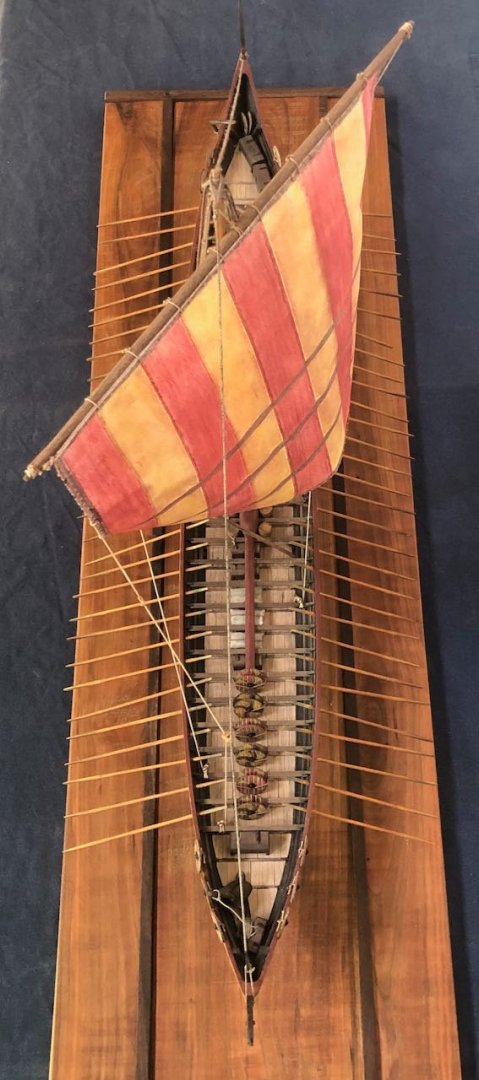
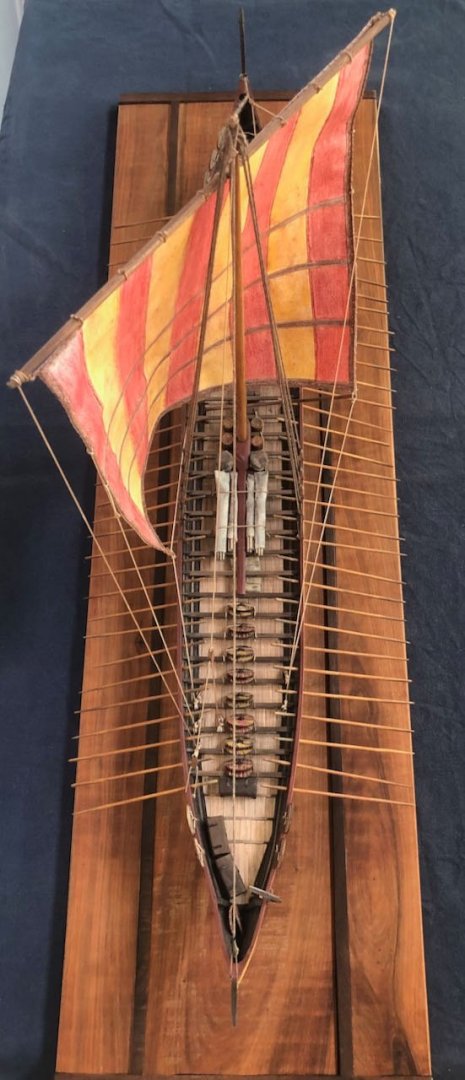
The longship is officially finished, just over a year from when I began it. It's spanned a rather intense period of my life, including the decline and death of my father-in-law, a lifelong scholar of Old English language and Anglo-Saxon history who was very important to me. In his final days, I stayed at his bedside night and day, at times reading Beowulf to him, including these lines: You have fared in life so that far and near Forever and ever, you will be honored… Thus it is duly just That one praise his prince in poem and story And hold him in heart when he must head away Forth from flesh elsewhere. This build is dedicated to him, as well as to my proudly Norwegian grandfather who was a mentor and role model to me, and who would have loved to see this model. I can't express how much the support, advice, and discussion from all of you following this has meant in the past year. Life has been rough in many other ways beyond the above, that I don't need to go into here, but this model will always be tied to this period of life and I thank you all so much for helping me carry forward. With that being said, here are the twelve images I officially submitted to the NRG 2021 photo contest this morning (there's still time to enter your own models, the more the merrier). The first eight are required angles: After this are four optional shots highlighting whatever details are desired. So I included this close view down the central hull: This view of the chests, shields, and rope coils at the stern: This overhead view that captures more of the cargo and deck detail: And this shot of the crew ready for their next adventure: I also took these additional shots that weren't submitted but that I also like. First, another of the crew, this time at the stern: Then these two vertical views: And finally, this one of the model's temporary home. I'm working on getting a full-size display cabinet for my models that will protect the large ones like this and my Arabia more efficiently than individual cases, but for now this works pretty well: To address the inevitable question, my next two projects won't be nearly as interesting to others. I purchased two NRG learning projects to work on my planking and scratchbuilding skills. First, the half-hull planking kit, which I want to do in part or whole with wood I've cut and milled on my property: Second, the capstan project, with the same goal for wood sourcing: I'll do build logs for these, and am looking forward to working on something smaller for a change after this Viking behemoth! Thanks, again, with all my heart for sticking with me on this voyage.
-
I'm working on my submissions and found two potentially confusing errors in the NRG information. I mention them publicly here not to criticize or embarrass anyone, but in case others are confused by these before they can be addressed (knowing that NRG is all-volunteer and can't respond instantly to such things). I'm excited about this contest and the opportunity it provides people to share models that might otherwise never make it into physical contests due to travel-based obstacles. First, on the Instructions page (https://thenrg.org/contests/instructions), the link to pay the entry fee (https://thenrgstore.org/products/2021-model- competition-entry) is mis-formatted: look carefully and you'll see a space after the hyphen between "model" and "competition". This returns (https://thenrgstore.org/products/2021-model-%20competition-entry) which throws a 404 error. If the user manually removes the space, so the link correctly reads (https://thenrgstore.org/products/2021-model-competition-entry), it works fine, but many of our members are not computer-savvy enough to recognize this fix on their own. Second, there are conflicting guidelines on how to name photos. The Competition Rules page (https://thenrg.org/contests/rules) suggests the format "HMS Victory–bow quarter.jpg" but the Instructions page (https://thenrg.org/contests/instructions) says that files need to be in the format "ModelNameBowPortQtr.jpg". This is needlessly confusing and I hope NRG wouldn't reject either approach as both are clear, but it would be best to decide on a consistent requirement.
-
I'm so sorry to hear that, it must have been a devastating feeling regardless of which model it was.
- 17 replies
-
- Colombo Express
- Revell
-
(and 1 more)
Tagged with:
-
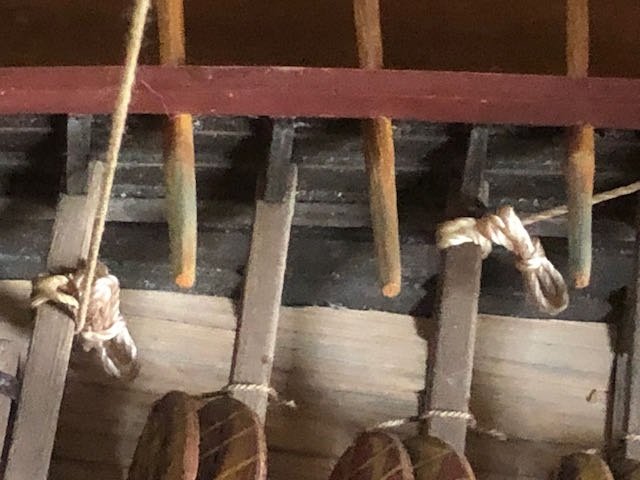
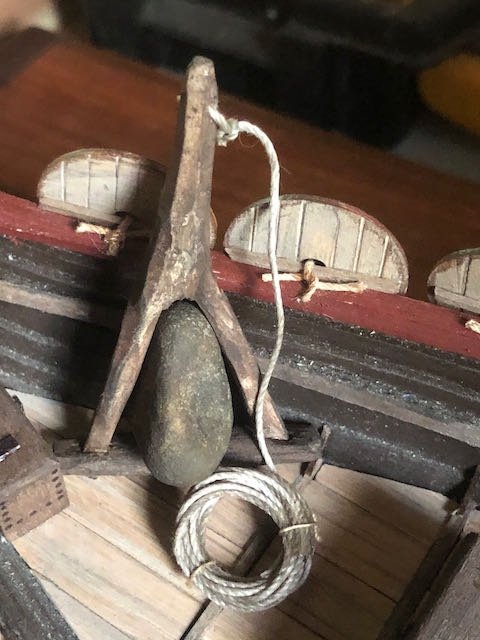
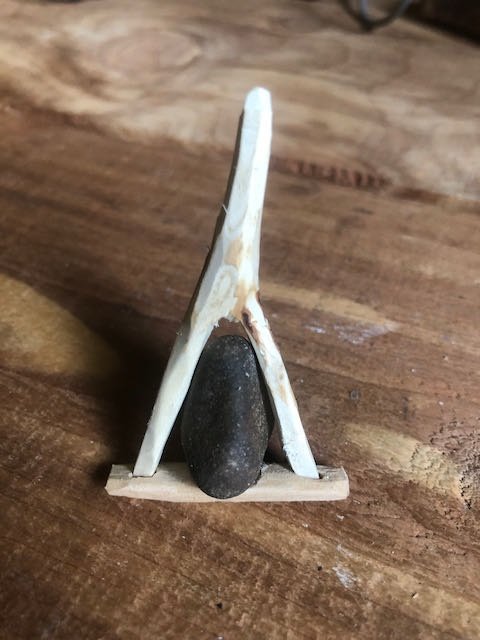
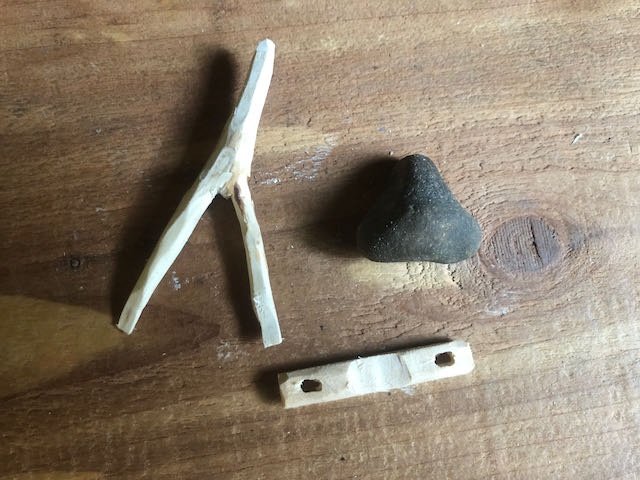
The final details have been added. First, I made a series of rope coils for each rigging line, to hide the cut-off end and because it just looks better this way. Below is just one example; no idea if this is just how Vikings coiled their lines but I don't think we can know for sure, so I'm going with it. And the final fun, an anchor. I like the look of stone anchors that other modelers have done, such as this one from killickthere's build: So I cut a few live branch junctions (so the wood would be flexible) and hunted around for a good igneous pebble that would look like the right kind of rounded glacial boulder a Viking shoreline would turn up. I found an awesome triangular one. I used a sharp knife to carve the branch junction down so it looked like an axe-hewn trunk, and made a bottom cross-piece: The cross-piece was bored so that the branch Y would have to bend around the rock a bit, helping hold it in place. The fit isn't perfect but it's the closest branch shape I could find in the time I wanted to spend on this. Test-fitting: I stained this with dilute paint and then rubbed it with pastel before installing the rock. I then made a final rope coil for the anchor. This is a big beast, but it's a big ship, and I can envision a few burly Vikings heaving this over the side with a grunt. Here it is in place at the bow: I think it gets the idea across well enough. So with this, I think I'm done adding details. Tomorrow I plan to take a full set of photos (including for the NRG model contest, due August 2), and then I'll declare it done.
-
Nicely done so far. I've always liked the look of driftwood bases.
- 33 replies
-
- Artesania Latina
- Whaleboat
-
(and 3 more)
Tagged with:
-
Glad to see you're still carrying on! You have a nice balance of wood colors there.
- 86 replies
-
- king of the mississippi
- artesania latina
-
(and 2 more)
Tagged with:
-
Oh cool, this looks fascinating. I speak some German but probably not enough to be useful in translating maritime history. You've been a great influence in dragging my interests from obscure American riverboats to even more obscure ancient ships. This looks like a good extension to the rabbit hole. I admit I was rather startled to see "Winchelsea by Louie da Fly" and wondered what prompted such a drastic change in modeling period for you!
-
Wow, that looks great. You're definitely right about the paint bringing out the realistic look. Nice job on the texturing. I like the idea of a dark/rusty maroon, something that sets off the edge a little but doesn't highlight it. I found a detailed painting of the Cairo's interior on another modeling forum in a log for the BlueJacket kit. Not going to directly post it here as I'm not sure about copyright issues (not even sure if it's from the kit or some other source), but here's a link. It's a bit grainy, but appears to show gun rigging that looks fairly standard for naval cannons. If it is from the kit, I wonder if you could source a good copy directly from BlueJacket? If nothing else, I bet they'd be willing to discuss their own research used to develop that kit and maybe help you find new information?
-
In the Heart of the Sea is another good one by him. Your vessel and base go nicely together. I hope you enjoy your hiking trip.
About us
Modelshipworld - Advancing Ship Modeling through Research
SSL Secured
Your security is important for us so this Website is SSL-Secured
NRG Mailing Address
Nautical Research Guild
237 South Lincoln Street
Westmont IL, 60559-1917
Model Ship World ® and the MSW logo are Registered Trademarks, and belong to the Nautical Research Guild (United States Patent and Trademark Office: No. 6,929,264 & No. 6,929,274, registered Dec. 20, 2022)
Helpful Links
About the NRG
If you enjoy building ship models that are historically accurate as well as beautiful, then The Nautical Research Guild (NRG) is just right for you.
The Guild is a non-profit educational organization whose mission is to “Advance Ship Modeling Through Research”. We provide support to our members in their efforts to raise the quality of their model ships.
The Nautical Research Guild has published our world-renowned quarterly magazine, The Nautical Research Journal, since 1955. The pages of the Journal are full of articles by accomplished ship modelers who show you how they create those exquisite details on their models, and by maritime historians who show you the correct details to build. The Journal is available in both print and digital editions. Go to the NRG web site (www.thenrg.org) to download a complimentary digital copy of the Journal. The NRG also publishes plan sets, books and compilations of back issues of the Journal and the former Ships in Scale and Model Ship Builder magazines.


