Cathead
-
Posts
3,550 -
Joined
-
Last visited
Content Type
Profiles
Forums
Gallery
Events
Everything posted by Cathead
-

Steamboats and other rivercraft - general discussion
Cathead replied to Cathead's topic in Nautical/Naval History
Randy, that's a creative suggestion. I think the reason I don't agree is that the "tube" perfectly meets every vertical support as if it runs through it. Any kind of long rolled up cloth would, one would think, have to go around or over those supports.- 281 replies
-
- 2
-

-
- Steamboats
- riverboats
- (and 3 more)
-
Steamboats and other rivercraft - general discussion
Cathead replied to Cathead's topic in Nautical/Naval History
I checked my copy of Way's packet directory, which does list this vessel but doesn't have much to say about it beyond what you already know. It mentions a documented inspection in 1881 at Valley City, IL, no idea if that's a lead toward finding some documentation? The last record it mentions is 1886. Cool project, good luck!- 281 replies
-
- 2
-
-
- Steamboats
- riverboats
- (and 3 more)
-
Whaddaya mean, "you hope you'll have more next time"? That's a huge dump of fantastic work.
-
Nice job, I agree that they really help visually tie the original knees in, accurate or not.
-
Oh, that's the dark side of scale modeling for sure. I also work on a carpet and have used nautical language to describe such events. Think of it as a chance to learn new skills in metal fabrication!
-
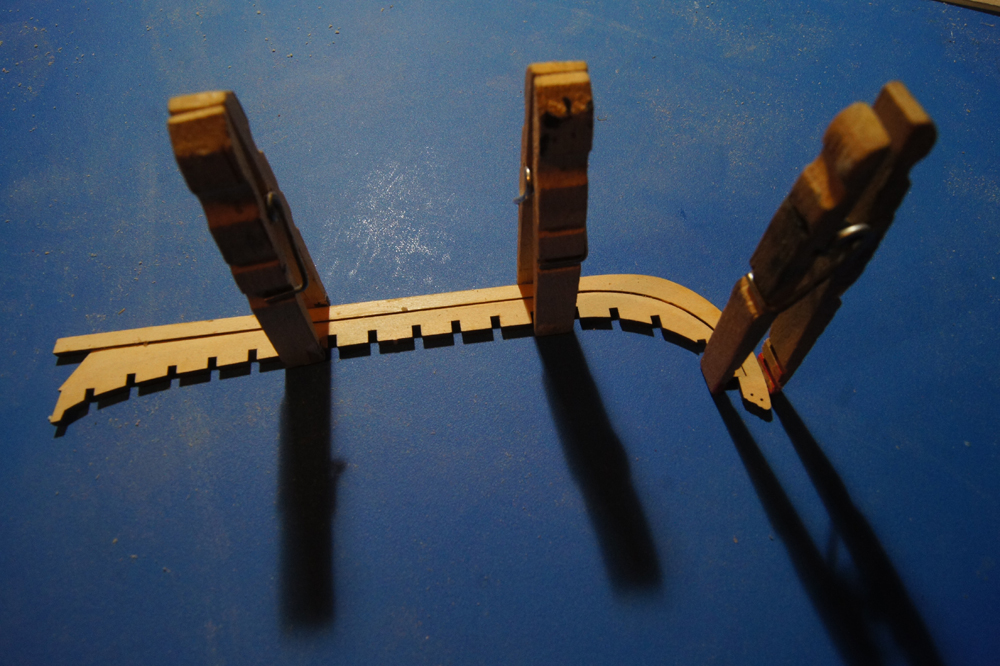
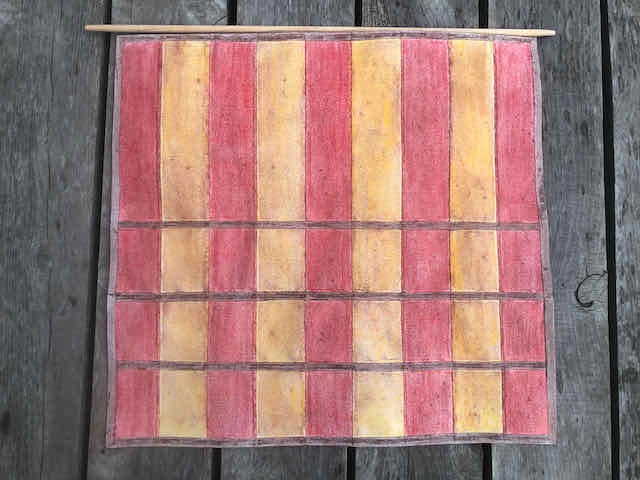
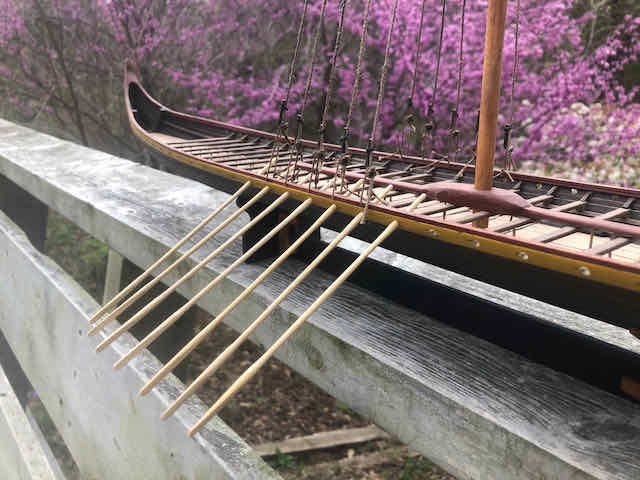
Turns out I moved forward today. I experimented with various cloth methods, after reading some more build logs, and just couldn't come up with something I liked or wanted to do. So I went back to the paper sail and applied another layer of colored pencil followed by a thick rub of brown pastel. This ended up darkening it pretty well with a better match for the model's color profile, and looks more like a weathered, heavily used sail. Before: After: So I think I'm just going to go with this. I want to keep moving. I also started shaping oars. These are hard to photograph, but I chucked dowels into my poor man's lathe (hand drill) and sanded down the shafts, then used a knife to flatten the oar blades. Here are the first seven test-fit on the vessel: I'll certainly stain and weather these, but it's fun to see them in place. And here's a shot of the sail propped up in roughly the right position: When it's installed for real, I'll bend it more so it isn't so two-dimensional. But this gets the idea across.

- 323 replies
-
- 12
-
-

-
Your excitement is justified.
-
Sorry for the slow reply, kept thinking I'd wait until I had something new to show but still don't. This is the first time I've done a multicolored sail with pastel. In the past, smearing hasn't been a big deal because I've just been using the pastels to age/weather the white paper into a faded yellowish (see the sails on my revenue cutter linked in my signature). It took a lot more care not to transfer colors back and forth between the different panels this time. I find that once colors get rubbed into bond paper, they smear less. I wipe/rub the paper surface first with fingers then a cloth. After that, the loose stuff is gone and the color is worked into the paper fibers. Still have to be careful, but it's not shedding all over the place. But this is why I did each coloration on a separate workspace as described above. THe bad news is, the more I look at my sail the less I like it. I placed it on the model and it just doesn't fit. I think it's too bright and soft for the darker tone of the rest of the model, and the paper texture is too fine for this large scale. Bond paper looks great on my 1:64 revenue cutter, but less so on this 1:35 ship. So I'm not sure what to do. I may try darkening it some. I'm also realizing I'm REALLY not looking forward to the delicate application of lots of thin paper strips for the cross-hatched reinforcements. So I'm considering making a quick furled cloth sail and displaying the yard stowed, especially as I'm leaning toward wanting to display the oars in working position rather than bundled. Life's really busy right now so I don't know when I'll decide or move forward on something else while delaying this decision.
-
Another detail you might consider, look closely at the deadeyes in the drawings given previously. Deadeyes are always rigged in the same orientation, with the point of the triangle of holes facing down for the lower deadeye and up for the upper one. They should "face away" from each other in a matched pair, like two triangles pointing away from each other. This is not only "right", it will also make the rigging easier and cleaner. Not sure if this is easy for you to fix or not, but wanted to point it out. Sorry I'm just catching up now, may be too late. One other small note, it's "wale" rather than "whale" when referring to that part of the ship. Not being a nit-picker, just pointing it out since you're enjoying learning from this build and using correct terminology is part of the fun and experience. It can also make it easier for others to help you! Keep up the good work!
-
Ominous. Going back and fixing things one doesn't like is often frustrating but usually feels better afterward.
-
HMS Beagle by Krupi - OcCre - 1:60
Cathead replied to Krupi's topic in - Kit build logs for subjects built from 1801 - 1850
Personally I think I'd remove it. Even if you feel it's more accurate, from an artistic/presentation perspective it may be distracting to casual viewers. I have a "soft" rule for myself that anything that's right but I feel like I should have an interpretive card explaining "well, actually" for, maybe I should rethink. But it's certainly up to you! -
It sure looks like you're right about the chains, they should naturally have a gap for the gunport without having to be angled around it.
-
First builds are always a learning process, I cringe at some of my early attempts! You've got the right attitude, keep having fun.
- 85 replies
-
- 4
-
-
- Lowell Grand Banks Dory
- First Build
- (and 2 more)
-
Looks nice so far, glad you decided to start a log. Things like the keel gap can be frustrating for the builder but are rarely noticed by viewers.
-
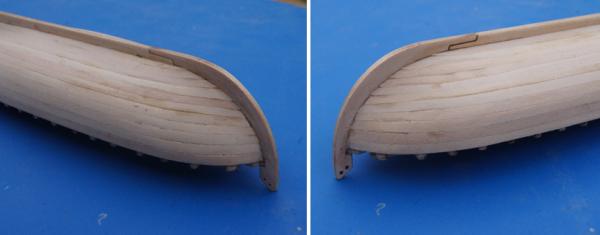
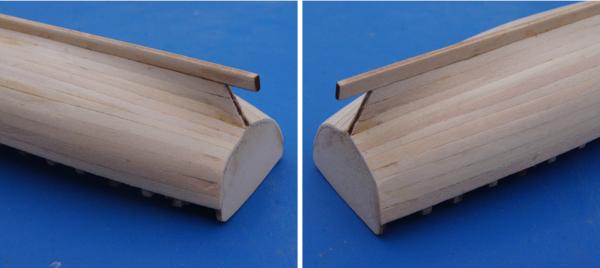
No worries, envisioning hull geometry can be really hard until you get used to it (I still struggle at times). Here are a couple more photos to help you envision this. In the bow planking below, look at how the planks butt up against the stem (the part of the keel that curves up to the front of the bow). Those plank ends are actually inserted into the little beveled notch you're forming in the false keel. Without that bevel, they'd just butt right up against the edge of the stem and you'd have a harder time getting them to stay in place and getting a nice smooth joint. In the stern planking below, see how the plank just above the keel (if the boat were right side up) is flush (smooth) with the keel? Again, that's the role of the bevel, it lets the plank slide in there smoothly. Otherwise, you'd be applying that plank to the original outer side of the false keel, and together they'd be wider than the actual keel, giving you a really awkward "step" between the two. All the way along, the bevel allows the planks to sit smoothly against the false keel and each other, giving a nice flowing compound curve to the outer hull. Hope that helps!
-
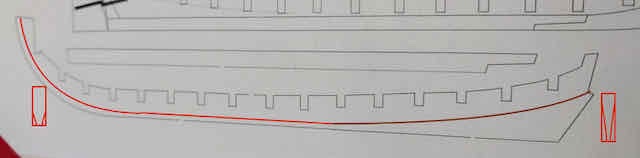
EDIT: Oops, looks like you deleted your latest question while I was responding to it, so the content below now seems rather odd! I'll leave it in case it still helps you or anyone else. This clarifies how and where the beveling happens. You are correct, the "bearding line" laser-etched into the false keel is the point at which the bevel starts. From that line, you bevel down toward the outer edge of the false keel (toward the real keel, away from the inside of the boat). So one point of confusion here is that I'm not sure exactly what you mean by "entire" and there are two possible answers. Are you asking (1) whether to put a bevel along the entire outer edge of the false keel, from stem to stern, or (2) whether to bevel the entire keel from top to bottom? I typed up a few different wordy attempts at talking through this before deciding just to draw out what you're supposed to do and hope that makes it clear. So here is the plan image you posted above, doctored to emphasize where the beveling should happen: Dark red shows where the laser-etched bearding line is. I don't remember whether the kit extends this along the whole false keel, but the plan image implies that it doesn't, which may be what's confusing you. You are supposed to bevel all the way from stern to bow (this is clearly stated in the instructions you posted above). In brighter red, I drew roughly where the bearding line should be for the rest of the false keel. Everything below the red line should be bevelled down to the lower edge of the false keel. I also drew two cross-sections to help you envision this. Forward, it's a small and sharp bevel, maybe 45-60º? As you go aft, the bevel gets wider and gentler, so that by the stern it's a very broad surface at a very shallow angle. To put it another way, start beveling at the stern and work forward. Once you get to the forward end of the laser-cut bearding line (where my dark line becomes brighter red), just keep roughly whatever that bevel angle and thickness is, going all the way to the bow. It might help to draw this in with a pencil or even scribe it with a tool. Does that help?
-
It's a good question, and good to ask before starting work as this piece would be difficult to replace.
-
I struggled with the same question, and also liked the idea of shrouds connected to knees rather than through the gunwale. I, too, came to the realization too late to adapt my model's existing structure to it. I just went ahead and tied off to the gunwale, but I like your idea of the added knees. Looks good and captures the essence of the idea. No one but the most pedantic observer will ask "hey, why are there more frames in that section?"
-
Have you looked at BlueJacket's Pirate Brig? It's not a larger ship than the Beagle, but would fit your interest in that realm. Realistically, pirate ships were generally just any ship of the period taken over and converted to that purpose. There wasn't a Royal Pirate Shipyard churning out bespoke designs. So you could also simply decide on an era, then adapt a kit for a likely candidate, for example by adding more guns or something. Could be a fun toe in the water of the kitbashing to scratchbuilding arc. If you want a link to literature, you could always tackle something like Model Shipways' Charles Morgan whaling ship and revisit Moby Dick while you're at it.
-
We did indeed open a bottle of homemade mead last night, so good call there. This is the third model I've made paper sails for and I adore this method.
-
Thanks, that helps. Yes, you do need to bevel the entire false keel. At the stern, the lowest plank will be parallel with the actual keel and ideally flush with it (a smooth surface from keel into planking). At the bow, the whole thing needs to be beveled so there's a "notch" into which the butt ends of the planks can fit, behind the keel (called the stem at the bow), helping hold them in place. See if this image from my build helps you see how this bevel looks. See how there's a shadow all the way along the false keel? Without that, the planks wouldn't have much to "grab on to" when you start attaching them. Does that help?

-
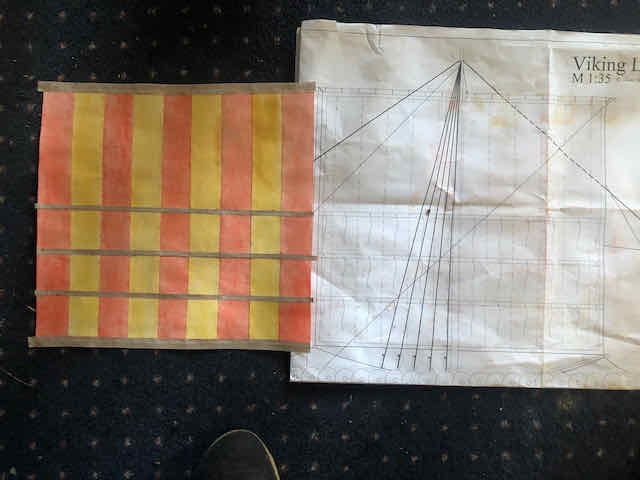
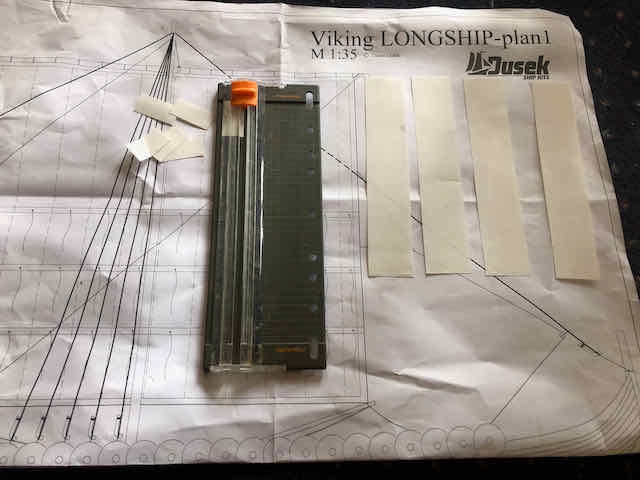
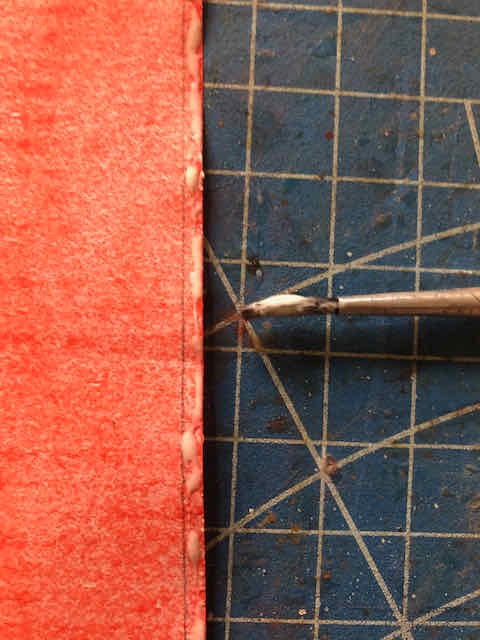
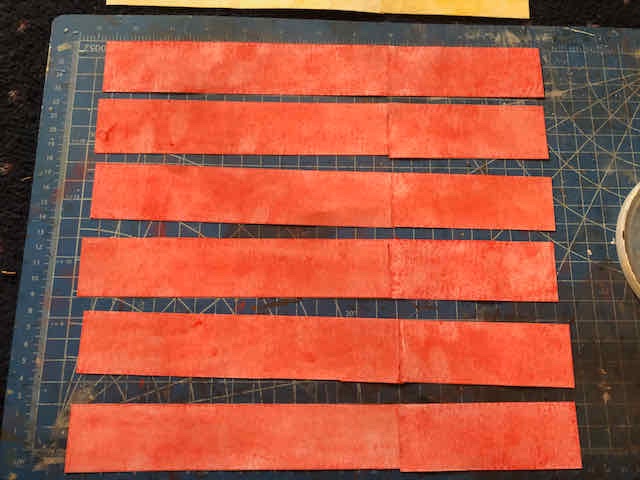
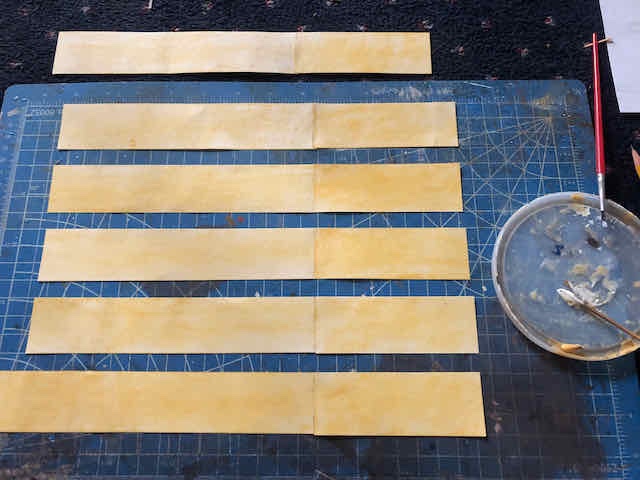
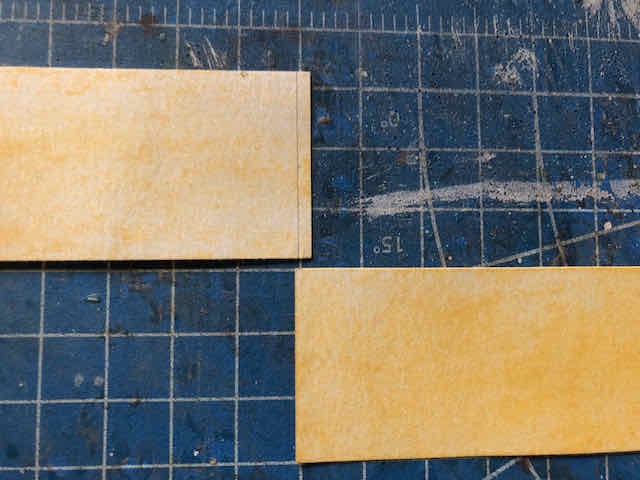
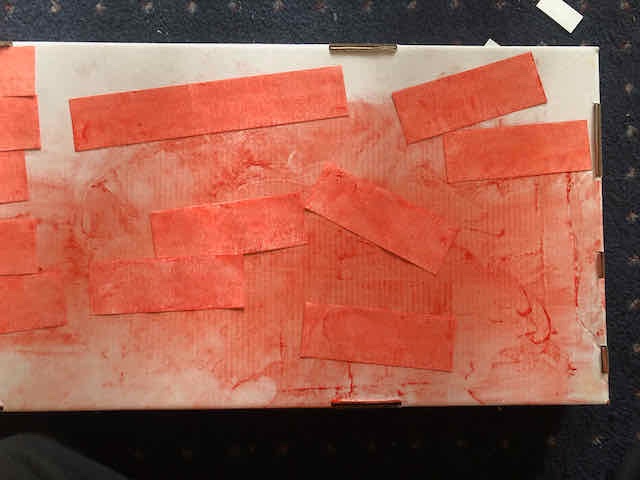
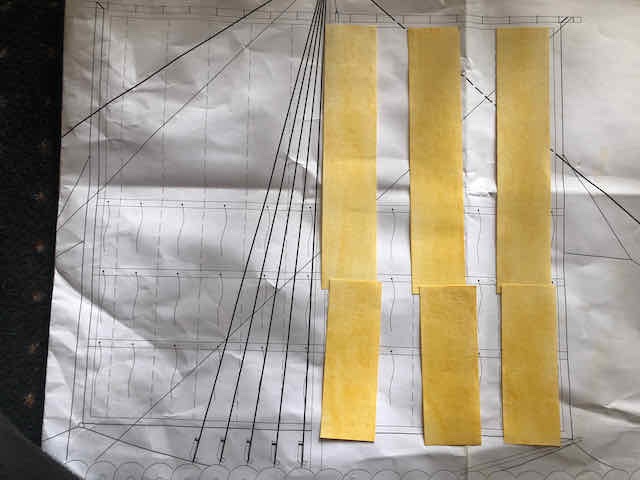
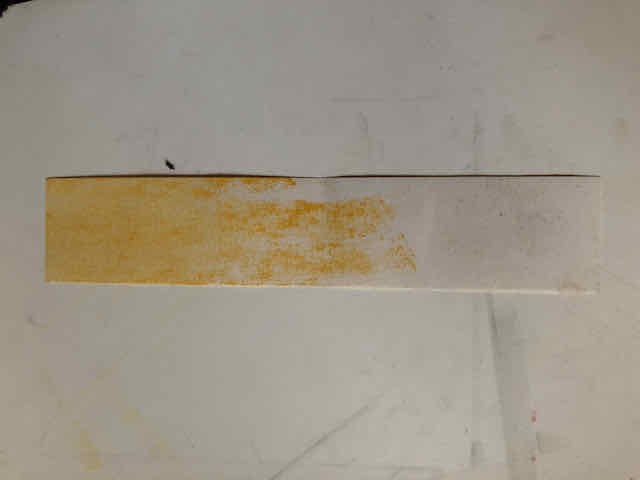
Made lots of progress on the sail, on a cold blustery rainy day that feels very appropriate for this Irish-Norse ship. Here's a step-by-step of what I decided to do. I cut paper panels to represent bolts of sailcloth, making these wide enough to allow for overlap (I decided to mimic the "lapped fell seam" in the link Steven shared above): I then colored each strip yellow or red using pastels rubbed in with my fingers. Do each color on its own and don't mix them, or you'll get all orange panels! The sail is taller than an individual sheet of paper, so I cut the bolts to join under one of the reinforced reefing lines so the seam would be hidden. I marked an overlap at the end of each bolt, gently applied wood glue, then pressed the joint together: Completed yellow and red bolts; these needed slight edge trimming where the joined bolts weren't exactly the same width: I then marked the overlap along the edge of each bolt, carefully brushed on glue, and carefully overlaid each alternate-color bolt: The next step was to start overlaying the reef point and edge reinforcements. I decided to make these grayish brown, as either red or yellow would look odd and I didn't want to try to match color along each bolt. This highlights the structure of the sail and my story is that they're a different cloth or maybe walrus hide. Artist's license. So here's where the sail stands this evening: And here's the other side, which doesn't have reinforcements yet: My current thought is still to do the diagonal reinforcements. Anyone have any idea if these were on both sides or just one side? I'd sure rather only do it once, it's going to be delicate and difficult. Hope you all like it, 'cause I don't want to redo this! Constructive feedback is, of course, welcome, as I can still learn from any mistakes for a future build. Thanks for your support.

-
Retired and ready to build my first model!
Cathead replied to lraymo's topic in New member Introductions
Welcomed! Have fun with your first build and don't sweat the details, there's so much to learn just by doing. To start a build log, just go to the main MSW page, scroll down until you see Members' Build Logs >> Build Logs for Ship Model Kits and click on the era your chosen kit fits into (such as 1851-1900). Then, just above where all the build log links start, you'll see big black button labeled "Start New Topic". Click that and it'll prompt you to fill in a title, after which you just start entering your first post. Be sure to read the rules for naming your build log as the site has standardized conventions. Sounds scary but it isn't. One other bit of advice, try to be as detailed as you can in your build log and use photos, especially when you have questions. We can only see what you share with us! -
I don't have my instructions anymore. Any chance you can post a photo of the step you're asking about?