


kurtvd19
-
Posts
2,988 -
Joined
-
Last visited
Content Type
Profiles
Forums
Gallery
Events
Posts posted by kurtvd19
-
-
-
Don't worry about the hull plank edges not showing. With the overhang of the deck they will be in the shadow of the deck and when you weather the hull it will all blend together.
- Canute, Paul Le Wol, Keith Black and 3 others
-
 5
5
-
 1
1
-
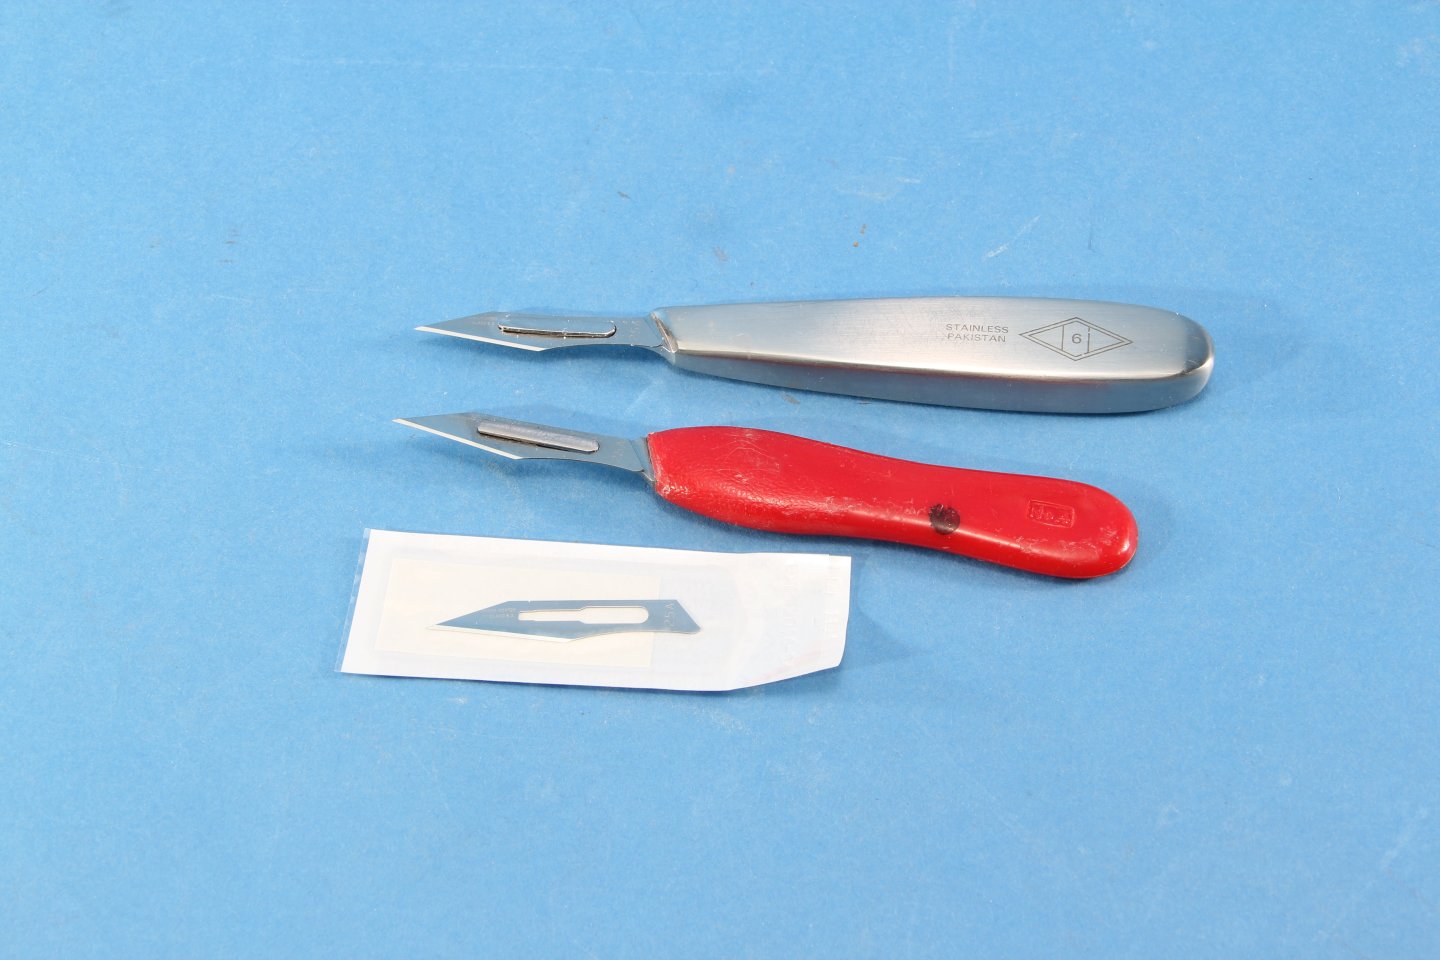
These handles are much better regarding comfort. They are available from several sources UMM-USA.com - put "Scalpel" into the search box and hit "enter" - blades and handles will come up. Scroll down a bit. Metal handle is about $8 and the plastic type is $5. I much prefer the metal handle as it is a better fir to my big hands. There are many tools here and John's prices are very good and he's a small business.
Amazon is another source.
-
The downside I see to keeping models in a cabinet of any type is that when downsizing while the cabinet will have a resale value the models being sold off without a case will have less value. Maybe it's a matter of when you think the cost vs resale value will benefit you the most. I know some modelers who could finance their later years very well by the sale of their models so they get the money instead of their kids or other relatives.
- mtaylor, Ryland Craze and thibaultron
-
3
-
I always case my models. For many years I made a lot of money repairing uncased models due to kids, animals and the accumulation of dirt on the models. Rigging and sails exposed to the home or office environment take their toll. I always advise modelers and owners to case their models. Maybe not a consideration for modelers, but even with the higher cost of Plexiglas I always urge the owner to case the model because it is cheaper than paying somebody like me to clean and repair their uncased model.
Kurt
- Ryland Craze, thibaultron, Cathead and 2 others
-
5
-
I use acetone. Get a bit undone and using a pipette or eyedropper put some acetone between the sandpaper and the disc. Keep adding the acetone as you peel the sandpaper off. If it's real hard to get the separation started apply some acetone the the top of the disc/sandpaper joint and let it work for a bit and you should be able to get the job started. You don't need a lot of acetone but apply it as you strip off the sandpaper right where the sandpaper is still stuck to the disc.
Good luck.
Kurt
- Ryland Craze, woodartist, Bob Cleek and 2 others
-
4
-
1
-
1 hour ago, Keith Black said:
have you seen another similar steering arrangement?
I have not been able to see a bunch of smaller boats and have not seen anything like this but there are only a few ways to transmit the steering to the rudders and small boats used simple arrangements. Rope around the steering wheel drum down through the floor to pulleys from the roof (directly under the wheel) to pulleys close to the left and right walls of the engine room to about the middle of the engine room and then through pulleys back to the center area of the engine room and then attached to the end of each tiller. Simple and fool proof.
Tugs used the same arrangement and ran the ropes to the side of the structure and to the pulleys going astern where they were attached to chains that ran in a trough to the stern where they attached to the steering quadrant. The chain troughs were covered with a lid to keep out most of the rain and snow so the chains didn't freeze in water. Sometimes the troughs were above the deck instead of inlaid into them and drain holes were provided to drain any water. Many different ways were provided to transmit the steering input to the rudders, but what Eric described is simple and the most likely method used.
Kurt
-
1 hour ago, Cathead said:
The tiller arms would be controlled by various blocks running tiller ropes up to the wheel in the pilot house. They might even be slaved together with a rod connecting them. It would be easy to arrange the ropes such that the wheel's turning translates into the correct motion of the tiller arms; that's how all steamboats worked.
I believe Eric is 100% correct. This is the only way I can see that the steering can work.
I have been working nonstop on some NRG stuff plus a model commission that has been taking up all my time. Just saw the rudder question today or I would have commented as Eric did.
Kurt
- mtaylor, Knocklouder, Cathead and 5 others
-
8
-
Make the door swing out. Or consider swapping door and window as Keith mentioned - for visibility for the Capt.
Kurt
- Keith Black, Glen McGuire, Canute and 2 others
-
5
-
Bruce:
Just had time to actually look at your build log (11-18-24) and am now following along (11-04-24). Great attention to detail.
Will be going back to day 1 and catch up.
Take care,
Kurt
- FriedClams and mtaylor
-
2
-
They have had this promo going for a long time. I think it is a great promo and should encourage more builds.
Kurt
- mtaylor, Ryland Craze and GrandpaPhil
-
3
-
I would recommend centering the stack as well as the wheel. The Capt would stand to one side or the other and operate the wheel from directly behind the handles on the spokes. Some wheels were quite tall and it was much easier to operate the wheel from one side or the other. Being offset to steer makes the issue of seeing around the stack unimportant. These boats and especially if pushing a barge required the Capt. to be looking way out in front of the boat or the Boat/Barge tow. The throttle and whistle controls were offset to one side or the other or provided on both sides of the wheel thus making the operation of the wheel from behind the spoke handles. This has carried over to this day.
Kurt
- FriedClams, GrandpaPhil, Canute and 4 others
-
6
-
1
-
Nigel:
We have some meetings where we bring our favorite tools to discuss. The Loom A Line (LoL) has never once been brought to a meeting as a favorite tool. In fact one meeting night I added a sub topic "Bring a tool that should never have been made or purchased. Three (3) brought Loom A Lines! For a very good reason - it is useless. Better to set up a jig to hold the mast with space below for the dead eyes and aligned as per the plans. They are most of the time at angles - at the most only one shroud will be directly line up with the dead eye's position per the plans using the LoL.
There is one other jig for doing what the LoL is supposed to do and that is the jig available from Model Expo that has adjustments for the dead eyes as well as height adjustment.
I stick with doing the rigging off the model but using the actual mast and locating the dead eyes below per the plan.
Kurt
- Thukydides, mtaylor, nheather and 3 others
-
6
-
4 hours ago, palmerit said:
If you're in your 40s or older, definitely consider something like an Optivisor.
I definitely back up this recommendation highly and further suggest you skip the plastic lens versions & get glass lenses - a bit more $ but later when you really need them you will be glad you spent the extra $. I am at the stage now that I am going to hang them next to my shop door so they are the first thing I grab and the last thing I put away.
Kurt
- Ryland Craze, Keith Black, CDR_Ret and 3 others
-
6
-
-
I think you are going to enjoy this build.
Kurt
- Nick 843, Canute, Knocklouder and 1 other
-
4
-
-
-
Check the Model Machines ad here on the right side. Click on the 4 inch disc sander and order the number of discs and the grit you want. Donna is still selling supplies for the machines just not the machines yet. Call if you want to confirm this but I just spoke to her last Thursday.
-
For what it is worth there is a motor upgrade for the Preac saw that uses a motor very similar to the Byrnes saw motor. Even has the same box with the capacitor inside. It is sold by Ship Ahoy Models in Saugus, MA. Phone is 781-231-0212. The owner's first name is Bob and he's a member of the Boston club. If you call him and get the information about the motor please let us know here.
- Canute, mtaylor, Keith Black and 4 others
-
7
-
First check the switch. The switch is the first thing to go and you mentioned two connectors to the switch have burnt shrink wrap. The rocker switches were the weak point. I replaced my rocker switch as a temporary fix until I could get a replacement rocker switch and I got the rocker switch and it is still in the drawer.
I know of several older saws that had this problem.
Some time ago Jim said that capacitor goes out and can be replaced. If replacing the switch does not work send an email to Model Machines and ask about the availability of a new capacitor or a new motor and capacitor. There is stock and Donna is filling orders for what they have on hand.
Kurt
- Keith Black, cotrecerf, mtaylor and 3 others
-
6
-
Their catalog- pdf downloadable - has some photos of the models. Do a search on MSW to see about build logs - I believe there will be some to be found. I have personally seen many models of these kits built over the years and I did some restorations of the Lucia Simpson model by a couple of builders for clients and can say the kits can produce nice models. I have seen several of their Challenge and Lucia A Simpson kits as well as a couple of the Edna G tug entered in competition at the WI Maritime Museum contest over the years - one model of the Simpson from their plans just recently got a Gold Medal - It was not this year but recent. Check this URL for some info on a very good model of the Simpson as well as historic photos of the boat. https://www.hrsms.org/Content/model/lucia-a-simpson/ BTW all Great Lakes Vessels are referred to as Boats, even the 1,000 ft ore carriers.
BTW the model shown below from the 2024 contest is the Lottie Cooper and the wreck I mentioned in my first post is the Lottie Cooper not the Lucia A Simpson as I mistakenly ID the wreck.
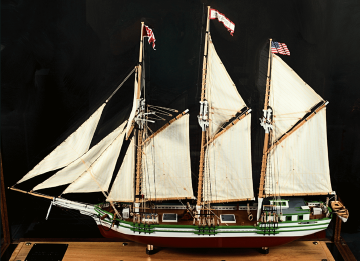
Photo of Lottie Cooper a three master lumber
schooner by Rocky Groh won a gold medal in class as
well as Best Great Lakes Vessel Award in the 2024
contest.
- thibaultron, Roger Pellett, mtaylor and 1 other
-
4
-
AJ Fisher has several kits - (Advertises in the NRG's Nautical Research Journal) has kits and plans for the following Great Lakes boats.
http://ajfisher.com/kits/challenge.htm
CHALLENGE Great Lakes Schooner - 1852 - Built in Manitowoc, WI 1/8" = 1'
CHAMPION Great Lakes Tug - 1868 1/8" = 1'
EDNA G. Great Lakes Tug - 1896 1/8" = 1'
LUCIA A. SIMPSON - 3 MAST LAKE SCHOONER - 1875 3/4" = 1'
The remaining wreck of the Lucia A. Simpson is on exhibit on the shore of Lake Michigan in Deland Park in Sheboygan, WI (26 miles S of Manitowoc). Shows the construction of the keel, center board and centerboard well and one side of the hull from the keel to about 4-6 ft high. A must visit for anybody researching or building models of Great Lakes sailing boats of the later 1800's.
- mtaylor, thibaultron, Roger Pellett and 2 others
-
5
-
On 2/2/2023 at 5:33 PM, Bob Cleek said:
I expect they will be rather sketchy if they are like other Midwest plans I've seen.
Bob:
I think they are virtually identical from Midwest to Model Shipways. Have compared one of the newer kits manual against one of the older manuals and while I didn't read every word a quick scan shows they look identical. I wrote a series of articles in Ships in Scale magazine starting in mid 2000 through mid 2006 meant to be a how to get started and progress to being an accomplished modeler (Series was done at the request of Clay Feldman the owner and publisher of Ships in Scale). I found the instructions in this series of Midwest kits to be very good especially compared to anything imported at that time.
The older series of kits from Midwest have a feature that I hope Model Shipways will add back in is a ranking of the kit's difficulty. They ranked the various kits as Levels 1, 2, 3 and 4 and the rankings in my opinion were right on.
Take care,
Kurt


Model Building With Brass
in Book, Monograph and Magazine reviews and Downloads. Questions and Discussions for Books and Pubs
Posted
I love this book. Every time I pick it up I learn something. Have both versions and I think it is a must have for anybody planning any work with brass. It will save you time and lower your stress.
Kurt