


kurtvd19
-
Posts
2,987 -
Joined
-
Last visited
Content Type
Profiles
Forums
Gallery
Events
Posts posted by kurtvd19
-
-
I use Badger's STYNYLREZ primers before the finish paint but often just use the STYNYLREZ as both primer and finish coat. These primers come in 18 colors.
Prep of metal parts is a dip in heated Sparex (I use a small crock pot as it will not boil liquids and it is IMPORTANT to not boil Sparex) for several minutes with a thorough rinse of plain water and then I air dry the parts without touching the parts with bare hands. I use exam gloves w/o powder. When thoroughly dry I prime the parts with STYNYLREZ and let them dry thoroughly.
The STYNYLREZ name is to show it is usable on Polystyrene, nylon and resin. But it also works great on metals and wood. If thinned use distilled water. Also, Badger recommends STYNYLREZ a point .05 needle (or larger).
-
I am attaching a link to Badger's website. Click on it and then download their ULTIMATE AIRBRUSH 101. It is a great guide to almost everything one needs to get started in airbrushing. On Page 5 of 13 the part about how to pick an airbrush starts. This tells you the brush or brushes they recommend for doing particular jobs. There is no one best airbrush for every job, but there is one best brush for a specific job. The trick is deciding what's most important for your particular job. And there are great brushes from all of the name brands.
Badger Website CLICK HERE
-
-
-
On 1/27/2023 at 10:07 PM, Oldsalt1950 said:
If you are just starting out, this combo can't be beat: Airbrush Kit
Edited Friday at 10:12 PM by Oldsalt1950 (see edit history)
Oldsallt1950:
Your signature line of "I stand firmly against piracy!" is misplaced with this post as at a minimum one of the 3 brushes is pirated from Binks. The bottom black airbrush is a direct copy of the Badger 350 - who took over the design from Binks - their neighbor across the street when Binks stopped making airbrushes. I have both the original Binks "Wren" I got for Xmas and two of the 350's from Badger. I think this is the most copied airbrush on the market. And there is a reason, ass it is a very good airbrush for it's intended use.
I am willing to bet that all 3 are pirated, but I know the black one is a knockoff of the 350. I consult with Badger, so I know of what I speak. Why do I have two of the 350's? I teach airbrushing for Badger using Badger brushes. I have many Badger brushes (two were custom made for me) and they are all great. They fit my large hands perfectly with the exception of their Crescendo 175 model. I use the Badger Modelflex Marine Colors for all my models and teaching. I developed these colors for Badger a bunch of years ago. They are acrylics. I was using the Badger 360 and Modelflex paints long before I had a relationship with Badger.
http://www.badgerairbrush.com/library/175.jpgIt is too fat for me to hold comfortably which was why I sold my Paasche brush and bought my Badger 360. I know what you are asking? I thought he had big hands? I do but the fat brushes just don't fit my hand.
I love my Badgers, but they are only one make. All of the legitimate name airbrushes are great brushes - IF they fit your hand and you use the right brush for the job. In my local IPMS club that I attend there is another modeler who does essentially what I do with Badger except he goes to more trade show for Iwata. When somebody asks a general question about airbrushes we are both given equal time to answer the question unless it's specific with one brand or another. Many times all that the other will have to say is "I agree completely" because the name brands produce near identical results with comparable models.
But, please purchase name brand brushes - you will benefit in the end. And try getting somebody from the Pirates to answer questions or come to your club meeting to show the latest brushes, paints or let you spray with one.
Take care,
Kurt
-
Did you set the fence up to be perfectly parallel or did you st it so it is parallel only up to the blade? Byrnes builds in a slight taper for more clearance beyond the blade. It is something like 0.003" to 0.005" to provide relief for the expansion of the cut off. I don't remember where the taper starts but it would be equal to the centerline of the blade or before the center line of the blade - not beyond the center line. I know I have the information somewhere and I am looking for it but I bet it's available right here where Jim described the method of adjusting the alignment.
Kurt
-
-
The Cameron is overkill if you are building wooden ships/boats. The Proxon or Microlux drill presses are more than accurate enough. Wood will expand and contract due to atmospheric changes more than one drill presses accuracy over another. Personally I don't consider the various adaptions of a Dremel or other brand press - they are known for the inability to hold settings as they age - some right out of the box.
I have the top of the line Microlux press - variable speed with digital depth measure readout - with a good XY table & vise attachment the accuracy is more than adequate - at least for me.
-
That's a nice tight joint!
- druxey, Keith Black, Greg Davis and 3 others
-
 6
6
-
Correct Ron. I always wipe the needle with Regdab - it is simply a needle lube and each mfg has their own - when I reinsert the needle after cleaning. I put a drop of it on a clean rag and drag the needle through it and then lightly wipe the needle before inserting it into the brush. Always wipe towards the tip - you don't want to stick yourself with the extremely sharp point - and you might bend the point too.
- DaveBaxt, Ryland Craze, mtaylor and 2 others
-
5
-
Paasche are US made. They were always in the Chicago area. Badger, Binks and Paasche used to be on the same block within sight of each other.
- thibaultron, Canute and Bob Cleek
-
3
-
I would beware of this airbrush. Not because of the fixed cup. I have several fixed cup Badger brushes - this is not the issue. Check the link you sent, as it goes to Amazon and then to the Paasche store what appears to be the Paasche store that does not show this airbrush. If you dig deeper you wind up at Micro-Mark site - and it is not listed there either.
Search the brush name and model - it comes up to a direct link to Paasche at $209.
I sincerely doubt the air brushes shown at Micro-Mark are actual Paasche brushes. They have been guilty in the past of purchasing Chinese copies of various brushes and passing them off as legitimate. It looks like they are back to it.
I doubt that you can buy a legitimate Passcche brush of this model number for the price you see advertised.
Avoid issues like this and find legitimate dealers for the brand you want.
Kurt
-
Thanks. I want to see it at Manitowoc. Completed or in progress if you are not done with it.
😃
- mtaylor and Keith Black
-
2
-
Greg:
Please list the source for the applicators. That's a fantastic price.
Your work on this model is great and I am following with great interest.
Kurt
- druxey, Keith Black and mtaylor
-
3
-
There wasn't a user manual when Preac was in business. If I remember correctly there was a single sheet of information.
I agree that a book on table saw use is good regardless of the size saw you have. The Preac saw motor is under powered for hard use. There is a motor upgrade available for $100 that provides every thing one needs to upgrade to the bigger motor. I purchased it and it is good quality and overcomes the power issue. However nothing can fix the maximum cut of 1/4 inch. It has it's uses and I will never part with my Preac even though I have two Byrnes saws.
- Keith Black, Chuck Seiler and mtaylor
-
3
-
Brian:
Do you have a zero clearance insert for your saw blade? The use of one for each saw blade cuts down on the splintering on plywood. Makes a much cleaner cut. Tell your wife that the Byrnes saw is a matter of saving your fingers. While it is quite capable of taking off a digit or two it being smaller and sized to the work you do with models makes it safer to use than the big shop saw.
Kurt
-
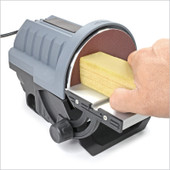
I keep a rubber cleaning block meant to clean sanding discs and belts on my bench if using sandpaper on the char as Chuck describes. The rubber when dragged across the sandpaper will remove the char from the sandpaper. If you use a disc sander or a belt sander you probably have used one of these cleaning blocks. Available at most stores selling sanding tool - even Micro-Mark has them. This will prolong the usefulness of the sandpaper.
-
With your help, our hobby has a bright future

Dear Friend of the Nautical Research Guild & Model Ship World.
Our shared passion for model ships and maritime subjects has brought serious ship modeling hobbyists together in previously unimaginable ways as we have tried to keep our unique pastime viable and vibrant for you, the members of the NRG and our Model Ship World forum.The NRG’s directors – along with other volunteers – have been working harder than ever to connect with you as well as keep you informed and focused on the future of model ship building. It’s been a privilege to engage many of you in online activity and to see so many new visitors to the NRG and MSW web sites; our broad resources are now more accessible than ever before with a dramatically expanded and improved internet
presence.
In order to sustain as well as increase our ability to plan for the future, we need your help. Your support enables us to ensure we can continue to expand our offerings, such as online workshops, a scholarship program as well as more diverse modeling projects and even helpful, affordable tools.
It’s for all these reasons that we ask for your help right now.
Please make a gift to the NRG for 2022 so we can do more to support this hobby that you and other members enjoy. The NRG is a 501(c)(3) not-for-profit corporation. If you are a U.S. taxpayer, your donation is tax deductible; of course, all donations are appreciated no matter where in the world you live.
Can we count on your support?
Thank You,
The Directors of the Nautical Research Guild
––––––––––––––––––––––––––––––––––––––––––––––
For your convenience, donations may be made online at the NRG website or here on the MSW homepage by clicking the Donate Now button. Donations can be made with PayPal or your check made payable to the NRG,** and sent to our office:
The NRG
237 S Lincoln St,
Westmont, IL 60559*Checks must be issued from a U.S.- based bank.
**If you wish your donation to be used for maintaining our MSW forum, please make a notation on the check or on a separate piece of paper to indicate this preference.
Please Do not make your check payable to ModelShipWorld!
- Keith Black, hollowneck, Craigie65 and 6 others
-
9
-
I think I would have great difficulty working between the walls of the work area on anything bigger than a few inches long. There is barely room for my two hands between the walls let alone a model of any size. Think about the attitude of your hands when working on a model - I doubt they are at a right angle to your arm - not much room for a model.
-
For the future I suggest you do a personal build log. I have always done this so I can remember the paints and glues used and where used. If I mix a color I record the paints used and the ratio of each so in case of needing a repair I can duplicate the color. Woods and other materials and where they were used is also a good idea to record. Upon completion of a model all the information is saved in a note book for later use.
Of course if you are doing a build log to share here you can everything recorded here.
- Riotvan88, mtaylor, Chuck Seiler and 3 others
-
6
-
You should be fine to go.
- thibaultron, mtaylor, druxey and 1 other
-
4
-
I would add epoxy to the interior of the hull from the waterline (at minimum) to the keel paying extra attention to any hull penetrations. If unable to access the entire area I described I would absolutely get epoxy around the prop shaft penetration and any other penetrations at minimum. The hull will not be in the water for days at a time, more likely less that a couple of hours. It takes time for water to soak into any exposed wood you might have missed and if you are like most RC boaters it will have at least a week to dry out - keep the interior of the hull accessible to the air.
Next time use glass cloth. It is easier than you think.
Kurt
- Riotvan88, Ryland Craze, mtaylor and 2 others
-
5
-
Gary:
I think you have convinced me to get the large table for my original saw (2003). I have a second Byrnes saw and will switch them around as I have the original set up for ripping and the 2nd saw set up for crosscutting.
I noticed in your first photo that the Preac saw in the background seems to have some modification (or a fixture) next to the fence. Can you provide and explanation and/or a photograph of the saw? I had my Preac (1995) long before the Byrnes saw and I have continued to use it as there is just some stuff II consider too small for the Byrnes saw. Always interested in accessories or modifications others have come up with for the Preac.
Take care,
Kurt
-

Caroline N by mbp521 - Scale 1:64 - Mississippi River Towboat
in - Build logs for subjects built 1901 - Present Day
Posted
The data below is from a report by the Maritime Administration of the US Dept. of Transportation titled "Environmental Advantages of Inland Barge Transportation".
As staggering as the fuel costs are, barges are the least expensive method of transportation. I can't locate the pictorial chart the IL DOT uses to show the amount of the average barge loads of a common tow vs how many RR cars and semi-truck loads. One barge can carry 1,500 Tons, while a single Railroad Hopper car can carry 100 Tons and a single Semi trailer can carry 25 Tons. Or the average 1,500-ton barge carries the equivalent of fifteen 100 ton Rail cars or sixty 25 ton semi trucks.
Or the average load of a 15 barge tow has a capacity of 22,500 tons and will stretch for 1/4 of a mile.
To match this capacity takes 225 rail cars = to 2 3/4 miles or 900 Twenty-five ton semis stretching 36 miles - assuming 150 feet between trucks. The fuel used to move a ton of product is 59 miles by truck, 202 miles by rail car and 514 miles by barge.
Comparison on a ton-mile per gallon basis shows that a semi-trailer on the hwy carries a bit less than 300 pounds per HP. A 175 car trainload of iron ore carries about 4,500 pounds per HP. A 3,600 HP towboat propels some 30,000 tons of cargo which is = to 10,700 pound per HP.
Of course water of suitable depth must be usable from point A to B to use these comparisons.