


Roger Pellett
-
Posts
4,456 -
Joined
-
Last visited
Content Type
Profiles
Forums
Gallery
Events
Posts posted by Roger Pellett
-
-
-
Since you are glassing inboard and outboard I assume that this will be a working (RC) Model. Correct?
Roger
- Keith Black, mtaylor and Canute
-
 3
3
-
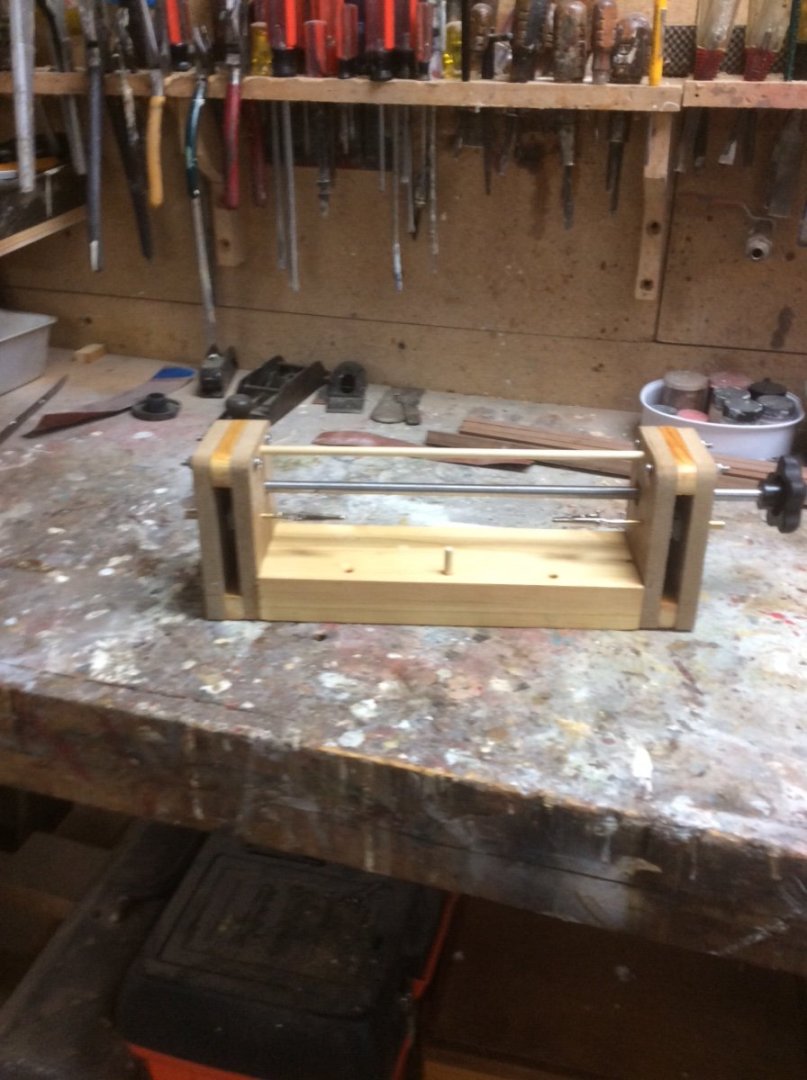
I second Wefalck’s suggestion. The key to one of these otherwise simple machines is a set of gears. Since the machine works at very slow speeds and carries very little load, plastic gears work just fine. These are readily available from online sources like Amazon. The photo below shows a serving machine that I built several years ago using ordinary workshop equipment and scrap materials in my shop. The gears are inside of the two vertical slots. There are no bearings, just holes in the four vertical MDF pieces. The shaft is steel but you could use Aluminum or in a pinch even plastic. The clips to hold the line being served are Alligator clips widely used in the electrical/electronics industry.
Roger
-
Welcome to MSW. Not just from Minnesota but Duluth!!
Roger
- RossR, Keith Black, JeffT and 1 other
-
4
-
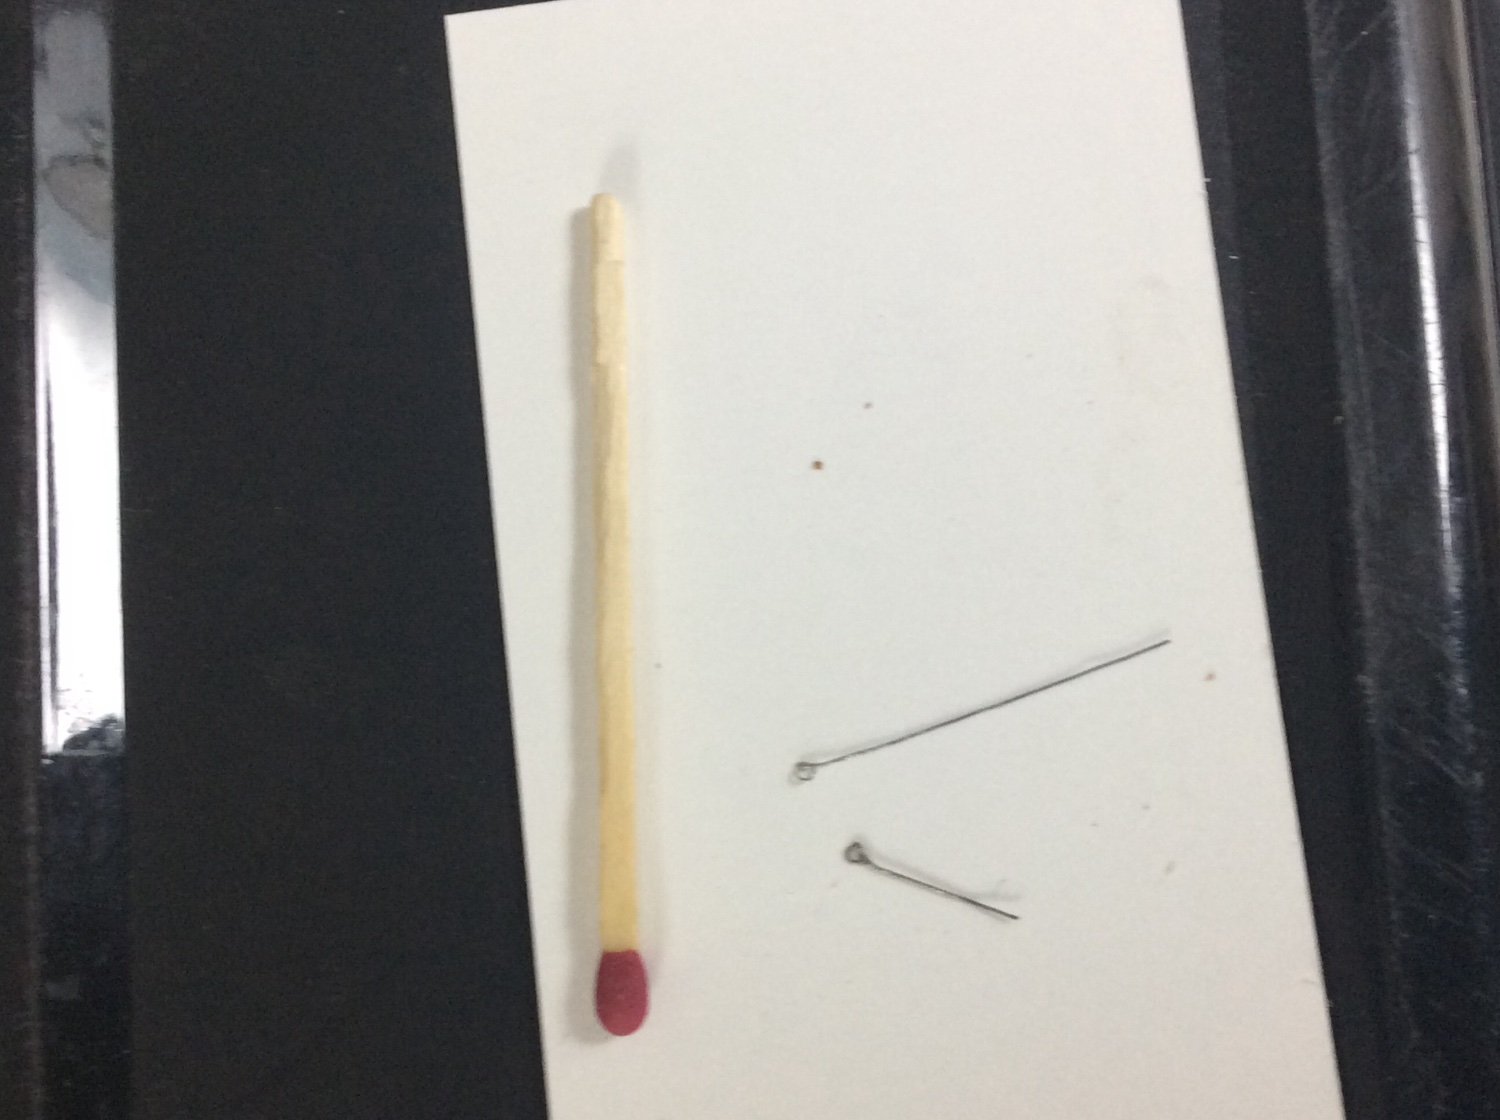
I too enjoy browsing stores like Michaels to find things that can be adapted for building models. Unfortunately, a lot of the “brass” nails, pins and such turn out to be brass plated steel.
Roger
- mtaylor, druxey and Keith Black
-
3
-
If you have any sort of small torch, there’s an interesting and useful trick that you can perform. Hold a piece of brass wire vertically with a pair of pliers. Heat the lower end of the wire. Just before it melts it will form a ball. One end of your rivet.
Roger
- mtaylor, Keith Black and druxey
-
3
-
Welcome to MSW and to the scratch build forum in particular. An ambitious project like this is a major investment of your time. Cost, on the other hand is amortized over a long period of time. It therefore pays to invest in top quality materials that will not cause problems as you proceed.
Most experienced modelers do not consider balsa to be suitable for high quality ship models. It is too soft and weak. You might want to see what other woods are available locally. Many British ship modelers prefer Lime wood, not to be confused with the tropical fruit, but similar to our American Basswood.
Roger
- Canute, mtaylor and Keith Black
-
3
-
I am not familiar with the kit but here are some thoughts:
Wood; The usual wood supplied in kits is Basswood, a nice wood to carve but low strength and soft. Splits easily. Substitute stronger wood. Maple would be a choice.
Riveting; The idea is to deform the point. If you are using wire, what is the material? Copper should be easier to form than brass. I would start by forming the head. This is best done off the model possibly just a hole in a block of hard wood. Tap with a hammer until it forms.
The other end of the rivet is called a point. With the rivet pushed through work piece, just enough of the other end should protrude to allow forming a head. Too much and it will just bend over. It is customary to back the point up with a washer called a Rove. The rove allows you to hammer the point into a head without splitting the wood.
Roger
- mtaylor and Keith Black
-
2
-
Experience from failed fiberglassing attempts over 50 years of full scale boatbuilding projects (I’m a slow learner):
1. West System’s regular (I believe it’s their 105) Epoxy is expensive but very reliable if properly measured and mixed. The ratio is 5 parts Epoxy to one part hardener so you need to figure out a reliable measuring procedure ahead of time. Their calibrated mixing pumps make this easy.
2. Do not try to glue the cloth onto the model’s hull!! This will result in ugly wrinkles and air bubbles. The correct procedure is to drape the cloth over the dry hull and to then apply the resin, working it into the weave with a small plastic squeegee.
3. The resin cloth combination does not adhere well to sharp corners.
4. West System has a HUGE free collection of Information Sheets covering correct application of their materials. Although aimed at builders of full sized boats, they are worth studying.
5. Wear gloves. The cloth is still glass regardless of how fine.
Roger
- Riotvan88, thibaultron and mtaylor
-
2
-
 1
1
-
A story about a great local business making a High quality specialized product. Readers invited to draw their own conclusions.
Evergreen Winterwear is a small local business located on Main Street in the tiny North Woods town of Ely, MN. Employing local people, they make and sell very high quality outdoor garments for customers ranging from infants to adults. The owner, wife of a noted arctic explorer, eventually grew tired and sold the business to an outside investor who promised “to take the business to the next level.”
Within month’s of taking ownership, he had closed the Ely, MN work room, laid off the workers, and outsourced all production. All that was left was “The Brand.” Dedicated customers, my wife included, were not fooled. The new business closed within a year.
Fortunately, in this case the original owner had the technical expertise to run the business. She bought unsold equipment back at auction and re-established the business in its original form- making and selling a high quality product on Ely’s Main Street.
Roger
-
-
My Sherline lathe was bought 20+ years ago to replace a very old Sears Dunlop lathe that DID have Babbitt bearings. At the time that I bought it I thought that I was also interested in doing some gunsmithing so I paid the extra $$ to buy the extended bed.
The Sherline is a great machine for model making. With the optional milling column and sensitive drilling attachment it also nicely solves drilling problems with small wire sized drill bitts. It spends more time configured as a mill than a lathe. I have since lost interest in gun smithing which is fortunate as I lack the machining skills to hold the necessary tolerances for doing this type of work safely. I also believe that a Sherline is really not intended for this type of machining with high strength tool steels. For this work, the Craftsman type machine that began this thread is more appropriate.
In my 20+ years of ownership I have never made use of the extended bed. 99 percent of the work that I do is performed within 2-3in of the headstock. I would not attempt to turn a 17” long mast on this machine. It is much easier to cut a square sectioned blank and plane octagonal, etc. The generous hole through the headstock also allows long slender items to be fed piecemeal to be turned in sections. If I were buying a Sherline knowing what I know now I would buy the shorter bed machine.
Roger
- Twokidsnosleep, Canute and mtaylor
-
3
-
Sherline DOES or rather did also make a small tool rest for freehand turning of very small metal parts using tools called “gravers.” Sherline lists this as a watchmakers tool. It is relatively expensive, but a beautifully made tool. It could be used for turning small wooden parts. Check their website.
Roger
-
She was tied up at Mystic Seaport during the 2015 NRG Conference. My recollection is that she had a Black hull. Certainly not Blue.
Roger
- FriedClams, Retired guy, Keith Black and 1 other
-
4
-
Unfortunately Naval Architects and Nautical Archeologists seem to be two different breeds “and never the twain shall meet.” All floating objects regardless of when built most obey the same laws of Newtonian Physics. In the end even these ancient vessels can be evaluated using basic Naval Architectural concepts. There is seemingly no reason why ancient seafarers would sacrifice freeboard by intentionally building a vessel with a crenelated hull.
Roger
- mtaylor, Glen McGuire and Bryan Woods
-
3
-
-
Evan,
Yes, not very sexy, but if you open 5 compartments in a two compartment ship to the sea it eventually sinks! End of story. Although she was state of the art for 1913, she was not sailor (or more accurately owner) proof.
My current project, the Great Lakes Steamship Benjamin Noble is another example of where an owner, or in this case his representative’s, misuse of a relatively new well designed ship resulted in a tragedy. She was lost with all hands on Lake Superior overloaded with a heavy cargo that she was not designed to carry. This happened in April 1914, exactly one year from the loss of Titanic.
Roger
- NavyShooter, Canute and bridgman
-
3
-
Start looking at scratch build logs in the 1900 and later category here on the forum. Pay particular attention to the research done to build the models. While no one is building the exact model that you are thinking of it will give you a good feel for the process.
Roger
- challenger86, Jim Lad and mtaylor
-
3
-
-
Keith,
The latest American Lake vessel launched 2-3 years ago has hatches that are three generations removed from the wooden covers fitted on the Benjamin Noble:
2nd generation- telescoping steel covers
3rd generation- One piece steel plate covers handled with a traveling hatch crane. (Used on all but 1 vessel in the American Lakes Fleet).
4th generation- one piece hydraulically operated cover (used on one vessel)
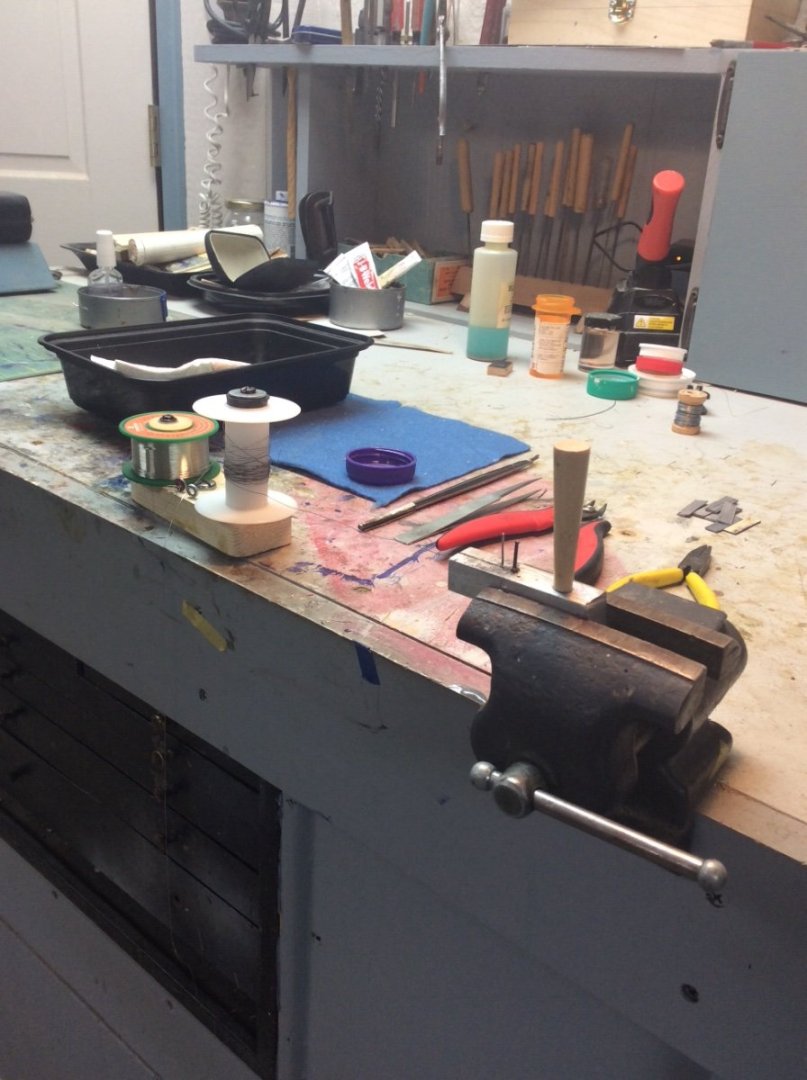
The tapered plug was just there to fix one end of the wire. The other end was attached to the closest spool shown in the first photo. This allowed me to put tension on the wire to endure round, uniform rings.
Roger
-
Ringbolts-
Work over the last two months centered on completing the hatches. There were three stages to the job; the 148 ringbolts, completing the hatch boards, and making the hatch bars that prevented the wooden hatch boards from floating.
Each of the 72 main deck hatch boards and the 8 bunker hatch boards were fitted with two ring bolts. While these usually appear on any model with wooden hatches readers might be interested in how they were actually used. This is described in Jay McCormick’s 1942 prize winning book November Storm. The book is a fictional account of a young man’s season aboard a Great Lakes Freighter fitted with wooden hatches. Shortly after joining the vessel he is called upon with another deckhand to remove the hatch covers for unloading.
Each hatch board, weighing about 150# was handled by two men each armed with a short wooden “hatch bat”. One end was pushed into a ringbolt and the other held by the deckhand. Working in unison at diagonally opposite ends the 9ft long hatch board could be lifted and walked over to the side of the deck. Since time is money, this had to be done quickly, before the vessel was tied up at the loading or unloading dock. The effort required is hard to imagine!
In my case, the problem was figuring how to make them. Each ringbolt ring had an OD of 6” so at 1:96 scale this would be 1/16”; Tiny! A feature of scratch building is the time that must be spent figuring how to make things, particularly if one chooses to build a variety of models and to work at different scales. As a result, several frustrating work sessions can go by until things get figured out. In my case, I first developed a system that I posted in the metalworking section of the forum that involved using a hand drill to twist a loop of wire. I abandoned this as it didn’t produce a round ring.
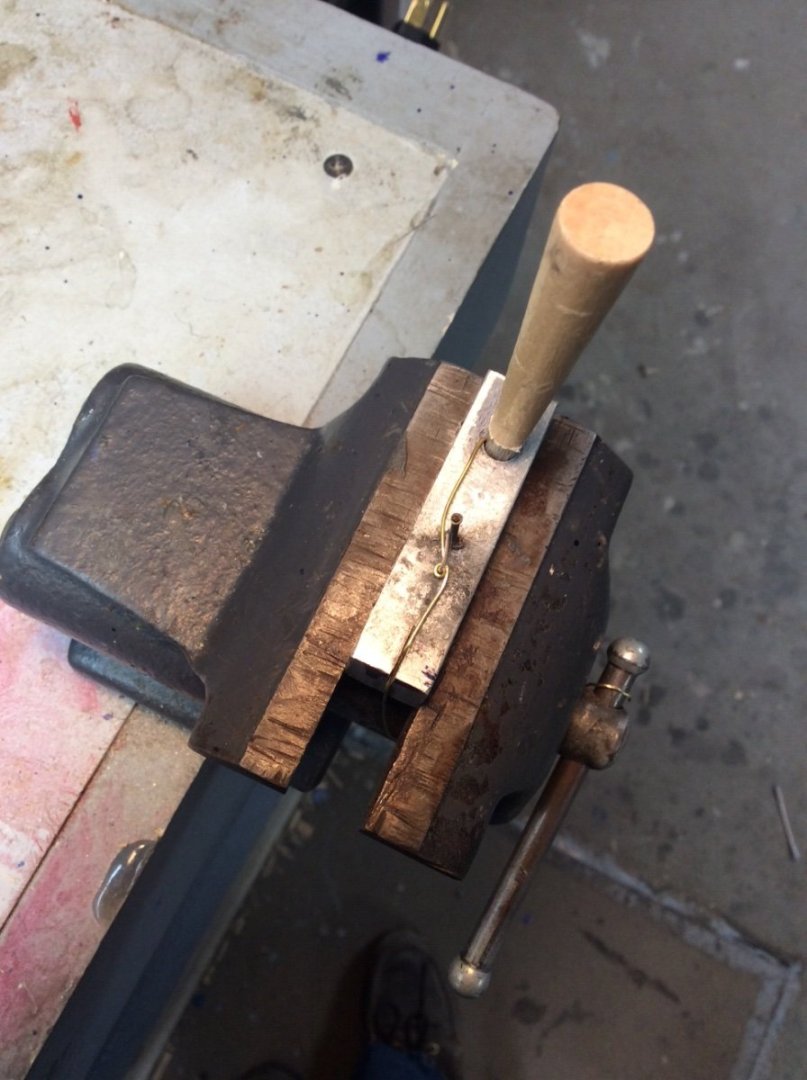
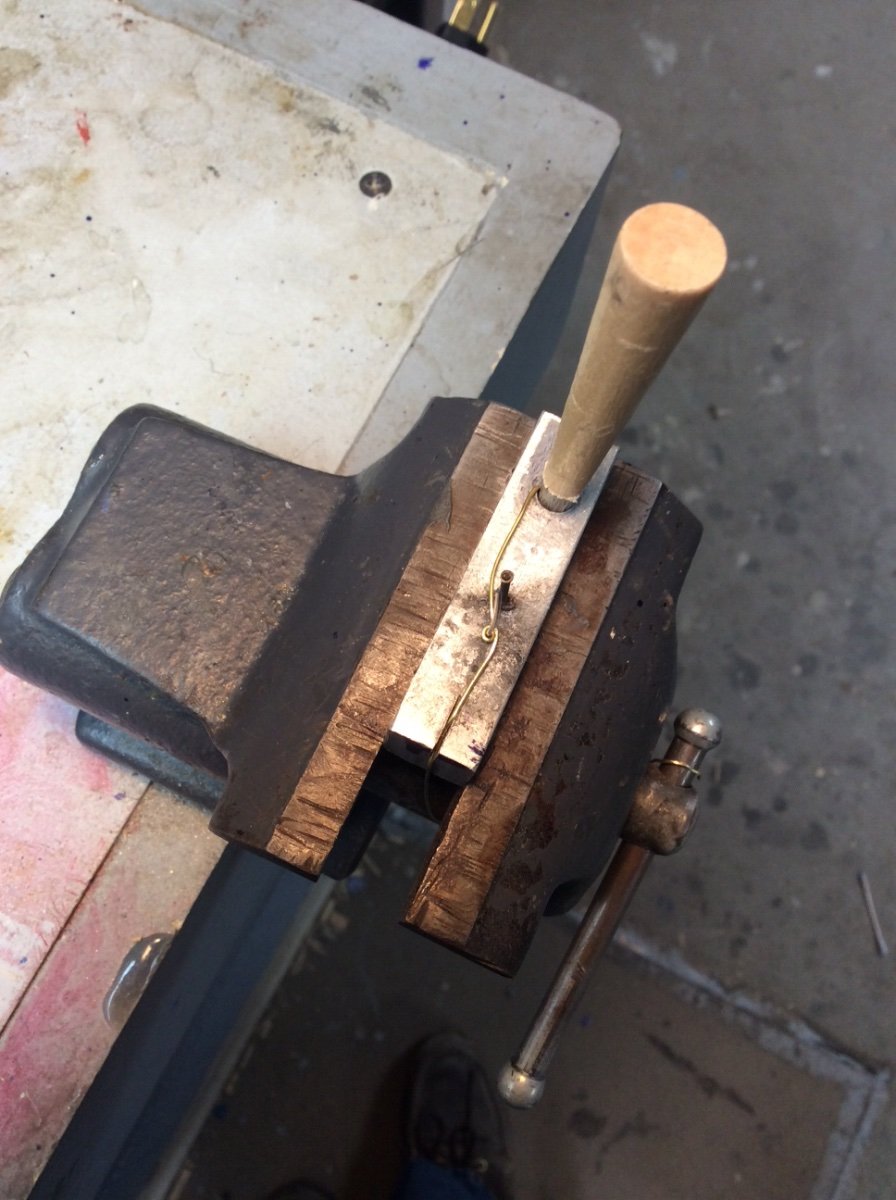
The system that I eventually used is shown in the photos below. It involved drawing .010” diameter wire around mandrel of 1/32” aluminum wire and soldering the loop with a drop of .010” diameter solder on the tip of a very small soldering iron. The result is slightly Under-scale but looks good relative to the hatch board. I began by using specially tinned brass wire but after running out found some .010” steel wire in my stash that was even easer to solder.
Roger
Note: the brass wire in the second photo is intentionally oversized to demonstrate the concept.

- FlyingFish, Glen McGuire, mcb and 14 others
-
17
-
What you really need to start is either a lines drawing or table of offsets from which you can make your own lines drawing. This is not information that you would likely find in the hands of operators; Steamship companies, shipboard crews, etc.
Apparently Finland was built by W. Cramp &Sons, an American Yard near Philadelphia. So, who holds Cramp’s Archives? Maybe Philadelphia’ Franklin Institute? Just a guess.
Roger
-
There is usually a lot of old lathe parts on EBay. I know buying things on EBay can be chancy...But ?
Some parts such as nuts, bolts, bearings, etc. will be standard industrial stock items Fortunately the lathe is belt driven with speed regulated via stepped pulley so if necessary, the old motor can be easily swapped out for a new one. You can probably use the lathe without replacing some missing parts. These lathes regulate the travel of the cutting tool vs. the rotation of the spindle using a series of changeable gears. This is necessary for cutting threads, but if the gears are missing the lathe can still run.
You should also inventory the lathe’s accessories that you have; chucks, tool posts, etc. Rule of thumb is that the cost of these will often exceed the cost of the lathe itself. If you buy a new machine like a Sherline, it will have to be outfitted with new accessories as the old ones will not fit.
With the notable exceptions of the Unimat and the various specialized watchmakers lathes the smaller model makers lathes are (by my timeline) a relatively new item. Back in the 70’s and 80’s there were lots of books and articles dedicated to using these and similar full sized machines for model making. I suspect that your lathe has good bones and it’s worth investing some money to restore it.
Roger
-
If you have the Atlas Craftsman lathe, you have a tool that I have llusted over for years but never owned. The top of the line lathe for modelmakers would be a Sherline but outfitted with chucks and other accessories to be useful will probably spend $1500++ and you will lose some capabilities; power feed and a good system for turning tapers.
Roger


Flying Fish by Wawona59 - Model Shipways - 1:96
in - Kit build logs for subjects built from 1851 - 1900
Posted
Wives are right about most things but not everything. People who do not build ship models cannot understand the drive that keeps us moving forward to create a masterpiece. Unfortunately, none of us have unlimited years to spend doing this so it behaves us to spend the time that we do have wisely. There is little point in working on a model that does not inspire you just so that you can cross it off of your list. If clipper ships in general and Flying Fish in particular is your interest, don’t give up. You’ll surprise yourself!
Roger