


Chuck
-
Posts
9,636 -
Joined
-
Last visited
Content Type
Profiles
Forums
Gallery
Events
Everything posted by Chuck
-
 Looks really good....you are doing a fine job on her. You picked a super advanced kit for your dive back into ship modeling. That is a job well done.
 -
Nope....but they are also all labelled. Go by what they are labelled as. Every line on that plan is labelled with the size. Dont look at the thickness of the line on the plan....except for the shrouds they are all the same thickness more or less. As most rigging plans are. Thats why they are labelled. It helps make the plan more readable that way. also look here on MSW.....everything is posted here for download.
-
Bob I hate to say it but please look at your plans!!!! Its all right there in front of you. Also noted in the instructions. Chuck
- 170 replies
-
- 1
-

-
- medway longboat
- Syren Ship Model Company
- (and 1 more)
-
They look pretty darn good to me. Well dine on a tricky part of the project
- 160 replies
-
- 2
-
-
- cheerful
- Syren Ship Model Company
- (and 1 more)
-
Any time....that is what this group is all about.
-
That side needs some work. Theres a lot of weirdness going on. I would say get rid of that lower piece....its not correct. and adjust that angle slightly upward on its forward end when repositioning it. And still adjust the template a bit downward on its forward end. Almost there though. But that bottom piece is really off in my opinion. But I imagine you dont want to remove it? Chuck
-
That looks just as it should. Much better. Just follow the steps in the right order. They were designed to keep everything lined up anticipating several steps ahead!!! Just like playing chess. Make sure you repeat that on the other side and they match. And like I said....if you have to lower that forward end a bit (just a hair) it will be fine. Hows the other side look?
-
Here is a blurry pic I just took on my cell phone to show you the angle. Its not perfect by any means. But more or less follows the run of the planking. So dont worry about getting a perfect match but it needs to be pretty close. This is when you view it from head on. Hope this helps.
-
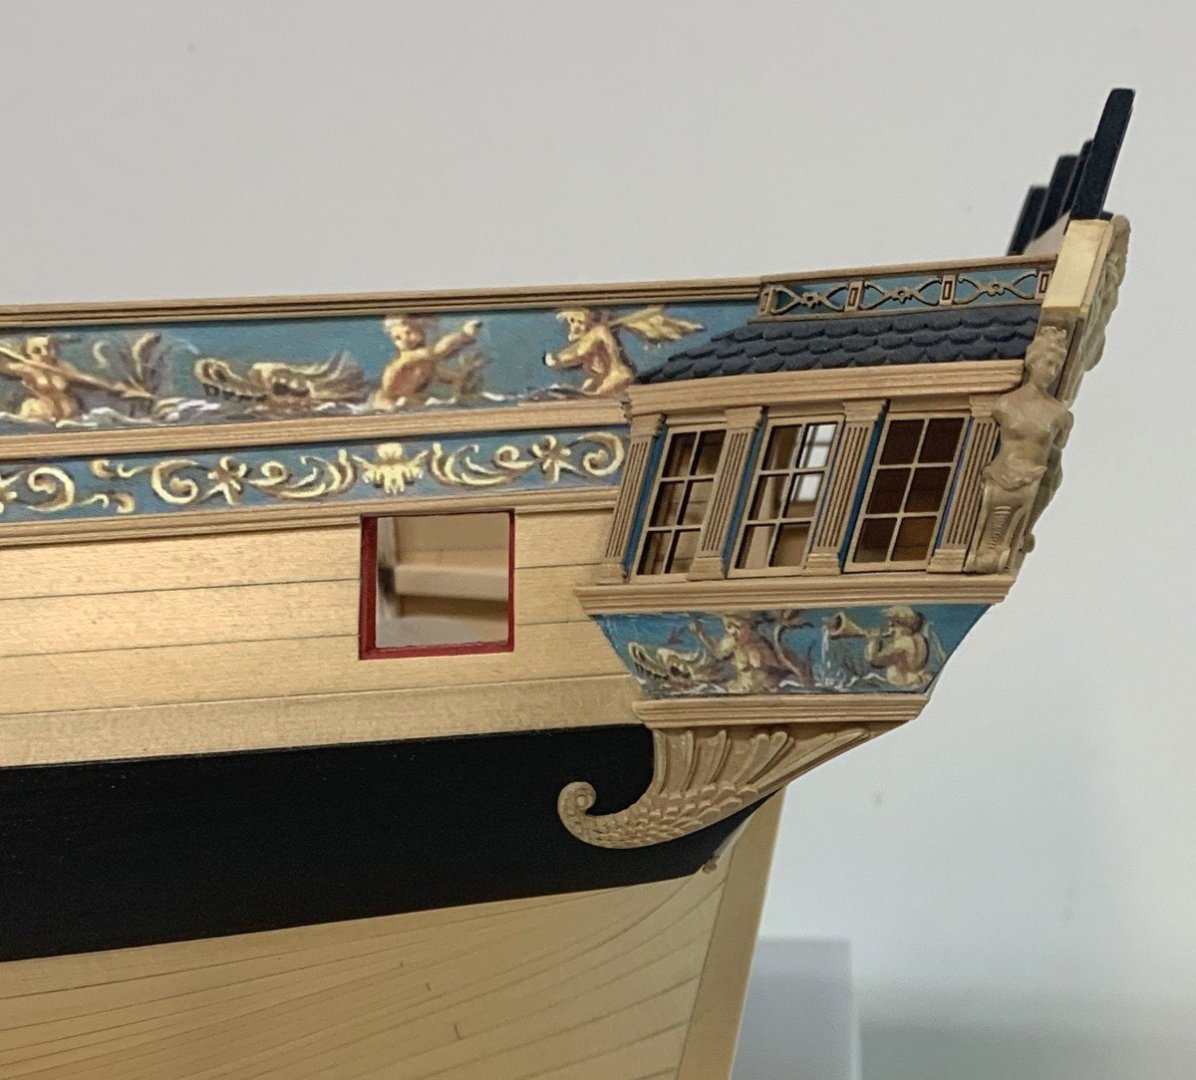
That is exactly right......100%. So you have some choices to make. Skew the angle of the template just a hair lower on the forward edge. You will be Ok. In addition however, that lower pie piece is also at the wrong angle. So it is throwing off how you look at the template while its in position. You should seriously remove it. It is too much in the other direction with the forward end too low. So you need to split the difference between both. Try not to use the run of your wales which is also a bit irregular. Notice how the run of your planking along the top of the template matches the template angle when viewing it head on. You are not that far off but have a lot of inconsistencies to deal with. You will need to use your judgement to establish a new angle for that template that will more or less follow the run of your planking. I would use the run of your upper planking rather than the wales as I mentioned. Some weird stuff going on with those. But yes you will probably be making some parts over again unfortunately. This is why the earlier parts of the build are so crucially important. As I have been saying, slow down quite a bit more and check all measurements and angles against the plans carefully. Its is not a race. It almost always has implications down the line. Not a complete disasters but yes, it means you probably will not be able to use many of the laser cut parts. Although for other folks I have included many extra qgallery windows at varying angles of skew for just this sort of thing. I anticipated that this would happen after watching many many qgalleries be built over the years. Also remember that the figure on the side of the transom will cover quite a bit. So if you just tilt the entire template lower on the forward side without skewing it.....it would be very hard to tell anything went wrong. Most of that aft-most fluted column is covered by that carved figure. Hope that makes sense also. So its a very good cheat to help you get back on track. But we are talking just a 1mm maybe 1.5mm on the front end. Its really hard to tell in your photos because you bent the template and its not flat and that lower piece is throwing everything off. Remove that lower piece and tape the template on again properly. Then take some more pictures. Chuck
-
Dont curve/bend the template it should be flat across. And the aft edge lined up as you show it. Now the angle of your transom dictates where this template falls. Unfortunately your transom looks like it was tilted a bit too far aft. But you need to go with where the template shows either way. Otherwise your laser cut pieces wont fit. Although you may have some wiggle room. This part of the construction will always show where measurements and angles went astray of the plans Earlier in your build. It will mean some creative adjustments are probably in your future. in addition you didnt really follow the steps in order for the Qgallery construction. Thats ok but....That bottom piece of the stool shouldnt be glued on yet and is definitely not at the correct angle. You will run into some serious issues. Your stool wont be consistent the way it is laid out currently. The template dictates the angle of your qgalleries. You need to put the top 1/8” stool beam in position first above it and then take some measurements to put that lower piece in which will leave a consistent width for the stool as the upper counter wraps around. Both pieces should be at the same angle as dictated by the template. Hope that makes sense. This is a very complex structure. I recommend you stick with the step by step as laid out in the instructions. I also recommend you slow down with this particular area and really double check your angles and measurements before you commit and glue everything in permanently. Tape them on first and examine them from many differnt angles to see how they are looking.
-
Very nice....you are moving along...😀
-
To answer your question about how these masts and bowsprits are put together. All that info is out there, but these early kits simplified the details way too much. In fact, the bowsprit on your model is missing a few things that would make the angles and rigging process go a lot smoother. Too much to mention in a post like this. But when you come by the shop next time I have many books on the topic and can show you. You can take borrow them and take a look. For example....if you add this small piece the jiboom would line up better with the bowsprit. so the distance between both were the same at the arse end of the jibboom. Do you see that little piece between the two. Your kit probably doesnt even show it on the plans and I am certain it wasnt mentioned in those 4 pages of instructions. But you are doing a lovely job with it. Its just a very outdated kit which was considered a good one at that time.
- 155 replies
-
- 7
-
-
- opium smuggler
- Authentic Models
- (and 1 more)
-
Nicely done!!! By the time you are all done, you will be ready to rig that 3 decker!!!
- 170 replies
-
- 1
-
-
- medway longboat
- Syren Ship Model Company
- (and 1 more)
-
Just follow the same procedures as explained in the instructions and you will be fine....
- 217 replies
-
- 2
-
-
- medway longboat
- Syren Ship Model Company
- (and 1 more)
-
No its fine.....it was just your photo. It looked funny and it wasnt until I looked at it closer did I notice it was OK. Chuck
-
Make sure you wait until the stem and keel pieces are glued to the bulkhead former and you taper the bearding line before gluing the bulkheads in. You will have a really hard time otherwise.
-
It looks fine. Just get more frames built and tested in place. For example...all of the one piece frames on both sides. I am also unsure what you issue is. It doesnt look like you have any frames installed on the aft side so its impossible to tell.
- 217 replies
-
- 1
-
-
- medway longboat
- Syren Ship Model Company
- (and 1 more)
-
Looks good Eric. That old kit is turning into a lovely model.
- 155 replies
-
- 2
-
-
- opium smuggler
- Authentic Models
- (and 1 more)
-
That looks lovely. I live your frieze.
-
That will work kind of. But just be prepared to do some extreme shaping when you start building those qgalleries. If at all possible you should try and straighten it Just just a bit more. Less curvy. But you can make it work if you dont.
-
Very nice so far. Too bad about the warping. But you are well on your way.
-
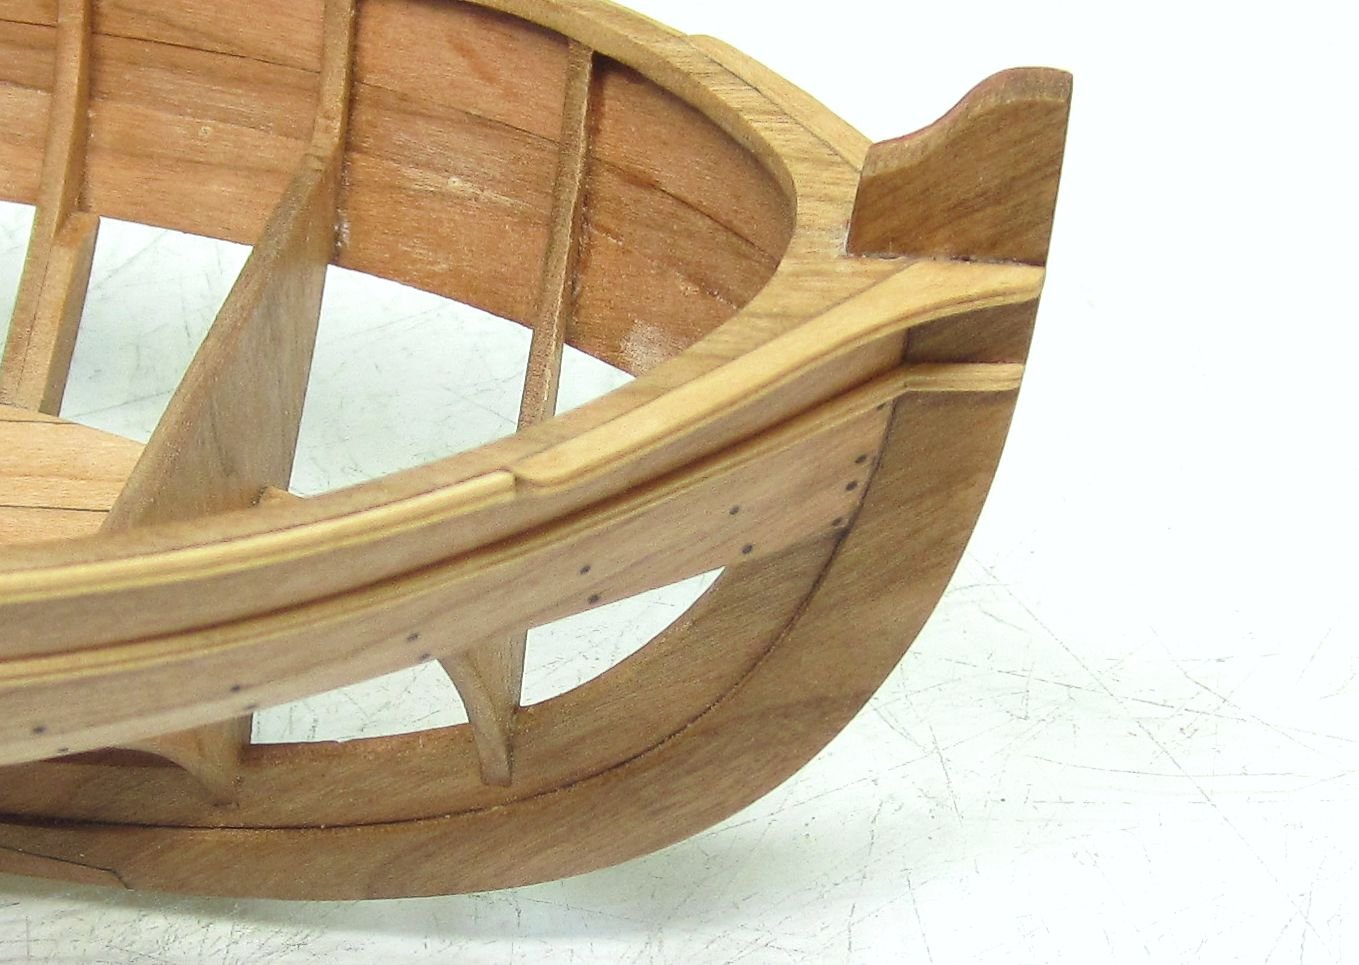
Keep in mind the molding has been added in this photo. But it shows the cap pretty well. Its pretty consistent almost all the way to the stem but then just before you get to the stem leave a bit of meat just aft of the stem. Hope this helps.
- 221 replies
-
- 5
-
-
- queen anne barge
- Syren Ship Model Company
- (and 1 more)
-
They are not glued anywhere. Just pinned into the hull. The pins are glued into place.
- 170 replies
-
- 2
-
-
- medway longboat
- Syren Ship Model Company
- (and 1 more)
-
Everytime I look at your model it keeps getting better. You are doing a fantastic job. I love the base. That will amazing when its all done. Well Done!!!
- 231 replies
-
- 3
-
-
- model shipways
- armed virginia sloop
- (and 1 more)
-
Mark Contact Kurt. See if they still have a copy or even possibly a digital record.
