


Chuck
-
Posts
9,388 -
Joined
-
Last visited
Content Type
Profiles
Forums
Gallery
Events
Posts posted by Chuck
-
-
-
It looks really good Bob. I am glad you will have more time to make ship models. Your paint work just amazes me every time I see new pictures. Well done!!

-
As another alternative you could try using hard maple and that is available here in sheets and strips. Very inexpensive. the wood is much harder than basswood and I have in fact used it for another pinnace build. I used it for the frames and keel. After applying wipe on poly it looks very good and very similar to boxwood. It is not as hard as boxwood and you cant get as sharp an edge on teh wood but it is leaps and bounds better than basswood.
http://www.nationalbalsa.com/category_s/232.htm
Chuck
- mtaylor and fnkershner
-
 2
2
-
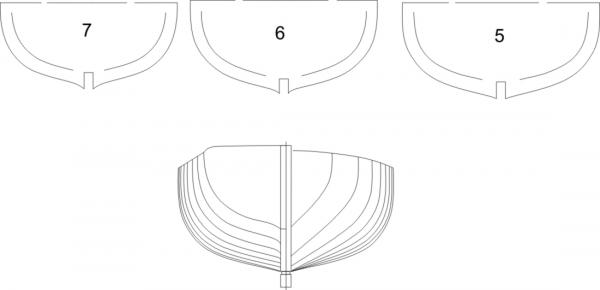
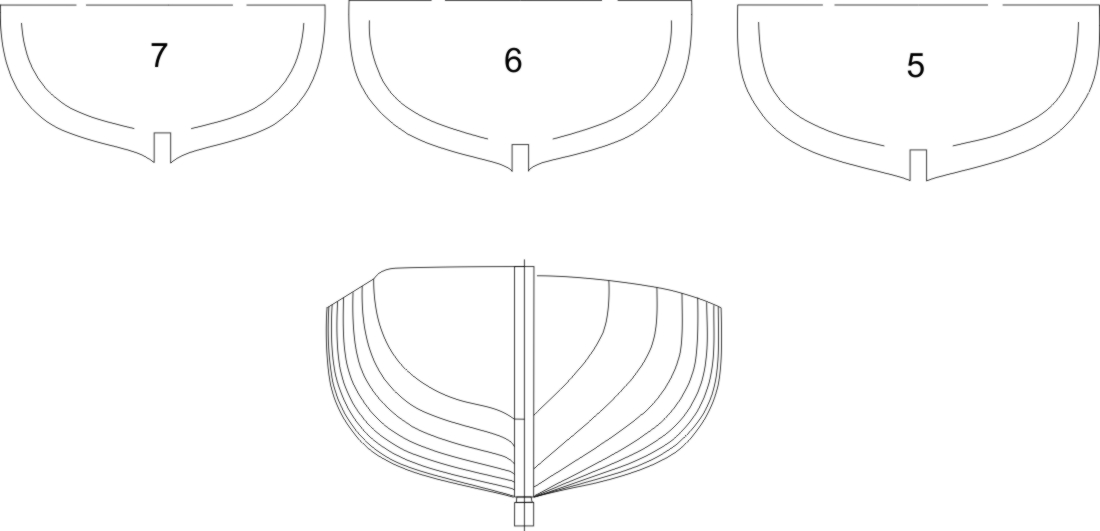
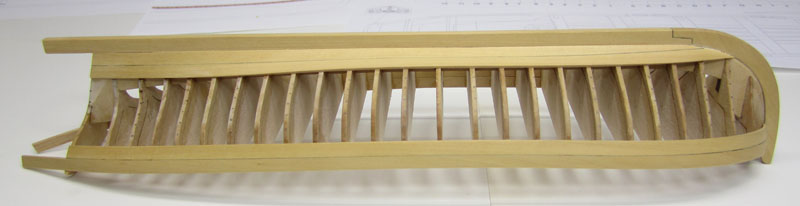
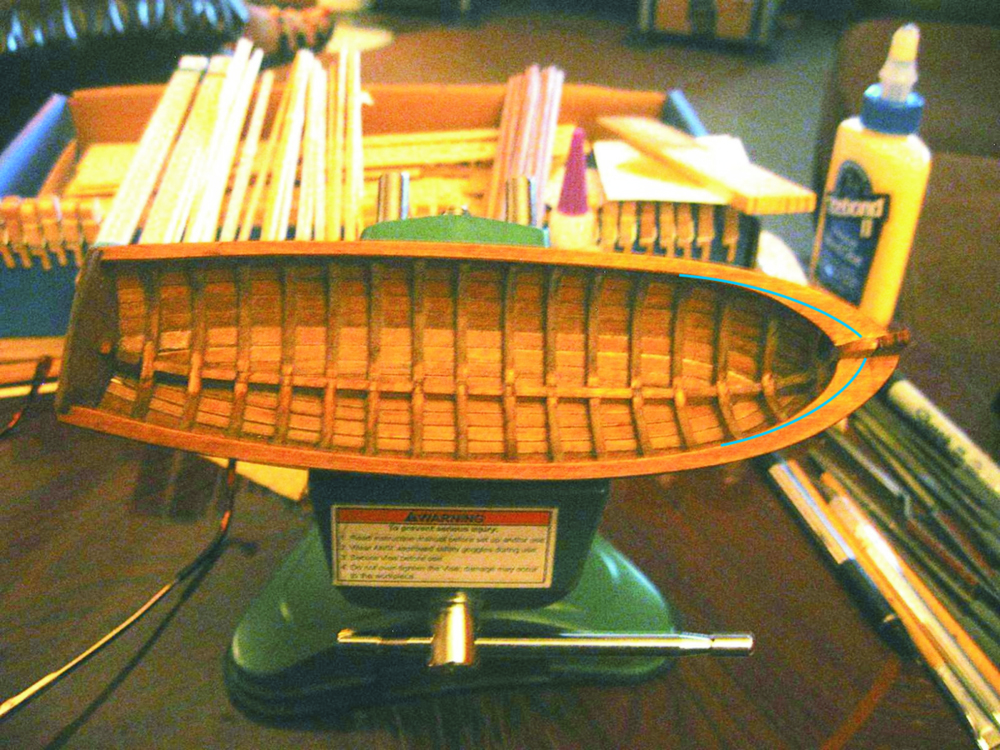
Yes I know....that isnt your fault...Take a look at the plans, It may be hard to tell on the paper plans at the actual scale but the bottoms were flattened during laser cutting. There is a tight curve there and the tolerances in the ME laser cutting is not tight enough to keep the curve you noticed with the pinnace. Those sharper points were just cut away. It happens. They were able to do so on the pinnace I suspect only because of the larger scale. Even though a tight curve doesnt exist for the reasons mentioned, it should be there. When fairing the bulkheads it should probably be sanded into the frames as much as possible. To mimic the tight curve - transition of frames, use the shape shown on the plans body plan. Depending on the consistency of their laser cutting it may be more pronounced and absent in some kits more than others. But the kerf they get while laser cutting is just too large to keep this detail.
Here are some images of those last three frames as they SHOULD appear and the body plan from the plans enlarged.
- Mike Y, fnkershner and Stuntflyer
-
3
-
Floyd
I dont have pictures dead on for the longboat but I think I have one for the pinnace. Its very similar if not identical. No stealers or drop planks. They were not typically used on these small boats if ever. But if you will be painting the underside it really doesnt matter.
Chuck

- fnkershner, WackoWolf, gjdale and 1 other
-
4
-
-
Yes I would....I dont have a photo of that but dont worry too much about it. Being your first model just examine the contemporary model as they are best pictures I have.
-
Bruce ...dont forget to introduce yourself properly to the forum in the appropriate area. Let folks know who you are. There is nothing more suspect than folks who sign up and simply post stuff for sale and then leave. It happens a lot. Folks here are so much more comfortable with these online transactions if you waited a few weeks and in teh meantime post about your cutrrent projects and your introduction to the hobby.
Otherwise....it gets a bit scary.
Chuck
-
That will happen. Better to just use diluted white glue. It dries clear. It wont darken the line at all.
Chuck
-
Russ is correct...you can add the keel and stem and even the stern post at any time. One thing you must remember is that every guide or log is only representing the sequences used by that individual builder. There are so many ways to plank the hull. I single planked the prototype also. I would say that if you had planned on double planking you should wait to add the keel. Otherwise it would be too short...or not deep enough. This is why I left it off until after planking. The rabbet is only used for the first layer. A second layer would sit along side the keel and make it look to narrow.
So for you it wouldnt matter.
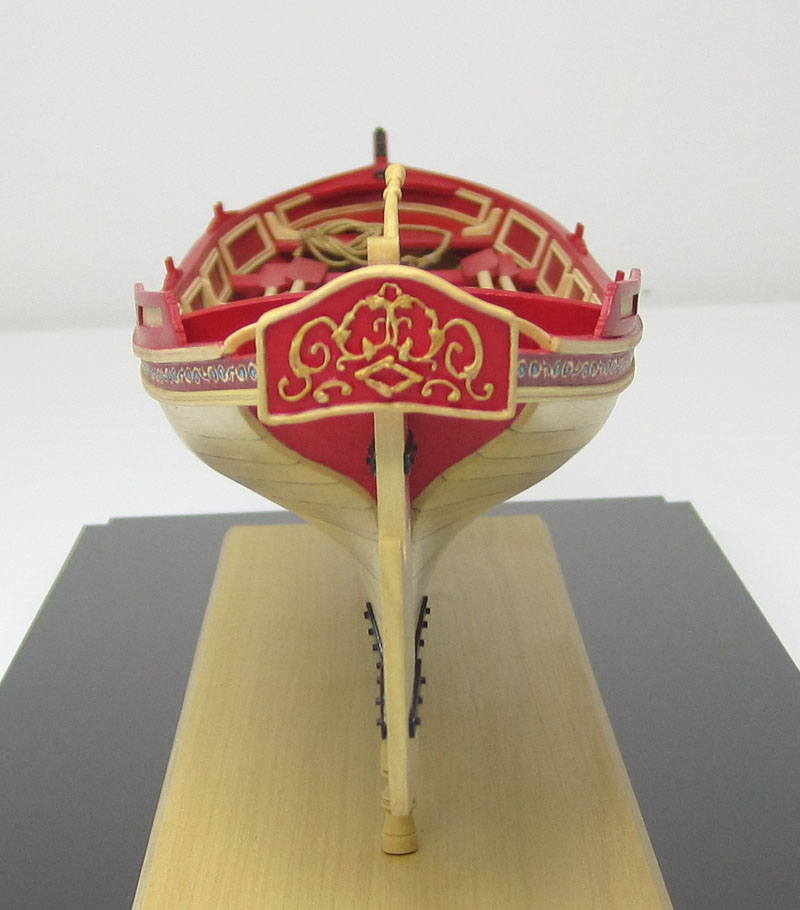
Here is a photo of my finished hull with just the bottom painted. One layer only below the wales.
-
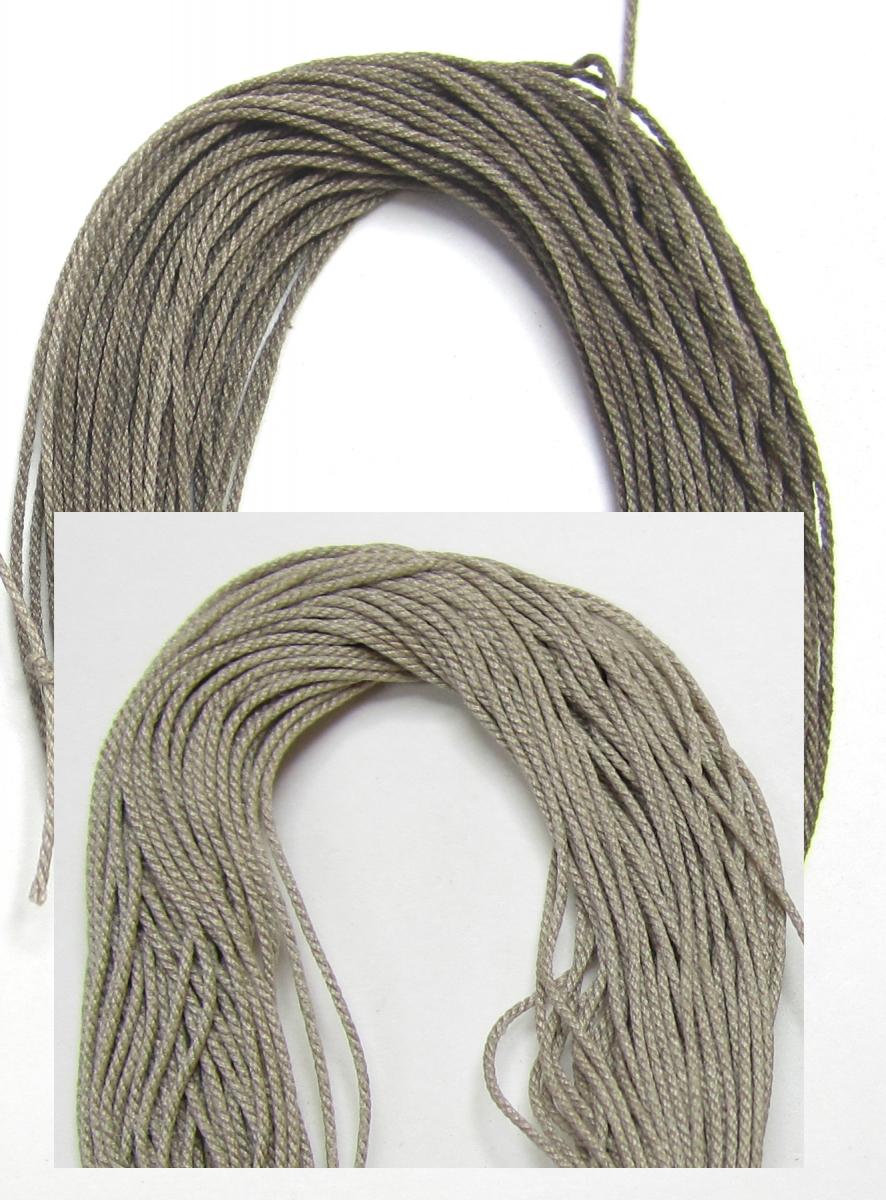
I am often asked by folks who buy my rope how they could make it look less new. They want to know how to give it a more weathered or even just textured look like they see on many contemporary models. First I tell them to wait 300 years and it will look just like they want it to.
But then after failing to get a laugh I suggest what I have done for years. Its quick and easy. Its not very messy. But it does take practice. So I figured I would post it here.
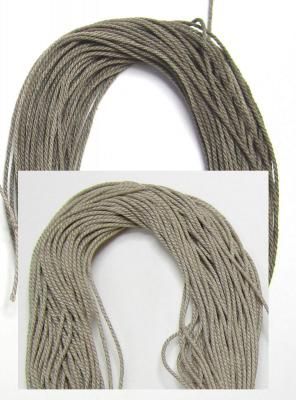
Model builders have been running their standing rigging (black or brown) through a candle flame for years. They do this to remove the fuzz. Luckily my rope doesnt have any fuzz. BUT.....should you run your light tan rope through a candle flame....it will pick up some nice color. The soot from the burning candle will give your rope some texture. Multiple passes through the candle will make it darker.
Running it through very quickly will create a very blotchy and uneven look so dont be afraid to take your time. Take as much time to slowly run it through or over the flame. You will have to practice because obviously if you go too slow it will just catch on fire.
Once I run it through the candle flame, I will run the rope between my fingers. This evenly distributes and softens the texturing. In the photo below you will see a brand new and untouched coil of rope and behind it....that was after I ran it through the candle flame twice. If you do it once it wont be as dark but I wanted you guys to actually see the results.
So if you are trying to figure out how to weather or darken the running rigging, you might want to give this a try. I havent tried yet....but I am also wondering if different color candles will impart a different shade of soot.....will have to try that next. This effect came from your standard average white unscented candle.
Click the thumbnail for a really big version.
- JesseLee, Gerald Spargo, MEDDO and 3 others
-
6
-
You are all set....good luck with the build and I hope you enjoy it.
Chuck
-
Pops
Looking good. You are in a good position to take that cap rail and just thin it down considerably at the bow. That extra piece you added will not be necessary at all. Just carefully thin down the caprail to remove what I have shown below. Then also thin down the frames in that area as well. Dont be afraid to weaken the hull. It will be quite sturdy. Just thin it out. It will make a huge difference.
Chuck

- fnkershner, Ryland Craze, dgbot and 1 other
-
4
-
BOO-HOOO
Ron.....You really must do a log.....dont be shy, it would be a real treat to follow. I know how inspired you have been and how much help MSW has been for your own model building progression....why not pay it forward?
Chuck
- mtaylor, hollowneck, gjdale and 3 others
-
6
-
28 gauge wire and the same shape as shown in the images.
Chuck
-
Yes its on the plans and you could certainly have a look at those hi-res photos I posted. They show it very clearly on the contemporary models. Almost all of the blocks had hooks seized to them and they were placed in the holes of the iron bands. This made it possible to un rig the boat quickly and store that stuff. For the kit, I only showed this a few times because it some tiny stuff. To simplify it I simply tied the blocks to the iron bands. But a more historically accurate method is to use hooks.
Check out these photos...
-
It wasnt always painted black....historically it was sometimes left natural...black or even another color. I have seen images/paintings/models within classes of ships with a different look and paint scheme. I think it was up to the captain or admiral within reason.....depending on the time period. This is certainly true in the early US....
- Chuck Seiler and druxey
-
2
-
Thats a very nice article....well done. Very interesting. Yes indeed I will see you in st. Louis.....wasnt that an old song?
Chuck
-
That looks so good. Wonderful work!!
-

Nautical Research Guild Summer Issue is in the mail.
Become a member and get it delivered to your front door every 3 months.
Here are some highlights including the table of contents.
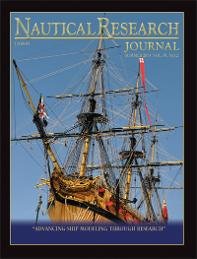 3D Printing and Model Ship Buildingby Patrick MatthewsUSS Arizonaby Oren Long, JrThe East Indiaman Edwin Fox of 1853by Ian PooleA French War Brigby Richard SimonCoppering the Fleet and an American Entrepreneurby Louis Arthur NortonBuilding HMS Isis of 1776: Highlights of a Multi-Year Projectby Byron GoreModelers’ GalleryShipbuilding Literature in the Netherlands (1671-1838), Part 4by Ab HovingSHOP NOTESMaking Dowelsby William E. SproulMODELERS’ REVIEWSAn 8-inch Shear from Harbor Freight Toolsby Steve WheelerThe 3D Elbow Bender from UMM-USA
And here is a look at at one of the models featured in this issue.Click on that photo to enlarge it and see what a great model Byron put together. Its stunning.HMS ISISby Byron Gore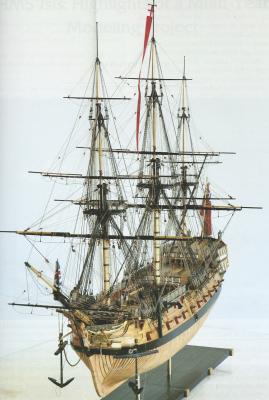
-

2014 Nautical Research Guild conference
St. Louis - October 16, 17 and 18
See the website for Details - CLICK Here
A new Conference format is being offered in 2014 to help make this event more affordable. The featured tour will be held on Thursday, and the Technical Sessions, which focus on model making topics, will be held on Friday. These two events have been switched so that those wanting to attend only the two days of classroom discussions can do so without having to incur the cost of an additional room night.
At the NRG Charleston Members’ Meeting, a number of attendees suggested that round table sessions should somehow be included in the weekend schedule. In the past, these talks were conducted on Sunday morning when most were leaving the conference. The Friday schedule will have three guest speakers in the morning, and five round table sessions in the afternoon. The General Sessions on Saturday will highlight topics that cover a wide range of nautical interests relating to research and history.
The Conference Tour will feature a cruise aboard the Tom Sawyer, a 50-year old riverboat. The journey will take you from downtown St. Louis to Kimmswick, Missouri, a quant riverside town known for its historic homes, shopping, and antiques. The narrated cruise will feature onboard bingo, card games, and riverstyle music. Upon disembarking from the “Sawyer,” lunch will be served at the Blue Owl Restaurant and Bakery. There will also be ample time to shop and explore the town on foot. A motor coach will be provided for transportation back to downtown St. Louis.
While visiting Kimmswick, guests must anticipate uneven walking terrain such as stairs and graveled pathways. With that in mind, we cannot recommend this trip for those needing the assistance of a wheelchair, walker, or those with significant physical/heart conditions or limitations.
Friday Technical Sessions:
Pat Mathews – 3D Printing
Greg Grieco – Excavation of the Riverboat Heroine
David Antscherl – Building the Fireship Comet
Friday Round Table Discussions:
David Antscherl – Frieze Painting
Steve Wheeler - Electroplating
Chuck Passaro – Ropewalk Demo
Greg Herbert – Making Scale Moldings
John Vojtech – Unique Modeling Tools.
Saturday General Sessions:
Jack Custer – Using images to take off the lines of steamboats
Dan Pariser – Comparing French & English ship building practices
Gary Lucy – Researching models and settings for paintings
Institute of Nautical Archeology – Speaker & subject to be determined
Banquet Guest Speaker
Christopher Gordon, President St. Louis Historical Museum
Topic: St Louis and The Lewis and Clark Expedition
You can download the registration form from the NRG website page here.
- druxey, flying_dutchman2, dvm27 and 3 others
-
6
-
Something lik e that is better cut from a wide piece to the proper shape.
Chuck
- src, fnkershner and druxey
-
3
-
-
They are for the jig....They are a little big though

18th Century LongBoat by jburchfield1 - Model Shipways - 1/4" scale - SMALL - 1st ever build
in - Kit build logs for subjects built from 1751 - 1800
Posted
Its on sheet two!!!! The one that is in color. See attached