HOLIDAY DONATION DRIVE - SUPPORT MSW - DO YOUR PART TO KEEP THIS GREAT FORUM GOING! (Only 44 donations so far out of 49,000 members - C'mon guys!)
×


michael mott
-
Posts
5,198 -
Joined
-
Last visited
Content Type
Profiles
Forums
Gallery
Events
Everything posted by michael mott
-
 Hi Chris thank you for the change to the title, certainly makes it more clear. As I mentioned at the top this is in essence a future build with the need for Photographs that I can legally have access to for the development of this model. The actual boat is in the Long Island Maritime Museum, I have sent them an email regarding digital membership. The drawings that are in the Merwin Thesis were credited to Thomas et al. If there are any members who are knowledgeable in this area I am all ears. Thanks Michael
 -
Very nice use of lateral thinking to accomplish a delicate bit of machining, Eberhard. Michael
-
Thanks to Keith Black for directing me to this post which references Gill Smith's work. Michael
-
Yes thanks Druxey a good idea, I will do that. All further references to the cat boat can now be posted here Michael
-
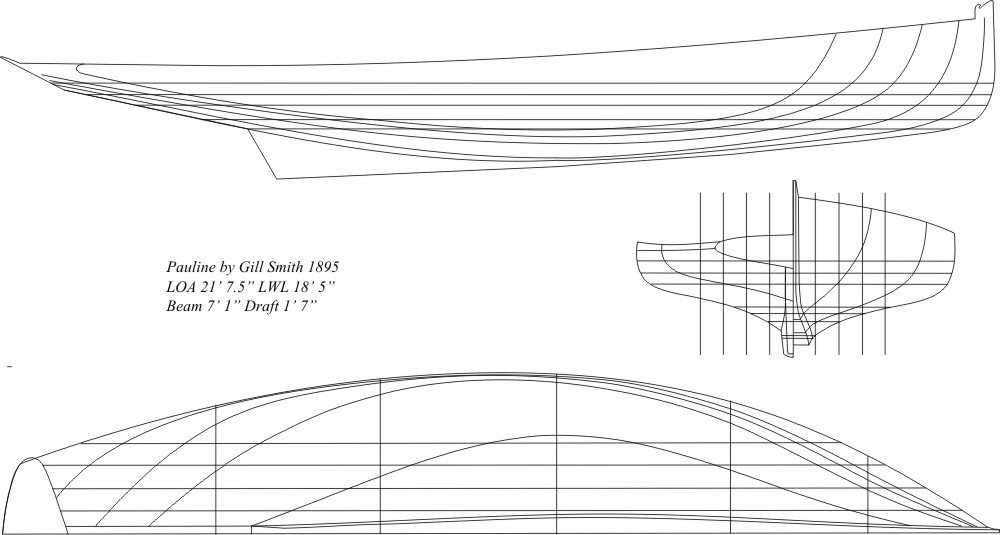
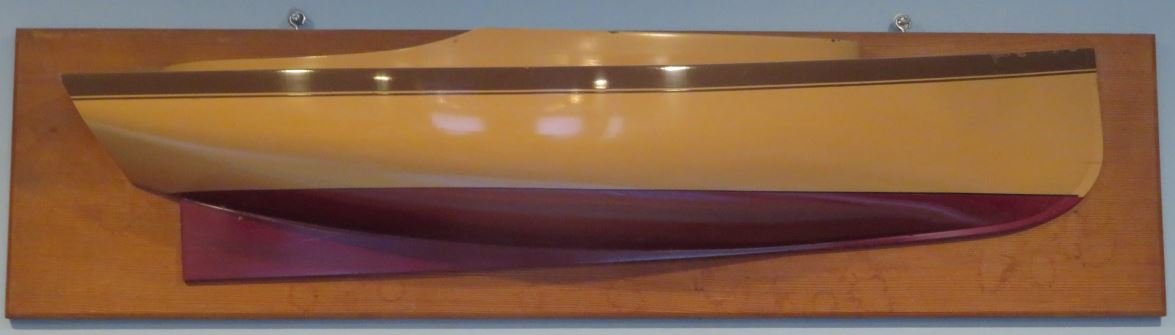
This is the new project that has to be fully researched yet. There is some cursory information for this model in the Thesis by Daria Elizabeth Merwin pages 57-65 I will add information as it comes together before the build starts.
-
Keith, thanks for this information. I am guessing that the Merwin Thesis that was submitted to the Office of Graduate studies is likely not published for general distribution. I am going to open a new thread about this boat as a start so that any research materials and references can be discussed there. Michael
-
The document I used for my tracing of Pauline's hull lines is this one. I would love to get a hard copy of this thesis. Michael
-
Mechanical Solar System by jim_smits - Eaglemoss
michael mott replied to jim_smits's topic in Non-ship/categorised builds
The first picture looks correct from a gear meshing point of view, I am not sure what the problem is? Michael -
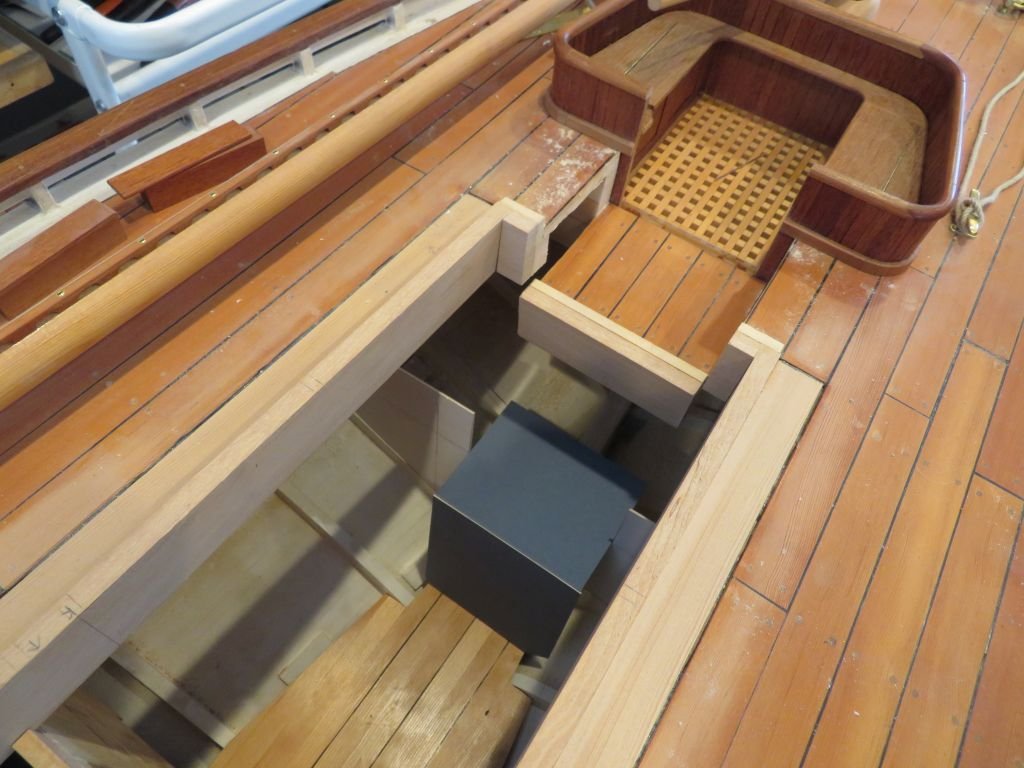
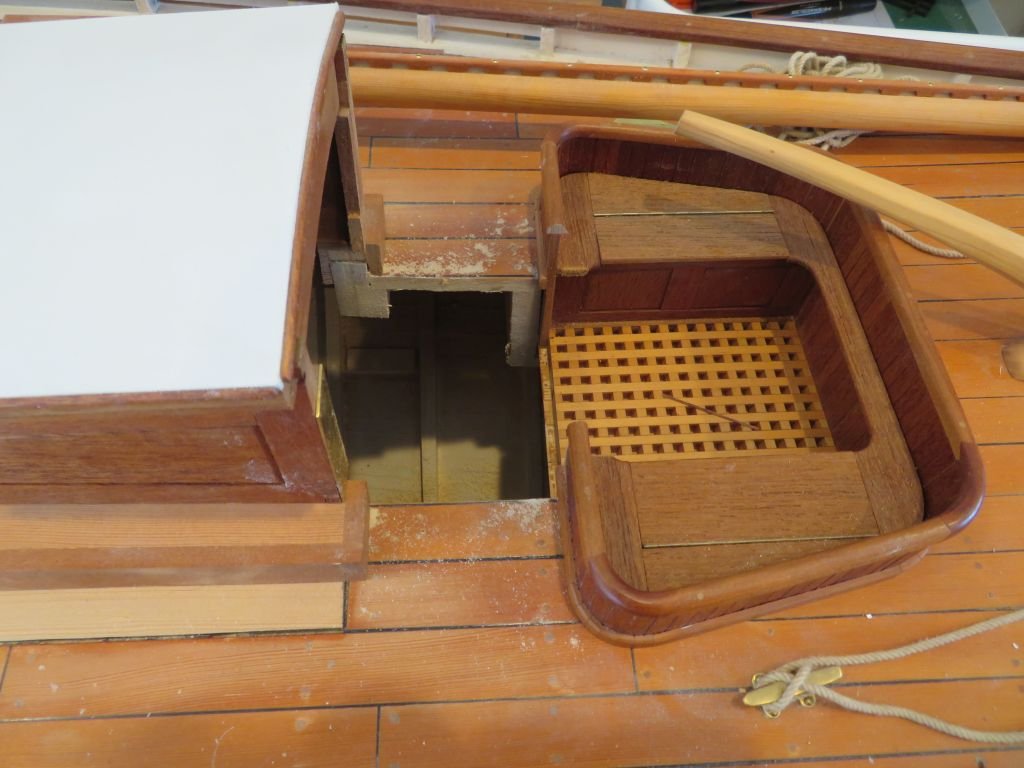
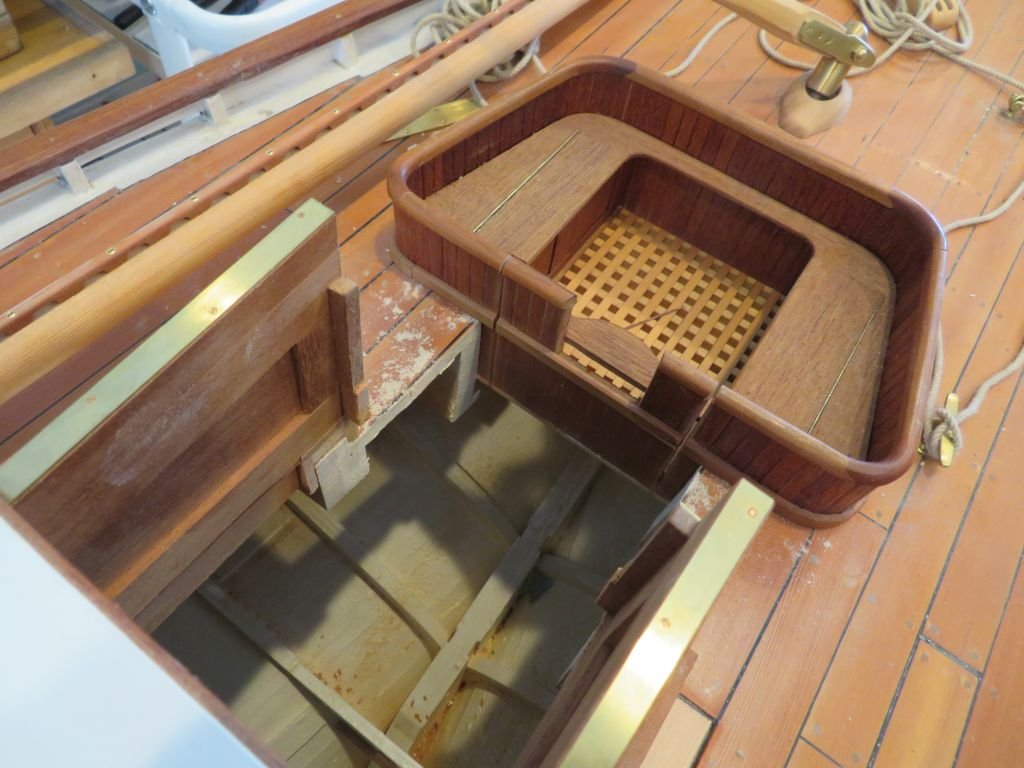
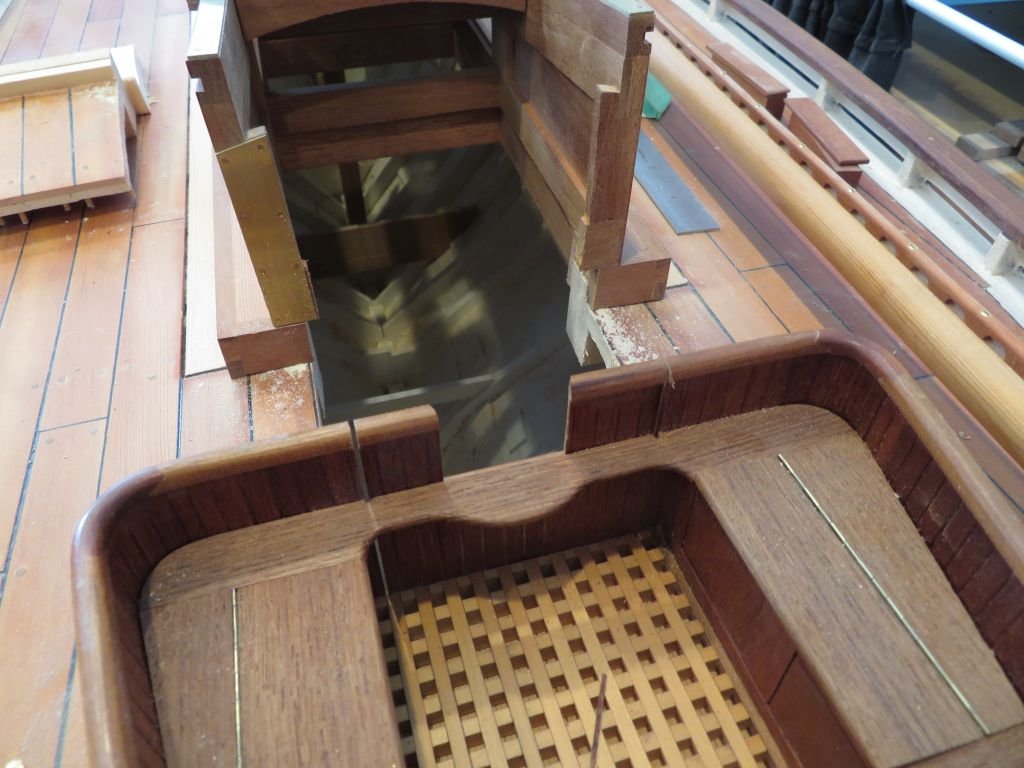
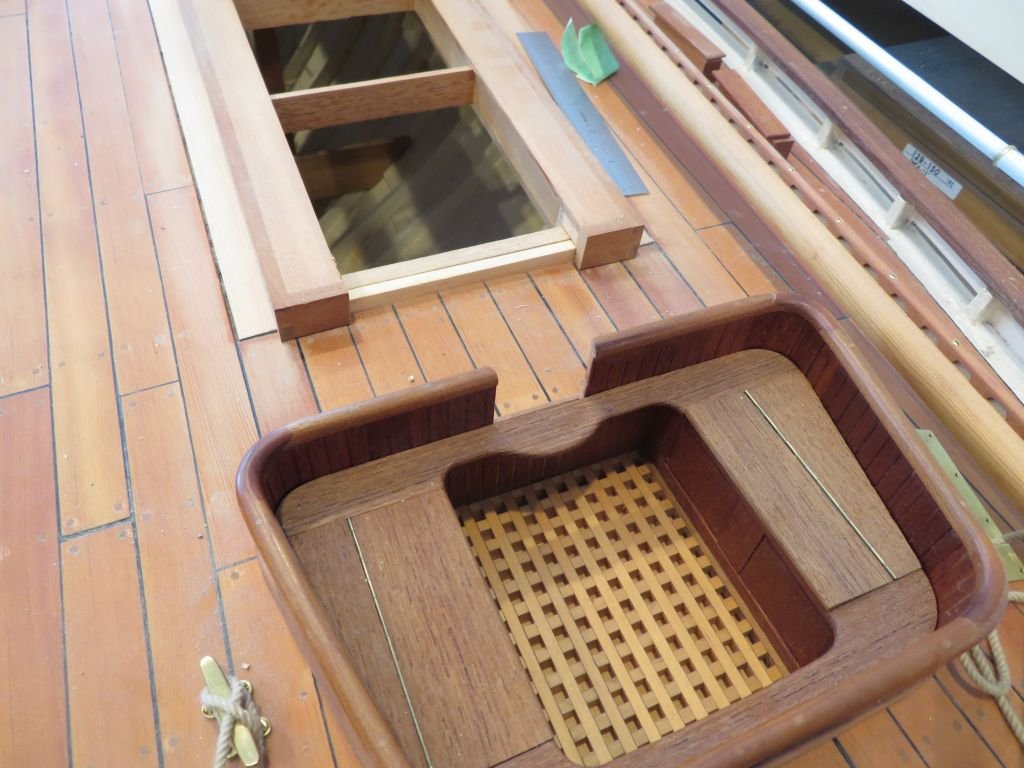
Or daft depending on which school of Design one subscribes to. The reason of course is that if I had known back in 2012 what I current know (a little more) I would have designed the cockpit and deck openings differently. Because this model is not of a particular vessel but a combination of ideas from the type along with the current ideas of modern yachts being built as recreational boats for the pleasure of those with deep enough pockets, but alluding to the traditional working craft of the previous centuries. Basically this model is my apprenticeship for plank on frame model boats and rigging. My next model sailboat is likely going to be a Gill Smith catboat which will be an accurate model This is my tracing of a drawing from a book. That will need to wait though I still have a few things to learn and a trip down east to see the gill smith boats that are in a museum. once all the Covid issues are sorted. The Cat boats have such a beautiful and simple rig. back in 1970's I cannot remember the year I made a half model of a cat boat from a drawing that was in a scan from an early issue of Rudder that a friend send me. The future looks exciting. Michael
-
Bob, so I'm guessing that Stirling and Sons would have probably not have liked your comment. That said they could have been cleverly disguised latch handles that needed a slight twist to open them, by having the top rotate a 1/2 inch or less sort of like a lever type handle only vertical. Michael
-
Nice work on fitting the Garboard plank Vaddoc. Michael
-
Now I know why Kitchen reno's and rebuilds are so expensive. Time for a coffee break, My arms ache from all that handsawing. Michael
-
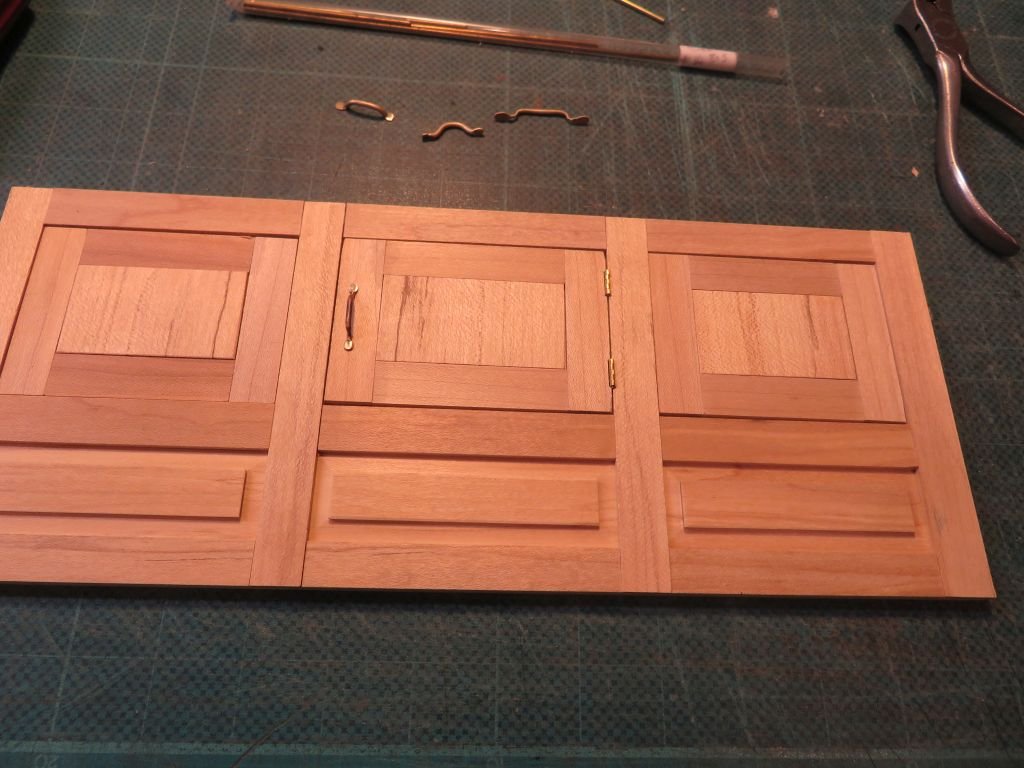
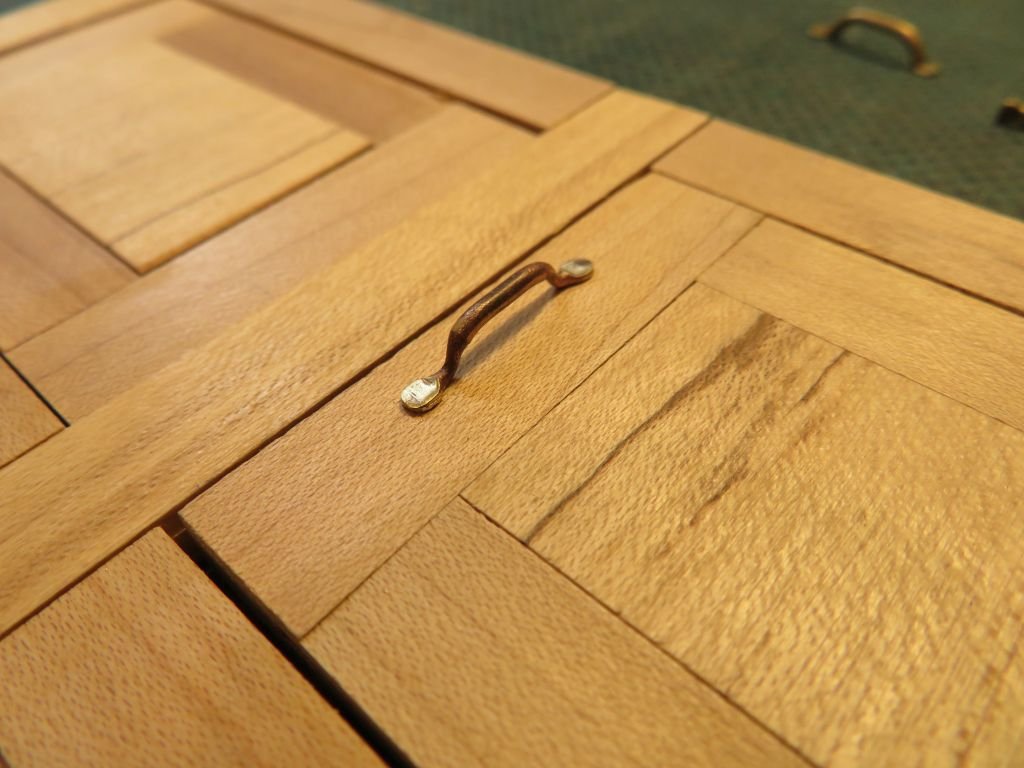
I started my new vocation today after visiting this build log Seriously the log of the Young America by bitao7697 is stunning. I worked on the handle design for the port side cupboard had a few trials to come close to what I was after. I will start the kitchen area tomorrow once I put the needles down. Michael
-
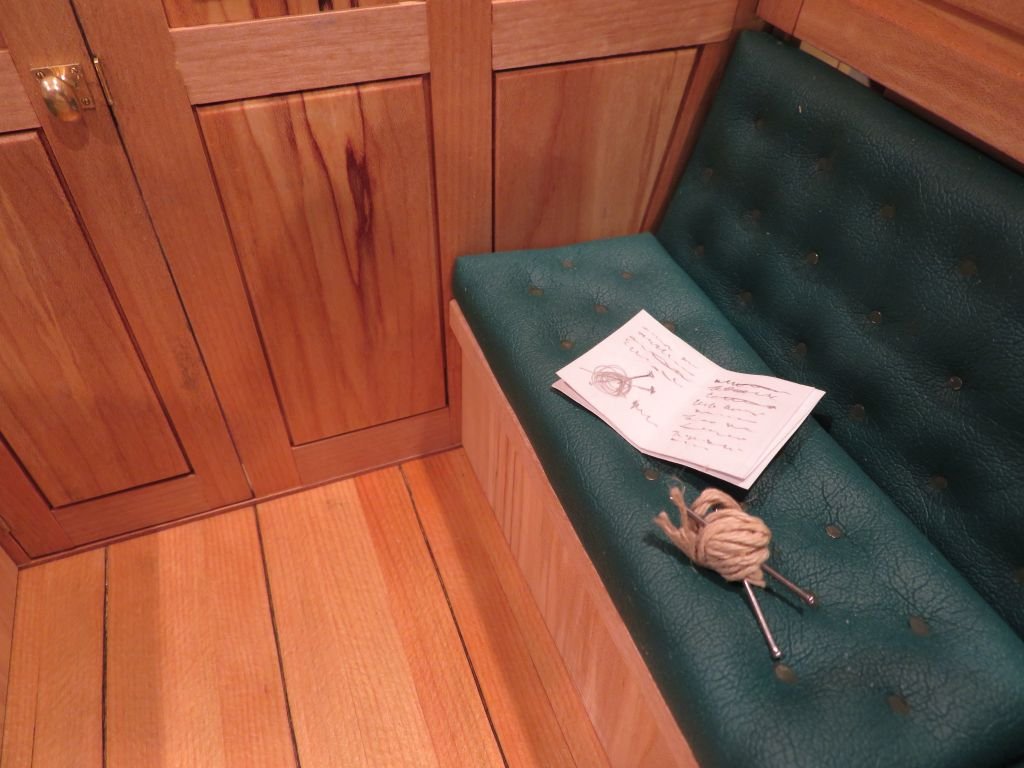
I just found your build log and am virtually speechless. It is always humbling to see the highest level of workmanship exhibited so well. Your tooling is outstanding, The precision that you are achieving with your joinery is enviable. On top of that you must have the best vacuum system in the world. What a joy to see your work, I will be following along as I take up knitting! with respect Michael
- 257 replies
-
- 3
-

-
- young america
- Finished
- (and 1 more)
-
Thanks for the link Pat very interesting. Michael
-
Hello Kevin interesting to follow along with some of the tricks and tips of how you gauge things. It looks like your new bench is fitting in well. Michael
-
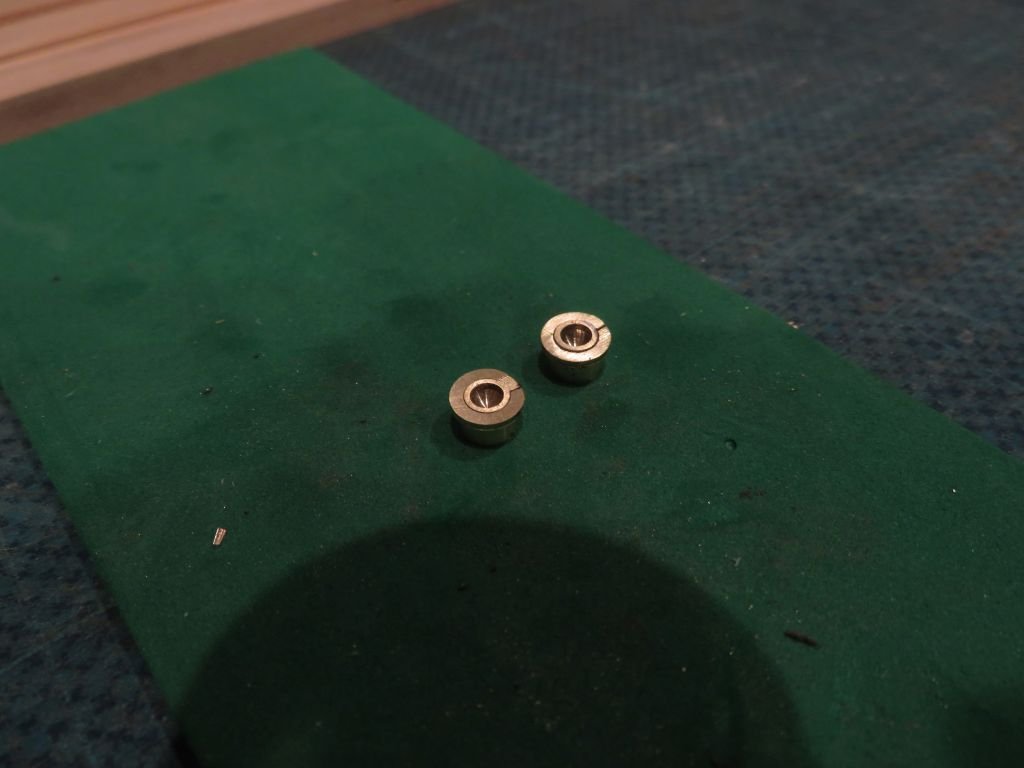
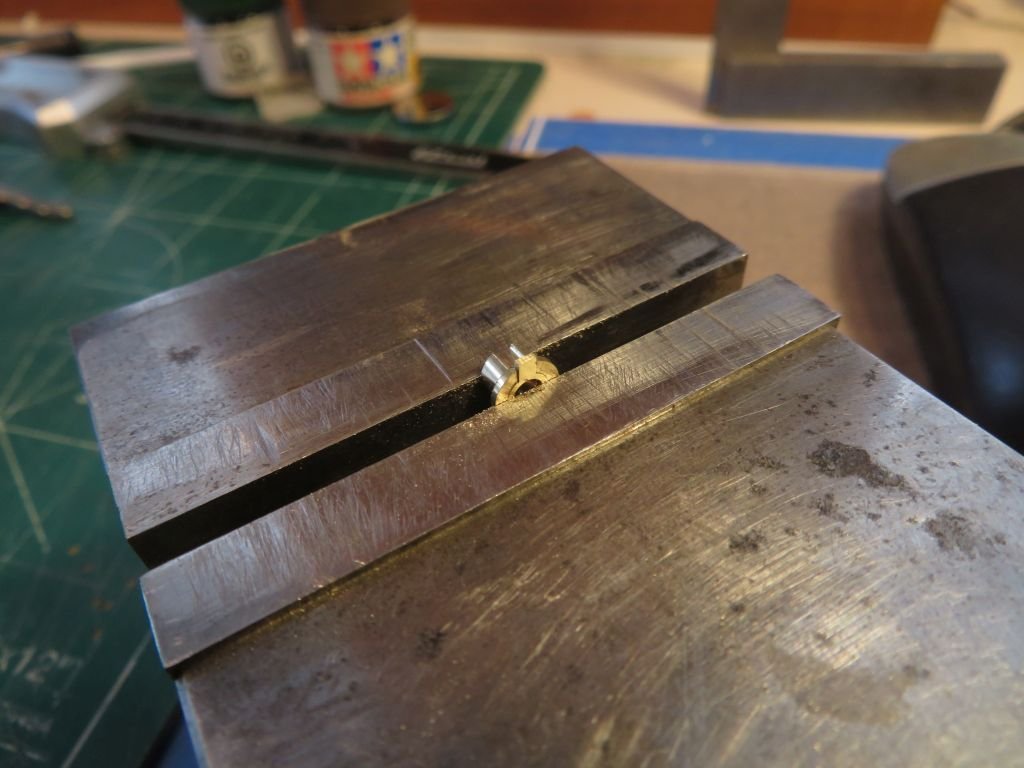
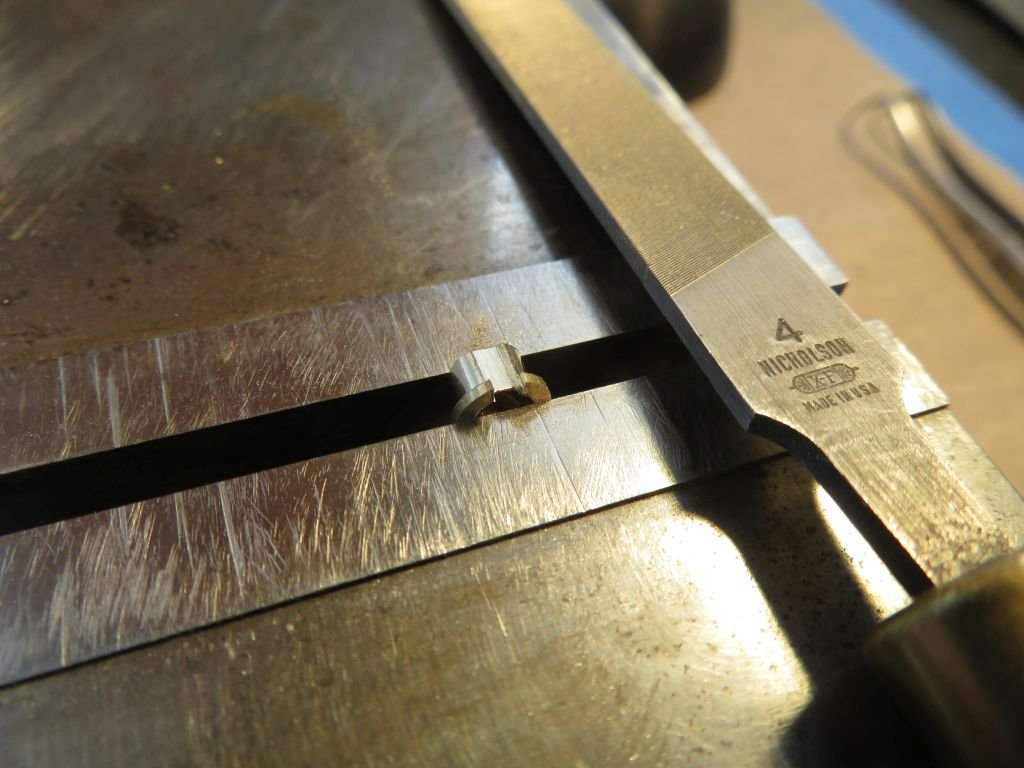
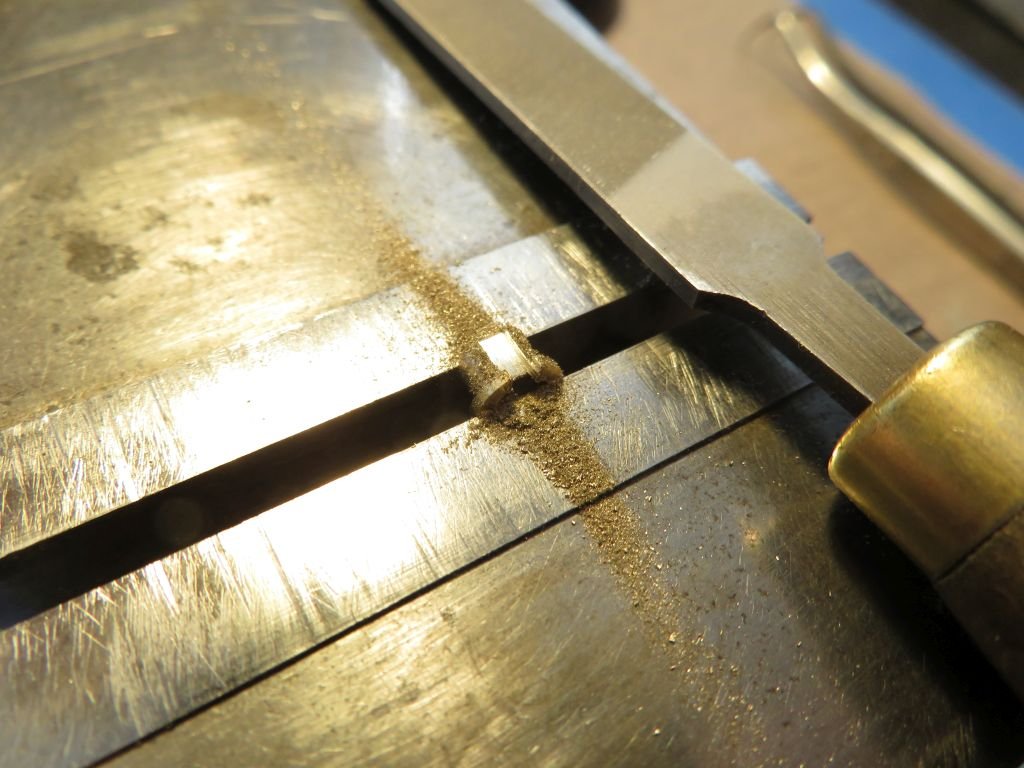
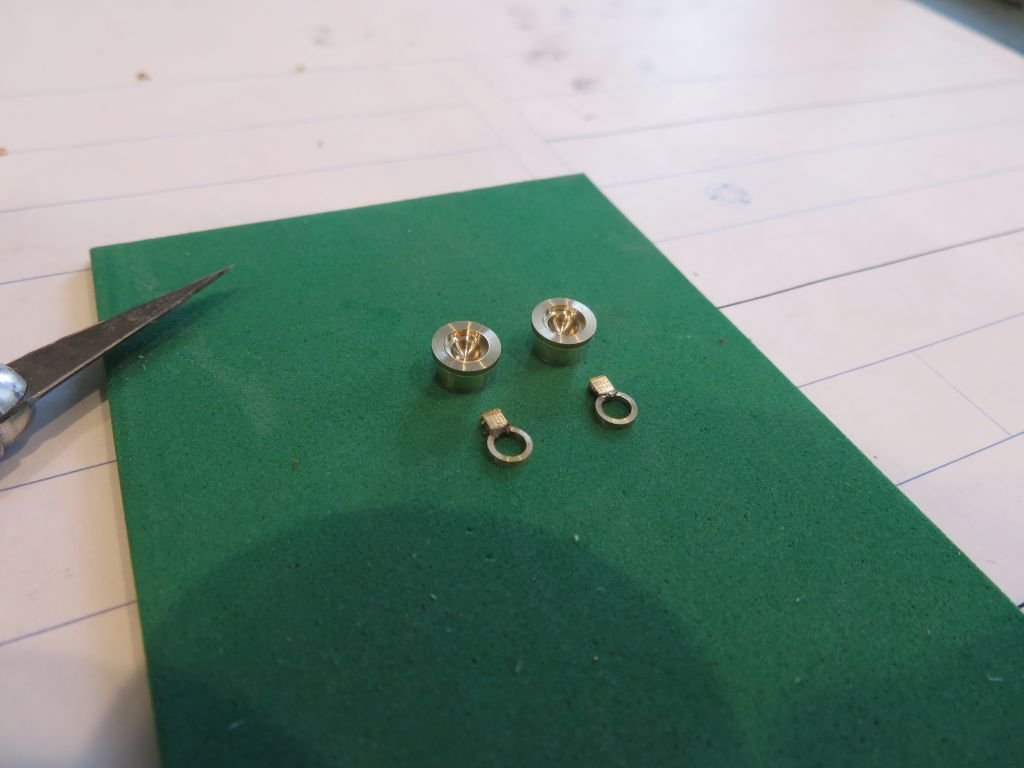
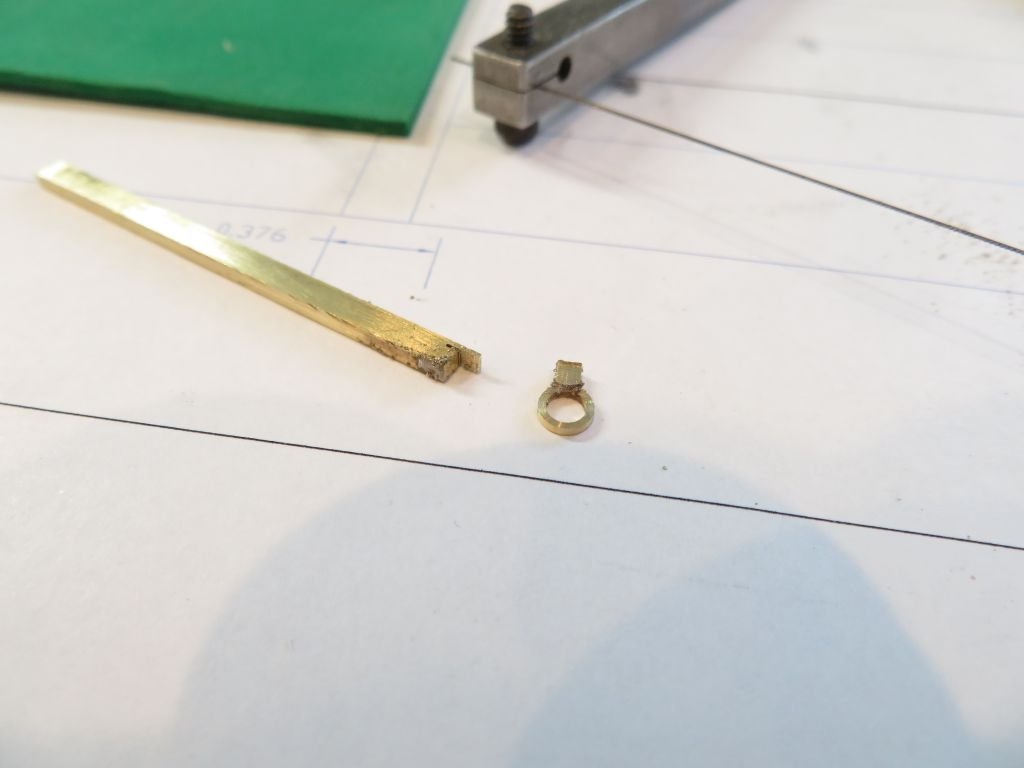
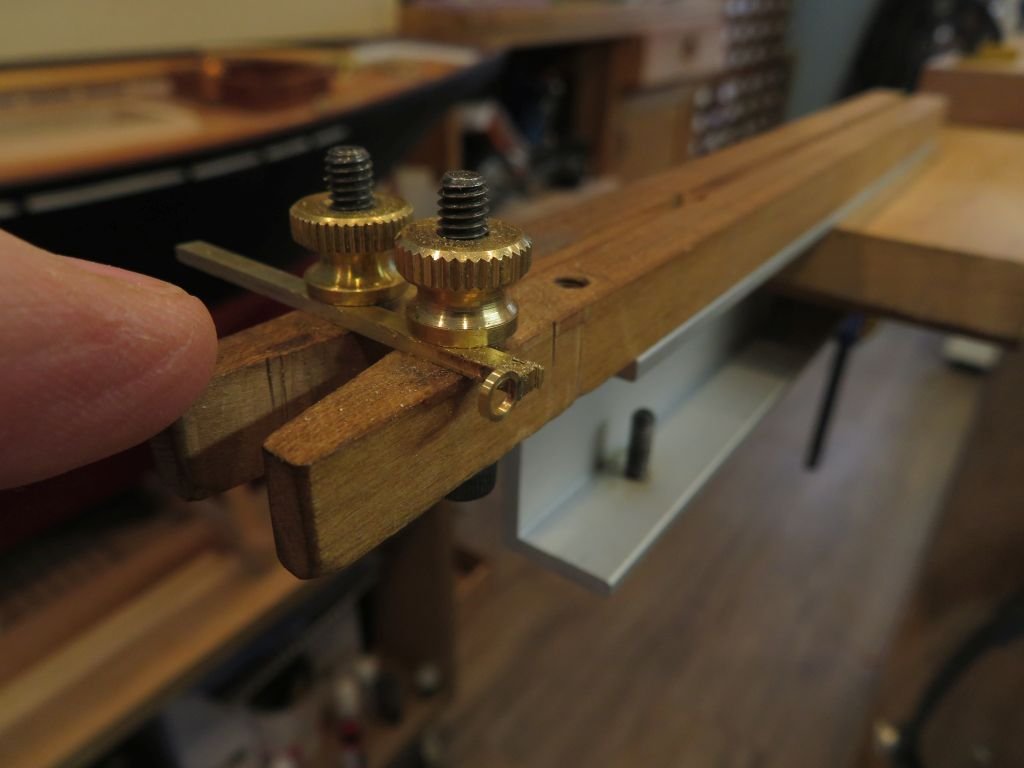
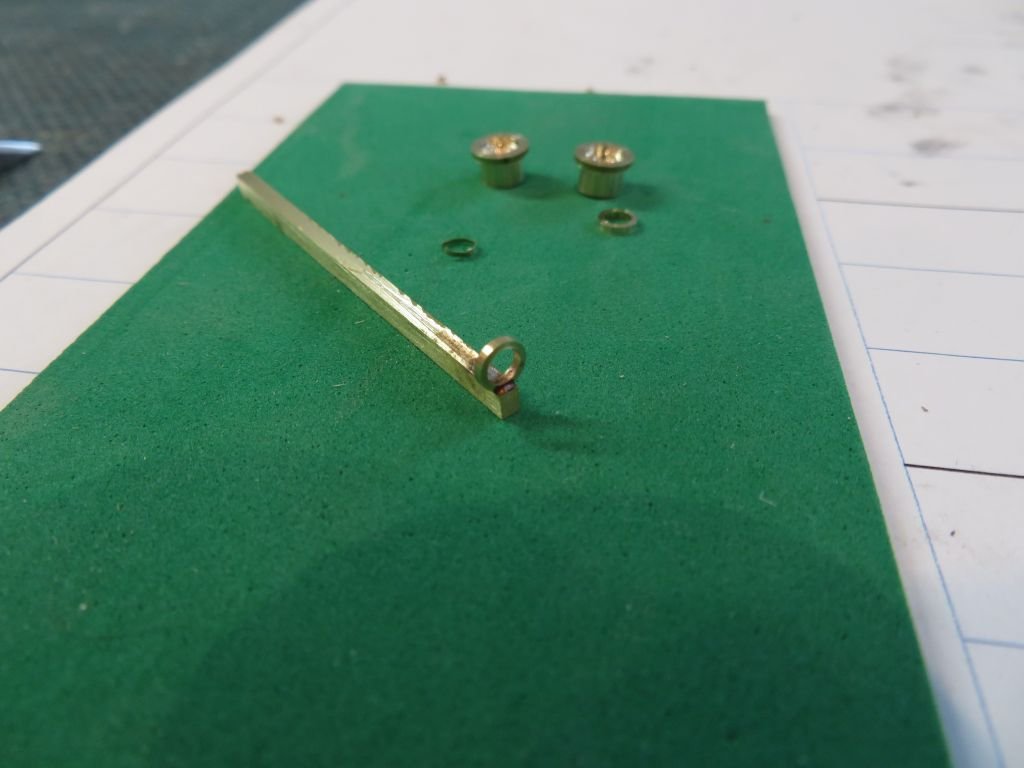
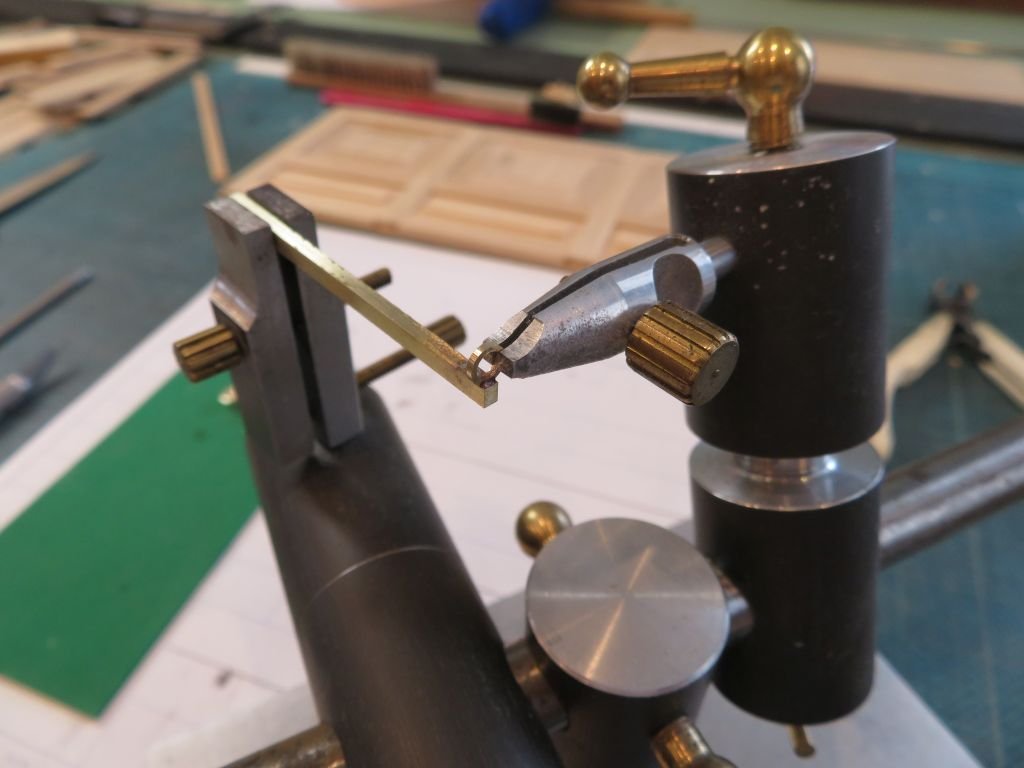
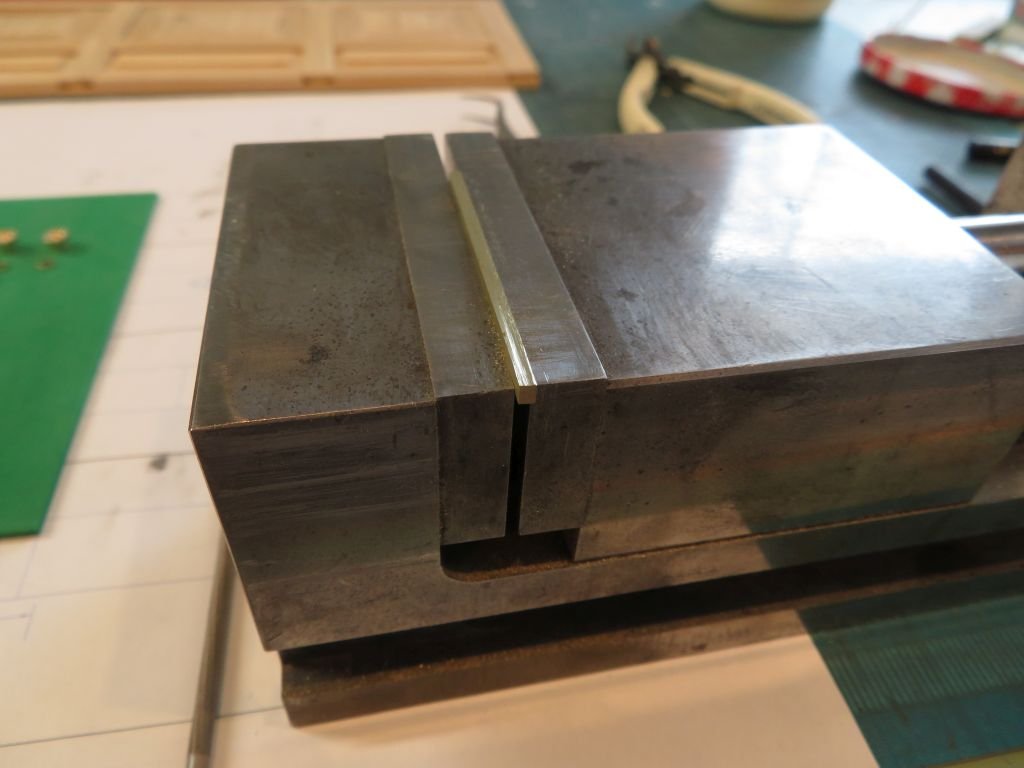
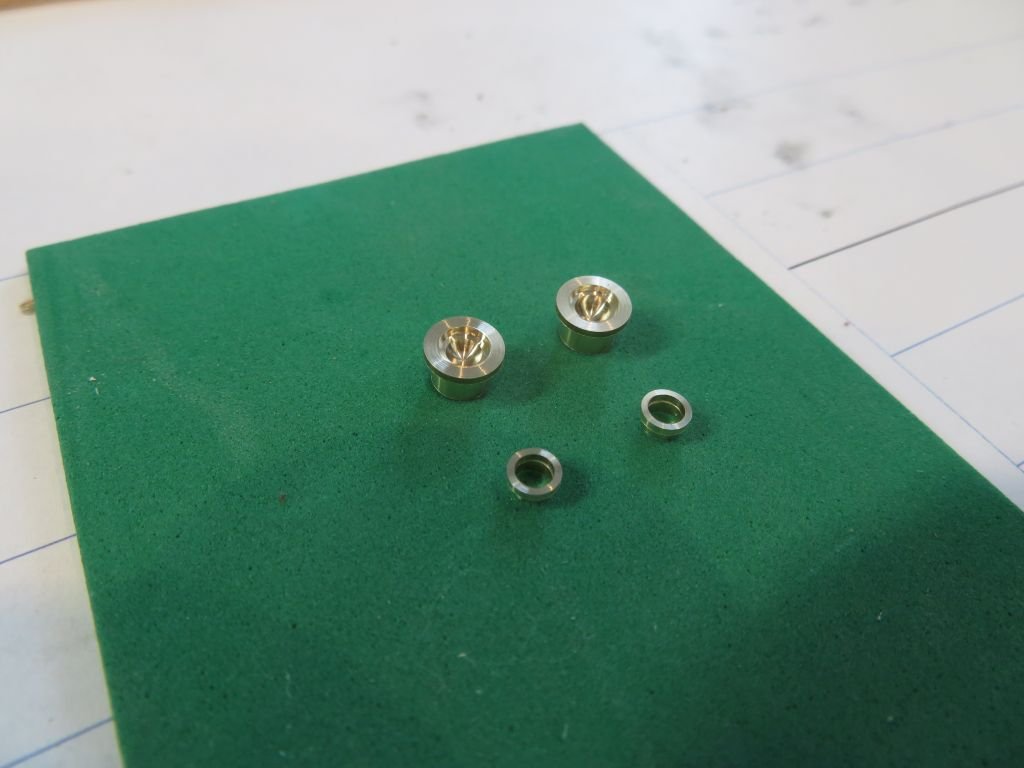
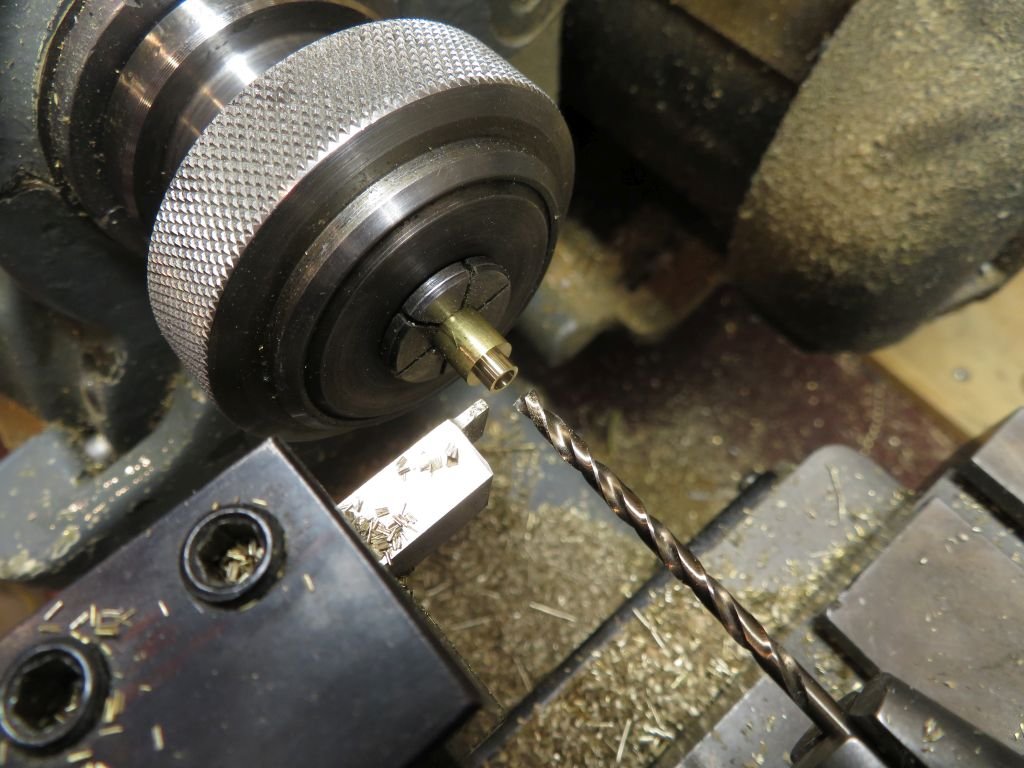
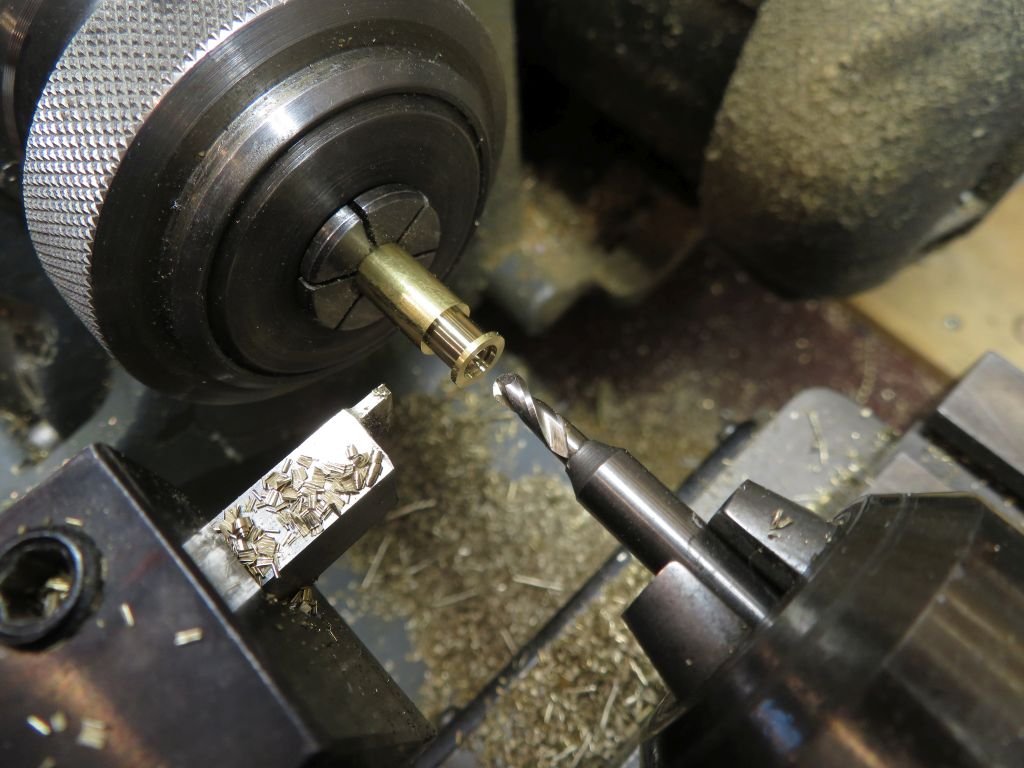
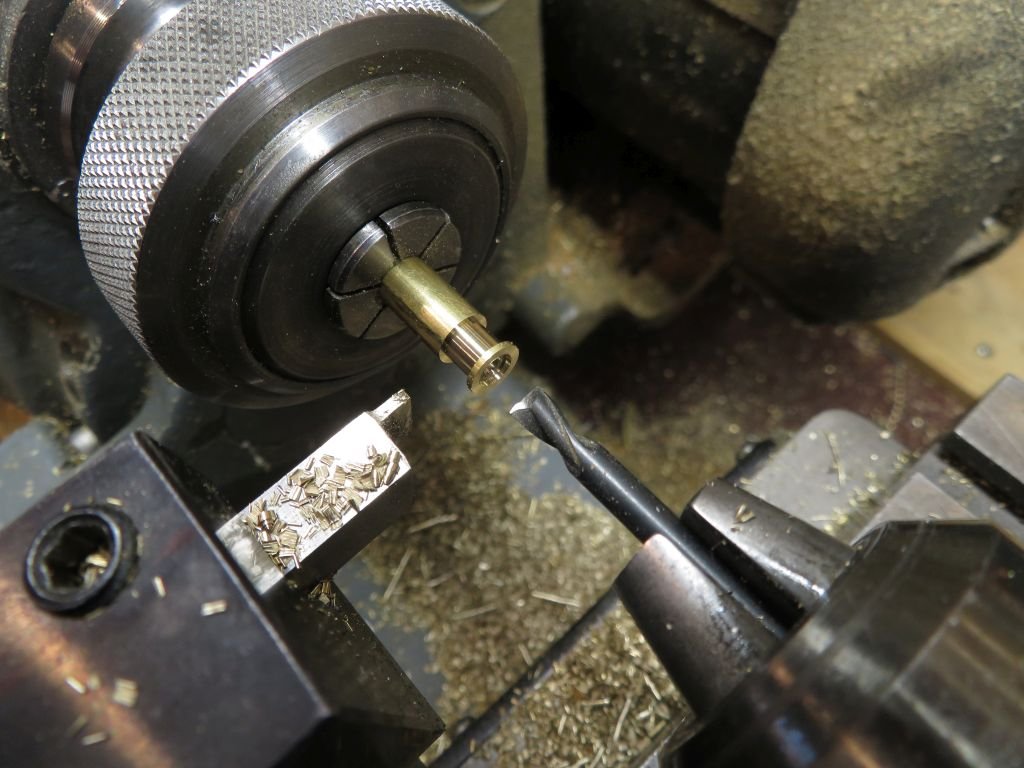
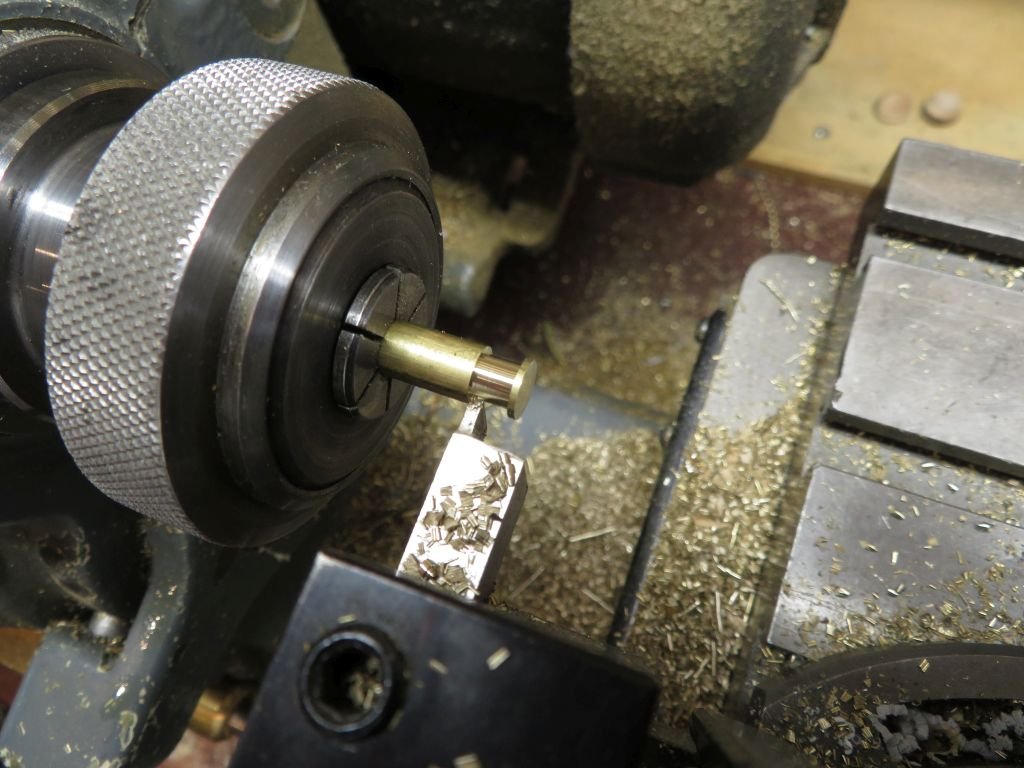
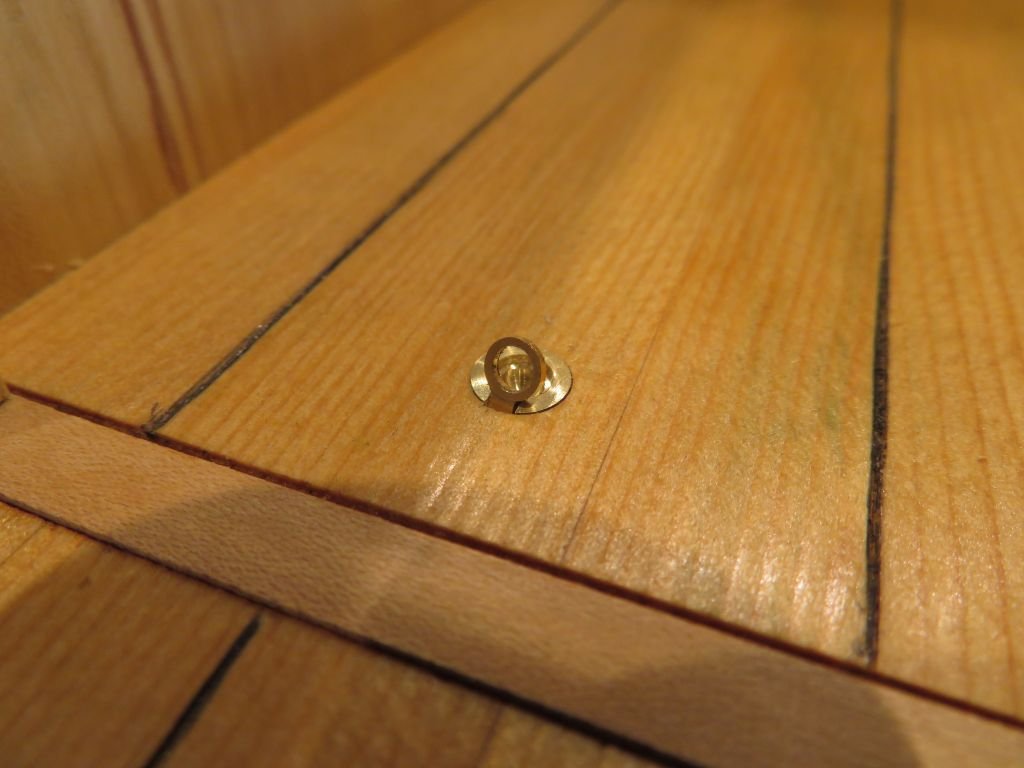
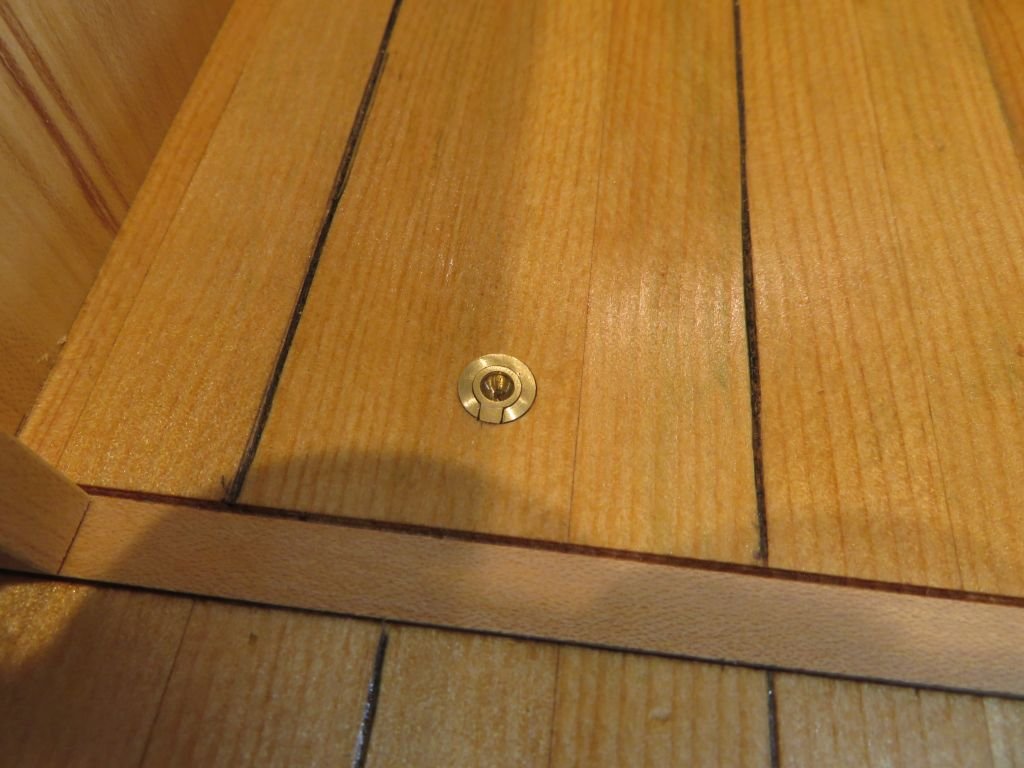
Thank you all for your generosity now I have to come clean Here is the step by step the pictures should speak for themselves. the basic body from some free machining 1/4 inch brass rod. Next the pull rings are formed basic components ready to set up the tab on the pull ring A 1/8th chainsaw file was used to create the hollow I love using my third hand After removing them from the end of the bar with the jewelers saw they were filed flat . The slot in the body was filed with a #4 The lift ring was placed to finalize the shape I spent a few hours trying to set up a pin in the bottom side of the lift ring but failed to make it an actual operating pull and given that the floor boards would not be able to be lifted anyway I shall stick with them looking like they would work. ......Now if I had gone into watchmaking as I had originally thought I would when I was 15 years old perhaps they would be fully operational. The design shows no screws because in world of my imagination the body of the pull penetrates the board and a flange is screwed onto the bottom side giving a much stronger connection and leaving a cleaner looking top surface. That's my story an' I'm sticking to it. Regards michael
-
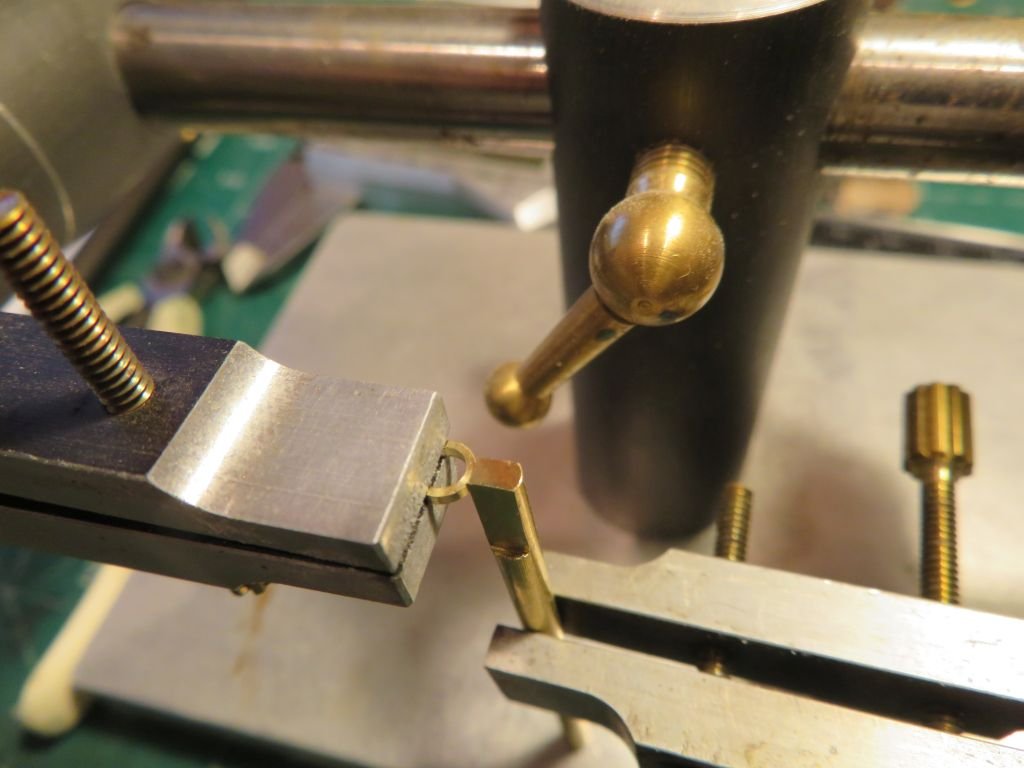
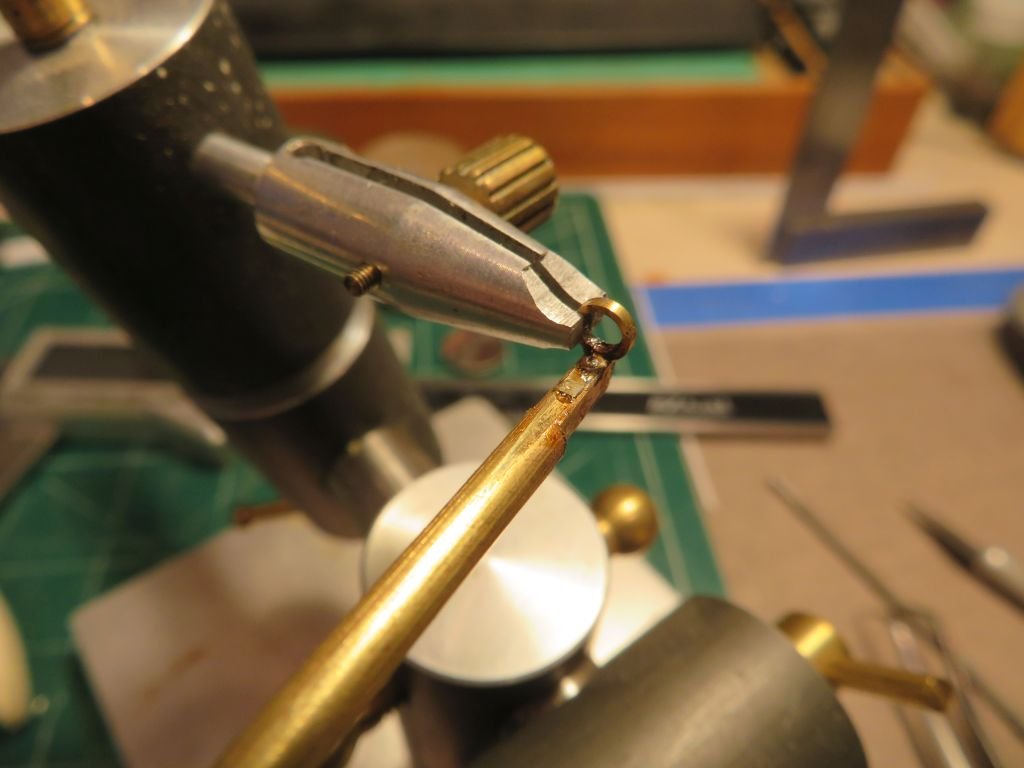
Well that was a lot tougher than I thought it would be. I did not take any step by steps on this because I was fiddling about trying to make different bits so will do that for the next one. This set up failed, too much of a heat sink This worked a lot better. I used a jewelers saw to remove the soldered piece then cleaned it up. here is the unit set into the floor on the port side with the ring raised and the proverbial pencil for scale Now for a break. Michael

-
Wow! your dedication to the memory of your daughter is very moving! I am guessing that you are not doing much else, not even sleep even looking at the speed with which you are building this ship. Lovely work and for a wonderful cause. Michael
-
Probably speaking out of the top of my hat here.... But would it not be possible to make a cradle that you can hold the hull in and be able to revolve it and lock it into position for various operations. The model engineers do it for working on the underside of model locomotives, The automotive industry does it for building cars. Beautiful work on the metal parts Mark. Michael
-
An interesting build I am very interested in how your framing and planking will turn out. Michael
-
Hi Dennis, just catching up with whats been happening in your shipyard, looks like you are keeping busy, and I thought I had a lot of projects on the go. Glad to hear you and family are safe and getting a Covid shot, might be a while before I can get mine, so it goes. Happy new year to you and Phyllis. Michael
-
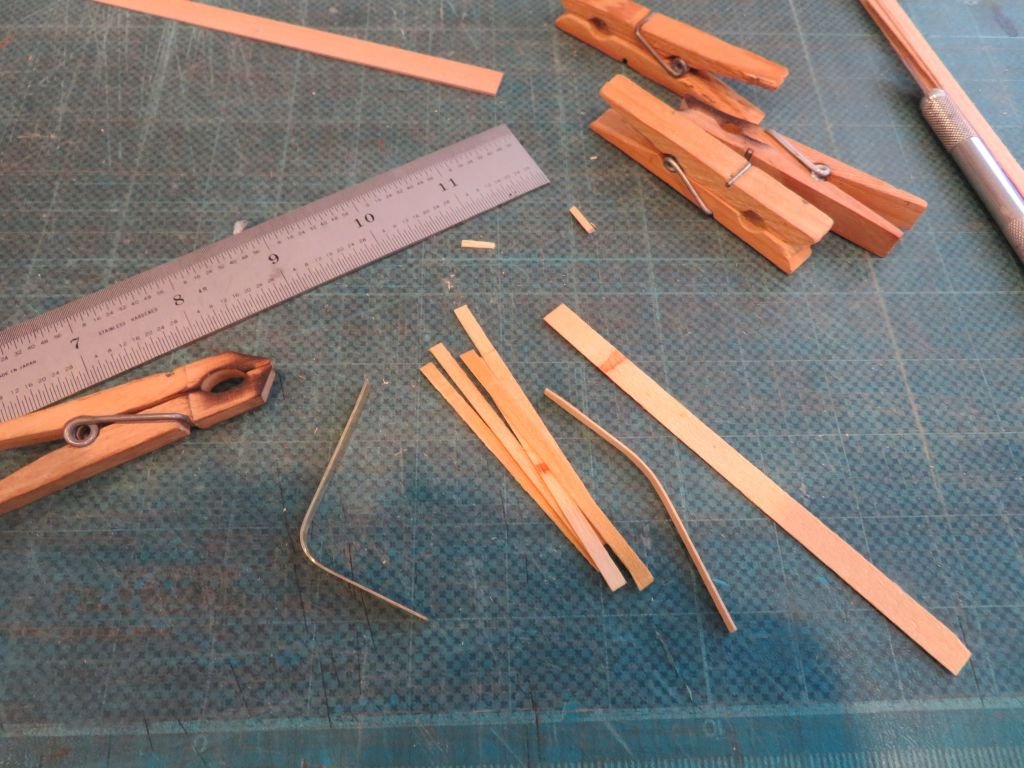
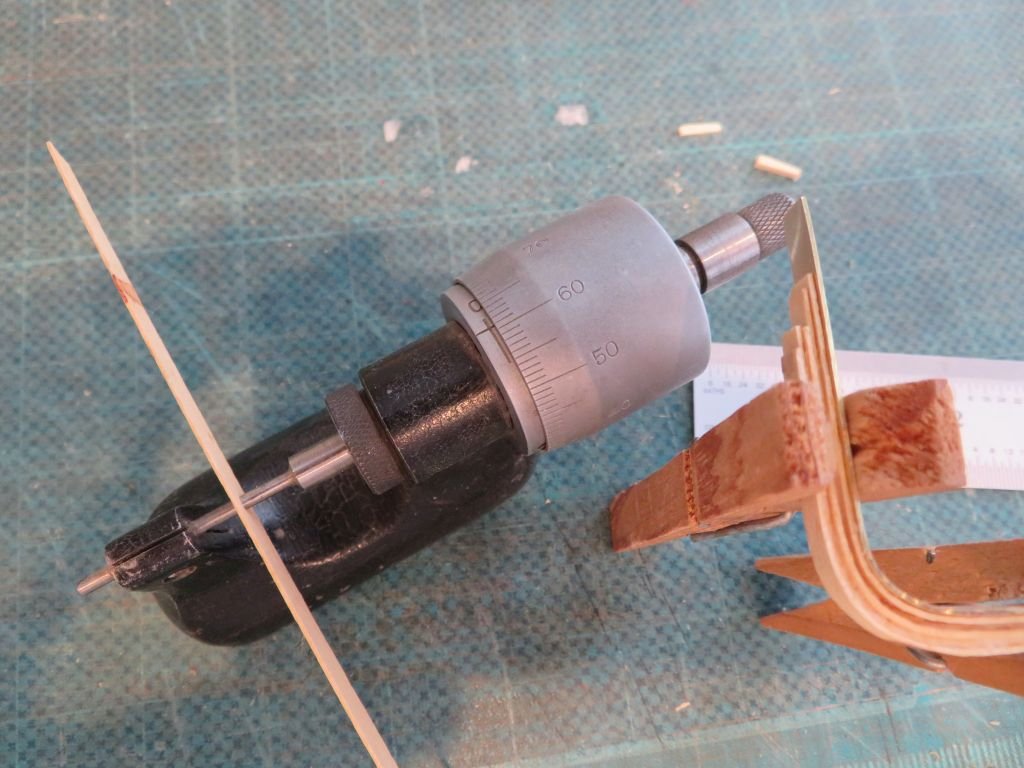
Hi Tom Here are a couple of pics of some 1/8th wide by .6mm maple strips glued up into a fairly tight curve with some carpenters glue wrapped on a bit of 1/32 brass strip for the former. When it has dried I will do some shaping. Obviously different woods are more or less able to bend through tight curves. I wet the strips first with some water. I have just used 5 strips which equal 3mm or approx 1/8th inch . Michael