


michael mott
-
Posts
5,185 -
Joined
-
Last visited
Content Type
Profiles
Forums
Gallery
Events
Posts posted by michael mott
-
-
3 hours ago, Kevin said:
lol wish i understood the question
Asking a question about copyright in all honesty, And this answer from the person noted as the MSW social Media Moderator is a bit disappointing to say the least. I thought my question was quite clear. One is told not to post images that one does not have permission to post, so forgive this old man for not being as savvy about the internet protocols, and for wanting to do the right thing.
Michael
-
A question arose when I linked to the google search to let the visitor to my thread see images on the google search page. I linked to the google search because I do not have any of my own pictures of the subject matter.
Does linking to google search infringe on copyright?
Thanks in advance
Michael
- WalrusGuy, mtaylor, thibaultron and 1 other
-
 4
4
-
2 hours ago, shipman said:
Doesn't that make a mockery of the forums stance on copyright?
that is a good question, perhaps Admin can respond.
- mtaylor, Canute and thibaultron
-
3
-
The leaves are now glued in to form the core. I will add a smear of epoxy to seal it all together.
and from the outside
There is a few bits to the engine, it will be simple and from wood and plastic. It wont be anything like a complex s the buffalo engine for Skipjack.
now I can move on to the next challenge.
Michael
-
When I saw this picture It had not clearly registered how small all this stuff is.... then the picture looking down onto the bow and workbench it clicked. Wow that is some fine work there Rob!
Michael
- druxey, GrandpaPhil, Keith Black and 1 other
-
4
-
Jut found this Nils a great looking start, as you have probably realized these types of vessels are my favorites, I shall follow along.
Michael
-
Rob superb work it just keeps getting better.
Michael
- BANYAN and Keith Black
-
2
-
A bit of gluing today
The first section was held in place with the old third hand. I used some medium thickness ACC.
I do find that my third hand is really handy sometimes😉
After the first one set up a simple task of slowly adding the next set of Leaves. I had to have a look at the texture.
Feels good!
Some more tomorrow.
Michael
-
Nice to see another cutter being built, as you say they are beautiful craft, one of these days I shall have to build a smaller one that can be displayed easily.
I shall continue to follow along.
Michael
-
Hello all and thank you for your very kind remarks,
Eberhard, I will definitely be able to apply this new knowledge about the punching into end grain with applications for my model boat building, if it works for hexagons it will also work for squares. watch this space for that.
Reggiemon, thank you, my hands have healed. At the moment my mind is hurting, everyone in the world knows why. I will get back to some boat modeling soon enough.
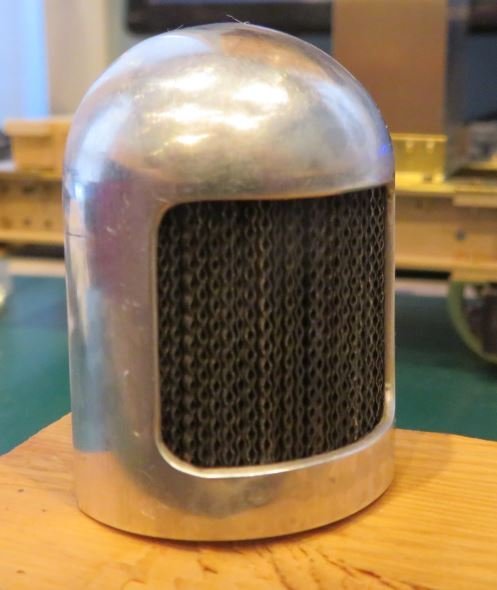
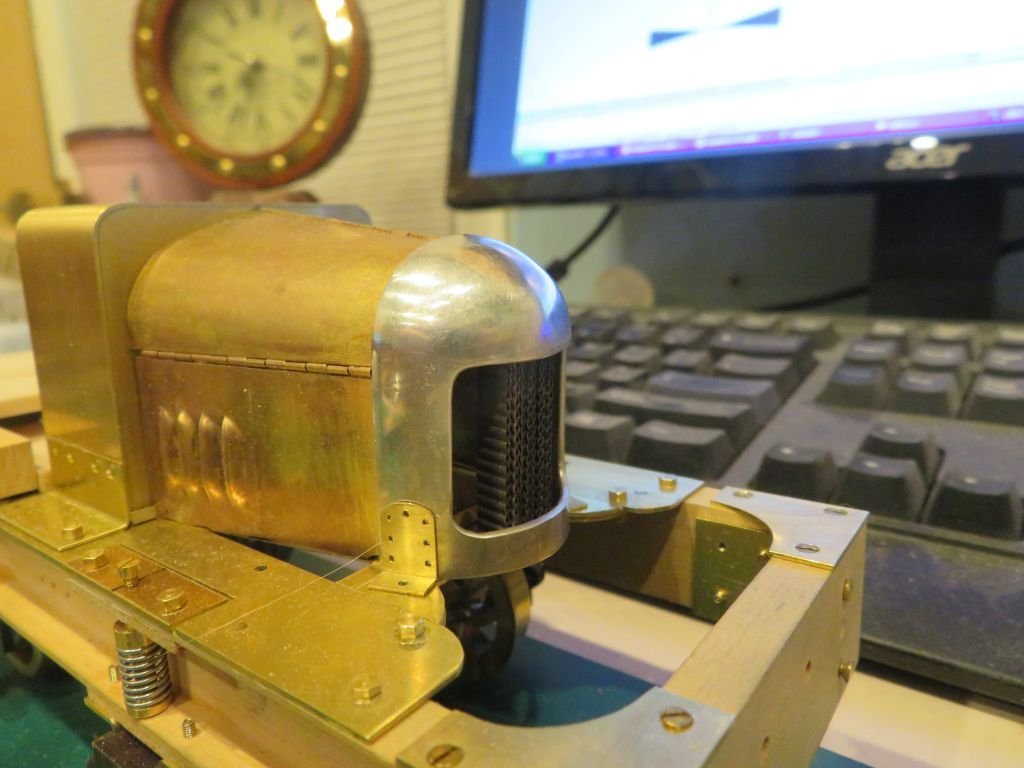
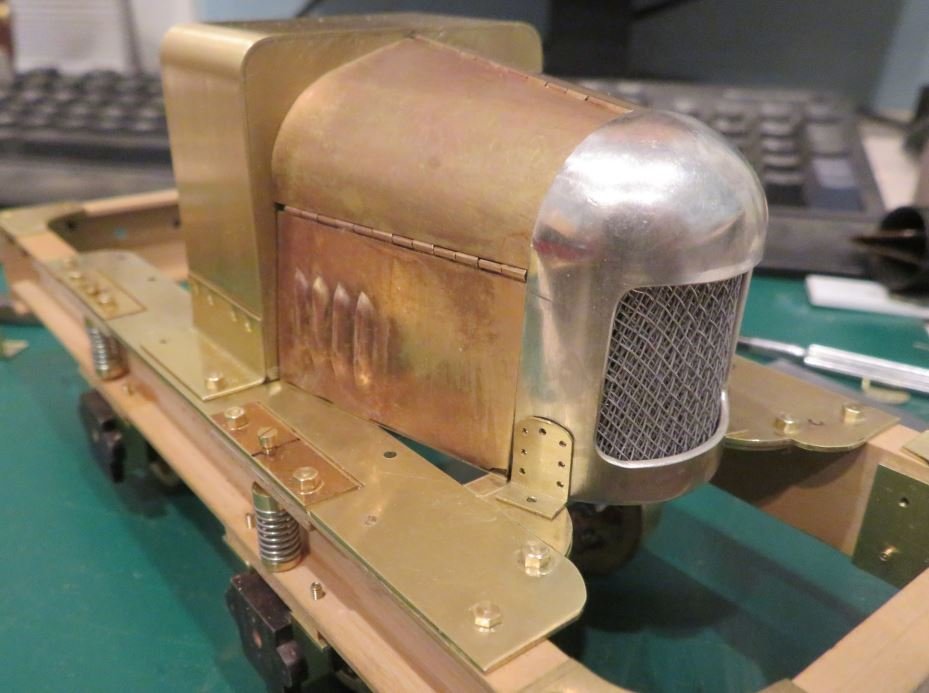
Rob As I do not have any of my own copyright pictures here is a link to the bullnose radiator images on Google, by simulating the core the appearance moves beyond a simple screen, I think that there were a few of the radiators that used a screen in front of the core but many did not. My representation will be a compromise in actual accuracy but it hopefully will emulate the correct look.
Druxey, thank you, I do enjoy receiving and sharing knowledge.
Harshil, thanks I hope I can apply the principle in some boats.
Michael
-
Lovely work on the furled sails Rob, they are very realistic looking.
Michael
-
Hello Keith, a bit of catching up, very nice work on all the rigging details, nice choice of color for the "whippings" on the ends.
Michael
- Keith Black, druxey, KeithAug and 3 others
-
6
-
Thank you all for you kind words.
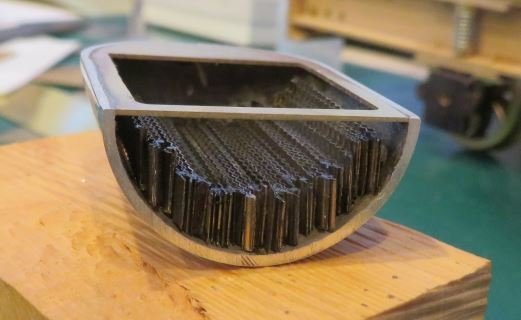
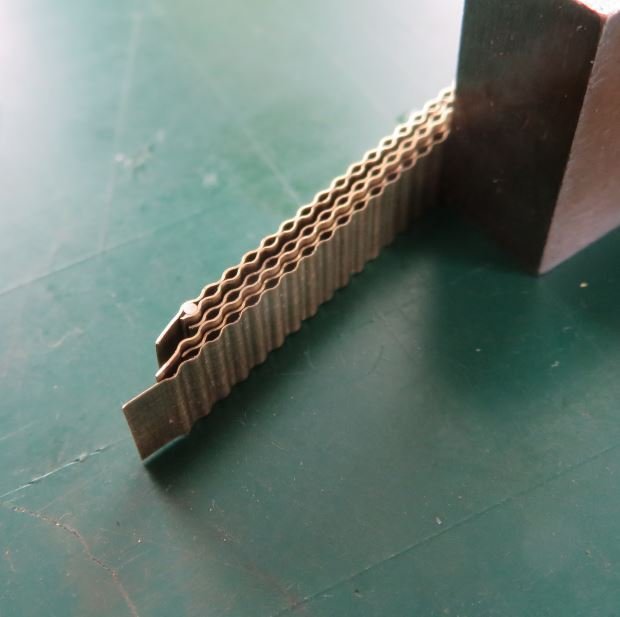
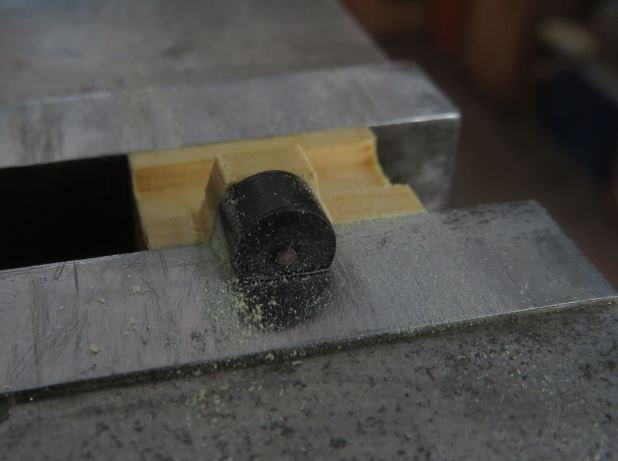
I have been working away at this little project trying to solve some issues related to the radiator, I tried a model shipbuilding technique for making the grill but in the end decided on the proper way to build the core, Oh yes and have been making more piano type hinges using the same methods that I have outlined in other threads.
The first idea was multiple layers of woven screen.
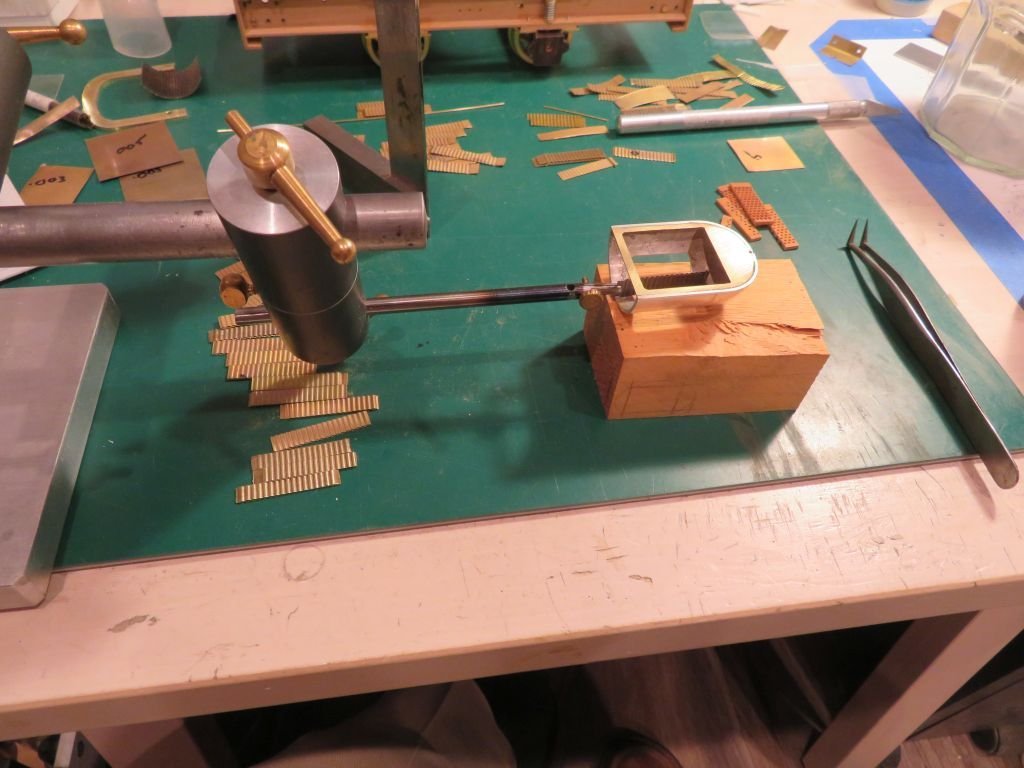
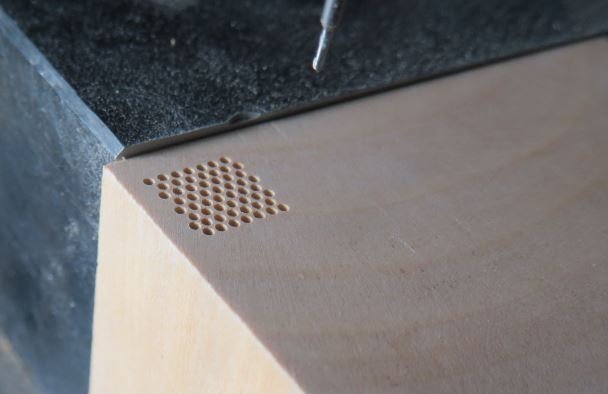
Its Ok but the wrong look and it is the proper look that I am after. so then a lot of time was invested in a wooden grill after a few quit experiments by pushing punches into the end of some off cuts of Castello and the English boxwood (a little side experiment by pushing one of these into some fimo modeling clay an Idea for using the wood block for molding bolts comes to mind)I set up block of salvaged boxwood that was a central American Ash tray in its former life.
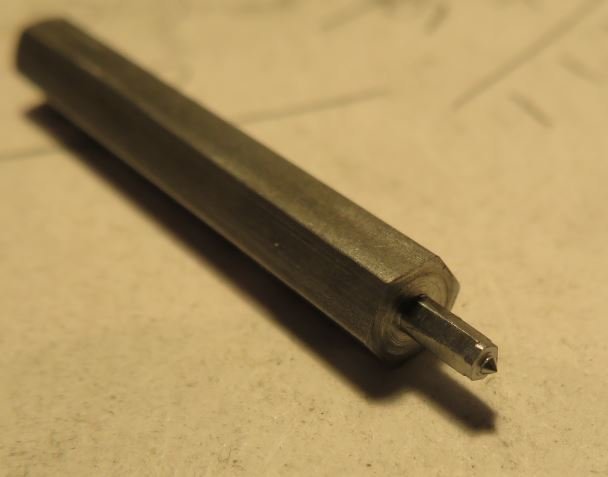
And spend a couple of long hours over two days punching the hex indent .030 deep following a chart of offsets, then back to 0,0 and repeated the same by drilling a further .030 with a .038" drill
The punch filed up
Tests
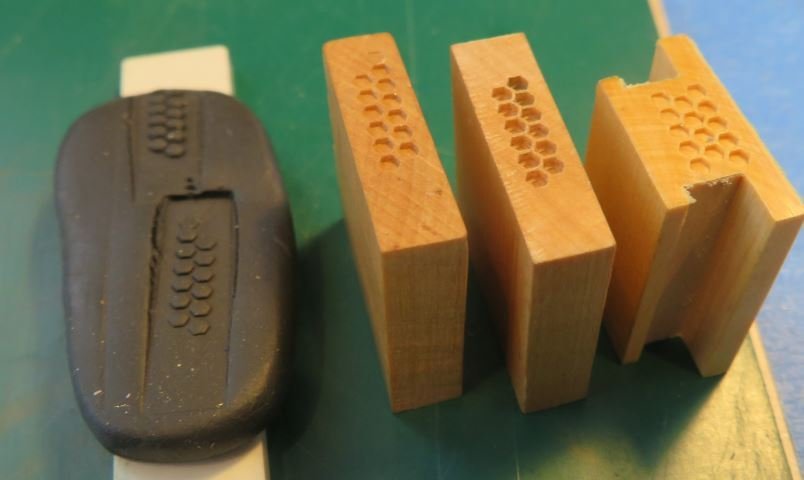
Block punched and drilled then painted with ACC
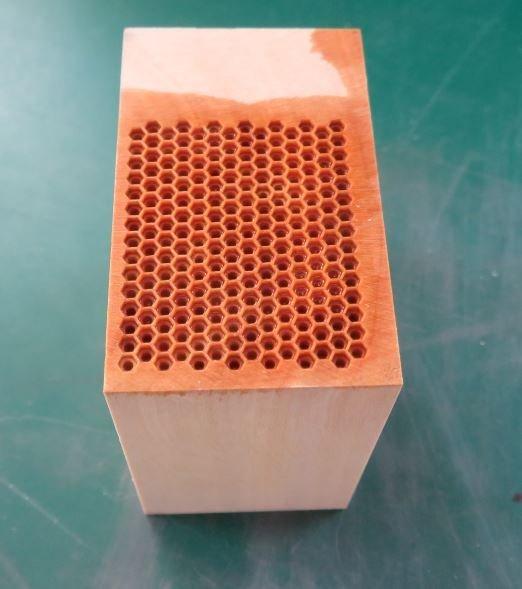
sliced off and sanded on the back untill the holes were exposed.
All old hat for all you folk who make all those wonderful gratings in such small scales.
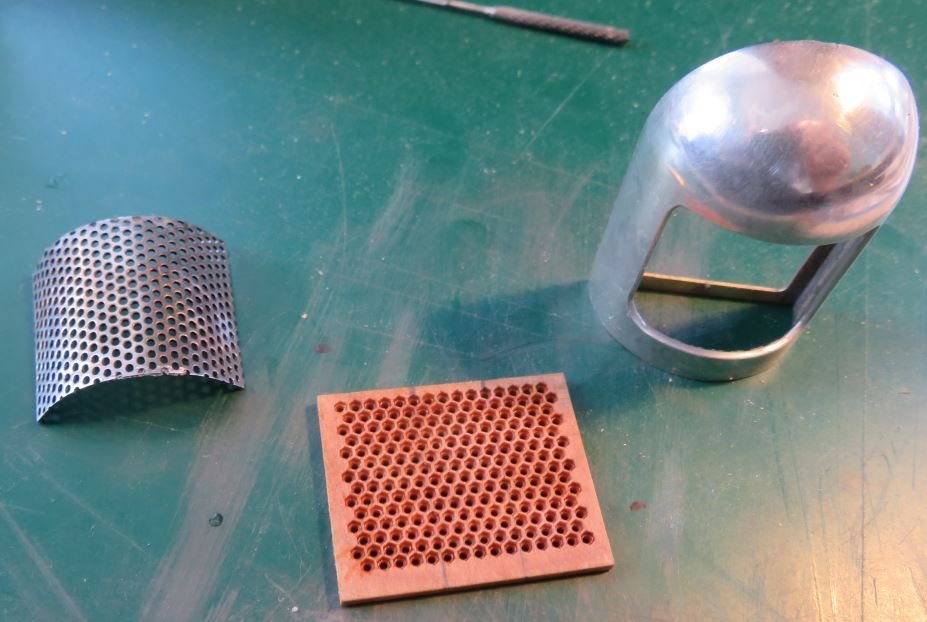
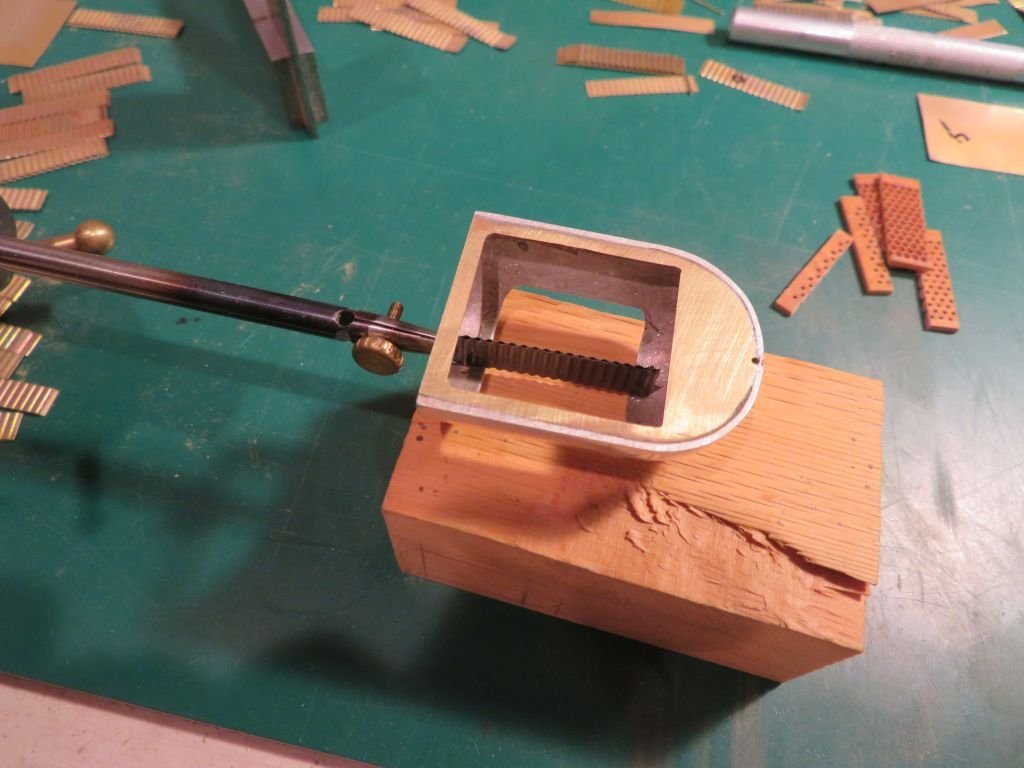
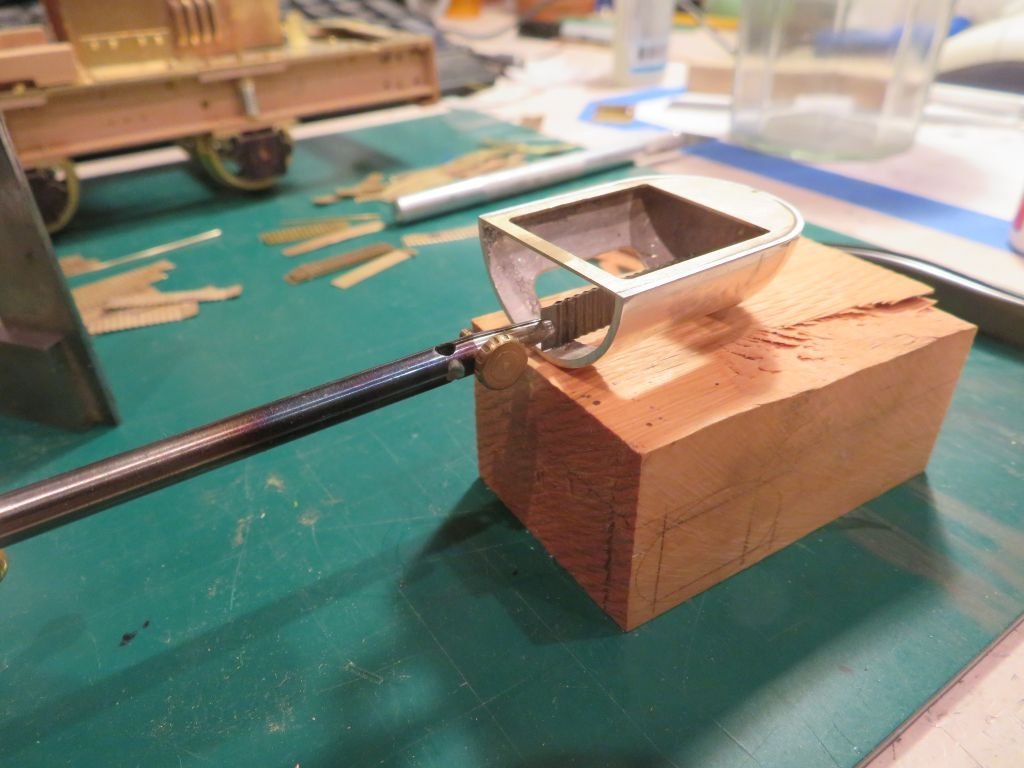
Then it was sectioned with the jewelers saw beveled and fitted into the radiator shell and held in place with a snapped in sheet of clear acetate, I did not want to glue it yet.
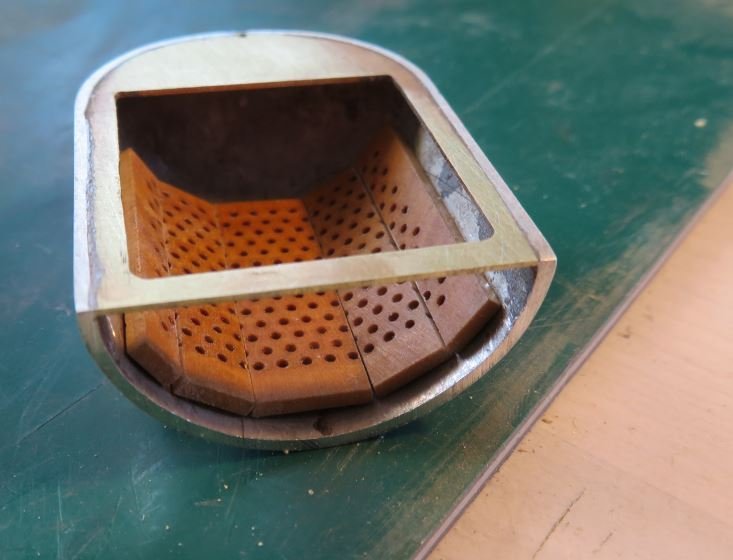
I look reasonable but not quite right and a bit over scale
.

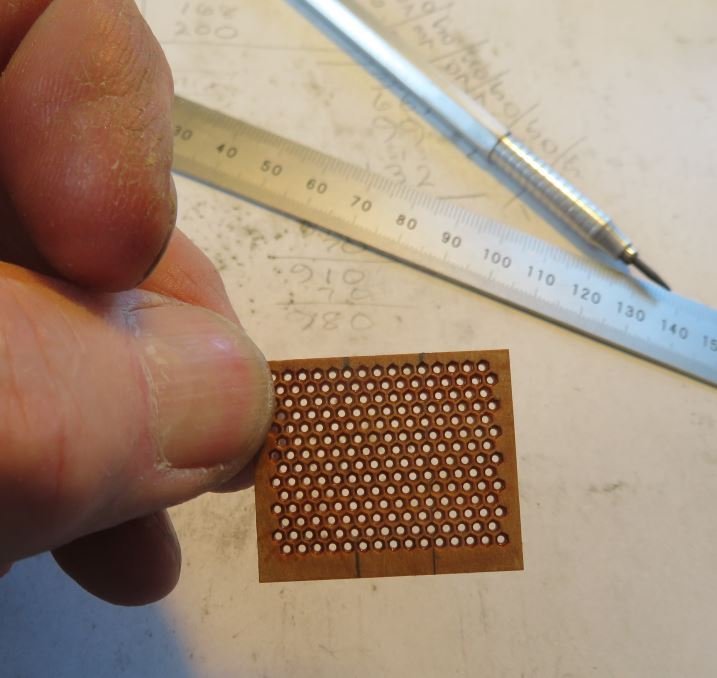
So a new block was begun with a smaller grid on a .030 x .025 set of offsets using a .022" watchmakers spade drill bit But after an hoer I decided it was time for a rethink of this whole exercise.
I slept on it.
Woke up and had one of those aha moments when I remembered just how old radiator cores are made with sheet metal.
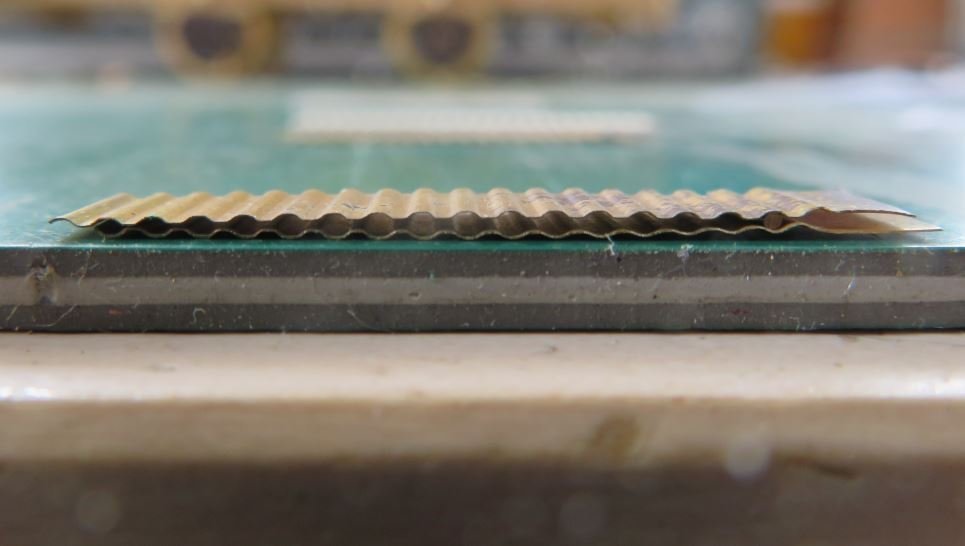
So some little strips of annealed .003" brass pressed between a couple of strips of plastic model corrugated roofing.
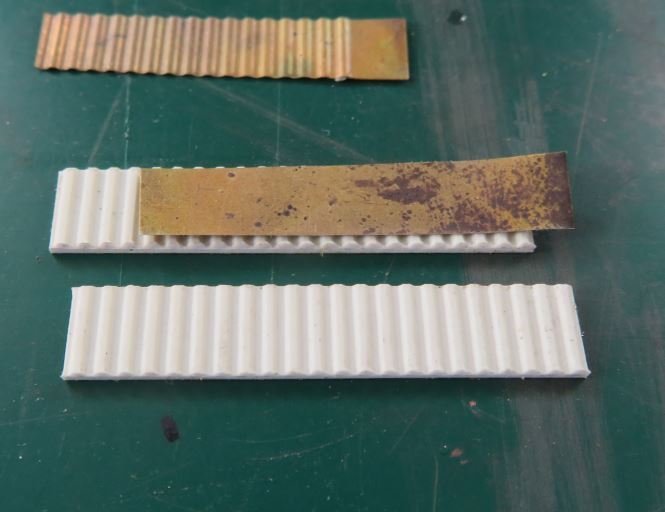
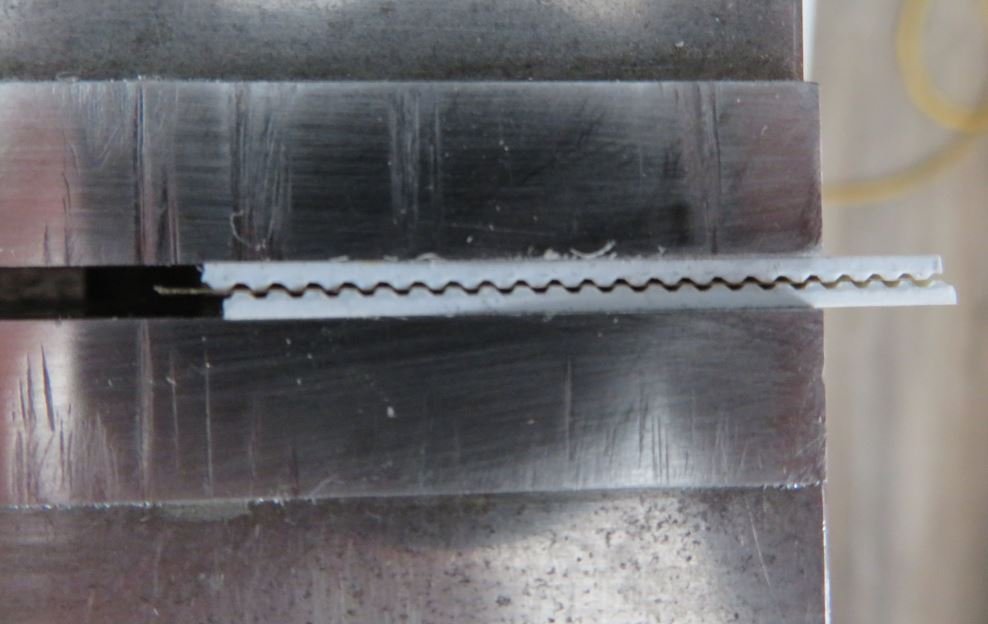
Then the two strips placed back to back with a dowel of .028" brass rod as a register produced this.
And as "Monty Python's Dinsdale brothers" would say this operation was the changing point.
All I need now is a stack of 30 of these side by side inside the curve of the shell laid up just like the frames of a ship
Here they are laying inside an earlier experiment using a perforated sheet.
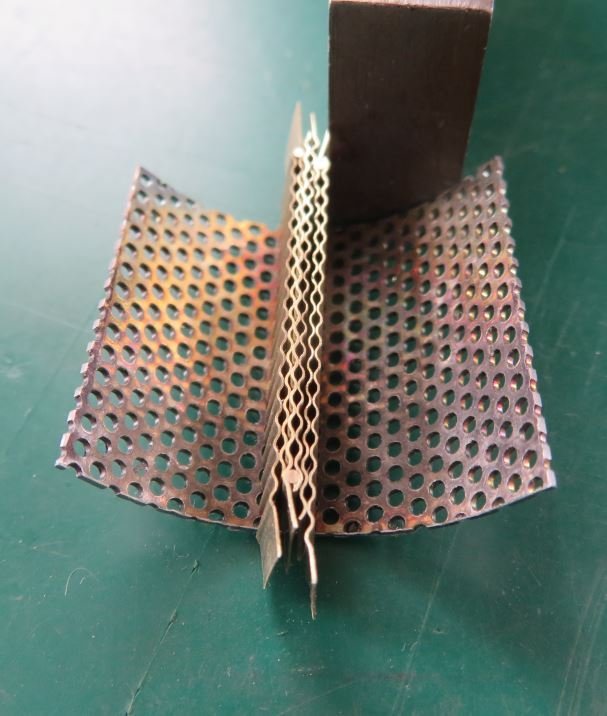
I am happy to climb out of this rabbit hole for now, A bit of crimping in order today.
Michael
-
Late afternoon brass-work replacements.
Sorting out the springs comes next.
Michael
- oneslim, Boccherini, WalrusGuy and 6 others
-
9
-
1 hour ago, bitao said:
There is always something wrong with one piece of work, and it may serve as a profound lesson for improvement for my next piece.☺️
So True, it is the most one of the most valuable lessons we can learn, but at the same time not hold us back. I feel that these challenges are presented for us so that we can progress in our journey, which is after all the most important consideration.
Overall the model does look amazing.
Michael
- billocrates, mtaylor, Keith Black and 4 others
-
6
-
 1
1
-
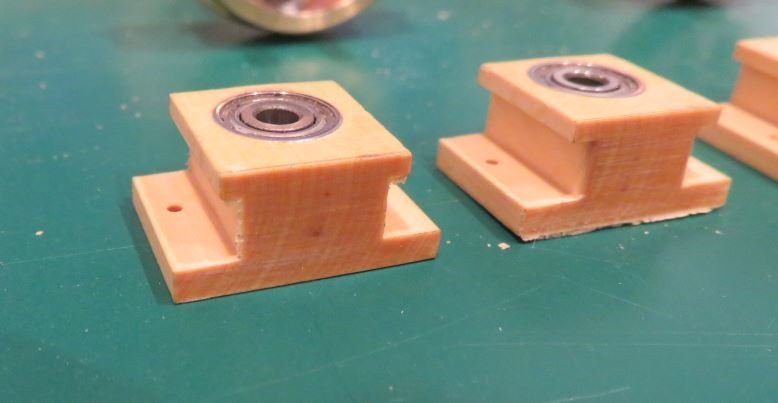
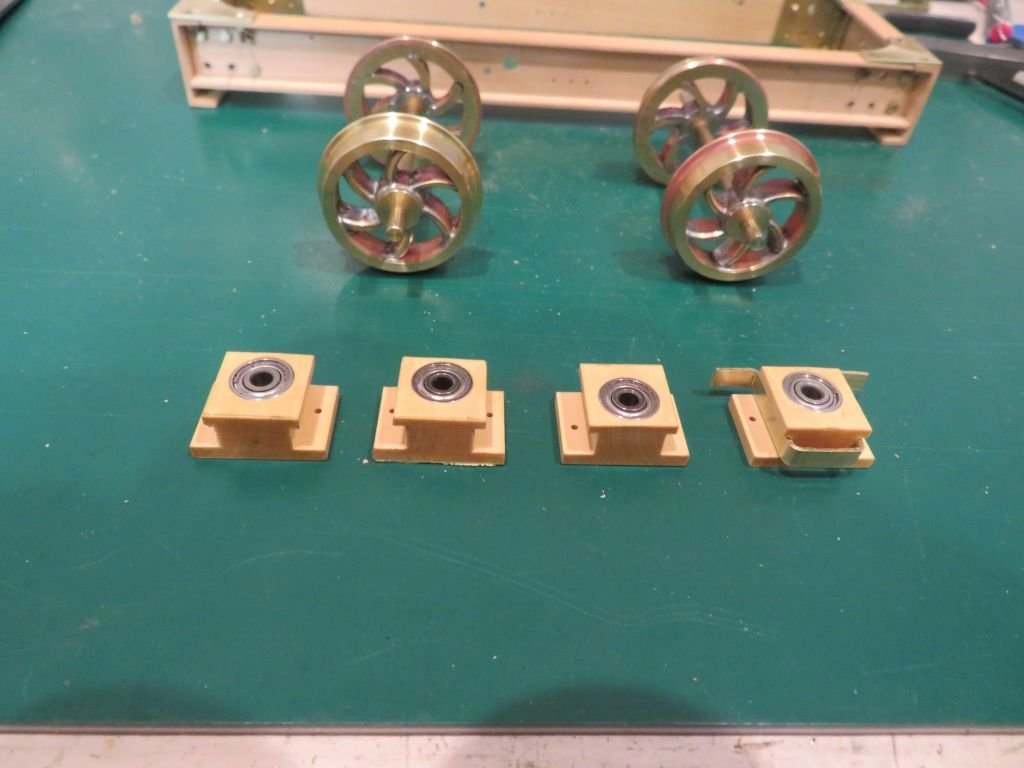
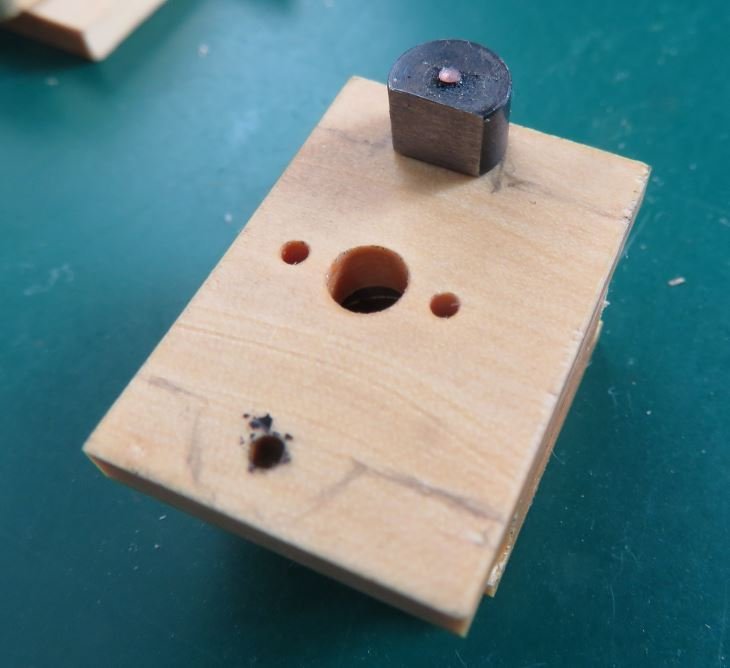
I used some English boxwood for the hornblocks with ball races for the bearings.
As my supply is now very limited I will be putting all the offcuts into the boxwood cuttings box for future considerations.
The rectangular section is the prize this time. After squaring the peice up on the shooting board I milled out the sides.
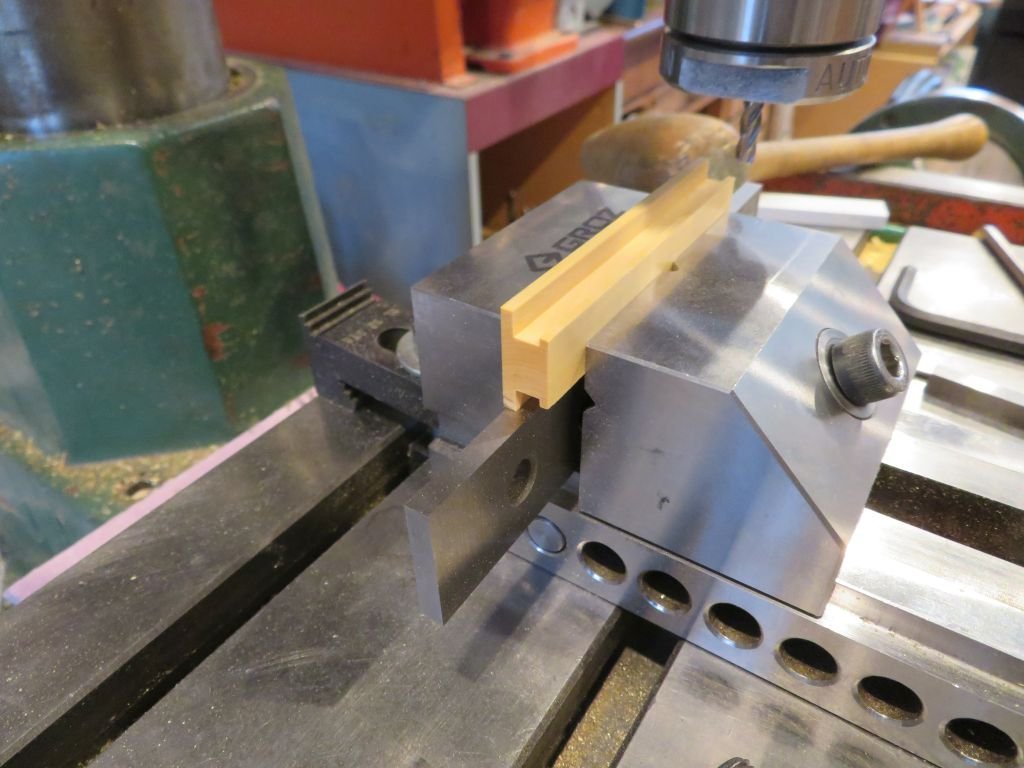
Then turned the section on its face to bore the recess for the 3/8 x 5/32 ball race. and drill the holes for the stabilising rods and the cover plate. As each one was drilled it was sliced off with the exacto saw and reset for the next set of holes. The surface looked like glass.... such an amazing wood.
Next I turned up a small button for filing the tabs for the stabilizing rods then hardened and ground it so as to act as a depth gauge as well.
After removing the bulk of the material either side of the tab the offcuts went into the boxwood scrap box.

ready for the finishing filing
The completed hornblock after a little bit of filing to round off some of the edges and blackened with a sharpie pen.
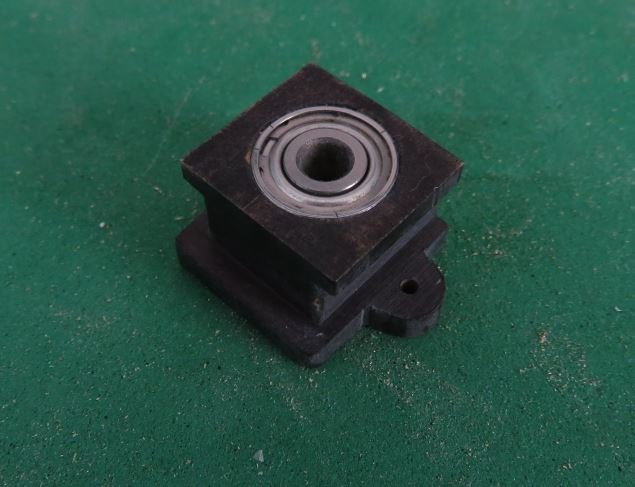
The hornblocks were dry placed to check the fit and appearance.
The hornblock guides had to be remade today because I made them too long, but the method i used was a good practice for the final ones which I have not photographed yet.
Michael
- thibaultron, wefalck, oneslim and 5 others
-
8
-
Thank you Phil for the links.
Michael
- mtaylor, Canute, Keith Black and 1 other
-
4
-
All your hard work is paying off Well done.
Michael
- Retired guy and WalrusGuy
-
1
-
1
-
Thanks for all the comments and likes, Kevin there is a member here who has done a absolutely outstanding job making ventilators like the one you have shown. If my memory serves me correctly it is on a Russian steam yacht, he used a method of electroplating that built up the layers of metal over time.
Michael
- mtaylor, Canute and thibaultron
-
3
-
Hi Ron, your model of the Oneida has come along really nicely. The thing that always amazes me is how long these models take, and at the same time it is one of their joys, there is no rush, in my mind because it is all out the journey.
Michael
- Wintergreen, smotyka, John Cheevers and 4 others
-
7
-
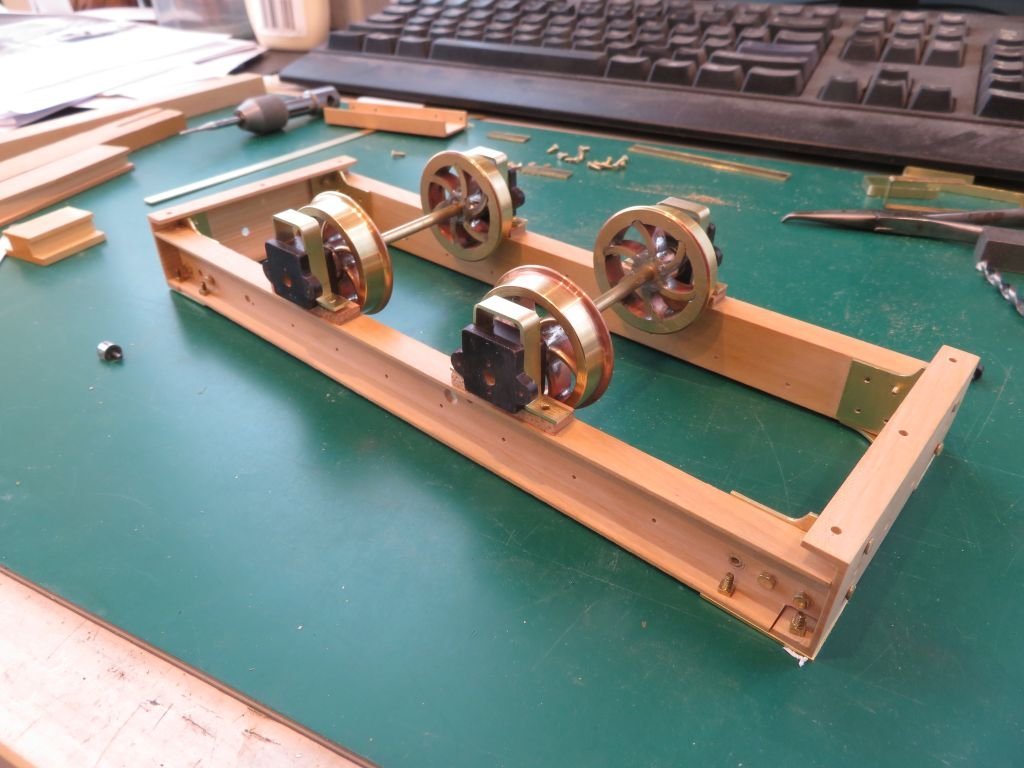
Eberhard, yes I did do the tapping on the lathe. It is robust and I was careful to tap gently and many annealings to keep the silver soft, Plus I only used a leather head on the small mallet.
The Castello frames worked out well.
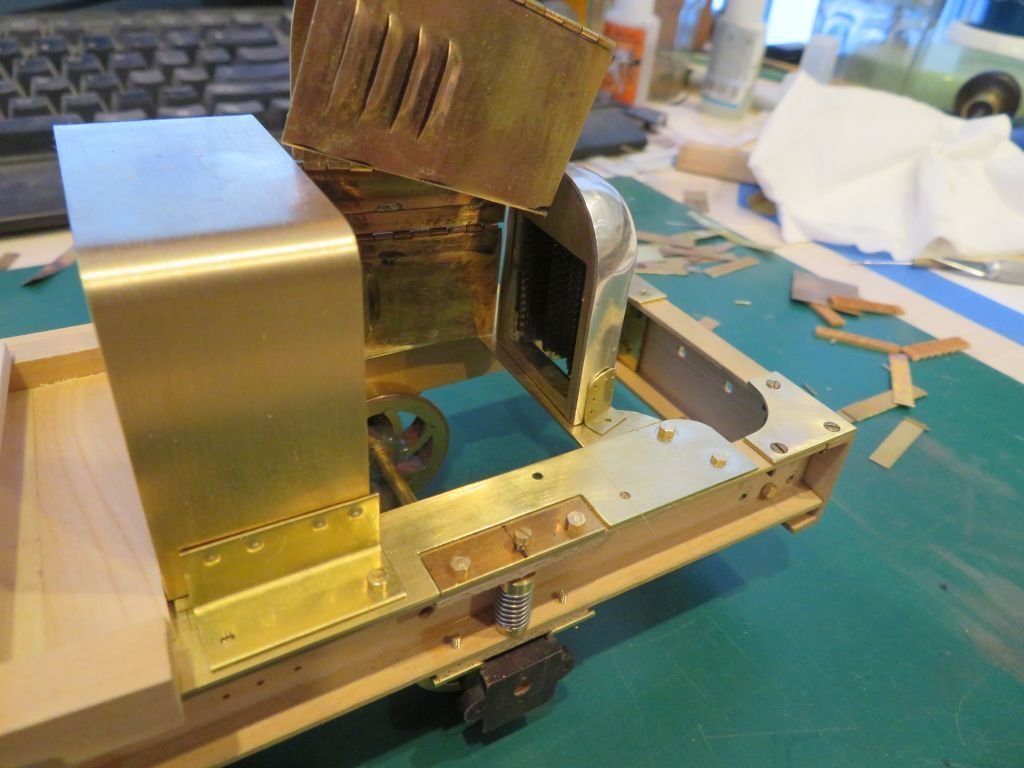
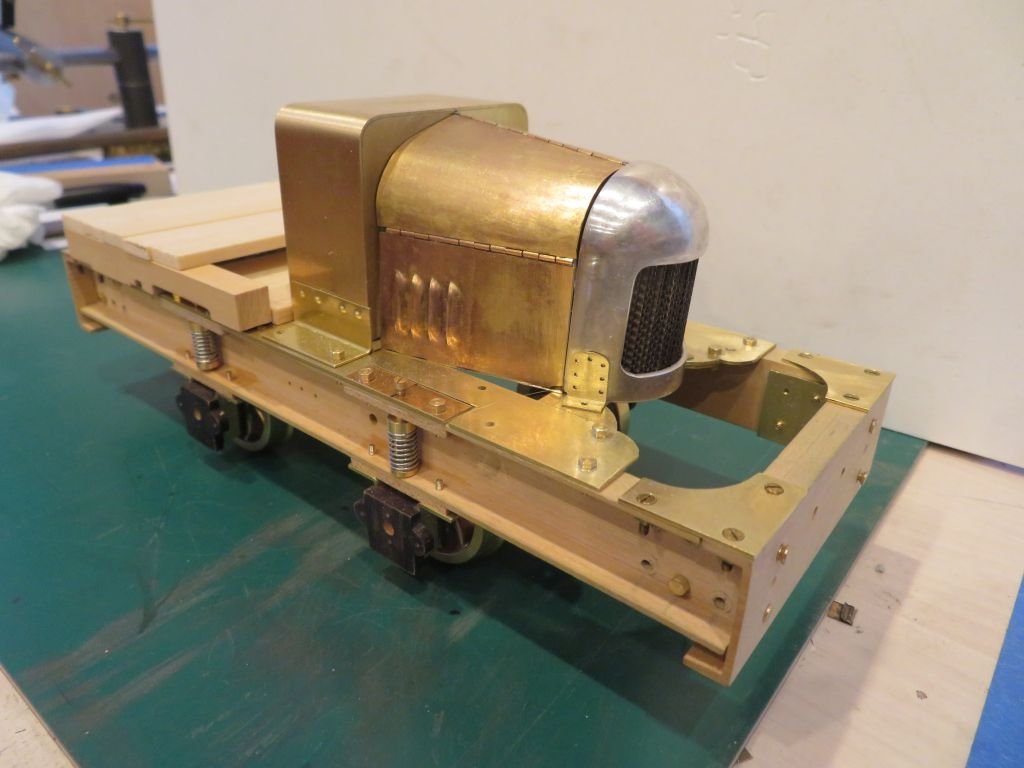
Then a lot of small parts made (0x80 hex and square nuts and bolts) and now the frame is all bolted together. and a cameo appearance of the cutter which is sitting patiently for my muse to change.
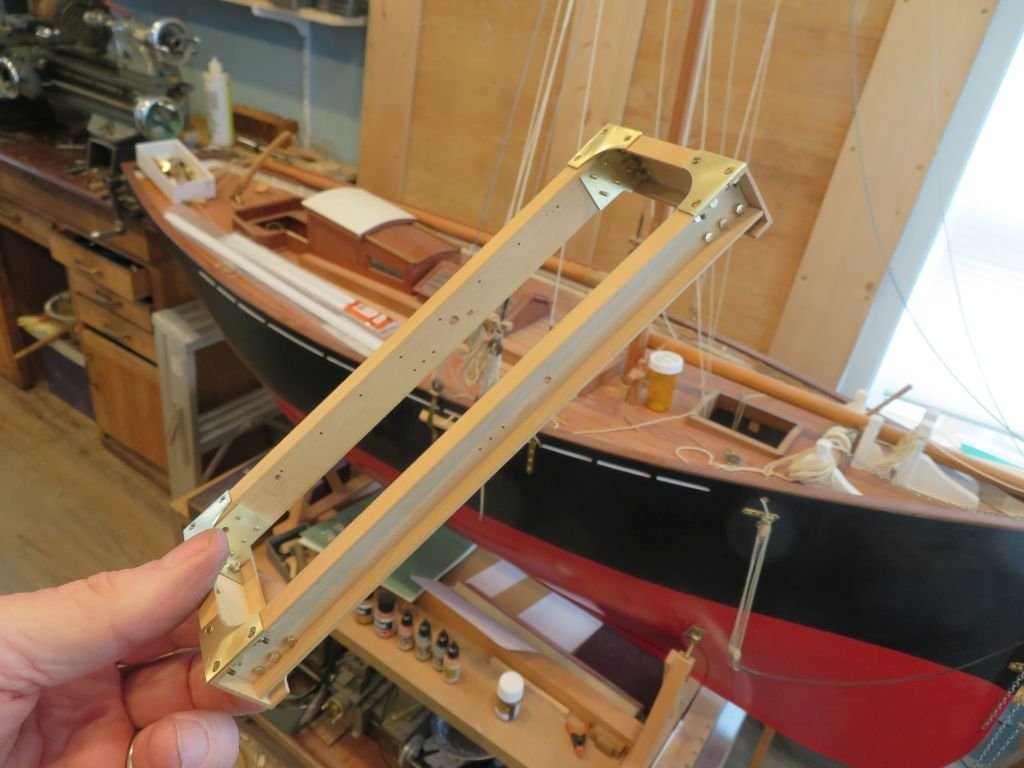
Now to make the axle boxes for the wheels
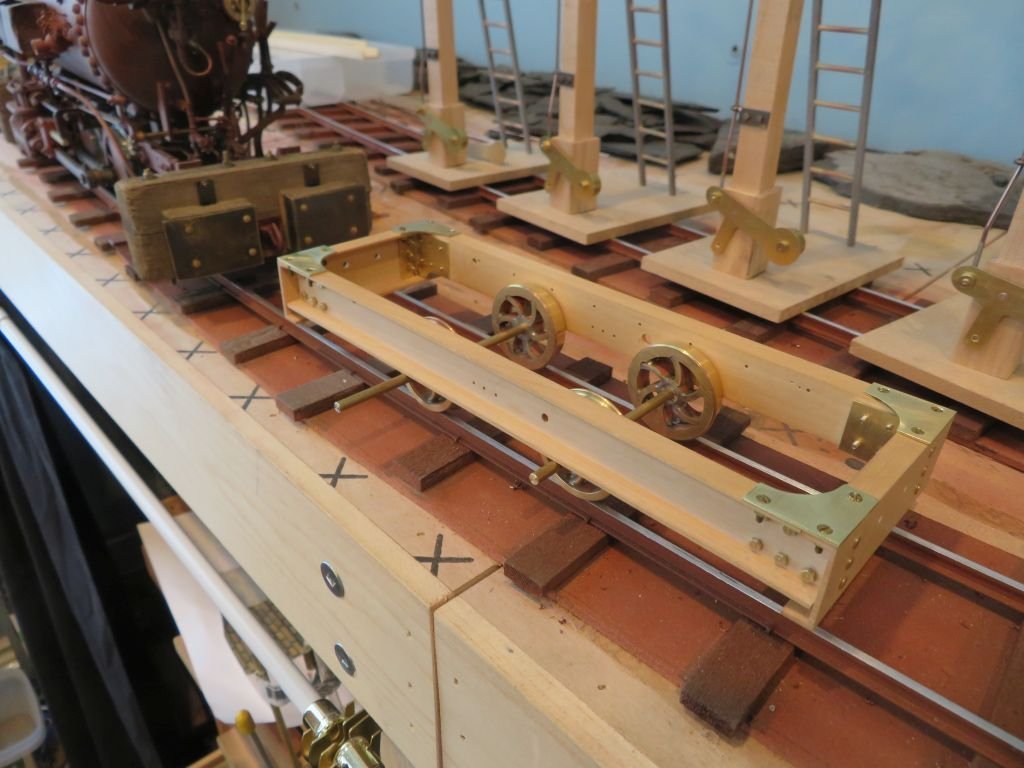
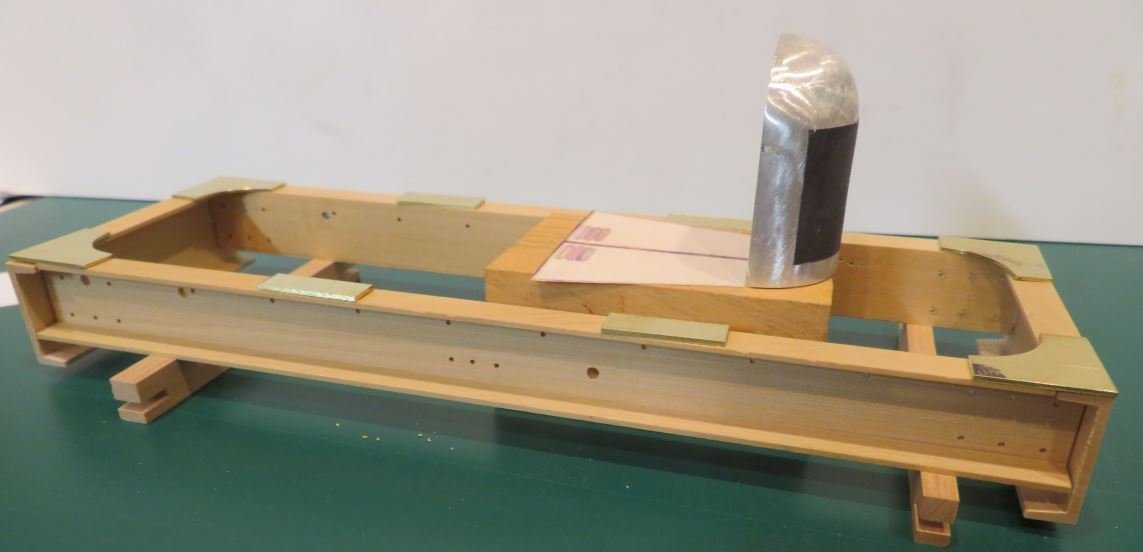
The Penrhyn Quarry used a number of car parts from the Bullnose Morris Cowley, here is another modelmakers interpretation of this loco
I am using a collection of photographs that appeared in a special publication of the Penrhyn Quarry details for modelmakers. and preparing my own drawings based on those and some overall measurements of the loco. They basically chopped off the front end of the car chassis and bilted it inside the structural steel frame.
Michael
- thibaultron, druxey, Canute and 6 others
-
9
-
5 hours ago, KeithAug said:
The latch doesn't work.
Hmmmm why not? just a little spring😉
It does look convincing though.
Michael
- mtaylor, Bedford, FriedClams and 1 other
-
4
-
A huge improvement over the first one, I do agree with Steve about some of the spacing. The eye does like to see good order. I admire your willingness to accept council and then work at doing the work again. When you are old and grey and you pass on this knowledge to younger folk you will often have forgotten how you came by these things.
Michael
- Retired guy, Cathead and WalrusGuy
-
3
-
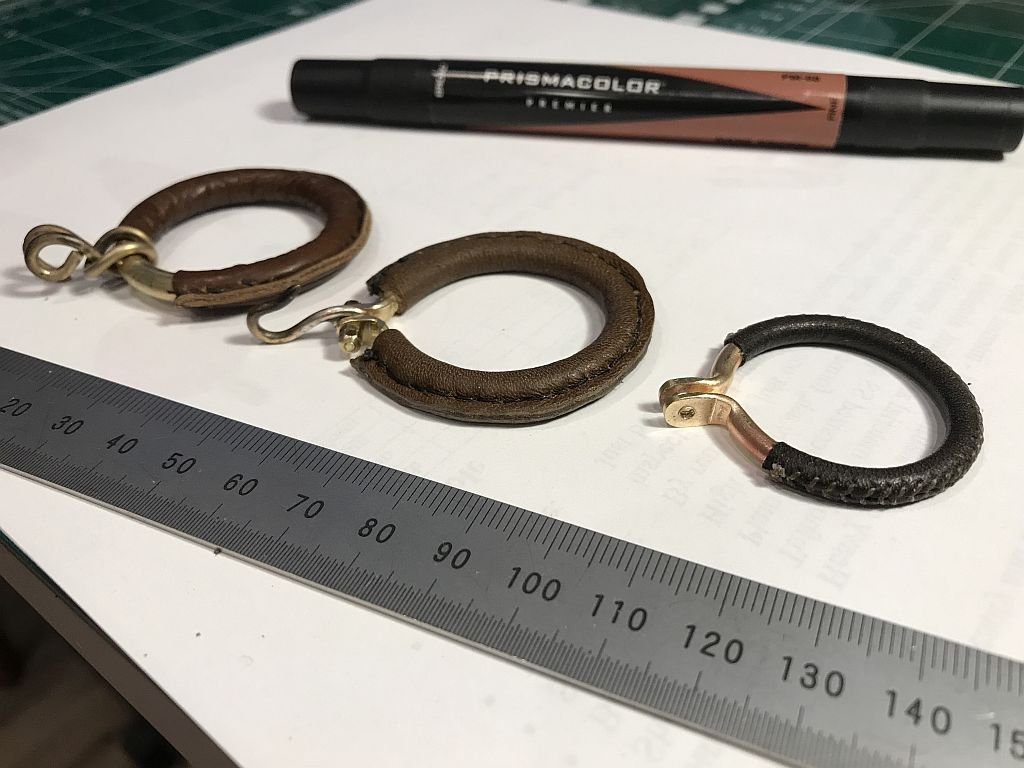
If you can find a piece of ladies leather skirt clothing at a thrift store, it is really nice fine leather very thin and flexible. it is what I used on my bowsprit traveler
You can always tell the clerk that it is a gift for your daughter😉
Michael
- KeithAug, WalrusGuy, Retired guy and 4 others
-
7


copyright
in How to use the MSW forum - **NO MODELING CONTENT**
Posted
Thank you for your clarification, I understand it a little better now, So I could link to a picture on the web by using the link to the particular image that I wanted to use to clarify a question.
Michael